文章目录
- Ansible单yaml文件部署Zabbix5.0监控平台
- 节点规划
- 案例实施
- 基础环境准备
- 编写剧本文件
- ZabbixWeb界面
- (1)改中文
- (2)添加监控主机
Ansible单yaml文件部署Zabbix5.0监控平台
节点规划
| IP | 主机名 | 节点 |
|---|---|---|
| 192.168.200.10 | ansible | Ansible节点 |
| 192.168.200.20 | zabbix-server | Zabbix-server节点 |
| 192.168.200.30 | zabbix-agent | Agent 节点 |
使用Ansible部署一个zabbix监控平台并监控192.168.200.30主机
案例实施
基础环境准备
(1)修改主机名
[root@localhost ~]# hostnamectl set-hostname ansible
[root@localhost ~]# hostnamectl set-hostname zabbix-server
[root@localhost ~]# hostnamectl set-hostname zabbix-agent
(2)安装ansible
[root@ansible ~]# yum install -y epel-release
[root@ansible ~]# yum install -y ansible
(3)配置Ansible节点和远程主机的连接
[root@ansible ~]# ssh-keygen
[root@zabbix-server ~]# ssh-keygen
[root@zabbix-agent ~]# ssh-keygen
[root@ansible ~]# ssh-copy-id 192.168.200.20
[root@ansible ~]# ssh-copy-id 192.168.200.30
(4)配置主机组
[root@ansible ~]# vim /etc/ansible/hosts
[yum]
192.168.200.20
192.168.200.30
[zabbix]
192.168.200.20
[agent]
192.168.200.30
(5)测试连通性
[root@ansible ~]# ansible zabbix -m ping
192.168.200.30 | SUCCESS => {
    "ansible_facts": {
        "discovered_interpreter_python": "/usr/bin/python"
    },
    "changed": false,
    "ping": "pong"
}
192.168.200.20 | SUCCESS => {
    "ansible_facts": {
        "discovered_interpreter_python": "/usr/bin/python"
    },
    "changed": false,
    "ping": "pong"
}
编写剧本文件
[root@ansible ~]# vim install_zabbix.yaml
- hosts: yum
  remote_user: root

  tasks:
  - name: stop firewalld setenforce 0
    shell: systemctl stop firewalld && systemctl disable firewalld && setenforce 0
  - name: download zabbix-repo
    yum:
      name: https://mirrors.aliyun.com/zabbix/zabbix/5.0/rhel/7/x86_64/zabbix-release-5.0-1.el7.noarch.rpm
      state: installed
  - name: modify zabbix-repo
    shell: sed -i 's#http://repo.zabbix.com#https://mirrors.aliyun.com/zabbix#' /etc/yum.repos.d/zabbix.repo
  - name: enable zabbix-frontend
    shell: sed -i '11s/enabled=0/enabled=1/g' /etc/yum.repos.d/zabbix.repo
  - name: install cangku
    yum:
      name:
        - centos-release-scl
        - epel-release
      state: installed

- hosts: zabbix
  remote_user: root

  tasks:
  - name: install zabbix
    yum:
      name:
        - zabbix-server-mysql
        - zabbix-agent
        - zabbix-web-mysql-scl
        - zabbix-apache-conf-scl
      state: installed
  - name: install mariadb
    yum: name=mariadb-server state=installed


  - name: start enable mariadb
    service: name=mariadb.service enabled=yes state=started
  - name: mariadb password
    shell: mysqladmin -uroot password '000000'
  - name: create zabbix database
    shell: mysql -uroot -p000000 -e "create database zabbix character set utf8 collate utf8_bin";
  - name: create zabbix user
    shell: mysql -uroot -p000000 -e "create user zabbix@localhost identified by '000000'";
  - name: shouquan
    shell: mysql -uroot -p000000 -e "grant all privileges on zabbix.* to 'zabbix'@'localhost';"
  - name: import db information
    shell:  zcat /usr/share/doc/zabbix-server-mysql-5.0.36/create.sql.gz | mysql -u zabbix -p000000 zabbix
  - name: DBPassword
    lineinfile:
      path: "/etc/zabbix/zabbix_server.conf"
      regexp: "DBPassword"
      line: "DBPassword=000000"
  - name: modify time zone
    lineinfile:
      path: "/etc/opt/rh/rh-php72/php-fpm.d/zabbix.conf"
      regexp: "^;php_value[date.timezone]"
      line: "php_value[date.timezone] = Asia/Shanghai"
  - name: restart zabbix-server
    shell: systemctl restart zabbix-server zabbix-agent httpd rh-php72-php-fpm && systemctl enable zabbix-server zabbix-agent httpd rh-php72-php-fpm
  - name: luanma install ziti
    yum: name=wqy-microhei-fonts state=installed
  - name: copy ziti
    shell: cp -rf /usr/share/fonts/wqy-microhei/wqy-microhei.ttc /usr/share/fonts/dejavu/DejaVuSans.ttf

- hosts: agent
  remote_user: root

  tasks:
  - name: install zabbix-agent
    yum: name=zabbix-agent state=installed
  - name: modify zabbix-agent.config 被动监控
    lineinfile:
      path: "/etc/zabbix/zabbix_agentd.conf"
      regexp: "^Server=127.0.0.1"
      line: "Server=192.168.200.20"
  - name: modify zabbix-agent.conf 主动监控
    lineinfile:
      path: "/etc/zabbix/zabbix_agentd.conf"
      regexp: "^ServerActive=127.0.0.1"
      line: "ServerActive=192.168.200.20"
  - name: modify zabbix-agent.conf 被监控的主机名
    lineinfile:
      path: "/etc/zabbix/zabbix_agentd.conf"
      regexp: "^Hostname=Zabbix server"
      line: "Hostname=zabbix-agent"

  - name: restart zabbix-agent enable
    service: name=zabbix-agent state=restarted enabled=yes
执行剧本
[root@ansible ~]# ansible-playbook  install_zabbix.yaml

PLAY [yum] ***********************************************************************************************************************************************

TASK [Gathering Facts] ***********************************************************************************************************************************
ok: [192.168.200.20]
ok: [192.168.200.30]

TASK [stop firewalld setenforce 0] ***********************************************************************************************************************
changed: [192.168.200.20]
changed: [192.168.200.30]

TASK [download zabbix-repo] ******************************************************************************************************************************
changed: [192.168.200.20]
changed: [192.168.200.30]

TASK [modify zabbix-repo] ********************************************************************************************************************************
[WARNING]: Consider using the replace, lineinfile or template module rather than running 'sed'.  If you need to use command because replace, lineinfile
or template is insufficient you can add 'warn: false' to this command task or set 'command_warnings=False' in ansible.cfg to get rid of this message.
changed: [192.168.200.20]
changed: [192.168.200.30]

TASK [enable zabbix-frontend] ****************************************************************************************************************************
changed: [192.168.200.20]
changed: [192.168.200.30]

TASK [install cangku] ************************************************************************************************************************************
changed: [192.168.200.20]
changed: [192.168.200.30]

PLAY [zabbix] ********************************************************************************************************************************************

TASK [Gathering Facts] ***********************************************************************************************************************************
ok: [192.168.200.20]

TASK [install zabbix] ************************************************************************************************************************************
changed: [192.168.200.20]

TASK [install mariadb] ***********************************************************************************************************************************
changed: [192.168.200.20]

TASK [start enable mariadb] ******************************************************************************************************************************
changed: [192.168.200.20]

TASK [mariadb password] **********************************************************************************************************************************
changed: [192.168.200.20]

TASK [create zabbix database] ****************************************************************************************************************************
changed: [192.168.200.20]

TASK [create zabbix user] ********************************************************************************************************************************
changed: [192.168.200.20]

TASK [shouquan] ******************************************************************************************************************************************
changed: [192.168.200.20]

TASK [import db information] *****************************************************************************************************************************
changed: [192.168.200.20]

TASK [DBPassword] ****************************************************************************************************************************************
changed: [192.168.200.20]

TASK [modify time zone] **********************************************************************************************************************************
changed: [192.168.200.20]

TASK [restart zabbix-server] *****************************************************************************************************************************
changed: [192.168.200.20]

TASK [luanma install ziti] *******************************************************************************************************************************
changed: [192.168.200.20]

TASK [copy ziti] *****************************************************************************************************************************************
changed: [192.168.200.20]

PLAY [agent] *********************************************************************************************************************************************

TASK [Gathering Facts] ***********************************************************************************************************************************
ok: [192.168.200.30]

TASK [install zabbix-agent] ******************************************************************************************************************************
changed: [192.168.200.30]

TASK [modify zabbix-agent.config 被动监控] *******************************************************************************************************************
changed: [192.168.200.30]

TASK [modify zabbix-agent.conf 主动监控] *********************************************************************************************************************
changed: [192.168.200.30]

TASK [modify zabbix-agent.conf 被监控的主机名] ******************************************************************************************************************
changed: [192.168.200.30]

TASK [restart zabbix-agent enable] ***********************************************************************************************************************
changed: [192.168.200.30]

PLAY RECAP ***********************************************************************************************************************************************
192.168.200.20             : ok=20   changed=18   unreachable=0    failed=0    skipped=0    rescued=0    ignored=0
192.168.200.30             : ok=12   changed=10   unreachable=0    failed=0    skipped=0    rescued=0    ignored=0
ZabbixWeb界面
浏览器访问192.168.200.20/zabbix
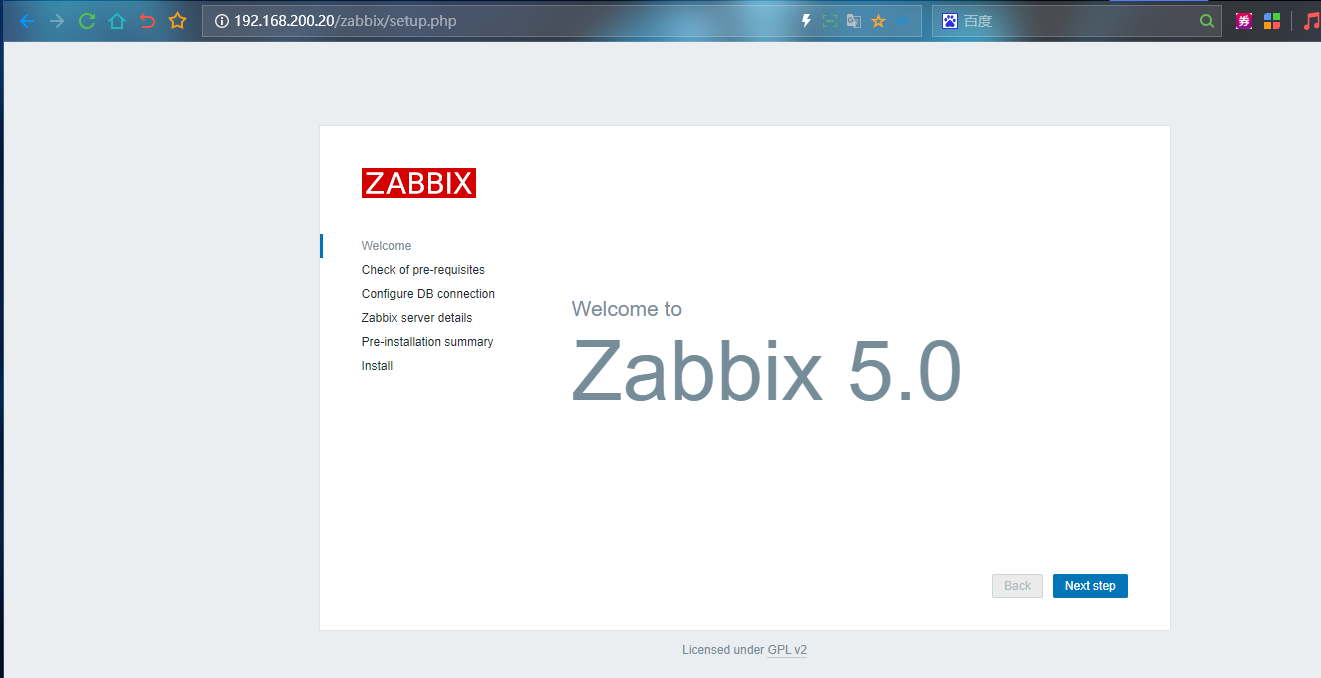
点击Next step
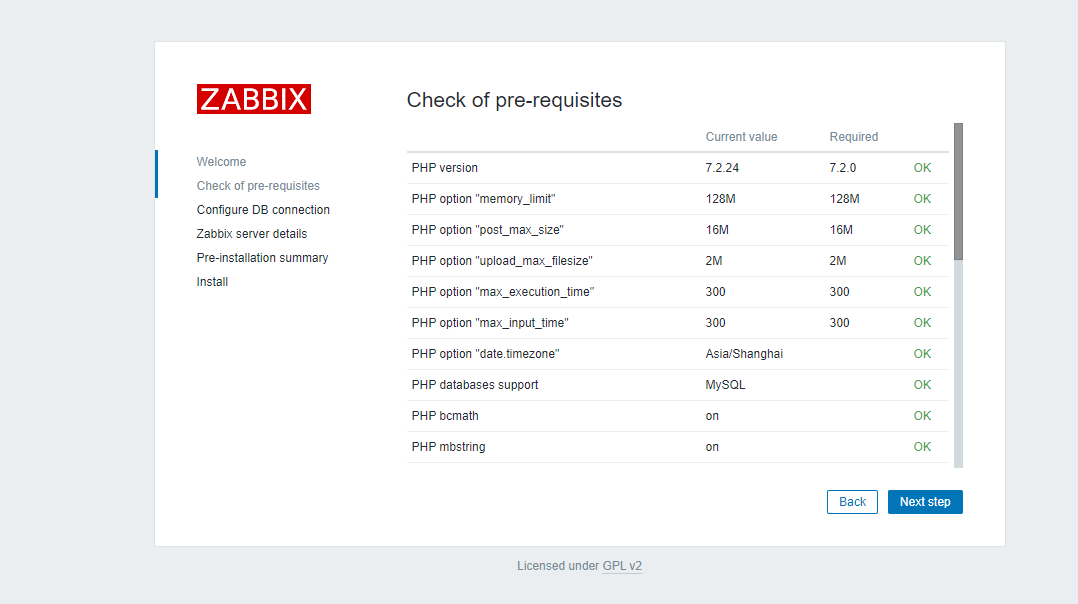
设置完信息,继续点击Next step
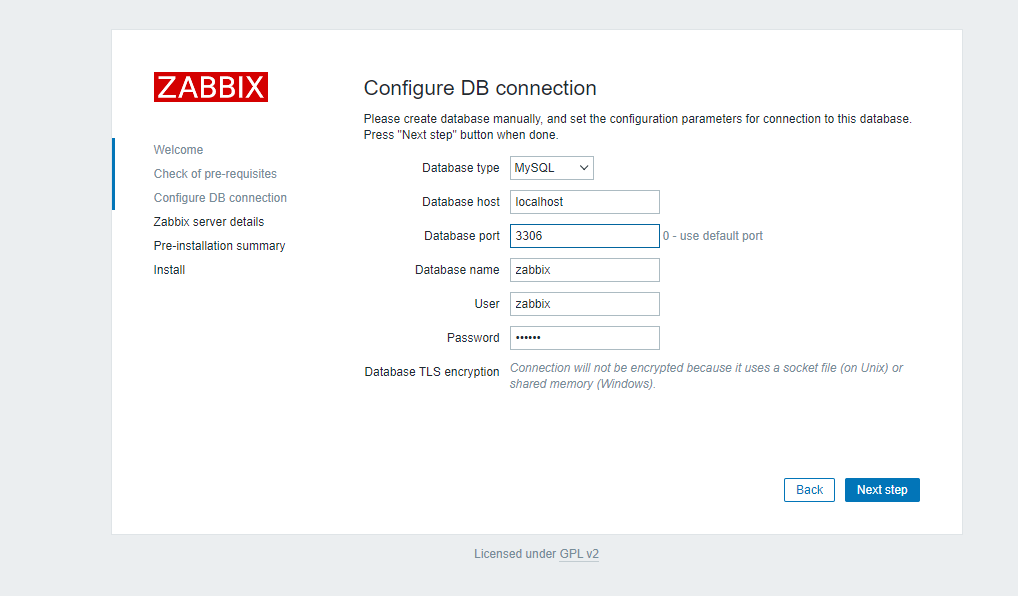
设置完信息,继续点击Next step
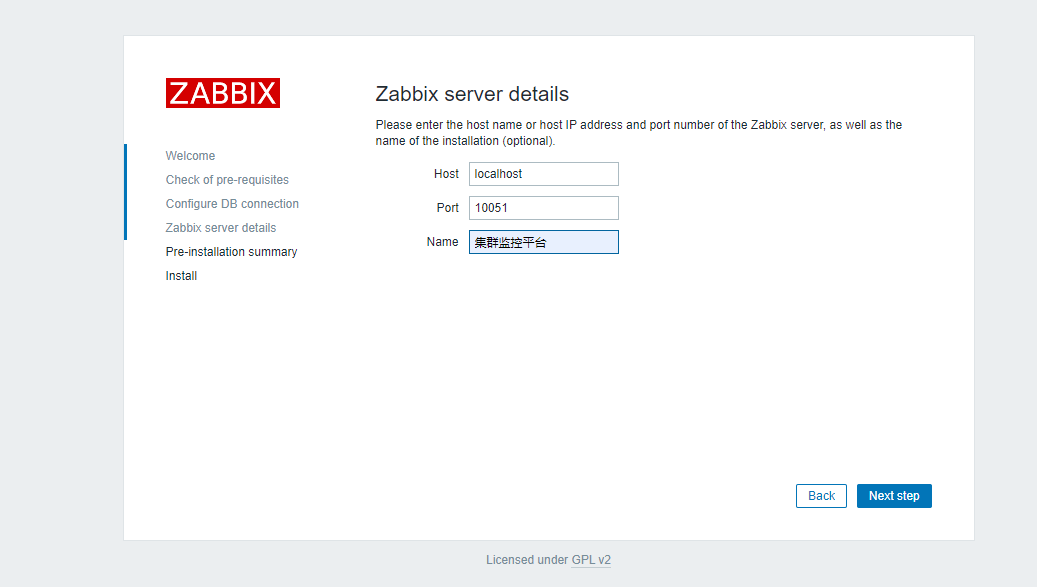
继续点击Next step
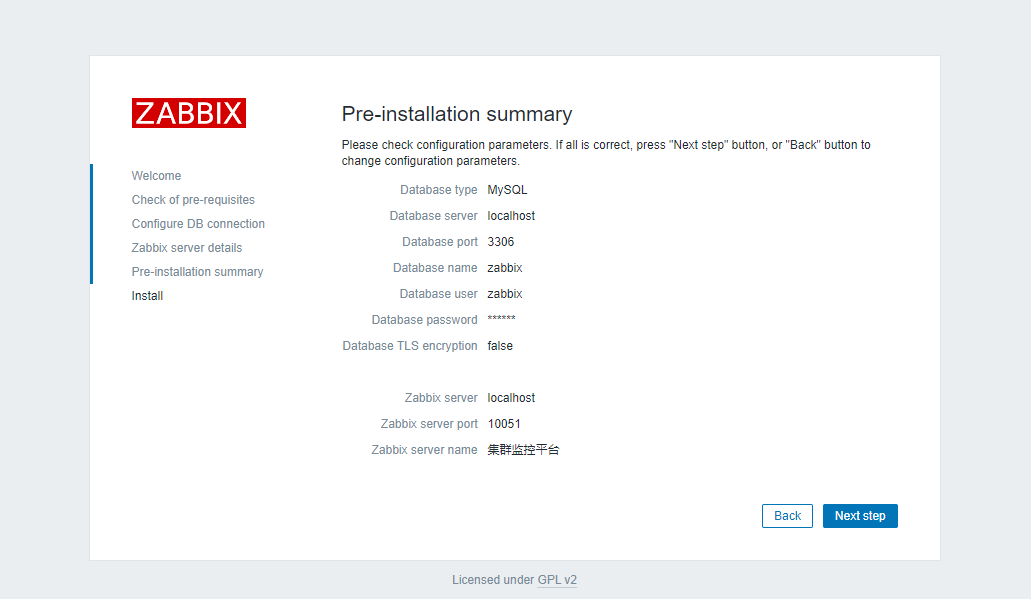
安装成功点击 Finish 登录
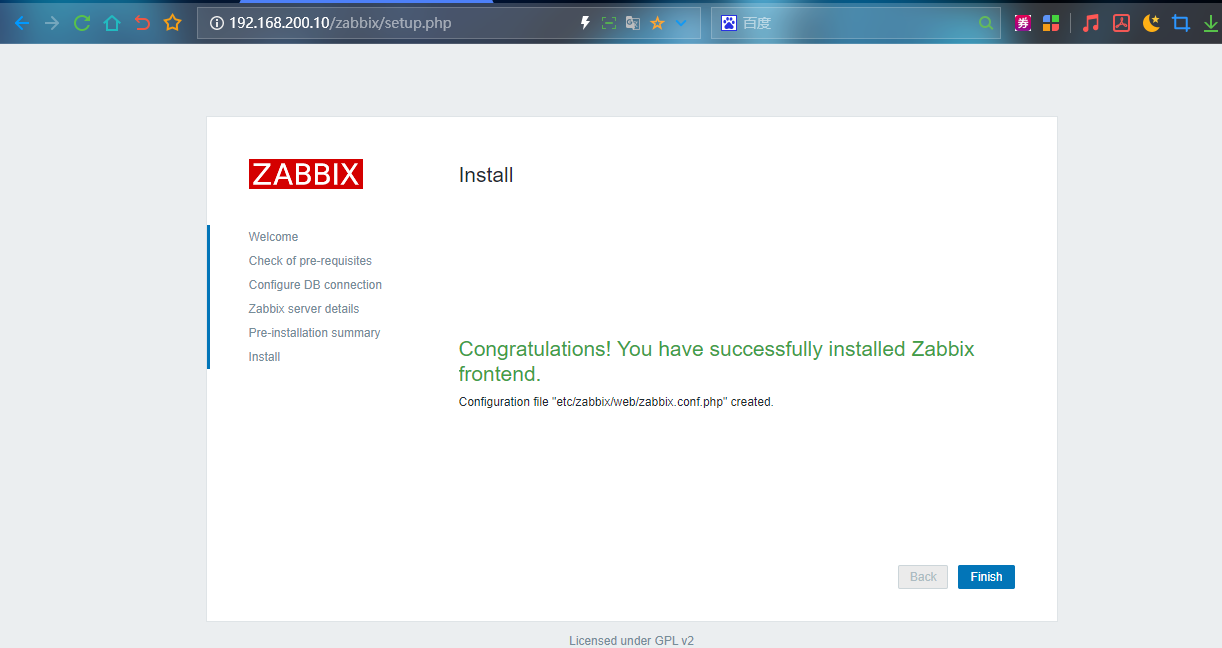
进入登录界面,使用默认的用户名和密码 Admin/zabbix 登录
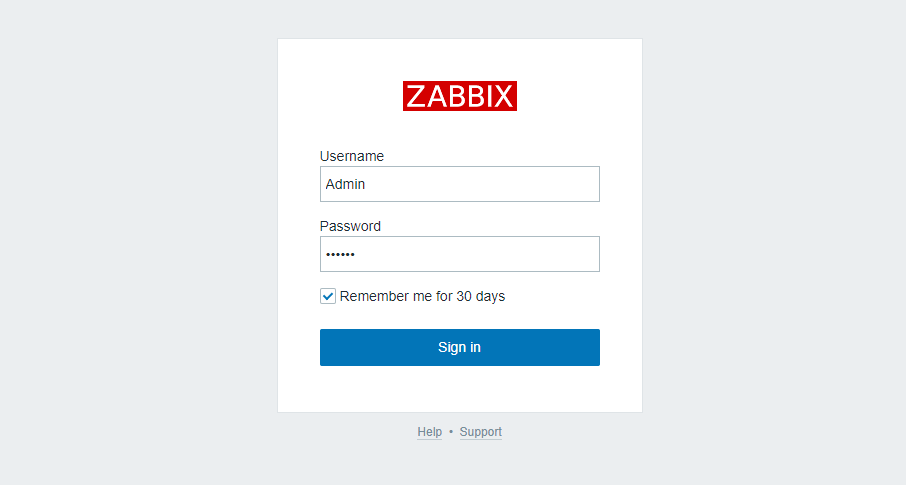
zabbix界面
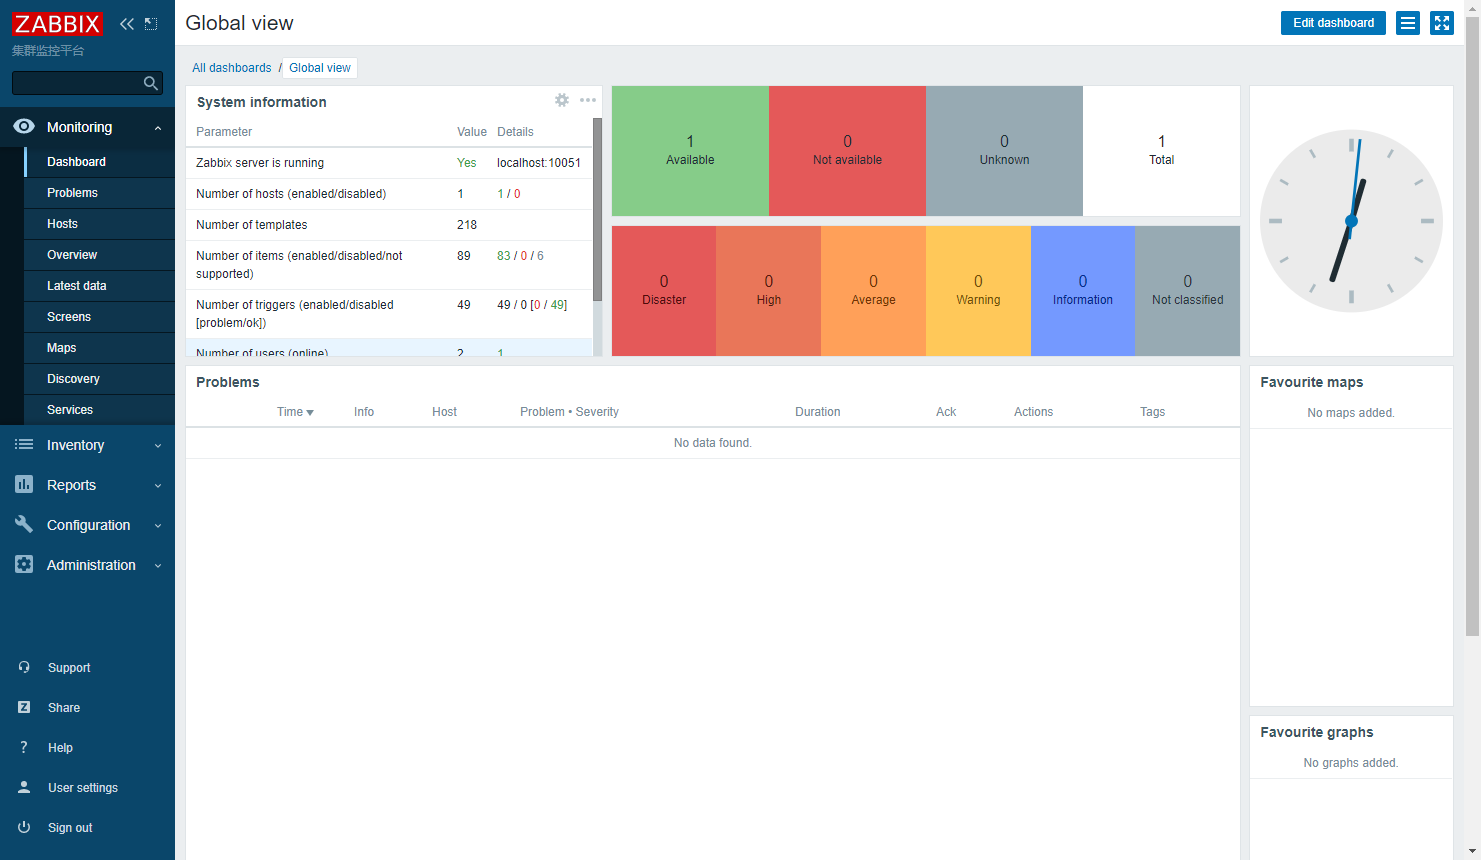
(1)改中文
点击user settings
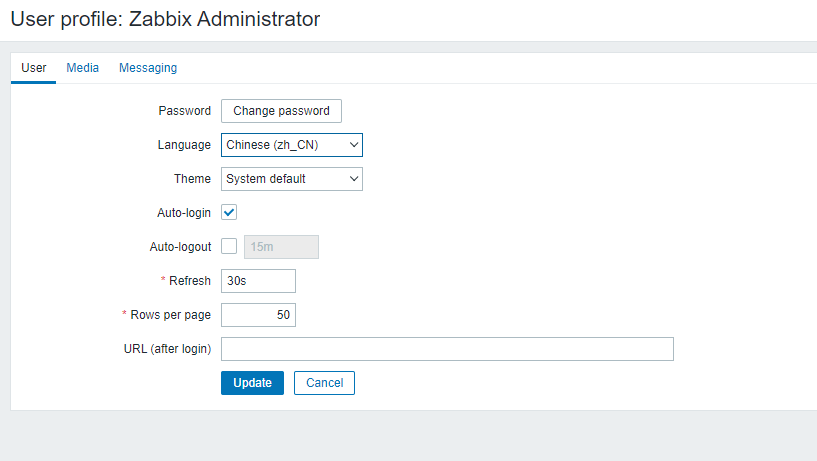
如果你想的话,设置中文可以改登录密码 点击左下角用户设置即可更改密码
(2)添加监控主机
点击配置→主机→创建主机
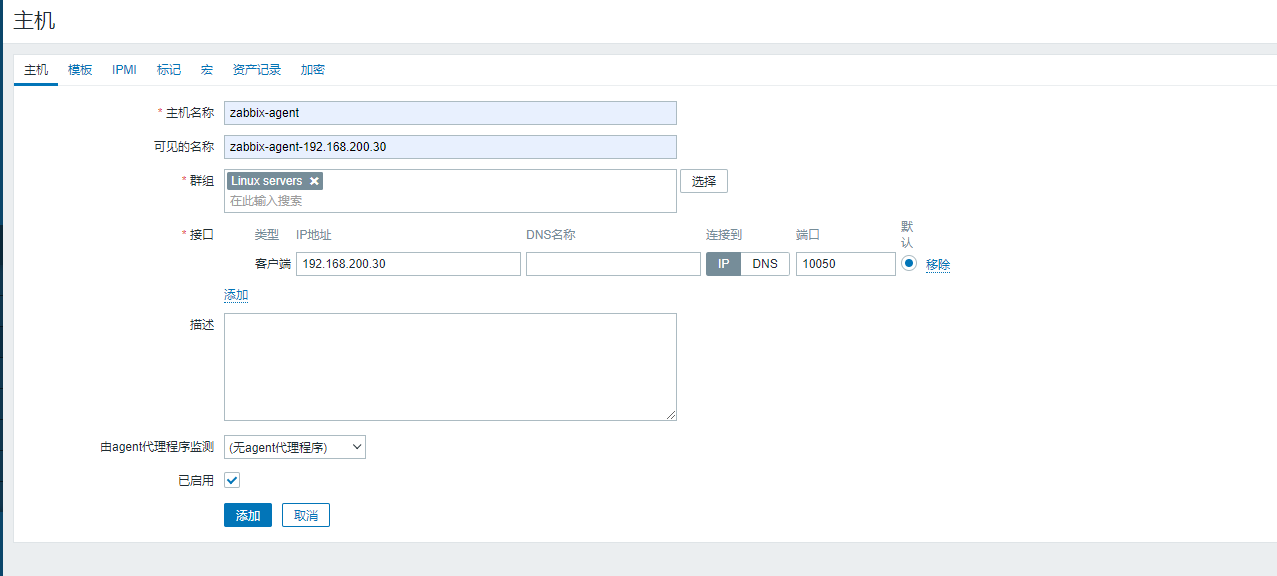
点击模板

查看日志文件
[root@zabbix-server ~]# tail -f /var/log/zabbix/zabbix_server.log

 7371:20230729:003919.818 enabling Zabbix agent checks on host "zabbix-agent": host became available
# 当出现了这条信息说明已经开启成功了
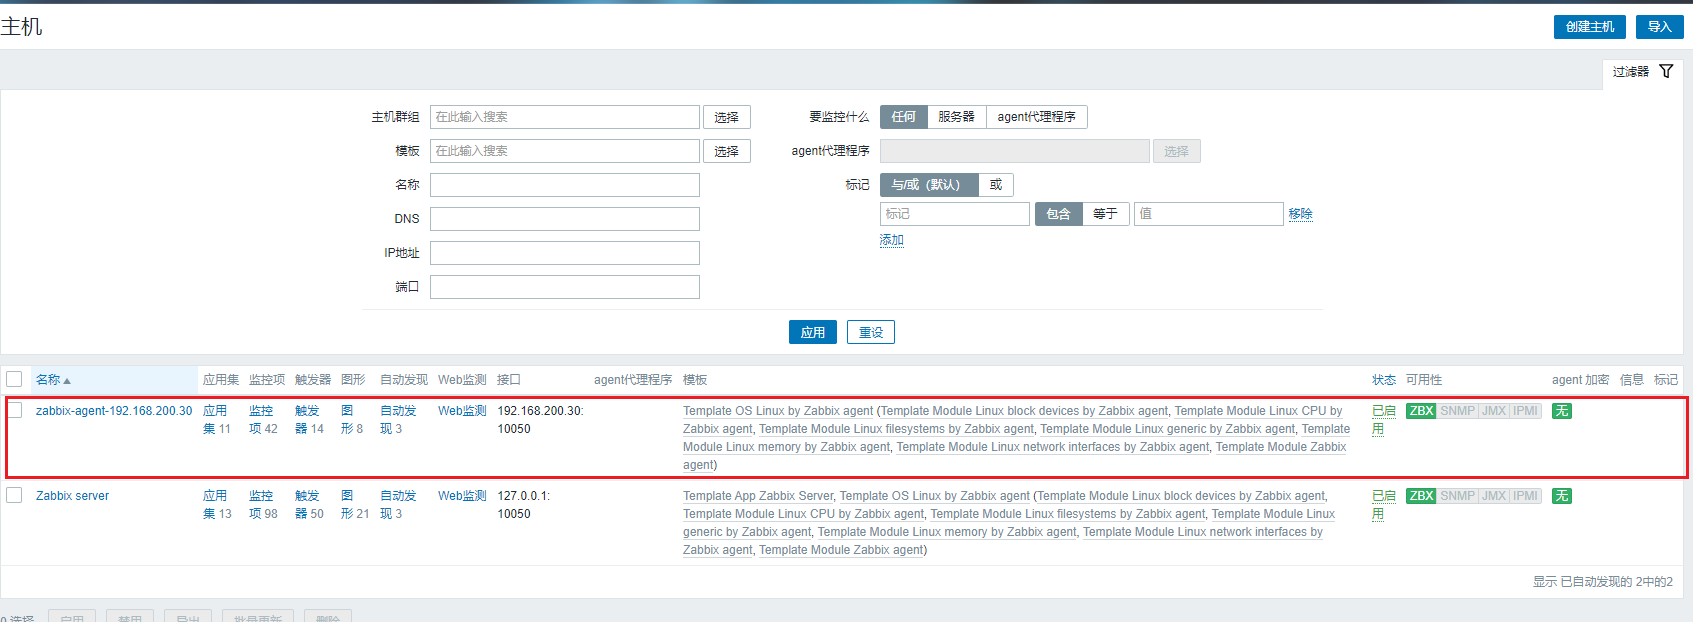
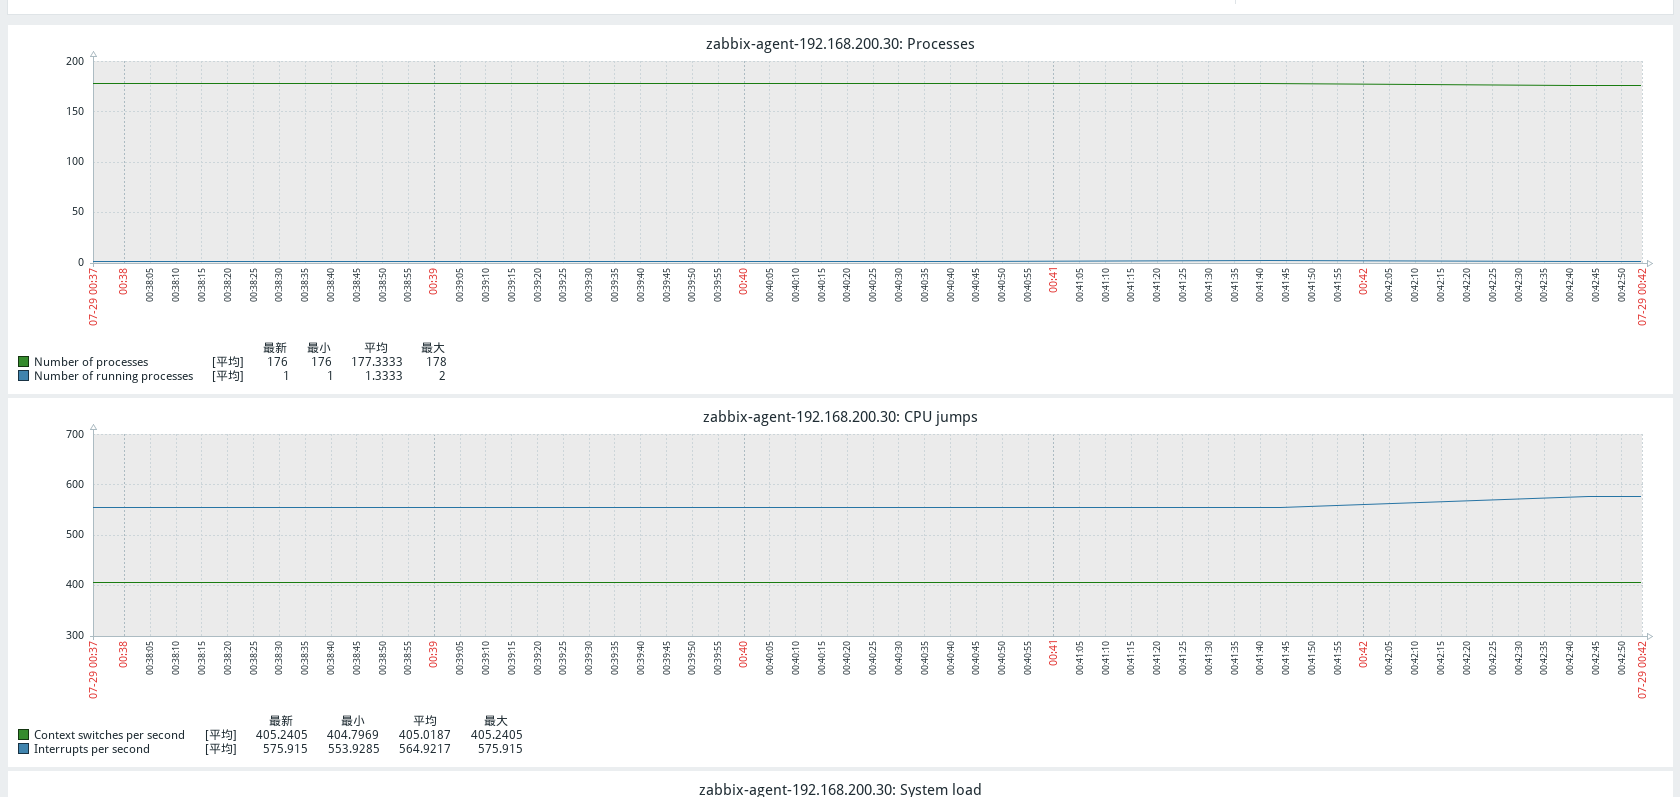
查看监控图表






![[CrackMe]Chafe.2.exe的逆向及注册机编写](https://img-blog.csdnimg.cn/77adb68daf4045678e87ba65a28294c5.png)


