使用Android Studio开发天气预报APP
今天我来分享一下如何使用Android Studio开发一个天气预报APP。在文中,我们将使用第三方接口获取实时天气数据,并显示在APP界面上。
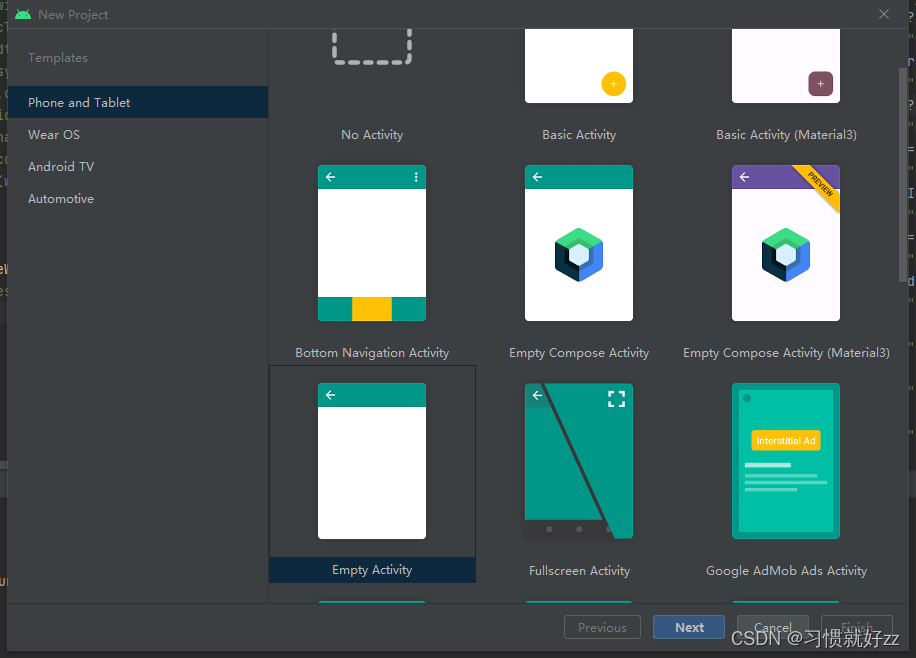
步骤一:创建新项目
首先,打开Android Studio并创建一个新的项目。在创建新项目时,我们需要设置项目名称、包名和支持的最低API级别。
步骤二:
为了获取实时天气数据,我们需要导入一个名为"Retrofit"的第三方库。可以使用以下代码在build.gradle文件中添加Retrofit库的依赖。
dependencies {

    implementation 'androidx.core:core-ktx:1.7.0'
    implementation 'androidx.appcompat:appcompat:1.6.1'
    implementation 'com.google.android.material:material:1.9.0'
    implementation 'androidx.constraintlayout:constraintlayout:2.1.4'
    testImplementation 'junit:junit:4.13.2'
    androidTestImplementation 'androidx.test.ext:junit:1.1.5'
    androidTestImplementation 'androidx.test.espresso:espresso-core:3.5.1'
//network
    implementation 'com.squareup.retrofit2:retrofit:2.9.0'
    implementation 'com.squareup.retrofit2:converter-gson:2.9.0'
}
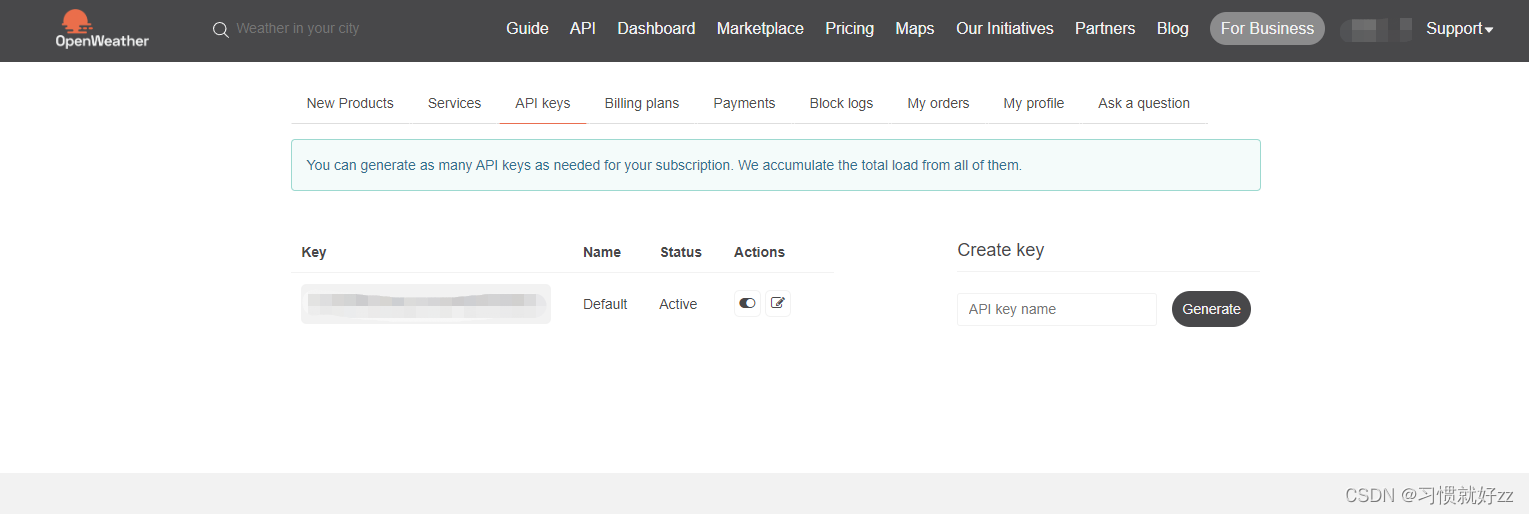
步骤三:获取API Key
为了使用OpenWeatherMap API,您需要注册一个免费的API Key。请访问OpenWeatherMap官网进行注册,并获取API Key。
步骤四:创建接口
首先,我们需要创建一个接口,定义我们需要的网络请求方法。在这个例子中,我们需要一个根据城市名称获取天气信息的方法:
interface WeatherService {

    @GET("weather")
    fun getWeatherByCityName(
        @Query("q") cityName : String,
        @Query("appid") apiKey : String
    ) : Call<WeatherResponse>

}
步骤五:构建对应的数据结构
这是对应的WeatherRespone数据结构,用来序列化返回的json接口。
这个json结构可以从openweathermap的api里查看到:
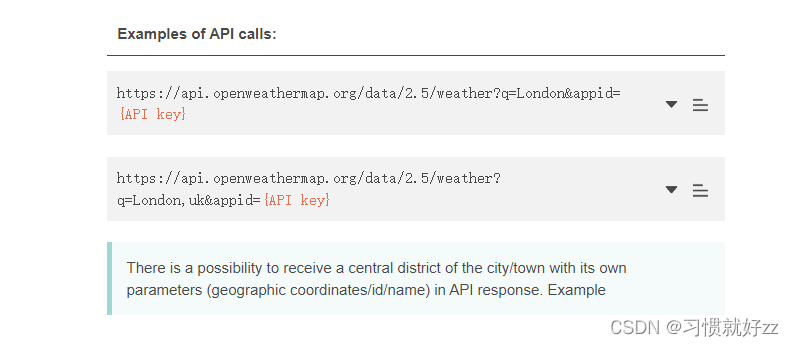
返回值在这里

根据OpenWeatherMap API的响应格式,我们需要创建相应的数据模型。这里我们以WeatherResponse为例,创建对应的数据模型类,对应的kotlin结构体:
data class WeatherResponse(
    @SerializedName("coord")
    var coord: Coord? = null,
    @SerializedName("weather")
    var weather : ArrayList<Weather>,
    @SerializedName("base")
    var base: String? = null,
    @SerializedName("main")
    var main: Main? = null,
    @SerializedName("visibility")
    var visibility: Int = 0,
    @SerializedName("wind")
    var wind: Wind ?= null,
    @SerializedName("clouds")
    var clouds: Clouds ? = null,
    @SerializedName("dt")
    val dt: Int,
    @SerializedName("sys")
    var sys: Sys ? = null,
    @SerializedName("id")
    var id: Int = 0,
    @SerializedName("name")
    var name: String ?= null,
    @SerializedName("cod")
    var cod: Int
)

class Coord {
    @SerializedName("lon")
    var lon : Float = 0.toFloat()
    @SerializedName("lat")
    var lat : Float = 0.toFloat()
}

class Weather {
    @SerializedName("id")
    var id: Int = 0
    @SerializedName("main")
    var main: String ?= null
    @SerializedName("description")
    var description: String ?= null
    @SerializedName("icon")
    var icon: String ?= null
}

class Main {
    @SerializedName("temp")
    var temp: Float = 0.toFloat()
    @SerializedName("pressure")
    var pressure: Int = 0
    @SerializedName("humidity")
    var humidity: Int = 0
    @SerializedName("temp_min")
    var temp_min: Float = 0.toFloat()
    @SerializedName("temp_max")
    var temp_max: Float = 0.toFloat()
}

class Wind {
    @SerializedName("speed")
    var speed: Float = 0.toFloat()
    @SerializedName("deg")
    var deg: Int = 0
}

class Clouds {
    @SerializedName("clouds")
    var clouds: Int = 0
}

class Sys {
    @SerializedName("type")
    var type: Int = 0
    @SerializedName("id")
    var id: Int = 0
    @SerializedName("message")
    var message: Float = 0.toFloat()
    @SerializedName("country")
    var country: String ?= null
    @SerializedName("sunrise")
    var sunrise: Int = 0
    @SerializedName("sunset")
    var sunset: Int = 0
}
步骤六:创建Retrofit实例
接下来,我们需要创建一个Retrofit实例,并配置相关参数。在这个例子中,我们需要配置基础URL和Gson转换器:
调用getWeatherByCityName(“London”)来获取伦敦的天气情况
object RetrofitClient {
    private const val BASE_URL = "https://api.openweathermap.org/data/2.5/"
    private const val API_KEY = "add your api key"

    private val retrofit = Retrofit.Builder()
        .baseUrl(BASE_URL)
        .addConverterFactory(GsonConverterFactory.create())
        .build();

    private val weatherService: WeatherService by lazy { retrofit.create(WeatherService::class.java) }

    fun getWeatherByCityName(cityName: String) {
        val call = weatherService.getWeatherByCityName(cityName, API_KEY)
        call.enqueue(object : Callback<WeatherResponse> {
            override fun onResponse(
                call: Call<WeatherResponse>,
                response: Response<WeatherResponse>
            ) {
                if (response.isSuccessful) {
                    val weatherData = response.body()
                    handleWeatherData(weatherData)
                } else {
                    handleWeatherFailure(response.message())
                }
            }

            override fun onFailure(call: Call<WeatherResponse>, t: Throwable) {
                handleWeatherFailure(t.message!!)
            }
        })
    }

    private fun handleWeatherData(weatherData: WeatherResponse?) {
        if (weatherData != null) {
            println("coord: lat:${weatherData.coord?.lat},lon:${weatherData.coord?.lon}")
            for(weather in weatherData.weather) {
                println("weather: id:${weather.id},main${weather.main}," +
                        "description:${weather.description},icon:${weather.icon}")
            }
            println("base:${weatherData.base}")
            println("main: temperature:${weatherData.main?.temp},pressure:${weatherData.main?.pressure}," +
                    "humidity:${weatherData.main?.humidity},temperature_min:${weatherData.main?.temp_min}," +
                    "temperature_max:${weatherData.main?.temp_max}")
            println("visibility:${weatherData.visibility}")
            println("wind: speed:${weatherData.wind?.speed},deq:${weatherData.wind?.deg}")
            println("clouds: clouds:${weatherData.clouds?.clouds}")
            println("dt: ${weatherData.dt}")
            println("sys: type:${weatherData.sys?.type},id:${weatherData.sys?.id},message:${weatherData.sys?.message}" +
                    ",country:${weatherData.sys?.country},+sunrise:${weatherData.sys?.sunrise},+sunset:${weatherData.sys?.sunset}")
            println("id: ${weatherData.id}")
            println("name: ${weatherData.name}")
            println("cod: ${weatherData.cod}")
        }
    }

    private fun handleWeatherFailure(message: String) {
        println("Request failed: $message")
    }
}
步骤七:程序的运行结果:
W/ample.myweathe: Accessing hidden method Landroid/os/Trace;->asyncTraceBegin(JLjava/lang/String;I)V (light greylist, reflection)
W/ample.myweathe: Accessing hidden method Landroid/os/Trace;->asyncTraceEnd(JLjava/lang/String;I)V (light greylist, reflection)
W/ample.myweathe: Accessing hidden method Landroid/os/Trace;->traceCounter(JLjava/lang/String;I)V (light greylist, reflection)
I/System.out: coord: lat:51.5085,lon:-0.1257
I/System.out: weather: id:804,mainClouds,description:overcast clouds,icon:04n
I/System.out: base:stations
I/System.out: main: temperature:285.53,pressure:1007,humidity:91,temperature_min:284.02,temperature_max:286.53
I/System.out: visibility:10000
I/System.out: wind: speed:0.82,deq:347
I/System.out: clouds: clouds:0
I/System.out: dt: 1690252945
I/System.out: sys: type:2,id:2075535,message:0.0,country:GB,+sunrise:1690258398,+sunset:1690315226
I/System.out: id: 2643743
I/System.out: name: London
I/System.out: cod: 200
W/ample.myweathe: Accessing hidden method Landroid/graphics/FontFamily;-><init>()V (light greylist, reflection)
W/ample.myweathe: Accessing hidden method Landroid/graphics/FontFamily;->addFontFromAssetManager(Landroid/content/res/AssetManager;Ljava/lang/String;IZIII[Landroid/graphics/fonts/FontVariationAxis;)Z (light greylist, reflection)
W/ample.myweathe: Accessing hidden method Landroid/graphics/FontFamily;->addFontFromBuffer(Ljava/nio/ByteBuffer;I[Landroid/graphics/fonts/FontVariationAxis;II)Z (light greylist, reflection)
W/ample.myweathe: Accessing hidden method Landroid/graphics/FontFamily;->freeze()Z (light greylist, reflection)
W/ample.myweathe: Accessing hidden method Landroid/graphics/FontFamily;->abortCreation()V (light greylist, reflection)
W/ample.myweathe: Accessing hidden method Landroid/graphics/Typeface;->createFromFamiliesWithDefault([Landroid/graphics/FontFamily;Ljava/lang/String;II)Landroid/graphics/Typeface; (light greylist, reflection)