5.2.10.应用程序如何调用驱动

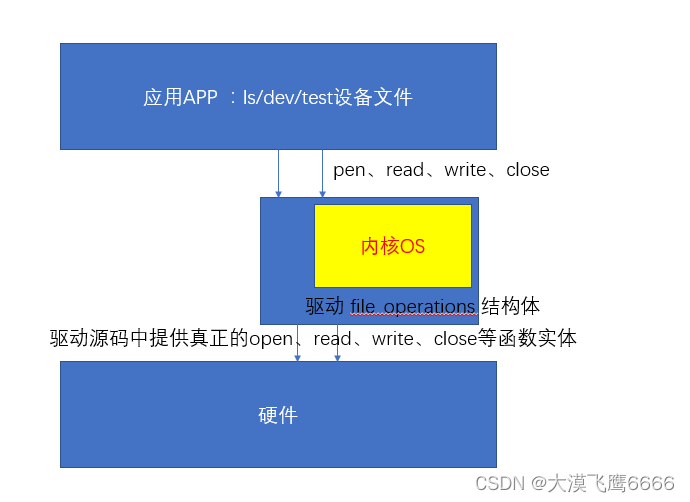
5.2.10.1、驱动设备文件的创建
(1)何为设备文件
索引驱动
(2)设备文件的关键信息是:设备号 = 主设备号 + 次设备号,使用ls -l去查看设备文件,就可以得到这个设备文件对应的主次设备号。
4颗LED不可能 都占用 主设备号,设备号 = 主设备号 + 次设备号
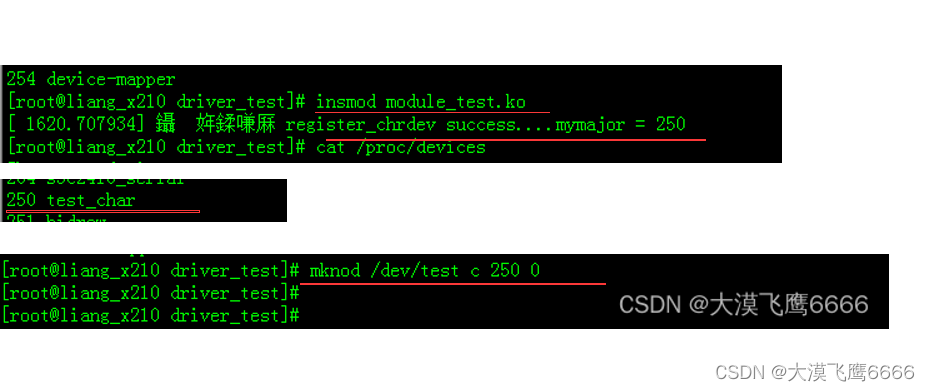
(3)使用mknod创建设备文件:mknod /dev/xxx c 主设备号 次设备号
xxx : 设备文件名 ,我们这里是 test
c : 字符设备; 主设备号: 我们这里是 250; 次设备号: 0


5.2.10.2、写应用来测试驱动
(1)还是原来的应用
(2)open、write、read、close等
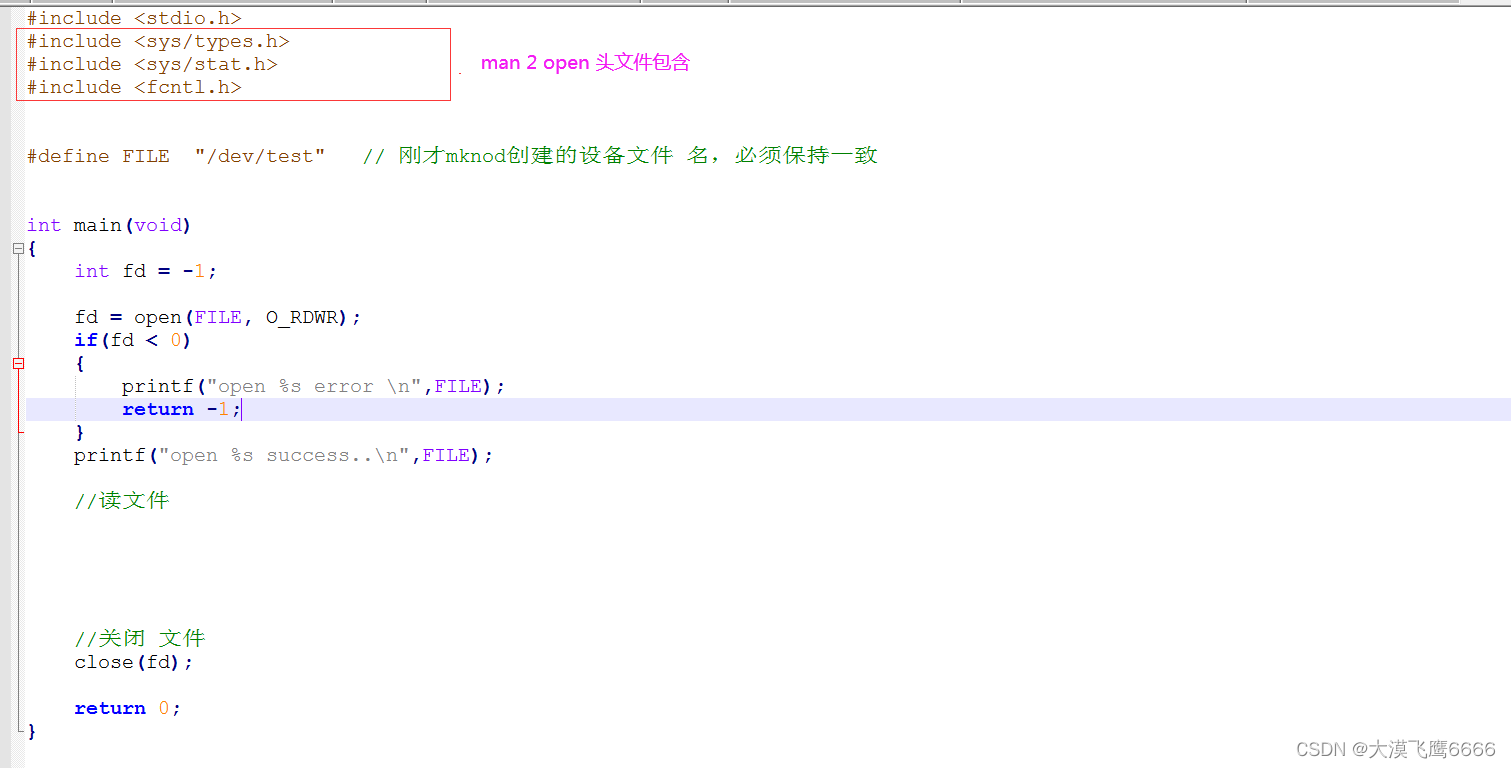
1. 增加了 app.c
#include <stdio.h>
#include <sys/types.h>
#include <sys/stat.h>
#include <fcntl.h>


#define FILE  "/dev/test"   // 刚才mknod创建的设备文件 名,必须保持一致


int main(void)
{
	int fd = -1;

	fd = open(FILE, O_RDWR);
	if(fd < 0)
	{
		printf("open %s error \n",FILE);
		return -1;
	}
	printf("open %s success..\n",FILE);

	//读文件


	//关闭 文件
	close(fd);

	return 0;
}
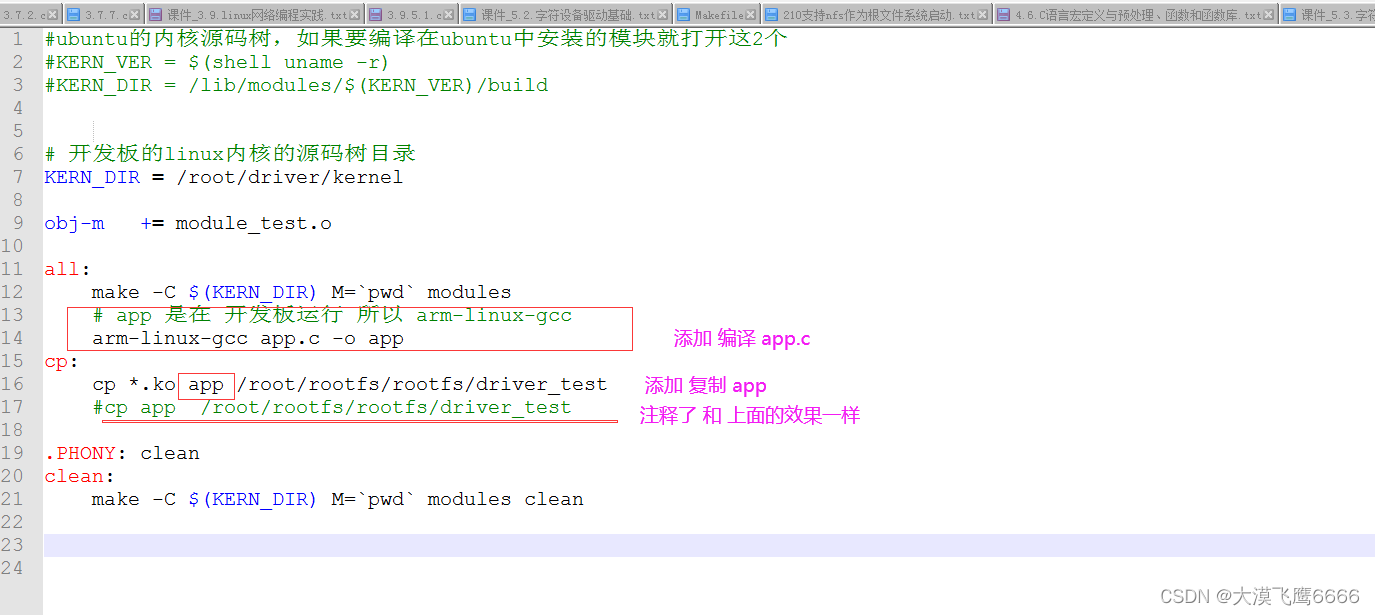
2. Makefile 文件
#ubuntu的内核源码树,如果要编译在ubuntu中安装的模块就打开这2个
#KERN_VER = $(shell uname -r)
#KERN_DIR = /lib/modules/$(KERN_VER)/build


# 开发板的linux内核的源码树目录
KERN_DIR = /root/driver/kernel

obj-m	+= module_test.o

all:
	make -C $(KERN_DIR) M=`pwd` modules
	# app 是在 开发板运行 所以 arm-linux-gcc
	arm-linux-gcc app.c -o app
cp:
	cp *.ko app /root/rootfs/rootfs/driver_test
	#cp app  /root/rootfs/rootfs/driver_test

.PHONY: clean
clean:
	make -C $(KERN_DIR) M=`pwd` modules clean
3. module_test.c 无更改,只是 KERN_INFO 更换 KERN_DEBUG
#include <linux/module.h>		// module_init  module_exit
#include <linux/init.h>			// __init   __exit
#include <linux/fs.h>


#define MYMAJOR 200  /* 定义 register_chrdev 注册设备的 主设备号 */

#define MYNAME  "test_char" /* 定义 register_chrdev 注册设备的 设备名字 */

int mymajor; /* 定义 register_chrdev 注册设备号*/

/* NOTE  自己定义函数指针  test_chrdev_open  */
static int test_chrdev_open(struct inode *inode, struct file *file)
{
	/* 这个函数中真正应该 放置 打开这个硬件设备的 操作代码 ,我们先 printk 代替一下 */
	printk(KERN_INFO "test_chrdev_open\n");

	return 0;

} /* test_chrdev_open() */


/* NOTE  自己定义函数指针 test_chrdev_release ,   release对应的就是 close  */
static int test_chrdev_release(struct inode *inode, struct file *file)
{
	printk(KERN_INFO "test_chrdev_release\n");

	return 0;
}


//自定义  file_operations 结构体 及其元素填充
/* NOTE  定义 register_chrdev 注册设备的 设备结构体 test_fops */
static const struct file_operations test_fops = {
	.owner		= THIS_MODULE,                    /* 所有的驱动 代码这一行不需要动,所有的都是这样,不是函数指针, 惯例直接写即可 */

	.open		= test_chrdev_open,  /* 将来应用 open 打开这个设备时实际 调用的就是这个 .open  函数指针*/
	.release	= test_chrdev_release,         /* release对应的就是 close    函数指针 */
};


// 模块安装函数
static int __init chrdev_init(void)
{
	int ret = -1;  /* 定义 register_chrdev 的返回值  */

	printk(KERN_INFO "chrdev_init helloworld init\n");


	// 在 module_init 宏 调用函数中去注册字符串 设备驱动
	mymajor = register_chrdev(0, "test_char", &test_fops);   /* major设成0,内核帮我们自动分配空白的设备号,分配的值会 做返回值 ,负数还是返回失败  */
	if(mymajor < 0)
	{
		printk(KERN_ERR "registe_chrdev fail \n");
		return -EINVAL;  /* 返回一个错误码 需要加 ’-‘负号*/
	}
	printk(KERN_INFO "自动分配 register_chrdev success....mymajor = %d \n",mymajor);

	return 0;
}

// 模块卸载函数
static void __exit chrdev_exit(void)
{
	printk(KERN_INFO "chrdev_exit helloworld exit\n");

	// 在 module_exit宏 调用函数中去注销 字符串 设备驱动
	unregister_chrdev(mymajor, "test_char");  /* 这里不判断返回值 了,一般不会出错 */
}


module_init(chrdev_init);
module_exit(chrdev_exit);

// MODULE_xxx这种宏作用是用来添加模块描述信息
MODULE_LICENSE("GPL");				// 描述模块的许可证
MODULE_AUTHOR("aston");				// 描述模块的作者
MODULE_DESCRIPTION("module test");	// 描述模块的介绍信息
MODULE_ALIAS("alias xxx");			// 描述模块的别名信息


/***********************************************************
如果 KERN_DEBUG 打印不出来,更改打印级别 或者
printk(KERN_DEBUG "chrdev_init helloworld init\n");

[root@liang_x210 driver_test]# cat /proc/sys/kernel/printk
7       4       1       7
[root@liang_x210 driver_test]# echo 8 > /proc/sys/kernel/printk
[root@liang_x210 driver_test]# cat /proc/sys/kernel/printk
8       4       1       7
************************************************************/
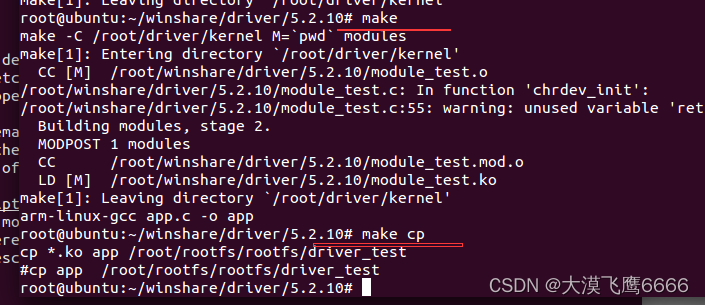
(3)实验现象预测和验证

5.2.10.3、总结
(1)整体流程梳理、注意分层
1.当我们 执行 ./app 程序时
    fd = open(FILE, O_RDWR);

2.其实就是执行 module_test.c
    static int test_chrdev_open(struct inode *inode, struct file *file)
    { printk(KERN_INFO "test_chrdev_open\n");  }


3.  当我们 执行 close(fd); /* app.c文件 */
4.  其实就是执行 module_test.c
    static int test_chrdev_release(struct inode *inode, struct file *file)
    { printk(KERN_INFO "test_chrdev_release\n"); }
代码更改图片:
(2)后续工作:添加读写接口


