tinkerCAD案例:7.Skull Button 骷髅纽扣
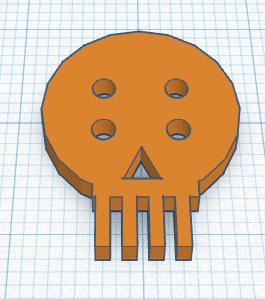
In this lesson you will learn to make a skull shaped button. Let’s get started!
在本课中,您将学习制作一个骷髅形按钮。让我们开始吧!
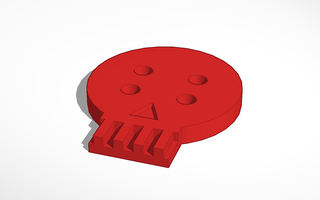
说明
-
Drag a Cylinder shape to the workplane.
将“圆柱”形状拖动到工作平面上 -
Scale it to a height of 2mm and a diameter of 16mm.
将其缩放到2毫米的高度和16毫米的直径。 -
Drag a Box shape to the workplane.
将“框”形状拖动到工作平面上。 -
Scale it smaller to a height of 2mm and a size of 8mm x 8mm.
将其缩小到 2 毫米的高度和 8 毫米 x 8 毫米的尺寸。 -
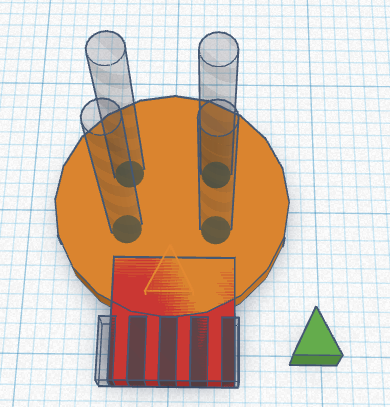
Drag a cylinder shape to the workplane and make it a hole.
将圆柱形状拖动到工作平面上并使其成为孔。 -
Scale it smaller to a size of 2mm x 2mm. Move it to the location marked in orange.
将其缩小到 2 毫米 x 2 毫米的大小。将其移动到标记为橙色的位置。
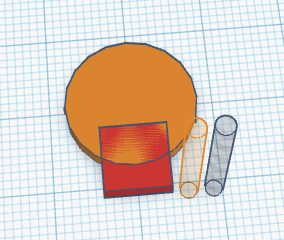
-
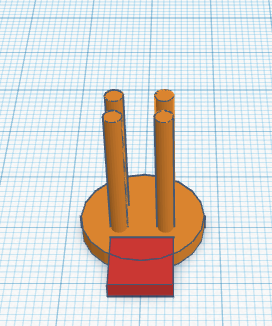
Copy and paste the holes and move them to the areas highlighted in orange.
复制并粘贴孔,并将其移动到以橙色突出显示的区域。
-
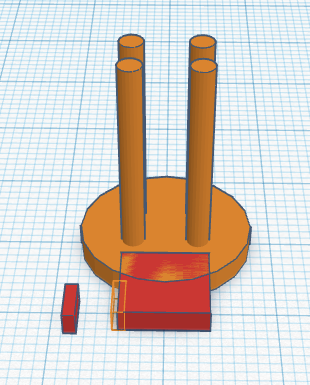
Drag a Box shape to the workplane and make it a hole.
将“框”形状拖动到工作平面上并使其成为孔。 -
Scale it smaller to a height of 2mm and a size of 1mm x 4mm.
将其缩小到 2 毫米的高度和 1 毫米 x 4 毫米的大小。
-
Move it to the area marked in orange.
将其移动到标记为橙色的区域。
-
Copy and paste the Box holes and move them to the area highlighted in orange.
复制并粘贴“框”孔,并将其移动到以橙色突出显示的区域。
-
Don’t forget you can adjust the Snap grid setting for more accuracy if needed.
不要忘记,如果需要,您可以调整捕捉网格设置以提高准确性。 -
Drag a Roof shape to the workplane.
将屋顶形状拖动到工作平面上。 -
Scale it smaller to a height of 3mm and size it to 3mm x 3mm.
将其缩小到 3 毫米的高度,并将其大小调整为 3 毫米 x 3 毫米。 -
Rotate and move the roof shape to the area marked in orange and make it a hole.
旋转屋顶形状并将其移动到标记为橙色的区域,并将其设置为孔。
-
Select all the shapes and group them into a single object by clicking the Group button in the menu bar.
选择所有形状,并通过单击菜单栏中的“组合”按钮将它们分组到单个对象中。
