1.搭建文件目录和clone代码
mkdir -p SC-LeGo-LOAM/src
cd SC-LeGo-LOAM/src
git clone https://github.com/AbangLZU/SC-LeGO-LOAM.git
cd ..
2.修改代码
需要注意的是原作者使用的是Ouster OS-64雷达,需要更改utility.h文件中适配自己的雷达类型,而本文采用velodyne 16线激光雷达,对utility.h文件要做以下修改
首先是pointCloudTopic
extern const string pointCloudTopic = "/os1_points";替换为
extern const string pointCloudTopic = "/velodyne_points";其次:
Ouster OS1-64
extern const int N_SCAN = 64;
extern const int Horizon_SCAN = 1024;
extern const float ang_res_x = 360.0/float(Horizon_SCAN);
extern const float ang_res_y = 33.2/float(N_SCAN-1);
extern const float ang_bottom = 16.6+0.1;
extern const int groundScanInd = 15;
替换为
1)对于16线的VLP雷达,添加
extern const int N_SCAN = 16;
extern const int Horizon_SCAN = 1800;
extern const float ang_res_x = 0.2;
extern const float ang_res_y = 2.0;
extern const float ang_bottom = 15.0+0.1;
extern const int groundScanInd = 7;
2)对于64线的VLP雷达,添加
extern const int N_SCAN = 64;
extern const int Horizon_SCAN = 2083;
extern const float ang_res_x = 360.0/float(Horizon_SCAN);
extern const float ang_res_y = 26.8/float(N_SCAN-1);
extern const float ang_bottom = 24.8;
extern const int groundScanInd = 55;
最后:
注释掉:
#include <opencv/cv.h>加入:
#include <opencv2/opencv.hpp>并且将
#include <pcl/kdtree/kdtree_flann.h>剪切到#include <opencv2/opencv.hpp>前面去
3.编译和运行launch
catkin_makesource ./devel/setup.bash
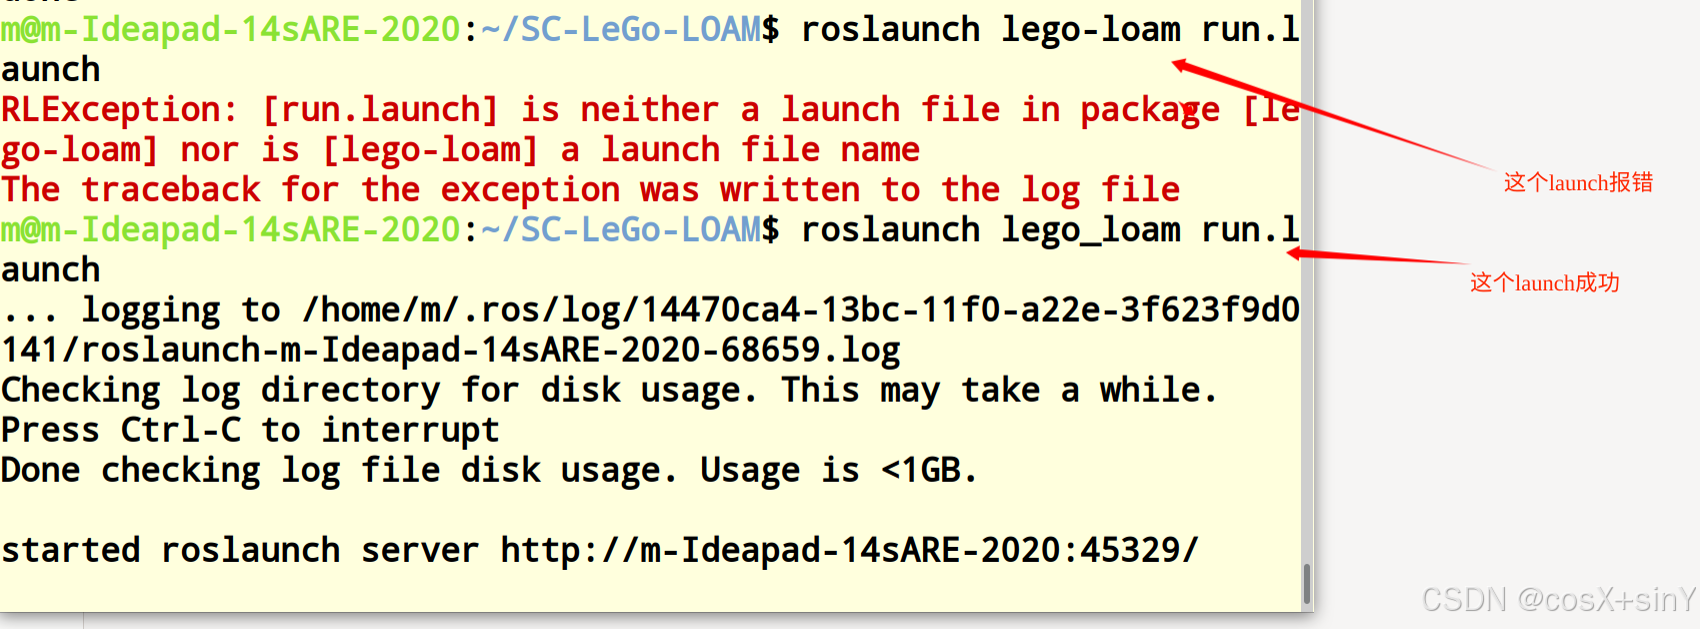
roslaunch lego_loam run.launch运行launch的经验
1)包名不管是大写和小写,运行是都是小写
2)包名中的“-” 和“_” 的区别,尽量运行 “_”
4.下载数据包和运行
这里我使用的是LeGo-LOAM的数据包
数据包链接
运行
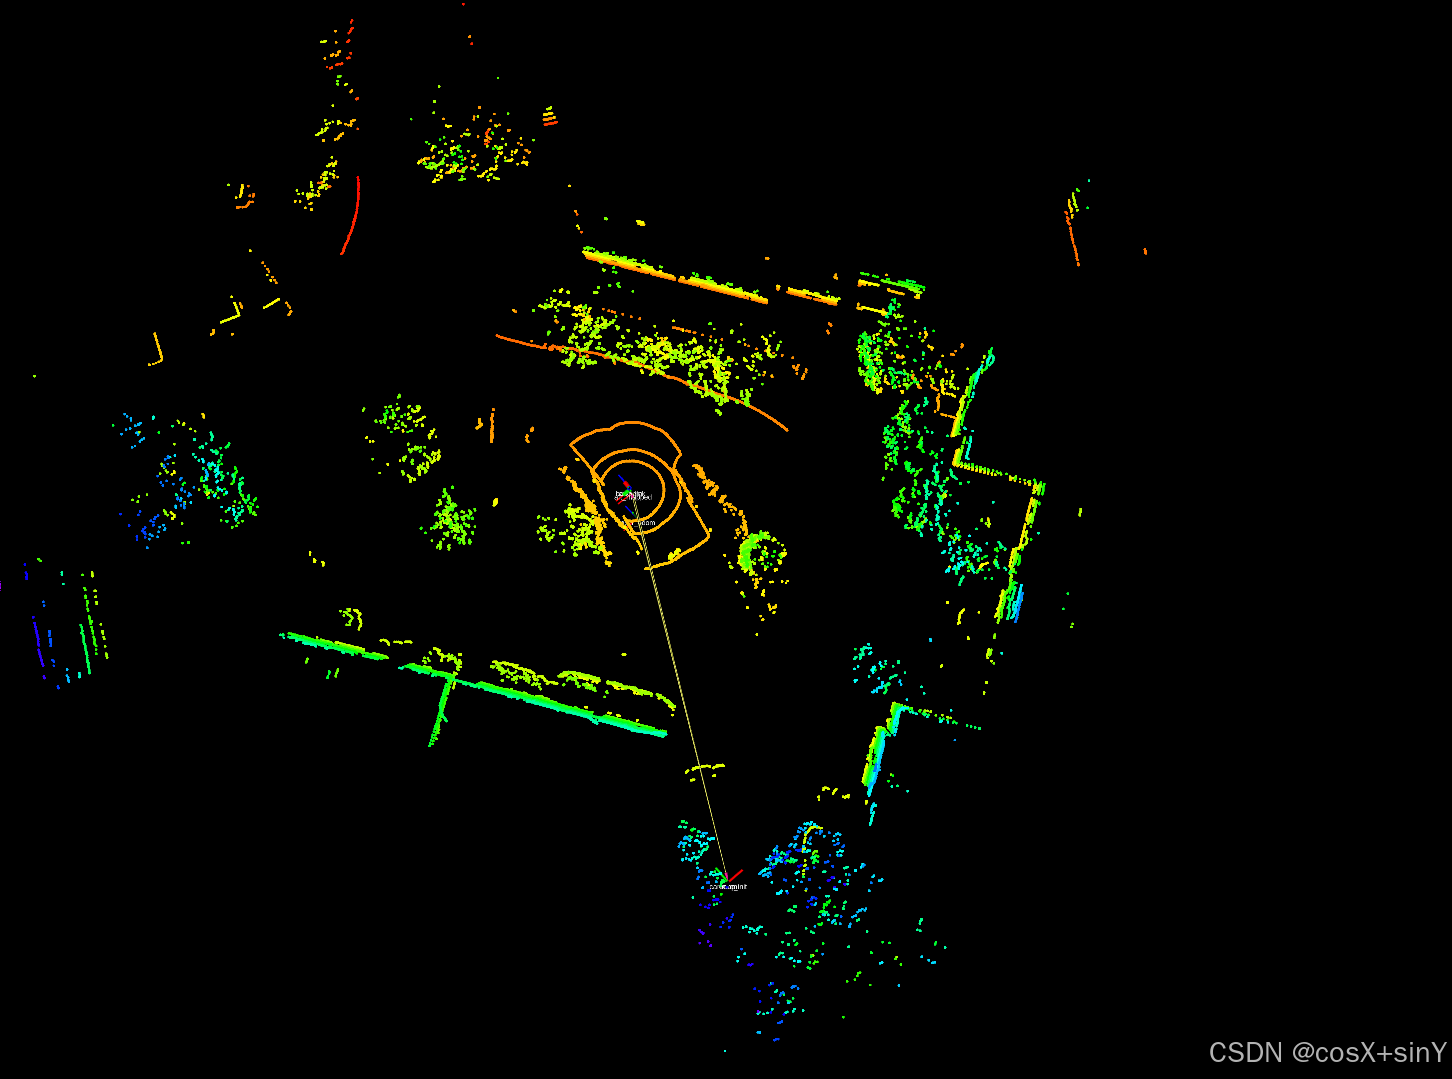
rosbag play --clock ***.bag5.效果图