目录
- 数据集
- 目的
- 所用的两种词嵌入方式
- 步骤
- 随机读取10000条文本
- TF-IDF方法
- 多模型比较
- CNN (用于比较 TF-IDF嵌入和词向量嵌入时的区别)
- LSTM
- BI-LSTM
数据集
10分类的新闻文本分类任务
目的
1.比较不同数据处理方式,词嵌入方式对任务的影响
2.比较相同处理方式下,不同模型对任务的影响
所用的两种词嵌入方式
1.TF-IDF
2.腾讯AI Lab开源的词嵌入(70000 small,2000000 big)
腾讯AI Lab地址链接
步骤
随机读取10000条文本
#读文件,并sample一部分数据出来单独保存
import numpy as np
import random

f=open('./data/train.txt','r',encoding='utf-8')
f_list=f.read().splitlines()
f_sample_list=random.sample(f_list,10000)
f.close
print('sample后的文件长度为:',len(f_sample_list))
#将sample后的文件保存
with open('./train_data/train_1w.txt','w',encoding='utf-8') as fw:
    for line in f_sample_list:
        line=line.strip()
        fw.write(line+'\n')
fw.close
TF-IDF方法
from sklearn.feature_extraction.text import TfidfVectorizer
import jieba
from tqdm import tqdm #用来看迭代进度条
import numpy as np
# s1.读输入数据文件, 区分input和label, 然后进行分词
f = open('./train_data/train_1w.txt', 'r' , encoding='utf-8')
train_data_list = f.read().splitlines()
label_list = []
input_list = []

for line_data in tqdm(train_data_list):
    line_data_split = line_data.split('\t')
    line_in = line_data_split[0]
    line_label = int(line_data_split[-1])
    label_list.append(line_label)

    line_data_seg = jieba.lcut(line_in)
    # print(line_data_seg)
    input_list.append(' '.join(line_data_seg))
    # print(' '.join(line_data_seg))
    # print('-------------------')

f.close()
# s2.将input转换为tf-tdf表示
tf_idf_vectorizer = TfidfVectorizer(max_features=200, use_idf=True)
tfidf = tf_idf_vectorizer.fit_transform(input_list)
tfidf_metrics = tf_idf_vectorizer.transform(input_list)
tfidf_metrics = tfidf_metrics.toarray()
# tfidf_test_metrics = np.reshape(tfidf_test_metrics, [-1,1,100])
print('tfidf_metrics shape: ', tfidf_metrics.shape, type(tfidf_metrics))
tfidf_metrics shape: (10000, 200) <class ‘numpy.ndarray’>
# s3. 以tf-idf表示作为输入,进行dataset打包
import os
import tensorflow as tf
import numpy as np
# from sklearn.feature_selection import mutual_info_regression

os.environ["CUDA_VISIBLE_DEVICES"]="-1" #使用cpu版tensorflow
print(tf.test.is_gpu_available())

# 3.1 首先可以对数据进行打乱
# 关于shuffle 和 seed 之间的关系,可以参考 https://blog.csdn.net/qq_46380784/article/details/128823842
tf.random.set_seed(222)
x_row = tf.reshape(tfidf_metrics, (-1, 10, 20))
x_row = tf.random.shuffle(x_row)

tf.random.set_seed(222)
y_row = tf.random.shuffle(label_list)
y_row = tf.one_hot(y_row, depth=10)

# 3.2 手动地将数据进行分割, 大概按照[8:2]或者[7.5:2.5]
x_train = x_row[:7600]
y_train = y_row[:7600]

x_test = x_row[7600:]
y_test = y_row[7600:]

print('训练输入: ', x_train.shape, type(x_train))
print('训练输出: ', y_train.shape, type(y_train))
print('测试输入: ', x_test.shape, type(x_test))
print('测试输出: ', y_test.shape, type(y_test))

db_train = tf.data.Dataset.from_tensor_slices((x_train,y_train))
db_train = db_train.batch(64)

db_test = tf.data.Dataset.from_tensor_slices((x_test,y_test))
db_test = db_test.batch(64)
# s4. 搭建神经网络用于实验
#需要说明的是:
    #以上数据处理的好处是:
    #1) sample的文件单独保存, 方便每次直接读取使用;
    #2) 数据处理和打包与神经网络的搭建较为独立, 这样方便在使用同样的数据处理方式时, 使用不同的模型对其进行实验.

# 4.1 普通卷积神经网络
from tensorflow.keras import layers, Sequential, Model, Input, optimizers, metrics

inputs = Input(shape=(10, 20), dtype=tf.float32)
cnn = layers.Convolution1D(64, kernel_size=3)
pool = layers.MaxPool1D(pool_size=2)
fc = layers.Dense(10, activation='softmax')

x = cnn(inputs)
print('cnn out: ', x.shape)
x = pool(x)
print('pool out: ', x.shape)
x = tf.reshape(x, (-1, 4*64))
print('Flatten out: ', x.shape)
x = fc(x)

model = Model(inputs=inputs, outputs=x)
model.compile(loss=tf.keras.losses.CategoricalCrossentropy(from_logits=False),
              optimizer=tf.keras.optimizers.Adam(),
               metrics=['accuracy'])

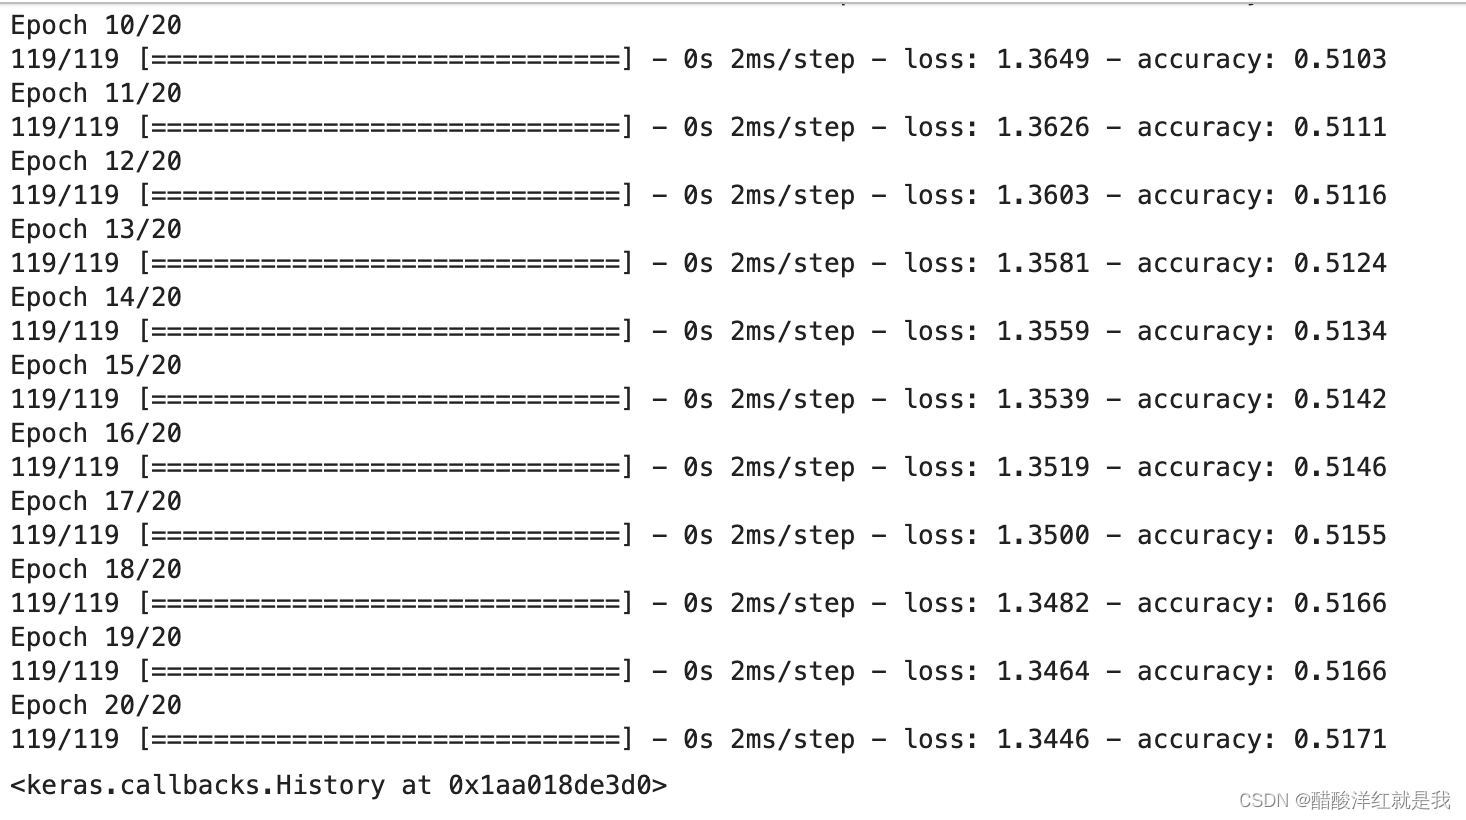
model.fit(db_train, epochs=20, verbose=True)
model.evaluate(db_test)

总结:tf-idf不适用于大文本,因为其没有考虑时序,其偏偏就是把每一个单词独立看待的一个东西
多模型比较
# 1. 读数据
from tqdm import tqdm
import numpy as np
f = open('./train_data/train_1w.txt', 'r' , encoding='utf-8')
train_data_list = f.read().splitlines()
label_list = []
text_list = []

for text in tqdm(train_data_list):
    text_split = text.split('\t')
    if len(text_split) == 2: #担心出现没有标签的情况
        text_list.append(text_split[0])
        label_list.append(text_split[1])

f.close()
print('文本处理长度为: ', len(text_list))
print('标签处理长度为: ', len(label_list))
# 2. 文本预处理
#主要包含:
    #2.1 Embedding;
    #2.2 分词;
    #2.3 padding;
#2.1 Embedding
from gensim.models import KeyedVectors

model = KeyedVectors.load_word2vec_format('./embeding/70000-small.txt')
model.get_vector('电脑')
model.similarity('电脑','手机')
0.722775
'哈拉少' in model.index_to_key
False
# 2.2 分词 获取每一句话的句向量形式 [n, sen_length, dim]
import jieba as jb

def getSenVec(sen):
    sen_vec = []
    for word in sen:
        if word in model.index_to_key:
            word_vec = model.get_vector(word)
        else:
            word_vec = model.get_vector('未知')

        sen_vec.append(word_vec)

    return sen_vec

vec_list = []

for text in tqdm(text_list):
    text_seg = jb.lcut(text)
    text_seg = [i for i in text_seg if i not in [' ', '《', '》','(',')','(',')','!','!','。','.']]
    text_vec = getSenVec(text_seg)
    vec_list.append(text_vec)


print('获取的句向量长度为: ', len(vec_list))
# 2.3 padding为统一长度
t_length = 0
for vec in vec_list:
    t_length = t_length + len(vec)
print('平均长度为: ', t_length / 10000)
平均长度为: 9.3808
所以, 我们取padding的长度为10.
pad_text_vec = []

for vec in vec_list:
    length = len(vec)

    if length < 10:
        num = 10-length

        for _ in range(num):
            vec.append(model.get_vector('pad'))
    elif length > 10:
        vec = vec[:10]
    pad_text_vec.append(vec)

vec_array = np.array(pad_text_vec)
print('padding 以后的向量维度: ', vec_array.shape)
padding 以后的向量维度: (10000, 10, 200)
# 处理一下Y label
import tensorflow as tf
one_hot_label_list = []

for label in label_list:
    label = tf.one_hot(int(label), depth=10)
    one_hot_label_list.append(label)

one_hot_label_array = np.array(one_hot_label_list)
print('经过处理后的label: ', one_hot_label_array.shape)
经过处理后的label: (10000, 10)
# 2. 打包数据
import os
import tensorflow as tf
import numpy as np
# from sklearn.feature_selection import mutual_info_regression

os.environ["CUDA_VISIBLE_DEVICES"]="-1"
print(tf.test.is_gpu_available())

tf.random.set_seed(222)
x_row = tf.random.shuffle(vec_array)

tf.random.set_seed(222)
y_row = tf.random.shuffle(one_hot_label_array)

# 3.2 手动地将数据进行分割, 大概按照[8:2]或者[7.5:2.5]
x_train = x_row[:7600]
y_train = y_row[:7600]

x_test = x_row[7600:]
y_test = y_row[7600:]

print('训练输入: ', x_train.shape, type(x_train))
print('训练输出: ', y_train.shape, type(y_train))
print('测试输入: ', x_test.shape, type(x_test))
print('测试输出: ', y_test.shape, type(y_test))

db_train = tf.data.Dataset.from_tensor_slices((x_train,y_train))
db_train = db_train.batch(64)

db_test = tf.data.Dataset.from_tensor_slices((x_test,y_test))
db_test = db_test.batch(64)

CNN (用于比较 TF-IDF嵌入和词向量嵌入时的区别)
# 3. 搭建神经网络
# 3.1 CNN (用于比较 TF-IDF嵌入和词向量嵌入时的区别)
class MyCNN(tf.keras.Model):
    def __init__(self):
        super(MyCNN, self).__init__()
        self.cnn = layers.Conv1D(256, 3, padding='same')
        self.pool = layers.MaxPool1D(padding='same')
        self.fc = layers.Dense(10, activation='softmax')

    def call(self, inputs):
        out = self.cnn(inputs)
        print('cnn out: ', out.shape)

        out = self.pool(out)
        print('pool out: ', out.shape)

        out = tf.reshape(out, (-1, 5*256))
        print('reshape out: ', out.shape)

        out = self.fc(out)

        return out
model_MyCNN = MyCNN()
model_MyCNN.compile(loss=tf.keras.losses.CategoricalCrossentropy(from_logits=False),
              optimizer=tf.keras.optimizers.Adam(),
               metrics=['accuracy'])
model_MyCNN.fit(db_train, epochs=20, verbose=True)
model_MyCNN.evaluate(db_test)

LSTM
#3.2 LSTM 用来进行, 同嵌入时, 不同模型的比较
class MyLSTM(tf.keras.Model):
    def __init__(self):
        super(MyLSTM, self).__init__()
        self.lstm = layers.LSTM(256)
        self.drop = layers.Dropout(0.1)
        self.fc = layers.Dense(10, activation='softmax')

    def call(self, inputs):
        out = self.lstm(inputs)
        print('lstm out: ', out.shape)

        out = self.drop(out)
        print('drop out: ', out.shape)

        out = self.fc(out)

        return out
model_MyLSTM = MyLSTM()
model_MyLSTM.compile(loss=tf.keras.losses.CategoricalCrossentropy(from_logits=False),
              optimizer=tf.keras.optimizers.Adam(),
               metrics=['accuracy'])
model_MyLSTM.fit(db_train, epochs=20, verbose=True)
model_MyLSTM.evaluate(db_test)

BI-LSTM
class MyBILSTM(tf.keras.Model):
    def __init__(self):
        super(MyBILSTM, self).__init__()
        self.lstm = layers.LSTM(256)
        self.bilstm = layers.Bidirectional(self.lstm, merge_mode='concat')
        self.drop = layers.Dropout(0.1)
        self.fc = layers.Dense(10, activation='softmax')

    def call(self, inputs):
        out = self.bilstm(inputs)
        print('bilstm out: ', out.shape)

        out = self.drop(out)
        print('drop out: ', out.shape)

        out = self.fc(out)

        return out
model_MyBILSTM = MyBILSTM()
model_MyBILSTM.compile(loss=tf.keras.losses.CategoricalCrossentropy(from_logits=False),
              optimizer=tf.keras.optimizers.Adam(),
               metrics=['accuracy'])
model_MyBILSTM.fit(db_train, epochs=20, verbose=True)
model_MyBILSTM.evaluate(db_test)






![[Linux] CentOS7 中 pip3 install 可能出现的 ssl 问题](https://img-blog.csdnimg.cn/img_convert/29c830d4f53c9cf7208604914d0e34a2.png)

