本节我们将为 Tauri 应用自定义应用图标的启动闪屏
起步
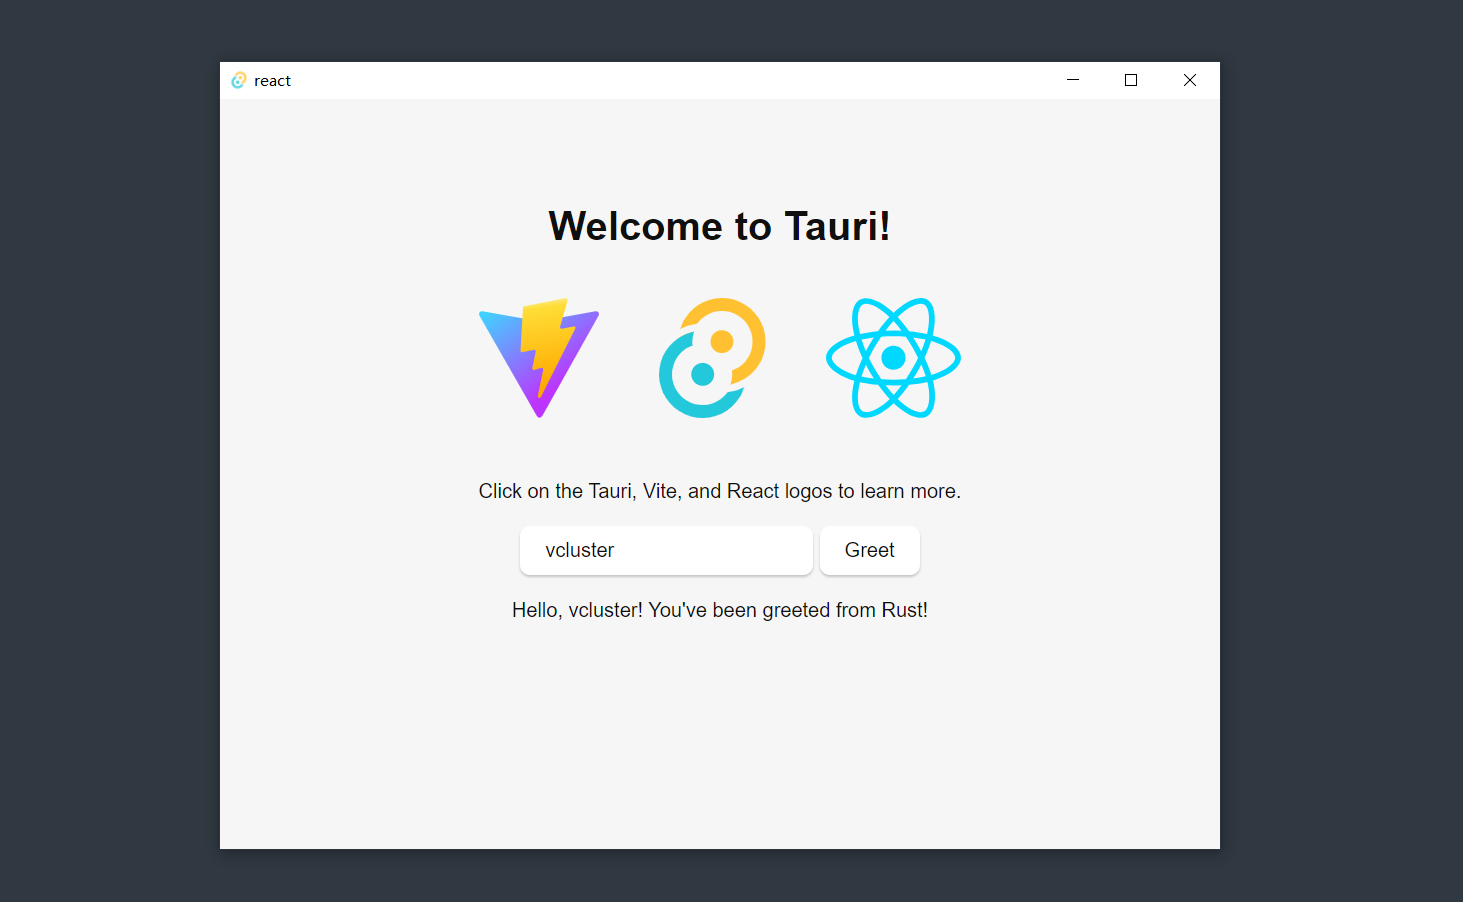
通过 npm create tauri-app@latest 我们成功创建了一个空白的 Tauri 项目,npm install安装好依赖后,通过 npm run tauri dev 即可开启热加载:
配置图标
官方示例很酷,但开发我们自己的应用自然要用自己的 logo。
准备源文件
我事先准备好了 VCluster 的logo(logo.png):

注意你要准备的 logo 源文件是一张 PNG 图片,而不是 svg,原因稍后会讲。
点开我们的 Tauri 项目目录,在 src-tauri 下面有一个 icons 目录,这里放着 Tauri 应用全平台的图标文件,种类非常齐全,有不同尺寸的 png ,还有 ico 和 icns。ico 和 icns 分别是 Tauri 应用在 macOS 和 Windows 上所使用的图标文件,linux 则使用的是 png。
那么这么多的图标文件,我们要如何制作呢?需要我们一个个去手动生成吗?自然不用,tauri-cli 会出手。
构建图标
npm run tauri icon <file> [-o -v]
我们将 logo.png 文件放到项目根目录下,然后运行 npm run tauri icon logo.png 即可为我们的 logo 生成全平台所有尺寸的 logo 文件到 src-tauri\icons 目录下,如果我们想要更改 logo 文件的位置,加上选项 -o <OUTPUT> 或者 --output <OUTPUT> 即可变更输出路径,同时,我们要更改 tauri 加载图标的配置:
打开 src-tauri 目录下的 tauri.config.json:
...
  "tauri": {
    "allowlist": {
      "all": false,
      "shell": {
        "all": false,
        "open": true
      }
    },
    "bundle": {
      "active": true,
      "targets": "all",
      "identifier": "com.tauri.dev",
      "icon": [
        "icons/32x32.png",
        "icons/128x128.png",
        "icons/128x128@2x.png",
        "icons/icon.icns",
        "icons/icon.ico"
      ]
    },
...
修改 tauri.bundle 下的 icon 为我们希望的路径即可。
配置启动闪屏
一个桌面应用从双击到可用,是有一段的加载时间的,如果很短那没关系,但稍微长点用户就会不耐烦,因此需要让我们的桌面应用在启动时,展示一个临时的闪屏(splashscreen),等到程序加载完成,闪屏自动关闭,让加载完毕的程序界面呈现在用户的面前。
在 Tauri 中的闪屏,其实就是一个新的窗口,启动应用时,显示闪屏即可。因此我们需要写一个简单的 splashscreen.html 来作为我们的闪屏。
编写闪屏页面
在根目录下的 public 目录下创建一个 splashscreen.html,并拷贝一份咱们的 logo 文件,然后写一个简单的界面:
<!DOCTYPE html>
<html lang="en">
<head>
    <meta charset="UTF-8">
    <meta http-equiv="X-UA-Compatible" content="IE=edge">
    <meta name="viewport" content="width=device-width, initial-scale=1.0">
    <title>SplashScreen</title>
</head>
<body>
    <img src="./logo.png" class="splash-logo" alt="splash-logo">
</body>
</html>
<style>
body {
    background: none;
}
.splash-logo {
  position: absolute;
  height: 60vmin;
  left: calc(50vw - 30vmin);
  top: calc(50vh - 30vmin);
  pointer-events: none;
}

@media (prefers-reduced-motion: no-preference) {
  .splash-logo {
    animation: splash-logo-spin infinite 1s linear;
  }
}

.splash-link {
  color: #61dafb;
}

@keyframes splash-logo-spin {
  0% {
    opacity: 0%;
    transform: rotate(0deg);
  }
  50% {
    opacity: 100%;
    transform: rotate(180deg);
  }
  100% {
    opacity: 0%;
    transform: rotate(360deg);
  }
}

</style>
我这里让 logo 以一个合适大小摆在页面的中心,并用 CSS 实现了一个渐变转圈的动态特效,这样加载的时候看着比较活跃,如果你的程序有着极长的加载时间(1min+ ??),你甚至可以在上面写点可以交互的东西。
配置闪屏页面
写好了闪屏,接下来就要让 Tauri 去在启动的时候打开我们的闪屏页面,先变更 tauri.config.json:
找到 windows 项,加一个新窗口,url 设置为我们的闪屏文件,是从 public 读取的,因此放在 public 下就不用写什么前缀路径了;窗口 label 命名为 splashscreen,名字后面要用到;center设置为 true,显示在屏幕正中间会比较美观,否则在屏幕靠左一侧:
...
    "windows": [
      {
        "fullscreen": false,
        "height": 600,
        "minHeight": 600,
        "resizable": true,
        "title": "VCluster",
        "width": 800,
        "center": true,
        "visible": false
      },
      {
        "width": 800,
        "height": 600,
        "decorations": false,
        "center": true,
        "url": "splashscreen.html",
        "label": "splashscreen"
      }
    ]
...
此时重启我们的 Tauri 应用,你会发现有 2个 窗口同时显示,而且闪屏关不掉,这不是我们想要的效果,接下来该怎么做?

后端调度窗口
Tauri 官方文档给出的方法是,在 rust 后端里面,去控制我们的闪屏和主屏的显示:
- 打开 src-tauri\src\main.rs,找到主函数中
tauri::Builder::default()这一段:
// Prevents additional console window on Windows in release, DO NOT REMOVE!!
#![cfg_attr(not(debug_assertions), windows_subsystem = "windows")]

// Learn more about Tauri commands at https://tauri.app/v1/guides/features/command
#[tauri::command]
fn greet(name: &str) -> String {
    format!("Hello, {}! You've been greeted from Rust!", name)
}

fn main() {
    tauri::Builder::default()
        .invoke_handler(tauri::generate_handler![greet])
        .run(tauri::generate_context!())
        .expect("error while running tauri application");
}
- 我们为其添加 setup 阶段的事件:setup阶段,后端先获取闪屏和主屏的实例,然后在
tauri::async_runtime::spawn中进行我们程序的初始化操作,比如我这里注释掉的部分是已经开发到后期的 vcluster 初始化数据库驱动的一个操作,现在我们还没有类似需要耗时初始的东西,就先用线程睡眠阻塞替代一下,我先睡了 1秒 模拟程序加载,然后在初始化完毕后又睡了1秒(轻量级应用往往加载很快,闪屏很可能只一闪而过,我们手动延长一下未尝不可,前提是你非常肯定你的程序加载时间很短),这之后我们指示闪屏实例通过 close() 关闭闪屏,并让 主屏实例 show() 展示
//...
    tauri::Builder::default()
        .setup(|app| {
          let splashscreen_window = app.get_window("splashscreen").unwrap();
          let main_window = app.get_window("main").unwrap();
          // we perform the initialization code on a new task so the app doesn't freeze
          tauri::async_runtime::spawn(async move {
            // initialize your app here instead of sleeping :)
            println!("Initializing...");
            //logger::console("Initializing...");
            //RB.init(SqliteDriver{},"sqlite:vcluster.db").unwrap();
            //util::init().await;
            std::thread::sleep(std::time::Duration::from_secs(1));
            println!("Done initializing.");
            //logger::console("Done initializing.");

            // After it's done, close the splashscreen and display the main window
            thread::sleep(time::Duration::from_millis(1000));
            splashscreen_window.close().unwrap();
            main_window.show().unwrap();
          });
          Ok(())
        })
//...
此时,我们的闪屏就可以正常工作了!
- 上面这一步是等待后端加载完成,有时候可能是前端加载更慢,就需要在前端中去操作我们的闪屏和主屏。
先在后台准备一个 tauri 命令,用于关闭闪屏和显示主屏:
#[tauri::command]
async fn close_splashscreen(window: tauri::Window) {
  // Close splashscreen
  if let Some(splashscreen) = window.get_window("splashscreen") {
    splashscreen.close().unwrap();
  }
  // Show main window
  window.get_window("main").unwrap().show().unwrap();
}
在tauri::Builder阶段中绑定这个命令:
    .invoke_handler(tauri::generate_handler![
       close_splashscreen,
       greet])
然后在前端中去监听 DOM 加载即可:
// With the Tauri API npm package:
import { invoke } from '@tauri-apps/api/tauri'
document.addEventListener('DOMContentLoaded', () => {
// This will wait for the window to load, but you could
// run this function on whatever trigger you want
invoke('close_splashscreen')
})
至此,Tauri 应用的图标和闪屏配置就到此完成。
