前言:用path画折线,2条线相交处导圆角
简介:为开发者提供工具类,方便对使用path画折线设置圆角。使用path画多边形,如三角形、矩形、平行四边形等,同时设置圆角。另外提供计算直线上某点坐标。
实现原理
三个点,2条直线相交,给中间点连接处导圆角。设圆角半径为radius, 三个点分别为p2, p3,p1, 如下图所示:给p3点处导圆角。先求出导圆角处连接的2点p4、p5坐标,再用path连接p2和p4,然后通过p4、p3、p5绘制贝塞尔曲线连接p4、p5两个点,最后连接p5、p1两个点。
总结:计算圆角的起始和结束点,使用贝塞尔曲线绘制圆角。

API使用:
三角形导圆效果如下:
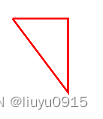 导圆角之后
导圆角之后
调用api如下
        int r = 22;//圆角尺寸
        Path path = SimplePath.buildle()
                .moveTo(50, 50, r, r)//起始点
                .lineTo(200, 50, r, r)
                .lineTo(200, 250, r, r)
                .close()//结束,完成三角形
                .build();
矩形导圆角
Path path = SimplePath.buildle()
        .addRect(50, 50, 200, 250, r)
        .build();
其它API使用:
获取线上点坐标 public static float[] getOnLinePointLocationEnd(float lenght, float x1, float y1, float x2, float y2)
示例:上述实现原理中,计算圆角起始坐标点p4. float[] p2f = SimplePath.getOnLinePointLocationEnd(r,x1,y1,x2,y2); Point p2 = new Point(p2f[0], p2f[1]); 其中r在这里是圆角半径,表示圆角起始点p4与中间点p2之间的距离。 画线并添加圆角 (绘制的线是起始点到圆角结束点的路径,并不包含到第三点路径) public static void lineToAndCorner(Path path, float startRadius, float endRadius, float x1, float y1, float x2, float y2, float x3, float y3)
示例:上述实现原理中,如果给p3点导圆角r.
path先要自行设置起始点p2, 然后
SimplePath.lineToAndCorner(path, r, r, p2.x, p2.y, p3.x, p3.y, p1.x,p1y);
绘制的线是 p2到p4,再到p5的路径, 不包含,p5到p1的路径。目标点是中间点p3.
备注:方法参数详情请查阅源码
源码:
package com.ttkx.deviceinfo.bkchart;


import android.graphics.Path;
import android.graphics.Rect;
import android.graphics.RectF;

import java.util.ArrayList;
import java.util.List;

public class SimplePath {

    public static Buildle buildle() {
        return new Buildle();
    }

    public static class Buildle {

        private Path mPath;

        private class P {

            public float x;
            public float y;
            public float startRadius;
            public float endRadius;
            public boolean isStartPoint;//是否是起始点

            public P(float x, float y) {
                this.x = x;
                this.y = y;
            }

            public P(float x, float y, float startRadiu, float endRadiu) {
                this.x = x;
                this.y = y;
                this.startRadius = startRadiu;
                this.endRadius = endRadiu;
            }
        }

        private List<P> mList = new ArrayList<>();

        public void moveTo(float x, float y) {
            moveTo(x, y, 0, 0);
        }

        public Buildle setPath(Path path) {
            mPath = path;
            return this;
        }

        public Buildle moveTo(float x, float y, float startRadius, float endRadius) {
            P p = new P(x, y, startRadius, endRadius);
            p.isStartPoint = true;
            mList.add(0, p);
            return this;
        }

        public Buildle addRect(Rect rect, float r) {
            return addRect(rect.left, rect.top, rect.right, rect.bottom, r);
        }

        public Buildle addRect(RectF rect, float r) {
            return addRect(rect.left, rect.top, rect.right, rect.bottom, r);
        }

        public Buildle addRect(float left, float top, float right, float bottom, float r) {
            moveTo(left, top, r, r);
            lineTo(right, top, r, r);
            lineTo(right, bottom, r, r);
            lineTo(left, bottom, r, r);
            close();
            return this;
        }

        public Buildle lineTo(float x, float y) {
            lineTo(x, y, 0, 0);
            return this;
        }

        public Buildle lineTo(float x, float y, float startRadius, float endRadius) {
            mList.add(new P(x, y, startRadius, endRadius));
            return this;
        }

        public Buildle close() {
            if (mList.size() >= 1) {
                mList.add(mList.get(0));
            }
            return this;
        }

        public Path build() {
            Path path = mPath;
            if (path == null) {
                path = new Path();
            }
            for (int i = 0; i < mList.size(); i++) {
                P p = mList.get(i);
                float x = p.x;
                float y = p.y;
                if (i == 0) {
                    if (p.isStartPoint) {
                        if (hasCorner(p)) {
                            P p1 = mList.get(i + 1);
                            P p2 = p;
                            float[] onePoint = getOnLinePointLocationEnd(p.startRadius, p1.x, p1.y, p2.x, p2.y);
                            path.moveTo(onePoint[0], onePoint[1]);
                        } else {
                            path.moveTo(x, y);
                        }
                    } else {
                        path.lineTo(x, y);
                    }
                } else if (i == mList.size() - 1) {
                    //最后一个点
                    P p0 = mList.get(0);
                    if (p.x == p0.x && p.y == p0.y && hasCorner(p0)) {
                        P p1 = mList.get(i - 1);
                        P p2 = p0;
                        P p3 = mList.get(1);
                        lineToAndCorner(path, p2.startRadius, p2.endRadius, p1.x, p1.y, p2.x, p2.y, p3.x, p3.y);
                    } else {
                        path.lineTo(p.x, p.y);
                    }
                } else {
                    if (hasCorner(p)) {
                        P p1 = mList.get(i - 1);
                        P p2 = p;
                        P p3 = mList.get(i + 1);
                        lineToAndCorner(path, p2.startRadius, p2.endRadius, p1.x, p1.y, p2.x, p2.y, p3.x, p3.y);
                    } else {
                        path.lineTo(x, y);
                    }
                }
            }
            return path;
        }


        private boolean hasCorner(P p) {
            return p.endRadius > 0 && p.startRadius > 0;
        }
    }

    /**
     * 画线并添加圆点 (绘制的线是起始点到圆角结束点的路径,并不包含到p3点路径)
     *
     * @param path
     * @param startRadius 起始圆角半径
     * @param endRadius   结束圆角半径
     * @param x1          起始点
     * @param y1
     * @param x2          中间点
     * @param y2
     * @param x3          结束点
     * @param y3
     */
    public static void lineToAndCorner(Path path, float startRadius, float endRadius, float x1, float y1, float x2, float y2, float x3, float y3) {
        float[] onePoint = getOnLinePointLocationEnd(startRadius, x1, y1, x2, y2);
        path.lineTo(onePoint[0], onePoint[1]);
        float[] twoPoint = getOnLinePointLocationStart(endRadius, x2, y2, x3, y3);
        //绘制圆角
        path.cubicTo(onePoint[0], onePoint[1], x2, y2, twoPoint[0], twoPoint[1]);
    }

    /**
     * 获取线上点坐标
     *
     * @param lenght 线上点距离起始点(x1,y1)长度
     * @param x1     起始点x坐标
     * @param y1     起始点y坐标
     * @param x2     结束点x坐标
     * @param y2     结束点y坐标
     * @return
     */
    public static float[] getOnLinePointLocationStart(float lenght, float x1, float y1, float x2, float y2) {
        double degree = getDegree(x1, y1, x2, y2);
        double dx = getRightSideFromDegree(degree, lenght);
        double dy = getLeftSideFromDegree(degree, lenght);
        double v2 = x1 + dx;
        double v3 = y1 + dy;
        return new float[]{(float) v2, (float) v3};
    }

    /**
     * 获取线上点坐标
     *
     * @param lenght 线上点距离结束点(x2,y2)长度
     * @param x1     起始点x坐标
     * @param y1     起始点y坐标
     * @param x2     结束点x坐标
     * @param y2     结束点y坐标
     * @return
     */
    public static float[] getOnLinePointLocationEnd(float lenght, float x1, float y1, float x2, float y2) {
        double degree = MathHelper.getDegree(x1, y1, x2, y2);
        double dx = MathHelper.getRightSideFromDegree(degree, lenght);
        double dy = MathHelper.getLeftSideFromDegree(degree, lenght);
        double v2 = x2 - dx;
        double v3 = y2 - dy;
        return new float[]{(float) v2, (float) v3};
    }


    //两点间的角度
    private static double getDegree(float sx, float sy, float tx, float ty) {
        float nX = tx - sx;
        float nY = ty - sy;
        double angrad = 0d, angel = 0d, tpi = 0d;
        float tan = 0.0f;
        if (Float.compare(nX, 0.0f) != 0) {
            tan = Math.abs(nY / nX);
            angel = Math.atan(tan);
            if (Float.compare(nX, 0.0f) == 1) {
                if (Float.compare(nY, 0.0f) == 1 || Float.compare(nY, 0.0f) == 0) {
                    angrad = angel;
                } else {
                    angrad = 2 * Math.PI - angel;
                }
            } else {
                if (Float.compare(nY, 0.0f) == 1 || Float.compare(nY, 0.0f) == 0) {
                    angrad = Math.PI - angel;
                } else {
                    angrad = Math.PI + angel;
                }
            }
        } else {
            tpi = Math.PI / 2;
            if (Float.compare(nY, 0.0f) == 1) {
                angrad = tpi;
            } else {
                angrad = -1 * tpi;
            }
        }
        return Math.toDegrees(angrad);
    }

    /**
     * 直角三角形 根据角度和斜边求直角边
     *
     * @param degree 角度
     * @param width  斜边
     * @return 直角边长
     */
    private static double getRightSideFromDegree(double degree, double width) {
        double cos = Math.cos(Math.toRadians(degree));
        return width * cos;
    }

    private static double getLeftSideFromDegree(double degree, double width) {
        double sin = Math.sin(Math.toRadians(degree));
        return width * sin;
    }
}
实践:绘制带箭头的提示框背景
第一步:先绘制带圆角的三角形。
三角形只有一个角导圆角
        int r = 10;//圆角尺寸
        int ph = 30;//箭头离左侧距离
        int arrowsHeight = 35;//箭头高度

        Point p1 = new Point(ph, arrowsHeight);
        Point p2 = new Point(ph + arrowsHeight * 2, arrowsHeight);
        Point p3 = new Point(ph + arrowsHeight, 0);

        Path path = SimplePath.buildle()
                .setPath(new Path())//设置path (可以设置也可以不设置, 若不设置工具类自己创建一个path对象)
                .moveTo(p1.x, p1.y)//起始点
                .lineTo(p2.x, p2.y)
                .lineTo(p3.x, p3.y, r, r)
                .close()
                .build();
效果如下:
第二步:添加圆角矩形
int rectRadius = 30;
path.addRoundRect(new RectF(0,arrowsHeight, getBounds().right, getBounds().bottom), rectRadius, rectRadius ,Path.Direction.CW);

第三步:创建自定义Drawable, 将path绘制出来,再将drawable设置为textView 背景, 最后给textView设置padding即可。
效果如下:


