java实现公众号发起新建草稿,并且发布得到文章链接
首先要先去微信公众号的设置与开发–基础设置 查看公众号的各个参数,这里我是存储到数据库,方便后期使用,实体类如下:
@Data
public class WeChatOfficial {

    private static final long serialVersionUID=1L;

    @TableId(value = "id", type = IdType.AUTO)
    private Integer id;

    /**
     * 公众号appid
     */
    private String appId;

    /**
     * 公众号appsecret
     */
    private String appSecret;

    /**
     * 文章图片链接
     */
    private String imageUrl;

    /**
     * 文章封面图片ID
     */
    private String mediaId;

    /**
     * 是否启用(0否;1是)
     */
    private Integer enable;

    /**
     * 公众号名称
     */
    private String officialName;

    /**
     * 微信公众号原始ID
     */
    private String originalId;

}
话不多说,直接上代码(新建草稿并发布代码)
public static String publish(String title, String sourceUrl, WeChatOfficial chatOfficialConfig){
        String tokenUrl = "https://api.weixin.qq.com/cgi-bin/token";
        String publishId = null;
        JSONObject paraObj = new JSONObject();
        JSONArray paraArr = new JSONArray();
        //组装草稿箱需要的参数
        JSONObject para = new JSONObject();
        para.put("title", title);
        para.put("content", "<p><a href='"+sourceUrl+"'><img src='"+chatOfficialConfig.getImageUrl()+"'/></a></p>\n" +
                "<a href='"+sourceUrl+"' style=\"color: #FFFFFF; text-decoration: none;\"><section style=\"text-align: center; margin-top: 8px; background: rgb(234, 68, 90); height: 48px; border-radius: 2px; color: rgb(255, 255, 255); line-height: 48px; font-size: 17px; text-shadow: rgb(255, 185, 149) 1px 1px 3px;\"><strong>打开剧场</strong></section></a>");
        para.put("thumb_media_id", chatOfficialConfig.getMediaId());
        para.put("content_source_url", sourceUrl);
        paraArr.add(para);
        paraObj.put("articles", paraArr);
        //先获取公众号token
        String tokenResult = HttpUtils.sendGet(tokenUrl+"?grant_type=client_credential&appid="+chatOfficialConfig.getAppId()+"&secret="+chatOfficialConfig.getAppSecret());
        if(StringUtils.isNotEmpty(tokenResult)) {
            log.info("公众号token:"+tokenResult);
            JSONObject jsonObject = JSONObject.parseObject(tokenResult);
            String accessToken = jsonObject.getString("access_token");
            String result = HttpUtils.sendPostByJSON("https://api.weixin.qq.com/cgi-bin/draft/add?access_token="+accessToken, JSONObject.toJSONString(paraObj));
            log.info("新建草稿返回:"+result);
            //{"media_id":"MEDIA_ID","item":[]} media_id 上传后的获取标志,长度不固定,但不会超过 128 字符
            JSONObject draftObj = JSONObject.parseObject(result);
            String mediaId = draftObj.getString("media_id");
            //发布草稿
            String publishUrl = "https://api.weixin.qq.com/cgi-bin/freepublish/submit?access_token="+accessToken;
            JSONObject pObj = new JSONObject();
            pObj.put("media_id", mediaId);
            String result1 = HttpUtils.sendPostByJSON(publishUrl, JSONObject.toJSONString(pObj));
            log.info("发布草稿返回:"+result1);
            JSONObject pubObj = JSONObject.parseObject(result1);
            Integer errCode = pubObj.getInteger("errcode");
            if(errCode==0){
                publishId = pubObj.getString("publish_id");
            }
            return publishId;
        }else{
            return null;
        }
    }
用到的util
public static String sendGet(String url) {
        String result = "";
        BufferedReader in = null;
        try {
            // String urlNameString = url + "?" +
            // URLEncoder.encode(param,"UTF-8");
            String urlNameString = url;
            System.out.println(urlNameString);
            URL realUrl = new URL(urlNameString);
            // 打开和URL之间的连接
            URLConnection connection = realUrl.openConnection();
            // 设置通用的请求属性
            connection.setRequestProperty("accept", "*/*");
            connection.setRequestProperty("connection", "Keep-Alive");
            connection.setRequestProperty("user-agent", "Mozilla/4.0 (compatible; MSIE 6.0; Windows NT 5.1;SV1)");
            // 建立实际的连接
            connection.connect();
            // 获取所有响应头字段
            Map<String, List<String>> map = connection.getHeaderFields();
            // 遍历所有的响应头字段
            for (String key : map.keySet()) {
                // System.out.println(key + "--->" + map.get(key));
            }
            // 定义 BufferedReader输入流来读取URL的响应
            in = new BufferedReader(new InputStreamReader(connection.getInputStream(), "UTF-8"));
            String line;
            while ((line = in.readLine()) != null) {
                result += line;
            }
        } catch (Exception e) {
            System.out.println("发送GET请求出现异常!" + e);
            e.printStackTrace();
        }
        // 使用finally块来关闭输入流
        finally {
            try {
                if (in != null) {
                    in.close();
                }
            } catch (Exception e2) {
                e2.printStackTrace();
            }
        }
        return result;
    }

/**
     * 参数json为json格式的字符串
     * @param urlStr
     * @param json
     * @return
     */
    public static String sendPostByJSON(String urlStr, String json) {
        OutputStreamWriter outputStreamWriter = null;
        BufferedReader bufferedReader = null;
        String response = "";

        try {
            URL url = new URL(urlStr);
            HttpURLConnection connection = (HttpURLConnection) url.openConnection();
            connection.setDoInput(true);
            connection.setDoOutput(true);
            connection.setUseCaches(false);
            connection.setRequestMethod("POST");      //POST需大写
            connection.setRequestProperty("content-Type", "application/json");        //设置数据格式为json
            connection.setRequestProperty("charset", "utf-8");                        //设置编码格式为utf-8
            connection.connect();

            outputStreamWriter = new OutputStreamWriter(connection.getOutputStream());
            outputStreamWriter.append(json);
            outputStreamWriter.flush();

            bufferedReader = new BufferedReader(new InputStreamReader(connection.getInputStream(), "utf-8"));
            String line = "";
            while((line = bufferedReader.readLine()) != null) {
                response += line;
            }

        } catch (MalformedURLException e) {
            e.printStackTrace();
        } catch (IOException e) {
            e.printStackTrace();
        } finally {
            try {
                outputStreamWriter.close();
                bufferedReader.close();
            } catch (IOException e) {
                e.printStackTrace();
            }
        }
        return response;
    }
由于发布任务提交后,发布任务可能在一定时间后才完成,因此,发布接口调用时,仅会给出发布任务是否提交成功的提示,若发布任务提交成功,则在发布任务结束时,会向开发者在公众平台填写的开发者URL(callback URL)推送事件。
推送的XML结构成功时示例:
<xml>
  <ToUserName><![CDATA[gh_4d00ed8d6399]]></ToUserName>
  <FromUserName><![CDATA[oV5CrjpxgaGXNHIQigzNlgLTnwic]]></FromUserName>
  <CreateTime>1481013459</CreateTime>
  <MsgType><![CDATA[event]]></MsgType>
  <Event><![CDATA[PUBLISHJOBFINISH]]></Event>
  <PublishEventInfo>
    <publish_id>2247503051</publish_id>
    <publish_status>0</publish_status>
    <article_id><![CDATA[b5O2OUs25HBxRceL7hfReg-U9QGeq9zQjiDvy
WP4Hq4]]></article_id>
    <article_detail>
      <count>1</count>
      <item>
        <idx>1</idx>
        <article_url><![CDATA[ARTICLE_URL]]></article_url>
      </item>
    </article_detail>
  </PublishEventInfo>
</xml>
既然是微信公众号回推,那就需要在公众号的服务器配置这里配置相关的回推接口
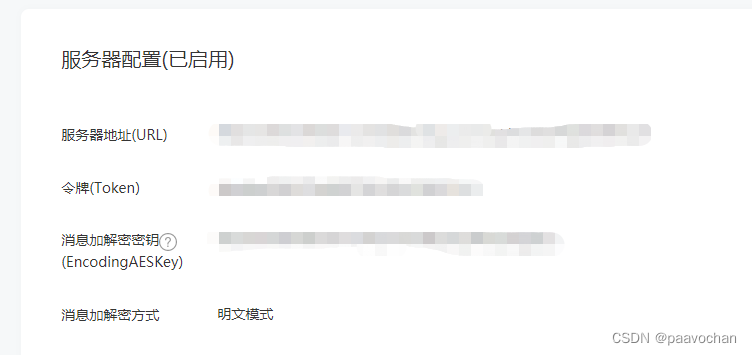
下面是回推接口的实现代码:
private String token = "xxx";

@ApiOperation(value = "接收微信公众号草稿箱发布成功信息")
    @RequestMapping(value = "/receivePublishResult", method = {RequestMethod.GET, RequestMethod.POST})
    @ResponseBody
    public String receivePublishResult(HttpServletRequest request){
        String signature = request.getParameter("signature");
        String timestamp = request.getParameter("timestamp");
        String nonce = request.getParameter("nonce");
        String echostr = request.getParameter("echostr");
        log.info("接收微信请求消息入参:signature-"+signature+"-timestamp-"+timestamp+"-nonce-"+nonce);
        log.info("其它信息:"+request.getParameterNames());
        String[] allStr = {token, timestamp, nonce};
        List<String> list = Arrays.asList(allStr);
        //对回推字符串进行排序
        Collections.sort(list);
        String arr = "";
        for (int i = 0; i < list.size(); i++) {
            arr += list.get(i);
        }
        //通过加密获取到本地的签名
        String decode = ShaUtils.getSha1(arr);
        //判断回推的签名是否和本地一致,一致则继续处理
        if(signature.equals(decode)) {
            try {
            //将回推的xml参数转换为HashMap
                Map<String, Object> map = InputStreamUtils.parseXml(request.getInputStream());
                log.info("微信推送消息map:");
                map.forEach((key, value) -> System.out.println(key + " = " + value));
                if (map.size() > 0) {
                    String originalId = map.get("ToUserName").toString();
                    Map<String, Object> eventInfo = (Map<String, Object>) map.get("PublishEventInfo");
                    if(eventInfo!=null){
                        String publishId = eventInfo.get("publish_id").toString();
                        Integer publishStatus = Integer.valueOf(eventInfo.get("publish_status").toString());
                        if (publishStatus == 0) {
                        //成功
                        //公众号文章链接
                            String articleUrl = eventInfo.get("article_detail").toString();
                            String url = articleUrl.substring(2);
                            String newUrl = null;
                            //这里需要注意:回推的文章链接是http的,在外部是访问不到的,需要转成https
                            if(url.contains("http") && !url.contains("https")){
                                newUrl = url.replace("http", "https");
                            }

                        }else if(publishStatus == 2){
                            //失败
                        }
                    }
                }
            } catch (Exception e) {
                e.printStackTrace();
            }
            //处理完成后将echostr回推给微信
            return echostr;
        }
        return null;
    }
ShaUtils工具类
import java.security.MessageDigest;

public class ShaUtils {

    public static String getSha1(String str) {

        char hexDigits[] = { '0', '1', '2', '3', '4', '5', '6', '7', '8', '9',
                'a', 'b', 'c', 'd', 'e', 'f' };
        try {
            MessageDigest mdTemp = MessageDigest.getInstance("SHA1");
            mdTemp.update(str.getBytes("UTF-8"));
            byte[] md = mdTemp.digest();
            int j = md.length;
            char buf[] = new char[j * 2];
            int k = 0;
            for (int i = 0; i < j; i++) {
                byte byte0 = md[i];
                buf[k++] = hexDigits[byte0 >>> 4 & 0xf];
                buf[k++] = hexDigits[byte0 & 0xf];
            }
            return new String(buf);
        } catch (Exception e) {
            return null;
        }
    }

}
InputStreamUtils工具类
import org.dom4j.Document;
import org.dom4j.Element;
import org.dom4j.io.SAXReader;
import java.io.InputStream;
import java.io.InputStreamReader;
import java.util.HashMap;
import java.util.Iterator;
import java.util.Map;

public class InputStreamUtils {

// 将输入流使用指定编码转化为字符串
    public static String inputStream2String(InputStream inputStream, String charset) throws Exception {
        if (inputStream == null){
            return null;
        }
        // 建立输入流读取类
        InputStreamReader reader = new InputStreamReader(inputStream, charset);
        // 设定每次读取字符个数
        char[] data = new char[512];
        int dataSize = 0;
        // 循环读取
        StringBuilder stringBuilder = new StringBuilder();
        while ((dataSize = reader.read(data)) != -1) {
            stringBuilder.append(data, 0, dataSize);
        }
        return stringBuilder.toString();
    }

    @SuppressWarnings("unchecked")
    public static Map<String, Object> parseXml(InputStream inputStream) throws Exception {
        if (inputStream == null){
            return null;
        }
        Map<String, Object> map = new HashMap();// 将解析结果存储在HashMap中
        SAXReader reader = new SAXReader();// 读取输入流
        Document document = reader.read(inputStream);
        Element root = document.getRootElement();// 得到xml根元素
        java.util.List<Element> elementList = root.elements();// 得到根元素的所有子节点
        for (Element e : elementList) {        // 遍历所有子节点
            System.out.println("解析key:"+e.getName());
            System.out.println("解析val:"+e.getText());
            //解析子节点
            if(e.elements()!=null && e.elements().size()>0){
                Iterator iterator1 = e.elementIterator();
                Map<String, Object> children = new HashMap();
                while (iterator1.hasNext()){
                    Element stuChild = (Element) iterator1.next();
                    children.put(stuChild.getName(), stuChild.getStringValue());
                    System.out.println("节点名:"+stuChild.getName()+"---节点值:"+stuChild.getStringValue());
                }
                map.put(e.getName(), children);
            }else{
                map.put(e.getName(), e.getText());
            }
        }
        inputStream.close();        // 释放资源
        inputStream = null;
        return map;
    }

}


