目录
1. Elasticsearch
1.1 基本概念
1.1.1 Index(索引)
1.1.2 Type(类型)
1.1.3 Document(文档)
1.1.4 倒排索引机制
1.2 Docker安装 ES
1.2.1 下载镜像文件
1.2.2 运行 Elasticsearch
1.3 初步检索
1.3.1 _cat
1.3.2 索引一个文档保存
1.3.3 查询文档
1.3.4 更新文档
1.3.5 删除文档和索引
1.3.6 bulk 批量 API
1.3.7 样本测试数据
1.4 进阶检索
1.4.1 SearchAPI
1.4.2 Query DSL
1.4.3 Mapping
1.4.4 分词
1.5 Elasticsearch-Rest-Client
1.5.1 SpringBoot整合es
1.6 附录-docker安装nginx
2 商品上架
2.1 sku在es中存储模型分析
2.2 nested 数据类型场景
2.3 商品上架
3 商城系统首页
3.1 首页-整合 thymeleaf 渲染首页
3.2 首页-整合dev-tools渲染一级分类数据
3.3 首页-渲染二级三级分类数据
3.4 nginx-搭建域名访问环境一(反向代理配置)
3.5 nginx-搭建域名访问环境二(负载均衡到网关)
4 性能测试
4.1 压力测试
4.1.1 基本介绍
4.1.2 Apache JMeter 安装使用
4.1.3 JMeter在windows下地址占用bug解决
4.2 性能监控
4.2.1 jvm 内存模型
4.2.2 堆
4.2.3 jconsole 与 jvisualvm
4.3 优化
4.3.1 优化中间件对性能的影响
4.3.2 简答优化吞吐量测试
4.3.3 nginx动静分离
4.3.4 模拟线上应用内存崩溃宕机情况
4.3.5 优化三级分类数据获取
5. 缓存与分布式锁
5.1 缓存使用
5.1.1 本地缓存
5.1.2 分布式缓存
5.1.3 整合redis
5.1.4 改造三级分类业务(使用redis缓存)
5.1.5 压力测试出的内存泄露及解决
5.1.6 高并发下缓存失效问题---缓存击穿、缓存穿透、缓存雪崩
5.1.7 本地锁synchronized----加锁解决缓存击穿问题
5.1.8 本地锁时序问题
5.1.9 本地锁在分布式下的问题
5.2 分布式锁
5.2.1 分布式锁原理与使用
5.2.1.2 redis set NX命令测试,新增几个虚拟会话
5.2.1.3 分布式锁演进
5.2.1.3.1 分布式锁演进-阶段一
5.2.1.3.2 分布式锁演进-阶段二
5.2.1.3.3 分布式锁演进-阶段三
5.2.1.3.4 分布式锁演进-阶段四
5.2.1.3.5 分布式锁演进-阶段五
5.2.2 Redisson(分布式锁)简介&整合
5.2.2.1 Redisson概述
5.2.2.2 SpringBoot整合Redisson
5.2.3 Redisson--lock锁测试
5.2.3.1 可重入锁(Reentrant Lock)
5.2.4 Redisson--lock看门狗原理--redisson如何解决死锁
5.2.5 Redisson--读写锁(ReadWriteLock)
5.2.6 Redisson--信号量测试
5.2.7 Redisson--闭锁测试
5.2.8 缓存一致性解决(必须满足最终一致性)
5.2.8.1 双写模式
5.2.8.2 失效模式
5.2.8.3 解决方案
5.3 SpringCache
5.3.1 简介
5.3.2 基础概念
5.3.3 注解
5.3.4 表达式语法
5.3.5 整合SpringCache & 体验@Cacheable
5.3.6 @Cacheable细节设置
5.3.7 自定义缓存配置
5.3.7.1 相关源码解析
5.3.7.2 自定义缓存配置
5.3.8 @CacheEvict
5.3.9 @Caching
5.3.10 双写模式&失效模式
5.3.11 SpringCache原理与不足
1. Elasticsearch

1.1 基本概念
1.1.1 Index(索引)
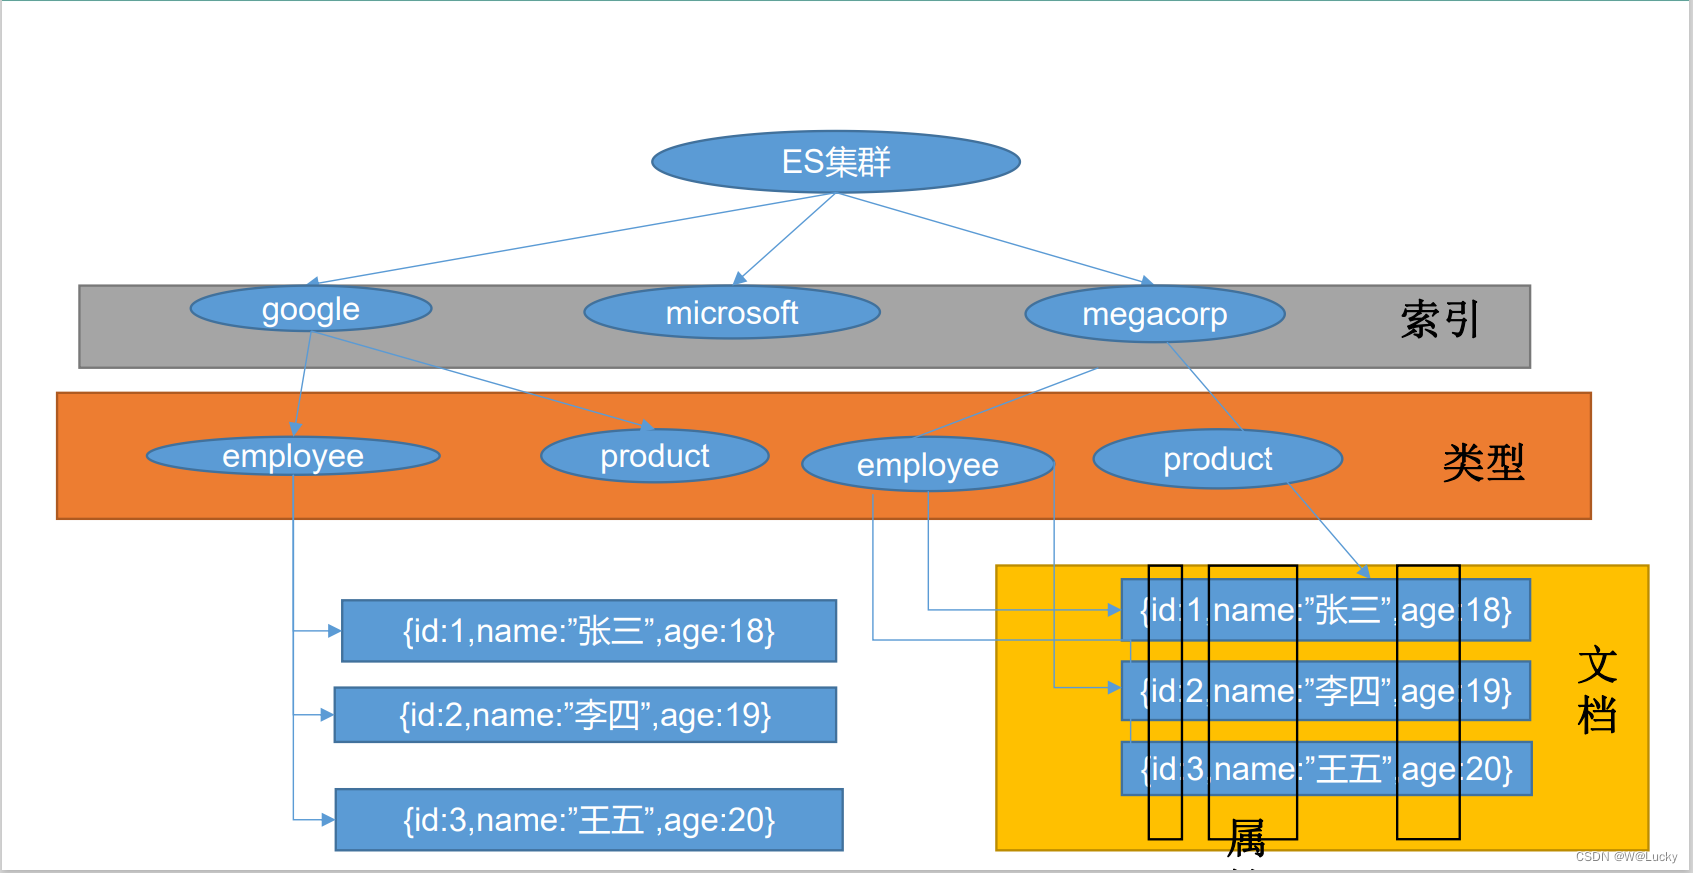
动词,相当于MySQL中的insert;名词,相当于MySQL中的Database。
1.1.2 Type(类型)
在Index(索引)中,可以定义一个或多个类型。类似于MySQL中的Table;每一种类型的数据放在一起。Elasticsearch8.x版本不在支持type。
1.1.3 Document(文档)
保存在某个索引(Index)下,某种类型(Type)的一行数据(Document),文档是JSON格式的,Document就像MySQL中某个Table里面的数据,每一行对应的列叫属性。
1.1.4 倒排索引机制
1.1.4.1 倒排索引名字由来
没有搜索引擎时,我们是直接输入一个网址,然后获取网站的内容,这是我们的行为是:
document -> to -> words通过文章,获取里面的单词,这就是所谓的“正向索引”(forward index)。
后来,我们希望能够输入一个单词,找到含有这个单词,或和这个单词有关系的文章:
words -> to -> document于是就把这种索引,称为inverted index,直译过来,应该叫“反向索引”,国内翻译成“倒排索引”。
1.1.4.2 倒排索引内部结构
比如插入一份文档,内容是红海行动,这个时候通过使用分词器将整句分拆成词语,会将他分为“红海”、“行动”。若是存在“还是”等这种无意义的词语,可能会把它干掉。
保存的记录(document):
1-红海行动
2-探索红海行动
3-红海特别行动
4-红海纪录片
5-特工红海特别探索
| word | documentId(记录) |
|---|---|
| 红海 | 1,2,3,4,5 |
| 行动 | 1,2,3 |
| 探索 | 2,5 |
| 特别 | 3,5 |
| 纪录片 | 4 |
| 特工 | 5 |
检索:
-
红海特工行动?
查出后计算相关性得分:3号记录命中2次,且3号本身有3个单词,占比2/3;5号记录也命中两次,占比2/4,所以3号记录最匹配。
在搜索“红海”时,会返回1,2,3,4,5五份文档。
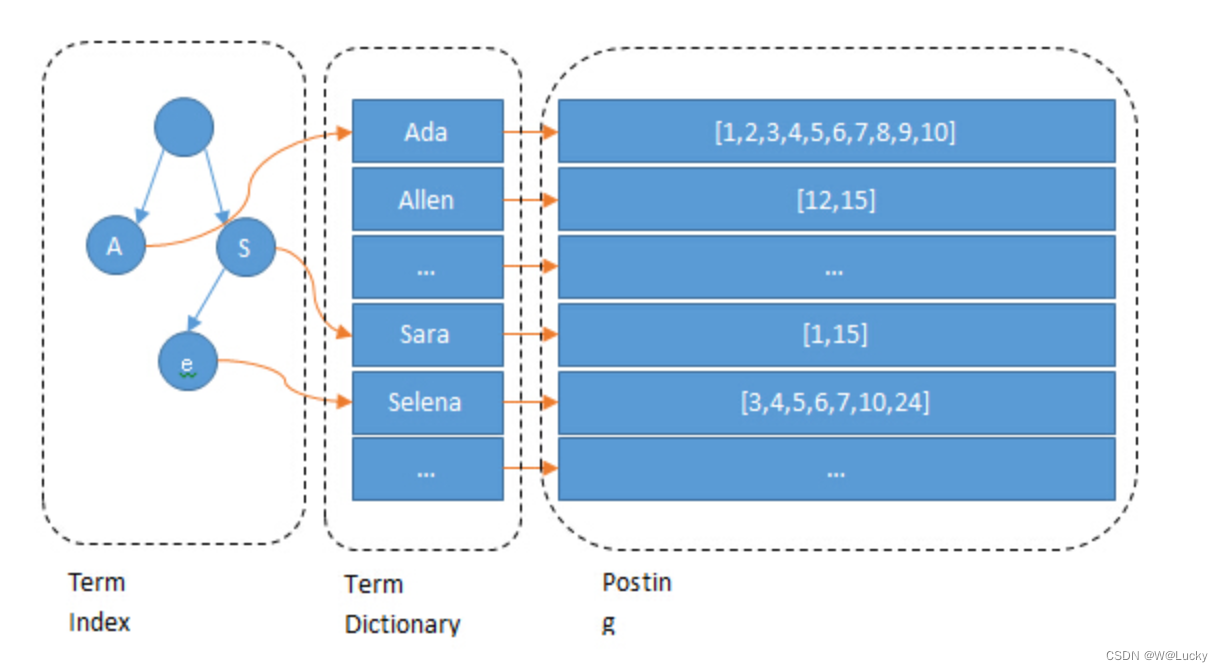 Lucene 的倒排索,增加了最左边的一层「字典树」term index,它不存储所有的单词,只存储单词前缀,通过字典树找到单词所在的块,也就是单词的大概位置,再在块里二分查找,找到对应的单词,再找到单词对应的文档列表。
单词词典(Term Dictionary):搜索引擎的通常索引单位是单词,单词词典是由文档集合中出现过的所有单词构成的字符串集合,单词词典内每条索引项记载单词本身的一些信息以及指向“倒排列表”的指针。
倒排列表(PostingList):倒排列表记载了出现过某个单词的所有文档的文档列表及单词在该文档中出现的位置信息及频率(作关联性算分),每条记录称为一个倒排项(Posting)。根据倒排列表,即可获知哪些文档包含某个单词。
倒排文件(Inverted File):所有单词的倒排列表往往顺序地存储在磁盘的某个文件里,这个文件即被称之为倒排文件,倒排文件是存储倒排索引的物理文件。 参考文献:
elasticsearch-倒排索引原理-CSDN博客
聊聊 Elasticsearch 的倒排索引 - 知乎
Elasticsearch 倒排索引原理_es倒排索引原理_SilvermingX的博客-CSDN博客
1.2 Docker安装 ES
1.2.1 下载镜像文件
docker pull elasticsearch:7.4.2 # 存储和检索数据
docker pull kibana:7.4.2 # 可视化检索数据
1.2.2 运行 Elasticsearch
mkdir -p /root/docker/elasticsearch/config
mkdir -p /root/docker/elasticsearch/data
# 任何ip都能访问
echo "http.host: 0.0.0.0" >> /root/docker/elasticsearch/config/elasticsearch.yml
# 运行elasticsearch REST API端口9200 集群端口9300
docker run --name elasticsearch -p 9200:9200 -p 9300:9300 \
--restart=always \
--privileged=true \
-e "discovery.type=single-node" \
-e ES_JAVA_OPTS="-Xms64m -Xmx512m" \
-v /root/docker/elasticsearch/config/elasticsearch.yml:/usr/share/elasticsearch/config/elasticsearch.yml \
-v /root/docker/elasticsearch/data:/usr/share/elasticsearch/data \
-v /root/docker/elasticsearch/plugins:/usr/share/elasticsearch/plugins \
-d elasticsearch:7.4.2
# 保证权限 任何人任何组都可以读写操作执行,可以进入elasticsearch使用ll命令查看权限
chmod -R 777 /root/docker/elasticsearch/测试是否安装成功:
# 查看elasticsearch是否运行
docker ps -a
在浏览器输入虚拟机的ip和elasticsearch的REST API端口http://192.168.56.10:9200/ ,如果出现以下内容,说明安装成功。
{
    "name": "7876d2859af8",
    "cluster_name": "elasticsearch",
    "cluster_uuid": "i46io2YkTY6pXr8IQ9qmXA",
    "version": {
        "number": "7.4.2",
        "build_flavor": "default",
        "build_type": "docker",
        "build_hash": "2f90bbf7b93631e52bafb59b3b049cb44ec25e96",
        "build_date": "2019-10-28T20:40:44.881551Z",
        "build_snapshot": false,
        "lucene_version": "8.2.0",
        "minimum_wire_compatibility_version": "6.8.0",
        "minimum_index_compatibility_version": "6.0.0-beta1"
    },
    "tagline": "You Know, for Search"
}
运行 Kibana
docker run --name kibana -e ELASTICSEARCH_HOSTS=http://172.1.11.10:9200 -p 5601:5601 \
-d kibana:7.4.2
1.3 初步检索
1.3.1 _cat
GET http://192.168.56.10:9200/_cat/nodes
GET http://192.168.56.10:9200/_cat/health
GET http://192.168.56.10:9200/_cat/master
GET http://192.168.56.10:9200/_cat/indices
GET /_cat/nodes:查看所有节点
GET /_cat/health:查看es健康状况
GET /_cat/master:查看主节点
GET /_cat/indices:查看所有索引  show databases; http://172.1.11.10:9200/_cat/indices
1.3.2 索引一个文档保存
保存一个数据,保存在哪个索引的哪个类型下,指定用哪个唯一标识PUT customer/external/1;在 customer 索引下的 external 类型下保存 1 号数据为:
PUT http://172.1.11.10:9200/customer/external/1
PUT customer/external/1
{
"name":"John Doe"
}注意:PUT和POST都可以保存一个文档。
-
POST:新增。如果不指定id,会自动生成id。指定id就会修改这个数据,并新增版本号。
-
PUT:可以新增可以修改。PUT必须指定id;由于PUT需要指定id,我们一般都用来做修改操作,不指定id会报错。指定id第一次请求是新增。
1.3.3 查询文档
http://192.168.56.10:9200/customer/external/1
GET customer/external/1
结果:
{
"_index": "customer", // 在哪个索引
"_type": "external", // 在哪个版本
"_id": "1", // 记录id
"_version": 3, // 版本号
"_seq_no": 2, // 并发控制字段,每次更新就会+1,用来做乐观锁
"_primary_term": 1, // 同上,主分片重新分配,如重启,就会变化
"found": true,
"_source": { // 真正的内容
"name": "John Doe"
}
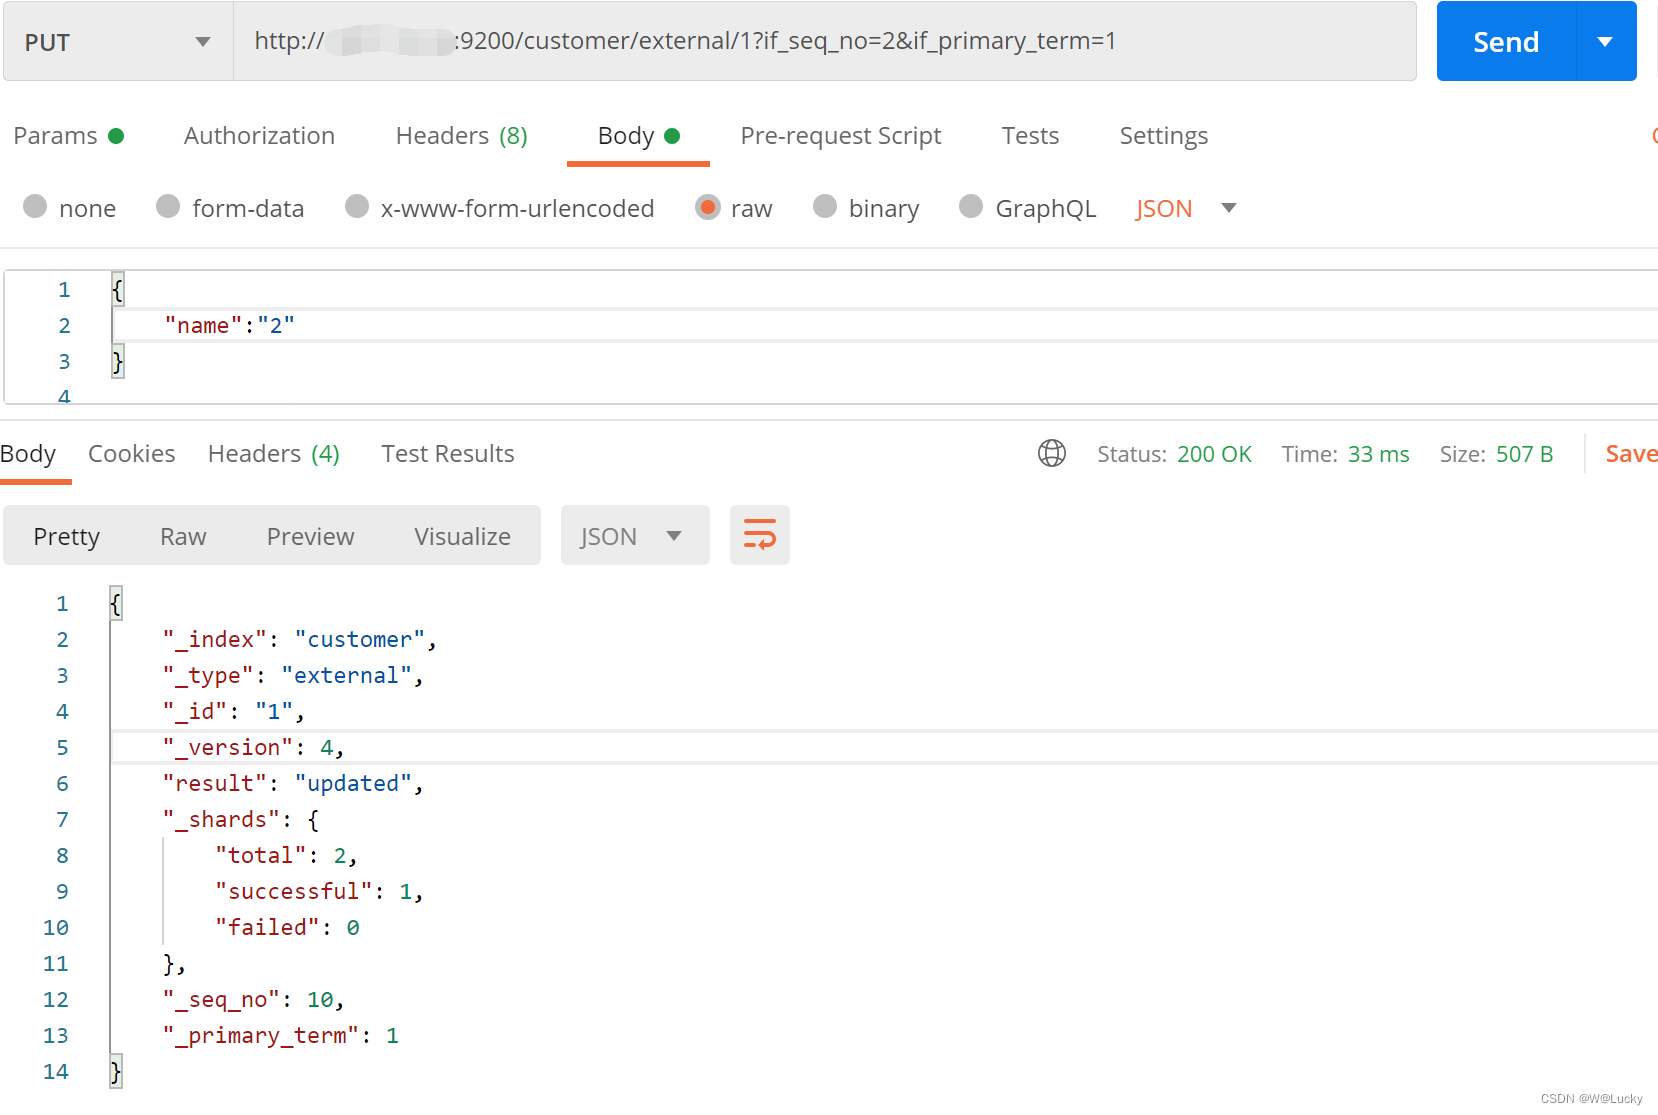
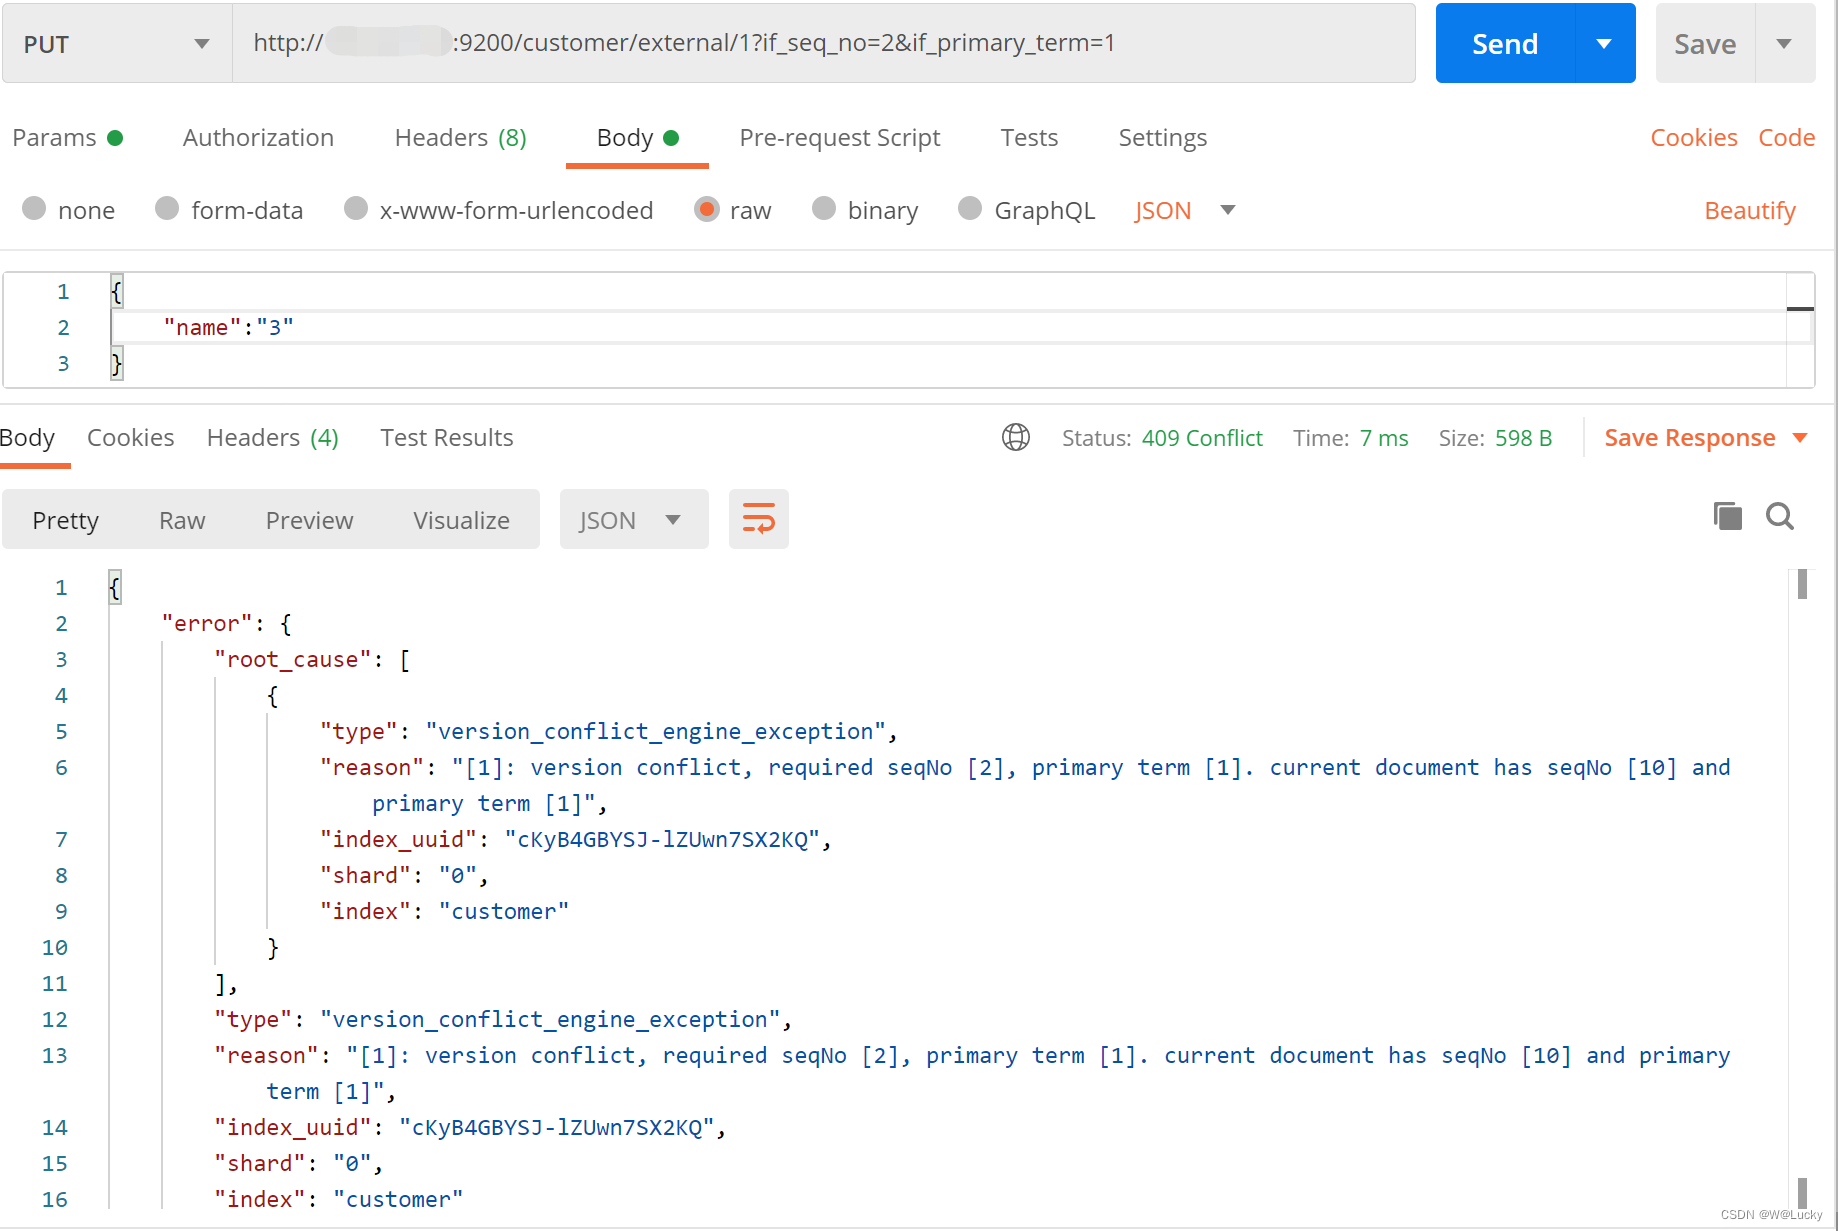
}更新携带 ?if_seq_no=0&if_primary_term=1,如果 _seq_no 和 _primary_term是对应的值才能修改,否则会报409。
1.3.4 更新文档
POST带 _update 和PUT(或POST不带 _ update)的区别是:POST带 _update的请求体中属性需要doc包一层,PUT(或POST不带 _ update)请求体中不需要doc对属性进行包一层。
1. 更新文档
POST http://172.1.11.10:9200/customer/external/1/_update
// 方法一:post带_update会对比元数据,如果一样就不进行任何操作result="noop"
POST customer/external/1/_update
// 更新文档的内容
{
    "doc":{
        "name":"John Doew"
    }
}


// 更新结果
// 与元数据不一样
{
    "_index": "customer",
    "_type": "external",
    "_id": "1",
    "_version": 6,
    "result": "updated",
    "_shards": {
        "total": 2,
        "successful": 1,
        "failed": 0
    },
    "_seq_no": 12,
    "_primary_term": 2
}

// 与元数据一样
{
    "_index": "customer",
    "_type": "external",
    "_id": "1",
    "_version": 6,
    "result": "noop",
    "_shards": {
        "total": 0,
        "successful": 0,
        "failed": 0
    },
    "_seq_no": 12,
    "_primary_term": 2
}
POST或PUT http://172.1.11.10:9200/customer/external/1
// 方法二:put或post(不带_update),都会直接更新version、seq_no都会改变
POST customer/external/1
{
"name":"John Doew1"
}
或
PUT customer/external/1
{
"name":"John Doew2"
}2. 更新同时增加属性
POST http://172.1.11.10:9200/customer/external/1/_update
// 方法一:post带_update
POST customer/external/1/_update
{
"doc":{
"name":"John Doew",
"age":21
}
}POST或PUT http://172.1.11.10:9200/customer/external/1
// 方法二:put或post不带_update
POST customer/external/1
{
"name":"John Doew",
"age": 20
}
或
PUT customer/external/1
{
"name":"John Doew",
"age": 20,
"addr":"shanghai"
}注意:
-
POST带 _update操作会对比源文档数据,如果相同不会有什么操作,文档version、seq_no不会改变;PUT和POST(不带 _update)操作总会将数据重新保存并增加version版本等。
-
带_update 对比元数据如果一样就不进行任何操作。
看场景:
对于大并发更新,不带 update;
对于大并发查询偶尔更新,带 update;对比更新,重新计算分配规则。
1.3.5 删除文档和索引
// 删除文档
DELETE customer/external/1
// 删除索引
DELETE customer
注意:没有删除类型Type的说法,会报405 Method Not Allowed。
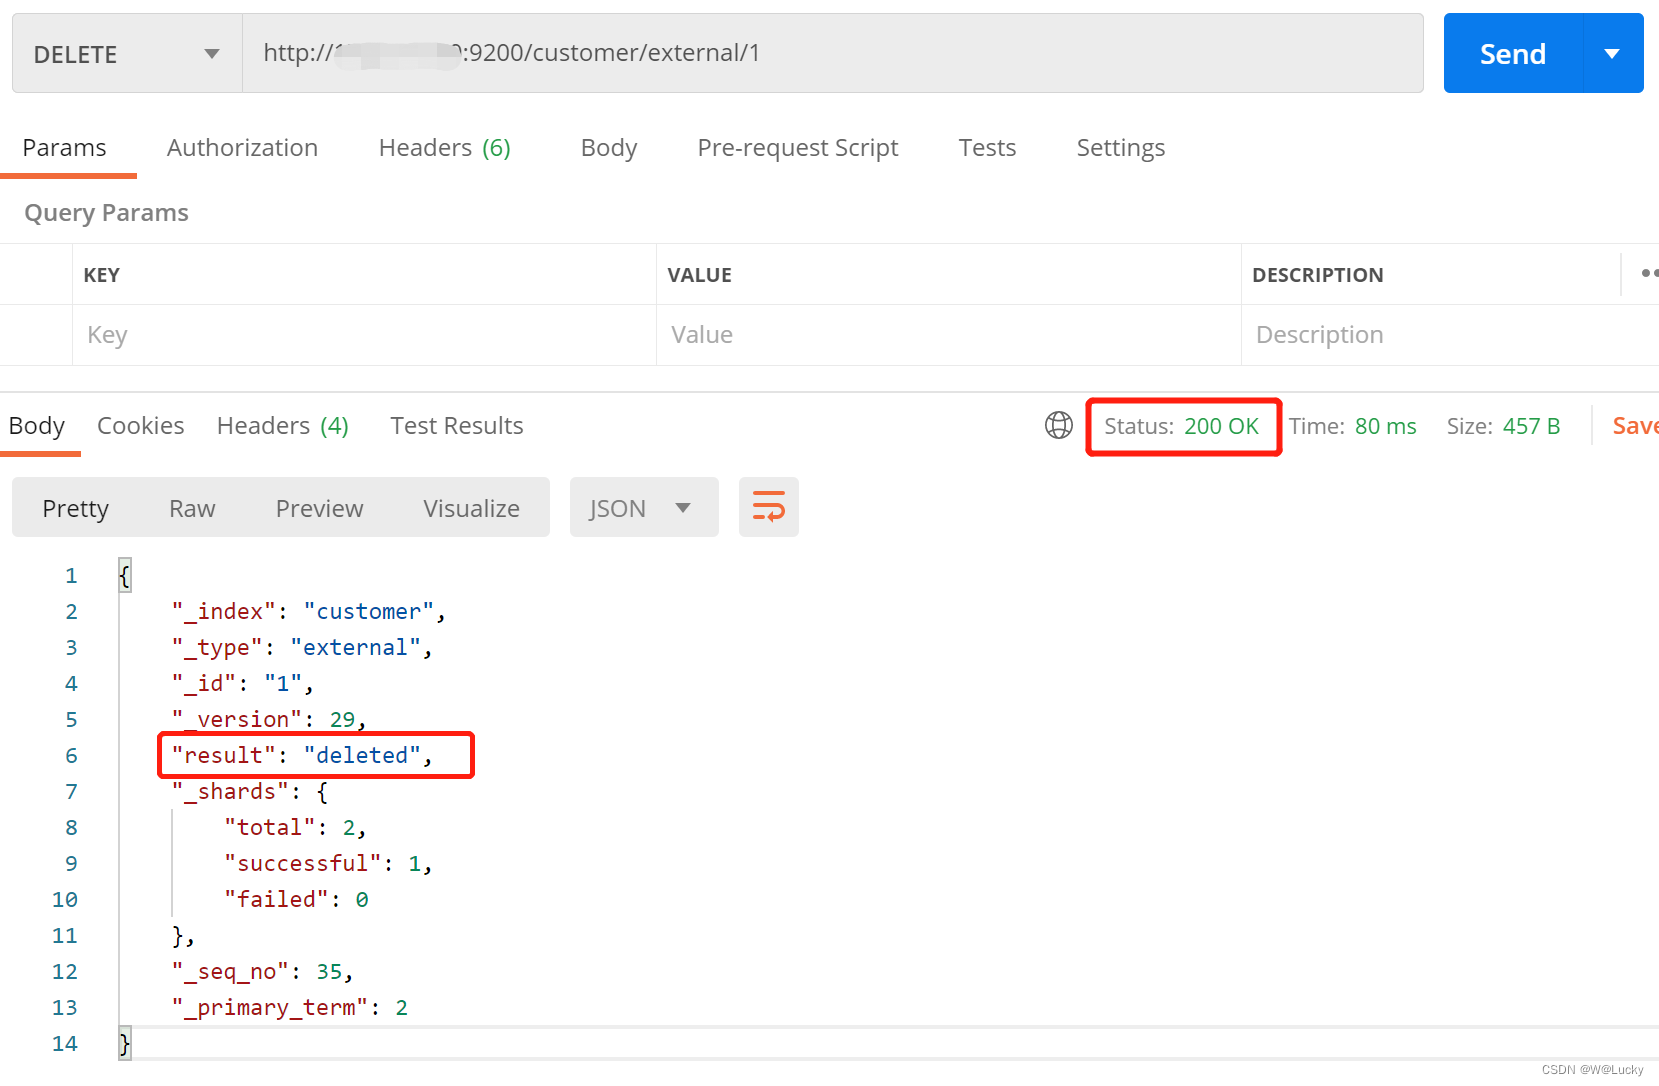
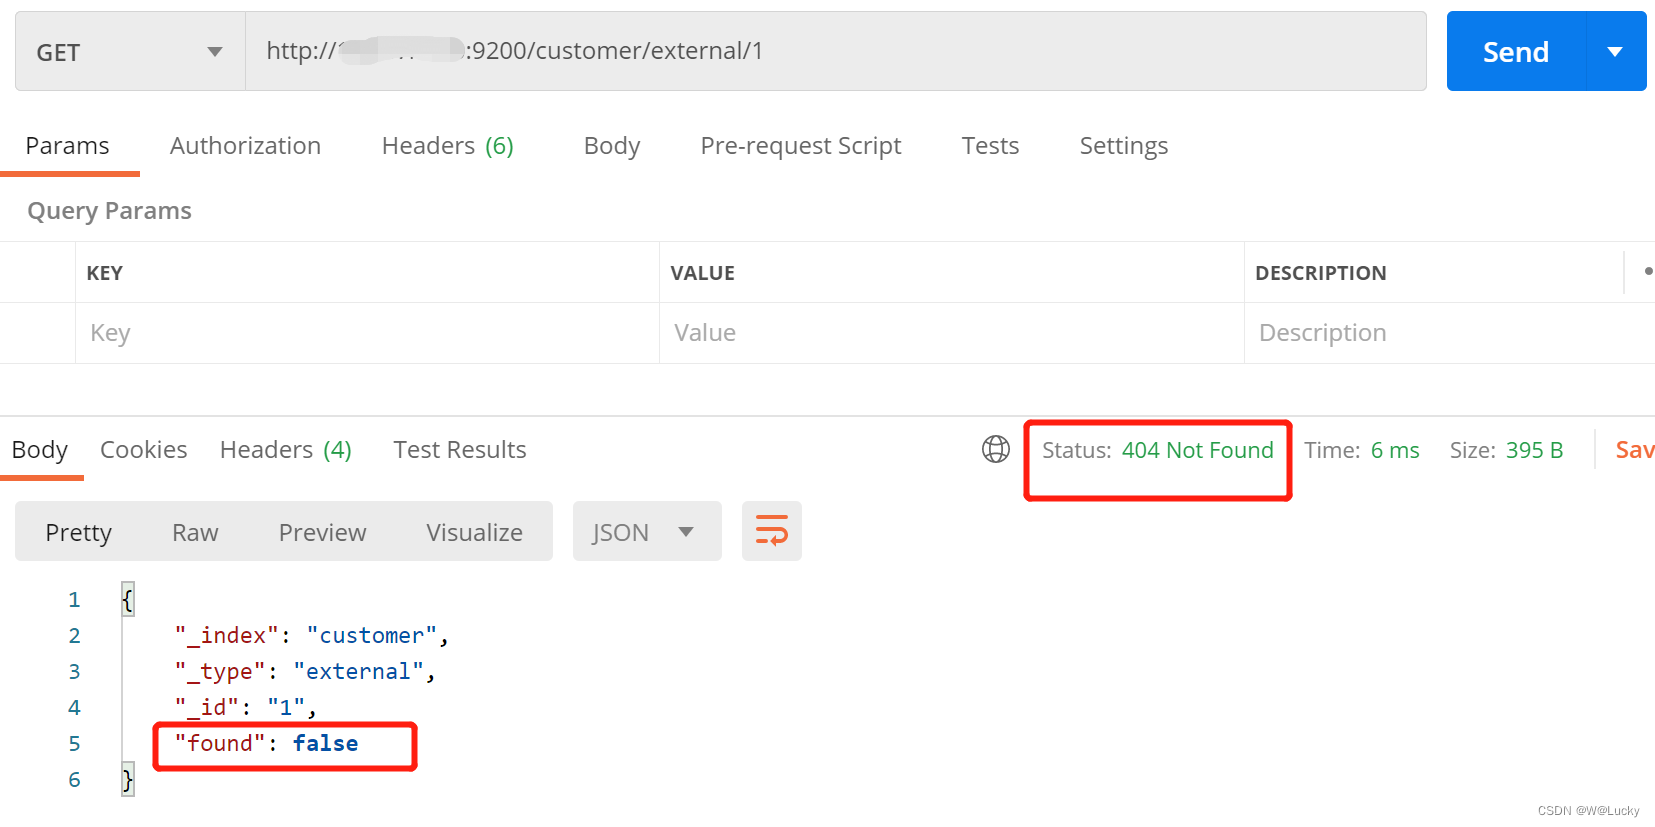
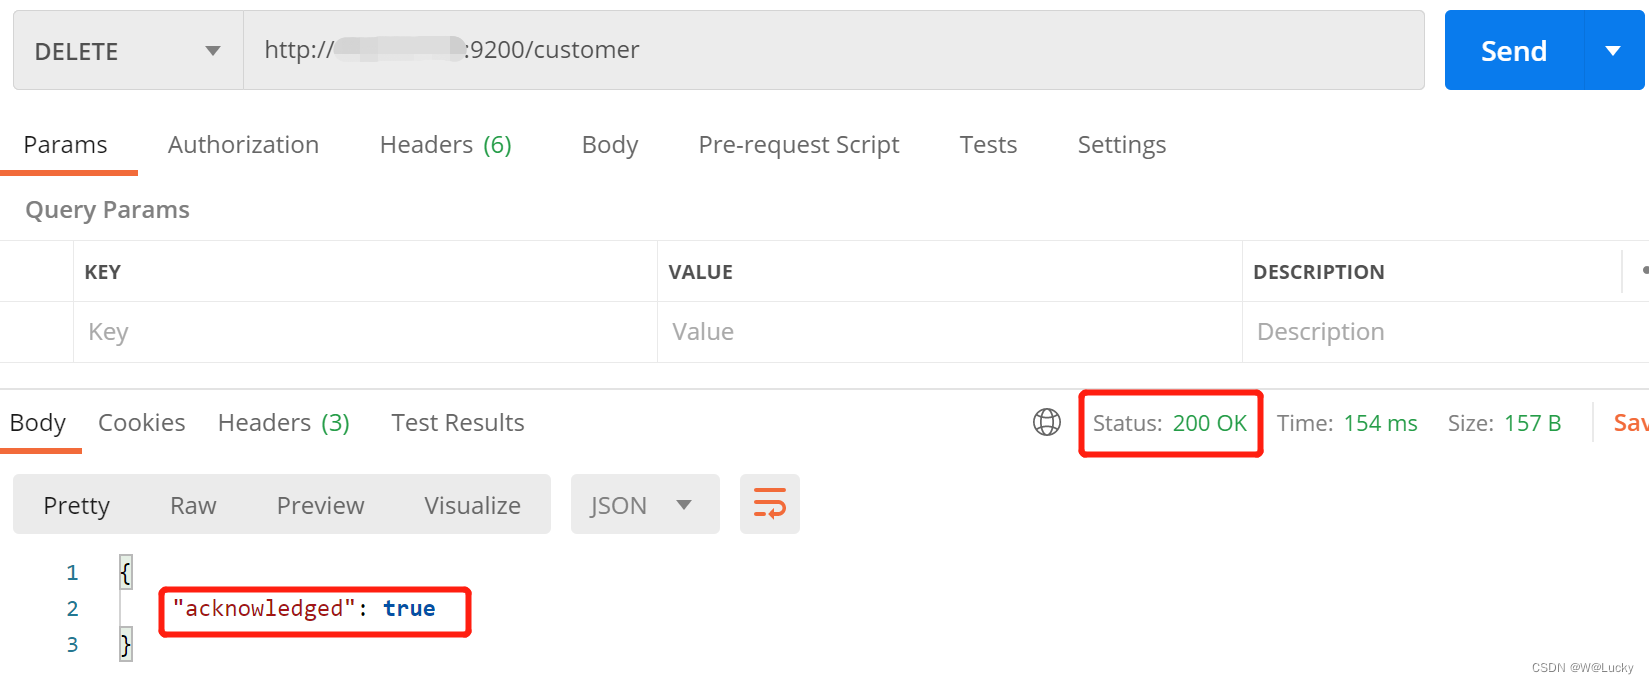
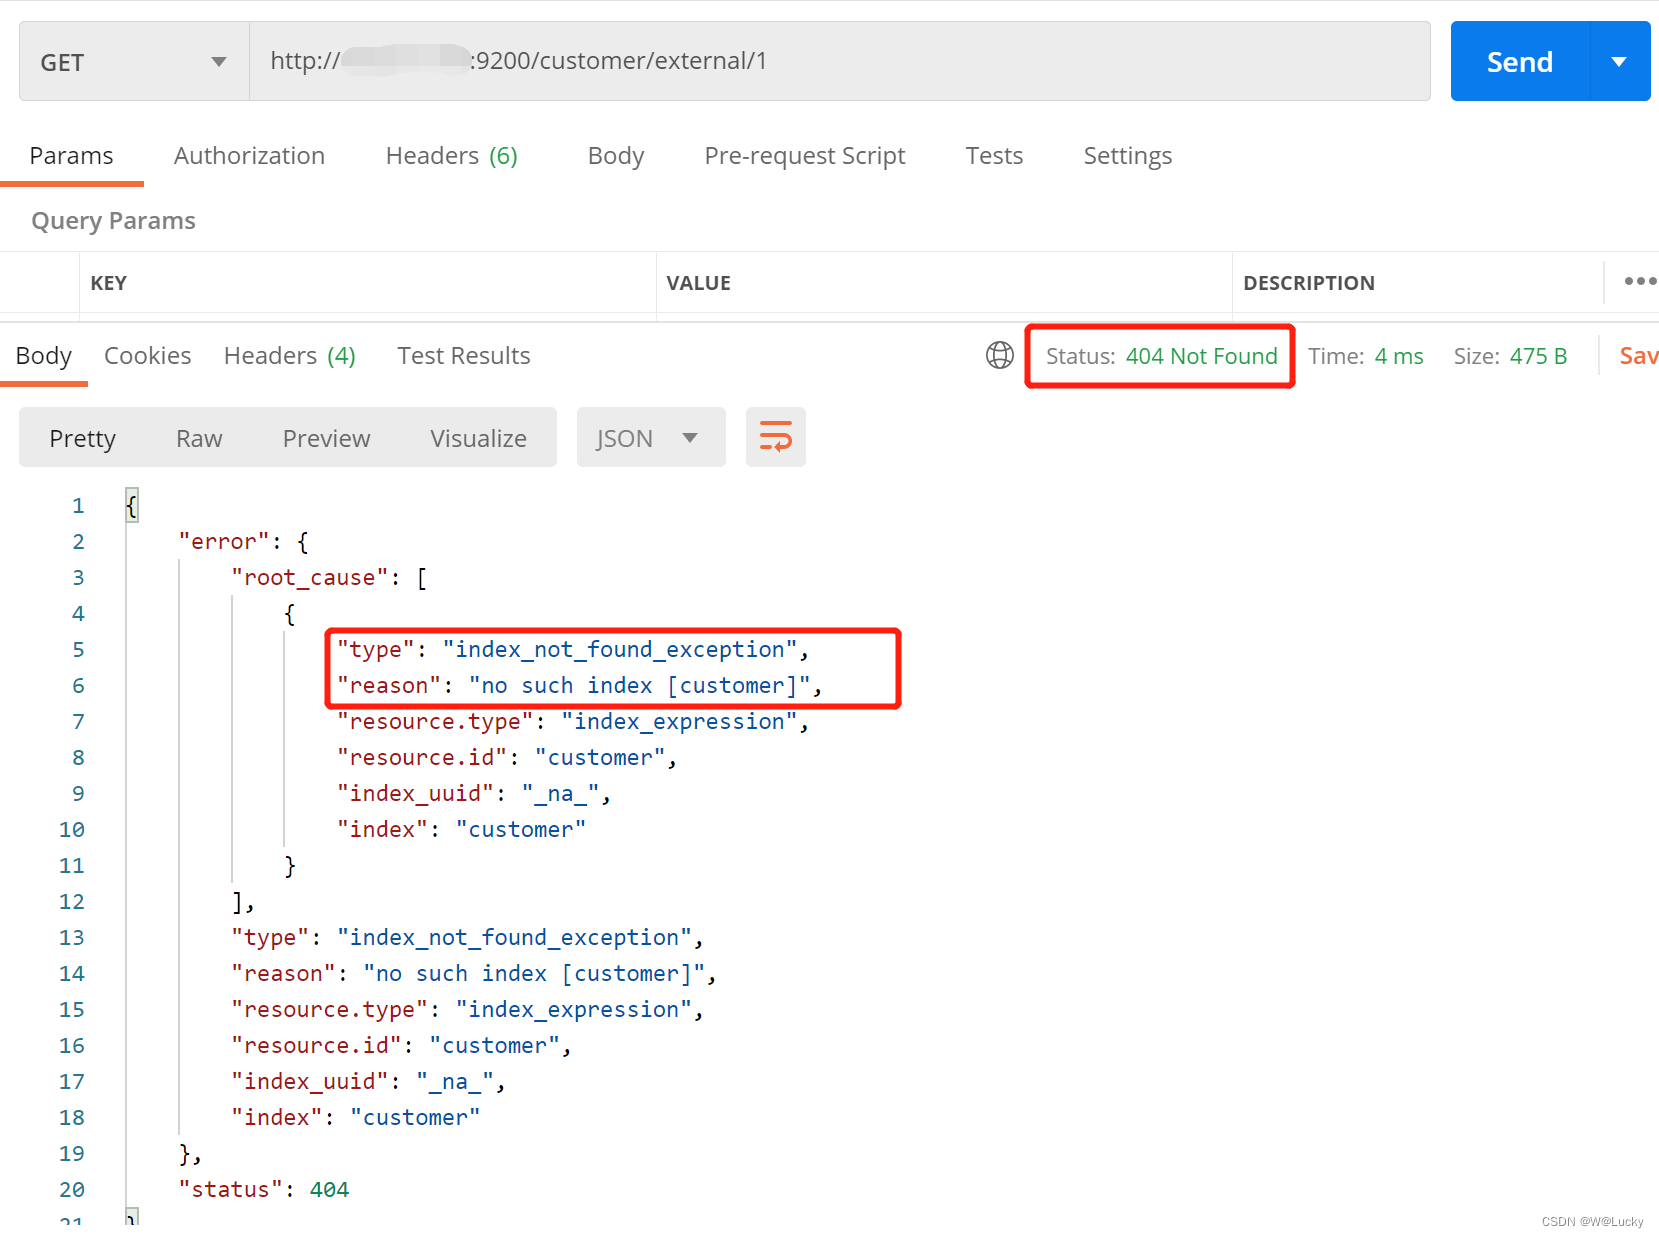
1.3.6 bulk 批量 API
注意:这里有多个 Json 无法使用 Postman 测试,可以使用es的可视化工具 Kibana的Dev Tools。
1. 基础批量-新增
多条数据成功失败互不影响。
// 创建索引customer类型external,批量新增文档
POST /customer/external/_bulk
{"index":{"_id":"1"}}
{"name":"John Doe"}
{"index":{"_id":"2"}}
{"name":"Jane Doe"}
运行结果:
// 运行结果
{
  "took" : 373,
  "errors" : false,
  "items" : [
    {
      "index" : {
        "_index" : "customer",
        "_type" : "external",
        "_id" : "1",
        "_version" : 1,
        "result" : "created",
        "_shards" : {
          "total" : 2,
          "successful" : 1,
          "failed" : 0
        },
        "_seq_no" : 0,
        "_primary_term" : 1,
        "status" : 201
      }
    },
    {
      "index" : {
        "_index" : "customer",
        "_type" : "external",
        "_id" : "2",
        "_version" : 1,
        "result" : "created",
        "_shards" : {
          "total" : 2,
          "successful" : 1,
          "failed" : 0
        },
        "_seq_no" : 1,
        "_primary_term" : 1,
        "status" : 201
      }
    }
  ]
}
2. bulk 批量 API 语法格式
// 语法格式
{ action: { metadata }}\n
{ request body }\n
{ action: { metadata }}\n
{ request body }\n
3. 复杂实例
POST _bulk
{ "delete": { "_index": "website", "_type": "blog", "_id": "123" }} // 1.删除
{ "create": { "_index": "website", "_type": "blog", "_id": "123" }} // 2.新增
{ "title": "My first blog post" }                                // 2的请求体
{ "index": { "_index": "website", "_type": "blog" }}               // 3.新增
{ "title": "My second blog post" }                                // 3的请求体
{ "update": { "_index": "website", "_type": "blog", "_id": "123" }} // 4.修改
{ "doc" : {"title" : "My updated blog post"} }                      // 4的请求体
运行结果:
{
  "took" : 577,
  "errors" : false,
  "items" : [
    {
      "delete" : {
        "_index" : "website",
        "_type" : "blog",
        "_id" : "123",
        "_version" : 1,
        "result" : "not_found",
        "_shards" : {
          "total" : 2,
          "successful" : 1,
          "failed" : 0
        },
        "_seq_no" : 0,
        "_primary_term" : 1,
        "status" : 404
      }
    },
    {
      "create" : {
        "_index" : "website",
        "_type" : "blog",
        "_id" : "123",
        "_version" : 2,
        "result" : "created",
        "_shards" : {
          "total" : 2,
          "successful" : 1,
          "failed" : 0
        },
        "_seq_no" : 1,
        "_primary_term" : 1,
        "status" : 201
      }
    },
    {
      "index" : {
        "_index" : "website",
        "_type" : "blog",
        "_id" : "_lsVt4cBA2Tbra8SVR5z",
        "_version" : 1,
        "result" : "created",
        "_shards" : {
          "total" : 2,
          "successful" : 1,
          "failed" : 0
        },
        "_seq_no" : 2,
        "_primary_term" : 1,
        "status" : 201
      }
    },
    {
      "update" : {
        "_index" : "website",
        "_type" : "blog",
        "_id" : "123",
        "_version" : 3,
        "result" : "updated",
        "_shards" : {
          "total" : 2,
          "successful" : 1,
          "failed" : 0
        },
        "_seq_no" : 3,
        "_primary_term" : 1,
        "status" : 200
      }
    }
  ]
}
1.3.7 样本测试数据
尚硅谷准备了一份顾客银行账户信息的虚构的 JSON 文档样本。每个文档都有下列的 schema(模式):
{
    "account_number": 0,
    "balance": 16623,
    "firstname": "Bradshaw",
    "lastname": "Mckenzie",
    "age": 29,
    "gender": "F",
    "address": "244 Columbus Place",
    "employer": "Euron",
    "email": "bradshawmckenzie@euron.com",
    "city": "Hobucken",
    "state": "CO"
}
测试数据网址:elasticsearch/accounts.json at v7.4.2 · elastic/elasticsearch · GitHub
// 导入数据
POST bank/account/_bulk
测试数据
可以通过http://xxxx:9200/_cat/indices查看所有索引:
                                                         //条数
yellow open website                  G0IsPj0JTDWKOkZdvmvnYA 1 1    2 2   8.6kb   8.6kb
yellow open bank                     _mMssaCwTdGiChu7suNuFw 1 1 1000 0 414.2kb 414.2kb
green  open .kibana_task_manager_1   Kzoc748mSEC3tIIochzwvA 1 0    2 0  30.5kb  30.5kb
green  open .apm-agent-configuration lwplF_izS_OJ-ffzy27yRA 1 0    0 0    283b    283b
green  open .kibana_1                c0FgFM-uTeiTHJMdRDqcYw 1 0    9 0  33.3kb  33.3kb
yellow open customer                 0TFyLM5AQRCCC2D2S5PUew 1 1    2 0   3.5kb   3.5kb
1.4 进阶检索
官方文档:Elasticsearch Guide [7.4] | Elastic
1.4.1 SearchAPI
ES 支持两种基本方式检索:
-
通过使用 REST request URI 发送搜索参数(uri+检索参数);
-
通过使用 REST requestBody 来发送它们(uri+请求体)。
ES 的中文官网:欢迎来到 Elastic — Elasticsearch 和 Kibana 的开发者 | Elastic -》资源 -》学习(文档)-》Elasticsearch: Store, Search, and Analyze (存储,检索,分析) -》Elasticsearch Guide[8.7]—other versions -》点击other versions,选择7.4版本-》Getting started with Elasticsearch -》Start searching
1. 检索信息
一切检索从_search开始。
-
uri+检索参数 进行检索
// 1. 请求参数方式检索
// 检索bank索引下
// 条件:q=* 查询所有 ;sort=account_number:asc 按照account_number进行升序排序
GET bank/_search?q=*&sort=account_number:asc
运行结果:
{
  "took" : 8,
  "timed_out" : false,
  "_shards" : {
    "total" : 1,
    "successful" : 1,
    "skipped" : 0,
    "failed" : 0
  },
  "hits" : {
    "total" : {
      "value" : 1000, // 总记录1000条,结果显示10条,类似分页
      "relation" : "eq"
    },
    "max_score" : null,
    "hits" : [ // 命中记录
      {
        "_index" : "bank",
        "_type" : "account",
        "_id" : "0",
        "_score" : null,
        "_source" : {
          "account_number" : 0,
          "balance" : 16623,
          "firstname" : "Bradshaw",
          "lastname" : "Mckenzie",
          "age" : 29,
          "gender" : "F",
          "address" : "244 Columbus Place",
          "employer" : "Euron",
          "email" : "bradshawmckenzie@euron.com",
          "city" : "Hobucken",
          "state" : "CO"
        },
        "sort" : [
          0
        ]
      },
        ..
    ]
  }
}
响应结果解释:
(1)took - Elasticsearch 执行搜索的时间(毫秒);
(2)time_out - 告诉我们搜索是否超时;
(3)_shards - 告诉我们多少个分片被搜索了,以及统计了成功/失败的搜索分片;
(4)hits - 搜索结果;
(5)hits.total - 搜索结果条数;
(6)hits.hits - 实际的搜索结果数组(默认为前 10 的文档);
(7)sort - 结果的排序 key(键)(没有则按 score 排序);
(8)score 和 max_score –相关性得分和最高得分(全文检索用)。
-
uri+请求体 进行检索
GET bank/_search
{
  "query":{
    "match_all": {}
  },
  "sort": [
    {
      "account_number":  "desc"
    }
  ]
}
或
GET bank/_search
{
  "query":{
    "match_all": {}
  },
  "sort": [
    {
      "account_number": {
        "order": "desc"
      }
    }
  ]
}
注意:
HTTP 客户端工具(POSTMAN),get 请求不能携带请求体,我们变为 post 也是一样的我们 POST 一个 JSON 风格的查询请求体到 _search API。需要了解,一旦搜索的结果被返回,Elasticsearch 就完成了这次请求,并且不会维护任何服务端的资源或者结果的 cursor(游标)。
1.4.2 Query DSL
1.4.2.1 基本语法格式
Elasticsearch提供了一个可以执行查询的JSON风格的DSL(domain-specific language 领域特定语言),这个被成为Query DSL。该查询语言非常全面。
-
一个查询语句的典型结构
{
    QUERY_NAME:{
        ARGUMENT:VALUE,
        ARGUMENT:VALUE,
        ..
    }
}-
如果是针对某个字段,那么它的结构如下:
{
    QUERY_NAME:{
        FIELD_NAME:{
           ARGUMENT:VALUE,
           ARGUMENT:VALUE,
           ..
        }
    }
}
举例:
GET bank/_search
{
  "query": {
    "match_all": {}
  },
  "sort": [
    {
      "balance": {
        "order": "desc"
      }
    }
  ],
  "from": 0, // 开始下标
  "size": 5 // 查询条数
}
运行结果:
{
  "took" : 3,
  "timed_out" : false,
  "_shards" : {
    "total" : 1,
    "successful" : 1,
    "skipped" : 0,
    "failed" : 0
  },
  "hits" : {
    "total" : {
      "value" : 1000,
      "relation" : "eq"
    },
    "max_score" : null,
    "hits" : [
      {
        "_index" : "bank",
        "_type" : "account",
        "_id" : "248",
        "_score" : null,
        "_source" : {
          "account_number" : 248,
          "balance" : 49989,
          "firstname" : "West",
          "lastname" : "England",
          "age" : 36,
          "gender" : "M",
          "address" : "717 Hendrickson Place",
          "employer" : "Obliq",
          "email" : "westengland@obliq.com",
          "city" : "Maury",
          "state" : "WA"
        },
        "sort" : [
          49989
        ]
      },
        ..
    ]
  }
}
requestBody解释:
(1)query :定义如何查询。
(2)match_all :查询类型,代表查询所有,es中可以在query中组合非常多的查询类型完成复杂查询。
(3)除了 query 参数之外,我们也可以传递其它的参数来改变查询结果。如 sort 、from 、size等。
(4)form+size :完成分页功能。
(5)sort :排序。多字段排序,会在前序字段相等时后序字段内部排序,否则以前序为准。
1.4.2.2 返回部分字段
在 _source 数组中指定返回的字段,类似select 具体字段 。
GET bank/_search
{
  "query": {
    "match_all": {}
  },
  "sort": [
    {
      "balance": {
        "order": "desc"
      }
    }
  ],
  "from": 0,
  "size": 5,
  "_source": ["balance","firstname"]
}
1.4.2.3 match 匹配查询
-
基本类型(非字符串),精确匹配
GET bank/_search
{
  "query": {
    "match": {
      "account_number": "6"
    }
  }
}
// 返回的是account_number=6的文档-
字符串,全文检索
GET /bank/_search
{
  "query": {
    "match": {
      "address": "mill"
    }
  }
}
最终查询出 address 中包含 mill 单词的所有记录。
match 当搜索字符串类型的时候,会进行全文检索,并且每条记录有相关性得分。
运行结果:
{
  "took" : 3,
  "timed_out" : false,
  "_shards" : {
    "total" : 1,
    "successful" : 1,
    "skipped" : 0,
    "failed" : 0
  },
  "hits" : {
    "total" : {
      "value" : 4,
      "relation" : "eq"
    },
    "max_score" : 5.4032025,
    "hits" : [
      {
        "_index" : "bank",
        "_type" : "account",
        "_id" : "970",
        "_score" : 5.4032025,
        "_source" : {
          "account_number" : 970,
          "balance" : 19648,
          "firstname" : "Forbes",
          "lastname" : "Wallace",
          "age" : 28,
          "gender" : "M",
          "address" : "990 Mill Road",
          "employer" : "Pheast",
          "email" : "forbeswallace@pheast.com",
          "city" : "Lopezo",
          "state" : "AK"
        }
      },
      {
        "_index" : "bank",
        "_type" : "account",
        "_id" : "136",
        "_score" : 5.4032025,
        "_source" : {
          "account_number" : 136,
          "balance" : 45801,
          "firstname" : "Winnie",
          "lastname" : "Holland",
          "age" : 38,
          "gender" : "M",
          "address" : "198 Mill Lane",
          "employer" : "Neteria",
          "email" : "winnieholland@neteria.com",
          "city" : "Urie",
          "state" : "IL"
        }
      },
     ..
    ]
  }
}-
字符串,多个单词(分词+全文检索)
全文检索按照评分进行排序,会对检索条件进行分词匹配。
GET /bank/_search
{
  "query": {
    "match": {
      "address": "mill lane"
    }
  }
}
最终查询出address中包含mill 或 lane 或者 mill lane 的所有记录,并给出相关性得分。
运行结果:
{
  "took" : 20,
  "timed_out" : false,
  "_shards" : {
    "total" : 1,
    "successful" : 1,
    "skipped" : 0,
    "failed" : 0
  },
  "hits" : {
    "total" : {
      "value" : 19,
      "relation" : "eq"
    },
    "max_score" : 9.507477,
    "hits" : [
      {
        "_index" : "bank",
        "_type" : "account",
        "_id" : "136",
        "_score" : 9.507477,
        "_source" : {
          "account_number" : 136,
          "balance" : 45801,
          "firstname" : "Winnie",
          "lastname" : "Holland",
          "age" : 38,
          "gender" : "M",
          "address" : "198 Mill Lane",
          "employer" : "Neteria",
          "email" : "winnieholland@neteria.com",
          "city" : "Urie",
          "state" : "IL"
        }
      },
      {
        "_index" : "bank",
        "_type" : "account",
        "_id" : "970",
        "_score" : 5.4032025,
        "_source" : {
          "account_number" : 970,
          "balance" : 19648,
          "firstname" : "Forbes",
          "lastname" : "Wallace",
          "age" : 28,
          "gender" : "M",
          "address" : "990 Mill Road",
          "employer" : "Pheast",
          "email" : "forbeswallace@pheast.com",
          "city" : "Lopezo",
          "state" : "AK"
        }
      },
      ..
   ]
  }
}
1.4.2.4 match_phrase 短语匹配
将需要匹配的值当成一个整体单词(不分词)进行检索。
GET bank/_search
{
  "query": {
    "match_phrase": {
      "address": "mill lane"
    }
  }
}
查询出address 中包含mill lane的所有记录,并给出相关性得分。
1.4.2.5 multi_match 多字段匹配
GET bank/_search
{
  "query": {
    "multi_match": {
      "query": "mill",
      "fields": ["address","state"]
    }
  }
}


// 查询多个单词,会进行分词+全文检索
GET bank/_search
{
  "query": {
    "multi_match": {
      "query": "mill ak",
      "fields": ["address","state"]
    }
  }
}
1.4.2.6 bool 复合查询
bool 用来做复合查询:
复合语句可以合并 任何 其它的语句,包括复合语句。这就意味着,复合语句之间可以互相嵌套,可以表达非常复杂的逻辑。
-
must :必须满足 must 列举的所有条件。影响相关性得分。
-
must_not :必须不是指定的情况。不影响相关性得分。
-
should :应该达到 should 列举的条件,如果达到会增加相关文档的评分。
GET bank/_search
{
  "query": {
    "bool": {
      "must": [
        {
          "match": {
            "gender": "M"
          }
        },
        {
          "match": {
            "address": "mill"
          }
        }
      ],
      "must_not": [
        {
          "match": {
            "age": "18"
          }
        }
      ],
      "should": [
        {
          "match": {
            "lastname": "Wallace"
          }
        }
      ]
    }
  }
}
1.4.2.7 filter 结果过滤
不是所有的查询都需要产生分数,特别是哪些仅用于“filtering”(过滤)的文档。为了不计算分数Elasticsearch会自动检查场景并且优化查询的执行。filter 用于过滤文档,对分数无影响。
// 1
GET bank/_search
{
"query": {
"bool": {
"filter": {
"range": {
"age": {
"gte": 28,
"lte": 30
}
}
}
}
}
}
// 2
GET bank/_search
{
"query": {
"bool": {
"must": [
{
"match": {
"gender": "M"
}
},
{
"match": {
"address": "mill"
}
}
],
"must_not": [
{
"match": {
"age": "18"
}
}
],
"should": [
{
"match": {
"lastname": "Wallace"
}
}
],
"filter": {
"range": {
"age": {
"gte": 28,
"lte": 30
}
}
}
}
}
}1.4.2.8 term
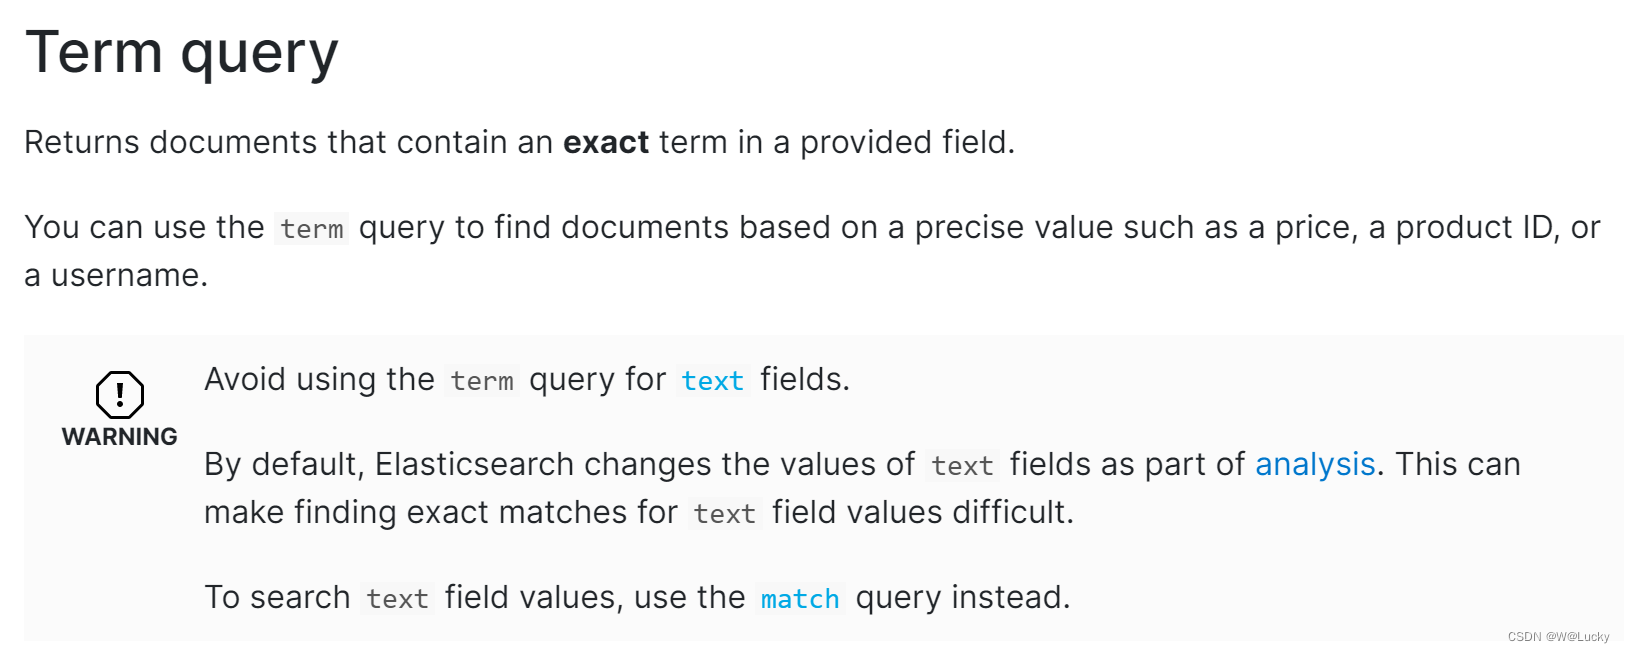
和match一样。匹配某个属性的值。全文检索字段用match,其他非text(文本)字段匹配用term。
term匹配年龄、价格等非文本。
GET bank/_search
{
  "query": {
    "term": {
      "balance": {
        "value": "32838"
      }
    }
  }
}
注意:
GET bank/_search
{
  "query": {
    "match_phrase": {
      "address":"789 Madison" // 可以检索包含"789 Madison"这个短语的所有文档,非精确匹配
    }
  }
}
// 精确匹配
GET bank/_search
{
  "query": {
    "match": {
      "address.keyword":"789 Madison Street" // 使用keyword做精确匹配
    }
  }
}
1.4.2.9 aggregations 执行聚合
聚合提供了从数据中分组和提取数据的能力。最简单的聚合方法大致等于SQL GROUP BY和SQL聚合函数。在Elasticsearch中,您有执行搜索返回 hits(命中结果),并且同时返回聚合结果,把一个响应中的所有hits(命中结果)分隔开的能力。这是非常强大且有效果的,您可以执行查询和多个聚合,并且在一次使用中得到各自的(任何一个的)返回结果,使用一次简洁和简化的API来避免网络往返。
-
搜索 address 中包含 mill 的所有人的年龄分布以及平均年龄,平均薪资
GET bank/_search
{
  "query": {
    "match": {
      "address": "mill"
    }
  },
  "aggs": {
    "groupAge": {
      "terms": {
        "field": "age",
        "size": 10
      }
    },
    "ageAvg":{
      "avg": {
        "field": "age"
      }
    },
    "balanceAvg":{
      "avg": {
        "field": "balance"
      }
    }
  },
  "size": 0 // 不显示搜索数据
}
aggs:执行聚合。聚合语法如下
"aggs": {
"aggs_name 这次聚合的名字,方便展示在结果集中": {
"AGG_TYPE 聚合的类型(avg,term,terms)": {}
}
}运行结果:
{
  "took" : 5,
  "timed_out" : false,
  "_shards" : {
    "total" : 1,
    "successful" : 1,
    "skipped" : 0,
    "failed" : 0
  },
  "hits" : {
    "total" : {
      "value" : 4,
      "relation" : "eq"
    },
    "max_score" : null,
    "hits" : [ ]
  },
  "aggregations" : {
    "ageAvg" : {
      "value" : 34.0
    },
    "balanceAvg" : {
      "value" : 25208.0
    },
    "groupAge" : {
      "doc_count_error_upper_bound" : 0,
      "sum_other_doc_count" : 0,
      "buckets" : [
        {
          "key" : 38,
          "doc_count" : 2
        },
        {
          "key" : 28,
          "doc_count" : 1
        },
        {
          "key" : 32,
          "doc_count" : 1
        }
      ]
    }
  }
}-
查出所有年龄分布,并且这些年龄段中 M 的平均薪资和 F 的平均薪资以及这个年龄段的总体平均薪资。
GET bank/_search
{
  "query": {
    "match_all": {}
  },
  "aggs": {
    "ageAgg": {
      "terms": {
        "field": "age",
        "size": 100
      },
      "aggs": {
        "genderAgg":{
          "terms": {
            "field": "gender.keyword"
          },
          "aggs": {
            "balanceAvg": {
              "avg": {
                "field": "balance"
              }
            }
          }
        },
        "balanceAvg": {
          "avg": {
            "field": "balance"
          }
        }
      }
    }
  }
}
1.4.3 Mapping
1.4.3.1 字段类型
-
核心类型
| 类型 | |
|---|---|
| 字符串(string) | text、keyword |
| 数字类型(Numeric) | long、integer、short、byte、double、float、half_float、scaled_float |
| 日期类型(Date) | date |
| 布尔类型(Boolean) | boolean |
| 二进制类型(binary) | binary |
-
复合类型
| 类型 | |
|---|---|
| 数组类型(Array) | Array支持不针对特定的类型 |
| 对象类型(Object) | Object用于单JSON对象 |
| 嵌套类型(Nested) | nested用于JSON对象数组 |
-
地理类型(Geo)
| 类型 | |
|---|---|
| 地理坐标(Geo-points) | geo_points用于描述经纬度坐标 |
| 地理图形(Geo-shape) | geo_shape用于描述复杂形状,如多边形 |
-
特定类型
| 类型 | |
|---|---|
| IP类型 | ip用于描述ipv4和ipv6地址 |
| 补全类型(Completion) | completion提供自动完成提示 |
| 令牌计数类型(Token count) | token_count用于统计字符串中的词条数量 |
| 附件类型(attachment) | 参考mapper-attachements插件,支持将附件如Microsoft Office格式,Open Document格式,ePub,HTML等等索引为attachment数据类型。 |
| 抽取类型(Percolator) | 接受特定领域查询语言(query-dsl)的查询 |
-
多字段
通常用于为不同目的用不同的方法索引同一个字段。例如,string字段可以映射为一个text字段用于全文检索,同样可以映射为一个keyword字段用于排序和聚合。另外,你可以使用standard analyzer、english analyzer、french analyzer来索引一个text字段。这就是multi-fields的目的。大多数的数据类型通过fields参数来支持multi-fields。
1.4.3.2 映射
-
Mapping(映射)是用来定义一个文档(document),以及它所包含的属性(field)是如何存储和索引的过程。例如:使用Mapping(映射)来定义:
(1)哪些字符串属性应该被看做全文本属性(full text fields)。
(2)哪些属性包含数字、日期或地理位置。
(3)文档中的所有属性是否都能被索引(_all 配置)。
(4)日期值的格式。
(5)自定义规则来控制动态添加字段的映射。
-
查看mapping映射信息
GET bank/_mapping
不指定属性的映射类型,es会默认给属性添加类型。
1.4.3.3 新版本改变
Es7 及以上移除了 type 的概念。
-
关系型数据库中两个数据表示是独立的,即使他们里面有相同名称的列也不影响使用,但 ES 中不是这样的。elasticsearch 是基于 Lucene 开发的搜索引擎,而 ES 中不同 type下名称相同的 filed 最终在 Lucene 中的处理方式是一样的。
-
两个不同 type 下的两个 user_name,在 ES 同一个索引下其实被认为是同一个 filed,你必须在两个不同的 type 中定义相同的 filed 映射。否则,不同 type 中的相同字段名称就会在处理中出现冲突的情况,导致 Lucene 处理效率下降。
-
去掉 type 就是为了提高 ES 处理数据的效率。
-
Elasticsearch 7.x
-
URL 中的 type 参数为可选。比如,索引一个文档不再要求提供文档类型。
Elasticsearch 8.x
-
不再支持 URL 中的 type 参数。
解决:
1)、将索引从多类型迁移到单类型,每种类型文档一个独立索引。
2)、将已存在的索引下的类型数据,全部迁移到指定位置即可。详见数据迁移
1. 创建映射
// 创建索引并指定映射
PUT my_index
{
  "mappings": {
    "properties": {
      "age":{"type": "integer"},
      "email":{"type": "keyword"}, // 指定为keyword精确匹配
      "name":{"type": "text"}      // 全文检索。保存时候分词,检索时候进行分词匹配
    }
  }
}
运行结果:
{
  "acknowledged" : true,
  "shards_acknowledged" : true,
  "index" : "my_index"
}
2. 添加新的字段映射
PUT my_index/_mapping
{
  "properties": {
    "employee-id": {
      "type": "long",
      "index": false  // 代表该字段不能被检索,index默认为true
    }
  }
}
可以在官网的mapping parameter中查看相关参数的使用。
index | Elasticsearch Guide [7.4] | Elastic
3. 更新映射
对于已经存在的映射字段,我们不能更新。更新必须创建的新的索引进行数据迁移。一般创建索引并指定映射。
// 创建新的索引并指定映射类型
PUT newbank
{
   "mappings" : {
      "properties" : {
        "account_number" : {
          "type" : "long"
        },
        "address" : {
          "type" : "text"
        },
        "age" : {
          "type" : "integer"
        },
        "balance" : {
          "type" : "long"
        },
        "city" : {
          "type" : "keyword"
        },
        "email" : {
          "type" : "keyword"
        },
        "employer" : {
          "type" : "keyword"
        },
        "firstname" : {
          "type" : "text"
        },
        "gender" : {
          "type" : "keyword"
        },
        "lastname" : {
          "type" : "text",
          "fields" : {
            "keyword" : {
              "type" : "keyword",
              "ignore_above" : 256
            }
          }
        },
        "state" : {
          "type" : "keyword"
        }
      }
    }
}
// 数据迁移
// 不用type,老的数据可以迁移过来
POST _reindex
{
"source": {
"index": "bank",
"type": "account"
},
"dest": {
"index": "newbank"
}
}
// 查询新索引下的数据
GET newbank/_search4. 数据迁移
先创建出 new_twitter 的正确映射。然后使用如下方式进行数据迁移
POST _reindex
{
  "source": {
    "index": "bank"
  },
  "dest": {
    "index": "newbank"
  }
}
// 将旧索引的 type 下的数据进行迁移
POST _reindex
{
"source": {
"index": "bank",
"type": "account" // 指定旧索引的类型
},
"dest": {
"index": "newbank"
}
}1.4.4 分词
一个 tokenizer(分词器)接收一个字符流,将之分割为独立的 tokens(词元,通常是独立的单词),然后输出 tokens 流。例如,whitespace tokenizer 遇到空白字符时分割文本。它会将文本 "Quick brown fox!" 分割为 [Quick, brown, fox!]。
该 tokenizer(分词器)还负责记录各个 term(词条)的顺序或 position 位置(用于 phrase 短语和 word proximity 词近邻查询),以及 term(词条)所代表的原始 word(单词)的 start(起始)和 end(结束)的 character offsets(字符偏移量)(用于高亮显示搜索的内容)。
Elasticsearch 提供了很多内置的分词器,可以用来构建 custom analyzers(自定义分词器)。
es默认分词,英文是根据空白字符分割,中文是一个字一分,中文分词需要使用ik分词器。
// 根据空白字符进行分割
POST _analyze
 {
   "analyzer": "standard",
   "text": "The 2 Brown-Foxes bone."
 }
1.4.4.1 安装 ik 分词器
-
ik 分词器下载地址(要对应es版本):
Releases · medcl/elasticsearch-analysis-ik · GitHub
-
下载 ik 分析器,解压后放到/root/docker/elasticsearch/plugins
(1)下载 ik 分词器
下载地址:Releases · medcl/elasticsearch-analysis-ik · GitHub
选择 elasticsearch-analysis-ik-7.4.2.zip 下载,解压到目录 ik 下,将 ik 文件夹拉到/root/docker/elasticsearch/plugins 会将 ik 映射到 es 容器的plugins 文件夹下,可以通过相关命令进入 es容器:
# 查看/root/docker/elasticsearch/plugins的ik
ls
# 修改ik 的相关权限
ll
chmod -R 777 ik/
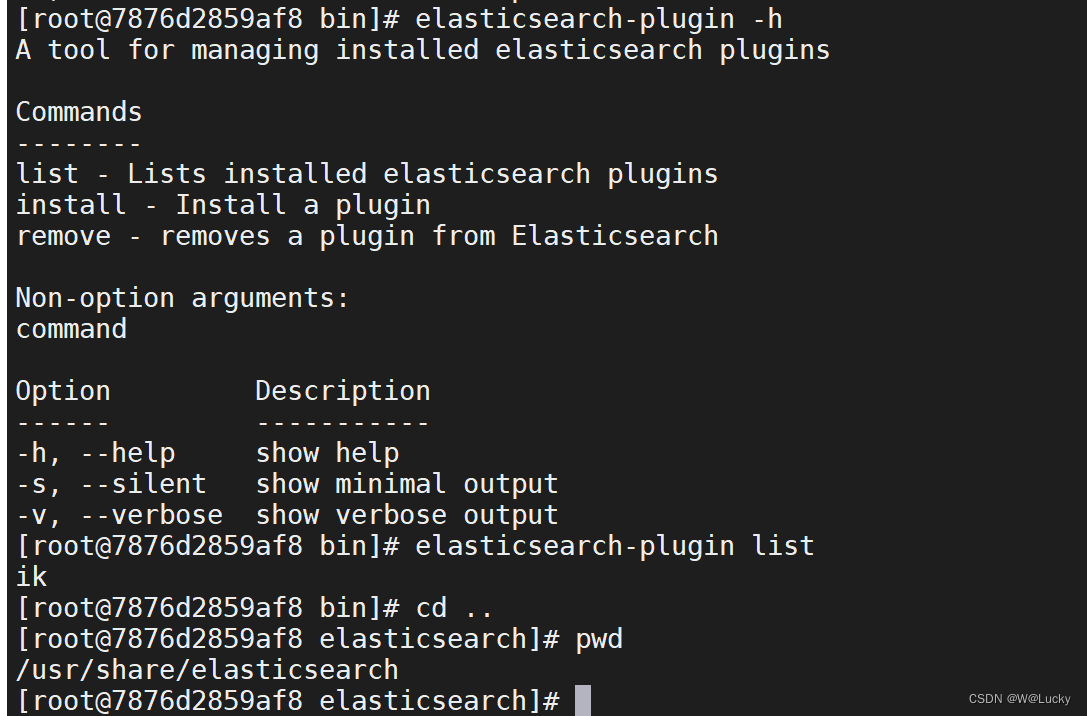
# 进入容器,7876d 是es部分容器ID,能区分容器即可不需全输
docker exec -it 7876d /bin/bash
# 进入es容器的plugins文件夹,并查看ik
cd plugins
ls
# 进入es容器的bin目录查看es的插件列表是否有ik
cd ..
cd bin
ls
elasticsearch-plugin list # 查看es插件列表,如果有ik说明ik装好了
# 退出es容器,并重启容器es
exit;
docker restart elasticsearch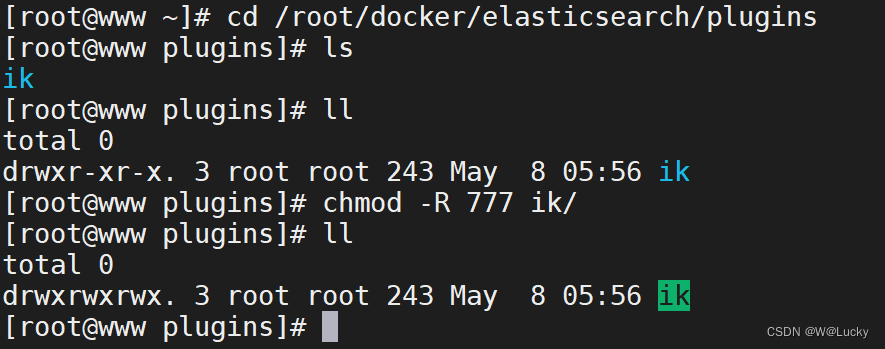

1.4.4.2 测试分词器
1. 使用默认的分词器
GET _analyze
{
  "text": "我是中国人"
}
运行结果:
{
  "tokens" : [
    {
      "token" : "我",
      "start_offset" : 0,
      "end_offset" : 1,
      "type" : "<IDEOGRAPHIC>",
      "position" : 0
    },
    {
      "token" : "是",
      "start_offset" : 1,
      "end_offset" : 2,
      "type" : "<IDEOGRAPHIC>",
      "position" : 1
    },
    {
      "token" : "中",
      "start_offset" : 2,
      "end_offset" : 3,
      "type" : "<IDEOGRAPHIC>",
      "position" : 2
    },
    {
      "token" : "国",
      "start_offset" : 3,
      "end_offset" : 4,
      "type" : "<IDEOGRAPHIC>",
      "position" : 3
    },
    {
      "token" : "人",
      "start_offset" : 4,
      "end_offset" : 5,
      "type" : "<IDEOGRAPHIC>",
      "position" : 4
    }
  ]
}
2. 使用 ik 分词器
GET _analyze
{
"analyzer": "ik_smart",
"text": "我是中国人"
}
// 运行结果:
{
"tokens" : [
{
"token" : "我",
"start_offset" : 0,
"end_offset" : 1,
"type" : "CN_CHAR",
"position" : 0
},
{
"token" : "是",
"start_offset" : 1,
"end_offset" : 2,
"type" : "CN_CHAR",
"position" : 1
},
{
"token" : "中国人",
"start_offset" : 2,
"end_offset" : 5,
"type" : "CN_WORD",
"position" : 2
}
]
}GET _analyze
{
"analyzer": "ik_max_word",
"text": "我是中国人"
}
// 运行结果:
{
"tokens" : [
{
"token" : "我",
"start_offset" : 0,
"end_offset" : 1,
"type" : "CN_CHAR",
"position" : 0
},
{
"token" : "是",
"start_offset" : 1,
"end_offset" : 2,
"type" : "CN_CHAR",
"position" : 1
},
{
"token" : "中国人",
"start_offset" : 2,
"end_offset" : 5,
"type" : "CN_WORD",
"position" : 2
},
{
"token" : "中国",
"start_offset" : 2,
"end_offset" : 4,
"type" : "CN_WORD",
"position" : 3
},
{
"token" : "国人",
"start_offset" : 3,
"end_offset" : 5,
"type" : "CN_WORD",
"position" : 4
}
]
}能够看出不同的分词器,分词有明显的区别,所以以后定义一个索引不能再使用默认的 mapping 了,要手工建立 mapping,,因为要选择分词器。
但是,有些语句无法按照我们的意愿分词,如下:
POST _analyze
{
   "analyzer": "ik_max_word",
   "text": "尚硅谷电商项目"
}
可以自定义分词。
扩展:
# 使用 yum 源安装 wget和unzip
yum install wget
yum install -y unzip # -y 表示yes同意安装
1.4.4.3 自定义词库
1. 创建自己的扩展字典放在 nginx
# 进入nginx的html文件夹
cd /root/docker/nginx/html
# 创建es文件夹
mkdir es
# 进入es文件夹
cd es
# 创建 扩展字典文件fenci.txt,并编辑内容
vi fenci.txt
fenci.txt
尚硅谷
乔碧罗可以访问http://172.1.11.10/es/fenci.txt查看扩展字典的分词,即扩展字典的地址。
2. 修改 ik 分词器的配置文件IKAnalyzer.cfg.xml连接远程扩展字典
cd /root/docker/elasticsearch
cd plugins
cd /ik/config
vi IKAnalyzer.cfg.xml
修改IKAnalyzer.cfg.xml配置远程扩展字典
<?xml version="1.0" encoding="UTF-8"?>
<!DOCTYPE properties SYSTEM "http://java.sun.com/dtd/properties.dtd">
<properties>
        <comment>IK Analyzer 扩展配置</comment>
        <!--用户可以在这里配置自己的扩展字典 -->
        <entry key="ext_dict"></entry>
         <!--用户可以在这里配置自己的扩展停止词字典-->
        <entry key="ext_stopwords"></entry>
        <!--用户可以在这里配置远程扩展字典 -->
        <entry key="remote_ext_dict">http://172.1.11.10/es/fenci.txt</entry>
        <!--用户可以在这里配置远程扩展停止词字典-->
        <!-- <entry key="remote_ext_stopwords">words_location</entry> -->
</properties>
修改之前的IKAnalyzer.cfg.xml
<?xml version="1.0" encoding="UTF-8"?>
<!DOCTYPE properties SYSTEM "http://java.sun.com/dtd/properties.dtd">
<properties>
        <comment>IK Analyzer 扩展配置</comment>
        <!--用户可以在这里配置自己的扩展字典 -->
        <entry key="ext_dict"></entry>
         <!--用户可以在这里配置自己的扩展停止词字典-->
        <entry key="ext_stopwords"></entry>
        <!--用户可以在这里配置远程扩展字典 -->
        <!-- <entry key="remote_ext_dict">words_location</entry> -->
        <!--用户可以在这里配置远程扩展停止词字典-->
        <!-- <entry key="remote_ext_stopwords">words_location</entry> -->
</properties>
3. 重启es ,在kibana中测试分词效果
# 重启es
docker restart elasticsearch
# 测试分词
POST _analyze
{
   "analyzer": "ik_max_word",
   "text": "乔碧罗殿下"
}
运行效果:
{
  "tokens" : [
    {
      "token" : "乔碧罗",
      "start_offset" : 0,
      "end_offset" : 3,
      "type" : "CN_WORD",
      "position" : 0
    },
    {
      "token" : "殿下",
      "start_offset" : 3,
      "end_offset" : 5,
      "type" : "CN_WORD",
      "position" : 1
    }
  ]
}
1.5 Elasticsearch-Rest-Client
(1)9300:TCP
用于集群
(2)9200:HTTP
-
JestClient:非官方,更新慢
-
RestTemplate:模拟发HTTP请求,ES很多操作需要自己封装,麻烦
-
HttpClient:同上
-
Elasticsearch-Rest-Client:官方RestClient,封装了ES操作,API层次分明,上手简单
最终选择 Elasticsearch-Rest-Client(elasticsearch-rest-high-level-client)
Java High Level REST Client | Java REST Client [7.17] | Elastic
Java REST Client 基于9200
Java API 基于9300
1.5.1 SpringBoot整合es
1. 引入依赖
<!--    导入es的rest-high-level-client -->
<dependency>
    <groupId>org.elasticsearch.client</groupId>
    <artifactId>elasticsearch-rest-high-level-client</artifactId>
    <version>7.4.2</version>
</dependency>
2. 对es相关依赖进行版本统一,因为SpringBoot也对es做了版本控制
<properties>
    <java.version>1.8</java.version>
    <!-- 更改elasticsearch 和 elasticsearch-rest-client的版本为7.4.2   -->
    <elasticsearch.version>7.4.2</elasticsearch.version>
</properties>
3. RequestOptions请求测试项
比如:为了es安全,添加了安全访问规则,访问es需要添加一个安全头,就可以通过RequestOptions进行设置。
4. es配置类
@Configuration
public class GulimallElasticsearchConfig {
/**
* RequestOptions类保存了请求的某些部分,这些部分应该在同一应用程序中的许多请求之间共享。
* 您可以创建一个单例实例并在所有请求之间共享它
*/
public static final RequestOptions COMMON_OPTIONS;
static {
RequestOptions.Builder builder = RequestOptions.DEFAULT.toBuilder();
// builder.addHeader("Authorization", "Bearer " + TOKEN);
// builder.setHttpAsyncResponseConsumerFactory(
// new HttpAsyncResponseConsumerFactory
// .HeapBufferedResponseConsumerFactory(30 * 1024 * 1024 * 1024));
COMMON_OPTIONS = builder.build();
}
@Bean
public RestHighLevelClient esRestClient(){
RestClientBuilder builder = RestClient.builder(new HttpHost("172.1.11.10", 9200, "http"));
RestHighLevelClient client = new RestHighLevelClient(builder);
// RestHighLevelClient client = new RestHighLevelClient(
// RestClient.builder(
// new HttpHost("172.1.11.10", 9200, "http")));
return client;
}
}5. 测试保存数据
参考es官网地址:Index API | Java REST Client [7.17] | Elastic
请求es执行保存或查询等操作有两种方式:
-
同步执行(Synchronous execution):client.search(searchRequest, RequestOptions.DEFAULT);
-
异步执行(Asynchronous execution):client.searchAsync(searchRequest, RequestOptions.DEFAULT, listener);
执行方式分为同步和异步,异步比同步多了一个监听,具体可参考官方文档。
@SpringBootTest
class GulimallSearchApplicationTests {
@Resource
private RestHighLevelClient restHighLevelClient;
/**
* 测试存储数据到es
* 也可以更新
*/
@Test
void indexData() throws IOException {
// 索引
IndexRequest indexRequest = new IndexRequest("users");
indexRequest.id("1"); // 文档id
// 文档 构造json数据
User user = new User();
user.setUserName("吴磊");
user.setAge(20);
user.setGender("男");
String jsonString = JSON.toJSONString(user);
// 要保存的内容
indexRequest.source(jsonString, XContentType.JSON);
// 执行创建索引和保存数据
IndexResponse index = restHighLevelClient.index(indexRequest, GulimallElasticsearchConfig.COMMON_OPTIONS);
System.out.println(index);
}
@Data
class User{
private String userName;
private Integer age;
private String gender;
}
}在 kibana 中输入以下uri进行查询存储的数据:
GET users/_search6. 测试复杂检索数据
#按照年龄聚合,并请求这些年龄段的这些人的平均薪资
@SpringBootTest
class GulimallSearchApplicationTests {
@Resource
private RestHighLevelClient restHighLevelClient;
@Data
public static class Account {
private int account_number;
private int balance;
private String firstname;
private String lastname;
private int age;
private String gender;
private String address;
private String employer;
private String email;
private String city;
private String state;
}
@Test
void searchData() throws IOException {
// 1. 创建检索请求
SearchRequest searchRequest = new SearchRequest();
// 指定索引
searchRequest.indices("bank");
// 指定DSL检索条件
SearchSourceBuilder searchSourceBuilder = new SearchSourceBuilder();
// 构造检索条件
//searchSourceBuilder.query();
//searchSourceBuilder.from();
//searchSourceBuilder.size();
//searchSourceBuilder.aggregation();
// 1.1 查询所有
searchSourceBuilder.query(QueryBuilders.matchAllQuery());
// 1.2 根据年龄进行聚合
TermsAggregationBuilder termsAggregationBuilder = AggregationBuilders.terms("ageGroup").field("age").size(100);
AvgAggregationBuilder avgAggregationBuilder = AggregationBuilders.avg("balanceAvg").field("balance");
// 1.3 这些年龄段的平均薪资
termsAggregationBuilder.subAggregation(avgAggregationBuilder);
searchSourceBuilder.aggregation(termsAggregationBuilder);
// 检索条件
System.out.println("检索条件:"+searchSourceBuilder.toString());
searchRequest.source(searchSourceBuilder);
// 2. 执行检索
SearchResponse searchResponse = restHighLevelClient.search(searchRequest, GulimallElasticsearchConfig.COMMON_OPTIONS);
// 3. 分析结果
System.out.println(searchResponse.toString());
// 3.1 获取所有查到的数据
SearchHits hits = searchResponse.getHits();
SearchHit[] searchHits = hits.getHits();
for (SearchHit hit : searchHits) {
String sourceAsString = hit.getSourceAsString();
Account account = JSON.parseObject(sourceAsString, Account.class);
System.out.println("account:"+account);
}
// 3.2 获取检索到的分析信息
Aggregations aggregations = searchResponse.getAggregations();
Terms ageGroup = aggregations.get("ageGroup");
for (Terms.Bucket bucket : ageGroup.getBuckets()) {
String keyAsString = bucket.getKeyAsString();
long docCount = bucket.getDocCount();
Avg balanceAvg = bucket.getAggregations().get("balanceAvg");
double value = balanceAvg.getValue();
System.out.println("年龄:"+keyAsString+"数量:"+docCount+"平均薪资:"+value);
}
}
}1.6 附录-docker安装nginx
1. 下载镜像
docker pull nginx:1.18.02. 创建实例并启动
# 随便启动一个nginx实例,只是为了复制出配置
docker run -p 80:80 --name nginx -d nginx:1.18.0
# 将容器内的配置文件拷贝到当前目录/root/docker
docker container cp nginx:/etc/nginx .
# 修改文件名称 将 nginx 修改为 conf
mv nginx conf
# 将 conf 移动到/root/docker/nginx 下
mkdir nginx
mv conf nginx/
# 删除随便创建的nginx实例
docker stop nginx
docker rm 容器ID
# 进入 /root/docker/nginx下创建文件夹logs和html
mkdir logs html
# 创建nginx实例并运行
docker run --restart=always -p 80:80 --name nginx --privileged=true \
-v /root/docker/nginx/html:/usr/share/nginx/html \
-v /root/docker/nginx/logs:/var/log/nginx \
-v /root/docker/nginx/conf:/etc/nginx \
-d nginx:1.18.02 商品上架
2.1 sku在es中存储模型分析
ES在内存中,所以在检索中优于mysql。ES也支持集群,数据分片存储。

需求:

上架的商品才可以在网站展示。
上架的商品需要可以被检索。
分析sku在es中如何存储
商品mapping

分析:商品上架在es中是存sku还是spu?

1)检索的时候输入名字,是需要按照sku的title进行全文检索的
2)检素使用商品规格,规格是spu的公共属性,每个spu是一样的
3)按照分类id进去的都是直接列出spu的,还可以切换。
4〕我们如果将sku的全量信息保存到es中(包括spu属性〕就太多字段了

方案1:
{
    skuId:1
    spuId:11
    skyTitile:华为xx
    price:999
    saleCount:99
    attr:[
        {尺寸:5},
        {CPU:高通945},
        {分辨率:全高清}
	]
缺点:如果每个sku都存储规格参数(如尺寸),会有冗余存储,因为每个spu对应的sku的规格参数都一样


方案2:
sku索引
{
    spuId:1
    skuId:11
}
attr索引
{
    skuId:11
    attr:[
        {尺寸:5},
        {CPU:高通945},
        {分辨率:全高清}
	]
}
先找到4000个符合要求的spu,再根据4000个spu查询对应的属性,封装了4000个id,long 8B*4000=32000B=32KB
1K个人检索,就是32MB


结论:如果将规格参数单独建立索引,会出现检索时出现大量数据传输的问题,会引起网络网络
因此选用方案1,以空间换时间
// 建立product的索引,并指定映射
// 数据模型,如下:
PUT product
{
"mappings": {
"properties": {
"skuId": {
"type": "long"
},
"spuId": {
"type": "keyword"
},
"skuTitle": {
"type": "text",
"analyzer": "ik_smart"
},
"skuPrice": {
"type": "keyword"
},
"skuImg": {
"type": "keyword",
"index": false,
"doc_values": false
},
"saleCount": {
"type": "long"
},
"hasStock": {
"type": "boolean"
},
"hotScore": {
"type": "long"
},
"brandId": {
"type": "long"
},
"catalogId": {
"type": "long"
},
"brandName": {
"type": "keyword",
"index": false,
"doc_values": false
},
"brandImg": {
"type": "keyword",
"index": false,
"doc_values": false
},
"catalogName": {
"type": "keyword",
"index": false,
"doc_values": false
},
"attrs": {
"type": "nested",
"properties": {
"attrId": {
"type": "long"
},
"attrName": {
"type": "keyword",
"index": false,
"doc_values": false
},
"attrValue": {
"type": "keyword"
}
}
}
}
}
}冗余存储的字段不用被检索index:false,也不用聚合doc_values:false。
mapping参数解释:
-
index:默认为true,如果是false ,表示该字段不会被索引,但是检索结果里面有,但字段本身不能当做检索条件。
-
doc_values:默认为true,设置成 false ,表示不能做排序、聚合以及脚本操作,这样更节省磁盘空间。还可以通过设定doc_values为true,index为false 来让字段不能被检索但是可以用于排序、聚合以及脚本操作。
2.2 nested 数据类型场景
如果需要索引对象数组并维护数组中每个对象的独立性,则应该使用嵌套数据类型而不是对象数据类型。在内部,嵌套对象将数组中的每个对象索引为单独的隐藏文档,这意味着可以使用嵌套查询独立地查询每个嵌套对象。
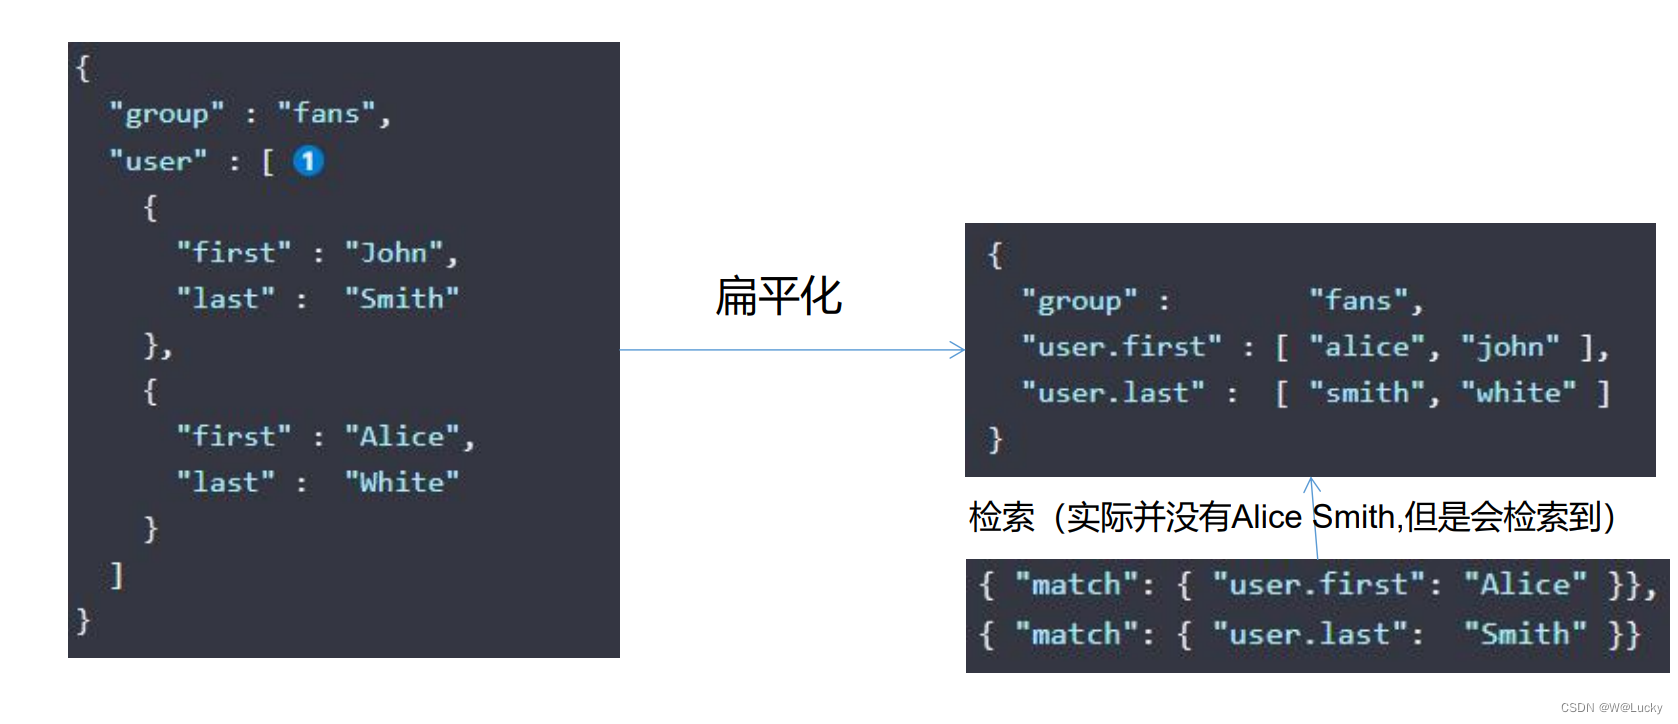
"type":"nested" ,因为是内部的属性进行检索。数组类型的对象如果不是nested类型,就会被扁平化处理,对象的每个属性会被分别存到一起,如下:
"user.first":["alice","john"]
"user.last":["smith","white"]
这种存储方式,可能会检索到不存在的组合{"first":"Alice","last":"Smith"},这样是错误的。
数组的扁平化处理会使检索能检索到本身不存在的,为了解决这个问题,就采用了嵌入式属性,数组里是对象时用嵌入式属性(不是对象无需用嵌入式属性)
nested官网介绍:Nested datatype | Elasticsearch Guide [7.4] | Elastic
举例:
// 创建my_index索引不指定user数组为内嵌
// 步骤一:
PUT my_index/_doc/1
{
  "group" : "fans",
  "user" : [
    {
      "first" : "John",
      "last" :  "Smith"
    },
    {
      "first" : "Alice",
      "last" :  "White"
    }
  ]
}
// 步骤二:理论上查不到数据,但可以查询到数据
GET my_index/_search
{
  "query": {
    "bool": {
      "must": [
        {
          "match": {
            "user.first": "Alice"
          }
        },
        {
          "match": {
            "user.last": "Smith"
          }
        }
      ]
    }
  }
}
// 指定user对象数组类型为内嵌
PUT my_index
{
"mappings": {
"properties": {
"user":{
"type": "nested"
}
}
}
}
// 重复以上步骤一和步骤二,其中步骤二查询不到数据的2.3 商品上架
商品上架:
(1)请求方式 post,请求url为/product/spuinfo/{spuId}/up;
(2)发送远程调用,在gulimall-ware系统查询是否有库存;
(3)查询当前sku的所有可以被用来检索的规格属性
(4)上架商品的相关数据发送给es(gulimall-search)保存;
(5)修改上架商品(当前Spu)的状态。
1. 商品上架需要在es中保存spu的信息,并更新spu的状态,SpuInfoEntity与索引的数据模型并不对应,所以我们要建立专门的to进行数据传输,在gulimall-common模块下的com.wen.common.to.es包下:
@Data
public class SkuEsModel {
    private Long skuId;
    private Long spuId;
    private String skuTitle;
    private BigDecimal skuPrice;
    private String skuImg;
    private Long saleCount;
    private boolean hasStock;
    private Long hotScore;
    private Long brandId;
    private Long catalogId;
    private String brandName;
    private String brandImg;
    private String catalogName;
    private List<Attr> attrs;

    @Data
    public static class Attr{
        private Long attrId;
        private String attrName;
        private String attrValue;
    }
}
2. 在gulimall-ware服务里查询是否有库存:
@RestController
@RequestMapping("ware/waresku")
public class WareSkuController {
    @Autowired
    private WareSkuService wareSkuService;

    @PostMapping("/hasstock")
    public R getSkusHasStock(@RequestBody List<Long> skuIds){
        // sku_id, stock
        List<SkuHasStockVo> vos = wareSkuService.getSkusHasStock(skuIds);
        R ok = R.ok();
        ok.setData(vos);
        return ok;
    }
}
public interface WareSkuService extends IService<WareSkuEntity> {
...
List<SkuHasStockVo> getSkusHasStock(List<Long> skuIds);
}@Service("wareSkuService")
public class WareSkuServiceImpl extends ServiceImpl<WareSkuDao, WareSkuEntity> implements WareSkuService {
@Resource
private ProductFeignService productFeignService;
...
@Override
public List<SkuHasStockVo> getSkusHasStock(List<Long> skuIds) {
List<SkuHasStockVo> collect = skuIds.stream().map(skuId -> {
SkuHasStockVo skuHasStockVo = new SkuHasStockVo();
// 查询是否有库存 = (库存数-锁定库存)> 0
Long count = this.baseMapper.getSkuStock(skuId);
skuHasStockVo.setSkuId(skuId);
skuHasStockVo.setHasStock(count==null?false:count > 0);
return skuHasStockVo;
}).collect(Collectors.toList());
return collect;
}
}3. 上架的商品保存在gulimall-search服务,保存在es中:
在gulimall-common模块,异常枚举类 BizCodeEnum 里添加商品上架异常状态码和异常信息
public enum BizCodeEnum {
    UNKNOW_EXCEPTION(10000,"系统未知异常"),
    VAILD_EXCEPTION(10001,"参数格式校验异常"),
    PRODUCT_UP_EXCEPTION(11000,"商品上架异常");
    private int code;
    private String msg;

    BizCodeEnum(int code, String msg){
        this.code = code;
        this.msg = msg;
    }

    public int getCode() {
        return code;
    }

    public String getMsg() {
        return msg;
    }
}
@Slf4j
@RequestMapping("/search/save")
@RestController
public class ElasticSaveController {
@Resource
private ProductSaveService productSaveService;
@PostMapping("/product")
public R productStatusUp(@RequestBody List<SkuEsModel> skuEsModels){
boolean b = false;
try {
b = productSaveService.productStatusUp(skuEsModels);
} catch (IOException e) {
log.error("商品上架错误:{}",e);
return R.error(BizCodeEnum.PRODUCT_UP_EXCEPTION.getCode(), BizCodeEnum.PRODUCT_UP_EXCEPTION.getMsg());
}
if(!b) {
return R.ok();
}else {
return R.error(BizCodeEnum.PRODUCT_UP_EXCEPTION.getCode(), BizCodeEnum.PRODUCT_UP_EXCEPTION.getMsg());
}
}
}public interface ProductSaveService {
boolean productStatusUp(List<SkuEsModel> skuEsModels) throws IOException;
}@Service
@Slf4j
public class ProductSaveServiceImpl implements ProductSaveService {
@Resource
private RestHighLevelClient restHighLevelClient;
@Override
public boolean productStatusUp(List<SkuEsModel> skuEsModels) throws IOException {
// 1. 给es中创建索引并建立映射关系
// 2. 给es中保存这些数据,使用批量保存
// BulkRequest RequestOptions
BulkRequest bulkRequest = new BulkRequest();
for (SkuEsModel skuEsModel : skuEsModels) {
// 构造保存请求
IndexRequest indexRequest = new IndexRequest(EsConstant.PRODUCT_INDEX);
// 设置文档id
indexRequest.id(skuEsModel.getSkuId().toString());
String s = JSON.toJSONString(skuEsModel);
indexRequest.source(s, XContentType.JSON);
bulkRequest.add(indexRequest);
}
// 执行批量保存文档数据
BulkResponse bulkResponse = restHighLevelClient.bulk(bulkRequest, GulimallElasticsearchConfig.COMMON_OPTIONS);
// TODO 1.如果批量错误
boolean b = bulkResponse.hasFailures();
if(b) {
List<String> collect = Arrays.stream(bulkResponse.getItems()).map(item -> {
// 返回文档id
return item.getId();
}).collect(Collectors.toList());
log.error("商品上架错误:{}", collect);
}
return b;
}
}es常量类:com.wen.gulimall.search.constant包下
public class EsConstant {

    public static final String PRODUCT_INDEX = "product";
}
4. 商品上架
@RestController
@RequestMapping("product/spuinfo")
public class SpuInfoController {
    @Autowired
    private SpuInfoService spuInfoService;

    // /product/spuinfo/{spuId}/up
    @PostMapping("/{spuId}/up")
    public R spuUp(@PathVariable Long spuId){
        spuInfoService.up(spuId);
        return R.ok();
    }
}
public interface SpuInfoService extends IService<SpuInfoEntity> {
...
/**
* 商品上架
* @param spuId
*/
void up(Long spuId);
}远程调用服务接口:
/**
 * @author W
 * @createDate 2023/5/12 9:33
 * @description 远程调用仓库服务
 */
@FeignClient("gulimall-ware")
public interface WareFeignService {
    /**
     * 1. R设计的时候可以加上泛型
     * 2. 直接返回想要的结果
     * 3. 自己封装解析结果
     * @param skuIds
     * @return
     */
    @PostMapping("/ware/waresku/hasstock")
    public R getSkusHasStock(@RequestBody List<Long> skuIds);
}
/**
* @author W
* @createDate 2023/5/12 15:43
* @description 远程调用es服务
*/
@FeignClient("gulimall-search")
public interface SearchFeignService {
@PostMapping("/search/save/product")
public R productStatusUp(@RequestBody List<SkuEsModel> skuEsModels);
}查询可以被检索的规格属性id:
public interface AttrService extends IService<AttrEntity> {

    ...

    List<Long> selectSearchAttrIds(List<Long> attrIds);
}
@Service("attrService")
public class AttrServiceImpl extends ServiceImpl<AttrDao, AttrEntity> implements AttrService {
@Resource
private AttrAttrgroupRelationDao attrAttrgroupRelationDao;
@Resource
private AttrGroupDao attrGroupDao;
@Resource
private CategoryDao categoryDao;
@Resource
private CategoryService categoryService;
...
/**
* 可以被检索的规格属性id集合
* @param attrIds
* @return
*/
@Override
public List<Long> selectSearchAttrIds(List<Long> attrIds) {
return this.baseMapper.selectSearchAttrIds(attrIds);
}
}@Mapper
public interface AttrDao extends BaseMapper<AttrEntity> {
List<Long> selectSearchAttrIds(List<Long> attrIds);
}
<?xml version="1.0" encoding="UTF-8"?>
<!DOCTYPE mapper PUBLIC "-//mybatis.org//DTD Mapper 3.0//EN" "http://mybatis.org/dtd/mybatis-3-mapper.dtd">

<mapper namespace="com.wen.gulimall.product.dao.AttrDao">

	<!-- 可根据自己的需求,是否要使用 -->
    <resultMap type="com.wen.gulimall.product.entity.AttrEntity" id="attrMap">
        <result property="attrId" column="attr_id"/>
        <result property="attrName" column="attr_name"/>
        <result property="searchType" column="search_type"/>
        <result property="icon" column="icon"/>
        <result property="valueSelect" column="value_select"/>
        <result property="attrType" column="attr_type"/>
        <result property="enable" column="enable"/>
        <result property="catelogId" column="catelog_id"/>
        <result property="showDesc" column="show_desc"/>
        <result property="valueType" column="value_type"/>
    </resultMap>
    <select id="selectSearchAttrIds" resultType="java.lang.Long">
        SELECT * FROM pms_attr WHERE attr_id IN
         <foreach collection="attrIds" item="id" separator="," open="(" close=")">
             #{id}
         </foreach>
         AND search_type = 1
    </select>


</mapper>
商品上架service层:
@Service("spuInfoService")
public class SpuInfoServiceImpl extends ServiceImpl<SpuInfoDao, SpuInfoEntity> implements SpuInfoService {
    @Resource
    private SpuInfoDescService spuInfoDescService;
    @Resource
    private SpuImagesService spuImagesService;
    @Resource
    private AttrService attrService;
    @Resource
    private ProductAttrValueService productAttrValueService;
    @Resource
    private SkuInfoService skuInfoService;
    @Resource
    private SkuImagesService skuImagesService;
    @Resource
    private SkuSaleAttrValueService skuSaleAttrValueService;
    @Resource
    private CouponFeignService couponFeignService;
    @Resource
    private BrandService brandService;
    @Resource
    private CategoryService categoryService;
    @Resource
    private WareFeignService wareFeignService;
    @Resource
    private SearchFeignService searchFeignService;

    ...

    /**
     * 商品上架
     * @param spuId
     */
    @Override
    public void up(Long spuId) {
        // 1. 根据spuId查询出所有对应的sku信息,品牌名称
        List<SkuInfoEntity> skus = skuInfoService.getSkusBySpuId(spuId);
        List<Long> skuIdList = skus.stream().map(SkuInfoEntity::getSkuId).collect(Collectors.toList());

        // TODO 4. 查询当前sku的所有可以被用来检索的规格属性
        List<ProductAttrValueEntity> baseAttrList = productAttrValueService.baseAttrListForSpu(spuId);
        List<Long> attrIds = baseAttrList.stream().map(item -> item.getAttrId()).collect(Collectors.toList());

        // 可以被检索的规格属性id
        List<Long> searchAttrIds = attrService.selectSearchAttrIds(attrIds);
        Set<Long> ids = new HashSet<>(searchAttrIds);
        // 从baseAttrList过滤出可以检索的规格属性
        List<SkuEsModel.Attr> attrsList = baseAttrList.stream().filter(item -> ids.contains(item.getAttrId()))
                .map(item -> {
                    SkuEsModel.Attr attr = new SkuEsModel.Attr();
                    BeanUtils.copyProperties(item, attr);
                    return attr;
                }).collect(Collectors.toList());

        Map<Long, Boolean> stockMap = null;
        try {
            // TODO 1. 发送远程调用,库存系统查询是否有库存  boolean hasStock
            R skusHasStock = wareFeignService.getSkusHasStock(skuIdList);
            stockMap = skusHasStock.getData(new TypeReference<List<SkuHasStockVo>>(){}).stream().collect(Collectors.toMap(SkuHasStockVo::getSkuId, item -> item.getHasStock()));
        } catch (Exception e) {
           log.error("查询库存服务异常,原因:{}",e);
        }

        // 2. 封装每个sku信息
        Map<Long, Boolean> finalStockMap = stockMap;
        List<SkuEsModel> upProducts = skus.stream().map(sku -> {
            // 组装需要的数据
            SkuEsModel skuEsModel = new SkuEsModel();
            BeanUtils.copyProperties(sku,skuEsModel);
            // skuPrice,skuImg
            skuEsModel.setSkuPrice(sku.getPrice());
            skuEsModel.setSkuImg(sku.getSkuDefaultImg());
            // hasStock,hotScore
            // 设置库存信息
            skuEsModel.setHasStock(finalStockMap != null?finalStockMap.get(sku.getSkuId()):true);

            // TODO 2.热度评分
            skuEsModel.setHotScore(0L);
            // 3. 查询品牌和分类的名称
            BrandEntity brand = brandService.getById(skuEsModel.getBrandId());
            skuEsModel.setBrandName(brand.getName());
            skuEsModel.setBrandImg(brand.getLogo());
            CategoryEntity category = categoryService.getById(skuEsModel.getCatalogId());
            skuEsModel.setCatalogName(category.getName());

            // 设置检索属性
            skuEsModel.setAttrs(attrsList);
            return skuEsModel;
        }).collect(Collectors.toList());

        // TODO 5. 将数据发送给es进行保存
        R r = searchFeignService.productStatusUp(upProducts);
        if(r.getCode() == 0){
            // 远程调用成功,
            // TODO 6. 修改当前Spu的状态
            this.baseMapper.updateSpuInfoStatus(spuId, ProductConstant.SpuEnum.SPU_UP.getCode());
        }else {
            // 远程调用失败
            // TODO 7. 重复调用?接口幂等性?重试机制?
            //
        }
    }

}
3 商城系统首页
3.1 首页-整合 thymeleaf 渲染首页
不在使用前后端分离,使用thymeleaf。

nginx通过反向代理,将数据转发到网关,网关在路由到各个服务。

页面放在服务中,静态资源(js/css/img)可以放到nginx中,做到动静分离。
(1)在gulimall-product模块引入thymeleaf依赖:
<!-- 模板引擎 :thymeleaf -->
<dependency>
<groupId>org.springframework.boot</groupId>
<artifactId>spring-boot-starter-thymeleaf</artifactId>
</dependency>
(2)html\首页资源\index放到gulimall-product下的static文件夹,index.html放在templates下。
(3)修改gulimall-product的application.yml,关闭thymeleaf缓存,便于开发实时看到更新
thymeleaf:
cache: false
(4)将gulimall-product的包名controller改为app,表示用于手机端或app端;添加web包,用来存储thymeleaf相关的controller。
(5)重启gulimall-product,访问http://localhost:10000可以看到商城首页效果图。
静态资源也是可以访问的http://localhost:10000/index/css/GL.css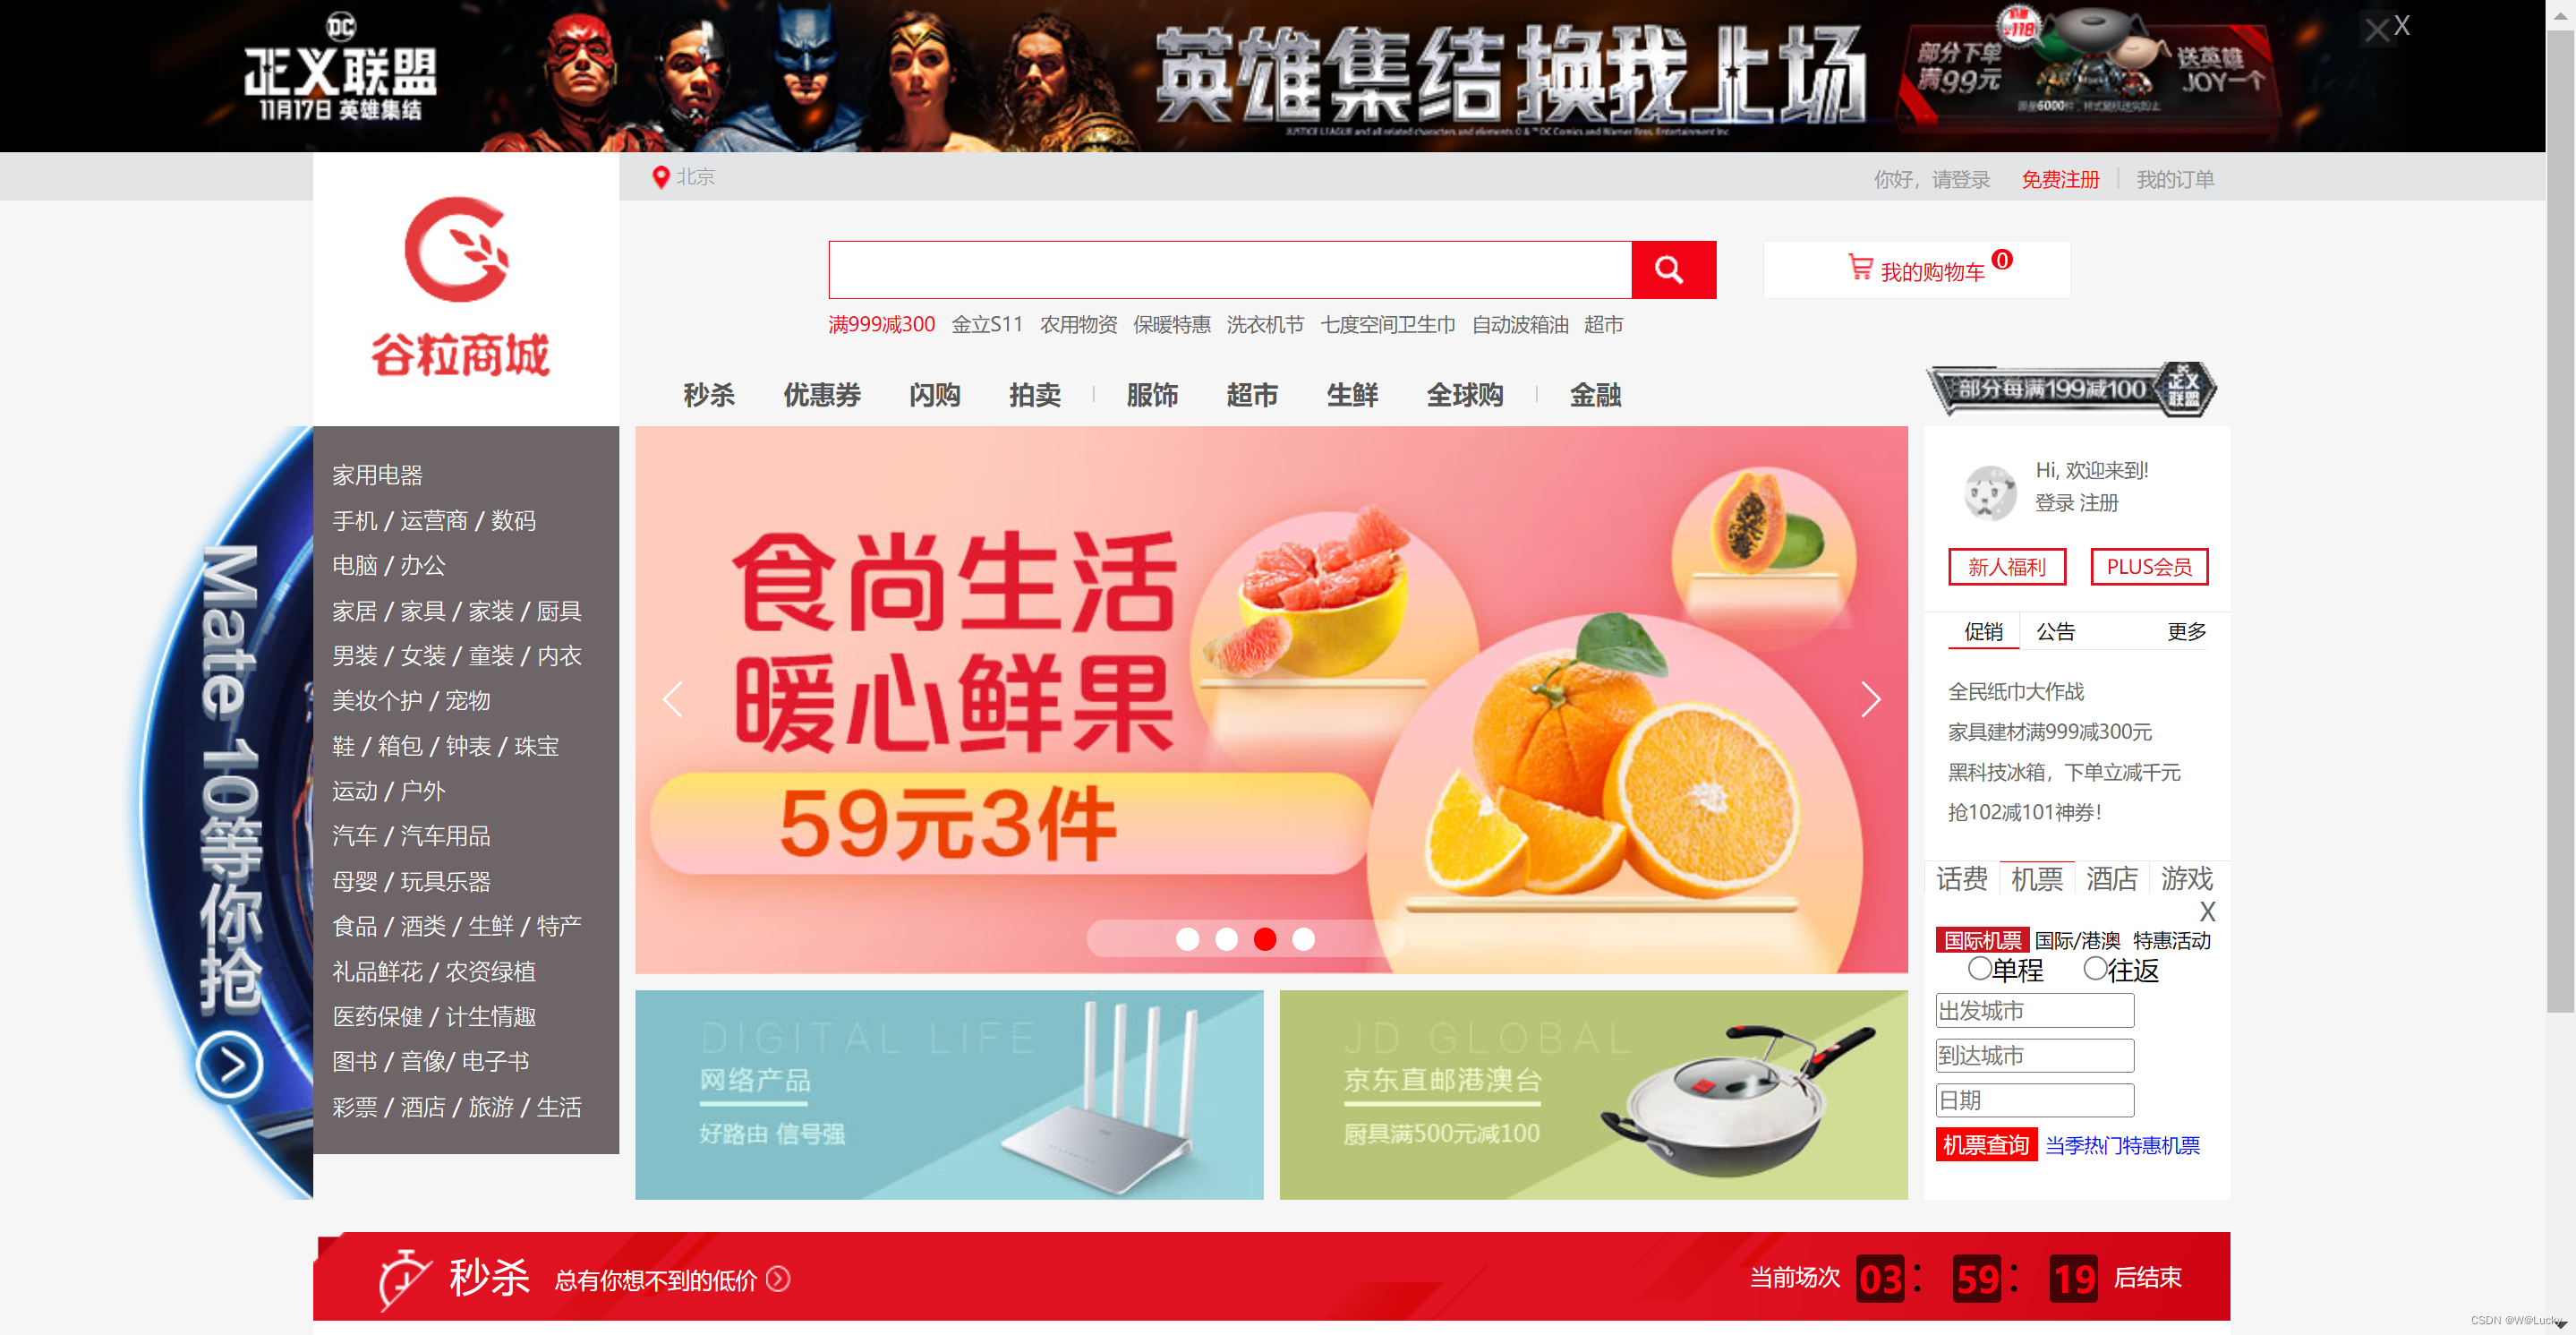
3.2 首页-整合dev-tools渲染一级分类数据
渲染一级分类菜单:
com.wen.gulimall.product.web.IndexController
parent_cid=0或者cat_level=1
/**
* @author W
* @createDate 2023/5/18 17:19
* @description 商城系统首页
*/
@Controller
public class IndexController {
@Resource
private CategoryService categoryService;
@GetMapping({"/","/index.html"})
public String indexPage(Model model){
// 返回三级分类所有的一级分类
List<CategoryEntity> categoryEntities = categoryService.getLevelOneCategory();
model.addAttribute("categorys",categoryEntities);
// 视图解析器进行拼串
// classpath:/templates/+返回值+.html
return "index";
}
}
public interface CategoryService extends IService<CategoryEntity> {

    ...

    List<CategoryEntity> getLevelOneCategory();
}
@Service("categoryService")
public class CategoryServiceImpl extends ServiceImpl<CategoryDao, CategoryEntity> implements CategoryService {
@Resource
private CategoryBrandRelationService categoryBrandRelationService;
...
/**
* 查询一级分类
* parent_cid=0或者cat_level=1
* @return
*/
@Override
public List<CategoryEntity> getLevelOneCategory() {
//
List<CategoryEntity> categoryEntities = this.baseMapper.selectList(new QueryWrapper<CategoryEntity>().eq("parent_cid", 0));
return categoryEntities;
}
}修改首页:
(1)首页使用thymeleaf,在index中添加thymeleaf的名声空间,在html标间上加入xmlns:th="http://www.thymeleaf.org";
<html lang="en" xmlns:th="http://www.thymeleaf.org">
(2)页面修改不重启服务器实时更新;
1)在gulimall-product中引入dev-tools
<dependency>
<groupId>org.springframework.boot</groupId>
<artifactId>spring-boot-devtools</artifactId>
<optional>true</optional>
</dependency>
2)修改页面,如果刷新不起作用可以对index.html重新编译,按ctrl+shift+f9,前提是要关闭thymeleaf的缓存,不然也看不到首页修改效果。
(3)遍历IndexController 传过来的categorys,循环遍历,展示一级数据。
<ul>
<!--/*@thymesVar id="categorys" type="com"*/-->
<li th:each="category : ${categorys}">
<a href="#" class="header_main_left_a" ctg-data="3" th:attr="ctg-data=${category.catId}"><b th:text="${category.name}">家用电器</b></a>
</li>
</ul>
thymeleaf参考文档:https://www.thymeleaf.org/doc/tutorials/3.1/usingthymeleaf.htmlindex.html
<!DOCTYPE html>
<html lang="en" xmlns:th="http://www.thymeleaf.org">
<head>
<meta charset="UTF-8">
<meta name="viewport" content="width=device-width, initial-scale=1.0">
<meta http-equiv="X-UA-Compatible" content="ie=edge">
<title>Document</title>
<link rel="stylesheet" href="index/css/swiper-3.4.2.min.css">
<link rel="stylesheet" href="index/css/GL.css">
<script src="index/js/jquery-3.1.1.min.js" type="text/javascript" charset="utf-8"></script>
<script src="index/js/swiper-3.4.2.jquery.min.js" type="text/javascript" charset="utf-8"></script>
<script src="index/js/swiper-3.4.2.min.js"></script>
</head>
<body>
<div class="top_find">
<div class="top_find_son">
<img src="index/img/top_find_logo.png" alt="">
<div class="input_find">
<input type="text" placeholder="卸妆水" />
<span style="background: url(../static/index/img/img_12.png) 0 -1px;"></span>
<a href="#"><img src="index/img/img_09.png" /></a>
</div>
</div>
</div>
<ul class="left_floor">
<li class="left_floor_xiang">享品质</li>
<li class="left_floor_fu">服饰美妆</li>
<li class="left_floor_jia">家电手机</li>
<li class="left_floor_dian">电脑数码</li>
<li class="left_floor_3C">3C运动</li>
<li class="left_floor_ai">爱吃</li>
<li class="left_floor_mu">母婴家居</li>
<li class="left_floor_tu">图书汽车</li>
<li class="left_floor_you">游戏金融</li>
<li class="left_floor_lv">旅行健康</li>
<li class="left_floor_hai">还没逛够</li>
<li class="left_floor_ding">顶部</li>
</ul>
<header>
<div class="head">
<a href="#"><img src="index/img/img_01.png" /></a>
<p>X</p>
</div>
<!--头部-->
<div class="header_head">
<div class="header_head_box">
<a href="#" class="img"><img src="index/img/logo.jpg" /></a>
<b class="header_head_p">
<a href="#">
<img src="index/img/img_05.png" style="border-radius: 50%;"/>
<!--<span class="glyphicon glyphicon-map-marker"></span>-->
北京</a>
<div class="header_head_p_cs">
<a href="#" style="background: #C81623;color: #fff;">北京</a>
<a href="#">上海</a>
<a href="#">天津</a>
<a href="#">重庆</a>
<a href="#">河北</a>
<a href="#">山西</a>
<a href="#">河南</a>
<a href="#">辽宁</a>
<a href="#">吉林</a>
<a href="#">黑龙江</a>
<a href="#">内蒙古</a>
<a href="#">江苏</a>
<a href="#">山东</a>
<a href="#">安徽</a>
<a href="#">浙江</a>
<a href="#">福建</a>
<a href="#">湖北</a>
<a href="#">湖南</a>
<a href="#">广东</a>
<a href="#">广西</a>
<a href="#">江西</a>
<a href="#">四川</a>
<a href="#">海南</a>
<a href="#">贵州</a>
<a href="#">云南</a>
<a href="#">西藏</a>
<a href="#">陕西</a>
<a href="#">甘肃</a>
<a href="#">青海</a>
<a href="#">宁夏</a>
<a href="#">新疆</a>
<a href="#">港澳</a>
<a href="#">台湾</a>
<a href="#">钓鱼岛</a>
<a href="#">海外</a>
</div>
</b>
<ul>
<li>
<a href="/登录页面\index.html">你好,请登录</a>
</li>
<li>
<a href="/注册页面\index.html" class="li_2">免费注册</a>
</li>
<span>|</span>
<li>
<a href="#">我的订单</a>
</li>
</ul>
</div>
</div>
<!--搜索导航-->
<div class="header_sous">
<div class="header_form">
<input id="searchText" type="text" placeholder="" />
<span style="background: url(../static/index/img/img_12.png) 0 -1px;"></span>
<!--<button><i class="glyphicon"></i></button>-->
<a href="#" ><img src="index/img/img_09.png" onclick="search()" /></a>
</div>
<div class="header_ico">
<div class="header_gw">
<img src="index/img/img_15.png" />
<span><a href="/购物车\One_JDshop.html">我的购物车</a></span>
<span>0</span>
</div>
<div class="header_ko">
<p>购物车中还没有商品,赶紧选购吧!</p>
</div>
</div>
<div class="header_form_nav">
<ul>
<li>
<a href="#" class="aaaaa">满999减300</a>
</li>
<li>
<a href="#">金立S11</a>
</li>
<li>
<a href="#">农用物资</a>
</li>
<li>
<a href="#">保暖特惠</a>
</li>
<li>
<a href="#">洗衣机节</a>
</li>
<li>
<a href="#">七度空间卫生巾</a>
</li>
<li>
<a href="#">自动波箱油</a>
</li>
<li>
<a href="#">超市</a>
</li>
</ul>
</div>
<nav>
<ul>
<li>
<a href="#">秒杀</a>
</li>
<li>
<a href="#">优惠券</a>
</li>
<li>
<a href="#">闪购</a>
</li>
<li>
<a href="#">拍卖</a>
</li>
</ul>
<div class="spacer">|</div>
<ul>
<li>
<a href="#">服饰</a>
</li>
<li>
<a href="#">超市</a>
</li>
<li>
<a href="#">生鲜</a>
</li>
<li>
<a href="#">全球购</a>
</li>
</ul>
<div class="spacer">|</div>
<ul>
<li>
<a href="#">金融</a>
</li>
</ul>
</nav>
<div class="right">
<a href="#"><img src="index/img/img_21.png" /></a>
</div>
</div>
<!--轮播主体内容-->
<div class="header_main">
<div class="header_banner">
<div class="header_main_left">
<ul>
<!--/*@thymesVar id="categorys" type="com"*/-->
<li th:each="category : ${categorys}">
<a href="#" class="header_main_left_a" ctg-data="3" th:attr="ctg-data=${category.catId}"><b th:text="${category.name}">家用电器</b></a>
</li>
</ul>
</div>
<div class="header_main_center">
<div class="swiper-container swiper1">
<div class="swiper-wrapper">
<div class="swiper-slide">
<a href="#"><img src="index/img/lunbo.png" /></a>
</div>
<div class="swiper-slide">
<a href="#"><img src="index/img/lunbo3.png" /></a>
</div>
<div class="swiper-slide">
<a href="#"><img src="index/img/lunbo6.png" /></a>
</div>
<div class="swiper-slide">
<a href="#"><img src="index/img/lunbo7.png" /></a>
</div>
</div>
<div class="swiper-pagination"></div>
<div class="swiper-button-next swiper-button-white"></div>
<div class="swiper-button-prev swiper-button-white"></div>
</div>
<div class="header_main_center_b">
<a href="#"><img src="index/img/5a13bf0bNe1606e58.jpg" /></a>
<a href="#"><img src="index/img/5a154759N5385d5d6.jpg" /></a>
</div>
</div>
<div class="header_main_right">
<div class="header_main_right_user">
<div class="user_info">
<div class="user_info_tou">
<a href="#"><img class="" src="index/img/touxiang.png"></a>
</div>
<div class="user_info_show">
<p class="">Hi, 欢迎来到!</p>
<p>
<a href="#" class="">登录</a>
<a href="#" class="">注册</a>
</p>
</div>
</div>
<div class="user_info_hide">
<a href="#">新人福利</a>
<a href="#">PLUS会员</a>
</div>
</div>
<div class="header_main_right_new">
<div class="header_new">
<div class="header_new_t">
<p class="active">
<a href="#">促销</a>
</p>
<p>
<a href="#">公告</a>
</p>
<a href="#">更多</a>
</div>
<div class="header_new_connter">
<div class="header_new_connter_1">
<ul>
<li>
<a href="#">全民纸巾大作战</a>
</li>
<li>
<a href="#">家具建材满999减300元</a>
</li>
<li>
<a href="#">黑科技冰箱,下单立减千元</a>
</li>
<li>
<a href="#">抢102减101神券!</a>
</li>
</ul>
</div>
<div class="header_new_connter_1" style="display: none;">
<ul>
<li>
<a href="#">关于召回普利司通(天津)轮胎有限公司2个规格乘用车轮胎的公告</a>
</li>
<li>
<a href="#">物流推出配送员统一外呼电话"95056”</a>
</li>
<li>
<a href="#">天府大件运营中心开仓公告</a>
</li>
<li>
<a href="#">大件物流“送装一体”服务全面升级!</a>
</li>
</ul>
</div>
</div>
</div>
</div>
<div class="header_main_right_ser">
<div class="ser_box">
<ul>
<li class="ser_box_item">
<a href="#">
<img src="index/img/huafei.png" />
<span>话费</span>
</a>
</li>
<li class="ser_box_item">
<a href="#">
<img src="index/img/jipiao.png" />
<span>机票</span>
</a>
</li>
<li class="ser_box_item">
<a href="#">
<img src="index/img/jiudian.png" />
<span>酒店</span>
</a>
</li>
<li class="ser_box_item">
<a href="#">
<img src="index/img/youxi.png" />
<span>游戏</span>
</a>
</li>
<li class="ser_box_item1">
<a href="#">
<img src="index/img/qiyegou.png" />
<span>企业购</span>
</a>
</li>
<li class="ser_box_item1">
<a href="#">
<img src="index/img/jiayouka.png" />
<span>加油卡</span>
</a>
</li>
<li class="ser_box_item1">
<a href="#">
<img src="index/img/dianyingpiao.png" />
<span>电影票</span>
</a>
</li>
<li class="ser_box_item1">
<a href="#">
<img src="index/img/huochepiao.png" style="height:20px;" />
<span>火车票</span>
</a>
</li>
<li class="ser_box_item1">
<a href="#">
<img src="index/img/zhongchou.png" />
<span>众筹</span>
</a>
</li>
<li class="ser_box_item1">
<a href="#">
<img src="index/img/licai.png" style="height:22px;" />
<span>理财</span>
</a>
</li>
<li class="ser_box_item1">
<a href="#">
<img src="index/img/lipinka.png" style="height:14px;" />
<span>礼品卡</span>
</a>
</li>
<li class="ser_box_item1">
<a href="#">
<img src="index/img/baitiao.png" style="height:20px;" />
<span>白条</span>
</a>
</li>
</ul>
<div class="ser_box_aaa">
<div class="ser_box_aaa_one">
<div class="ser_box_aaa_nav">
<ol>
<li class="active">
<a href="#">话费</a>
</li>
<li>
<a href="#">机票</a>
</li>
<li>
<a href="#">酒店</a>
</li>
<li>
<a href="#">游戏</a>
</li>
</ol>
<div class="ser_ol">
<div class="ser_ol_li">
<ul>
<div class="guanbi">X</div>
<a class="active">话费充值</a>
<a>流量充值</a>
<a>套餐变更</a>
<div class="ser_ol_div">
<p>号码<input type="text" /></p>
<p style="margin: 10px 0;">面值
<select name="">
<option value="">100元</option>
<option value="">20元</option>
<option value="">50元</option>
<option value="">10元</option>
<option value="">2元</option>
</select>
<span>¥98.0-¥100.0</span></p>
</div>
<button>快速充值</button>
<p class="p">抢99减50元话费</p>
</ul>
</div>
<div class="ser_ol_li">
<ul>
<div class="guanbi">X</div>
<a class="active">国际机票</a>
<a>国际/港澳</a>
<a>特惠活动</a>
<div class="ser_ol_div1">
<p>
<input type="radio" name="a" style="vertical-align:middle;" />单程
<input type="radio" name="a" style="vertical-align:middle;" />往返
</p>
<input type="text" placeholder="出发城市" />
<input type="text" placeholder="到达城市" />
<input type="text" placeholder="日期" />
</div>
<button>机票查询</button>
<span class="p">当季热门特惠机票</span>
</ul>
</div>
<div class="ser_ol_li">
<ul>
<div class="guanbi">X</div>
<a class="active" style="width: 50%;">国内港澳台</a>
<a style="width: 50%;">促销活动</a>
<div class="ser_ol_div1">
<input type="text" placeholder="出发城市" style="margin-top: 10px;" />
<input type="text" placeholder="到达城市" />
<input type="text" placeholder="日期" />
<input type="text" placeholder="酒店 商圈 地标" />
</div>
<button>酒店查询</button>
<span class="p">订酒店到</span>
</ul>
</div>
<div class="ser_ol_li">
<ul>
<div class="guanbi">X</div>
<a class="active">点卡</a>
<a>QQ</a>
<a>页游</a>
<div class="ser_ol_div1">
<input type="text" placeholder="游戏" style="margin-top: 15px;" />
<br />面值
<select name="" style="margin: 8px 0;">
<option value="">面值</option>
<option value="">面值</option>
<option value="">面值</option>
</select><span style="color: #C81623;">¥0.00</span>
<p>
<input type="radio" name="a" style="width: 15px;vertical-align:middle;" />直充
<input type="radio" name="a" style="width: 15px;vertical-align:middle;" />卡密
</p>
</div>
<button>快速充值</button>
<span class="p">吃鸡就要快人一步</span>
</ul>
</div>
</div>
</div>
</div>
</div>
</div>
</div>
</div>
</div>
<div class="header_banner1">
<a href="#" class="a">
<img src="index/img/5a1e5ce2N034ce344.png" class="aa" />
</a>
<div class="header_banner1_div">
<p>X</p>
</div>
</div>
</div>
</header>
<div class="section_second">
<!-- 第一层 -->
<div class="section_second_header">
<p class="section_second_header_img"></p>
<div class="section_second_header_left">
<p></p>
<span class="">秒杀</span>
<span>总有你想不到的低价</span>
<span>
</span>
</div>
<div class="section_second_header_right">
<p>当前场次</p>
<span class="section_second_header_right_hours">00</span>
<span class="section_second_header_right_mao">:</span>
<span class="section_second_header_right_minutes">00</span>
<span class="section_second_header_right_mao">:</span>
<span class="section_second_header_right_second">00</span>
<p>后结束</p>
</div>
</div>
<div class="section_second_list">
<div class="swiper-container swiper_section_second_list_left">
<div class="swiper-wrapper">
<div class="swiper-slide">
<ul>
<li>
<img src="index/img/section_second_list_img1.jpg" alt="">
<p>花王 (Merries) 妙而舒 纸尿裤 大号 L54片 尿不湿(9-14千克) (日本官方直采) 花王 (Merries) 妙而舒 纸尿裤 大号 L54片 尿不湿(9-14千</p>
<span>¥83.9</span><s>¥99.9</s>
</li>
<li>
<img src="index/img/section_second_list_img2.jpg" alt="">
<p>华为mate9 4GB+32GB版 月光银 移动联通电信4G手机 双卡</p>
<span>¥17.90</span><s>¥29.90</s>
</li>
<li>
<img src="index/img/section_second_list_img3.jpg" alt="">
<p>超能 植翠低泡洗衣液(鲜艳亮丽)2kg/袋装(新老包装随机</p>
<span>¥20.70</span><s>¥44.90</s>
</li>
<li>
<img src="index/img/section_second_list_img4.jpg" alt="">
<p>长城(GreatWall)红酒 特选5年橡木桶解百纳干红葡萄酒 整</p>
<span>¥399.00</span><s>¥599.00</s>
</li>
<li>
<img src="index/img/section_second_list_img5.jpg" alt="">
<p>惠普(HP)暗影精灵2代Pro 15.6英寸游戏笔记本电脑(i5-7300H</p>
<span>¥5999.00</span><s>¥6499.00</s>
</li>
</ul>
</div>
<div class="swiper-slide">
<ul>
<li>
<img src="index/img/section_second_list_img6.jpg" alt="">
<p>Apple iMac 21.5英寸一体机(2017新款四核Core i5 处理器/8GB内存/1TB/RP555显卡/4K屏 MNDY2CH/A) Apple iMac 21.5英寸一体机(2017新款四核Core i5 处理</p>
<span>¥9588.00</span><s>¥10288.00</s>
</li>
<li>
<img src="index/img/section_second_list_img7.jpg" alt="">
<p>中柏(Jumper)EZpad 4S Pro 10.6英寸二合一平板电脑(X5 z</p>
<span>¥848.00</span><s>¥899.00</s>
</li>
<li>
<img src="index/img/section_second_list_img8.jpg" alt="">
<p>飞利浦(PHILIPS)电动牙刷HX6761/03亮白型成人充电式声波震动牙刷粉色 飞利浦(PHILIPS)电动牙刷HX6761/03亮白型成人充电式声波
</p>
<span>¥379.00</span><s>¥698.00</s>
</li>
<li>
<img src="index/img/section_second_list_img9.jpg" alt="">
<p>美的(Midea) 258升 变频智能三门冰箱 一级能效 风冷无霜 中门</p>
<span>¥3088.00</span><s>¥3299.00</s>
</li>
<li>
<img src="index/img/section_second_list_img10.jpg" alt="">
<p>【第二件减50元】蒙羊 内蒙古羔羊羊肋排 2.4斤</p>
<span>¥99.90</span><s>¥199.00</s>
</li>
</ul>
</div>
</div>
<div class="swiper-button-prev second_list">
<p></p>
</div>
<div class="swiper-button-next second_list">
<p></p>
</div>
</div>
<ul class="section_second_list_right">
<li>
<img src="index/img/section_second_list_right_img.jpg" alt="">
</li>
<li>
<img src="index/img/section_second_list_right_img.png" alt="">
</li>
<div class="section_second_list_right_button">
<p class="section_second_list_right_button_active"></p>
<p></p>
</div>
</ul>
</div>
</div>
</body>
<script type="text/javascript">
function search() {
var keyword=$("#searchText").val()
window.location.href="http://search.gulimall.com/search.html?keyword="+keyword;
}
</script>
<script type="text/javascript" src="index/js/text.js"></script>
<script type="text/javascript" src="index/js/header.js"></script>
<script type="text/javascript" src="index/js/secend.js"></script>
<script type="text/javascript" src="index/js/zz.js"></script>
<script type="text/javascript" src="index/js/index.js"></script>
<script type="text/javascript" src="index/js/left,top.js"></script>
<script type="text/javascript" src="index/js/catalogLoader.js"></script>
</html>
效果图:
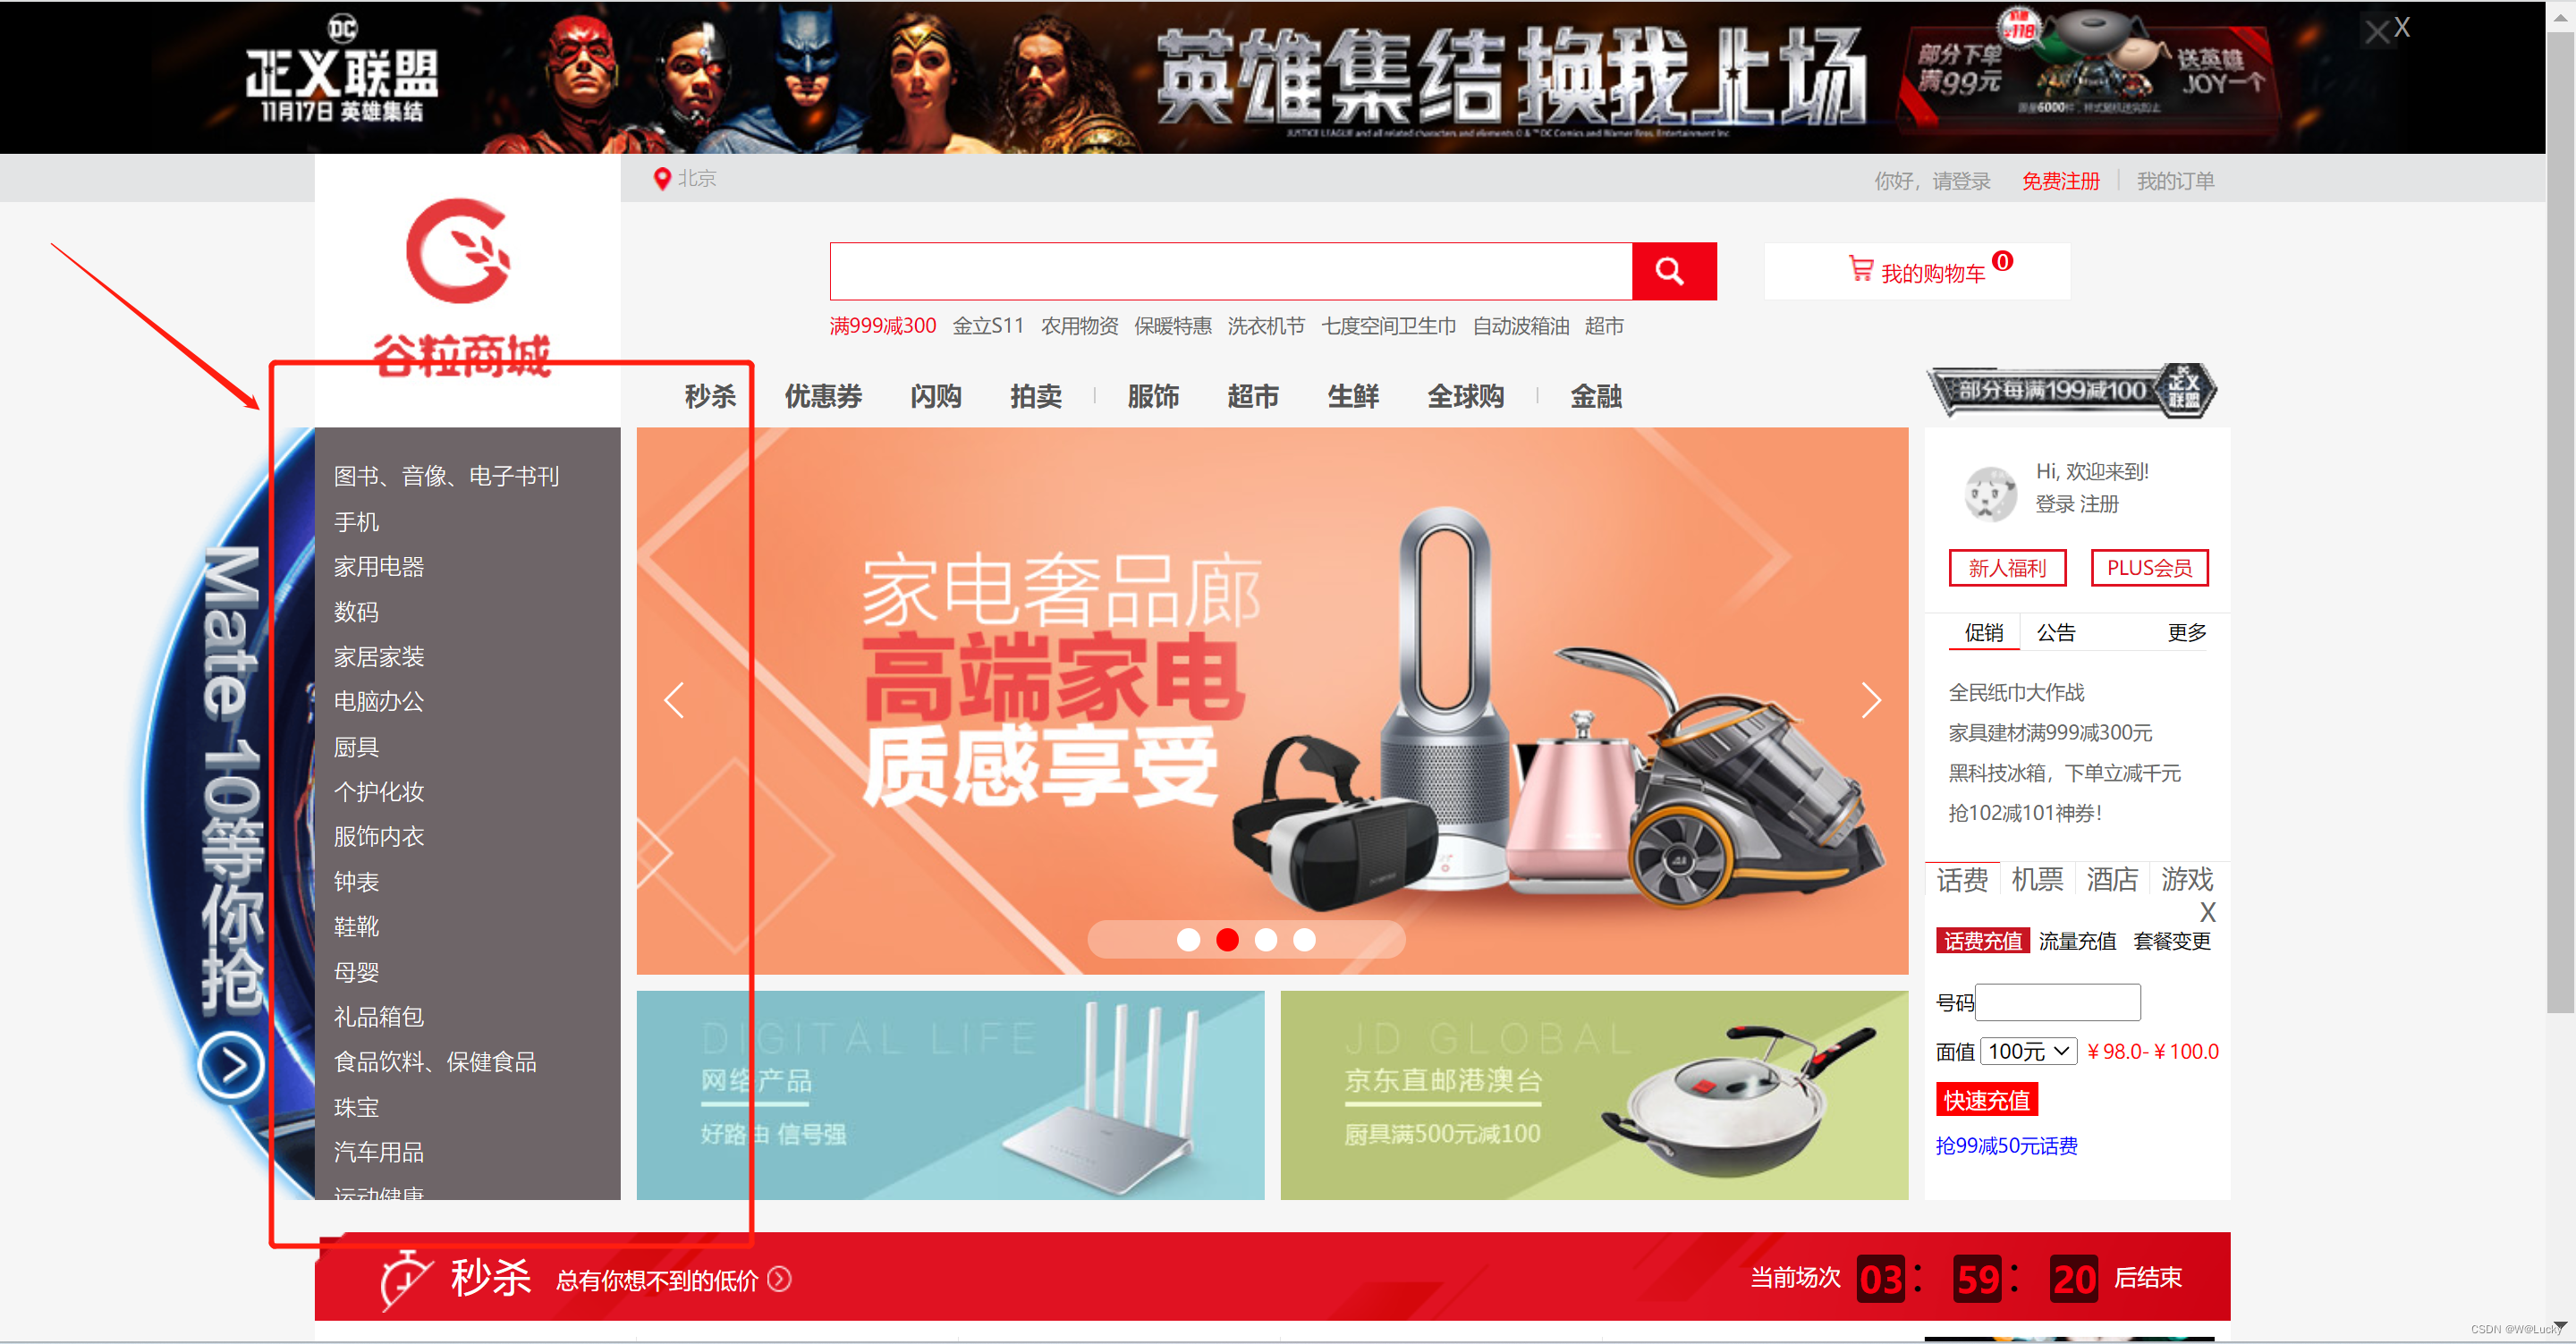
3.3 首页-渲染二级三级分类数据
渲染二级三级数据:
(1)根据static/index/json/catalog.json数据结构,创建相应的实体类Catelog2Vo;
(2)渲染二级三级分类菜单,修改catalogLoader.js请求获取二级三级的数据的url,如下:
$(function(){
    $.getJSON("index/catalog.json",function (data) {
(3)编写获取二级三级分类数据的代码。
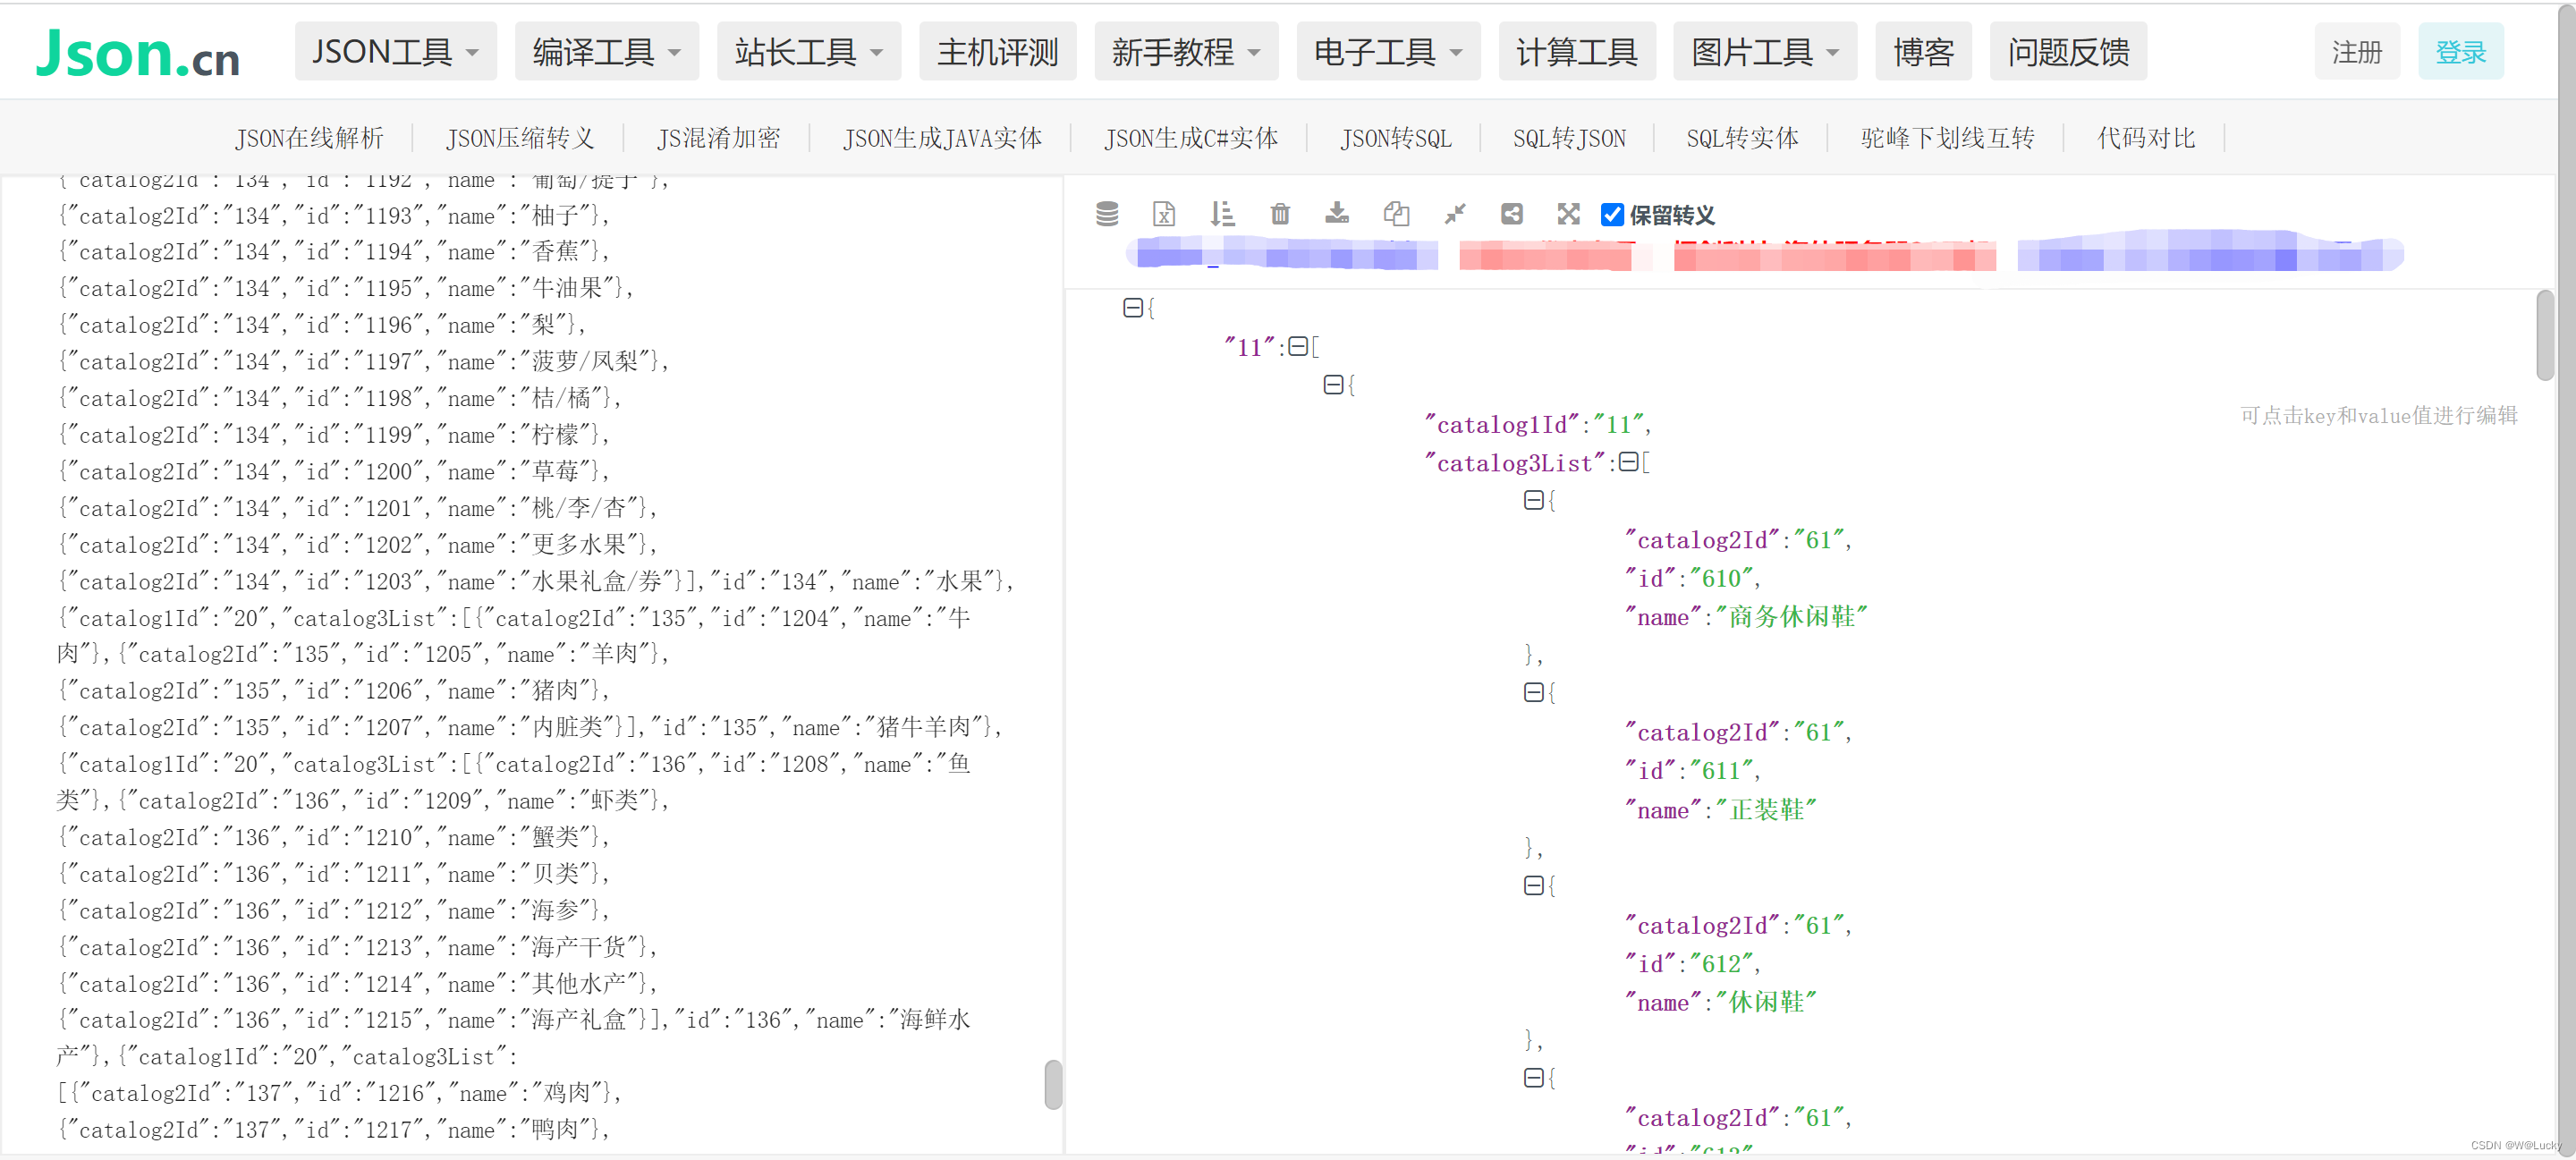
/**
 * @author W
 * @createDate 2023/5/19
 * @description 根据商城系统首页所需数据类型,封装二级实体类
 */
@NoArgsConstructor
@AllArgsConstructor
@Data
public class Catelog2Vo {
    private String catalog1Id; // 父级id,一级分类id
    private List<Object> catalog3List; // 三级子分类
    private String id;
    private String name;

    /**
     * 三级分类实体
     *      以内部类的形式
     */
    @NoArgsConstructor
    @AllArgsConstructor
    @Data
    public static class Catelog3Vo{
        private String catalog2Id; // 父级id,二级分类id
        private String id;
        private String name;
    }
}
获取二级三级分类的数据:
@Controller
public class IndexController {

    @Resource
    private CategoryService categoryService;

    ...

    // index/catalog.json
    @ResponseBody
    @GetMapping("/index/catalog.json")
    public Map<String, List<Catelog2Vo>> getCatalogJson(){
        Map<String, List<Catelog2Vo>> catalogJson = categoryService.getCatalogJson();
        return catalogJson;
    }
}
public interface CategoryService extends IService<CategoryEntity> {
...
Map<String, List<Catelog2Vo>> getCatalogJson();
}
@Service("categoryService")
public class CategoryServiceImpl extends ServiceImpl<CategoryDao, CategoryEntity> implements CategoryService {

    @Resource
    private CategoryBrandRelationService categoryBrandRelationService;

    ...

    @Override
    public Map<String, List<Catelog2Vo>> getCatalogJson() {
        // 查出所有的一级分类
        List<CategoryEntity> level1Category = getLevel1Category();
        // 封装数据
        Map<String, List<Catelog2Vo>> collect = level1Category.stream().collect(Collectors.toMap(k -> k.getCatId().toString(), v -> {
            // 1. 查询一级分类下的所有二级分类
            List<CategoryEntity> categoryEntities = this.baseMapper.selectList(new QueryWrapper<CategoryEntity>().eq("parent_cid", v.getCatId()));
            List<Catelog2Vo> level2Category = null;
            if (categoryEntities != null && categoryEntities.size() > 0) {
                level2Category = categoryEntities.stream().map(l2 -> {
                    Catelog2Vo catelog2Vo = new Catelog2Vo(v.getCatId().toString(), null, l2.getCatId().toString(), l2.getName());
                    // 2. 找二级分类下的所有三级分类
                    List<CategoryEntity> level3Category = this.baseMapper.selectList(new QueryWrapper<CategoryEntity>().eq("parent_cid", l2.getCatId()));
                    if (level3Category != null && level3Category.size() > 0) {
                        List<Catelog2Vo.Catelog3Vo> catelog3Vos = level3Category.stream().map(l3 -> {
                            // 封装成指定格式
                            Catelog2Vo.Catelog3Vo catelog3Vo = new Catelog2Vo.Catelog3Vo(l2.getCatId().toString(), l3.getCatId().toString(), l3.getName());
                            return catelog3Vo;
                        }).collect(Collectors.toList());
                        catelog2Vo.setCatalog3List(catelog3Vos);
                    }
                    return catelog2Vo;
                }).collect(Collectors.toList());
            }
            return level2Category;
        }));

        return collect;
    }
}
三级分类效果:
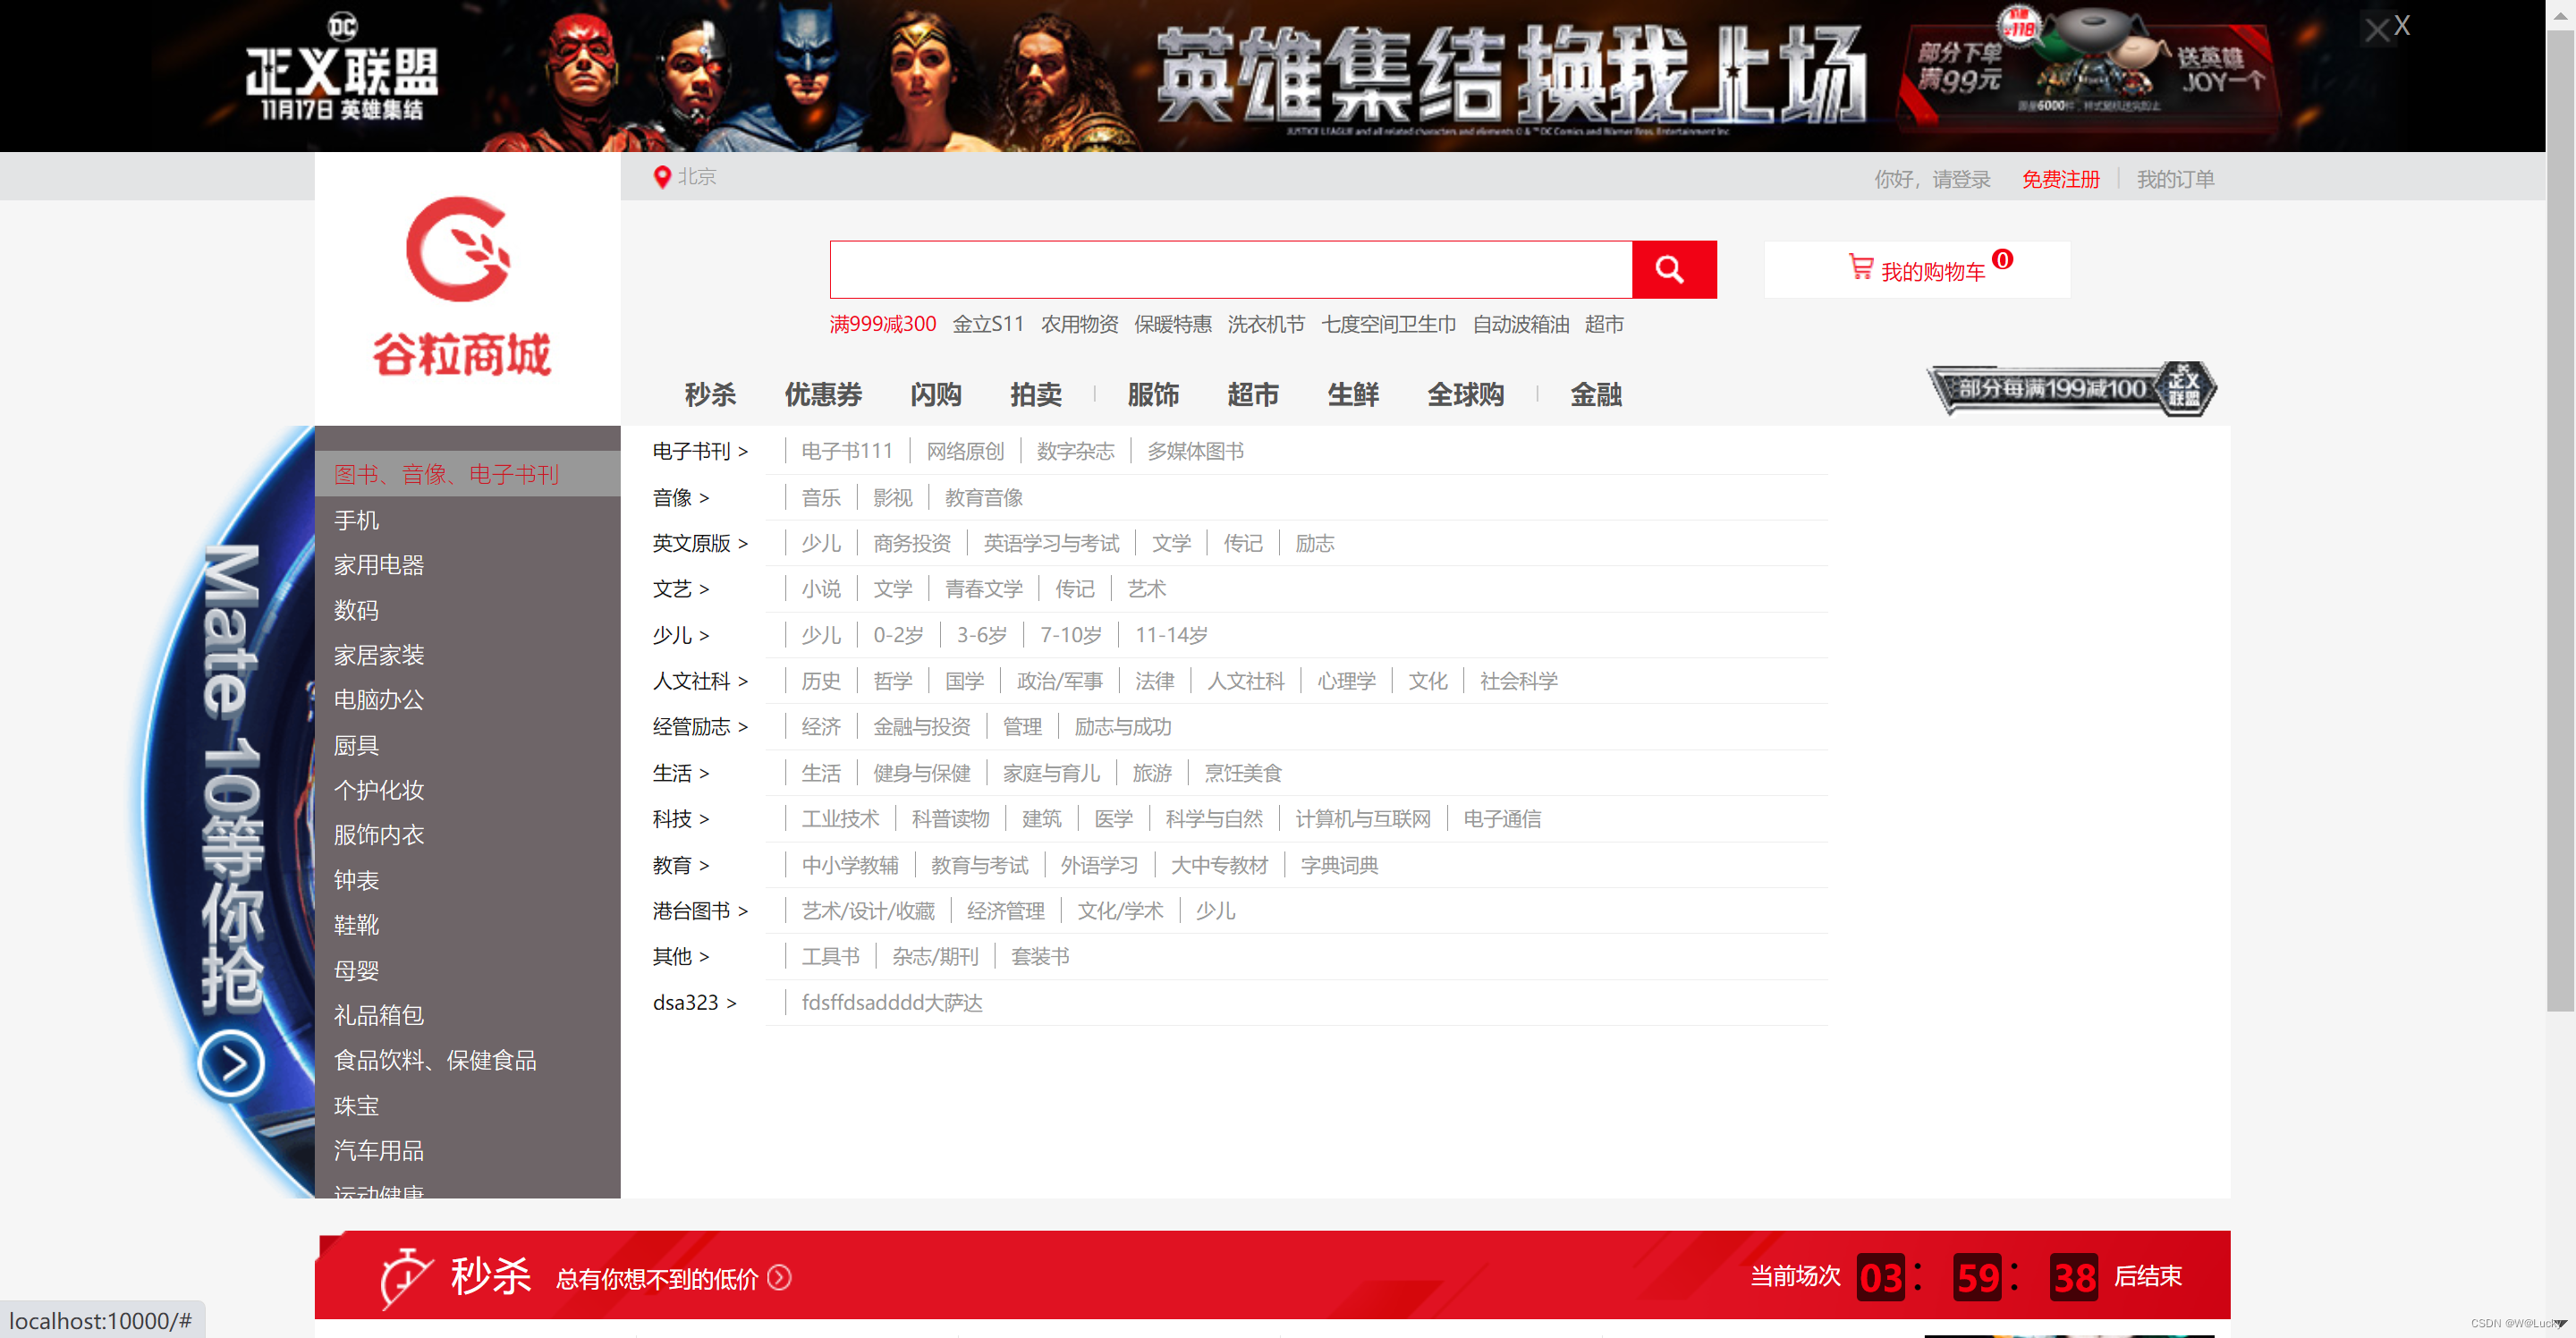
3.4 nginx-搭建域名访问环境一(反向代理配置)
(1)动静分离
(2)正向代理和反向代理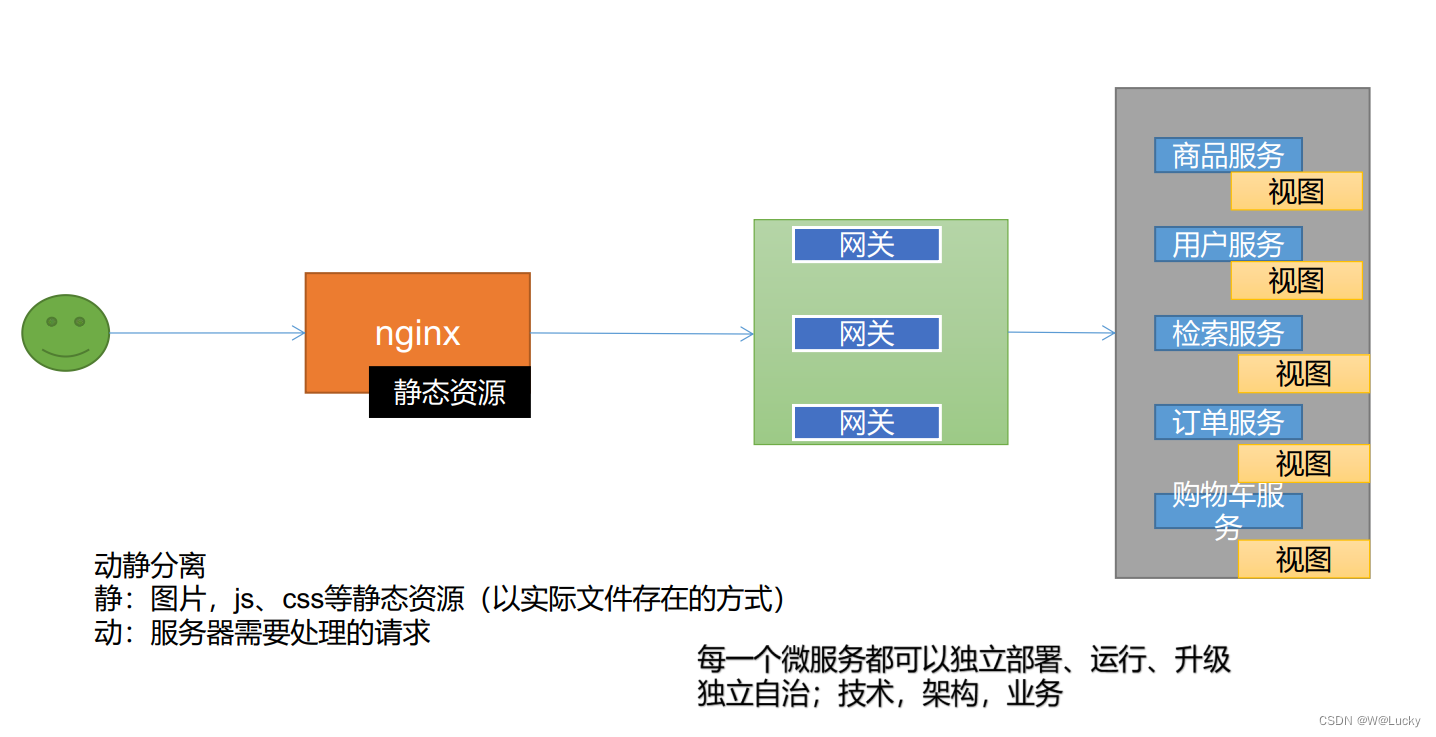
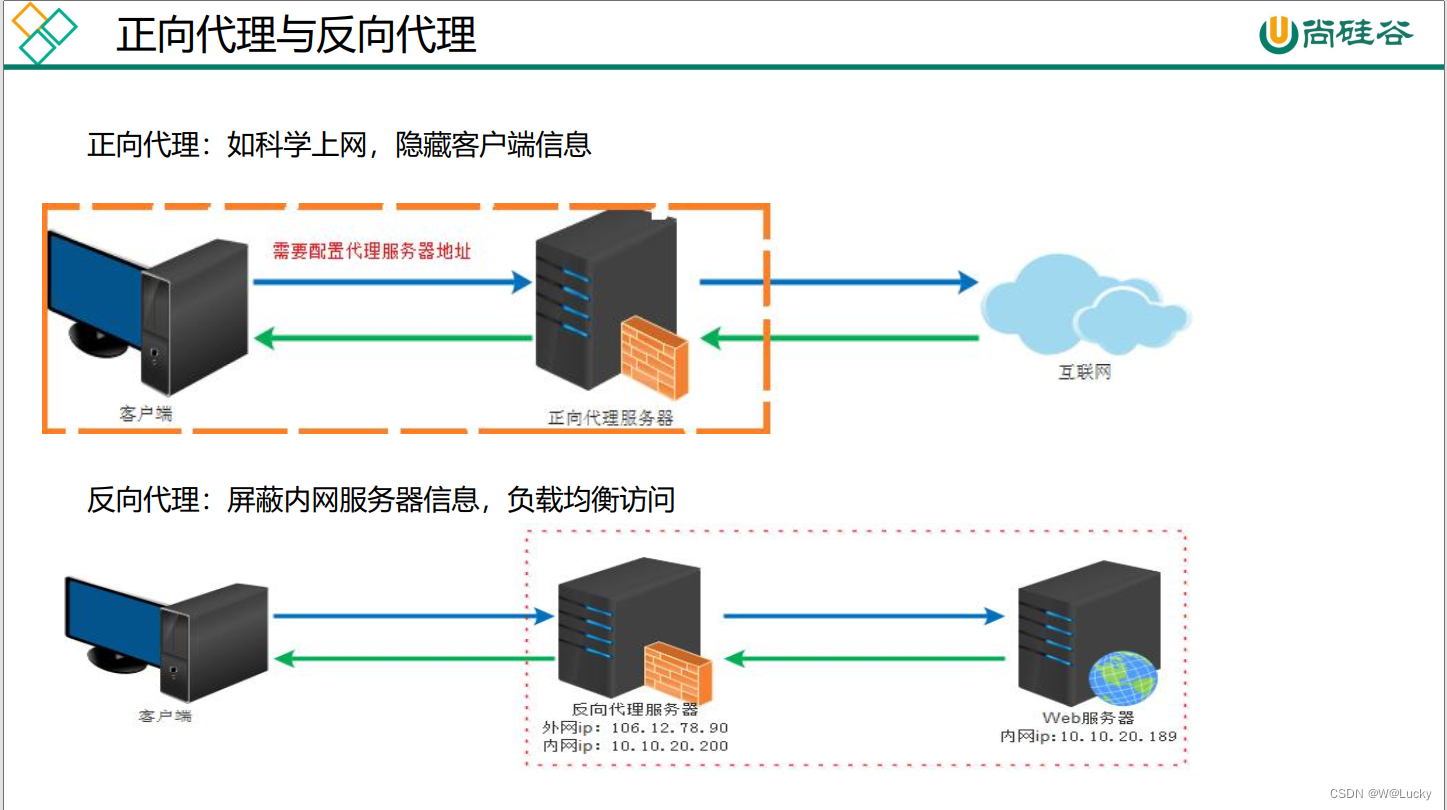
通过域名访问系统代替ip地址:
(1)域名解析是通过DNS解析的,在网络上访问网站,要首先通过DNS服务器把要访问的网络域名解析成ip地址,计算机才能对这个网络域名进行访问;
(2)也可以事先在本地电脑的Hosts文件中建立域名喝IP地址的映射关系来达到访问网络的域名时通过本地域名解析直达IP地址的目的。
电脑的hosts文件所在位置:C:\Windows\System32\drivers\etc

本系统使用hosts文件配置域名和ip映射,每次进入C盘修改hosts文件比较麻烦,可以使用SwitchHosts软件对hosts文件进行修改。

以管理员的身份运行SwitchHosts,新建本地方案,进行虚拟机IP和域名映射并保存,内容如下:

# gulimall
192.168.1.10 gulimall.com

可以通过域名访问es等进行测试。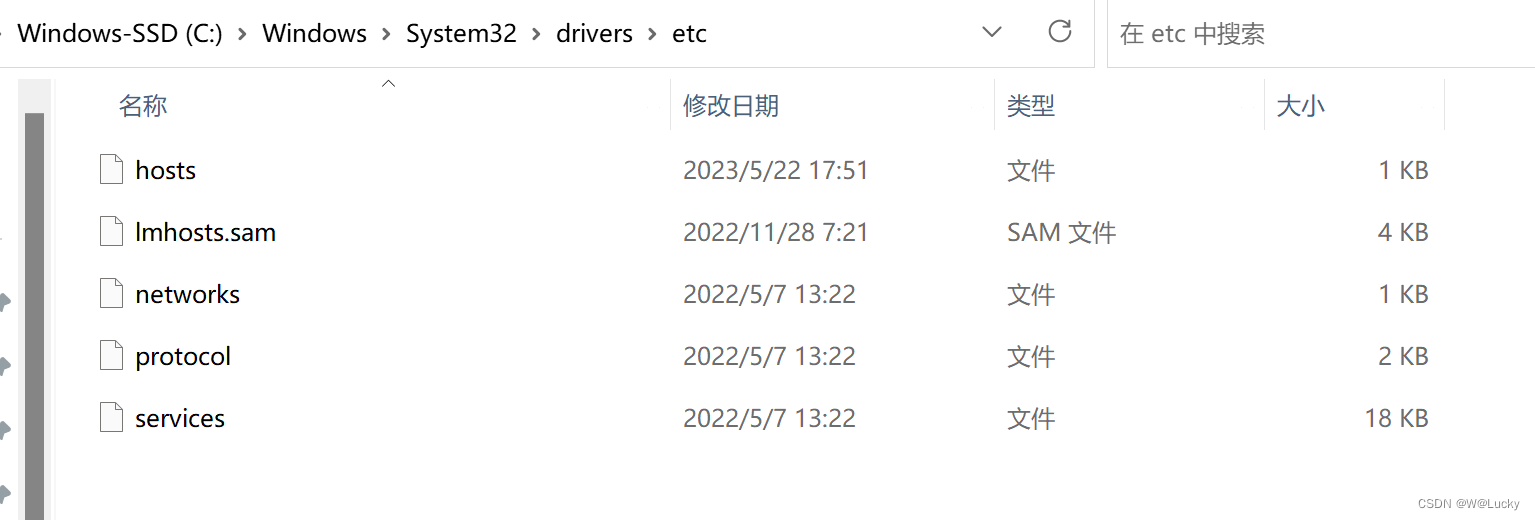


nginx配置文件:
(1)进入docker中nginx容器映射的配置文件,命令如下:
cd /root/docker/nginx/conf
vi nginx.conf # 打开nginx.conf文件
发现nginx.conf文件中没有server块,但是nginx.conf中包含了include /etc/nginx/conf.d/*.conf,查看conf.d文件夹下的配置文件default.conf,server块在default.conf。
(2)nginx.conf的组成图
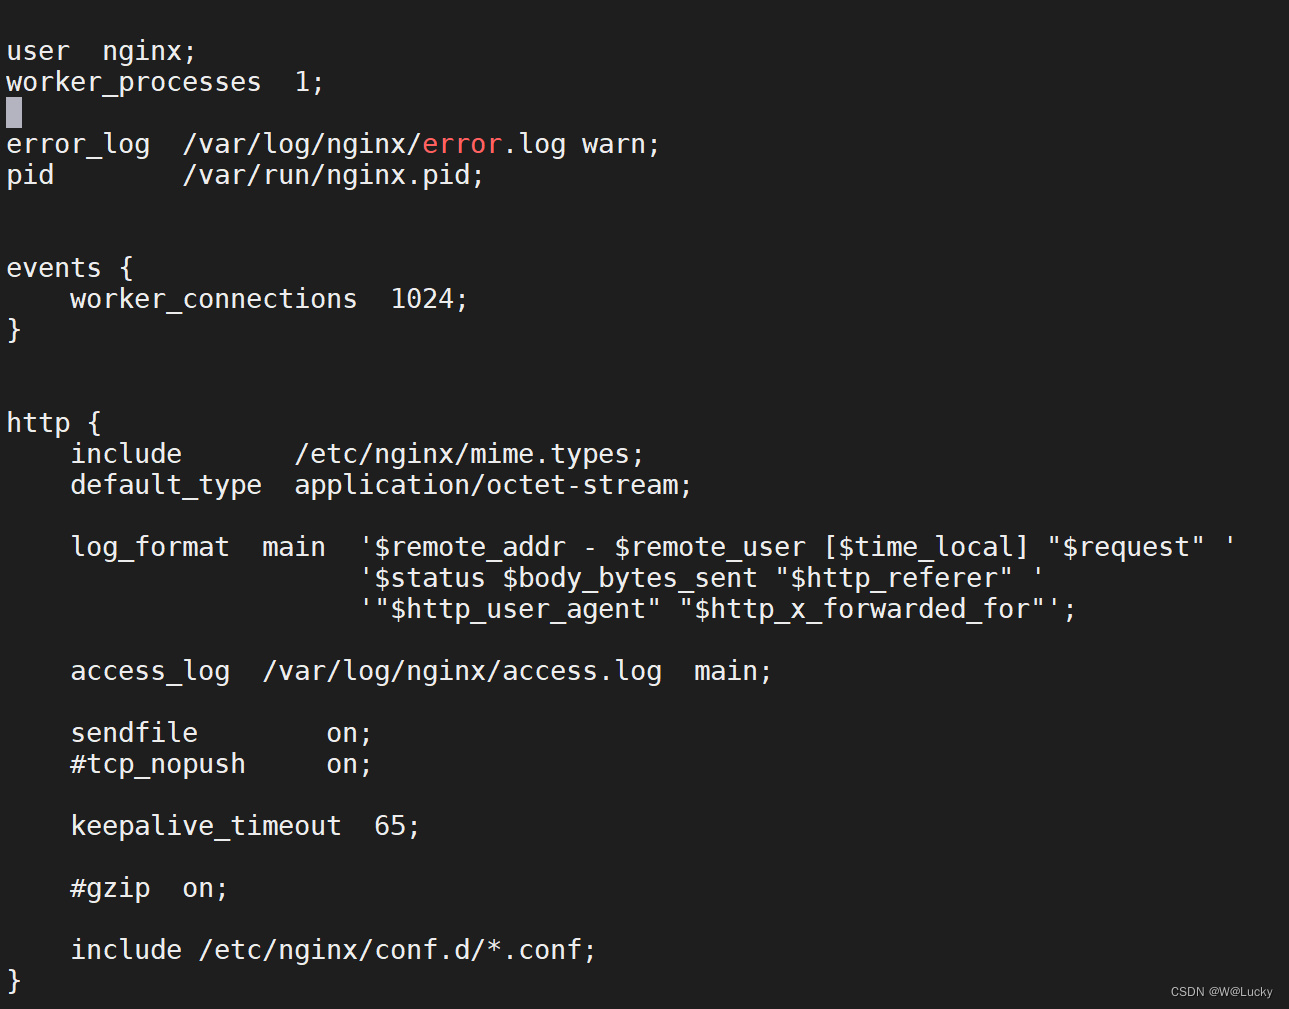
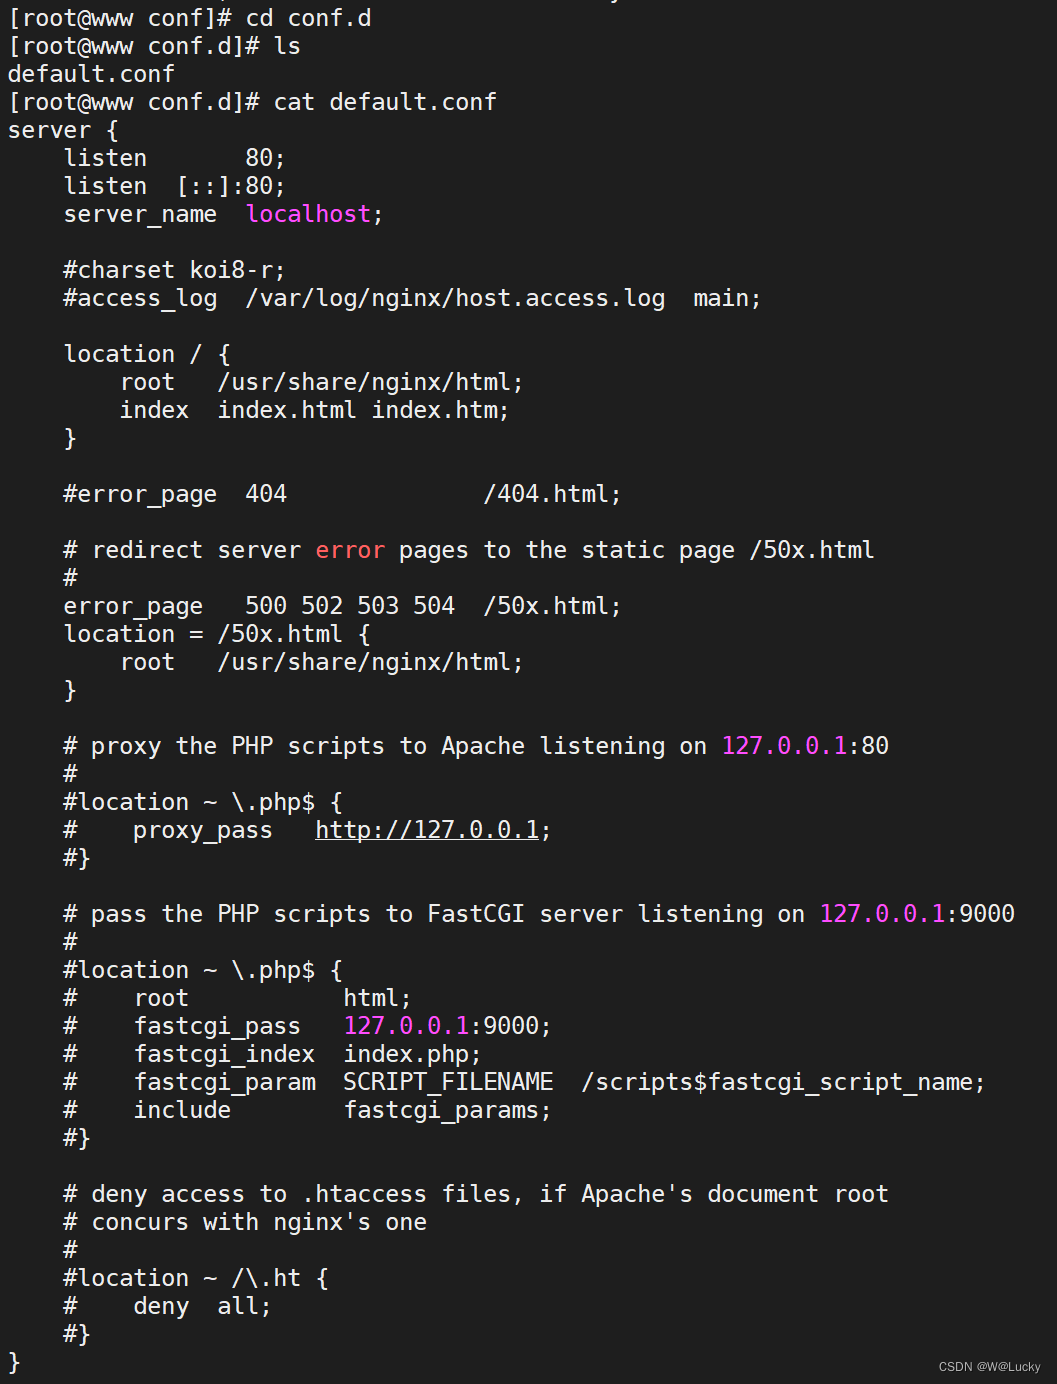
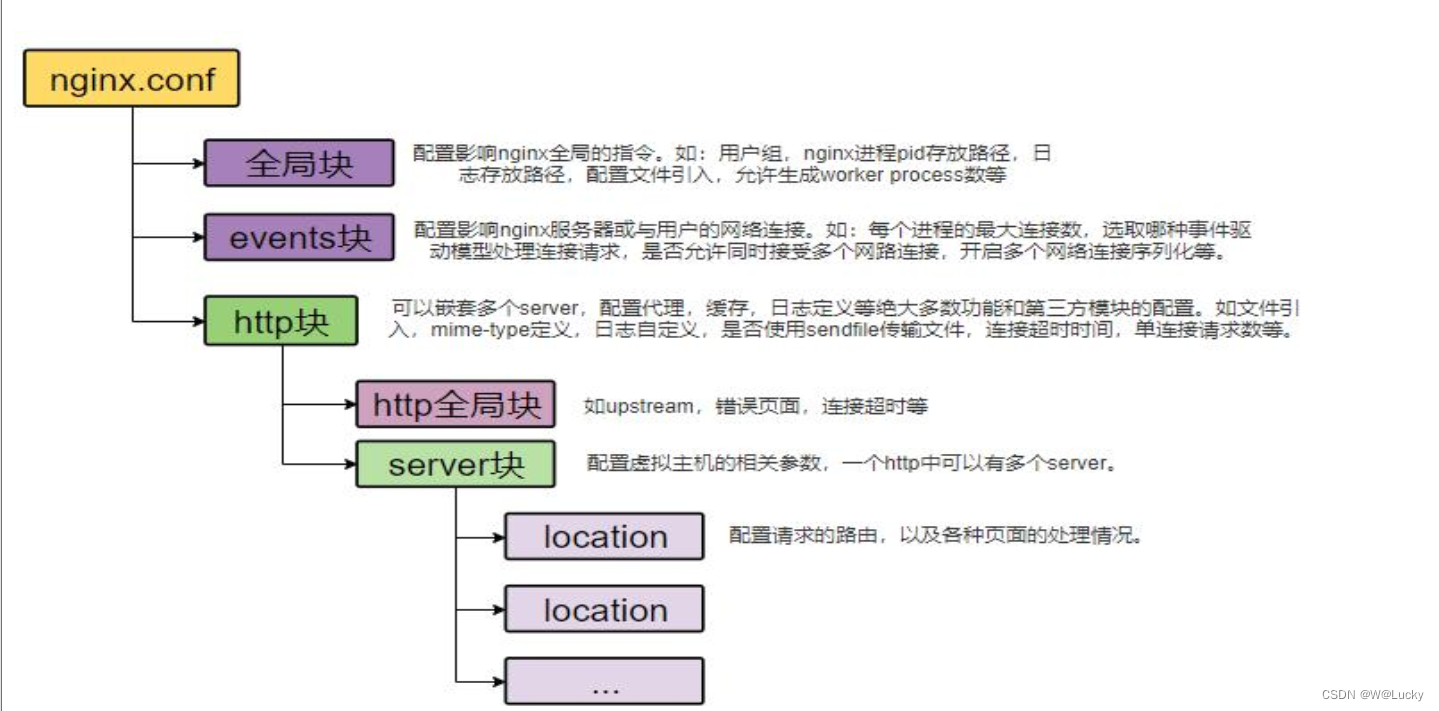
(1)复制default.conf命名为gulimall.conf,复制命令如下:
    cp default.conf gulimall.conf
(2)进入gulimall.conf,命令如下:
    vi gulimall.conf
(3)修改gulimall.conf中域名server_name,并通过nginx方向代理到商品服务;
    注意:gulimall.conf配置文件中反向代理的IP为192.168.1.1为虚拟机的地址和192.168.1.10可以互相ping通,所以使用192.168.1.1也可以访问商品服务。

    通过vi进入gulimall.conf可以输入以下命令显示配置文件的行数:
    :set number
(4)重新启动nginx,命令如下:
    docker restart nginx
(5)测试通过gulimall.com访问商品服务首页。![]()
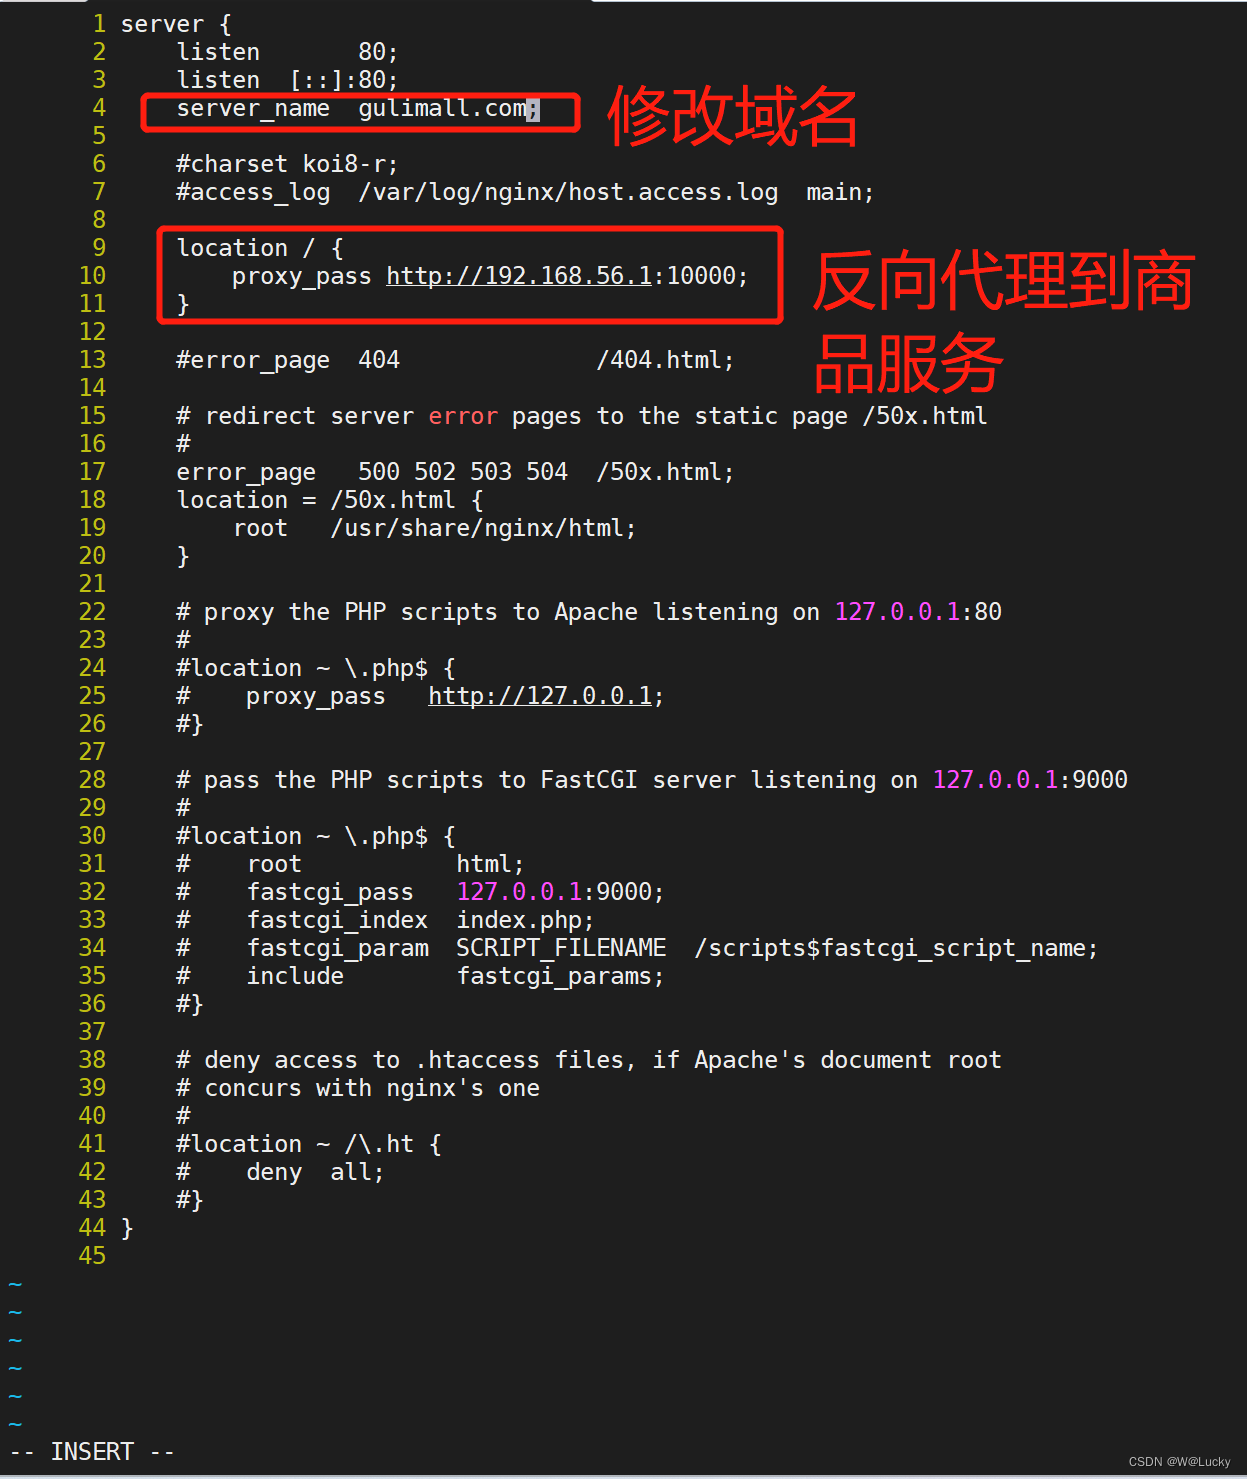
![]()

如果商品服务集群,nginx不止要代理一处,比较麻烦,nginx应该代理到网关,在由网关转发到各个服务,网关就可以动态的发现哪些服务上线下线,而且网关也有负载均衡的功能。下面使用网关。3.5 nginx-搭建域名访问环境二(负载均衡到网关)
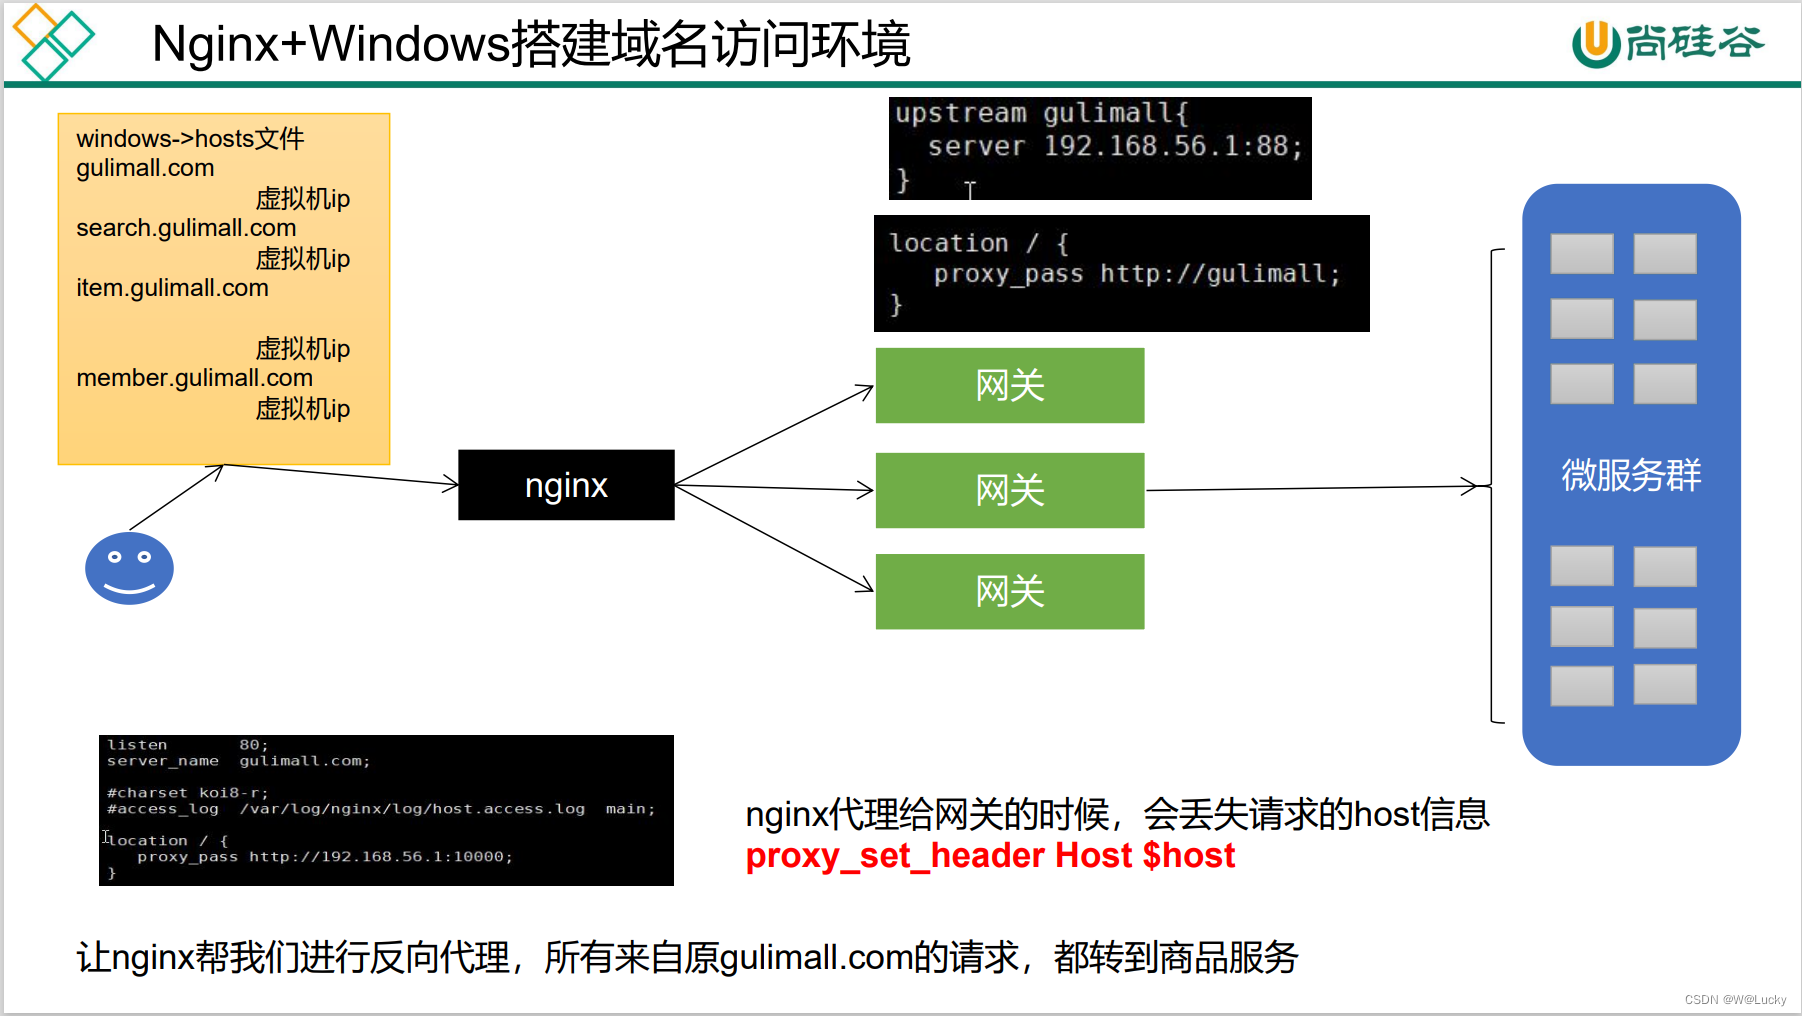
前面讲的是:
域名-》nginx-》反向代理到商品服务,如果商品服务集群还要动态的修改nginx反向代理的url.
现在是:
域名-》nginx-》反向代理到网关-》转发到商品服务,商品服务注册到注册中心,由网关发现有哪些商品服务,进行负载均衡。
使用nginx作为HTTP负载均衡器:
(1)查看nginx官方文档。
nginx网址:https://nginx.org/ -》点击documentation -》点击Using nginx as HTTP load balancer
(2)在nginx.conf中的http块中的配置upstream上游服务器,指定上有服务器的地址(网关的url)
(3)在nginx的配置文件gulimall.conf中的server块中反向代理到上游服务器。
(4)重启nginx,命令如下:
docker restart nginx
可以通过 docker ps -a 查看nginx是否重启成功。
(5)在网关gulimall-gateway中配置由域名转发到商品服务的路由。
- id: gulimall_host_route
uri: lb://gulimall-product
predicates:
# 由以下的主机域名访问转发到商品服务
- Host=**.gulimall.com
(6)重启网关,访问guilimall.com发现会404,原因Host主机地址没匹配上,nginx反向代理host信息会丢失。
解决方案:在server块添加 proxy_set_header Host $host; 配置
(7)重启nginx,进行测试,访问gulimall.com
注意:服务的ip使用虚拟机的ip,使用虚拟机配置的公网ip无效。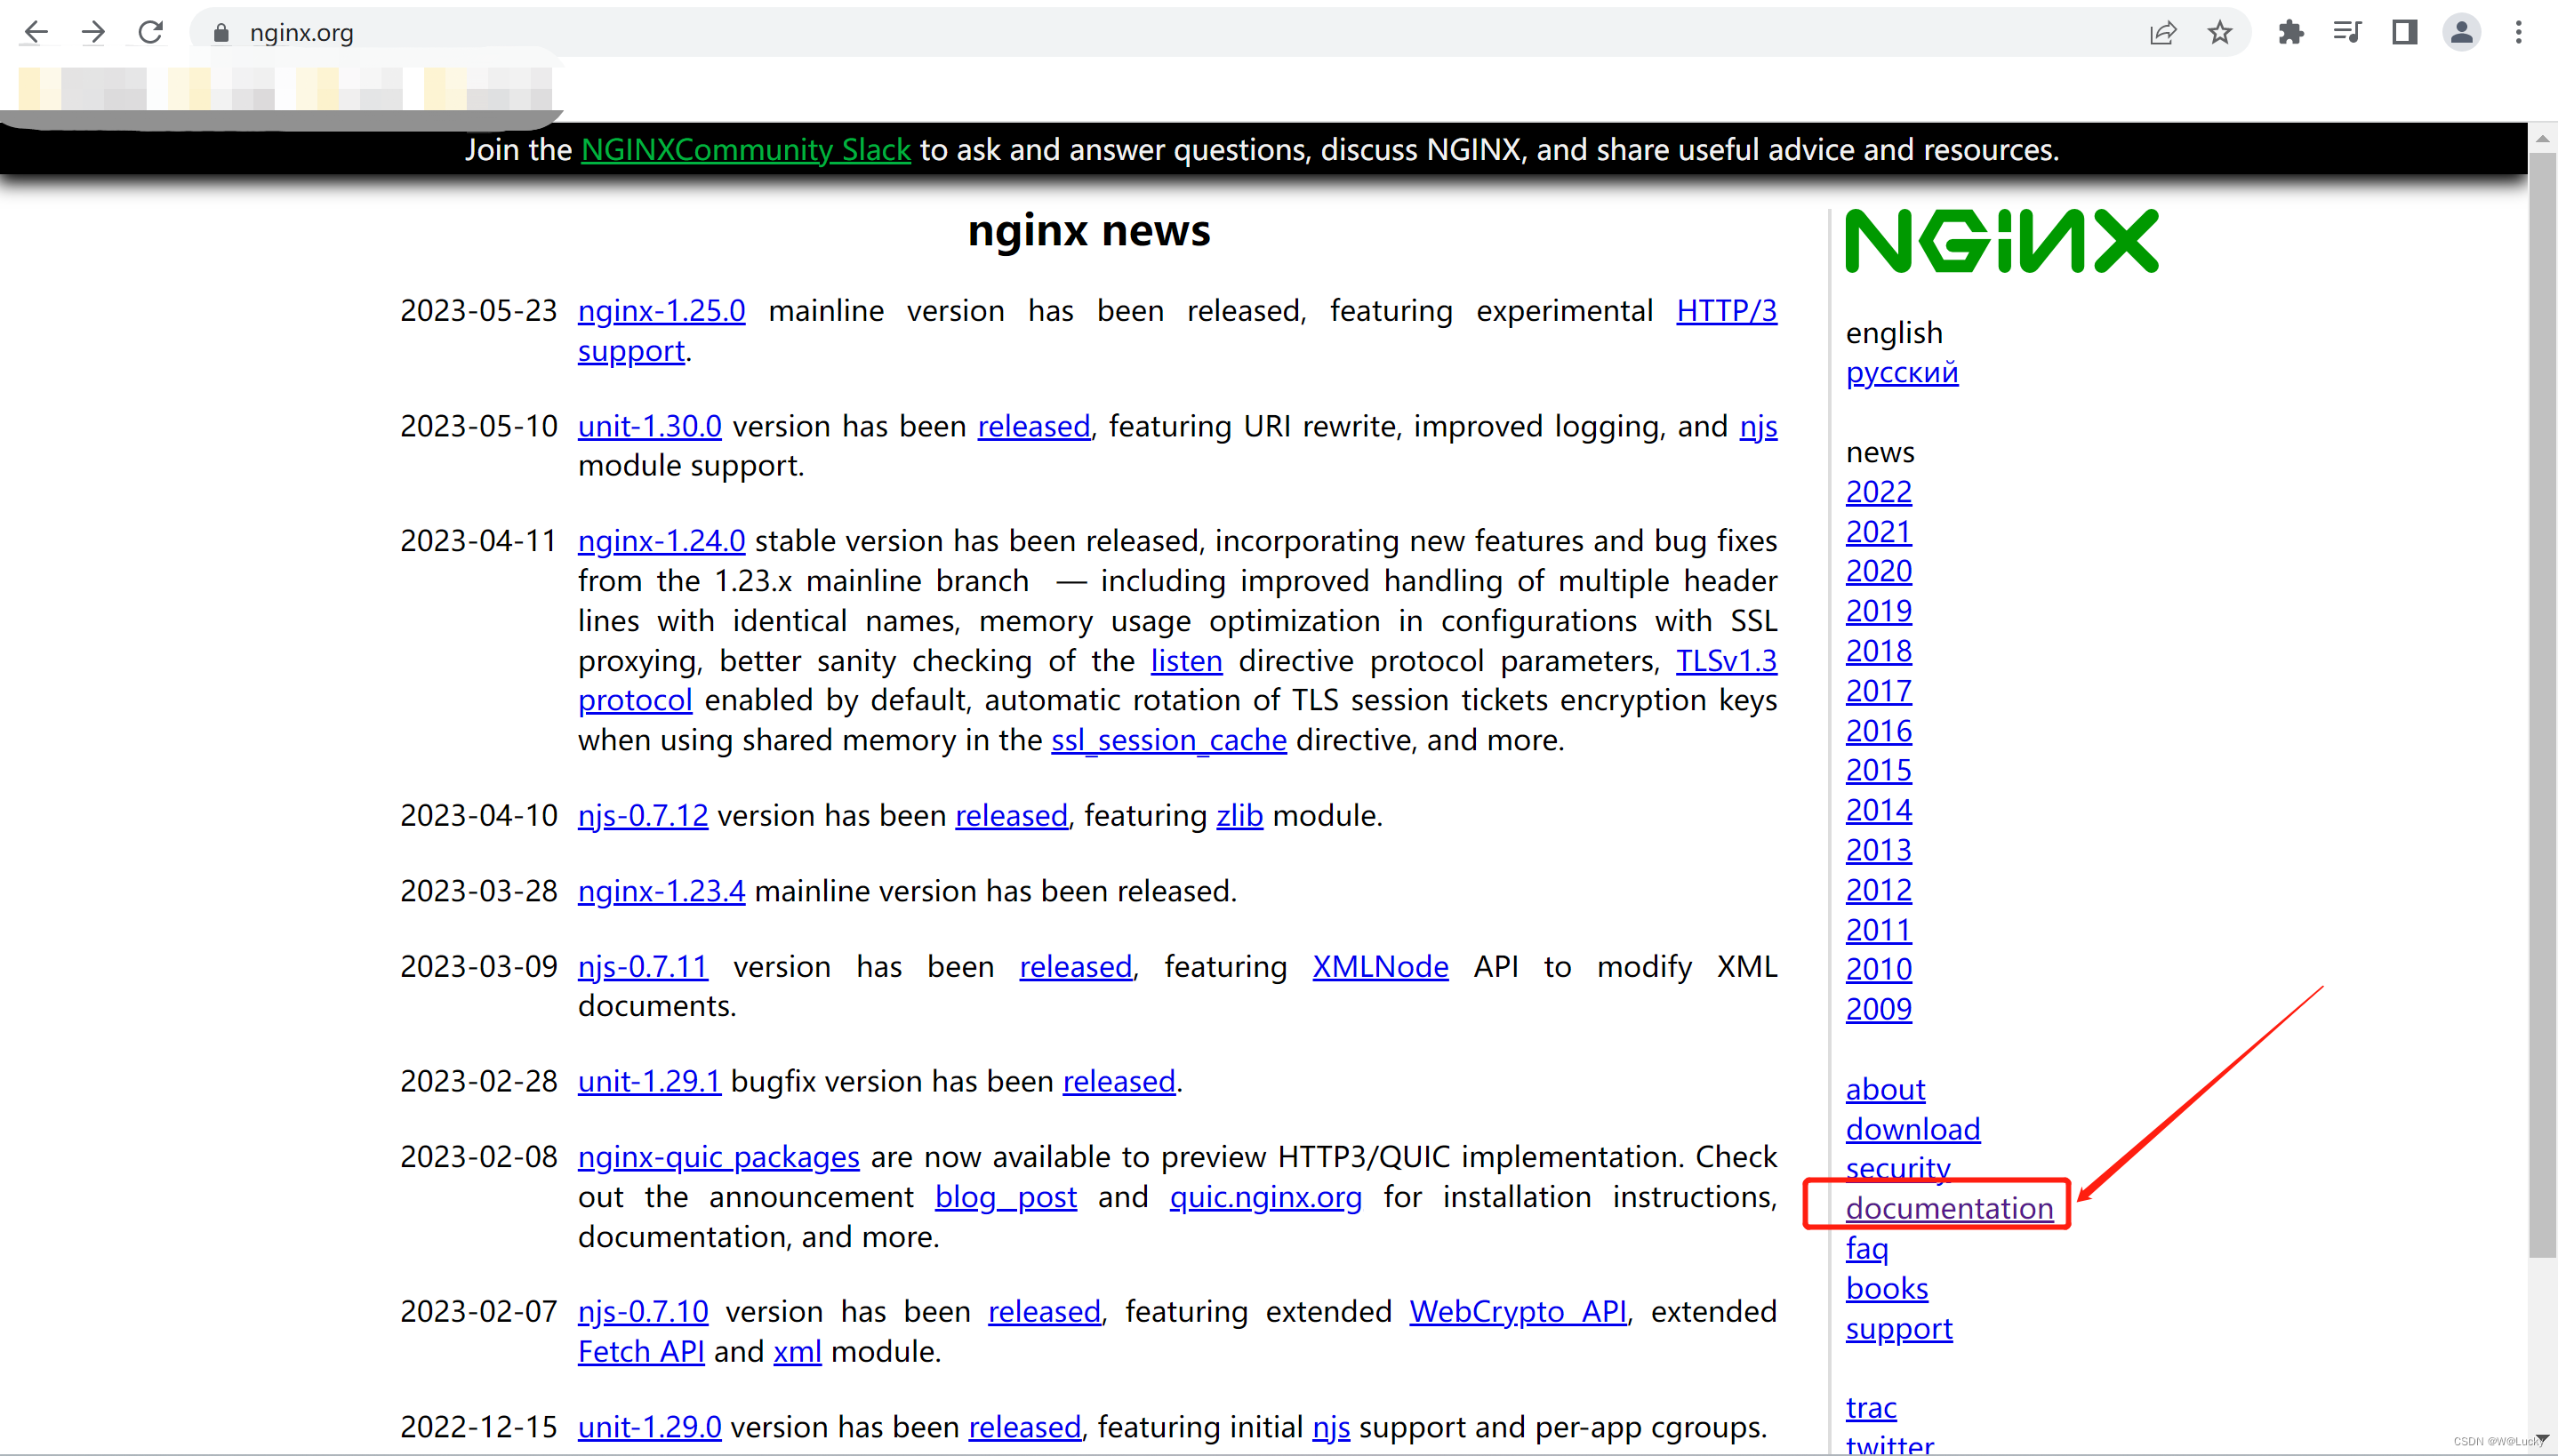
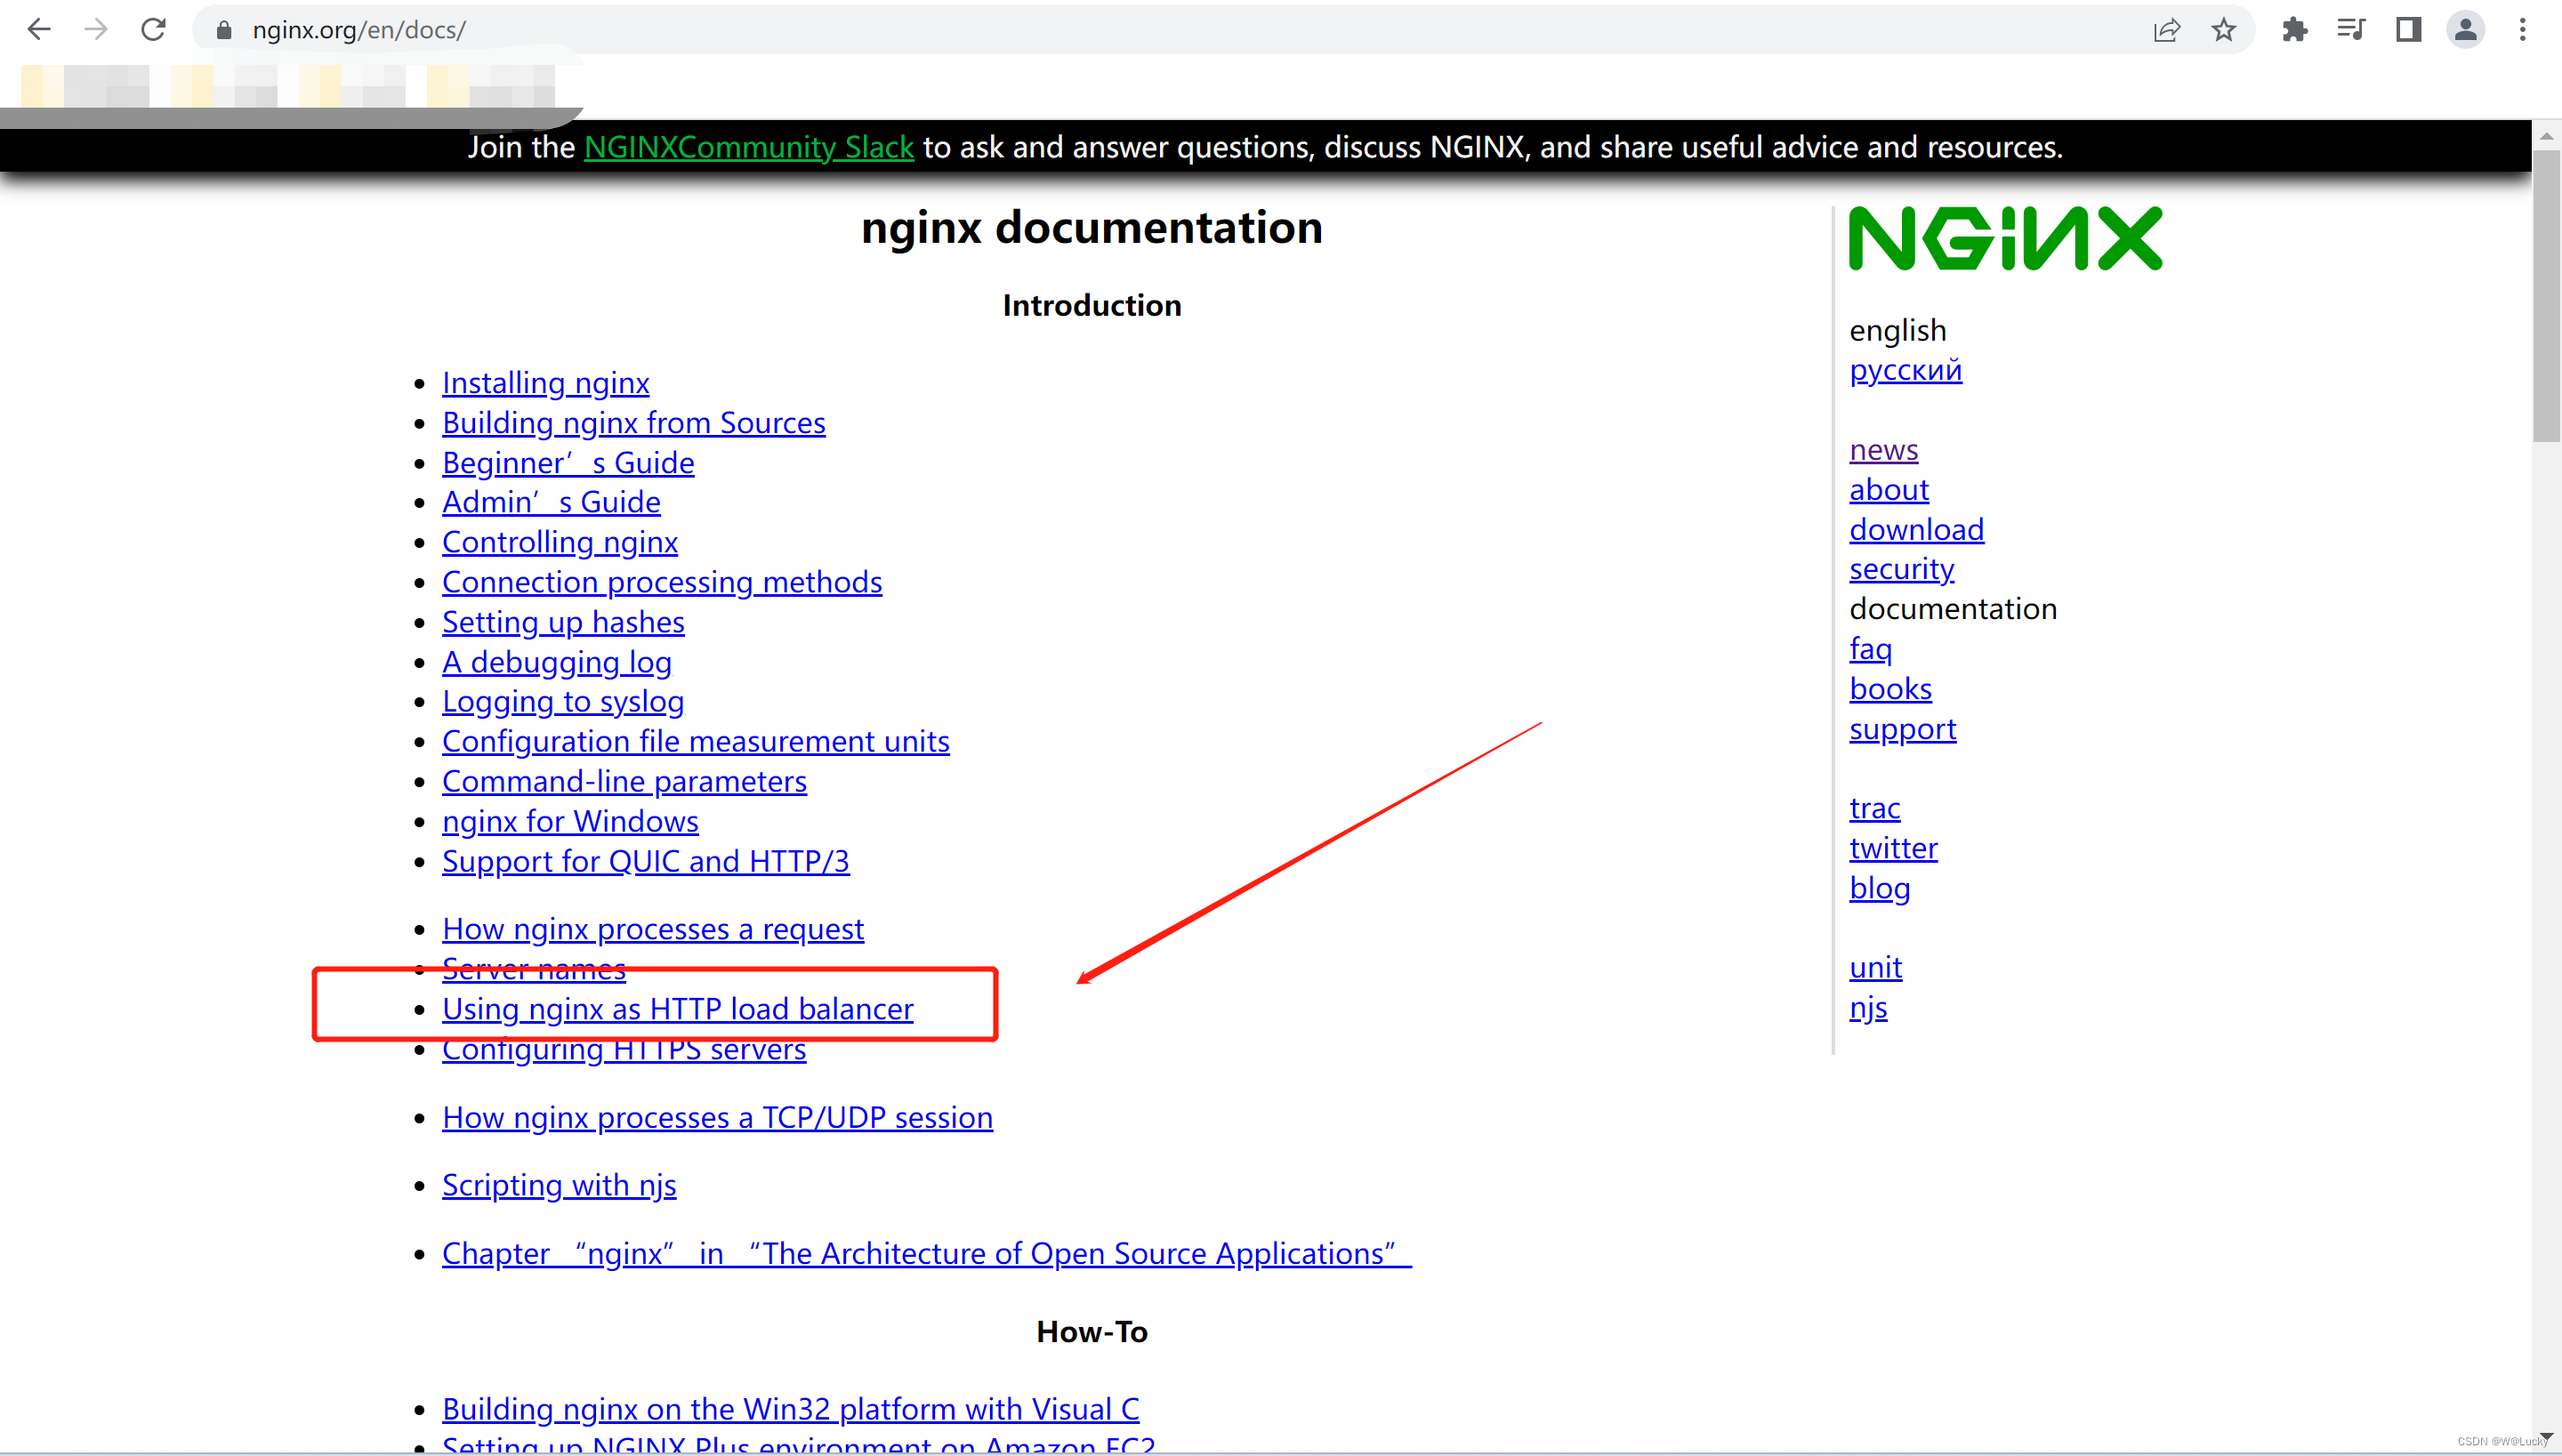
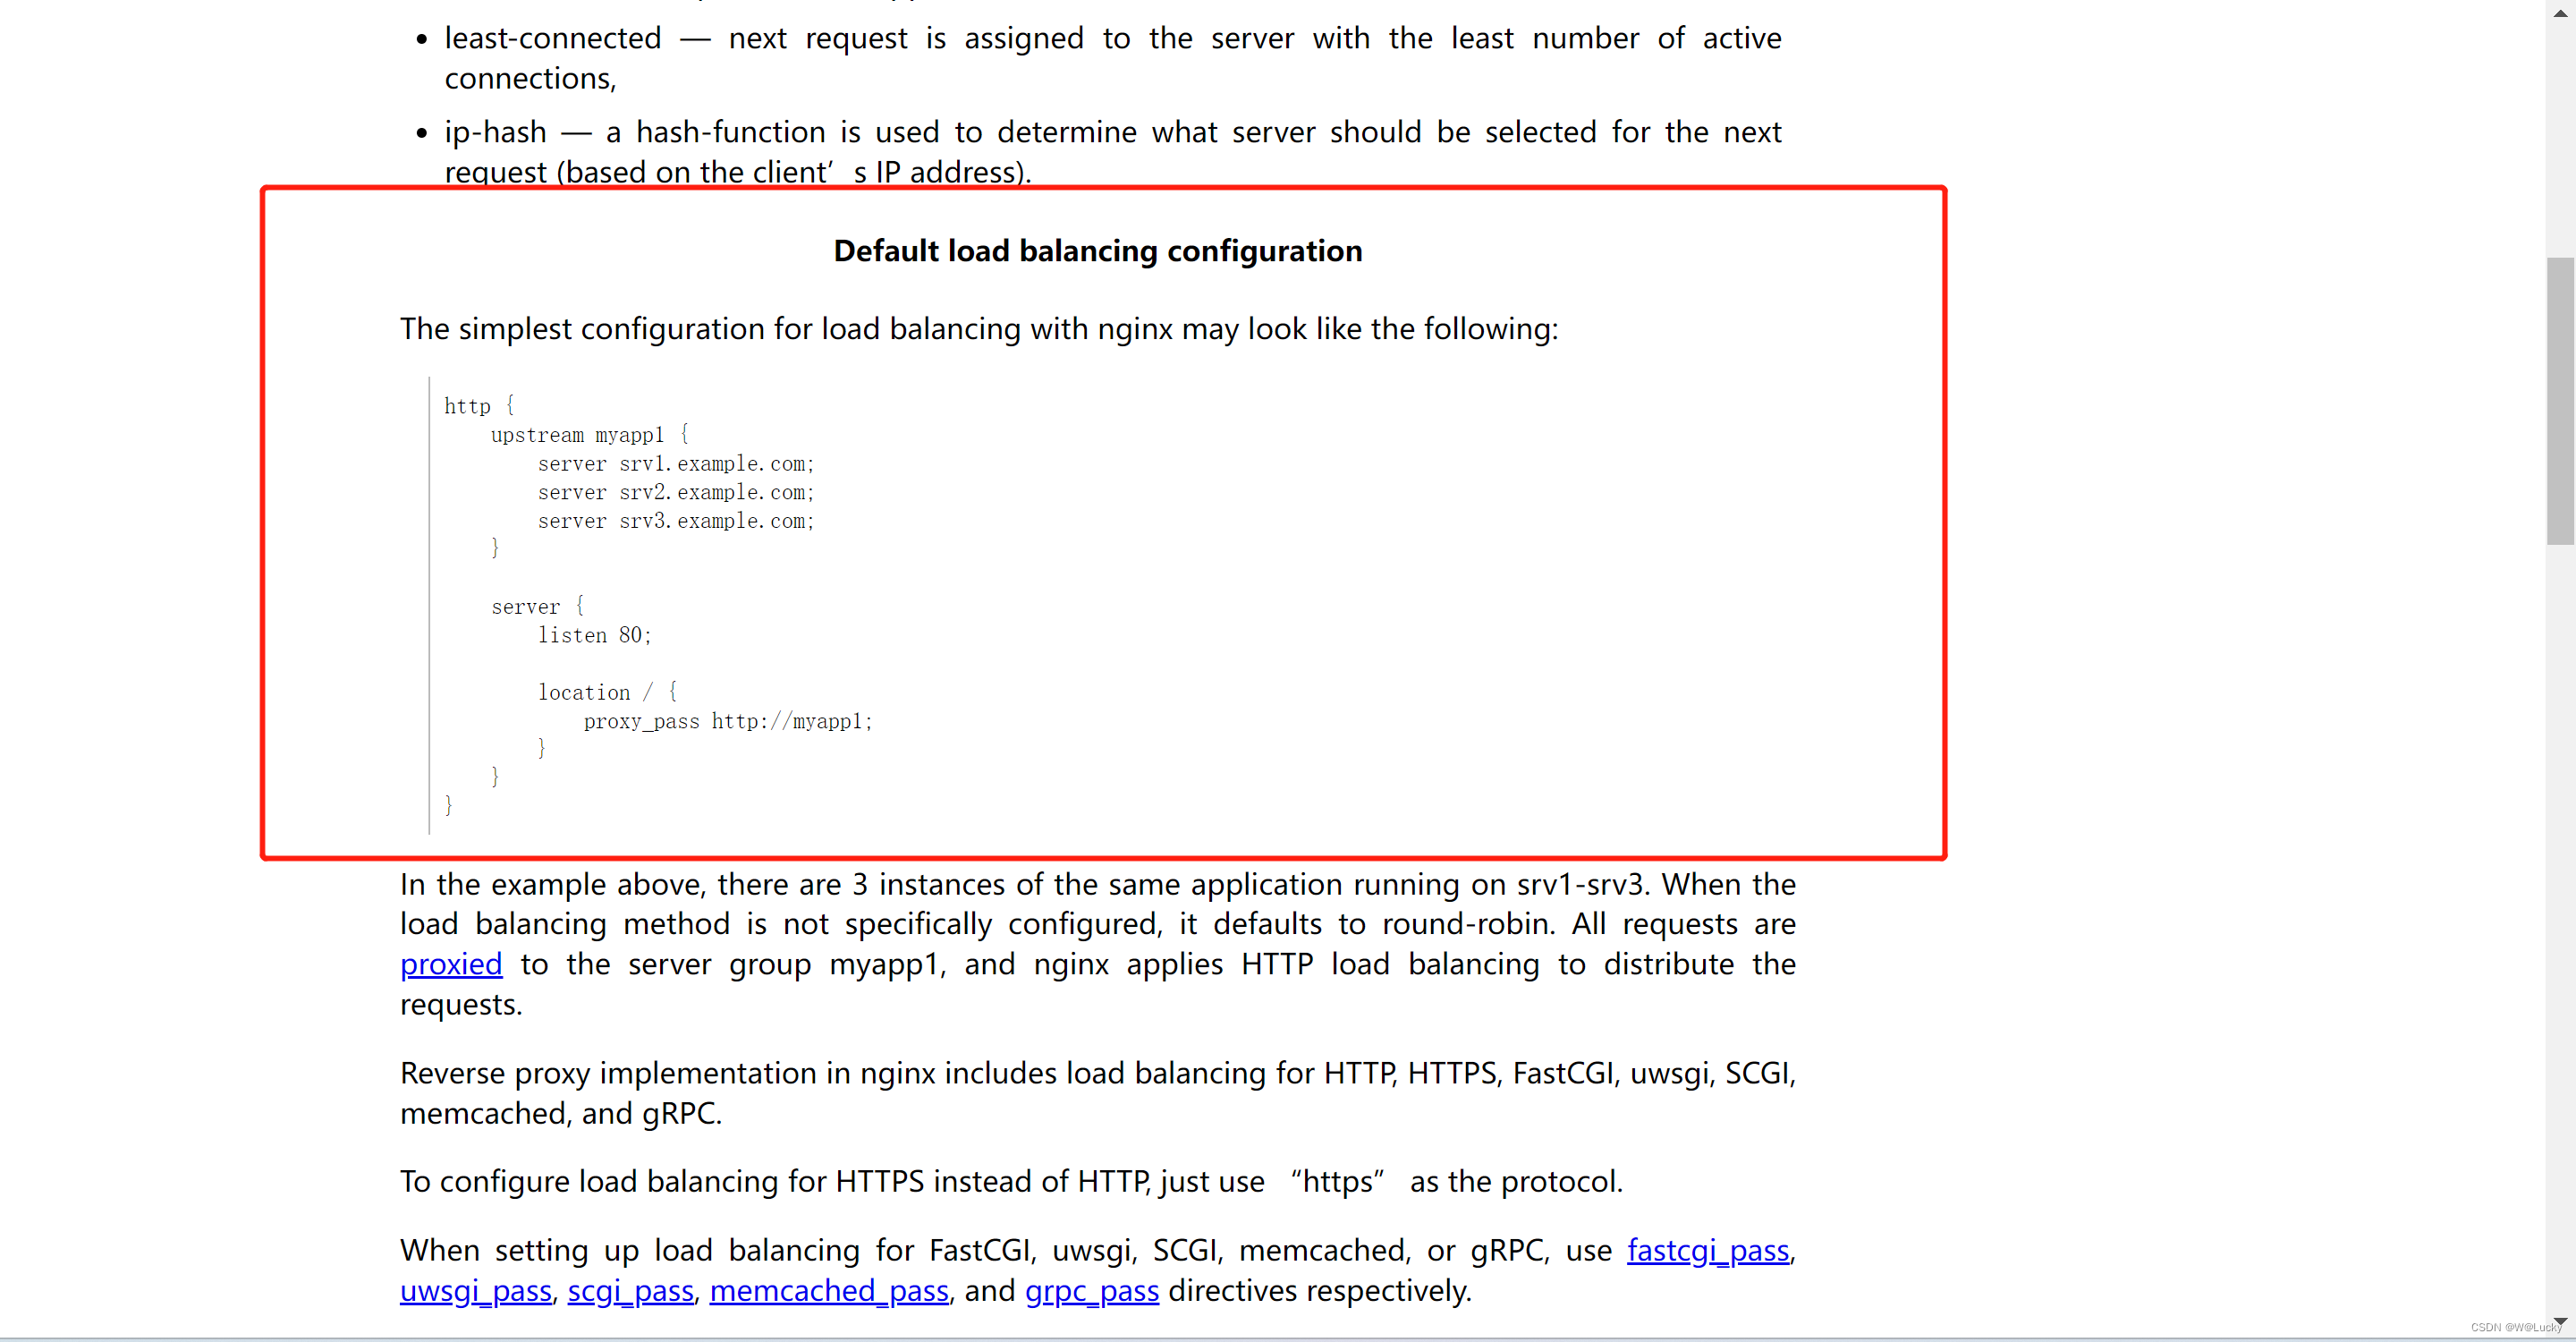


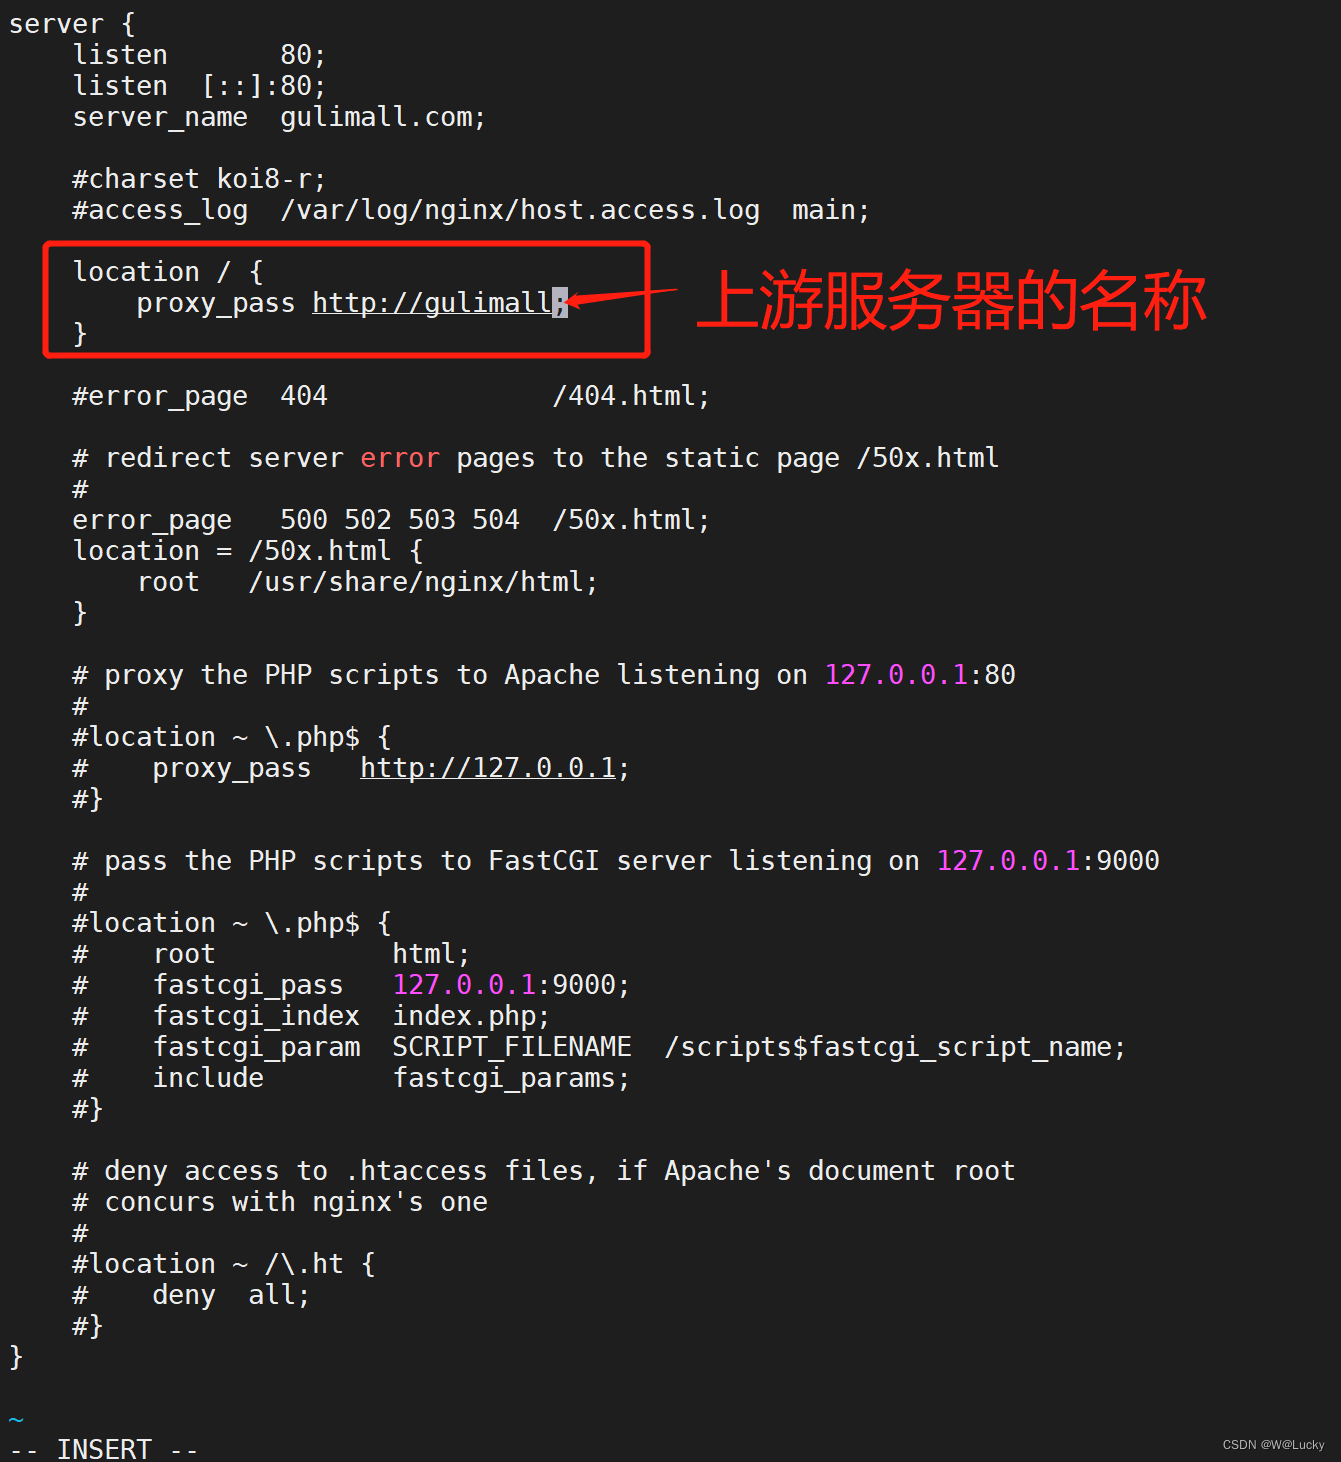
解决nginx反向代理host信息会丢失问题:

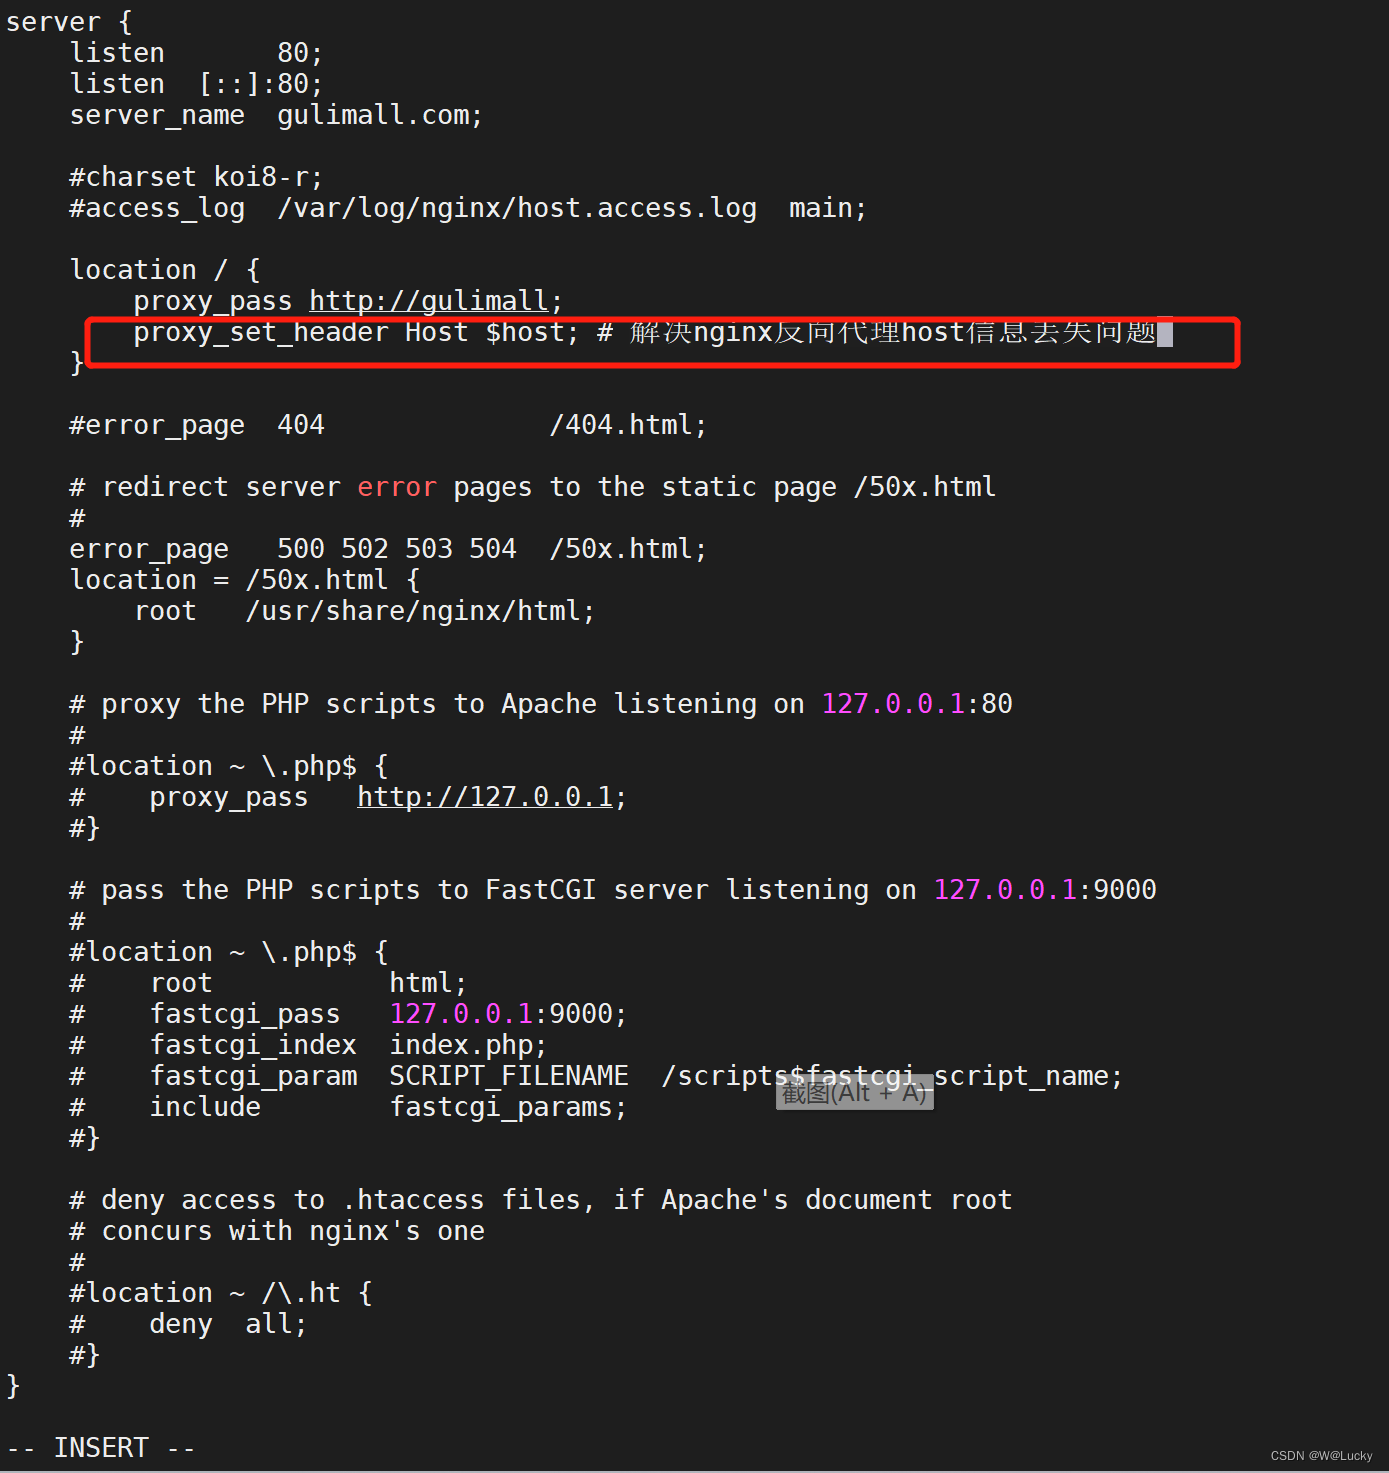

4 性能测试
4.1 压力测试
4.1.1 基本介绍
压力测试考察当前软硬件环境下系统所能承受的最大负荷并帮助找出系统瓶颈所在。压测都 是为了系统在线上的处理能力和稳定性维持在一个标准范围内,做到心中有数。
使用压力测试,我们有希望找到很多种用其他测试方法更难发现的错误。有两种错误类型是: 内存泄漏,并发与同步。
有效的压力测试系统将应用以下这些关键条件:重复,并发,量级,随机变化。
知道系统瓶颈,可以通过负载均衡配置,避免单位时间内给系统发送过多的请求,而给系统压垮,以至于宕机,导致服务的不可用。
1. 性能指标
- 响应时间(Response Time: RT)
响应时间指用户从客户端发起一个请求开始, 到客户端接收到从服务器端返回的响
应结束, 整个过程所耗费的时间。
- HPS(Hits Per Second) : 每秒点击次数, 单位是次/秒。
- TPS(Transaction per Second) : 系统每秒处理交易数, 单位是笔/秒。
- QPS(Query per Second) : 系统每秒处理查询次数, 单位是次/秒。
对于互联网业务中, 如果某些业务有且仅有一个请求连接, 那么 TPS=QPS=HPS, 一
般情况下用 TPS 来衡量整个业务流程, 用 QPS 来衡量接口查询次数, 用 HPS 来表
示对服务器单击请求。
- 无论 TPS、 QPS、 HPS,此指标是衡量系统处理能力非常重要的指标, 越大越好, 根据经
验, 一般情况下:
金融行业: 1000TPS~50000TPS, 不包括互联网化的活动
保险行业: 100TPS~100000TPS, 不包括互联网化的活动
制造行业: 10TPS~5000TPS
互联网电子商务: 10000TPS~1000000TPS
互联网中型网站: 1000TPS~50000TPS
互联网小型网站: 500TPS~10000TPS
- 最大响应时间(Max Response Time) 指用户发出请求或者指令到系统做出反应(响应)
的最大时间。
- 最少响应时间(Mininum ResponseTime) 指用户发出请求或者指令到系统做出反应(响
应) 的最少时间。
- 90%响应时间(90% Response Time) 是指所有用户的响应时间进行排序, 第 90%的响
应时间。
- 从外部看, 性能测试主要关注如下三个指标
吞吐量: 每秒钟系统能够处理的请求数、 任务数。(吞吐量大,并发量大)
响应时间: 服务处理一个请求或一个任务的耗时。(响应时间越短,接口性能就越好)
错误率: 一批请求中结果出错的请求所占比例。
4.1.2 Apache JMeter 安装使用
1. JMeter安装
JMeter安装:
(1)安装网址:https://jmeter.apache.org/
(2)JMeter官网首页-》点击Download Releases-》点击Archives下的Apache JMeter Archives.. -》点击binaries -》选择apache-jmeter-5.2.1.zip下载
(3)解压安装,解压后进入apache-jmeter-5.2.1\bin目录下,双击jmeter.bat运行JMeter.
(4)修改JMeter语言为中文简体。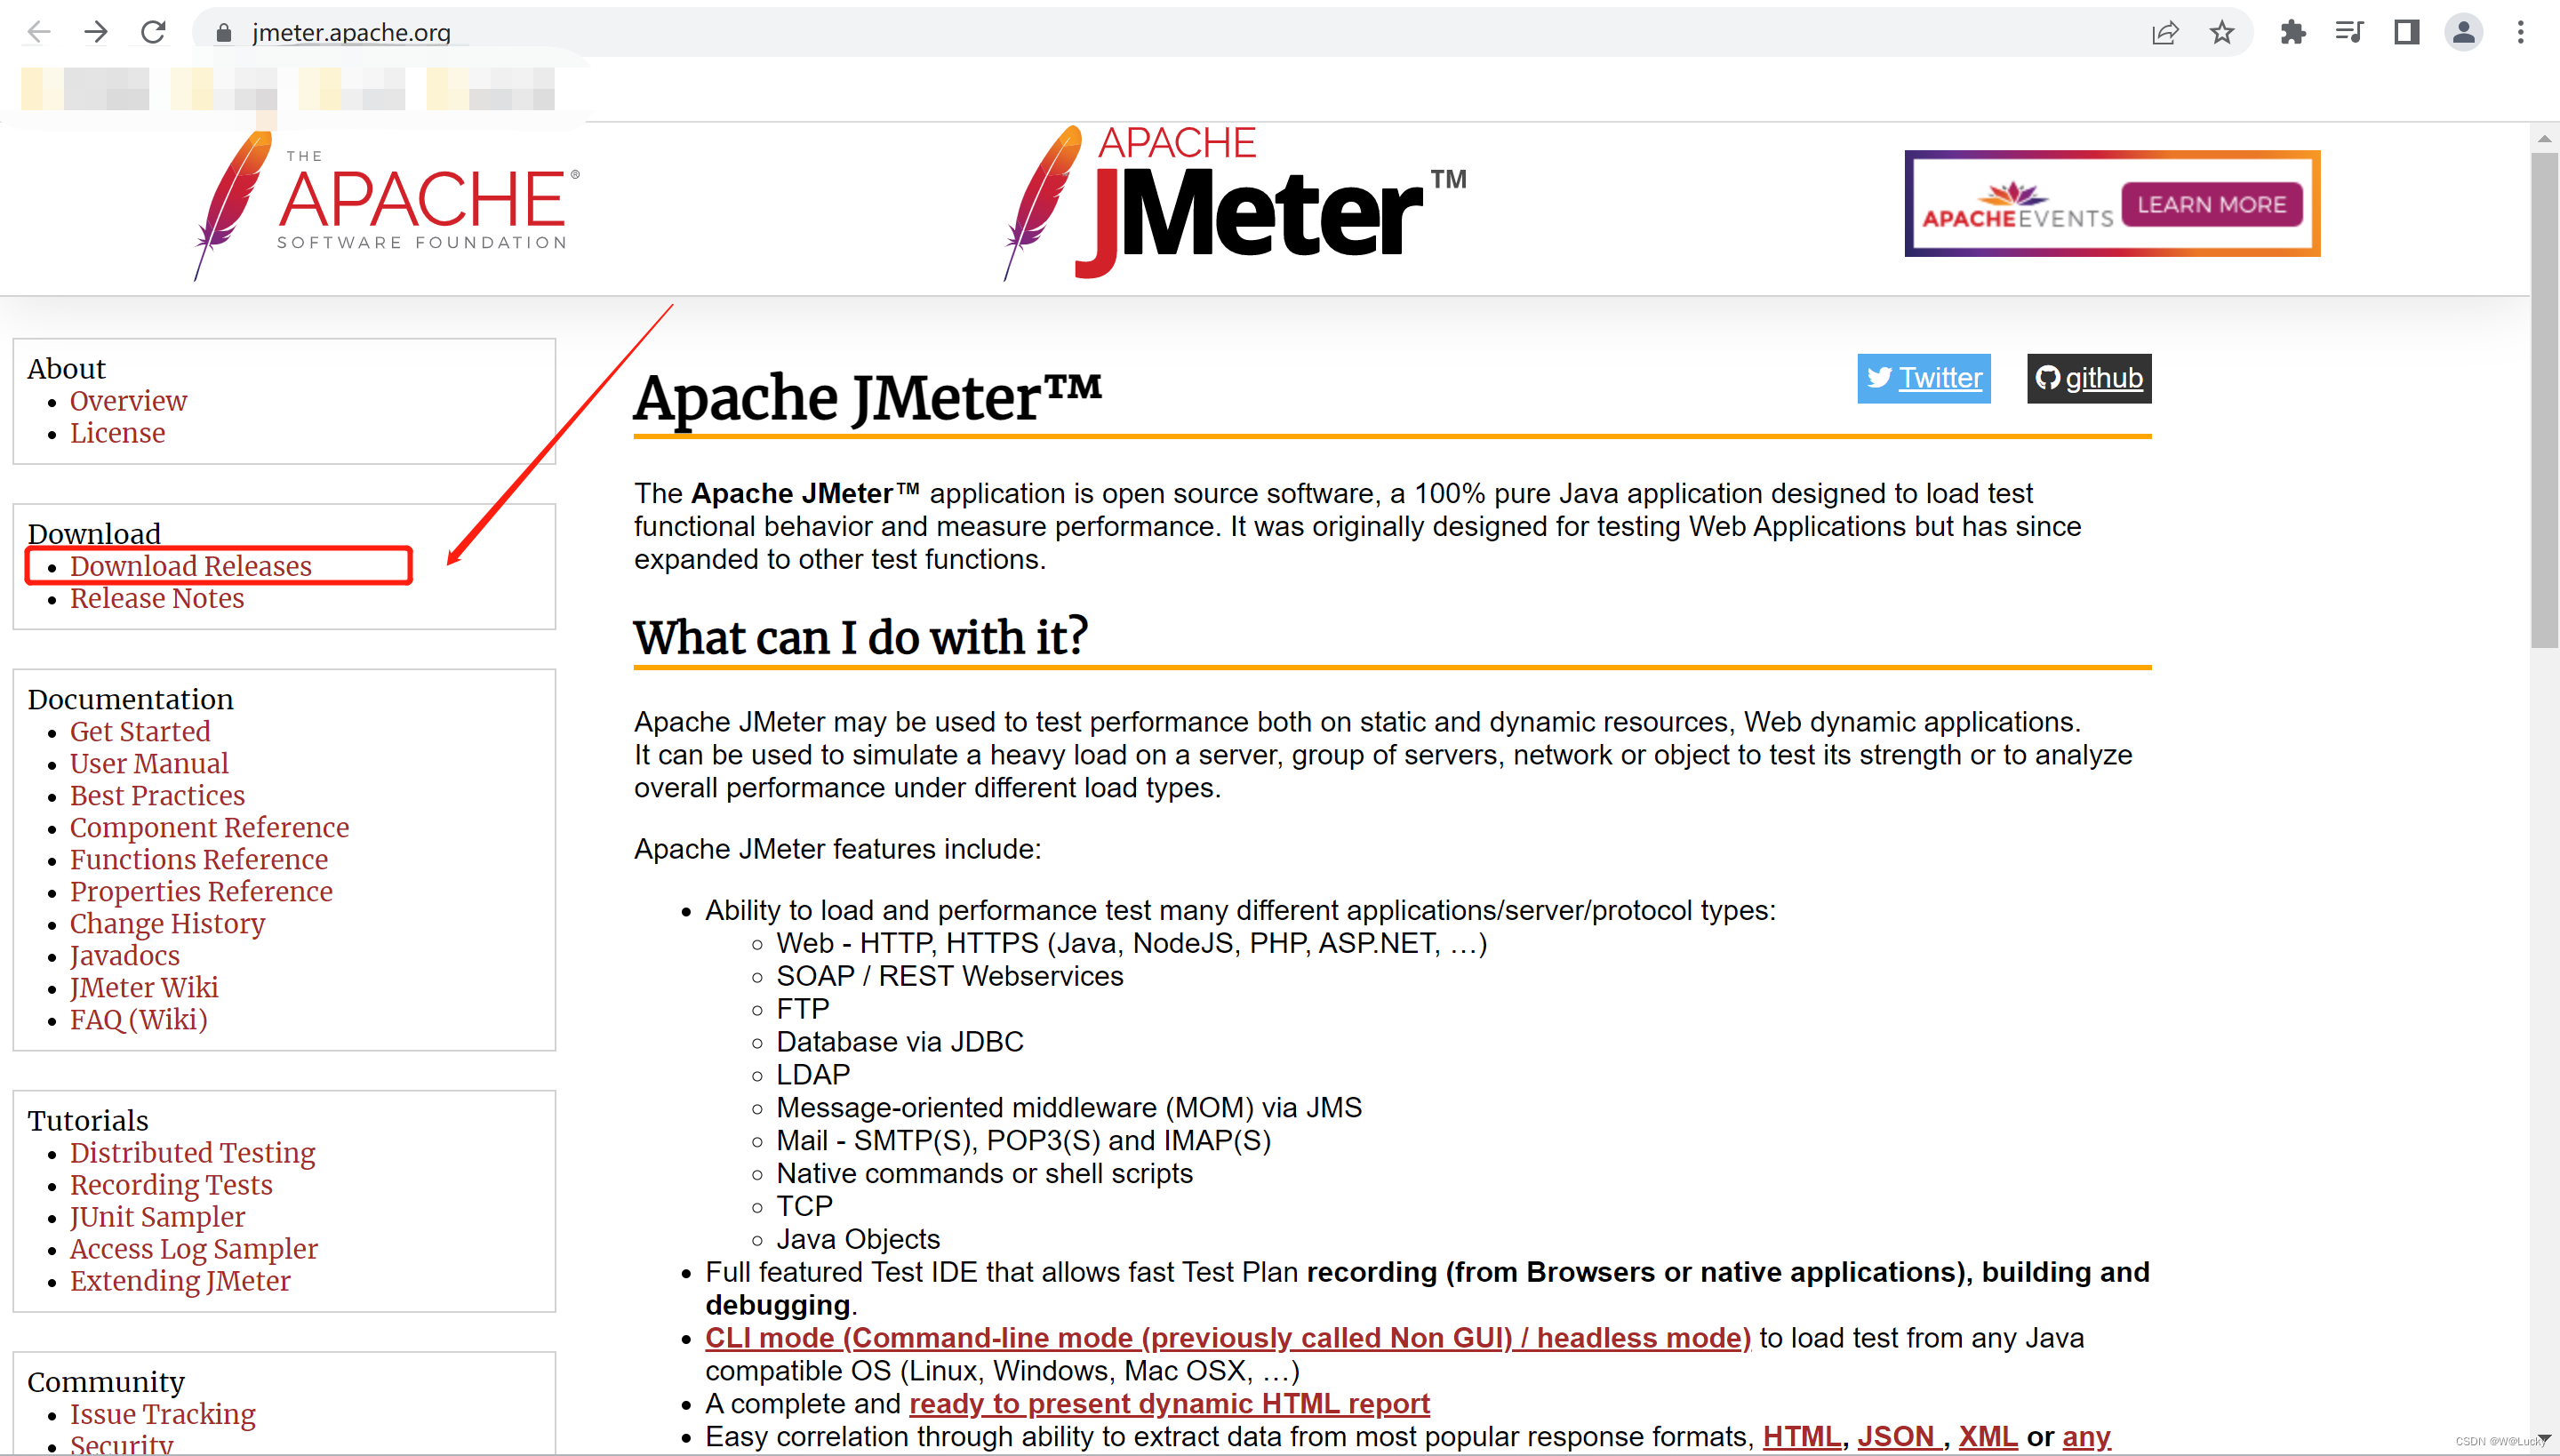
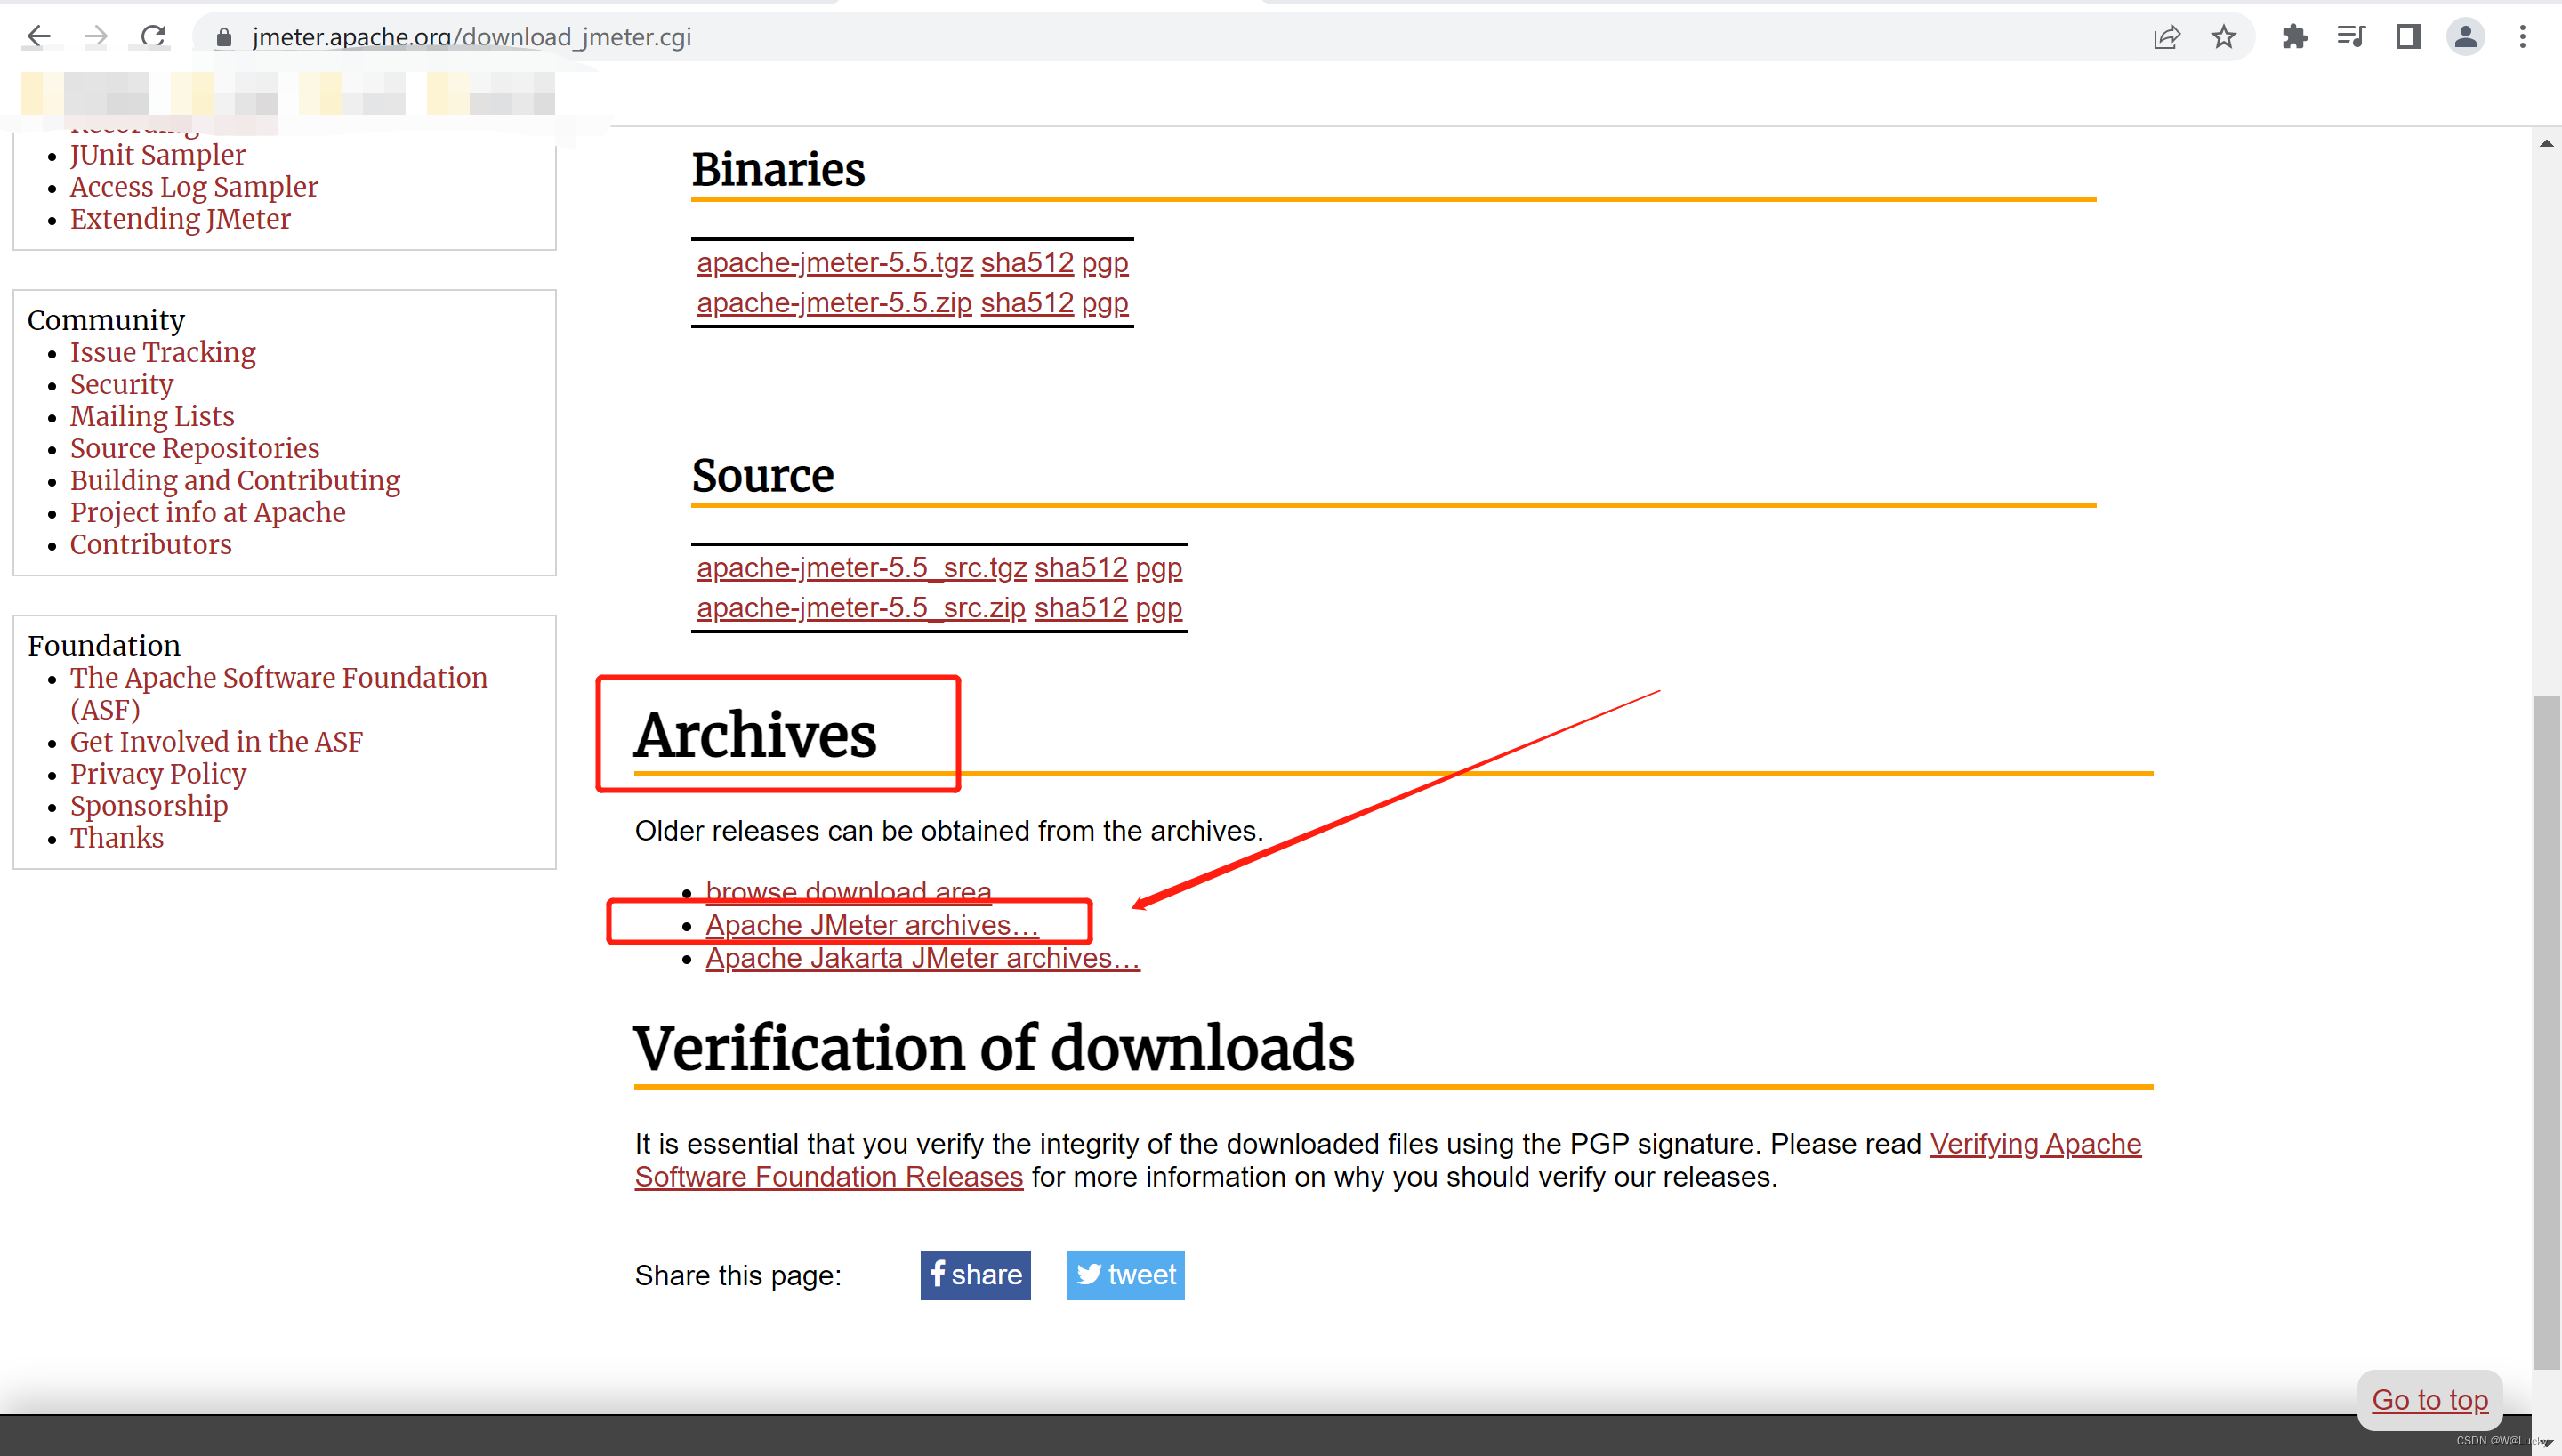

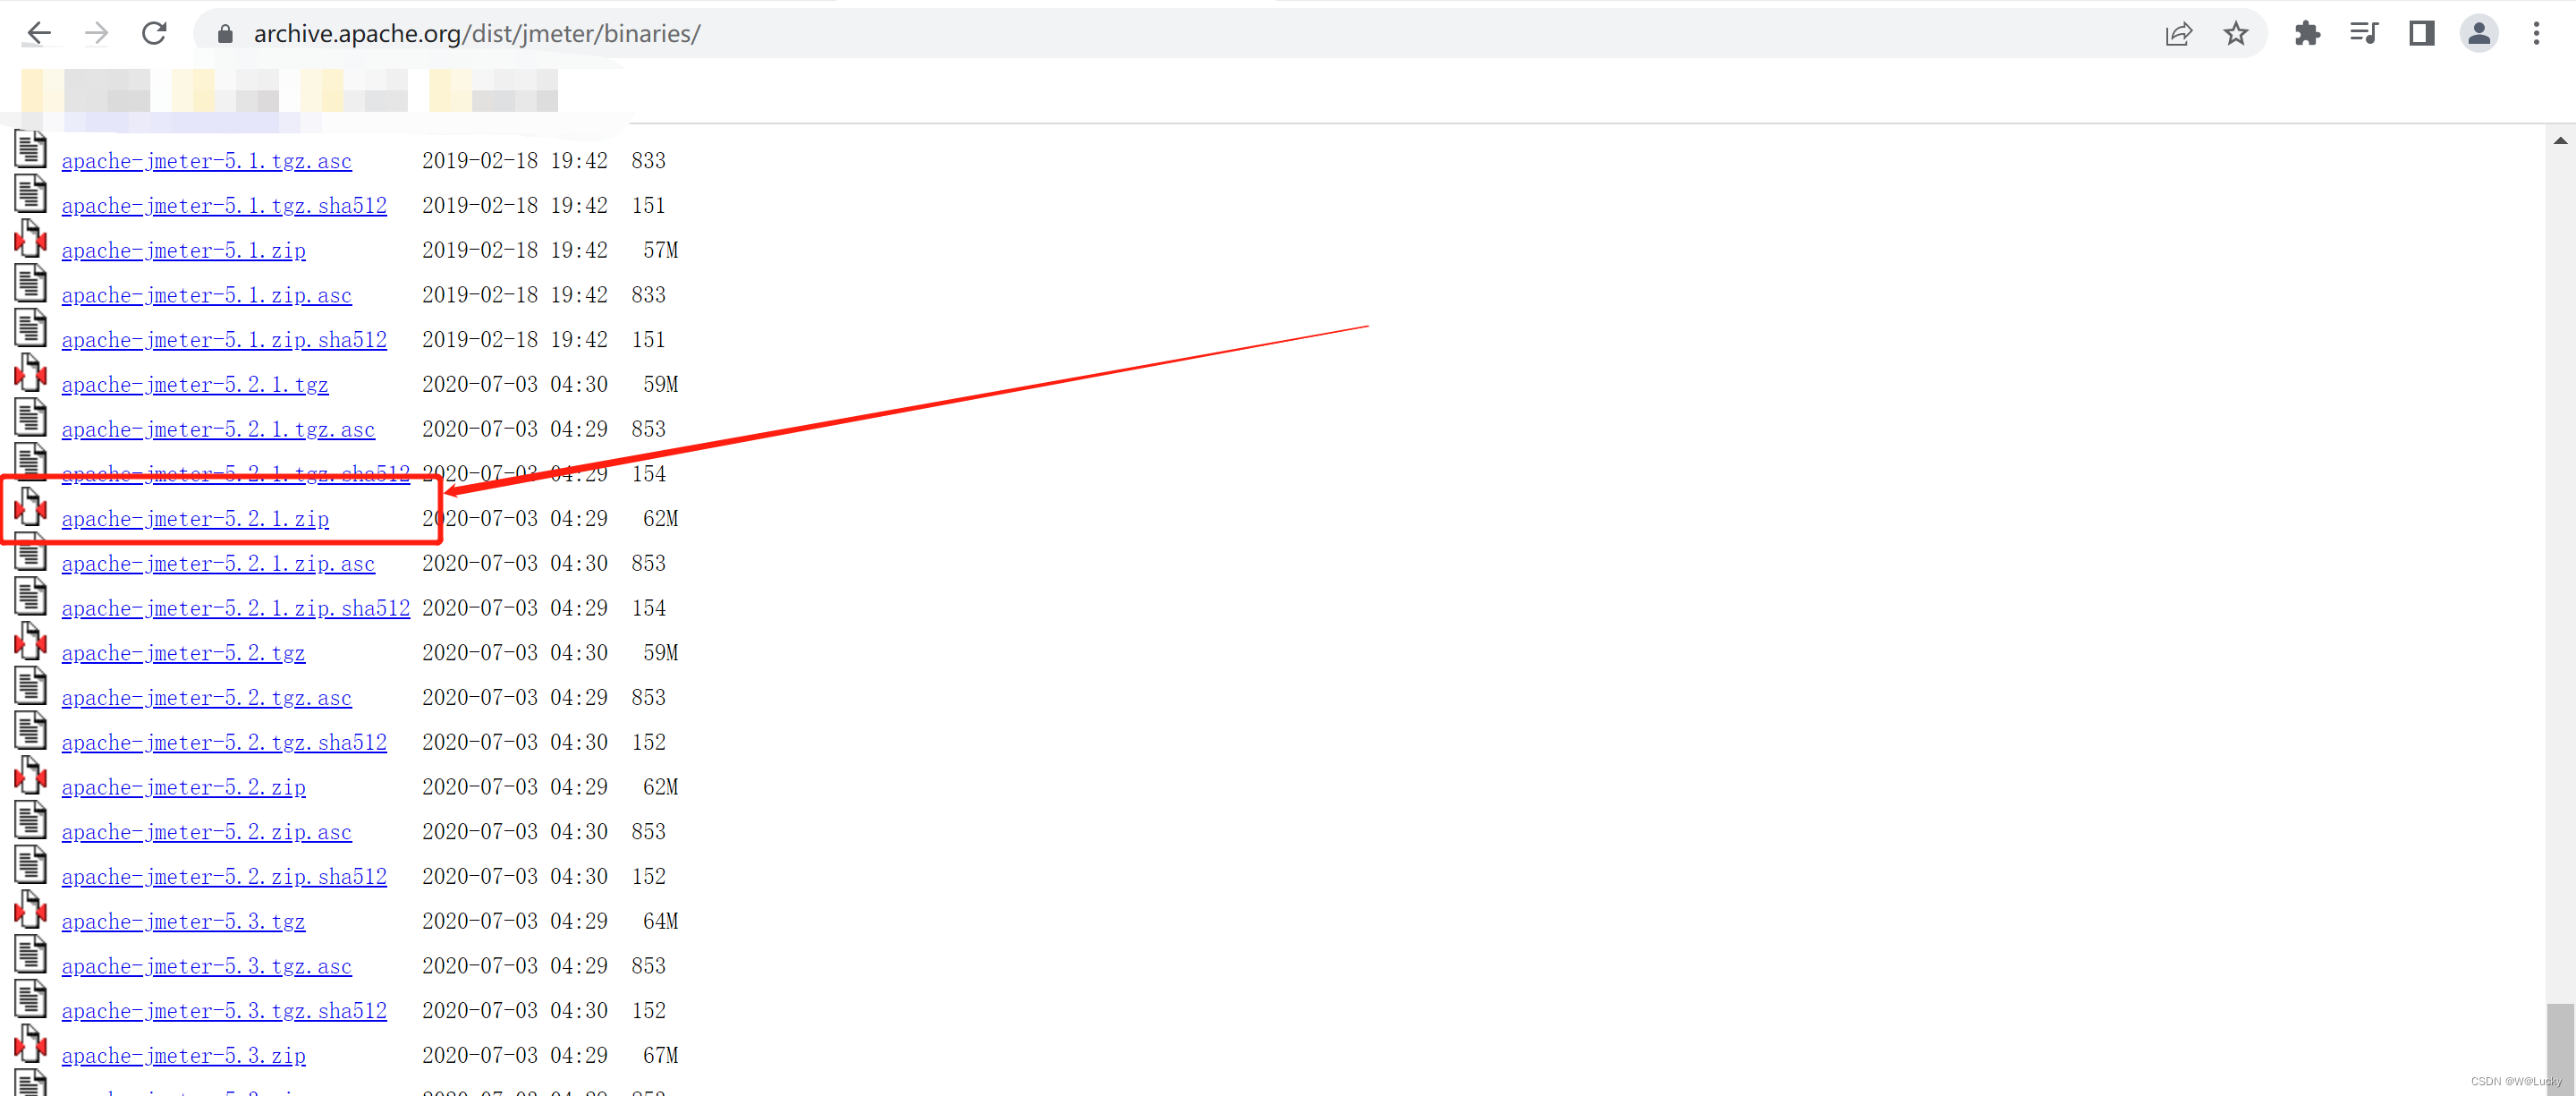


2. 压力测试示例
测试百度:
(1)添加线程组;
选中Test Plan右击-》添加-线程(用户)-线程组-》在线程组页面添加数据,如下:
    线程数:200
    循环次数:100
200*100=20000次请求
(2)添加HTTP请求:
选中线程组右击-》添加-取样器-HTTP请求-》在HTTP请求页面添加数据,如下:
    协议:http
    服务器名称或IP:www.baidu.com
    端口:80
(3)添加察看结果树、汇总报告、聚合报告、汇总图,便于查看测试结果;
选中线程组右击-》添加-监听器-察看结果树、汇总报告、聚合报告、汇总图.
(4)点击绿色按钮运行,查看结果
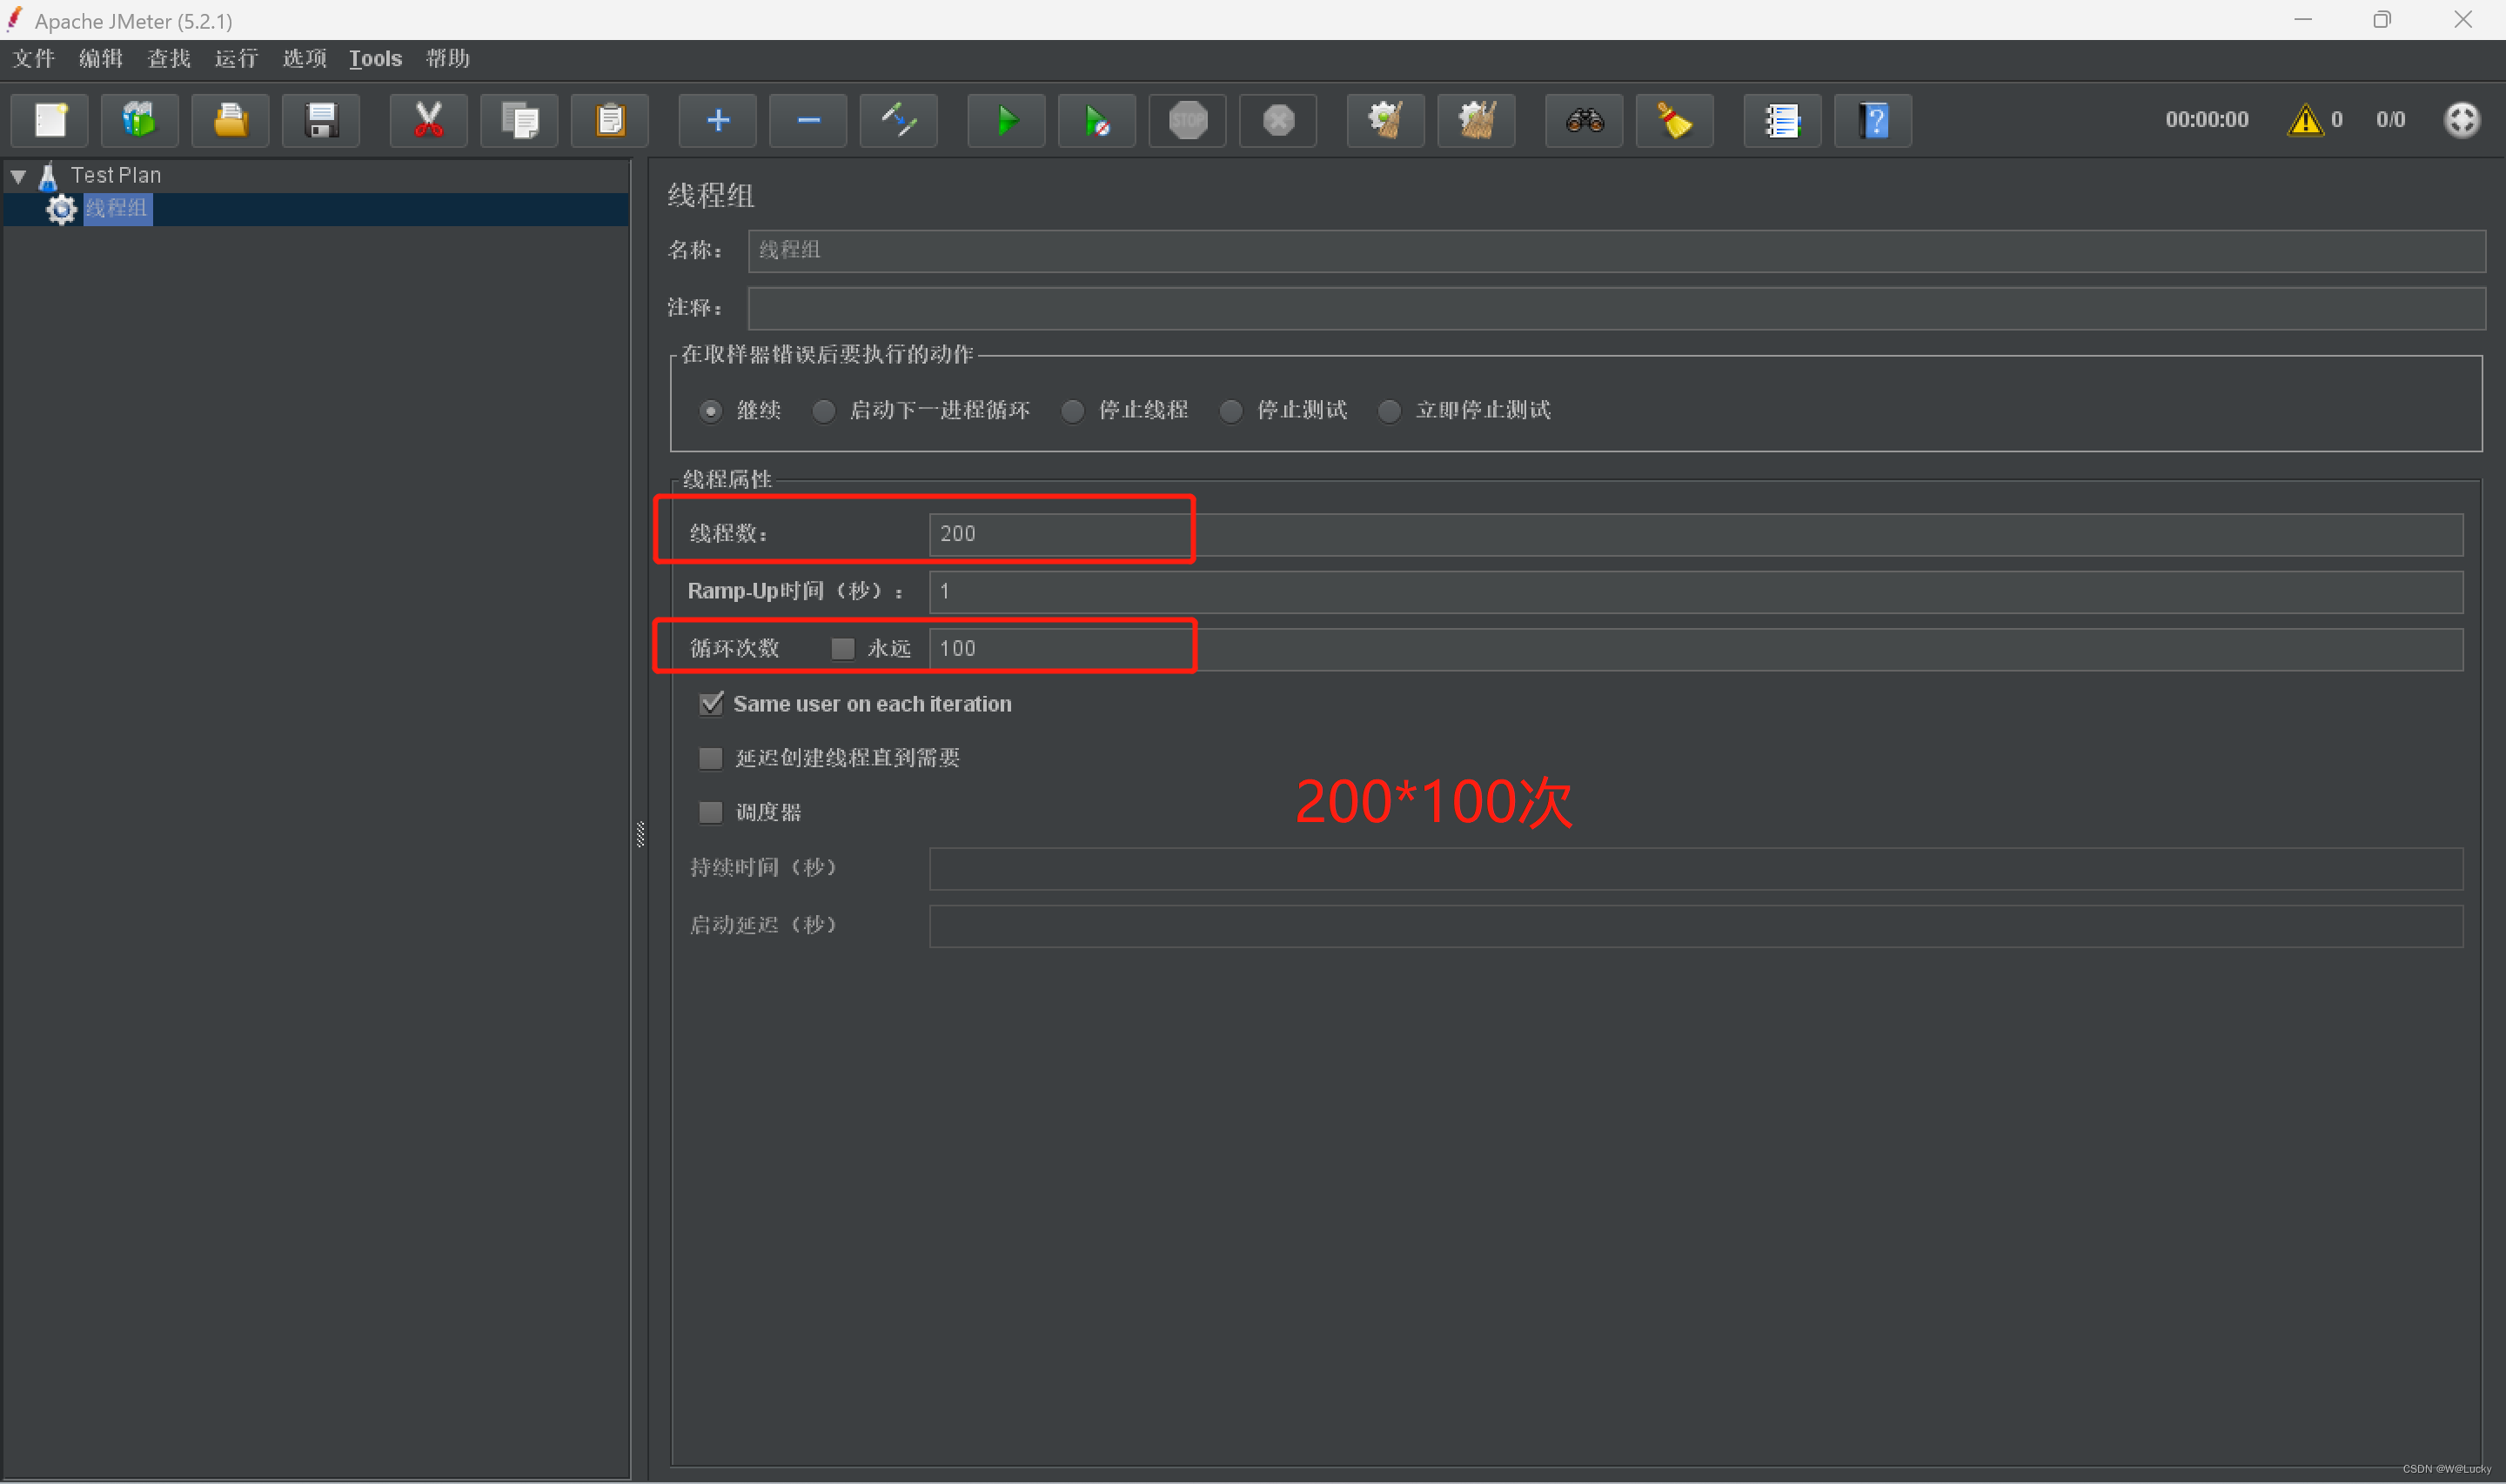
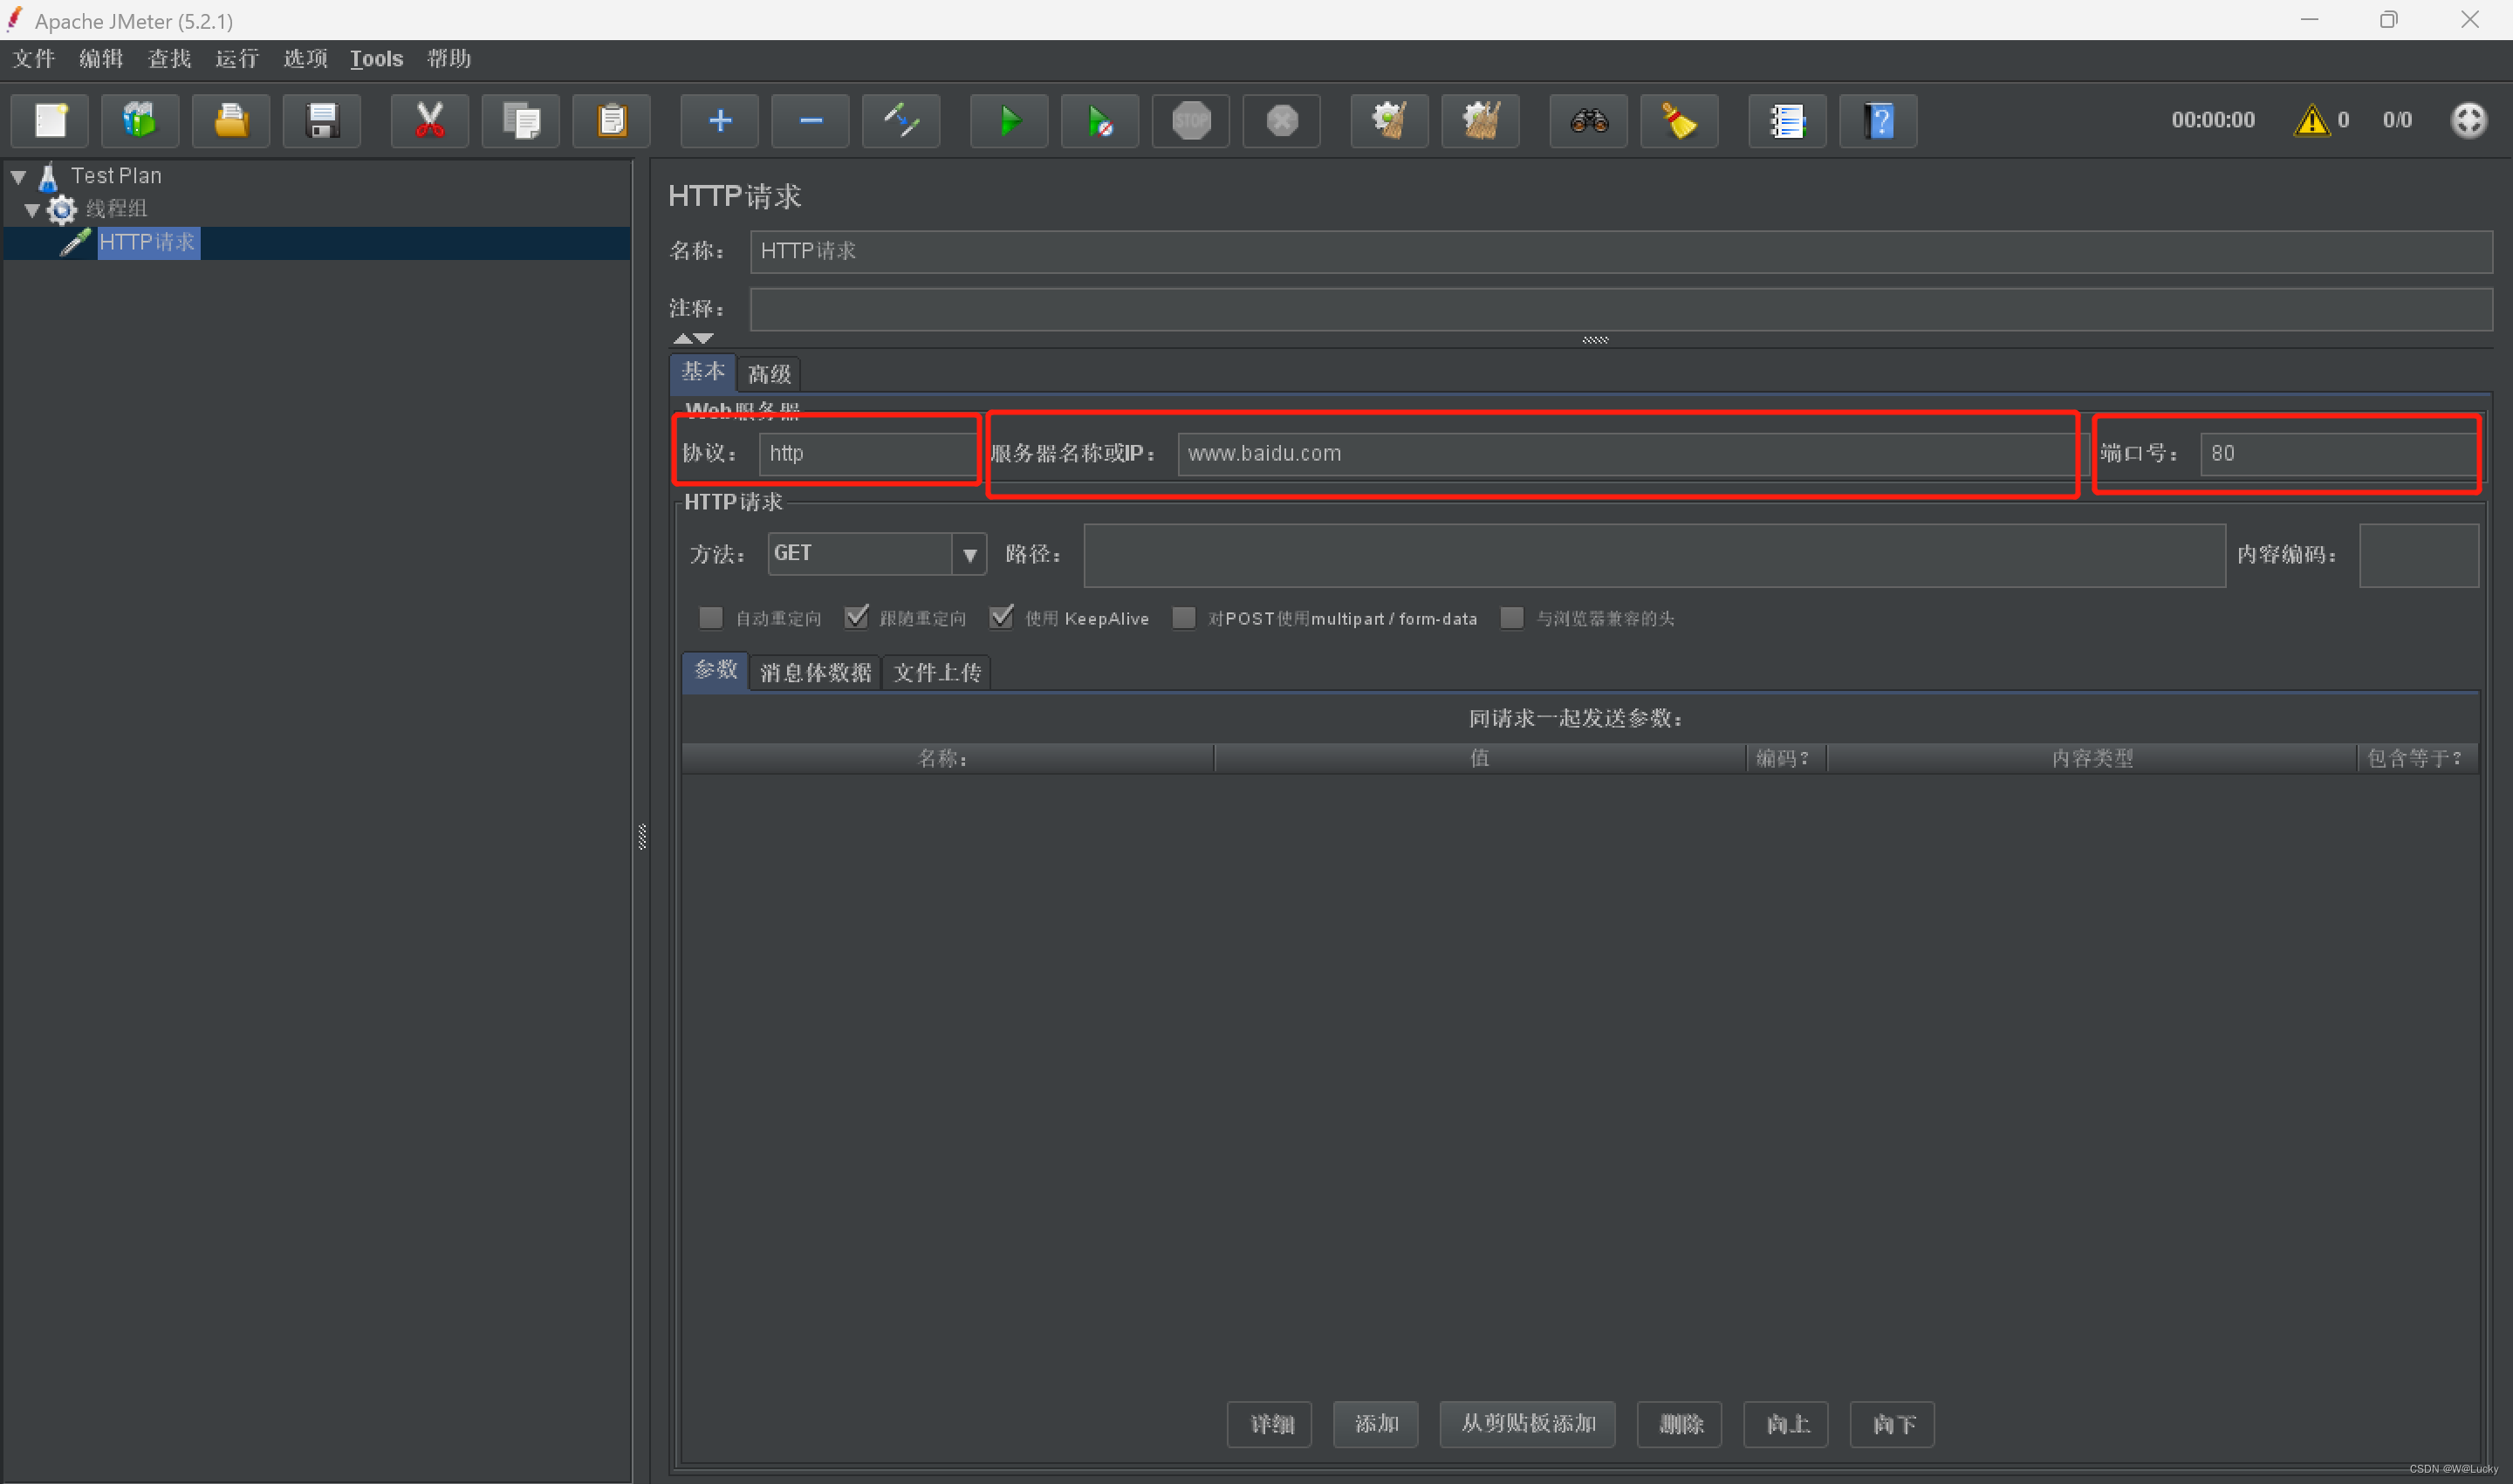
压力测试测试商城首页请求:
(1)修改http请求,为http://gulimall.com:80;
(2)查看压力测试的汇总报告和聚合报告,吞吐量小;
(3)修改商品服务gulimall-product的最大堆大小-Xmx=512m,重启商品服务;
(4)清空压测结果,将压测循环次数改为10,重新对商品首页进行压测。简单调优,响应时间变快。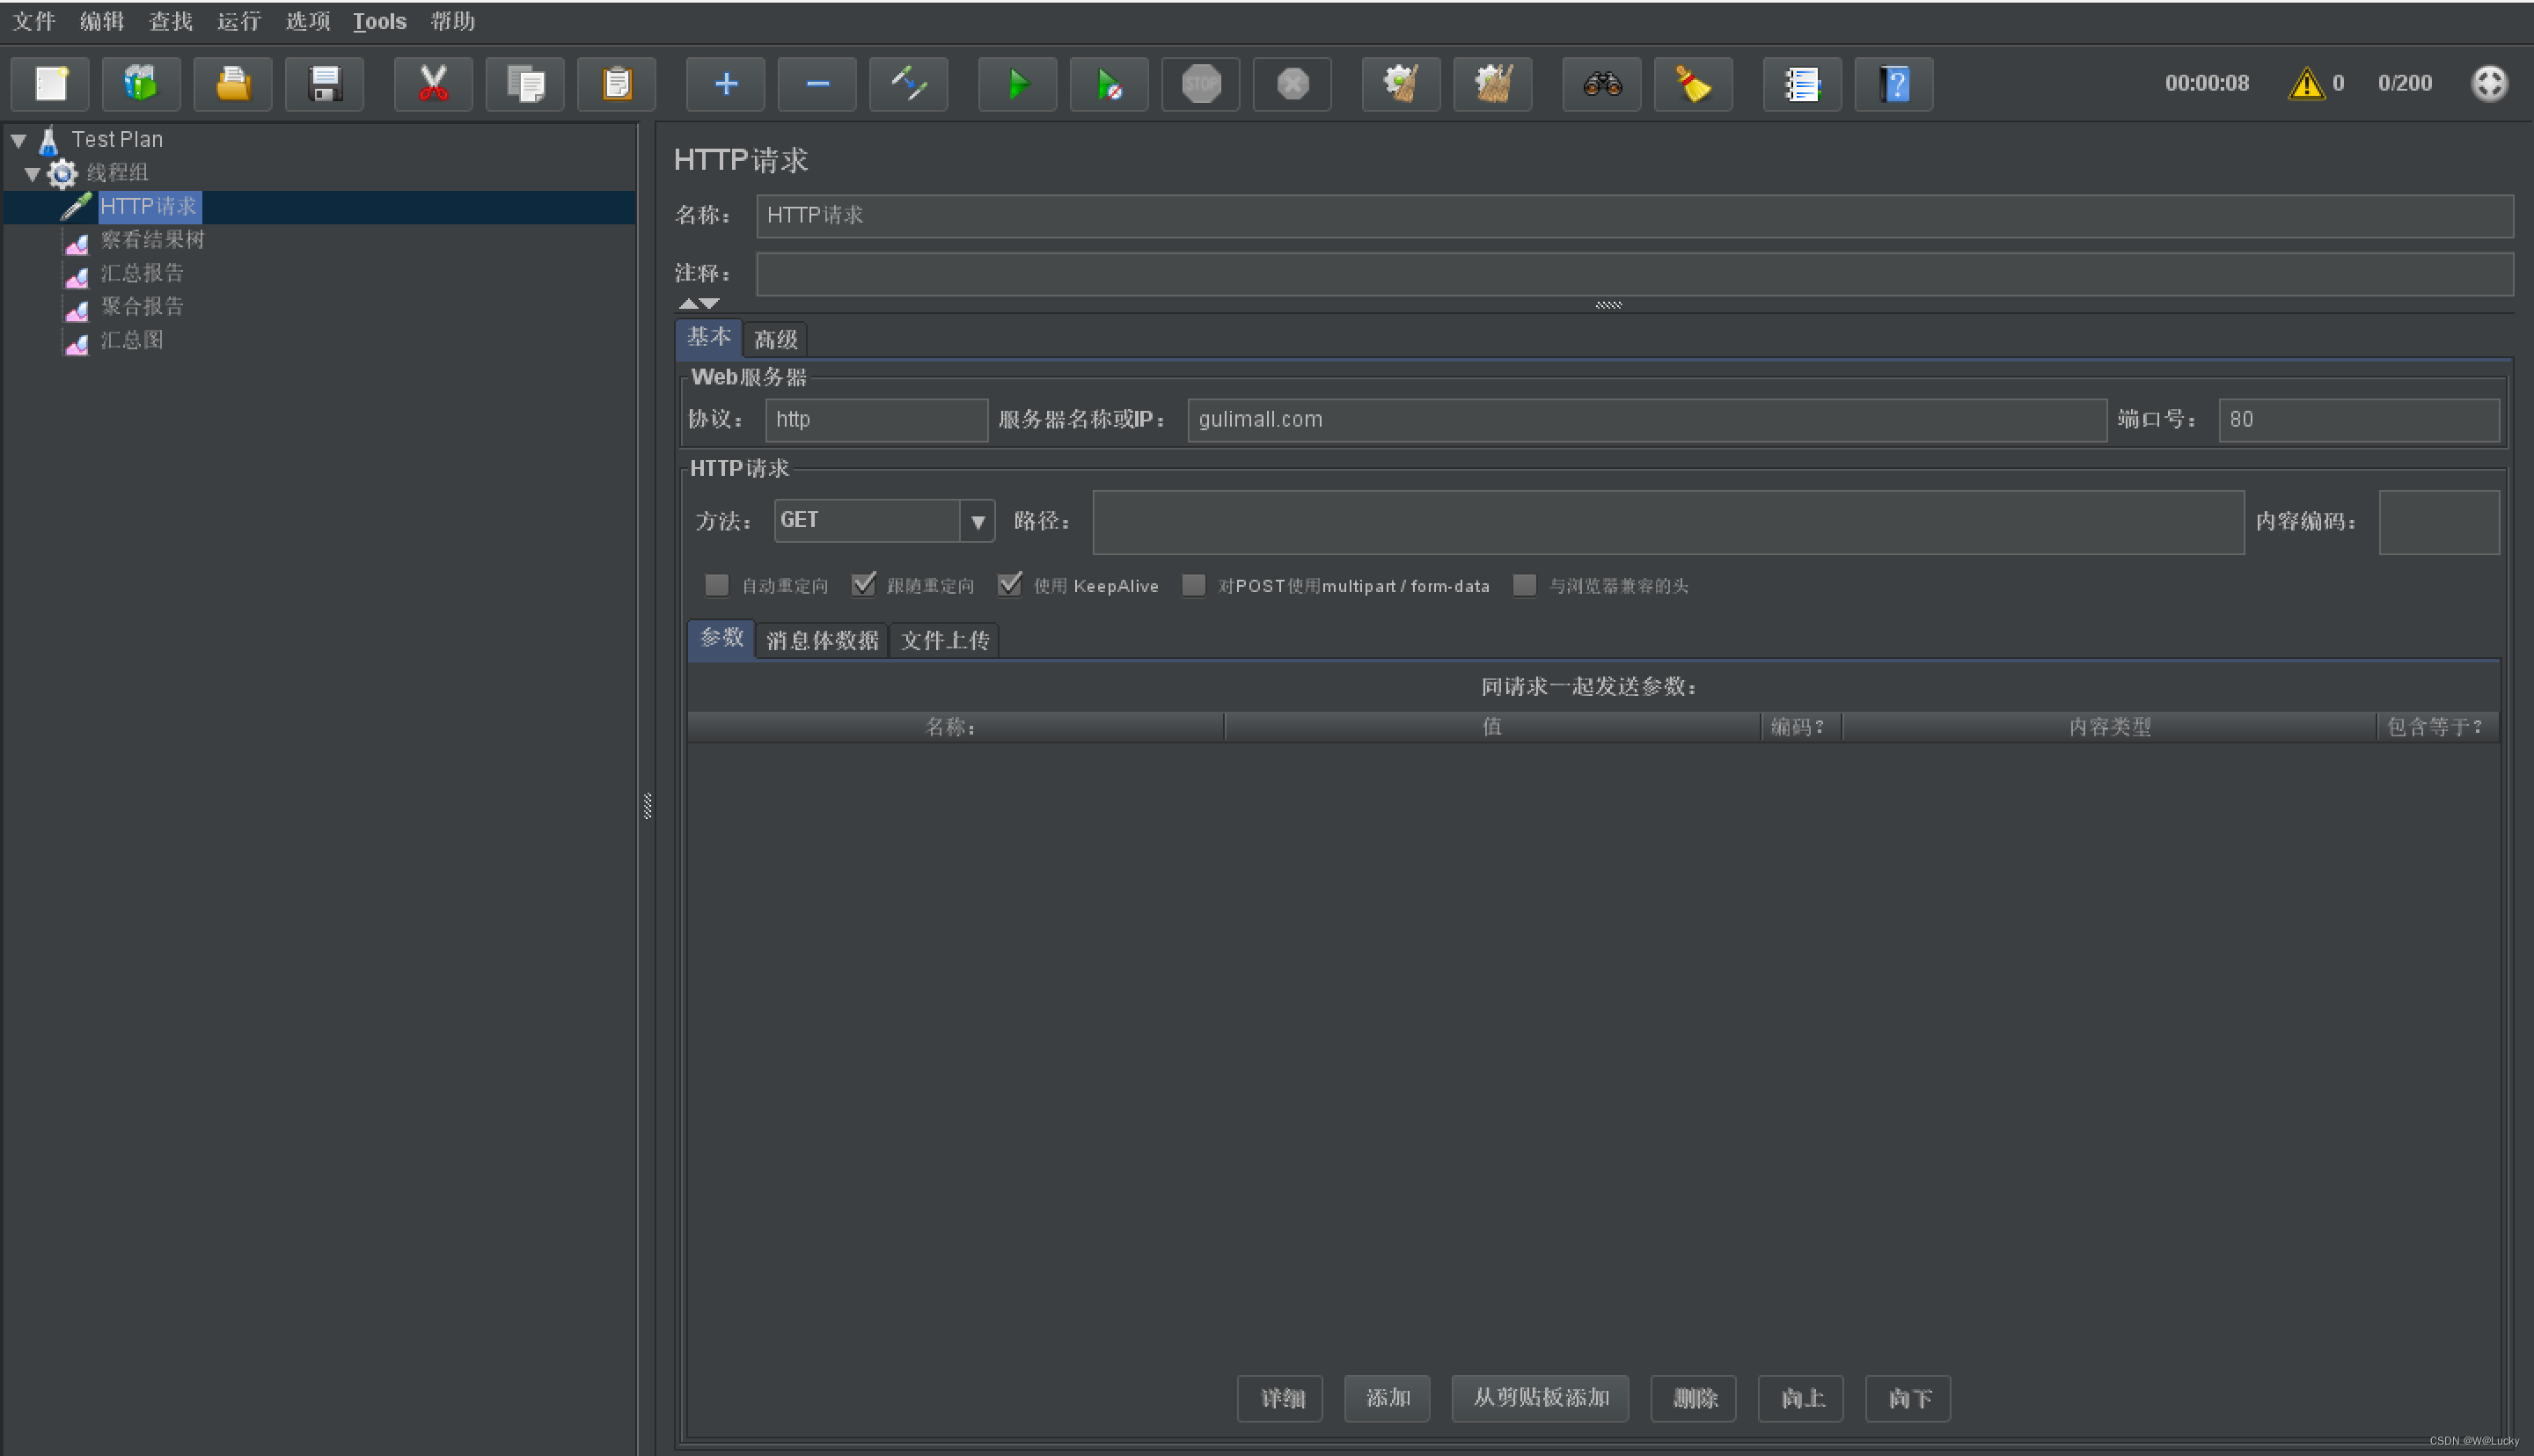
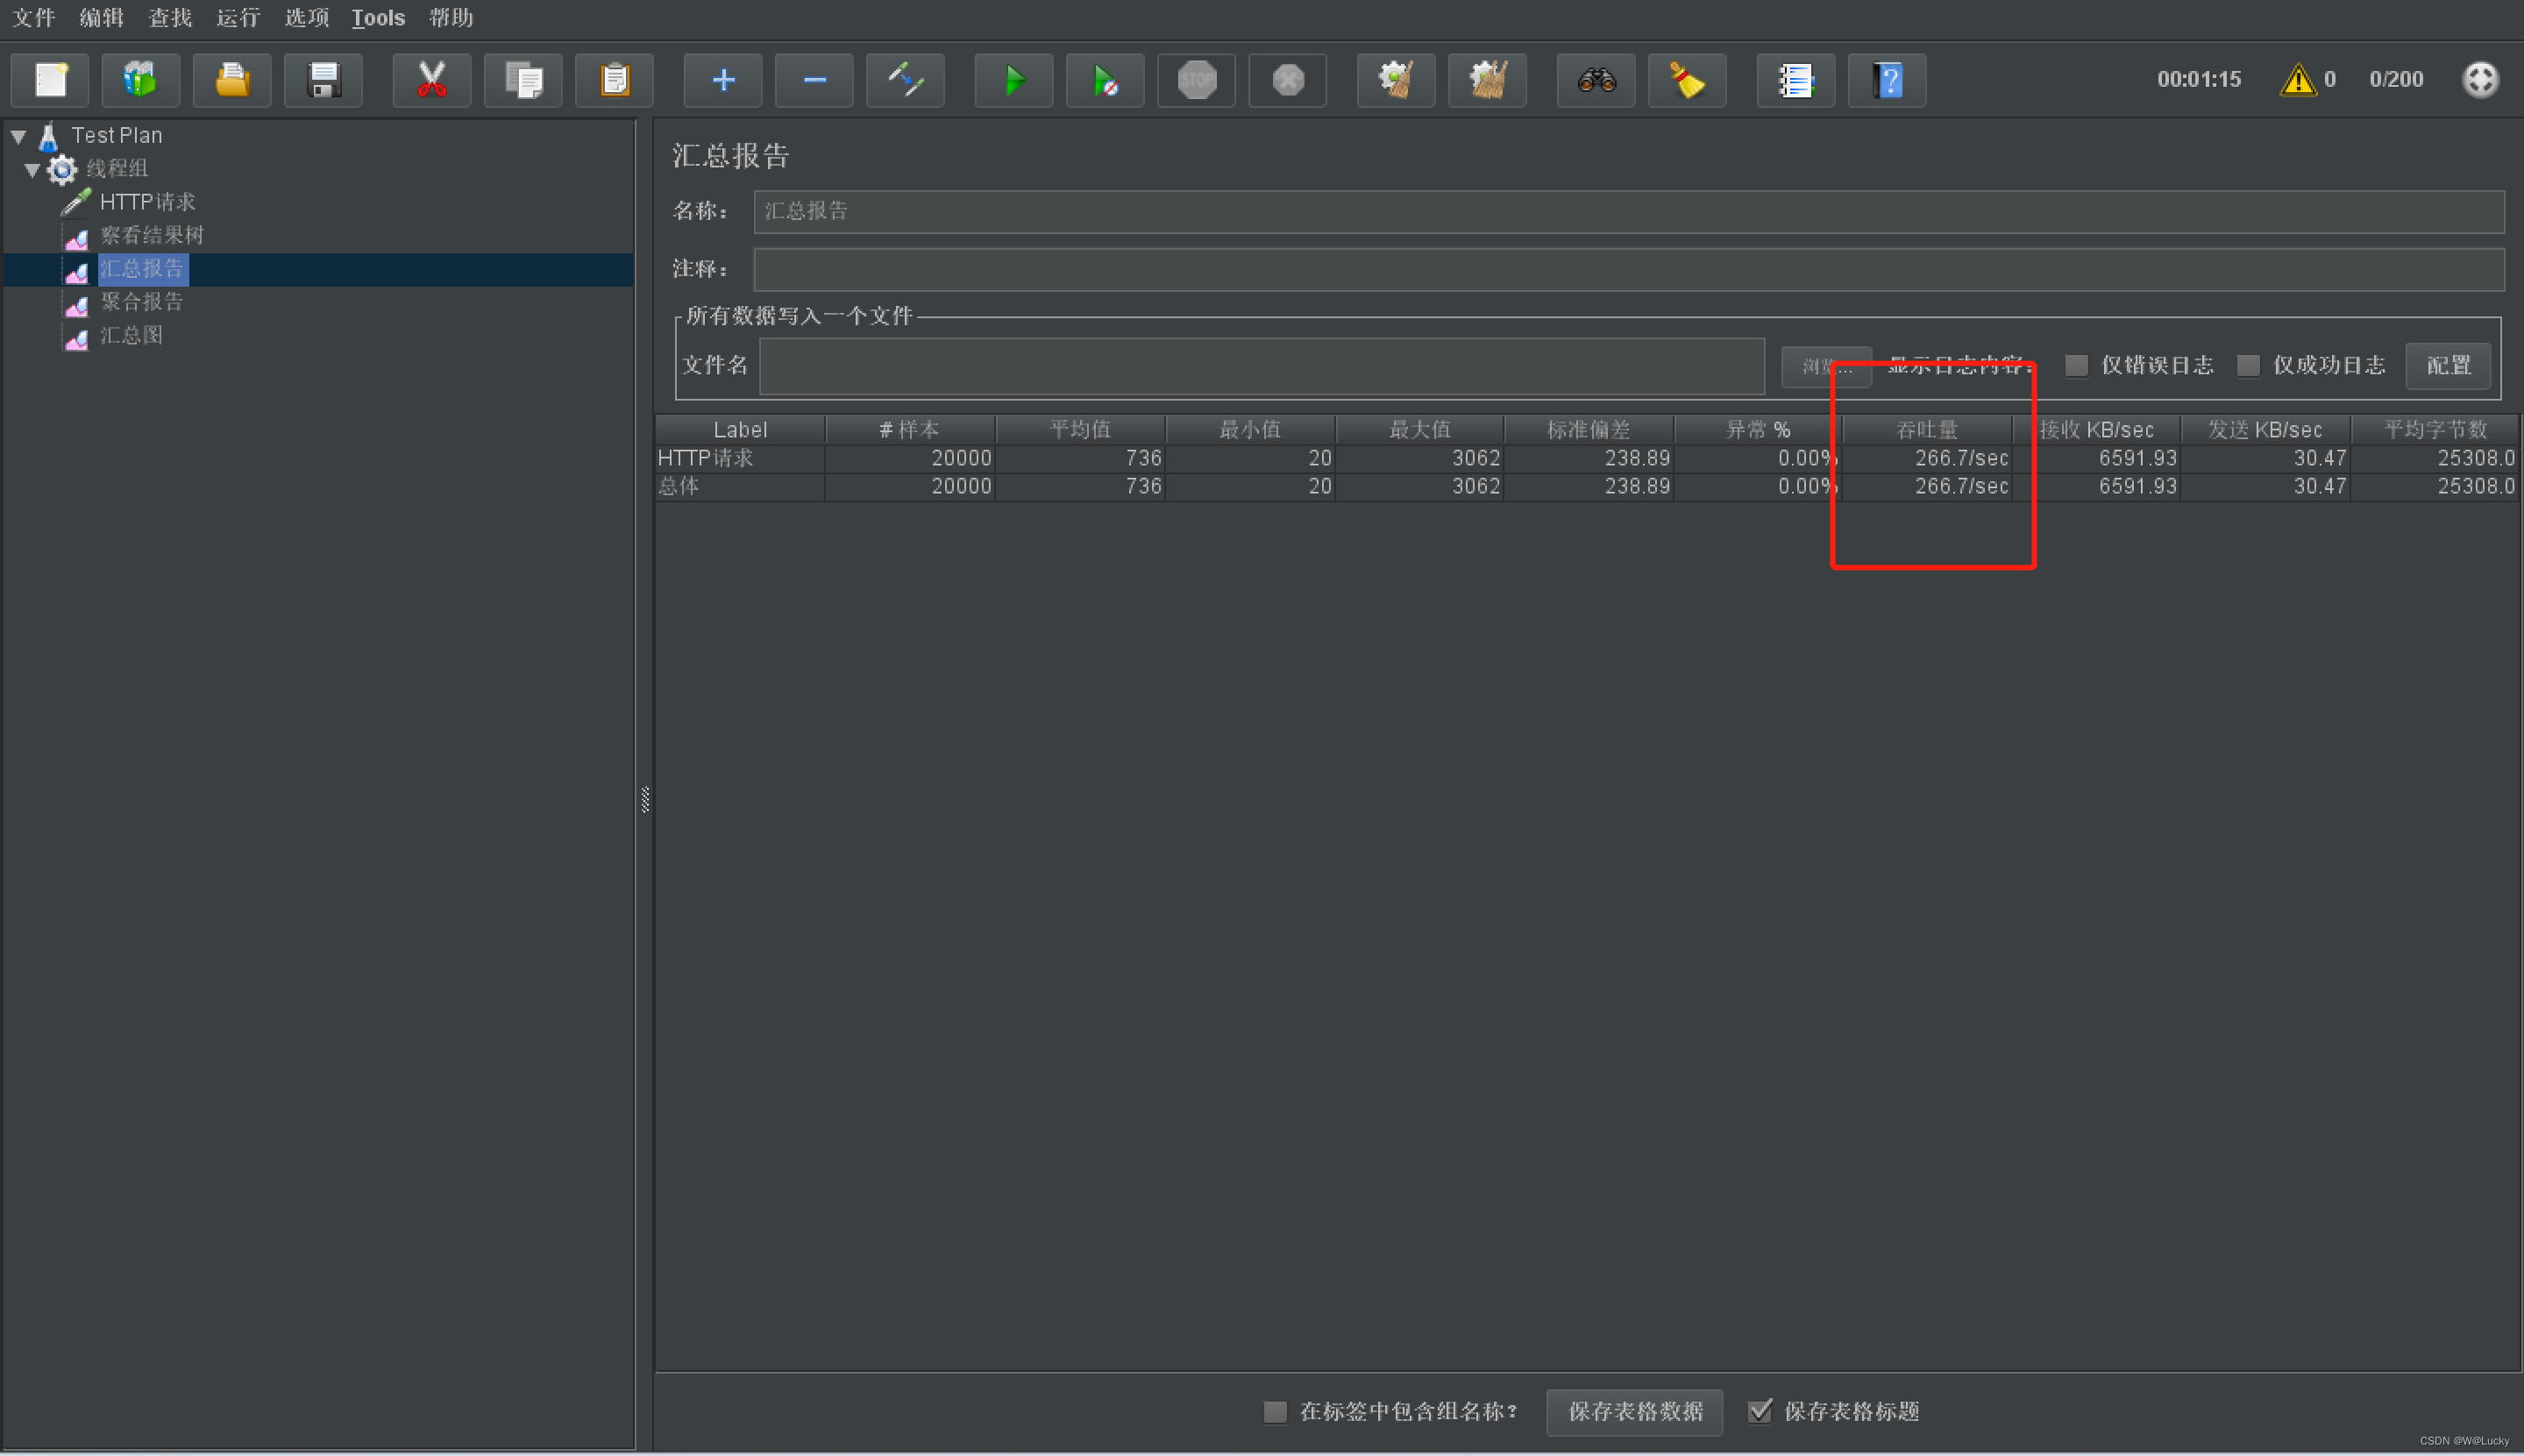
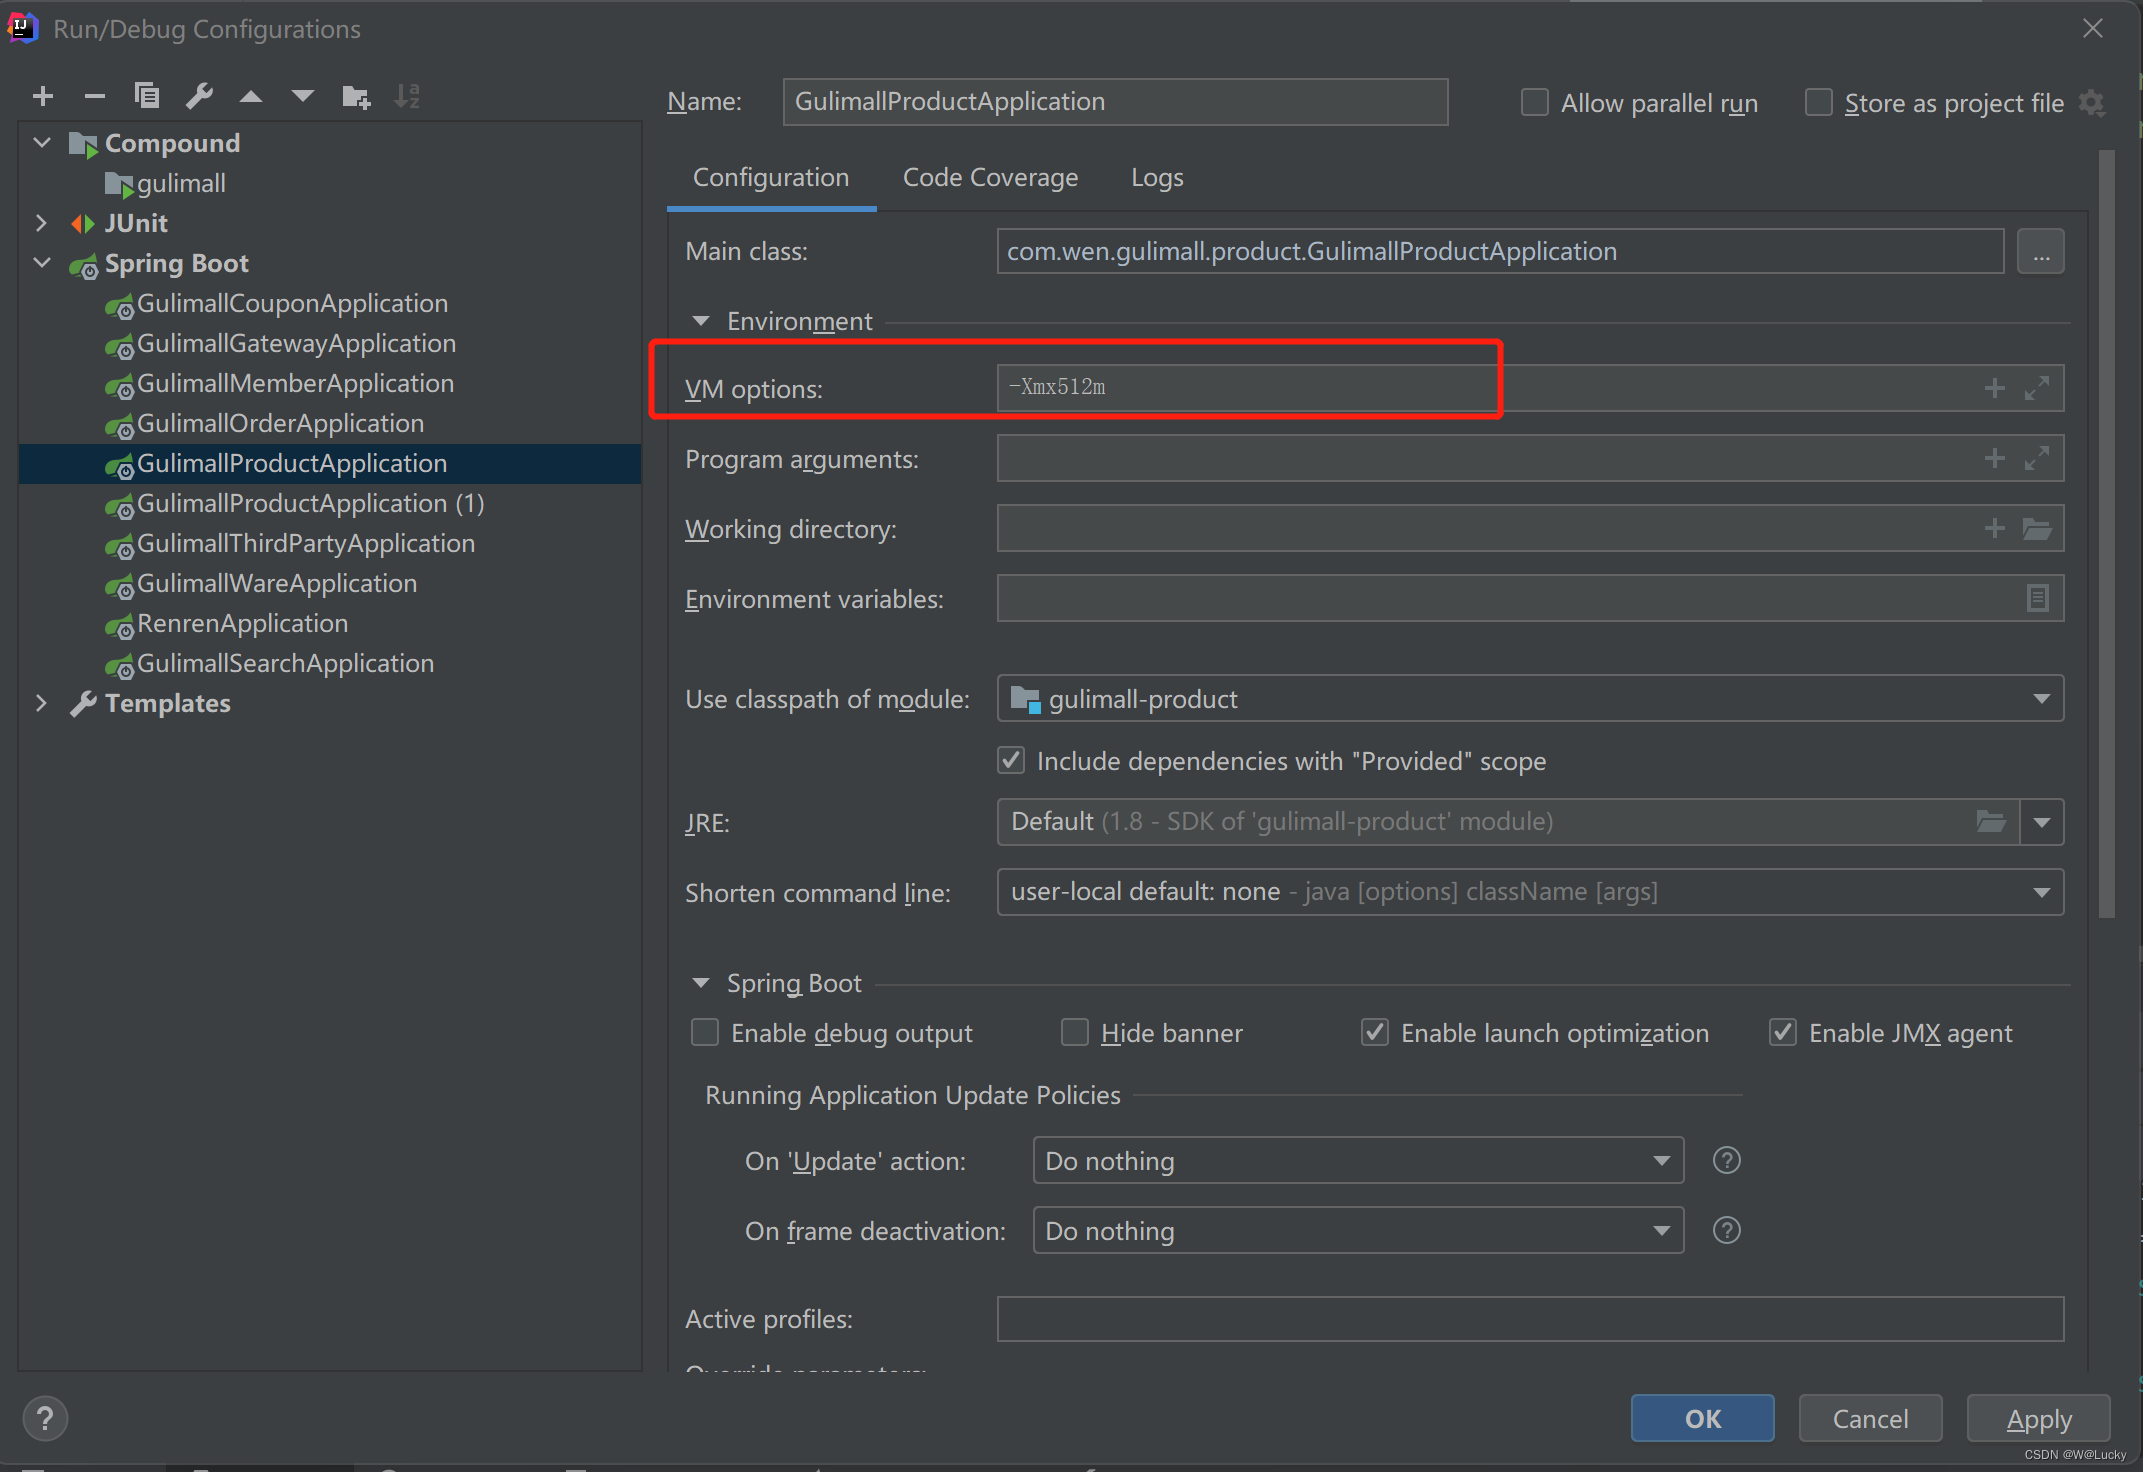
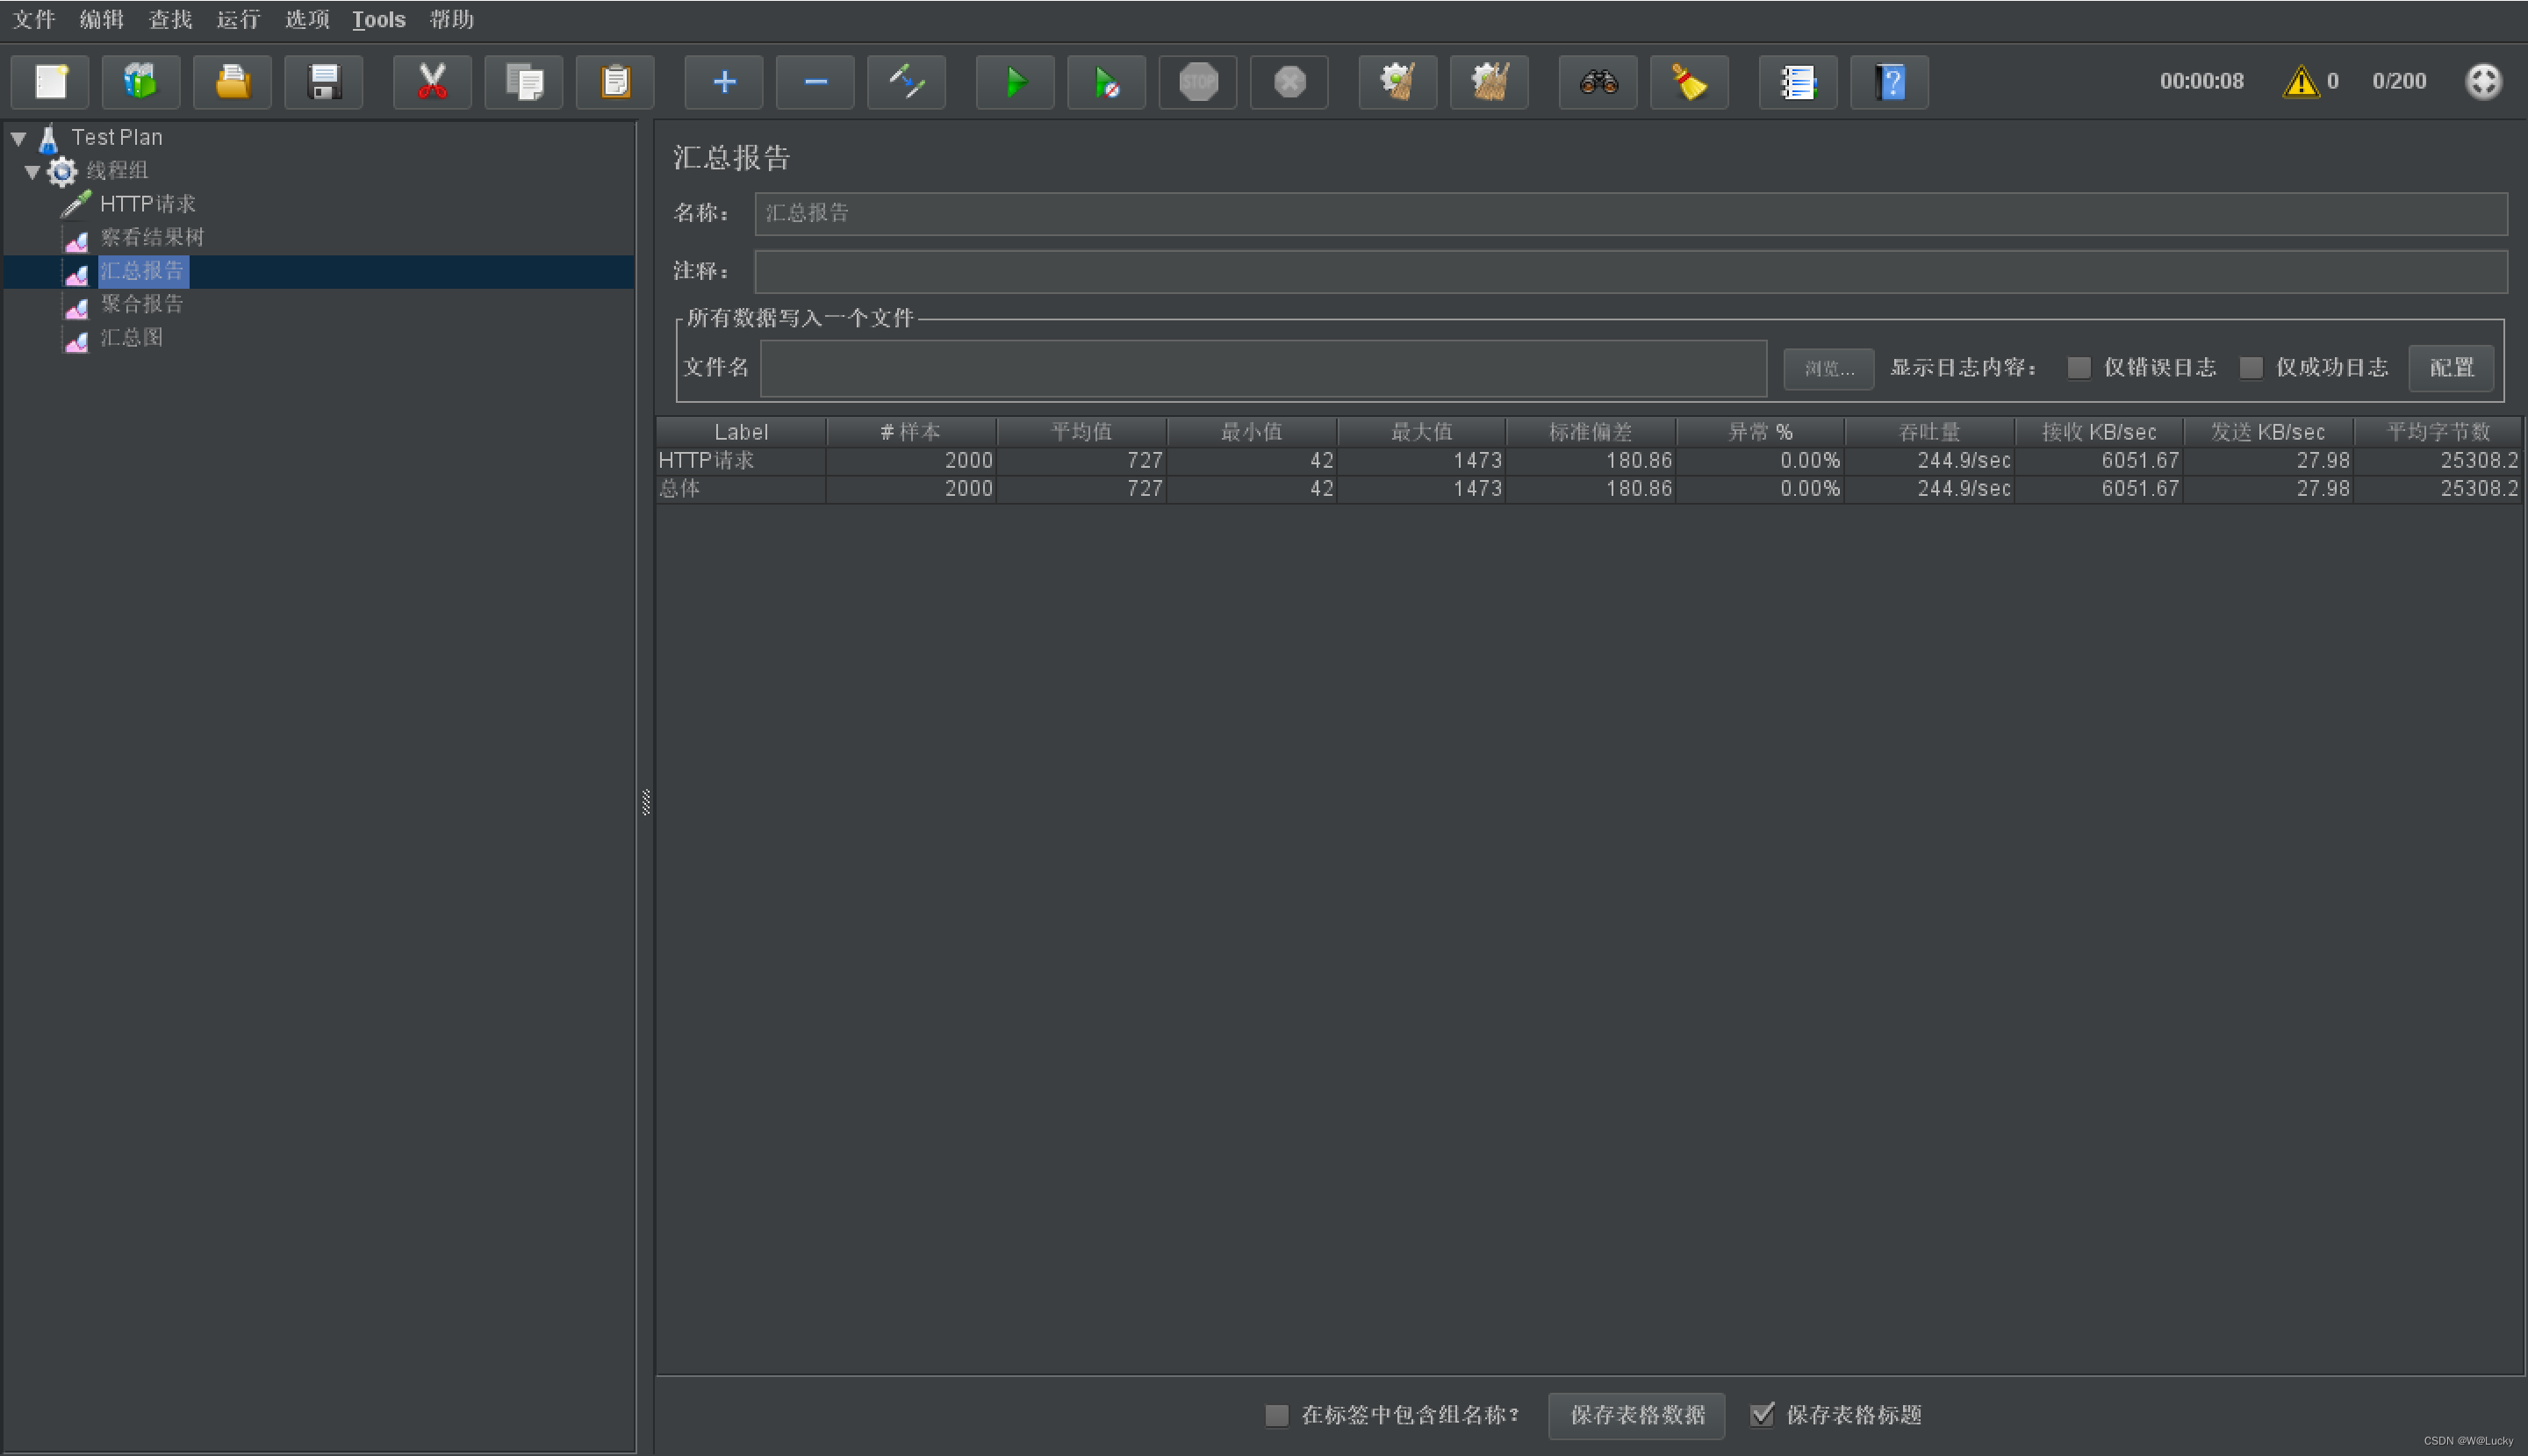
4.1.3 JMeter在windows下地址占用bug解决
测试bug:
(1)修改http请求为 http://127.0.0.1:10000直接访问商品服务;
(2)线程组中线程数改为50,循环次数选永远,按老师视频所说30000次请求50%的异常,需要对注册表进行以下修改;
注意:我使用的是win11,没出现该异常。
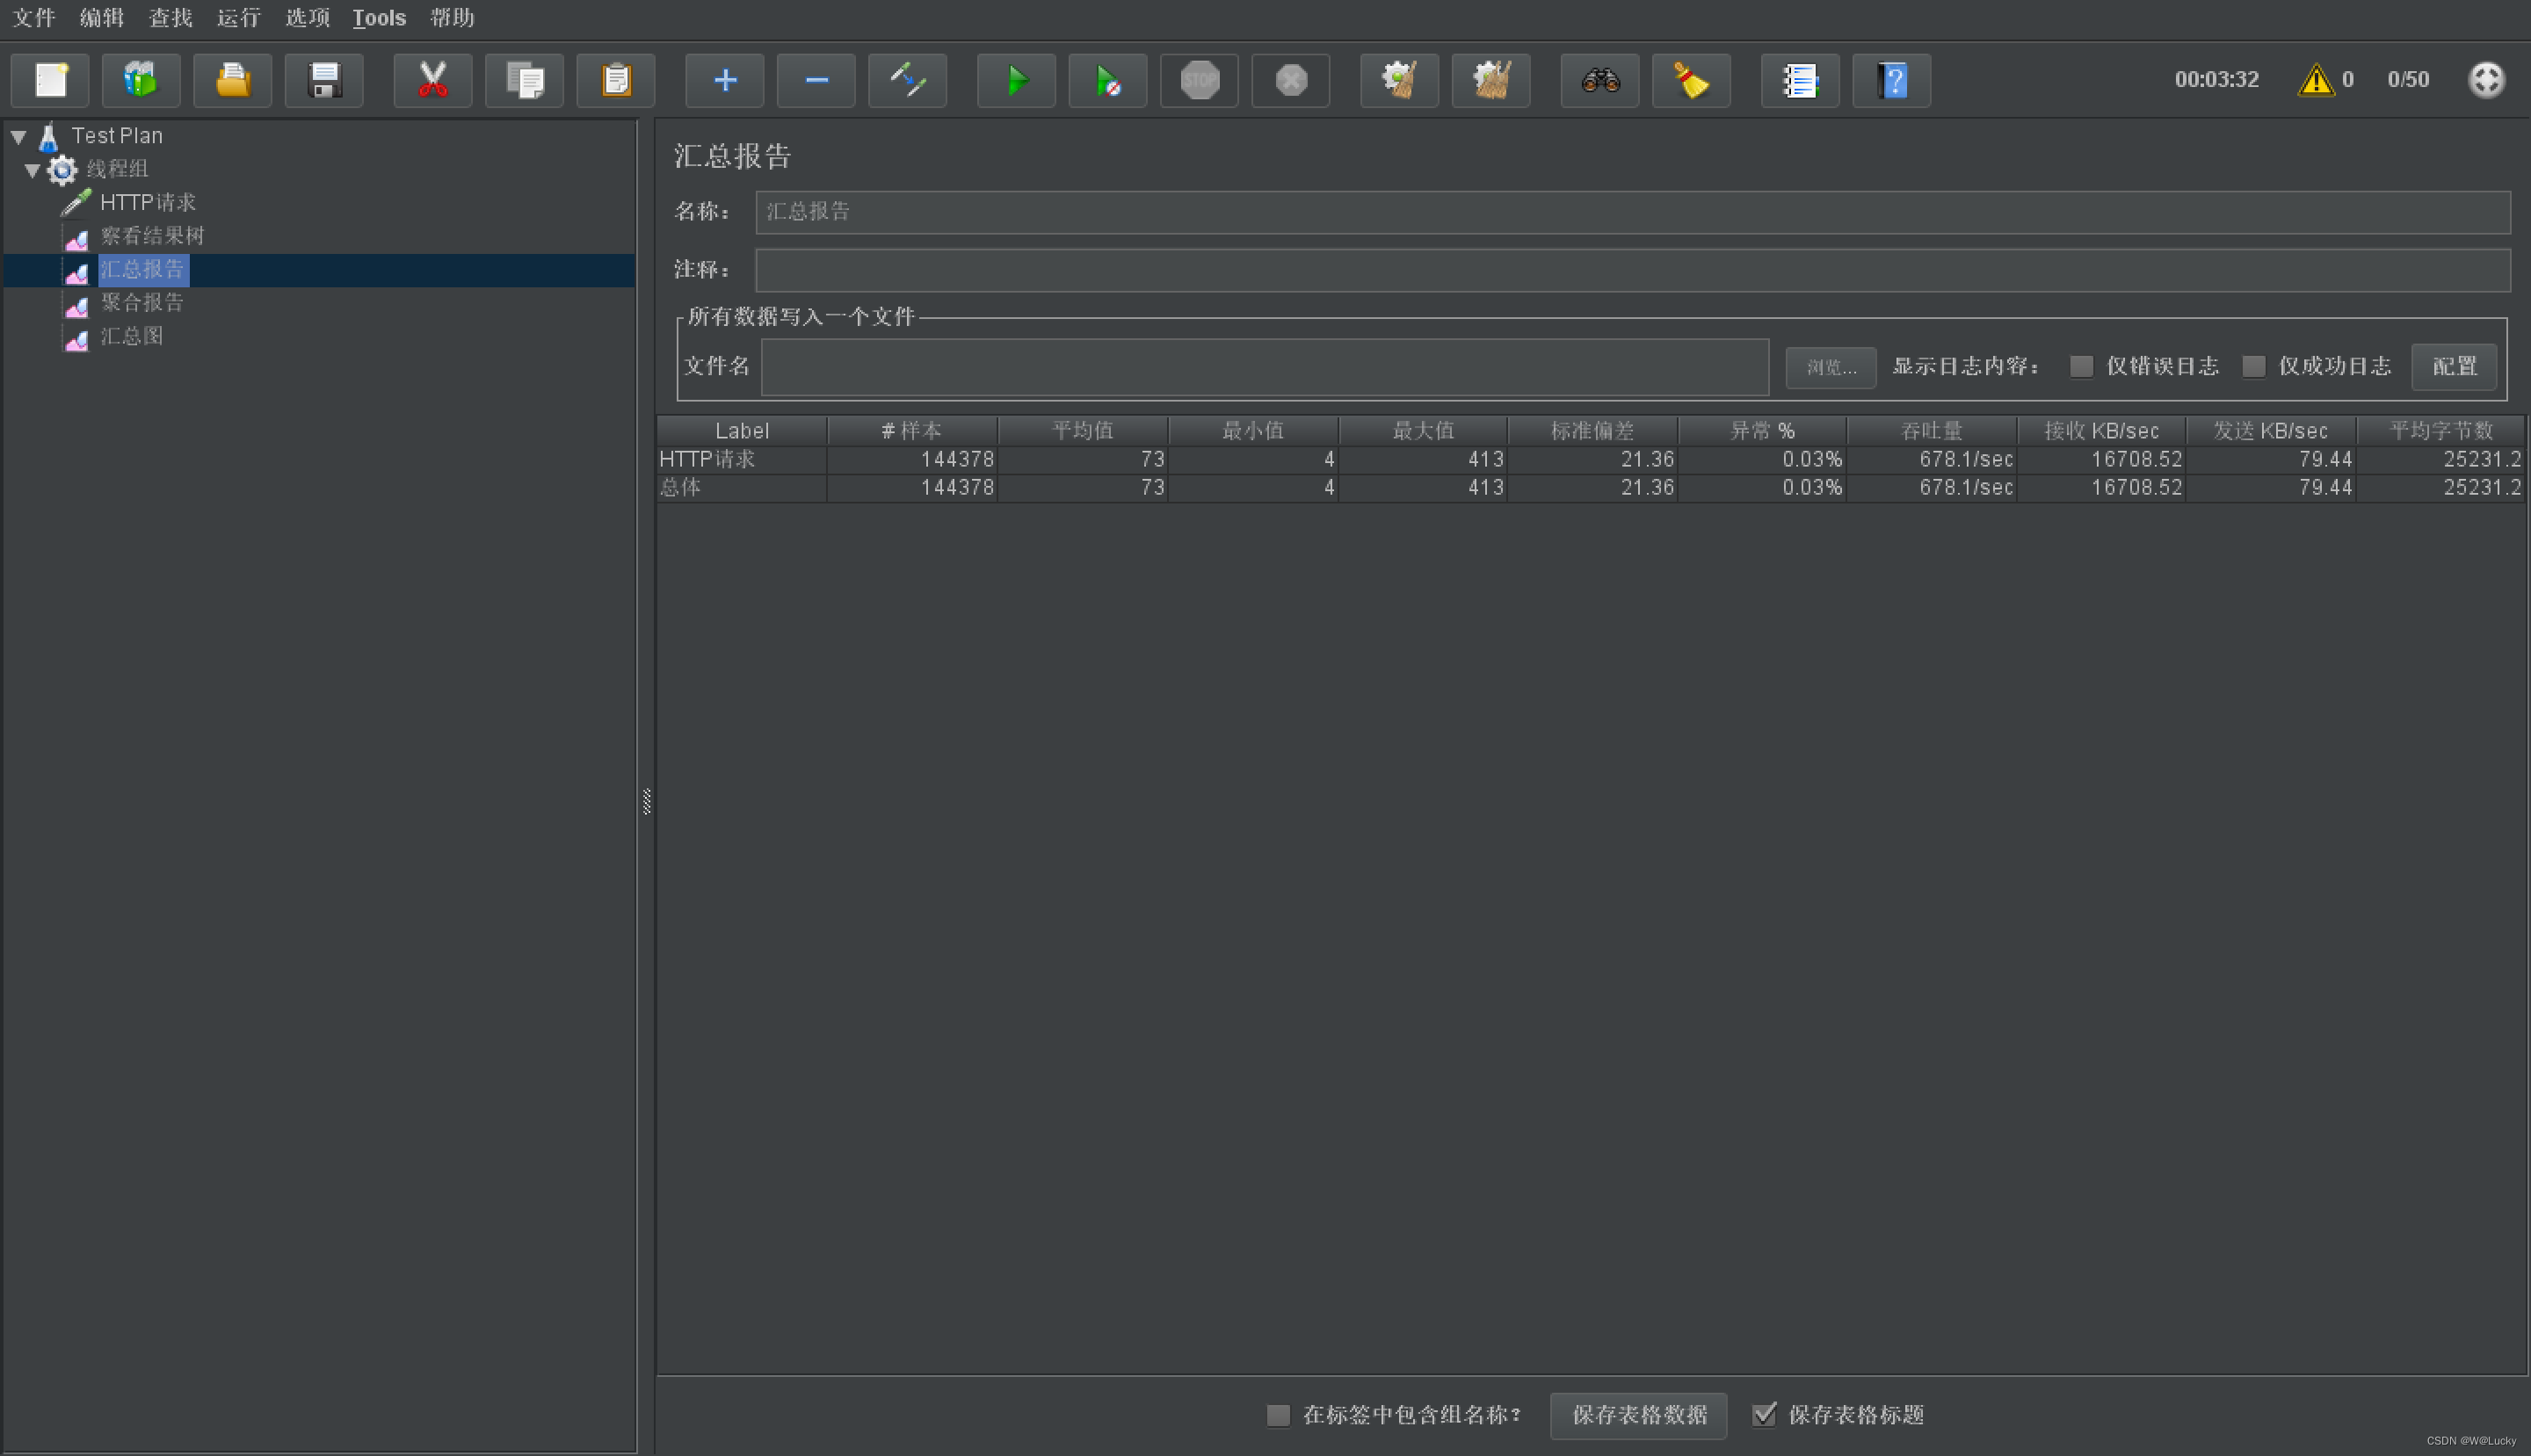
如果出现视频中的问题,按以下方式解决:
https://support.microsoft.com/zh-cn/help/196271/when-you-try-to-connect-from-tcp-ports-grea
ter-than-5000-you-receive-t

4.2 性能监控
(1)影像性能考虑点包括:
    数据库、应用程序、中间件(tomcat、nginx)、网络和操作系统等方面(例如:带宽)。

(2)首先考虑自己的应用属于CPU密集型还是IO密集型。
    CPU密集型:大量的计算。 解决方案:升级服务器、加CPU、多台服务器。
IO密集型:网络IO、磁盘IO、数据库IO、Redis IO。 解决方案:固态硬盘、加内存条、各种缓存技术、提升网卡的传输效率等。对商城首页接口进行压测,增大堆内存(-Xmx)发现对吞吐量影像不大,那我们的接口需要优化,如何优化还要借助性能监控。4.2.1 jvm 内存模型

- 程序计数器 Program Counter Register:
记录的是正在执行的虚拟机字节码指令的地址,
此内存区域是唯一一个在JAVA虚拟机规范中没有规定任何OutOfMemoryError的区
域
- 虚拟机: VM Stack
描述的是 JAVA 方法执行的内存模型, 每个方法在执行的时候都会创建一个栈帧,
用于存储局部变量表, 操作数栈, 动态链接, 方法接口等信息
局部变量表存储了编译期可知的各种基本数据类型、 对象引用
线程请求的栈深度不够会报 StackOverflowError 异常
栈动态扩展的容量不够会报 OutOfMemoryError 异常
虚拟机栈是线程隔离的, 即每个线程都有自己独立的虚拟机栈
- 本地方法: Native Stack
本地方法栈类似于虚拟机栈, 只不过本地方法栈使用的是本地方法
- 堆: Heap
几乎所有的对象实例都在堆上分配内存
详细模型:
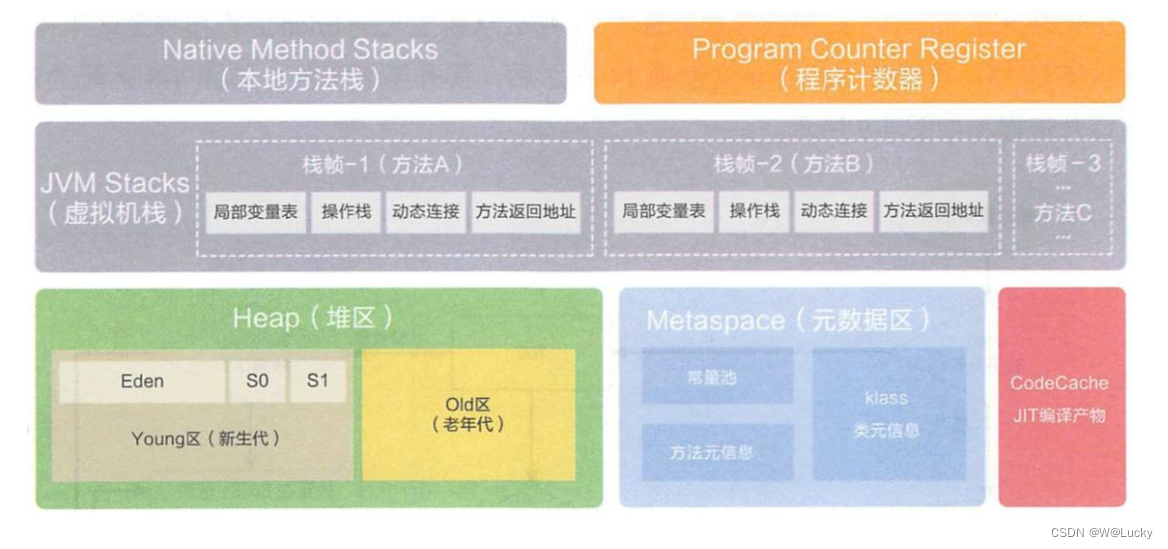
4.2.2 堆
所有的对象实例以及数组都要在堆上分配。 堆是垃圾收集器管理的主要区域, 也被称为“GC
堆” ; 也是我们优化最多考虑的地方。
堆可以细分为:
- 新生代
Eden 空间
From Survivor 空间
To Survivor 空间
- 老年代
- 永久代/元空间
Java8 以前永久代, 受 jvm 管理, java8 以后元空间, 直接使用物理内存。 因此,默认情况下, 元空间的大小仅受本地内存限制。
垃圾回收:
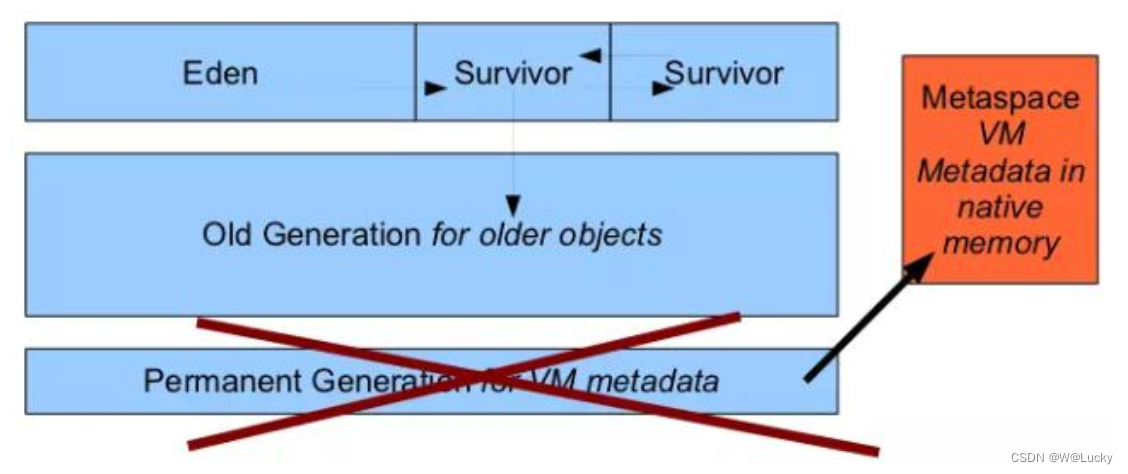
从 Java8 开始, HotSpot 已经完全将永久代(Permanent Generation) 移除, 取而代之的是一
个新的区域—元空间(MetaSpace)。
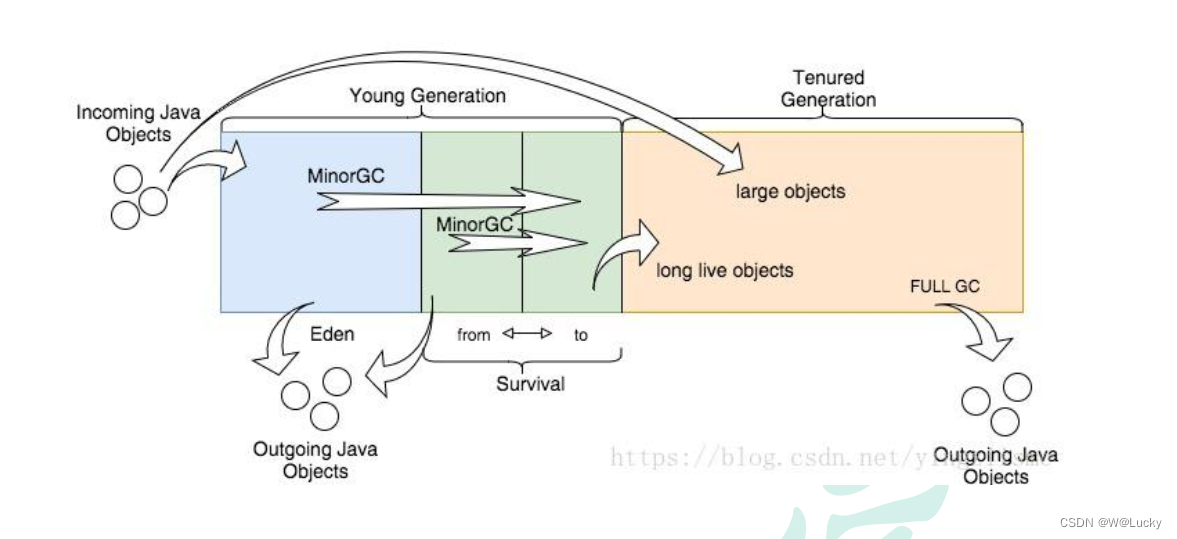
具体流程:
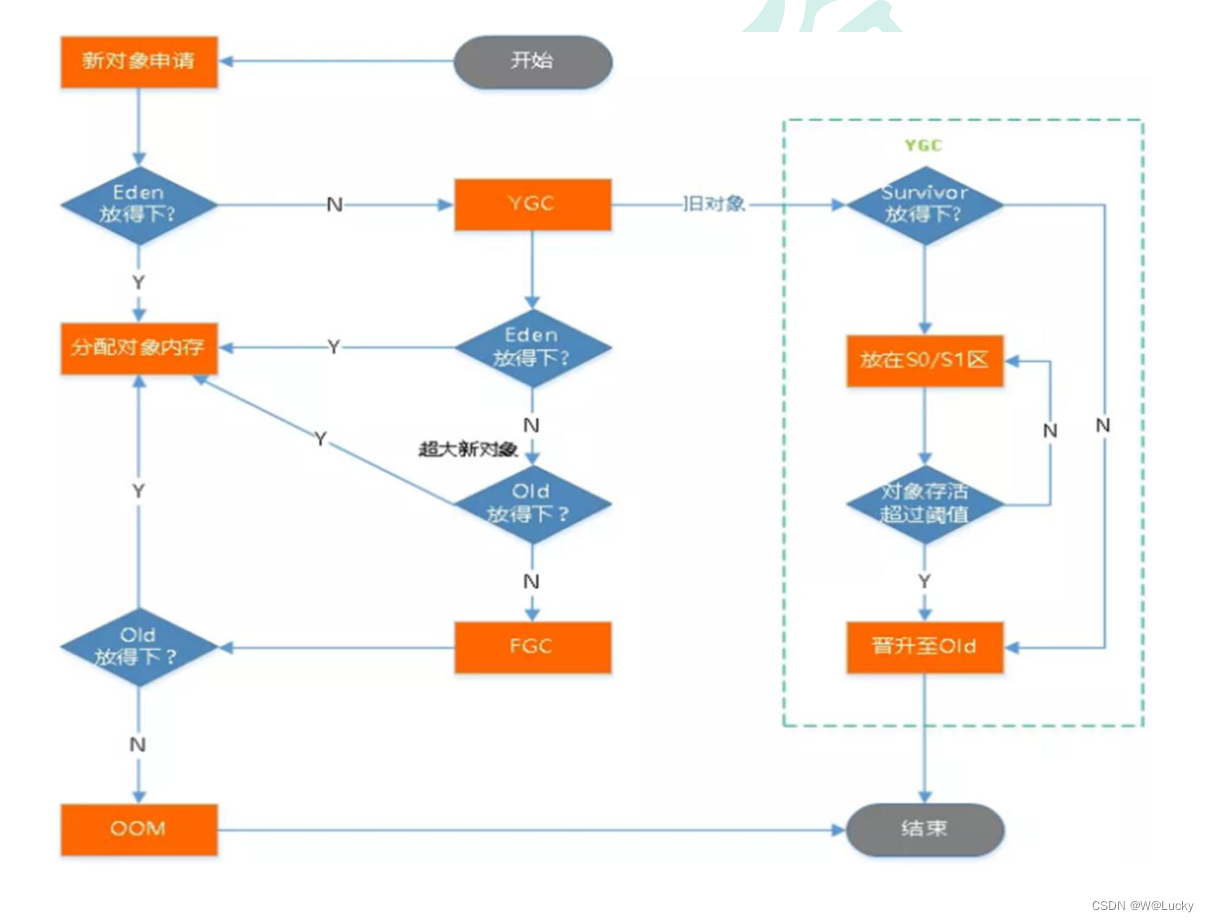
(1)老年代存放的是大对象和存活时间长的对象。
(2)FullGC要比YongGC差不多慢10倍。
创建的对象放到堆内存的流程:
(1)Eden区放的下,放在Eden区;Eden区放不下,执行MinorGC;
(2)在判断Eden区是否放得下,放不下,判断老年代是否放的下,放不下执行FullGC;
(3)如果老年代还放不下报内存溢出OOM(out of memory)。
旧对象:
(1)放到幸存区survivor,对象存活超过15年阈值,放到老年代;
(2)如果幸存区survivor放不下,判断老年代是否放得下,放不下执行FullGC
(3)如果老年代还放不下报内存溢出OOM(out of memory)。4.2.3 jconsole 与 jvisualvm
Jdk 的两个小工具 jconsole、 jvisualvm(升级版的 jconsole) ;通过命令行启动, 可监控本地和远程应用。 远程应用需要配置。
1. jconsole
(1) 进入cmd,输入jconsole,选择需要查看的进程
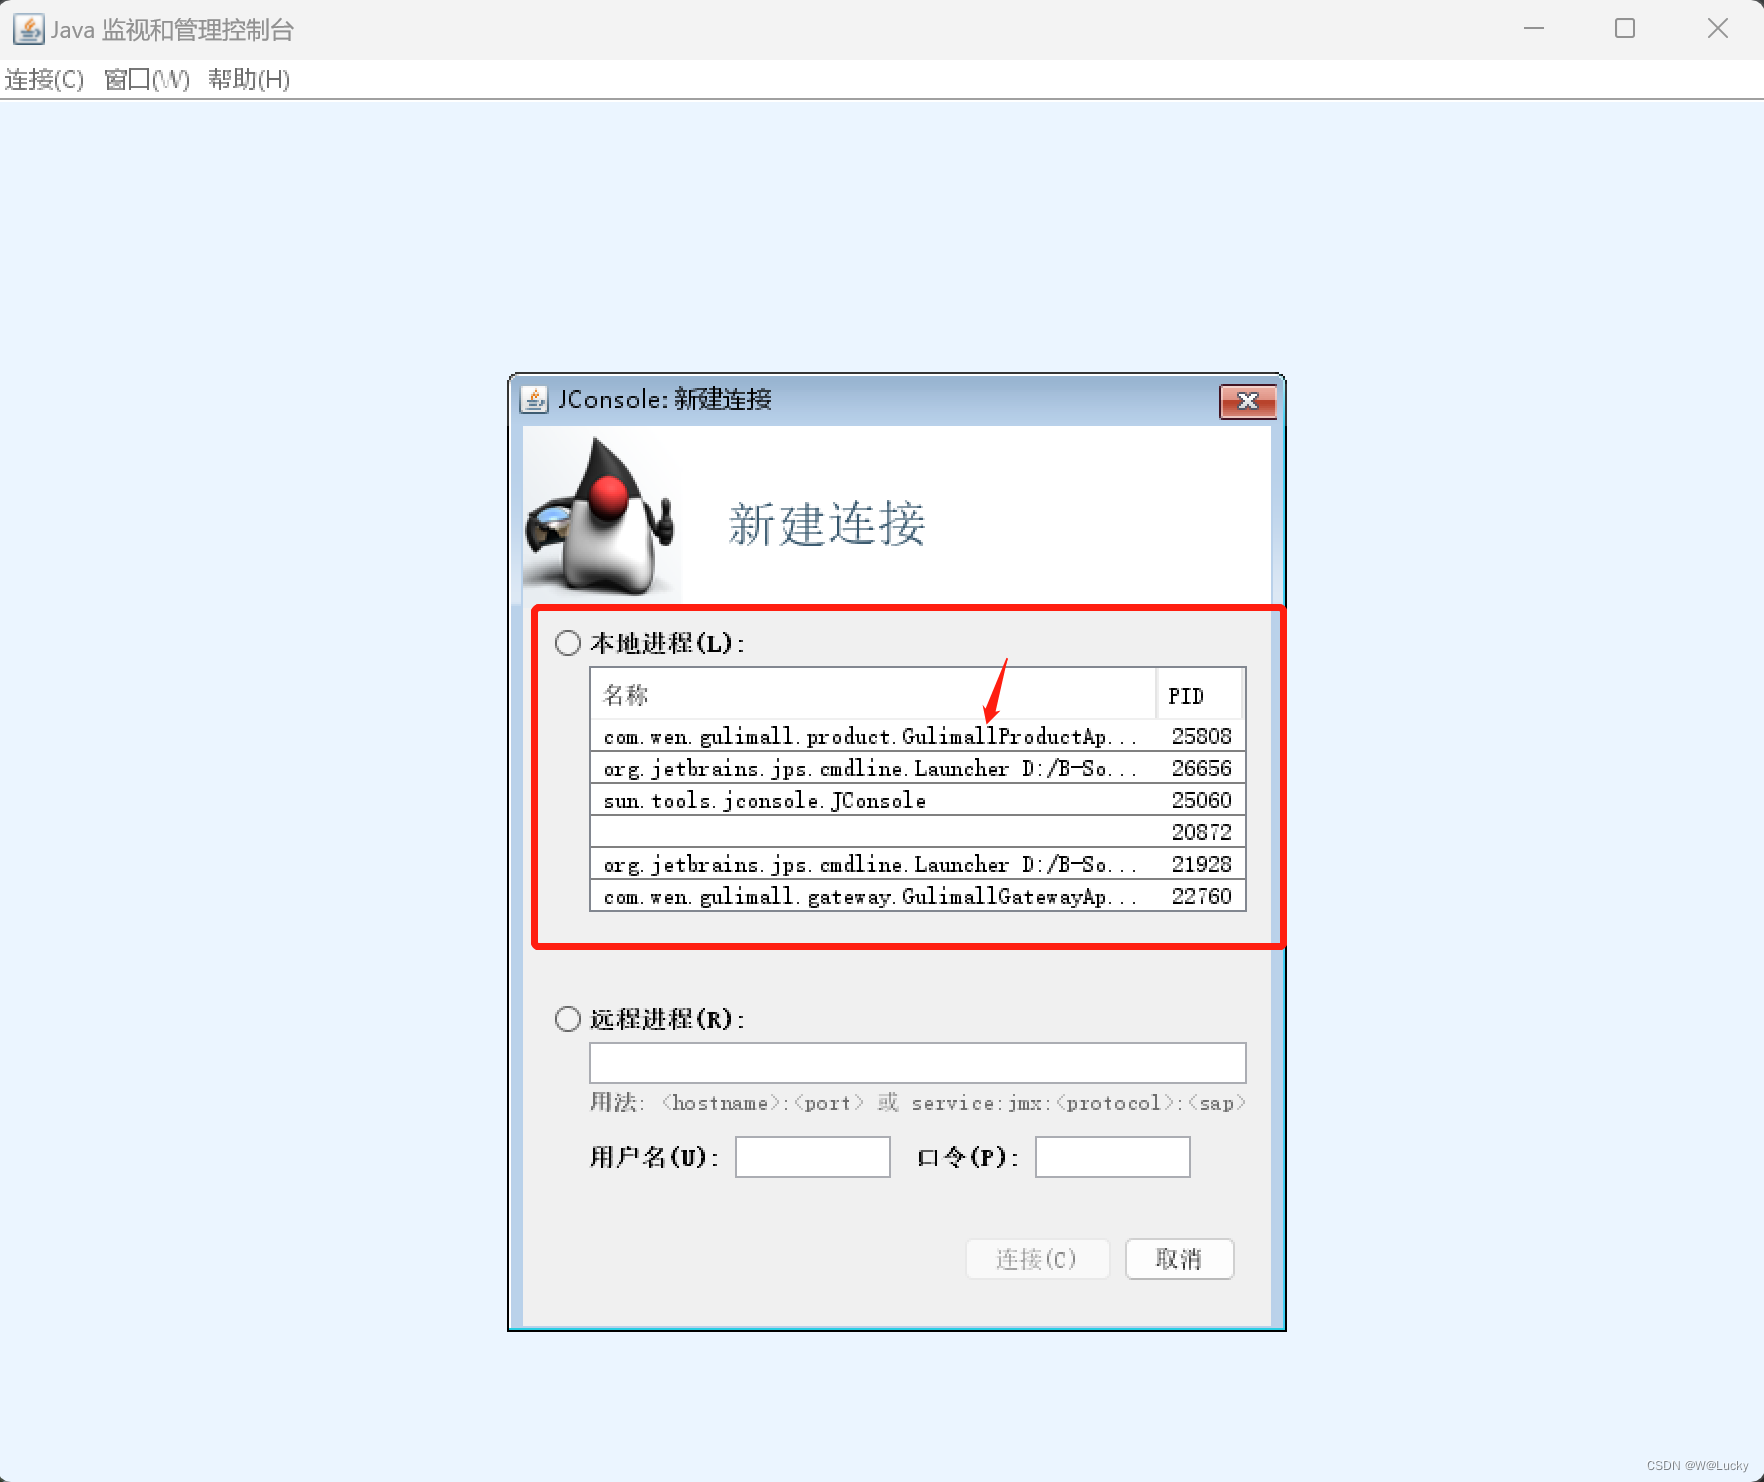
(2)双击GulimallProduct...进程,进入首页
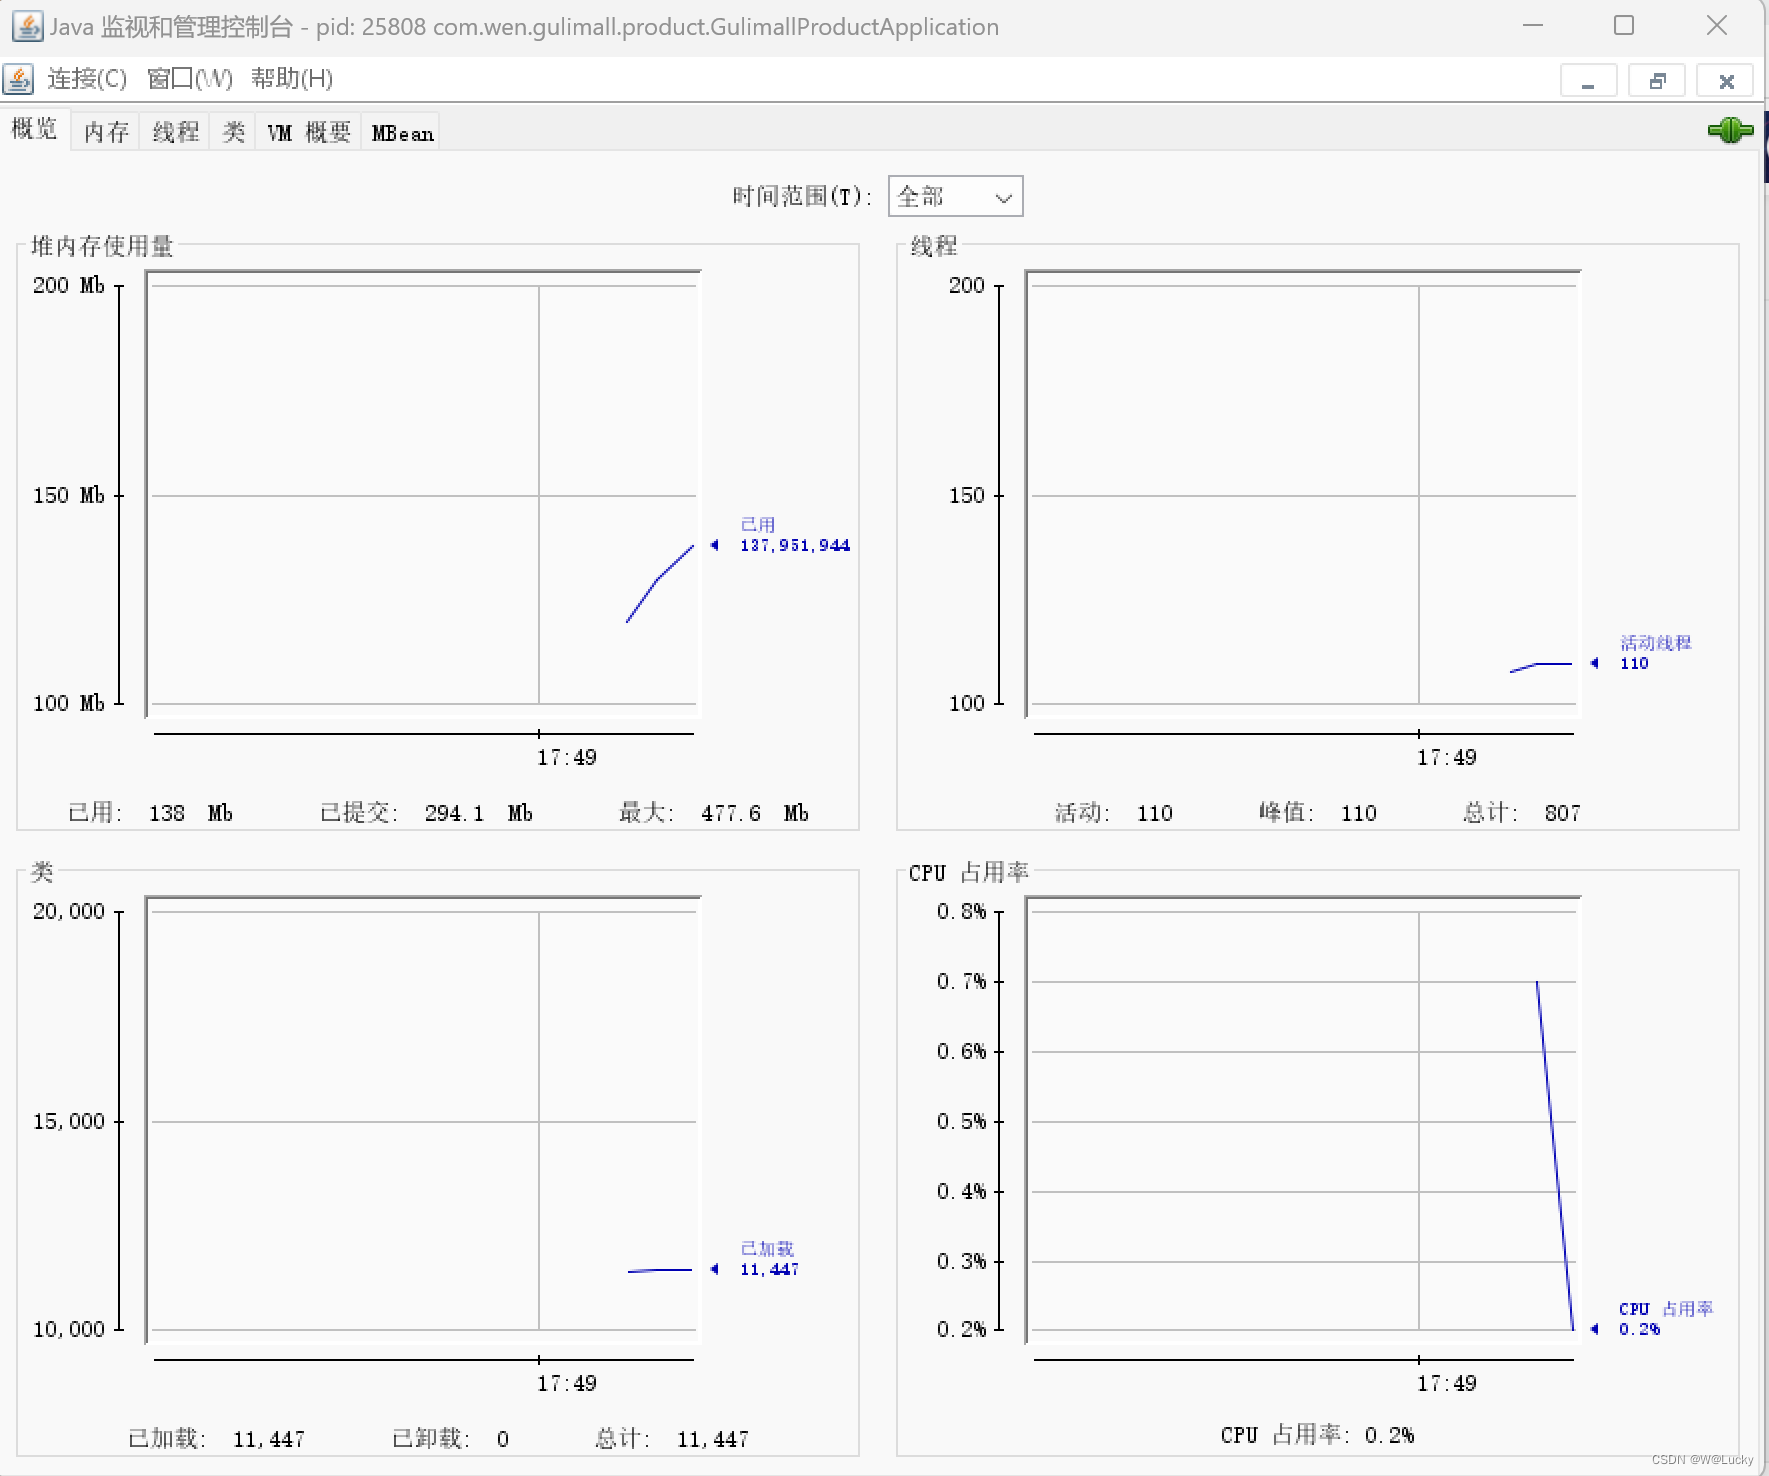
(3)内存信息
 2. jvisualvm
(1)jvisualvm能干什么
监控内存泄漏、跟踪垃圾回收、执行时内存、cpu分析、线程分析等等。
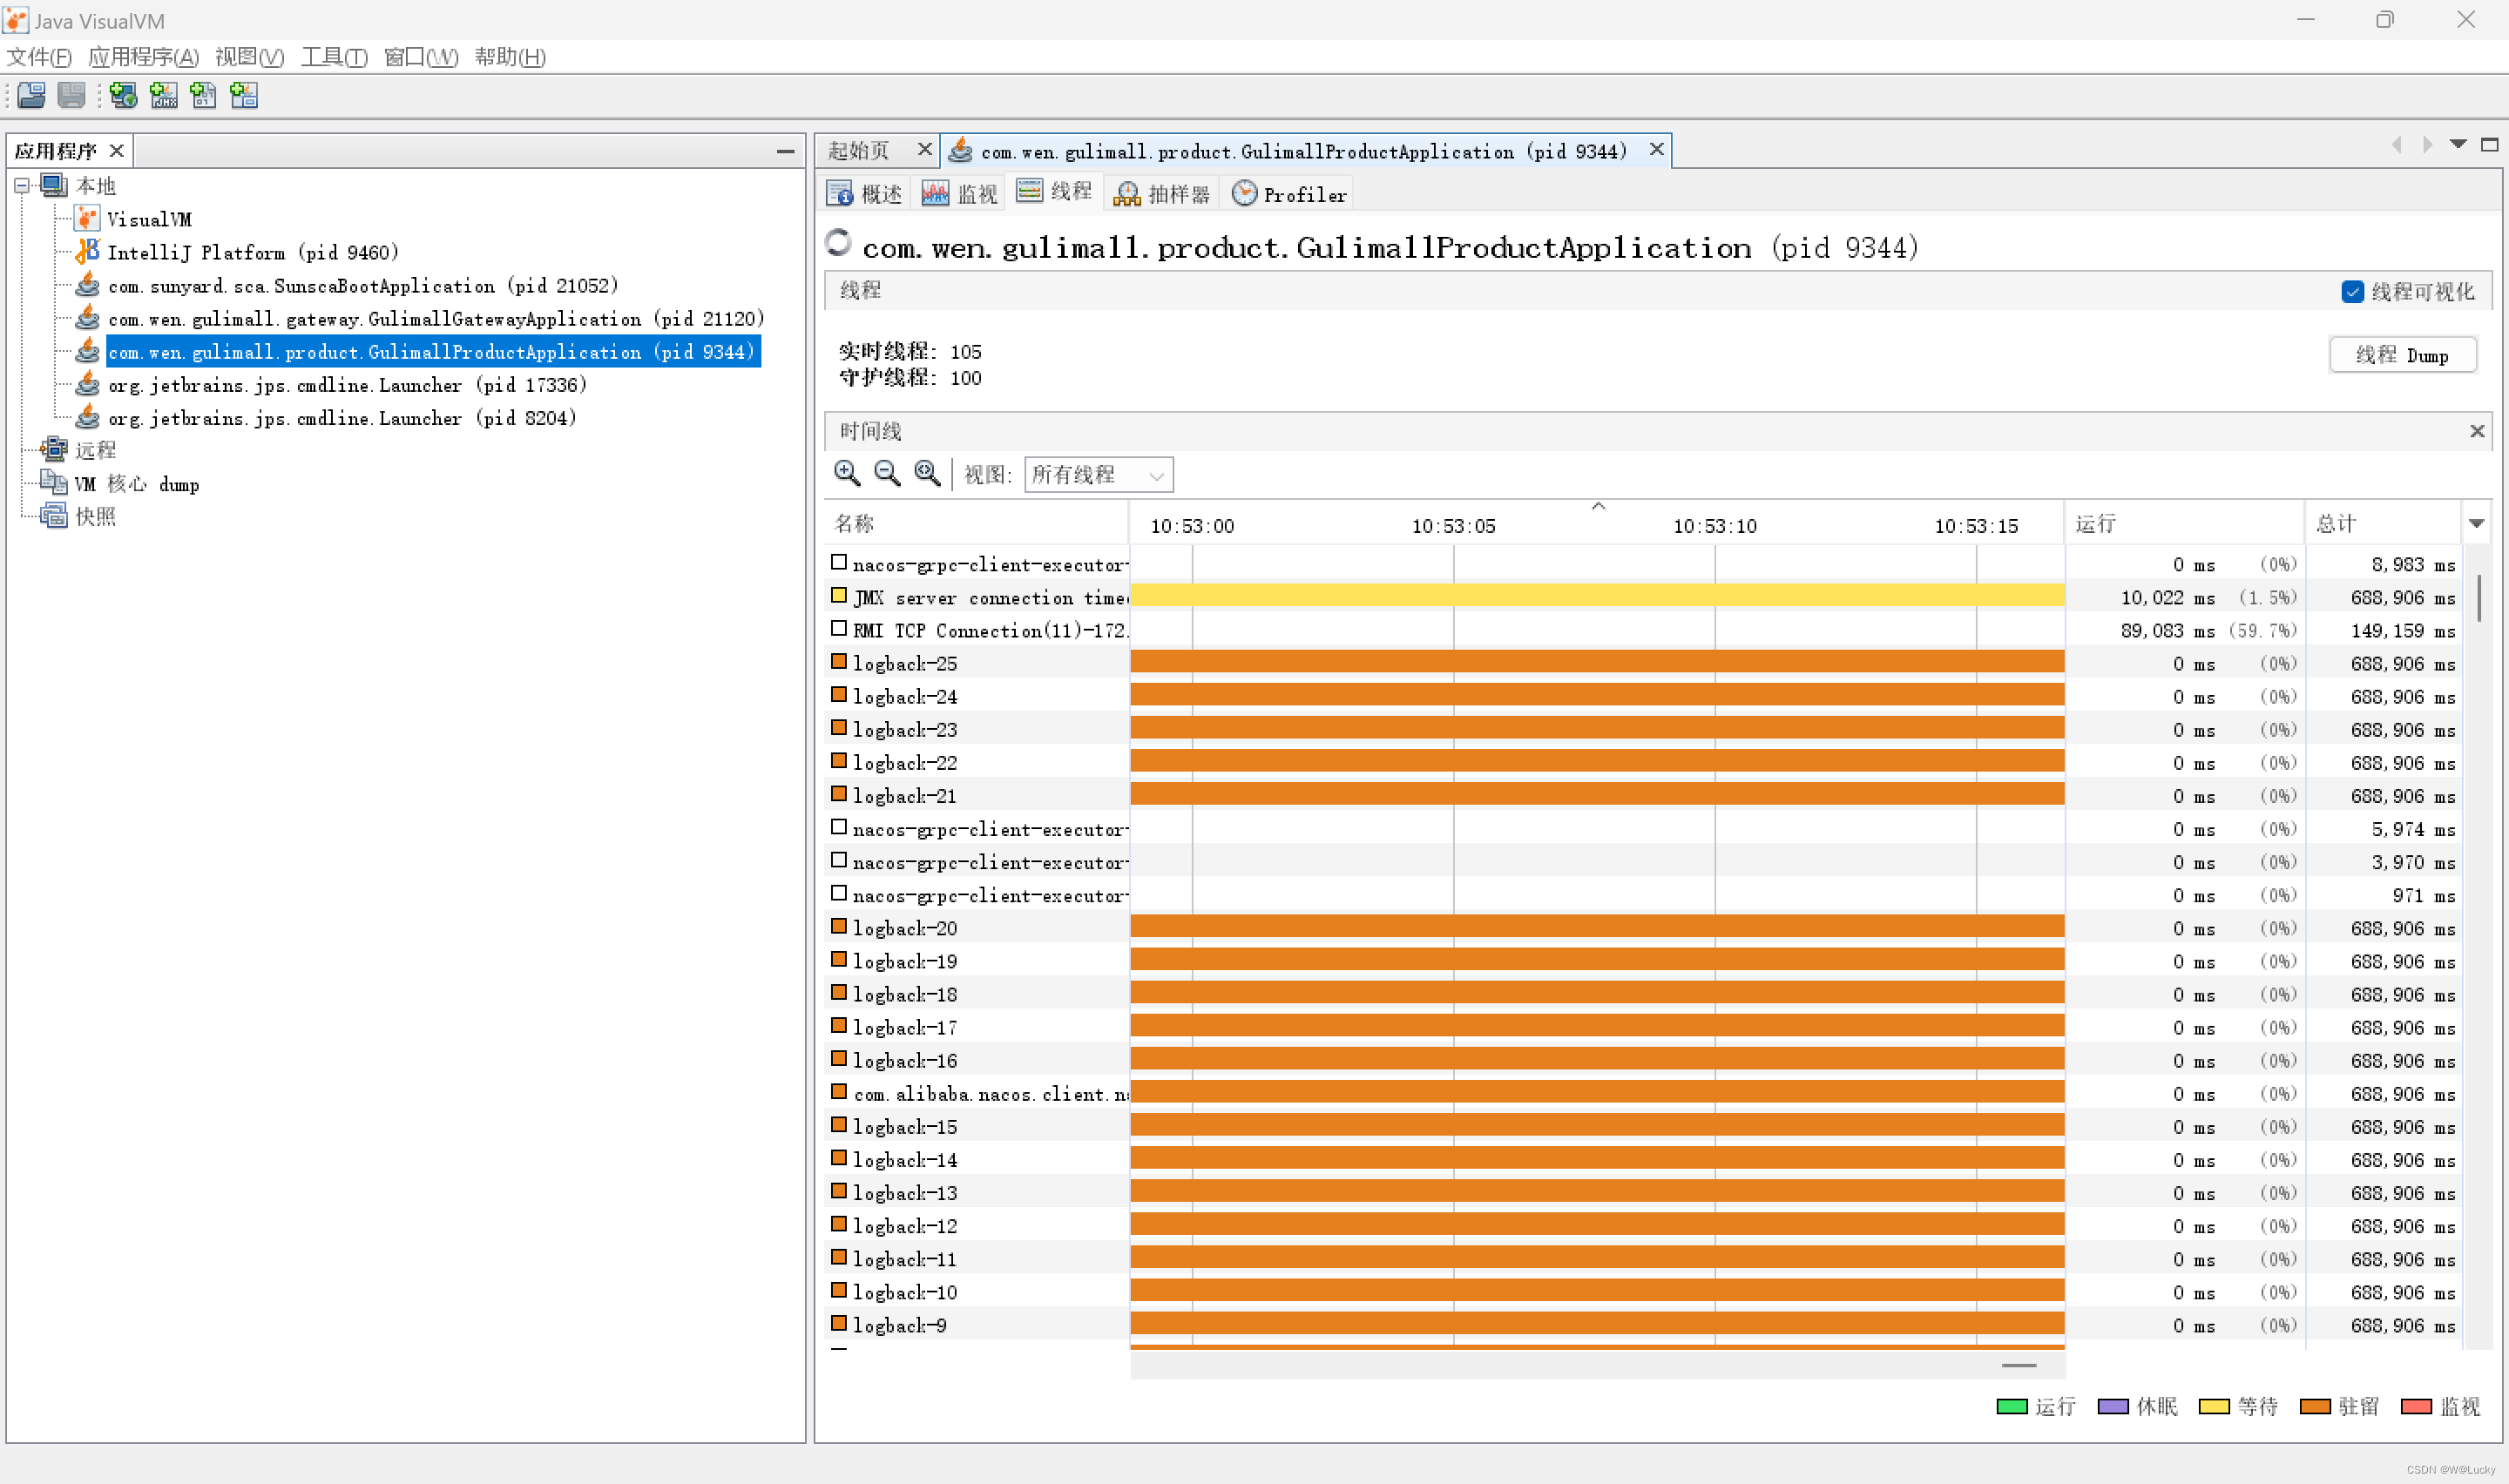
运行:正在运行的。
休眠:sleep。
等待:wait。
驻留:线程池里的空闲线程。
监视:阻塞的线程,正在等待锁。
(2)安装插件Visual GC,方便查看gc
最重要的是监控内存的GC,默认看不到,需要安装插件。

(1)cmd启动jvisualvm;
(2)安装Visual GC。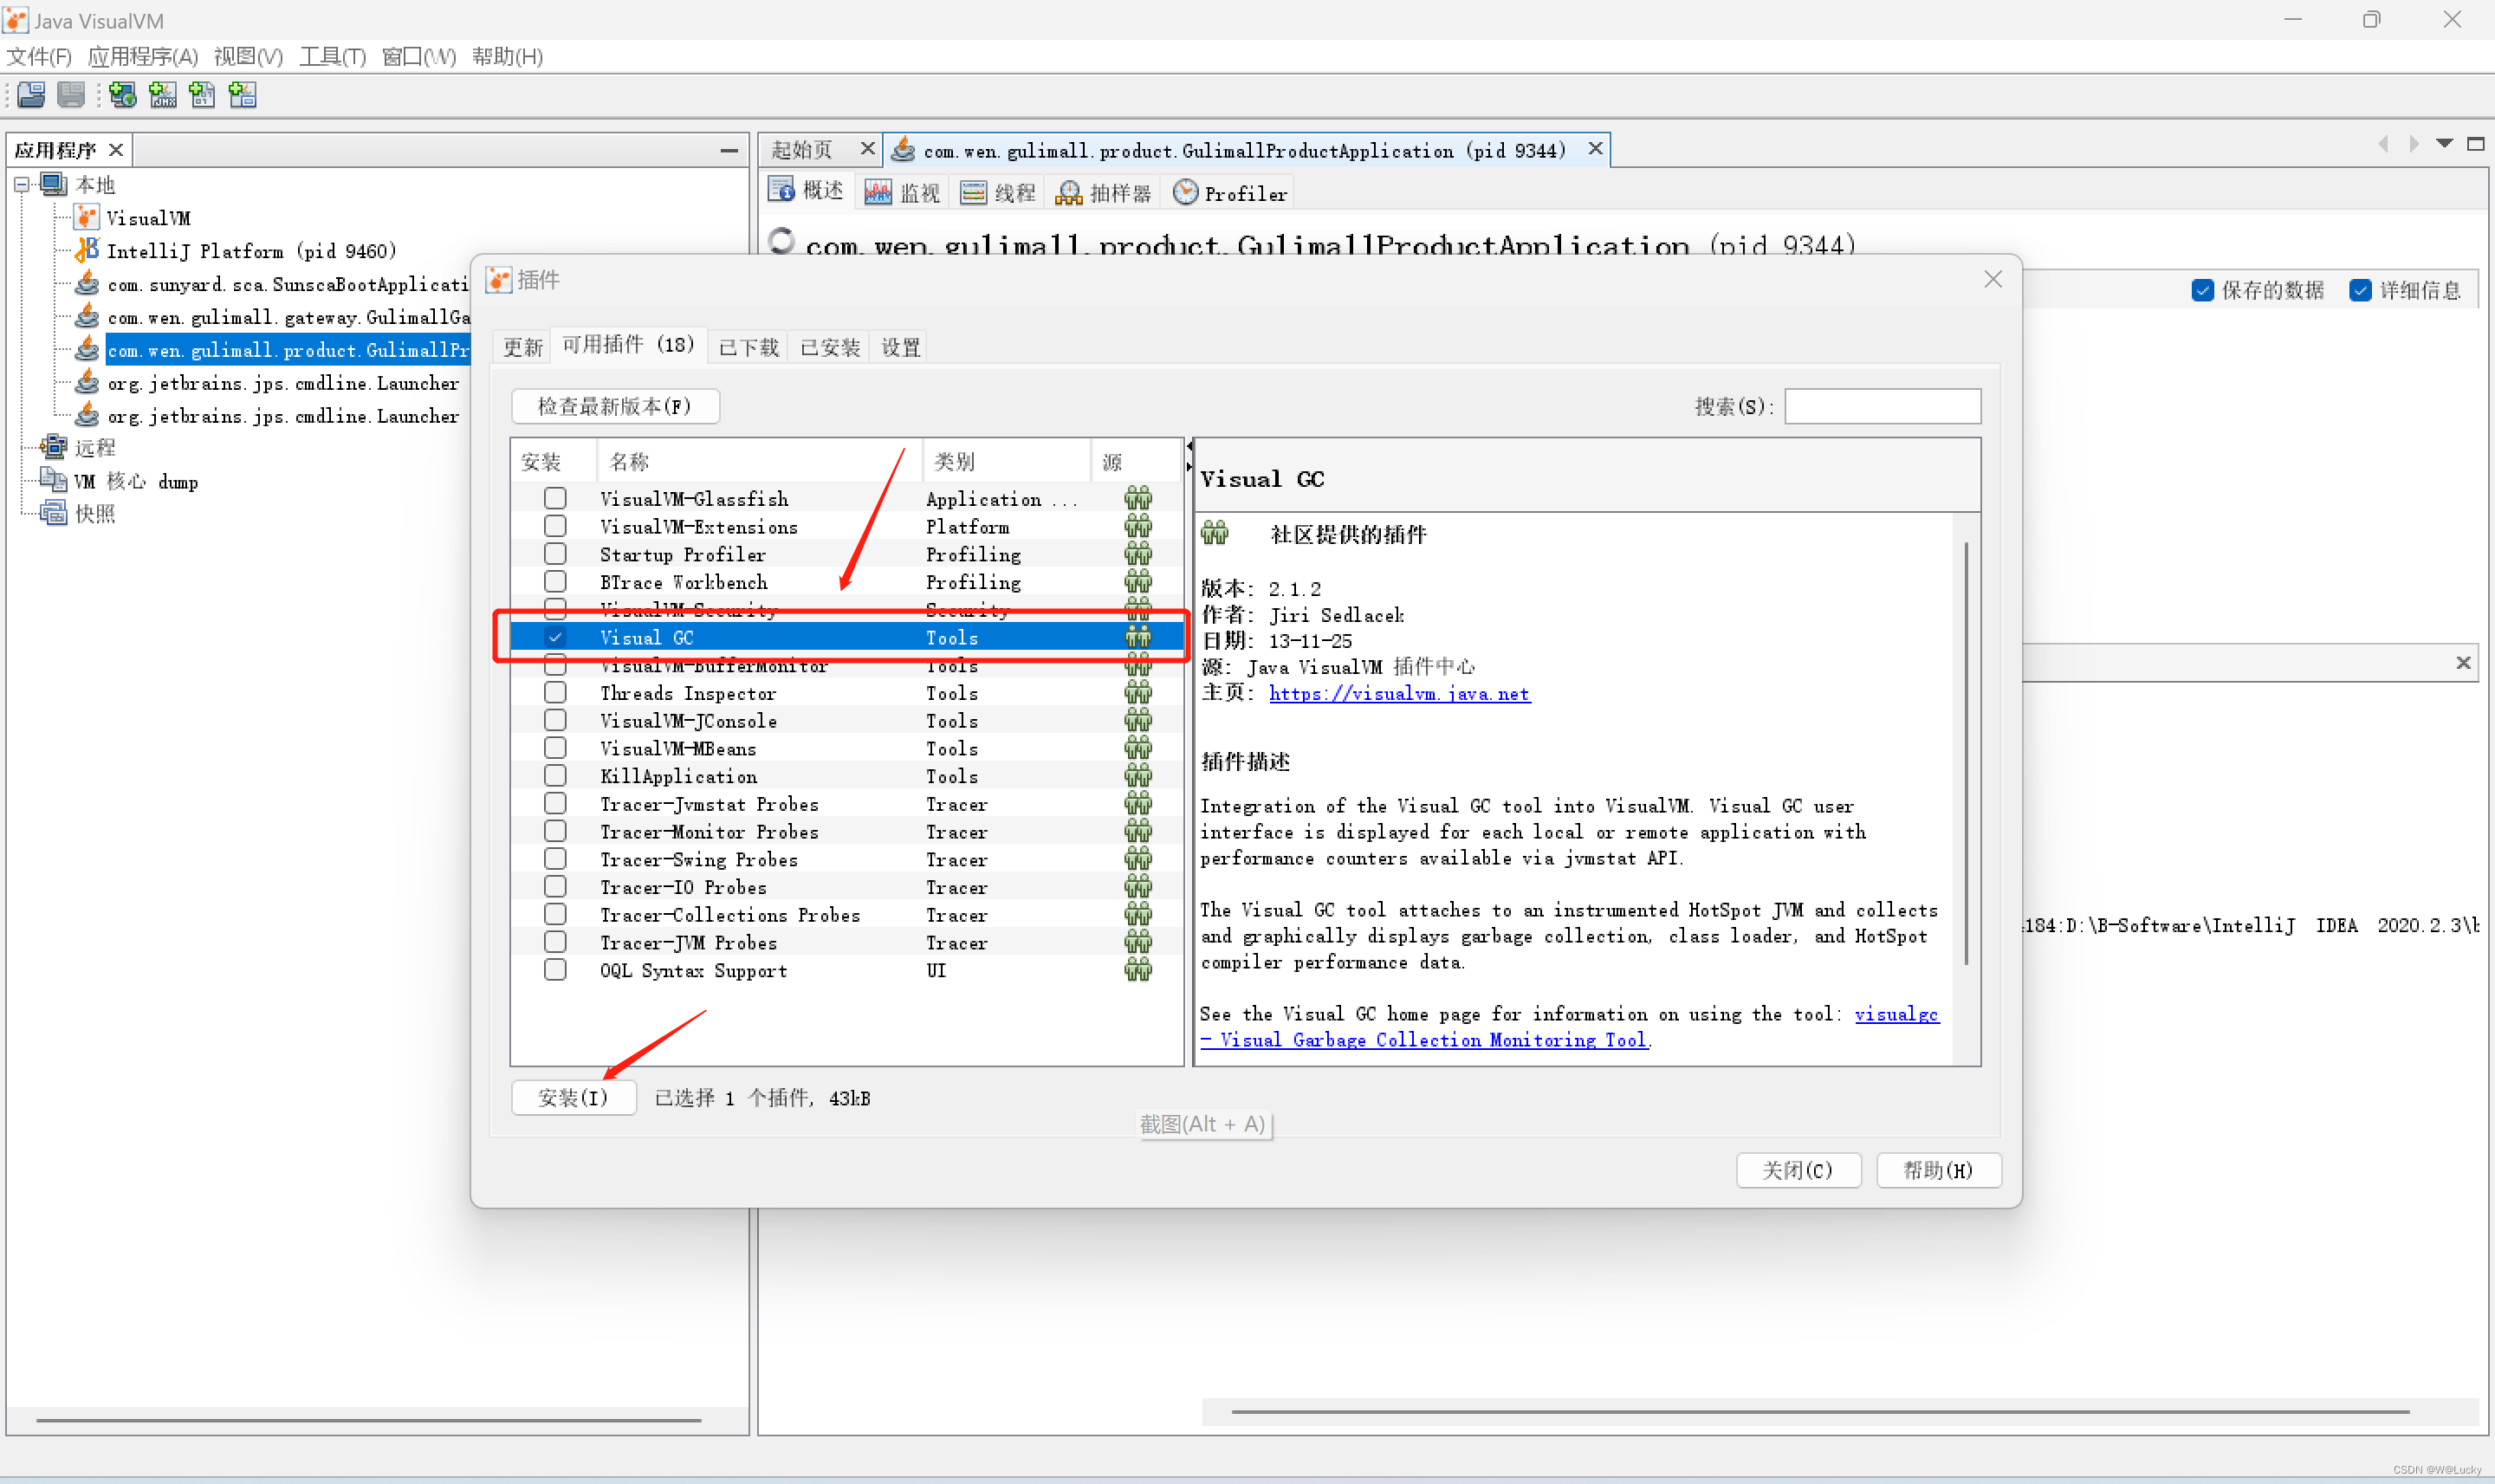
(3)插件安装失败问题
原因:
更新配置的URL不对。

解决方案:
(1)cmd输入java -version查看jdk版本;
(2)在以下网址中选择对应jdk版本的配置URL;
https://visualvm.github.io/pluginscenters.html
(3)修改配置链接;
(4)下载Visual GC,重启jvisualvm

以java version "1.8.0_251"版本为例: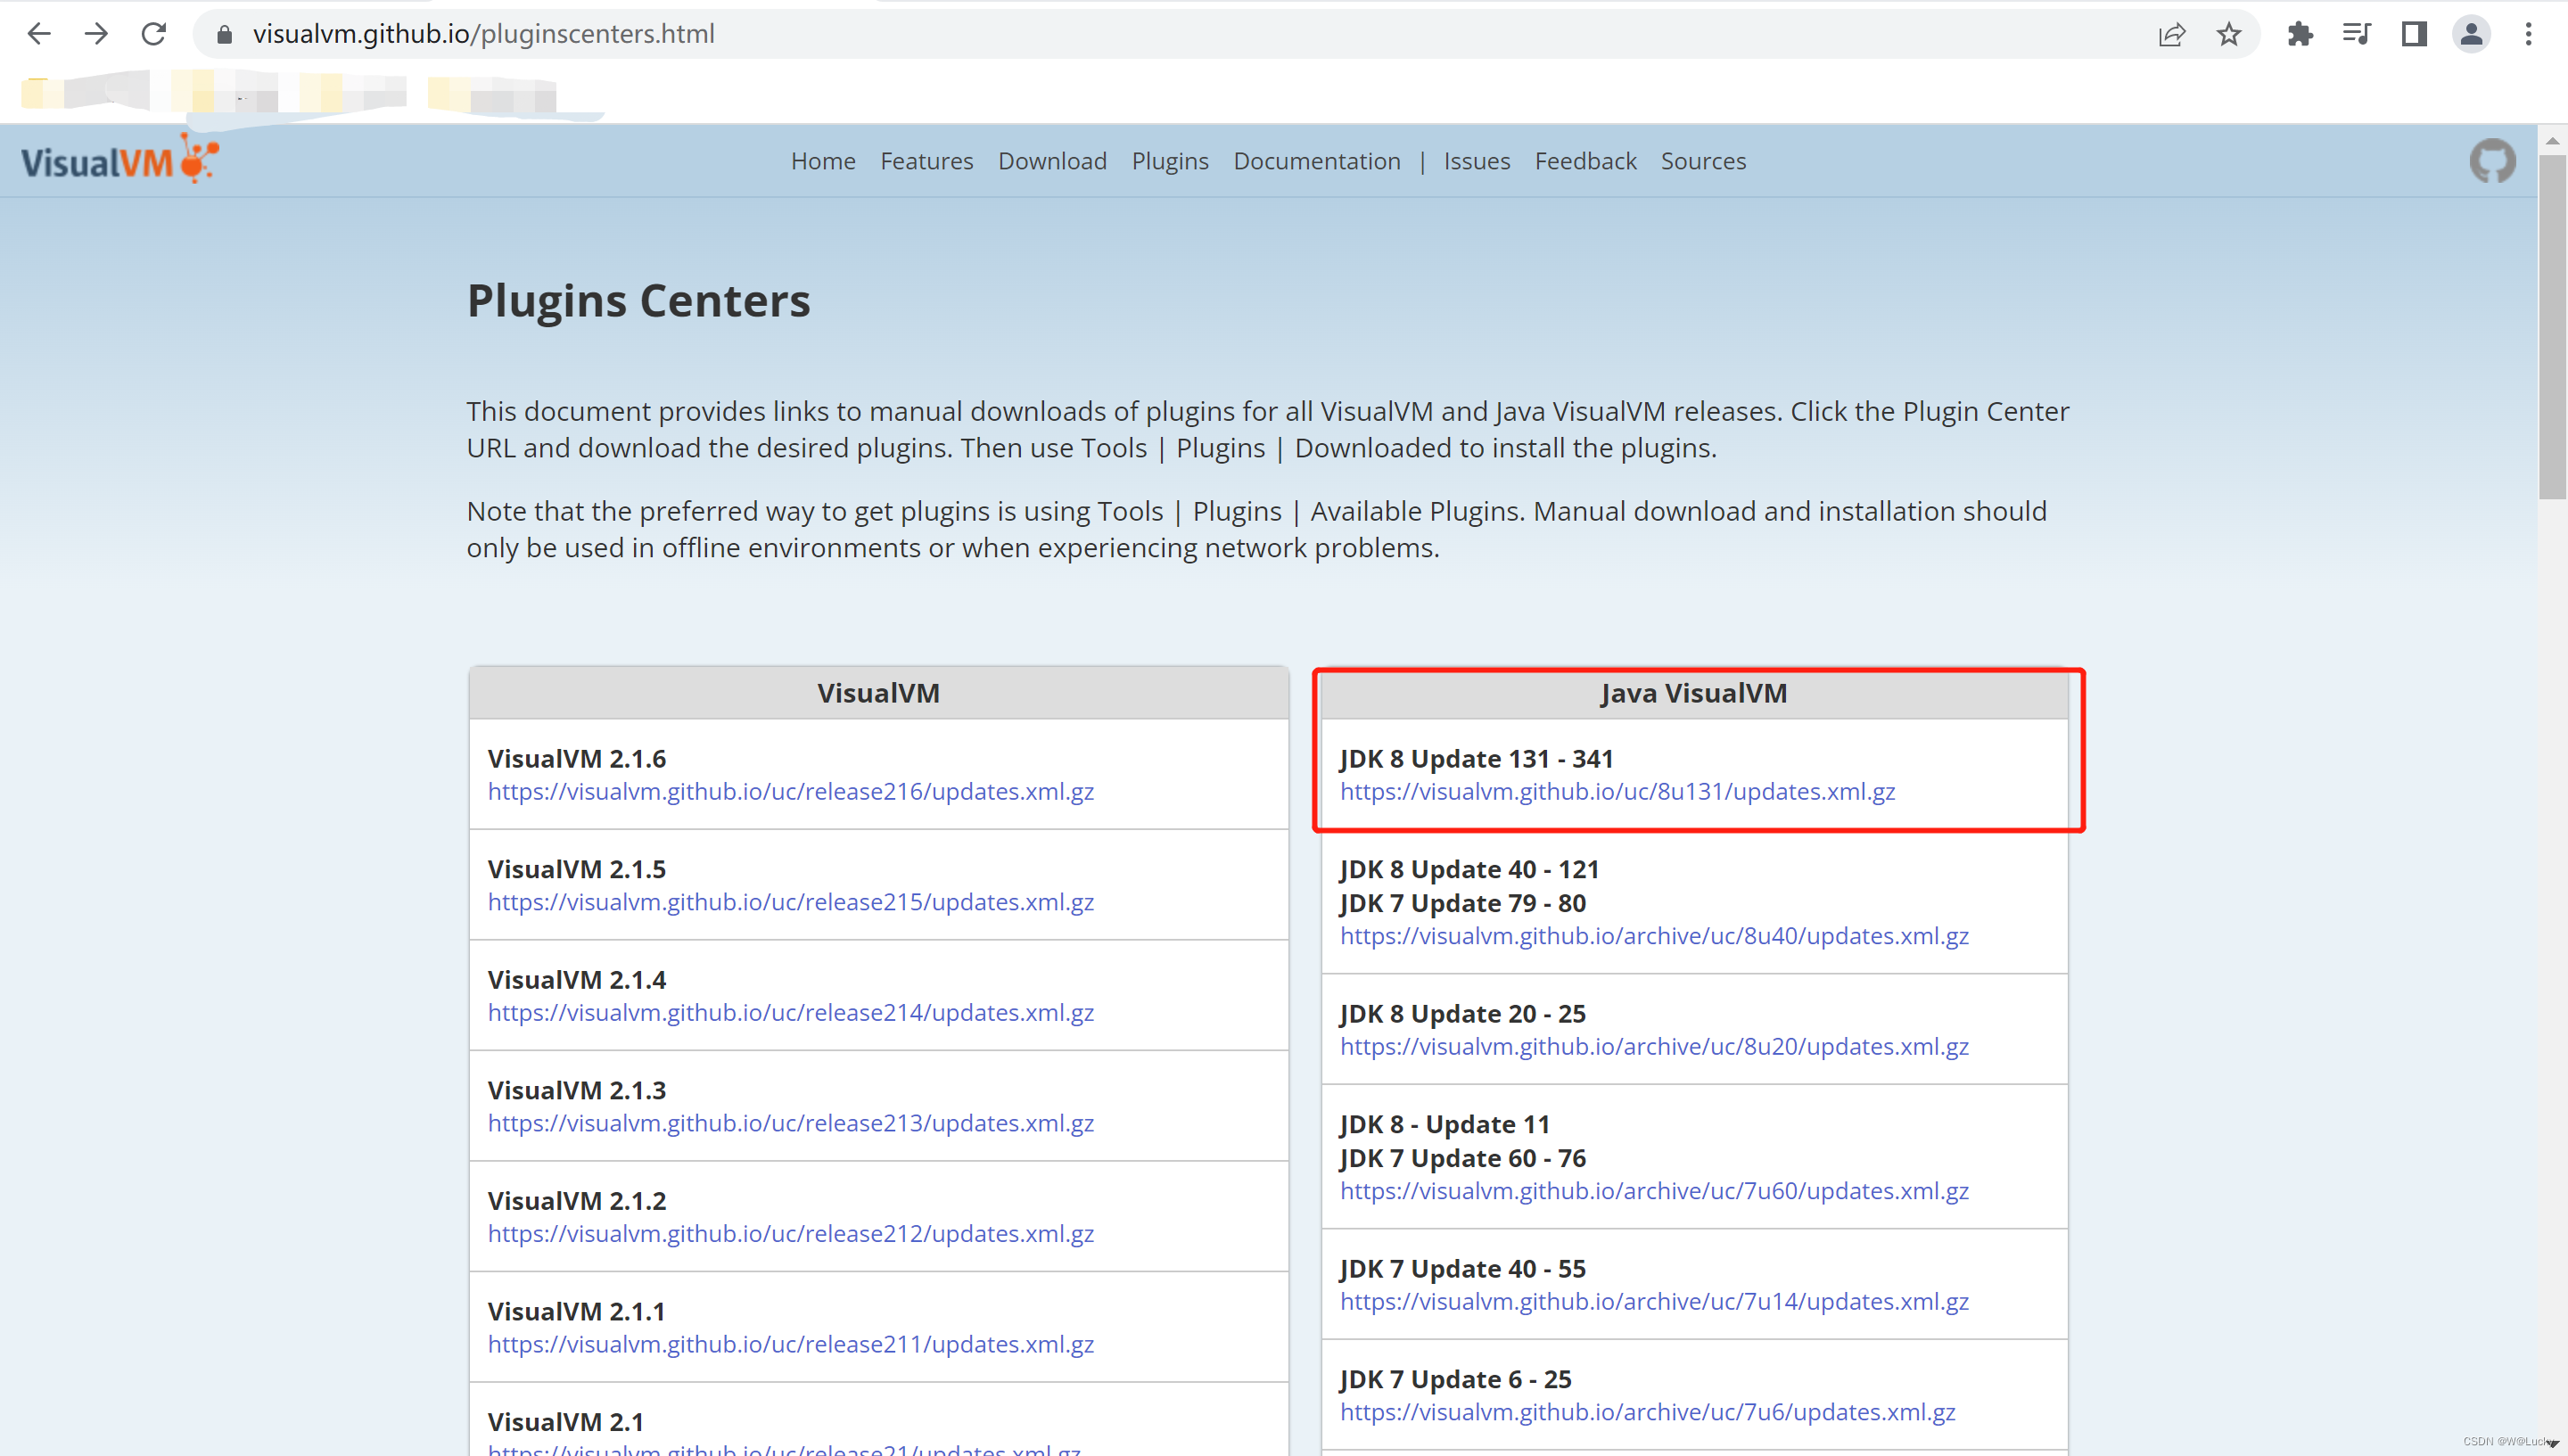
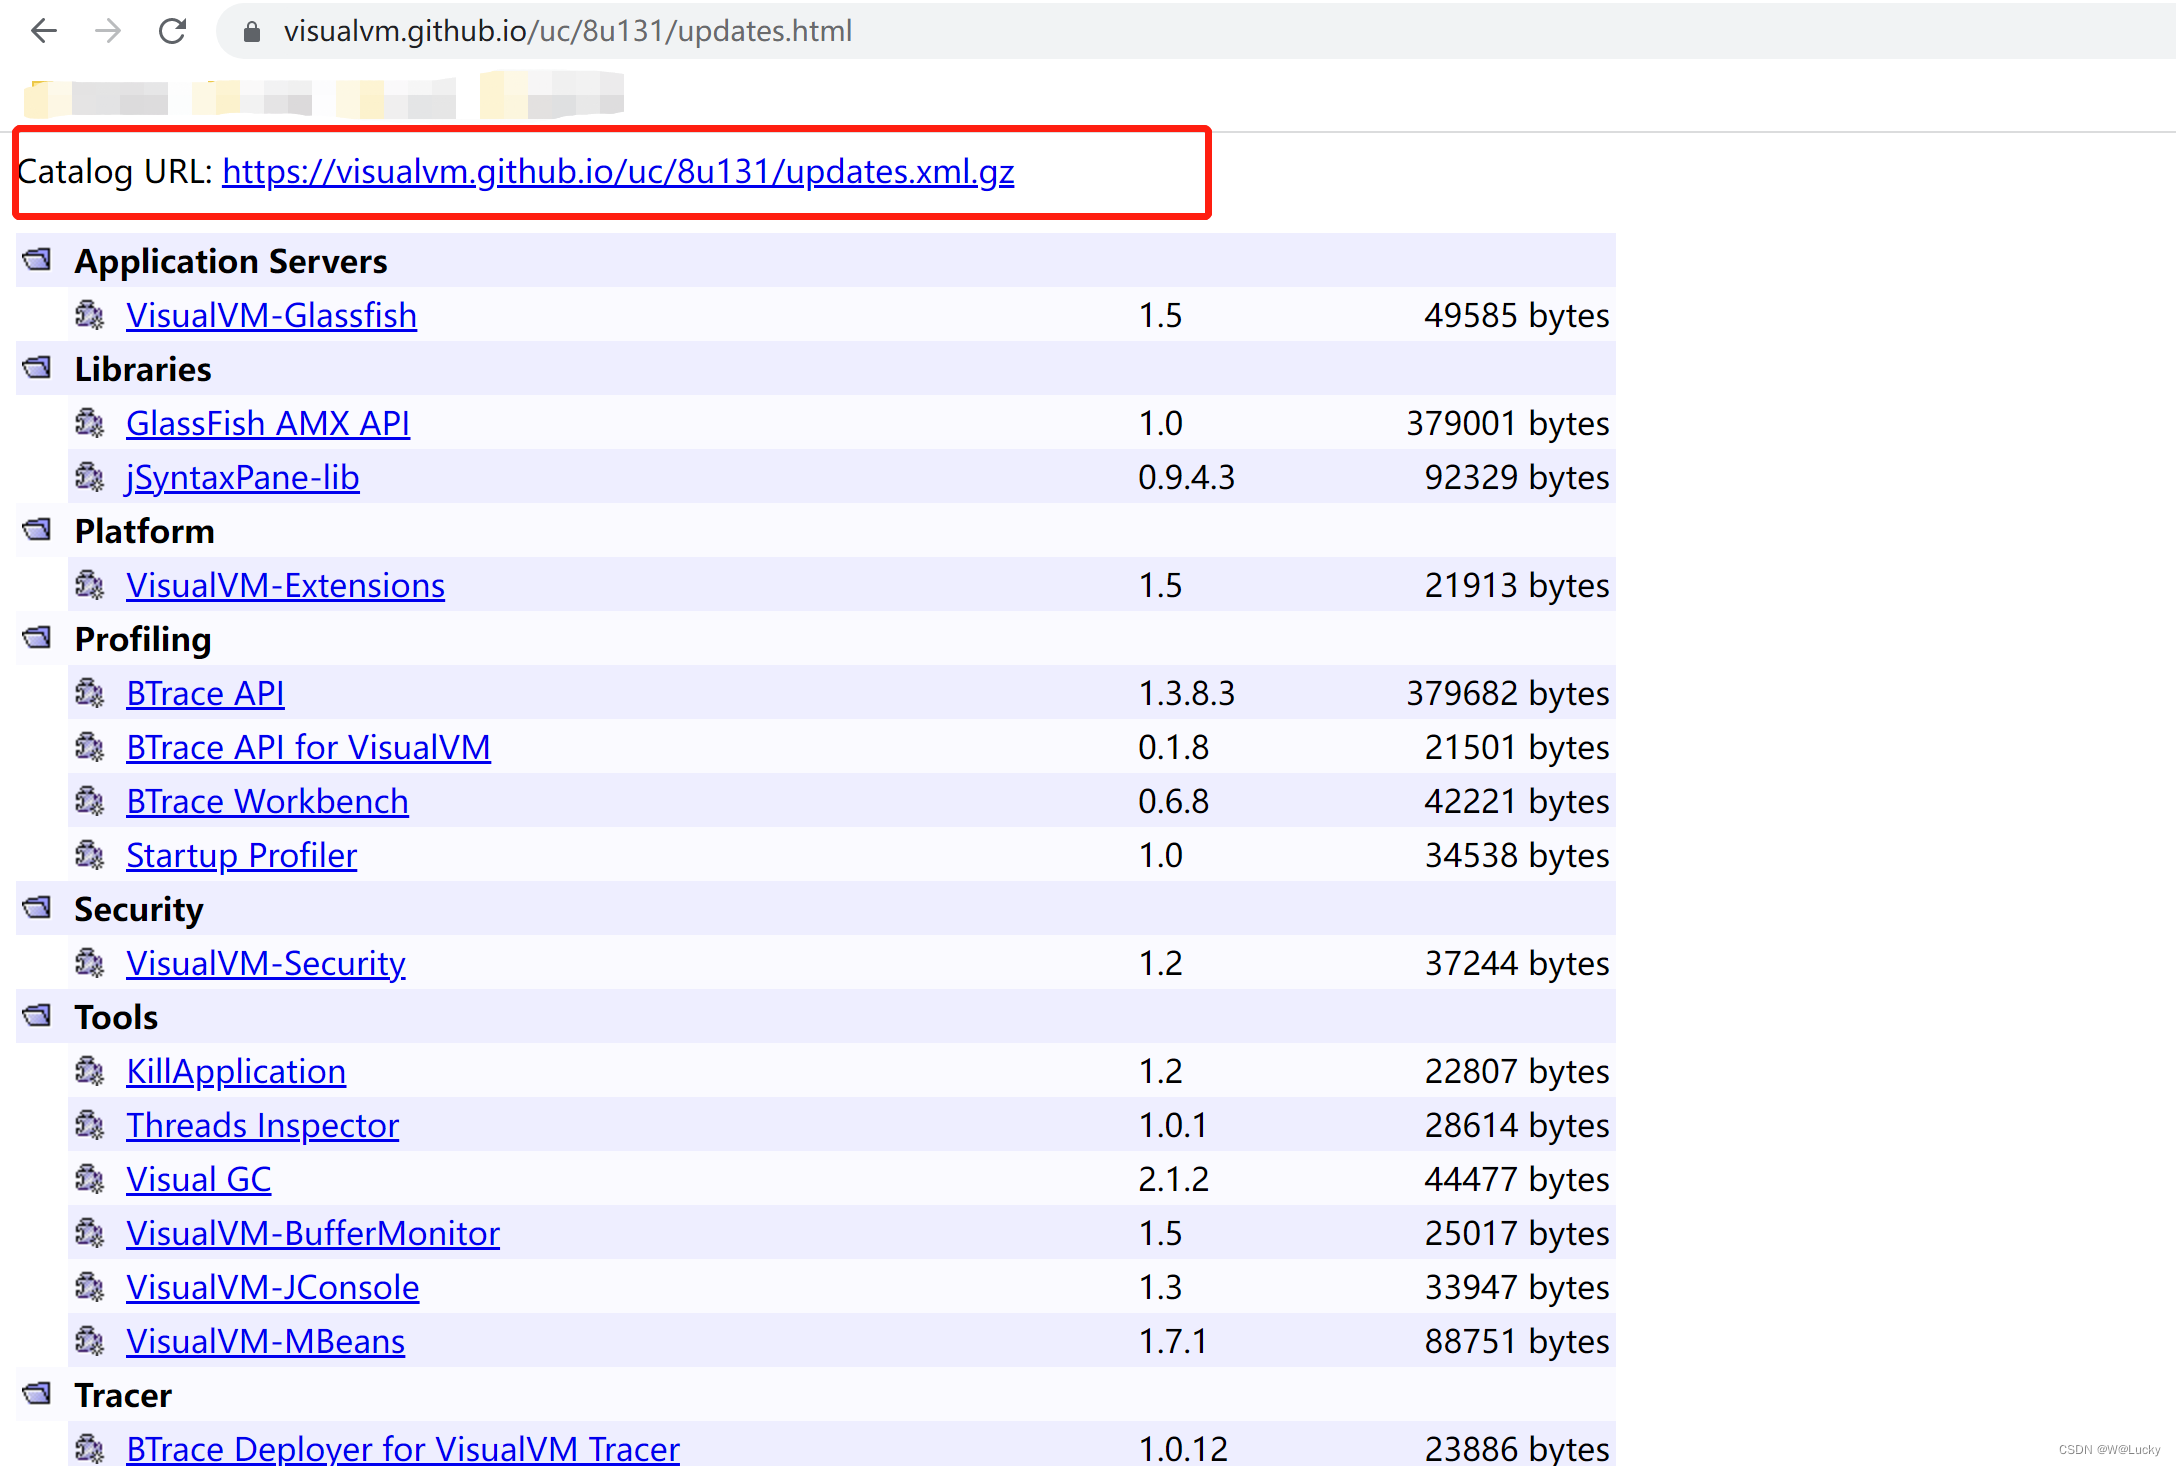
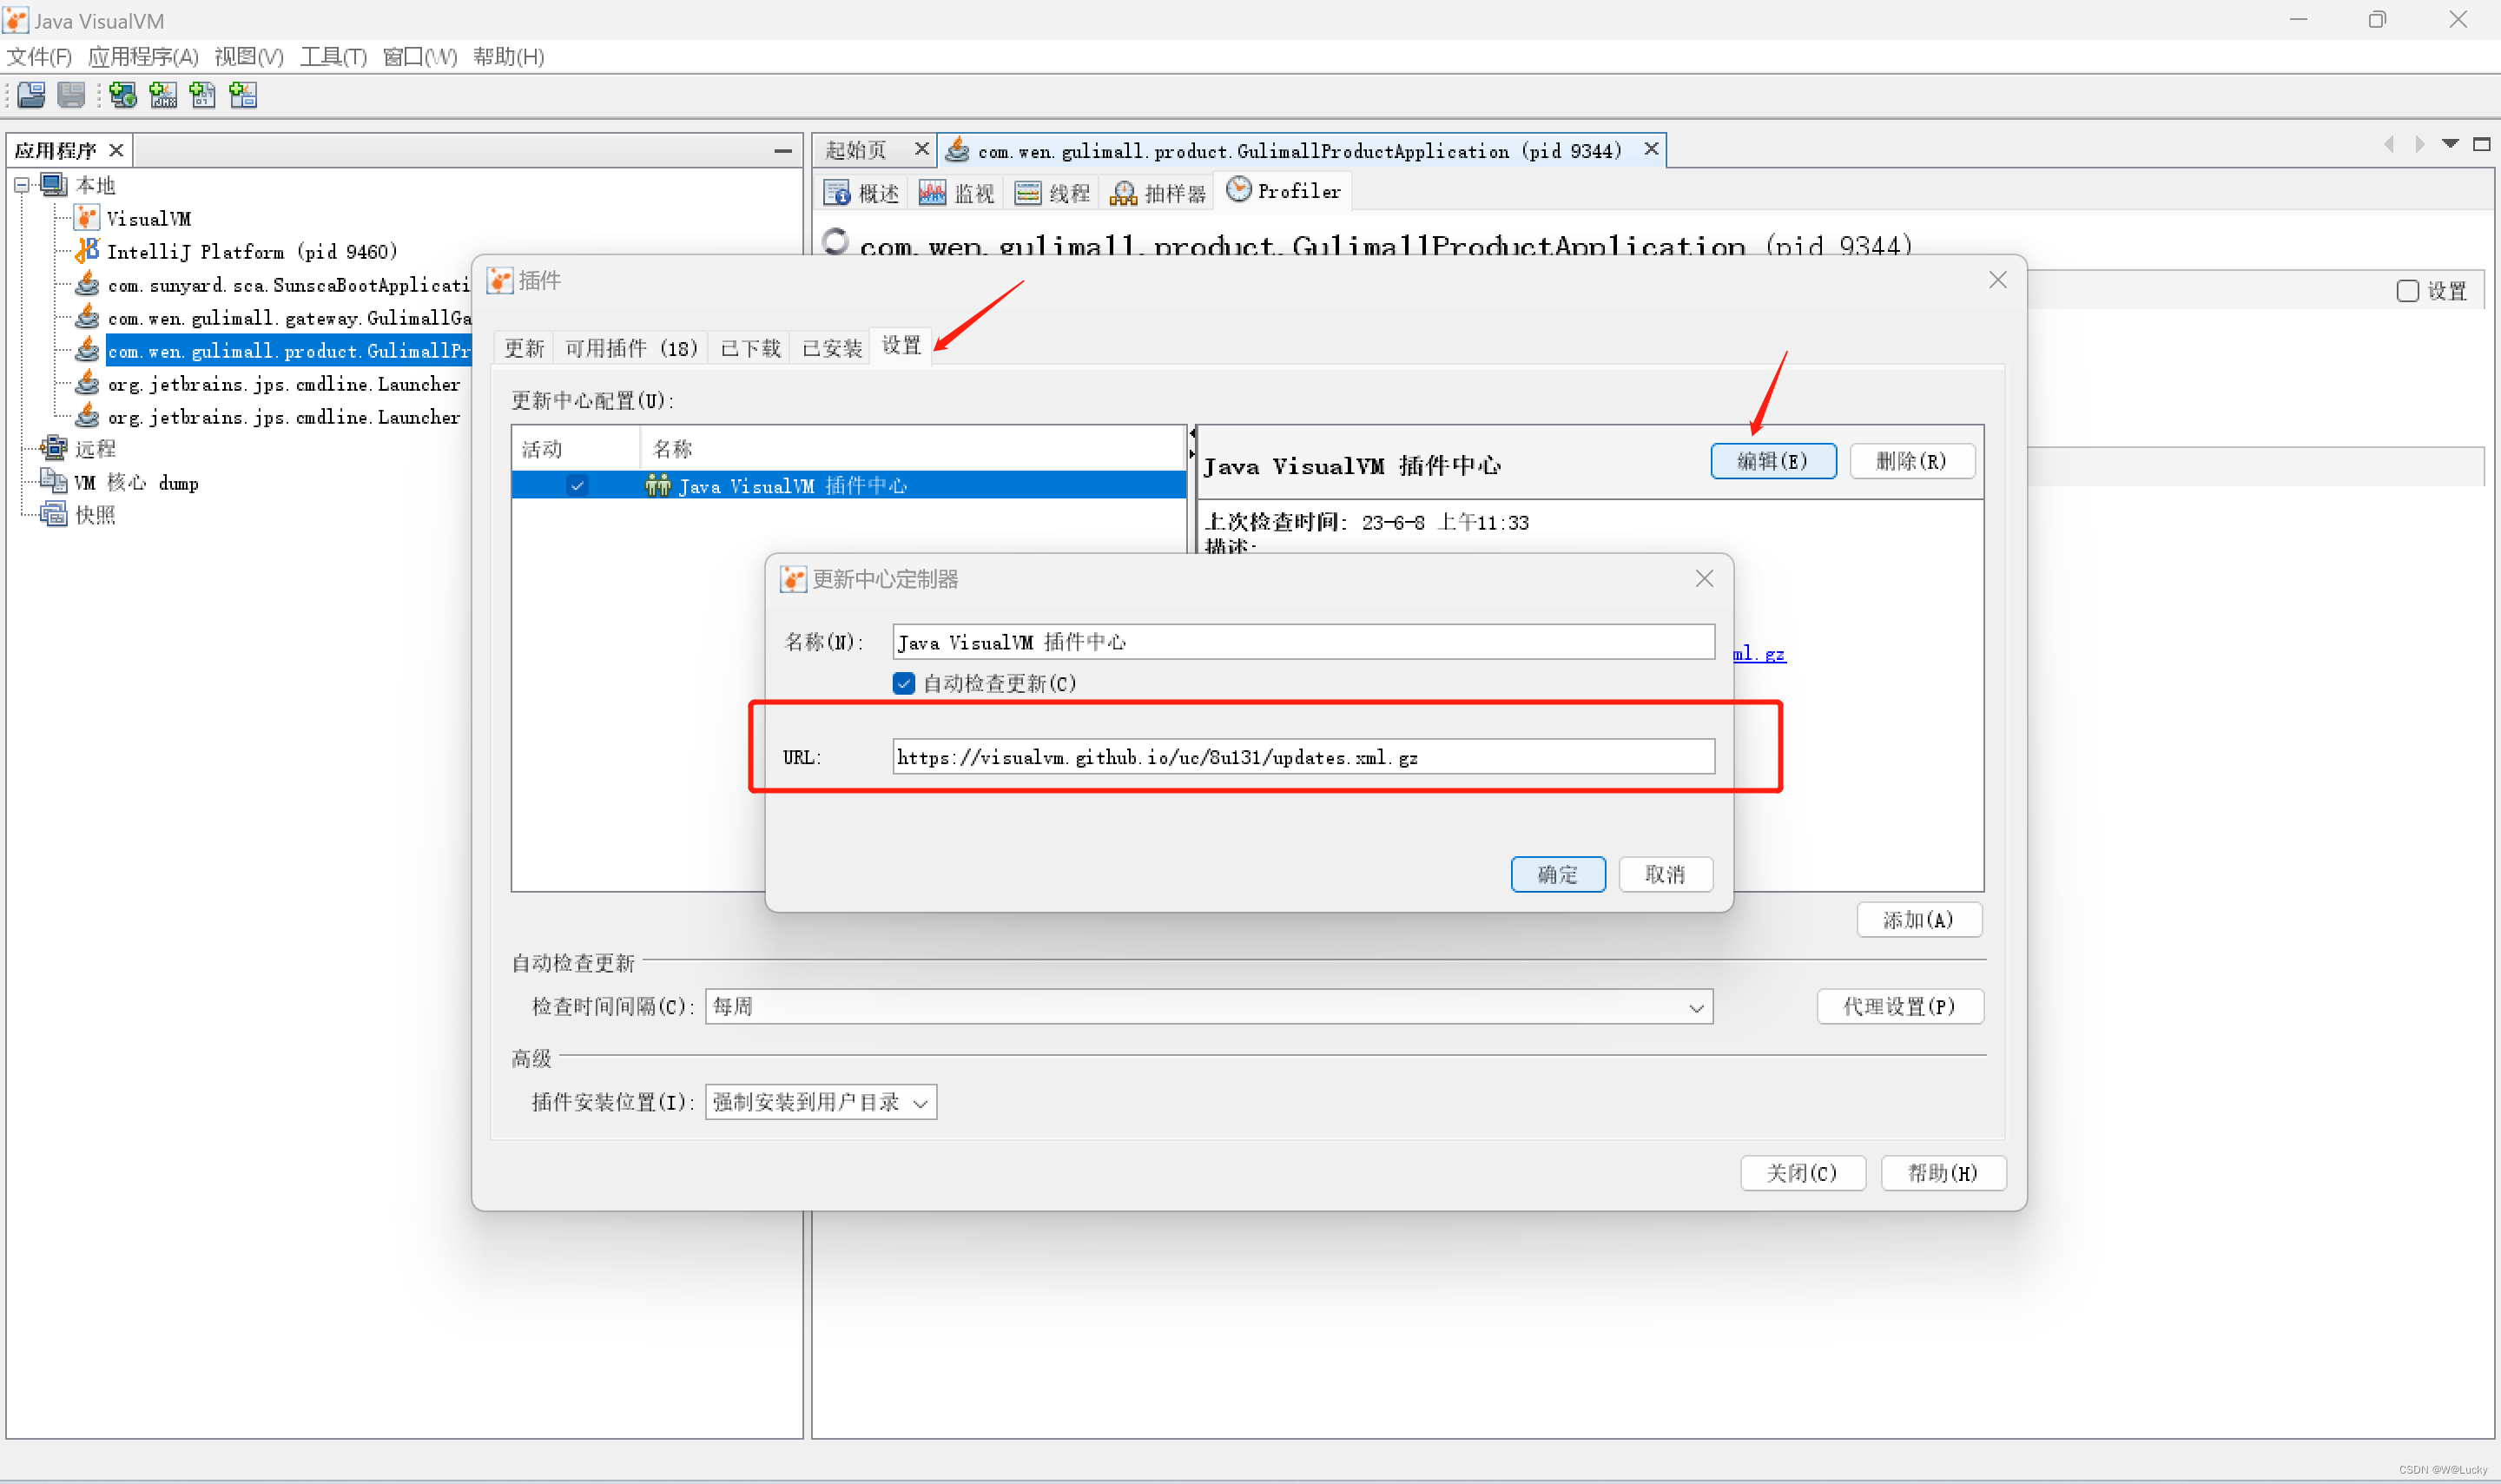
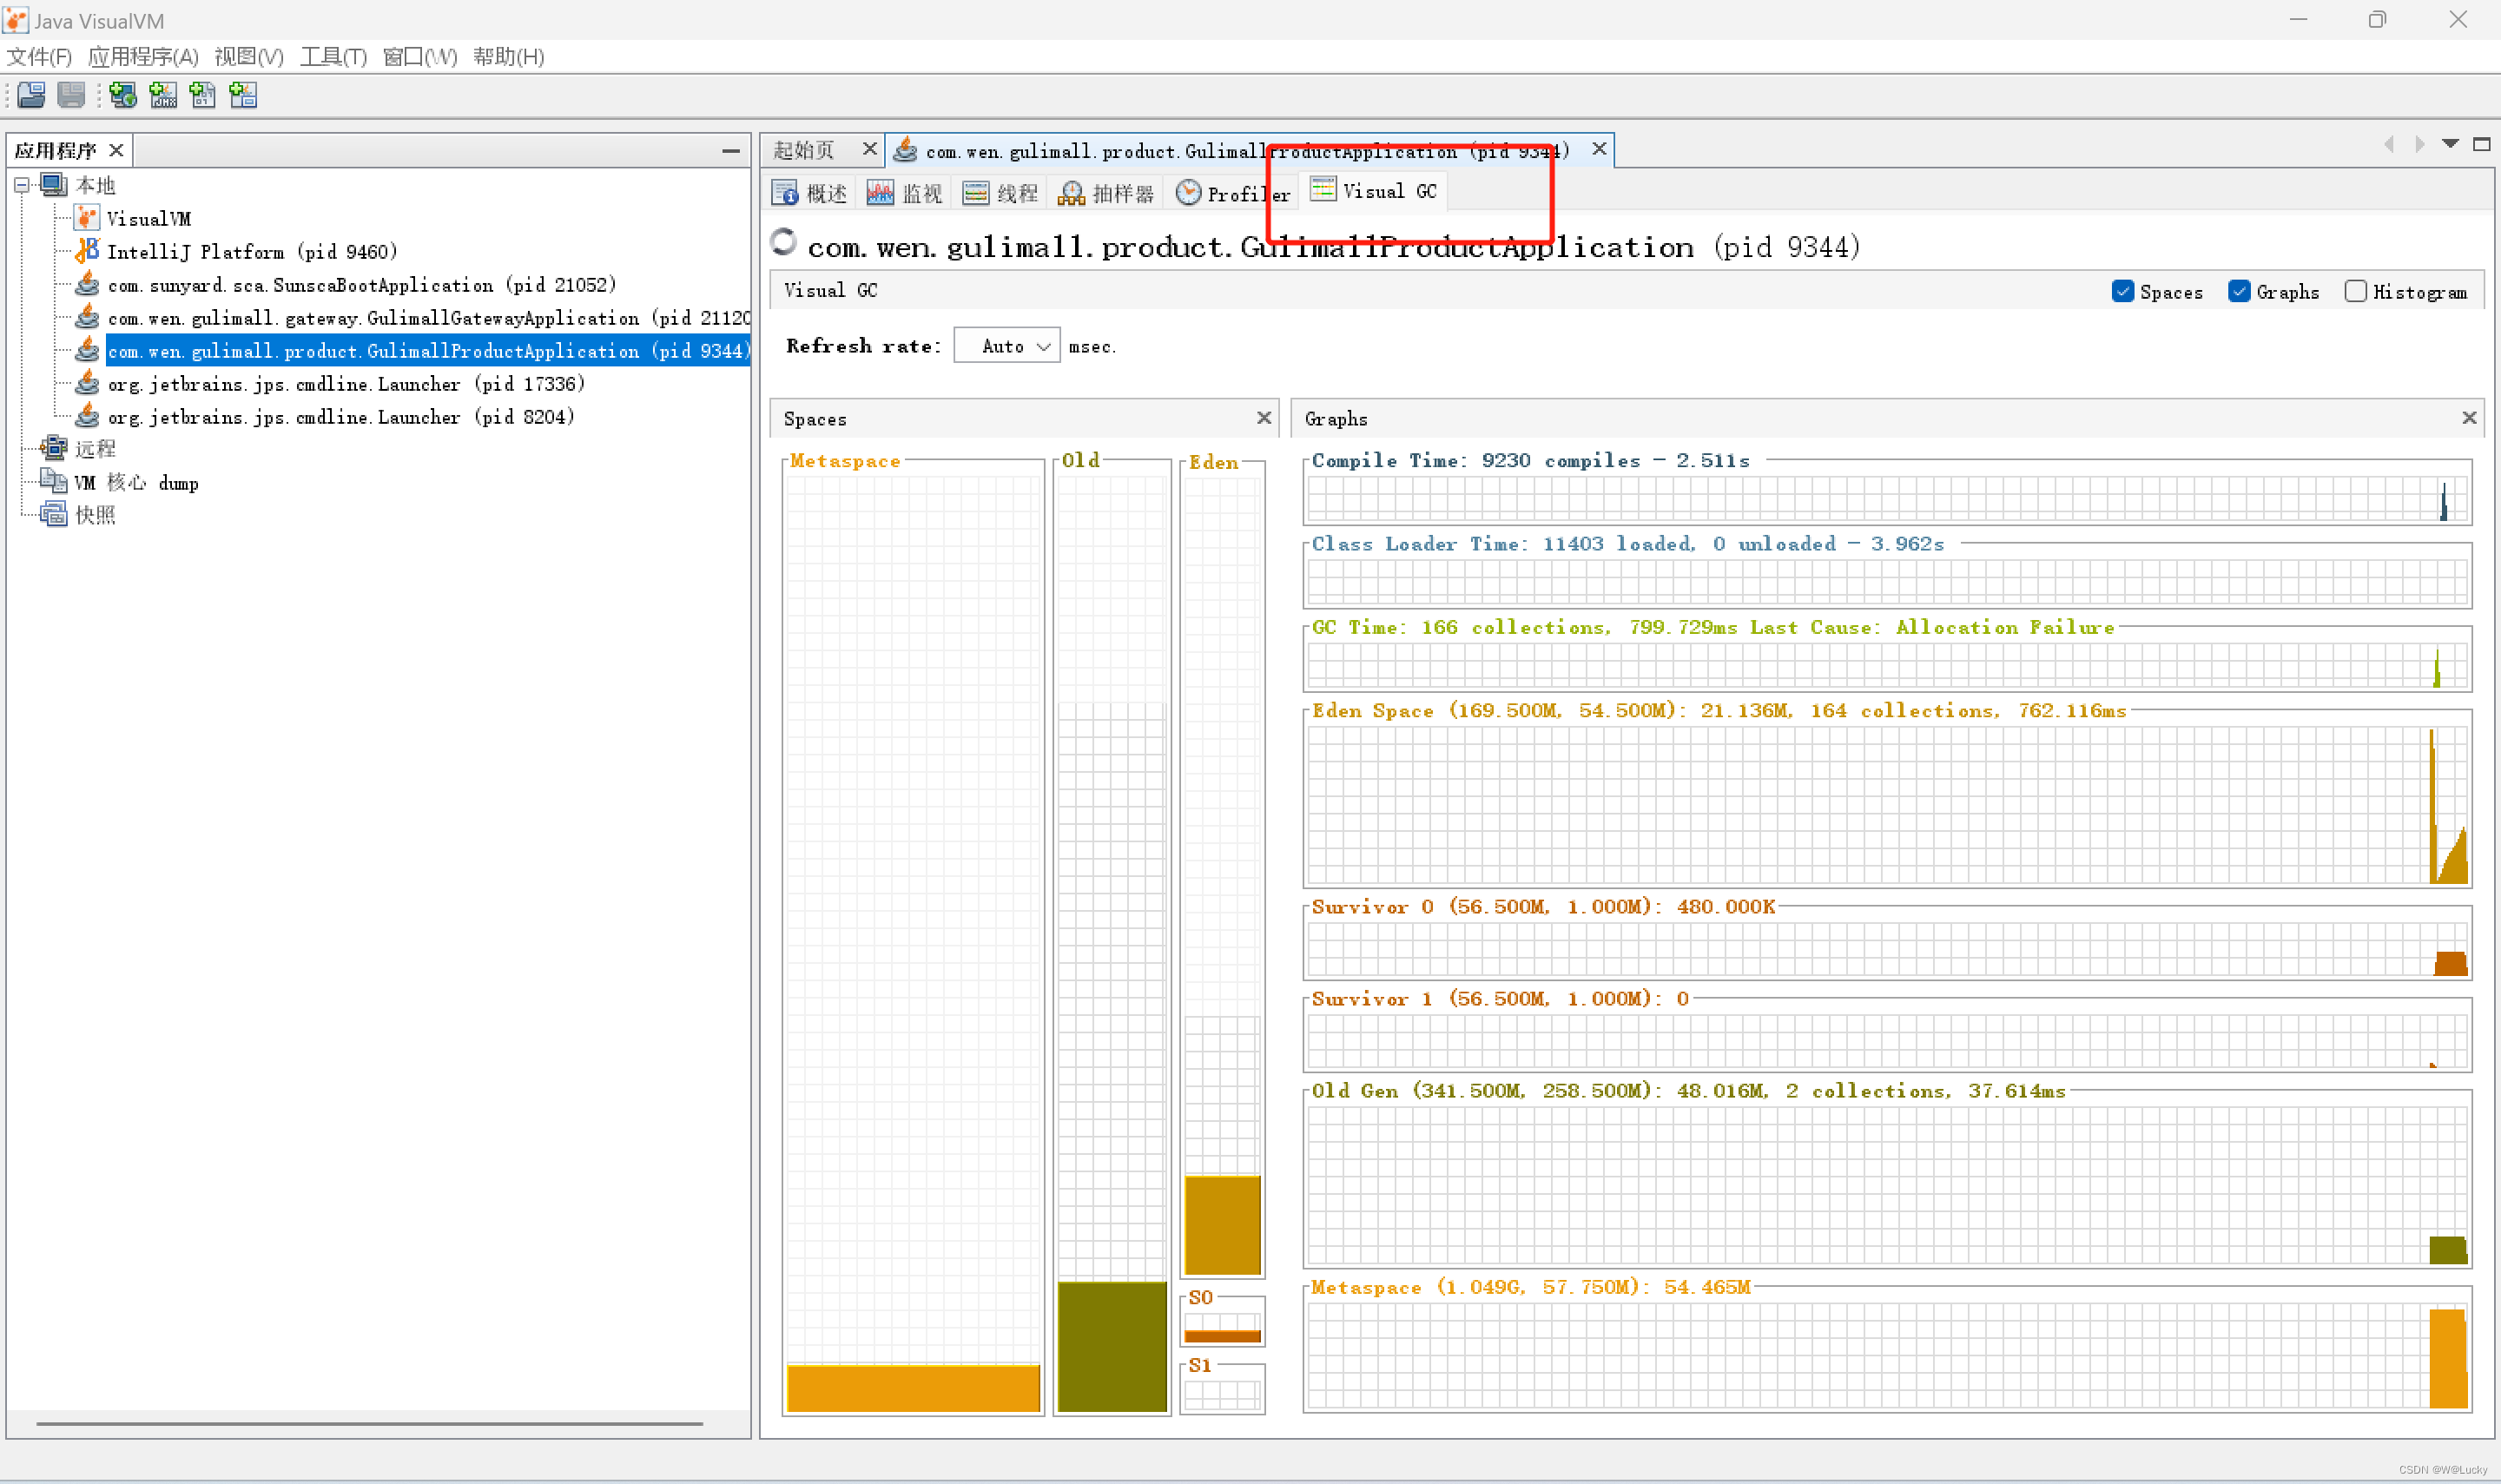 4.2.4 监控指标
对商城首页相关两个接口进行压力测试,同时监控以下JVM指标:
CPU使用情况、内存使用率、GC次数。
1. 中间件指标
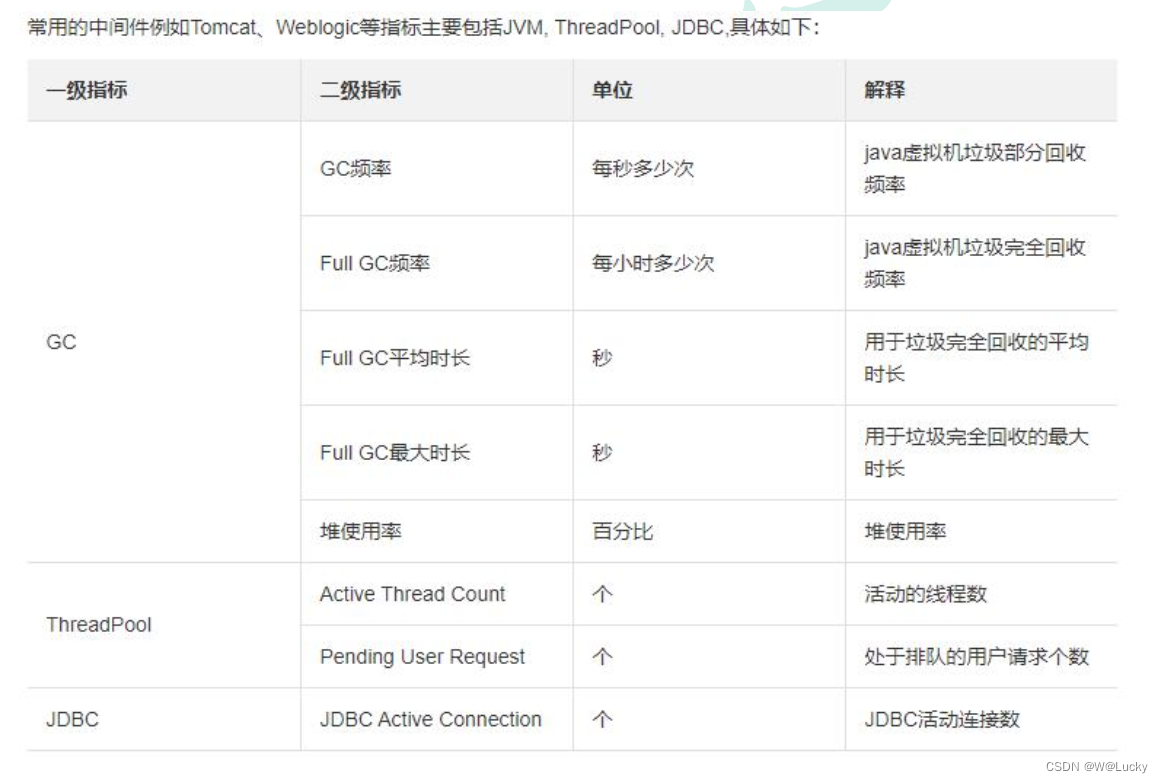
- 当前正在运行的线程数不能超过设定的最大值。 一般情况下系统性能较好的情况下, 线
程数最小值设置 50 和最大值设置 200 比较合适。
- 当前运行的 JDBC 连接数不能超过设定的最大值。 一般情况下系统性能较好的情况下,
JDBC 最小值设置 50 和最大值设置 200 比较合适。
- GC 频率不能频繁, 特别是 FULL GC 更不能频繁, 一般情况下系统性能较好的情况下,
JVM 最小堆大小和最大堆大小分别设置 1024M 比较合适。
2. 数据库指标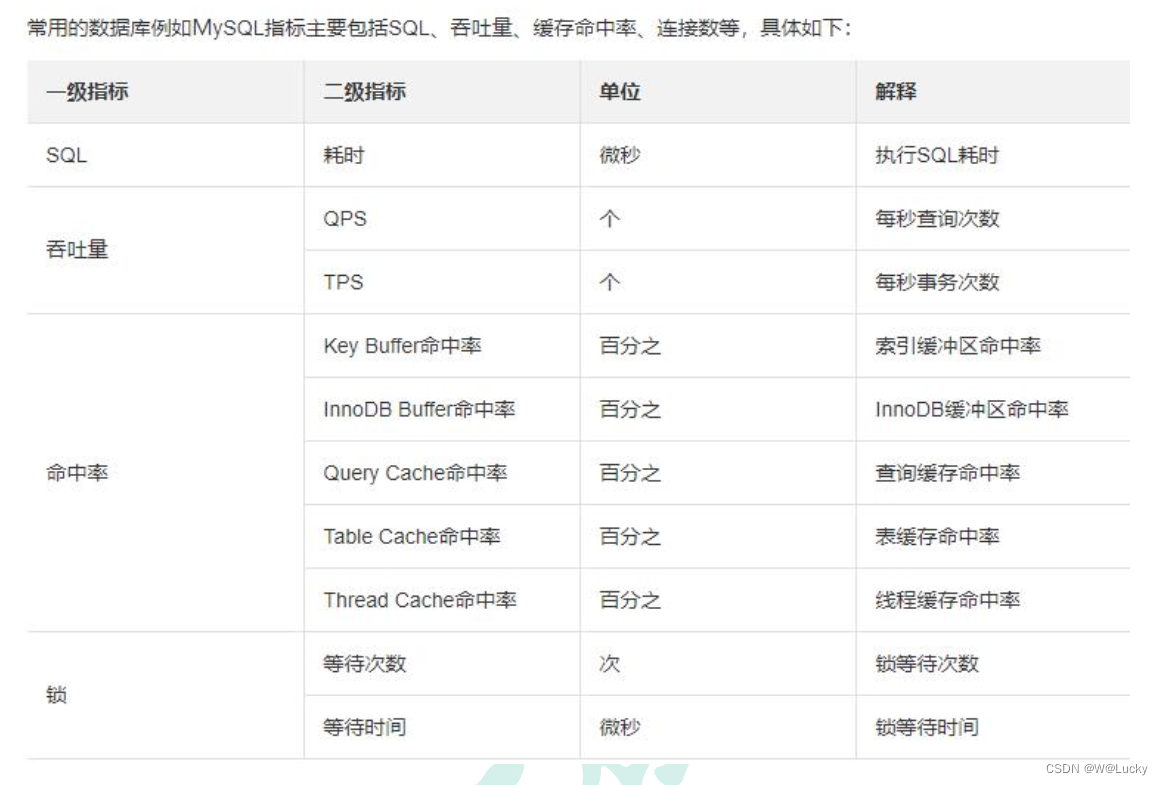
- SQL 耗时越小越好, 一般情况下微秒级别。
- 命中率越高越好, 一般情况下不能低于 95%。
- 锁等待次数越低越好, 等待时间越短越好。
| 压测内容 | 压测线程数 | 吞吐量/s | 90%响应时间 | 99%响应时间 |
|---|---|---|---|---|
| Nginx | 50 | 8109 | 9 | 16 |
| Gateway | 50 | 19779 | 2 | 55 |
| 简单服务 | 50 | 46956 | 2 | 4 |
| 首页一级菜单渲染 | 50 | 875(db,thymeleaf) | 98 | 182 |
| 首页渲染(开缓存) | 50 | 897 | 73 | 110 |
| 首页渲染(开缓存、优化数据库、关日志) | 50 | 2655 | 36 | 127 |
| 三级分类数据获取 | 50 | 5(db) | ...(不具参考意义) | ... |
| 三级分类(加索引) | 50 | 20 | ... | ... |
| 三级分类(优化业务) | 50 | 264 | 1872 | 4430 |
| 三级分类(使用redis作为缓存) | 50 | 1052 | 75 | 118 |
| 首页全量数据获取 | 50 | 7(静态资源) | ... | ... |
| 全量数据获取(开缓存、优化数据库、关日志) | 50 | 12 | ... | ... |
| Gateway+简单服务 | 50 | 8426 | 9 | 18 |
| 全链路 | 50 | 835 | 88 | 122 |
4.3 优化
4.3.1 优化中间件对性能的影响
在测试期间因为要持续不断的监控其性能指标,所以线程进行永远循环。1. 对 Nginx 进行压测
// 动态查看docker各个容器的状态,这里看不到各个容器的名字所以我使用下面的命令
docker stats
// 动态查看docker指定容器的状态,nginx
docker stats nginx
初始状态:


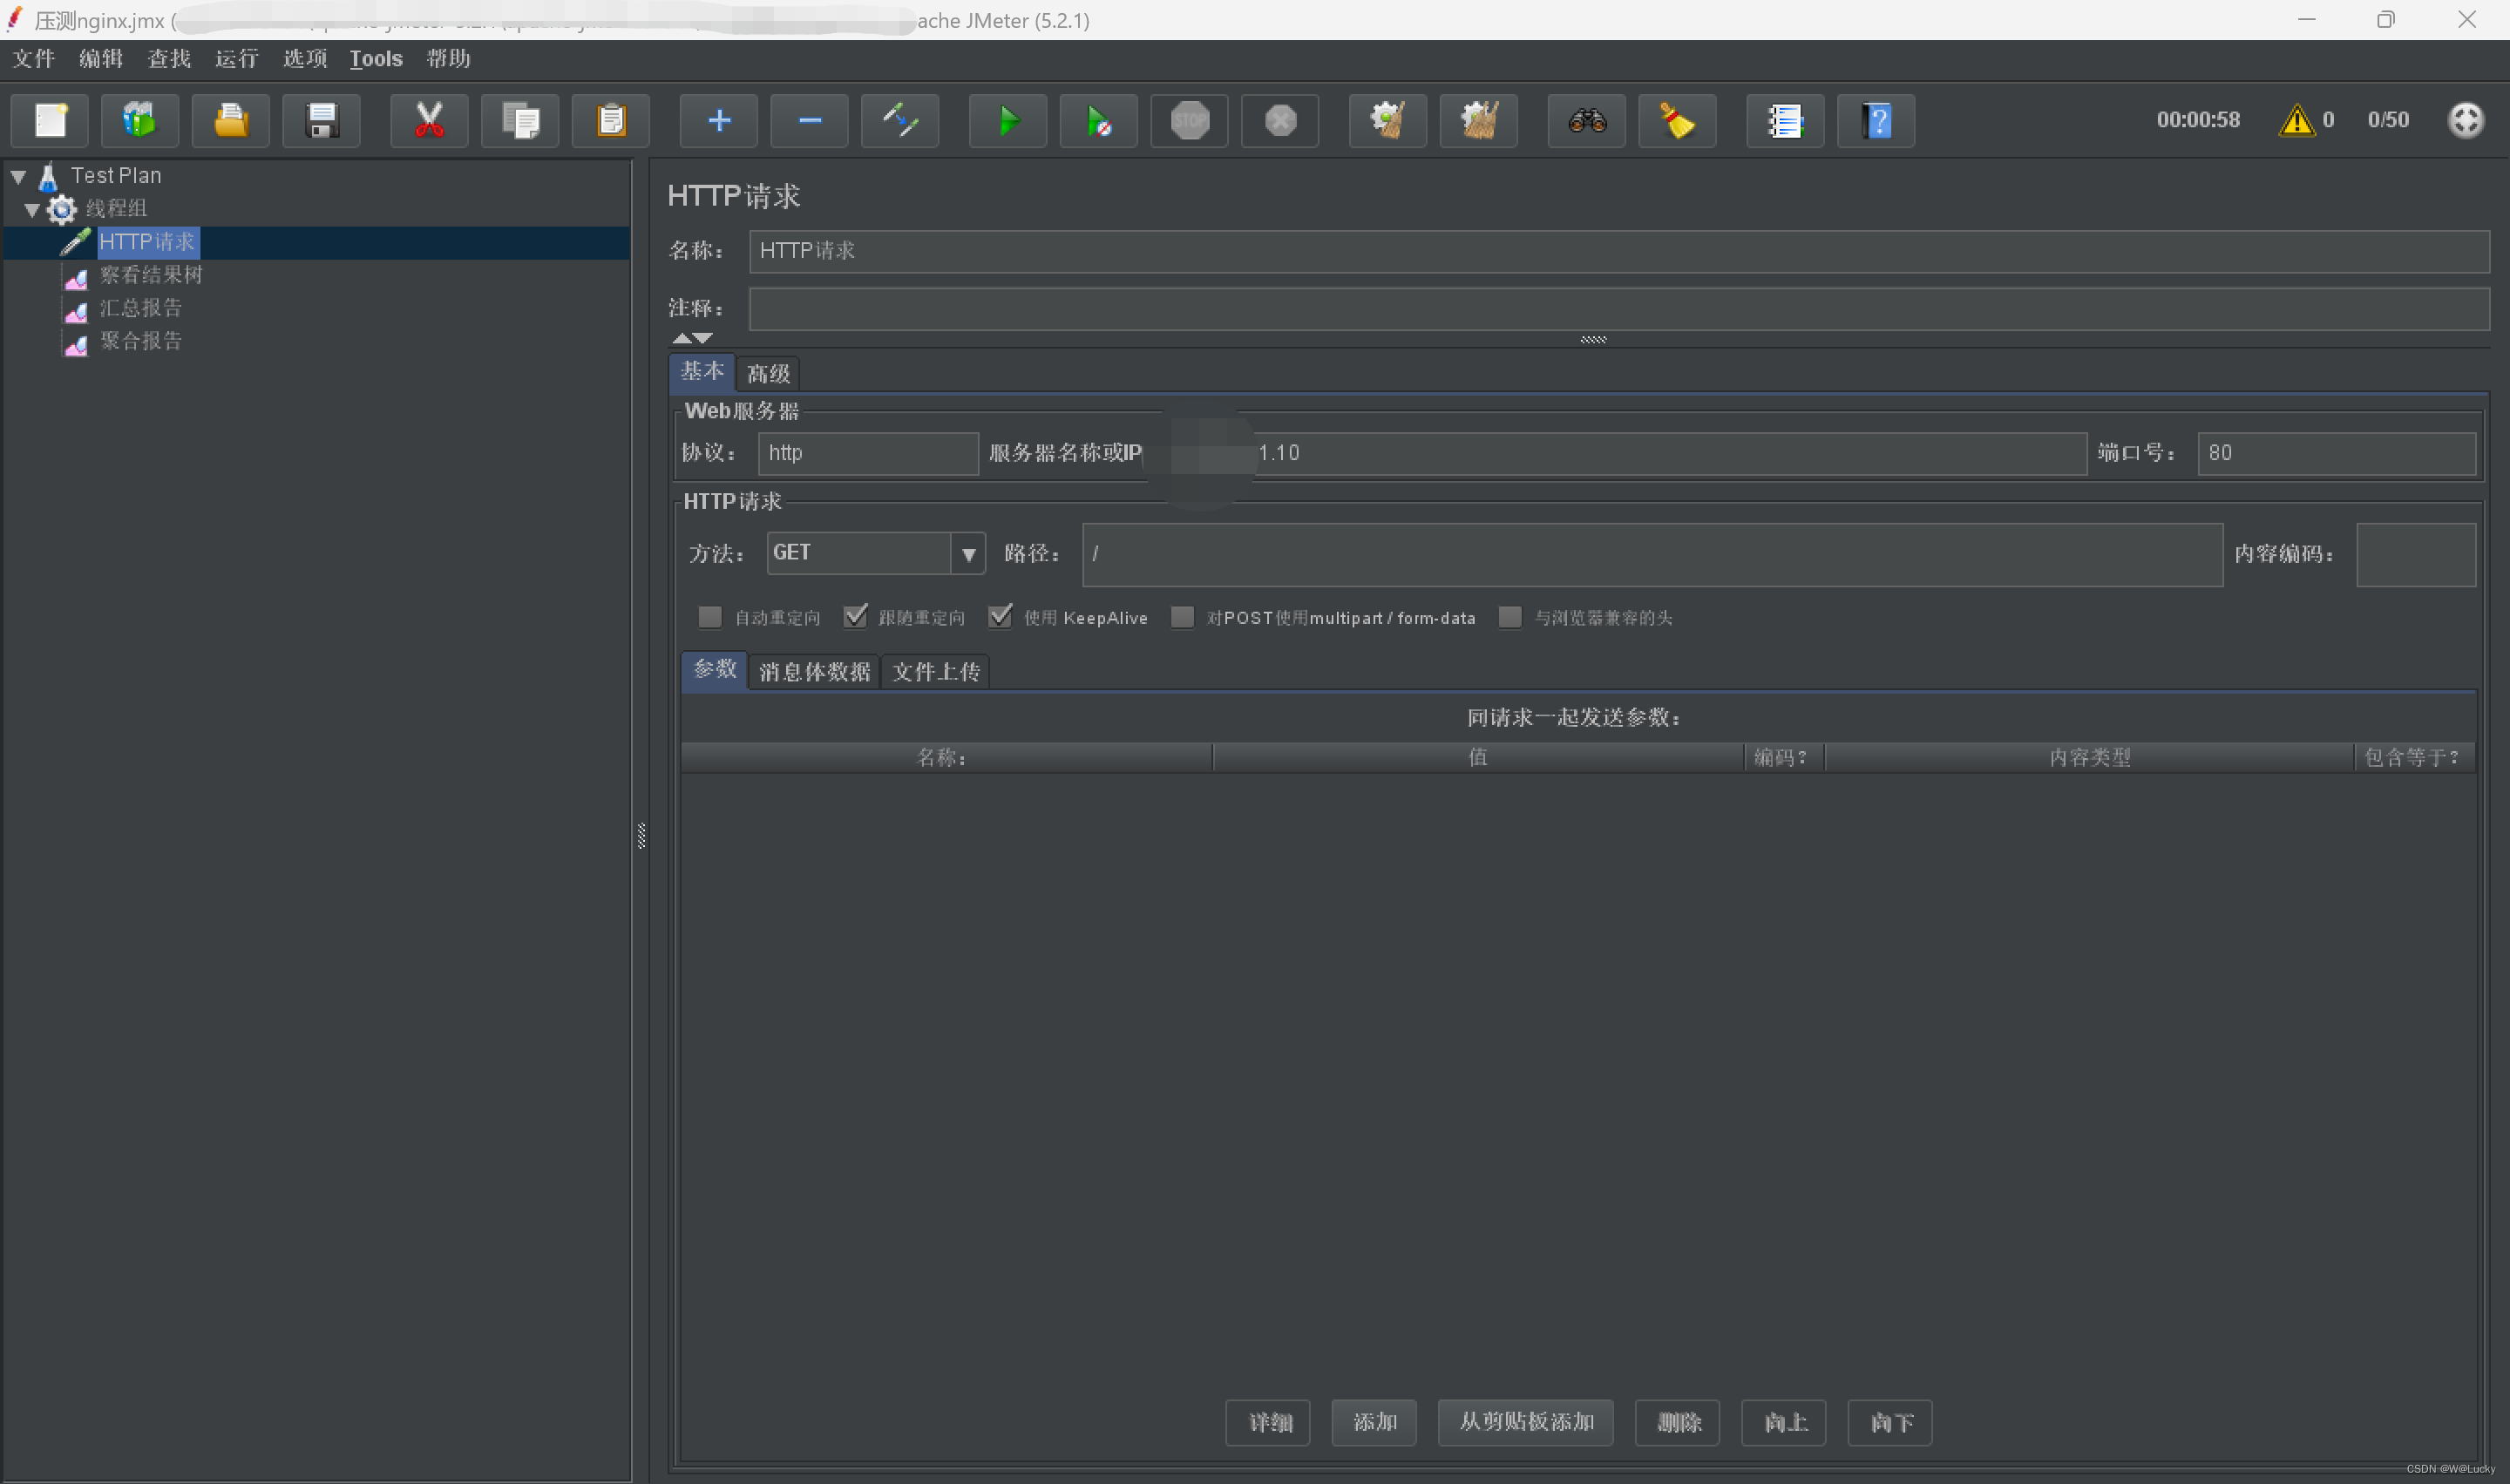
50个线程循环压测后的状态:
 得出结论,nginx是CPU密集型:
| 压测内容 | 压测线程数 | 吞吐量/s | 90%的响应时间 | 99%的响应时间 |
|---|---|---|---|---|
| Nginx | 50 | 8109 | 9 | 16 |
2. 对网关进行压测
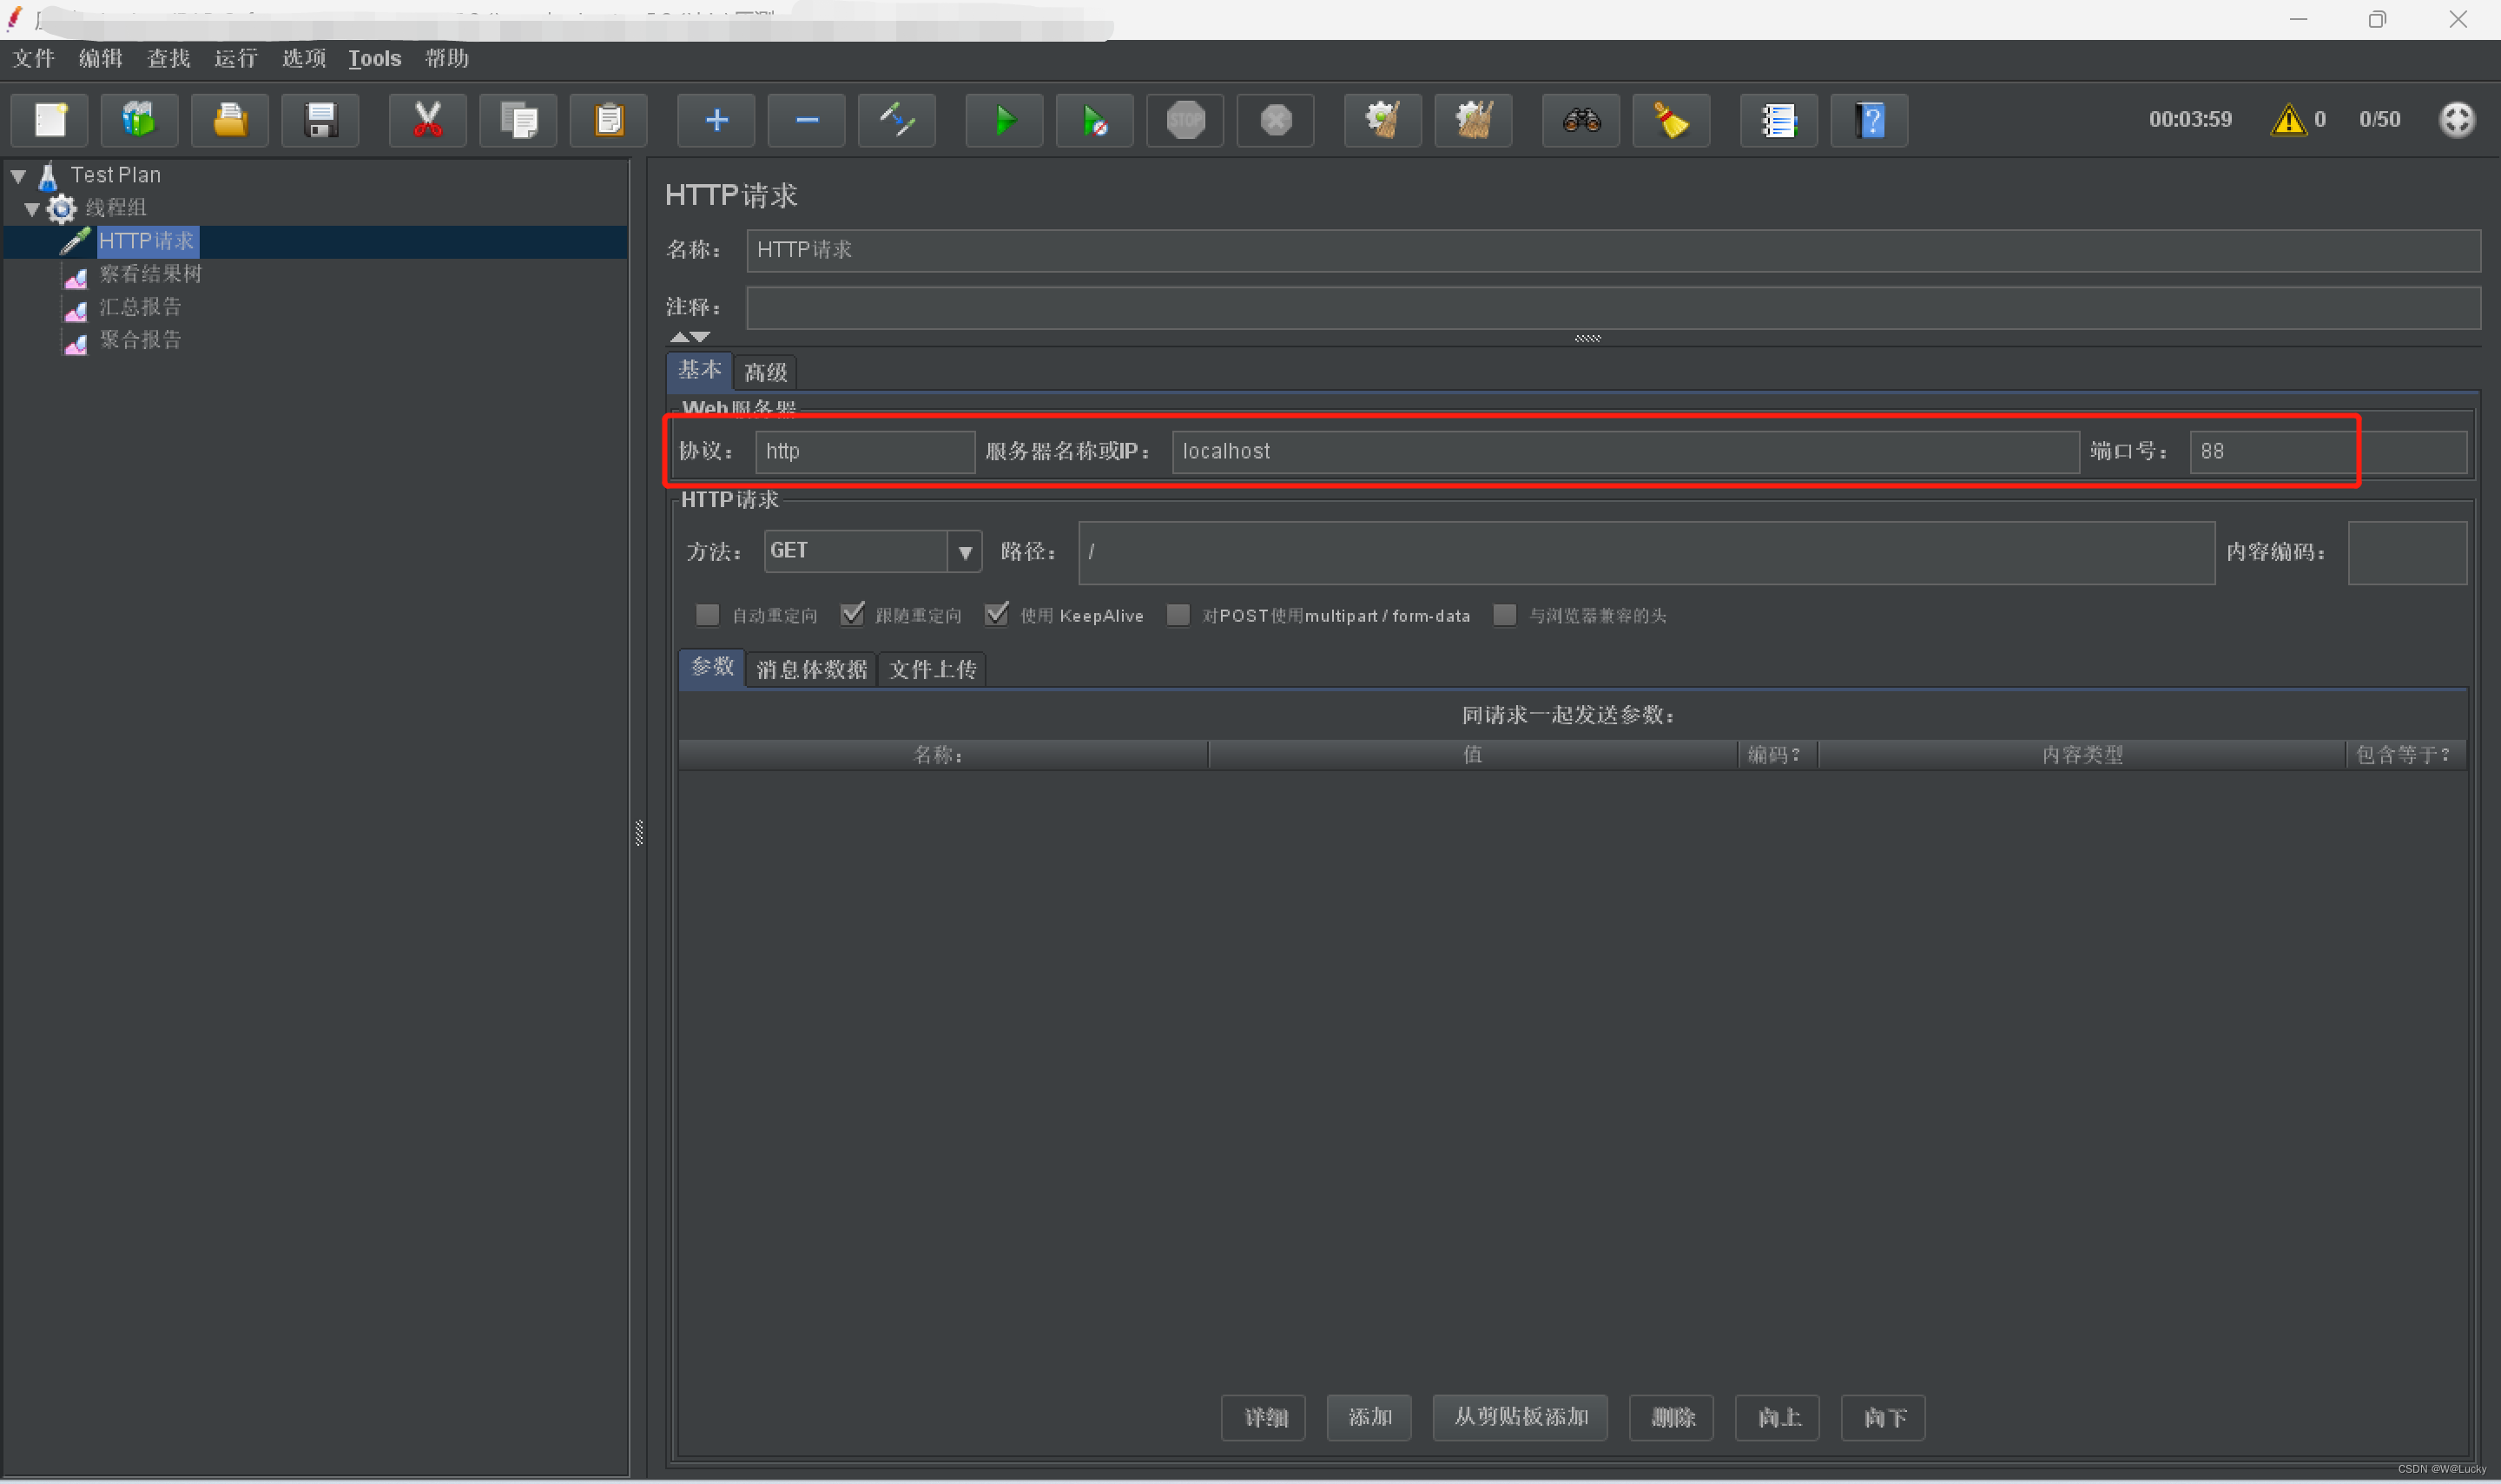
50个线程循环压测后的状态:
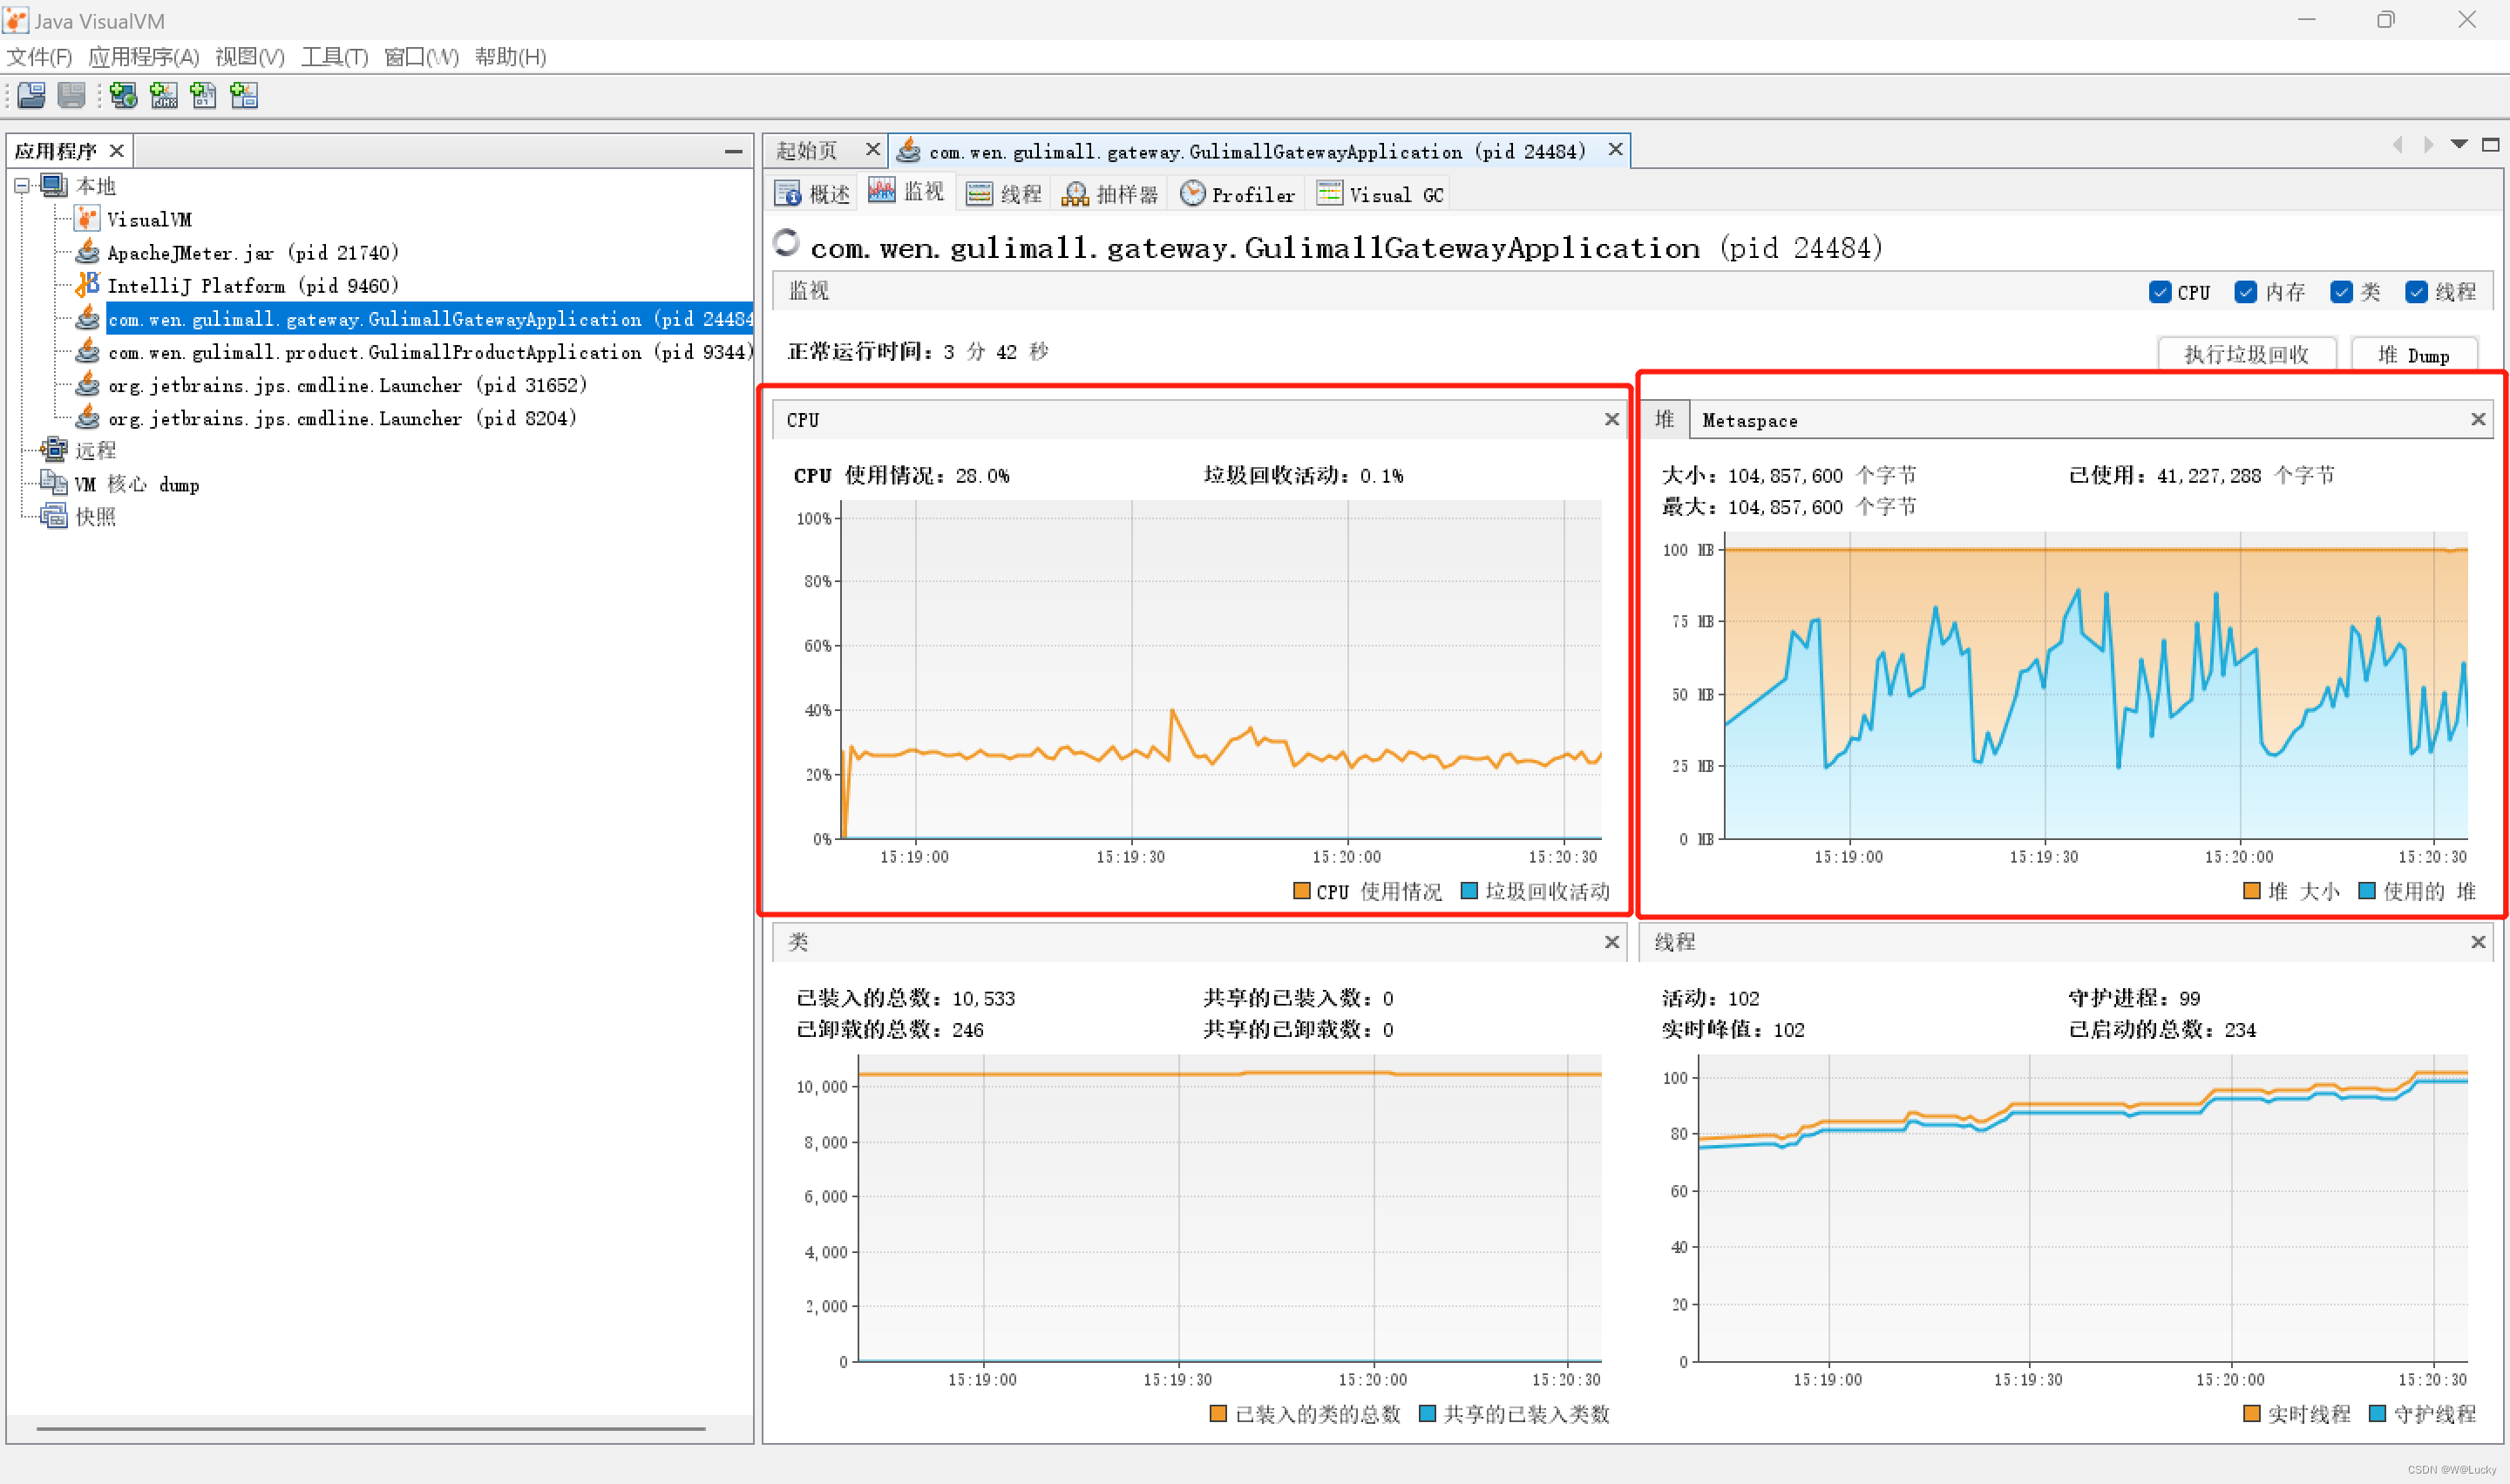
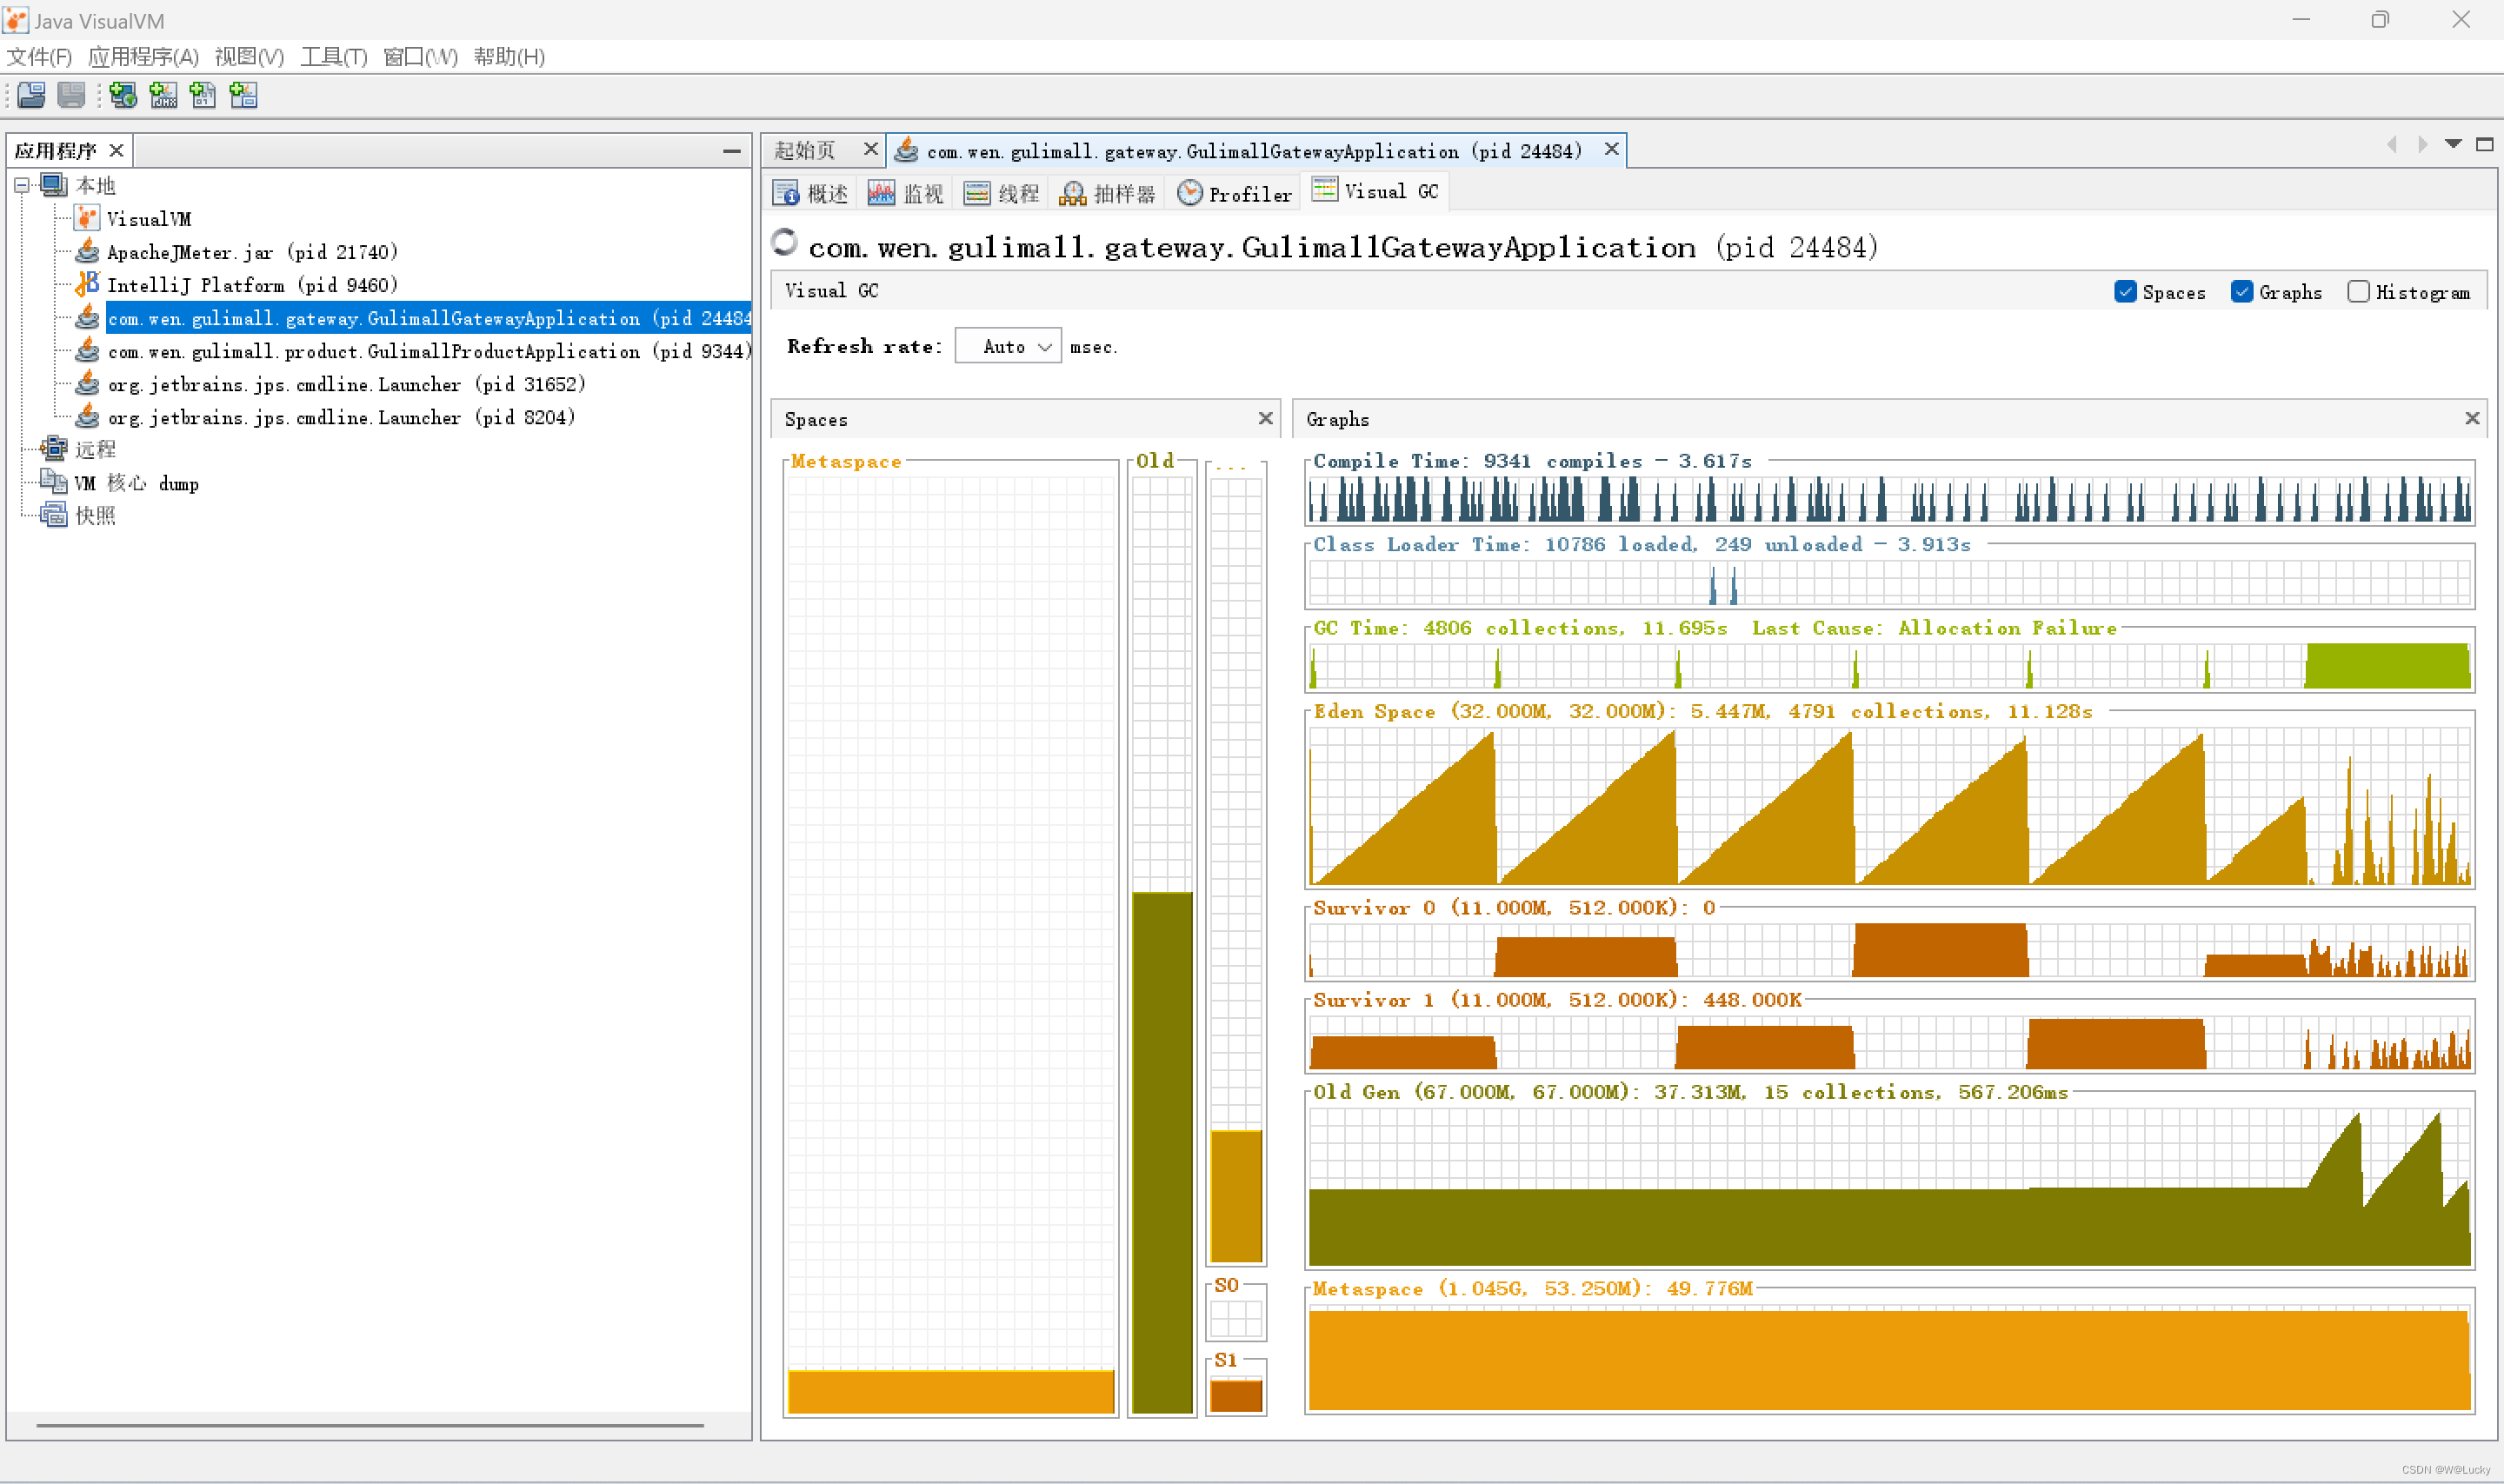
// 对cpu和内存监控:
// 得知网关也是cpu密集型。


对gc进行监控:
发现网关不断地进行轻GC,偶尔进行FullGC。虽然请GC次数多单并未花费太多的时间。
结论:可以适当调大内存的大小,避免GC次数太多导致性能下降。
3. 对简单服务进行压测
在gulimall-product模块下,com.wen.gulimall.product.web.IndexController中编写简单接口,如下:
   @ResponseBody
    @GetMapping("/hello")
    public String hello(){
        return "hello";
    }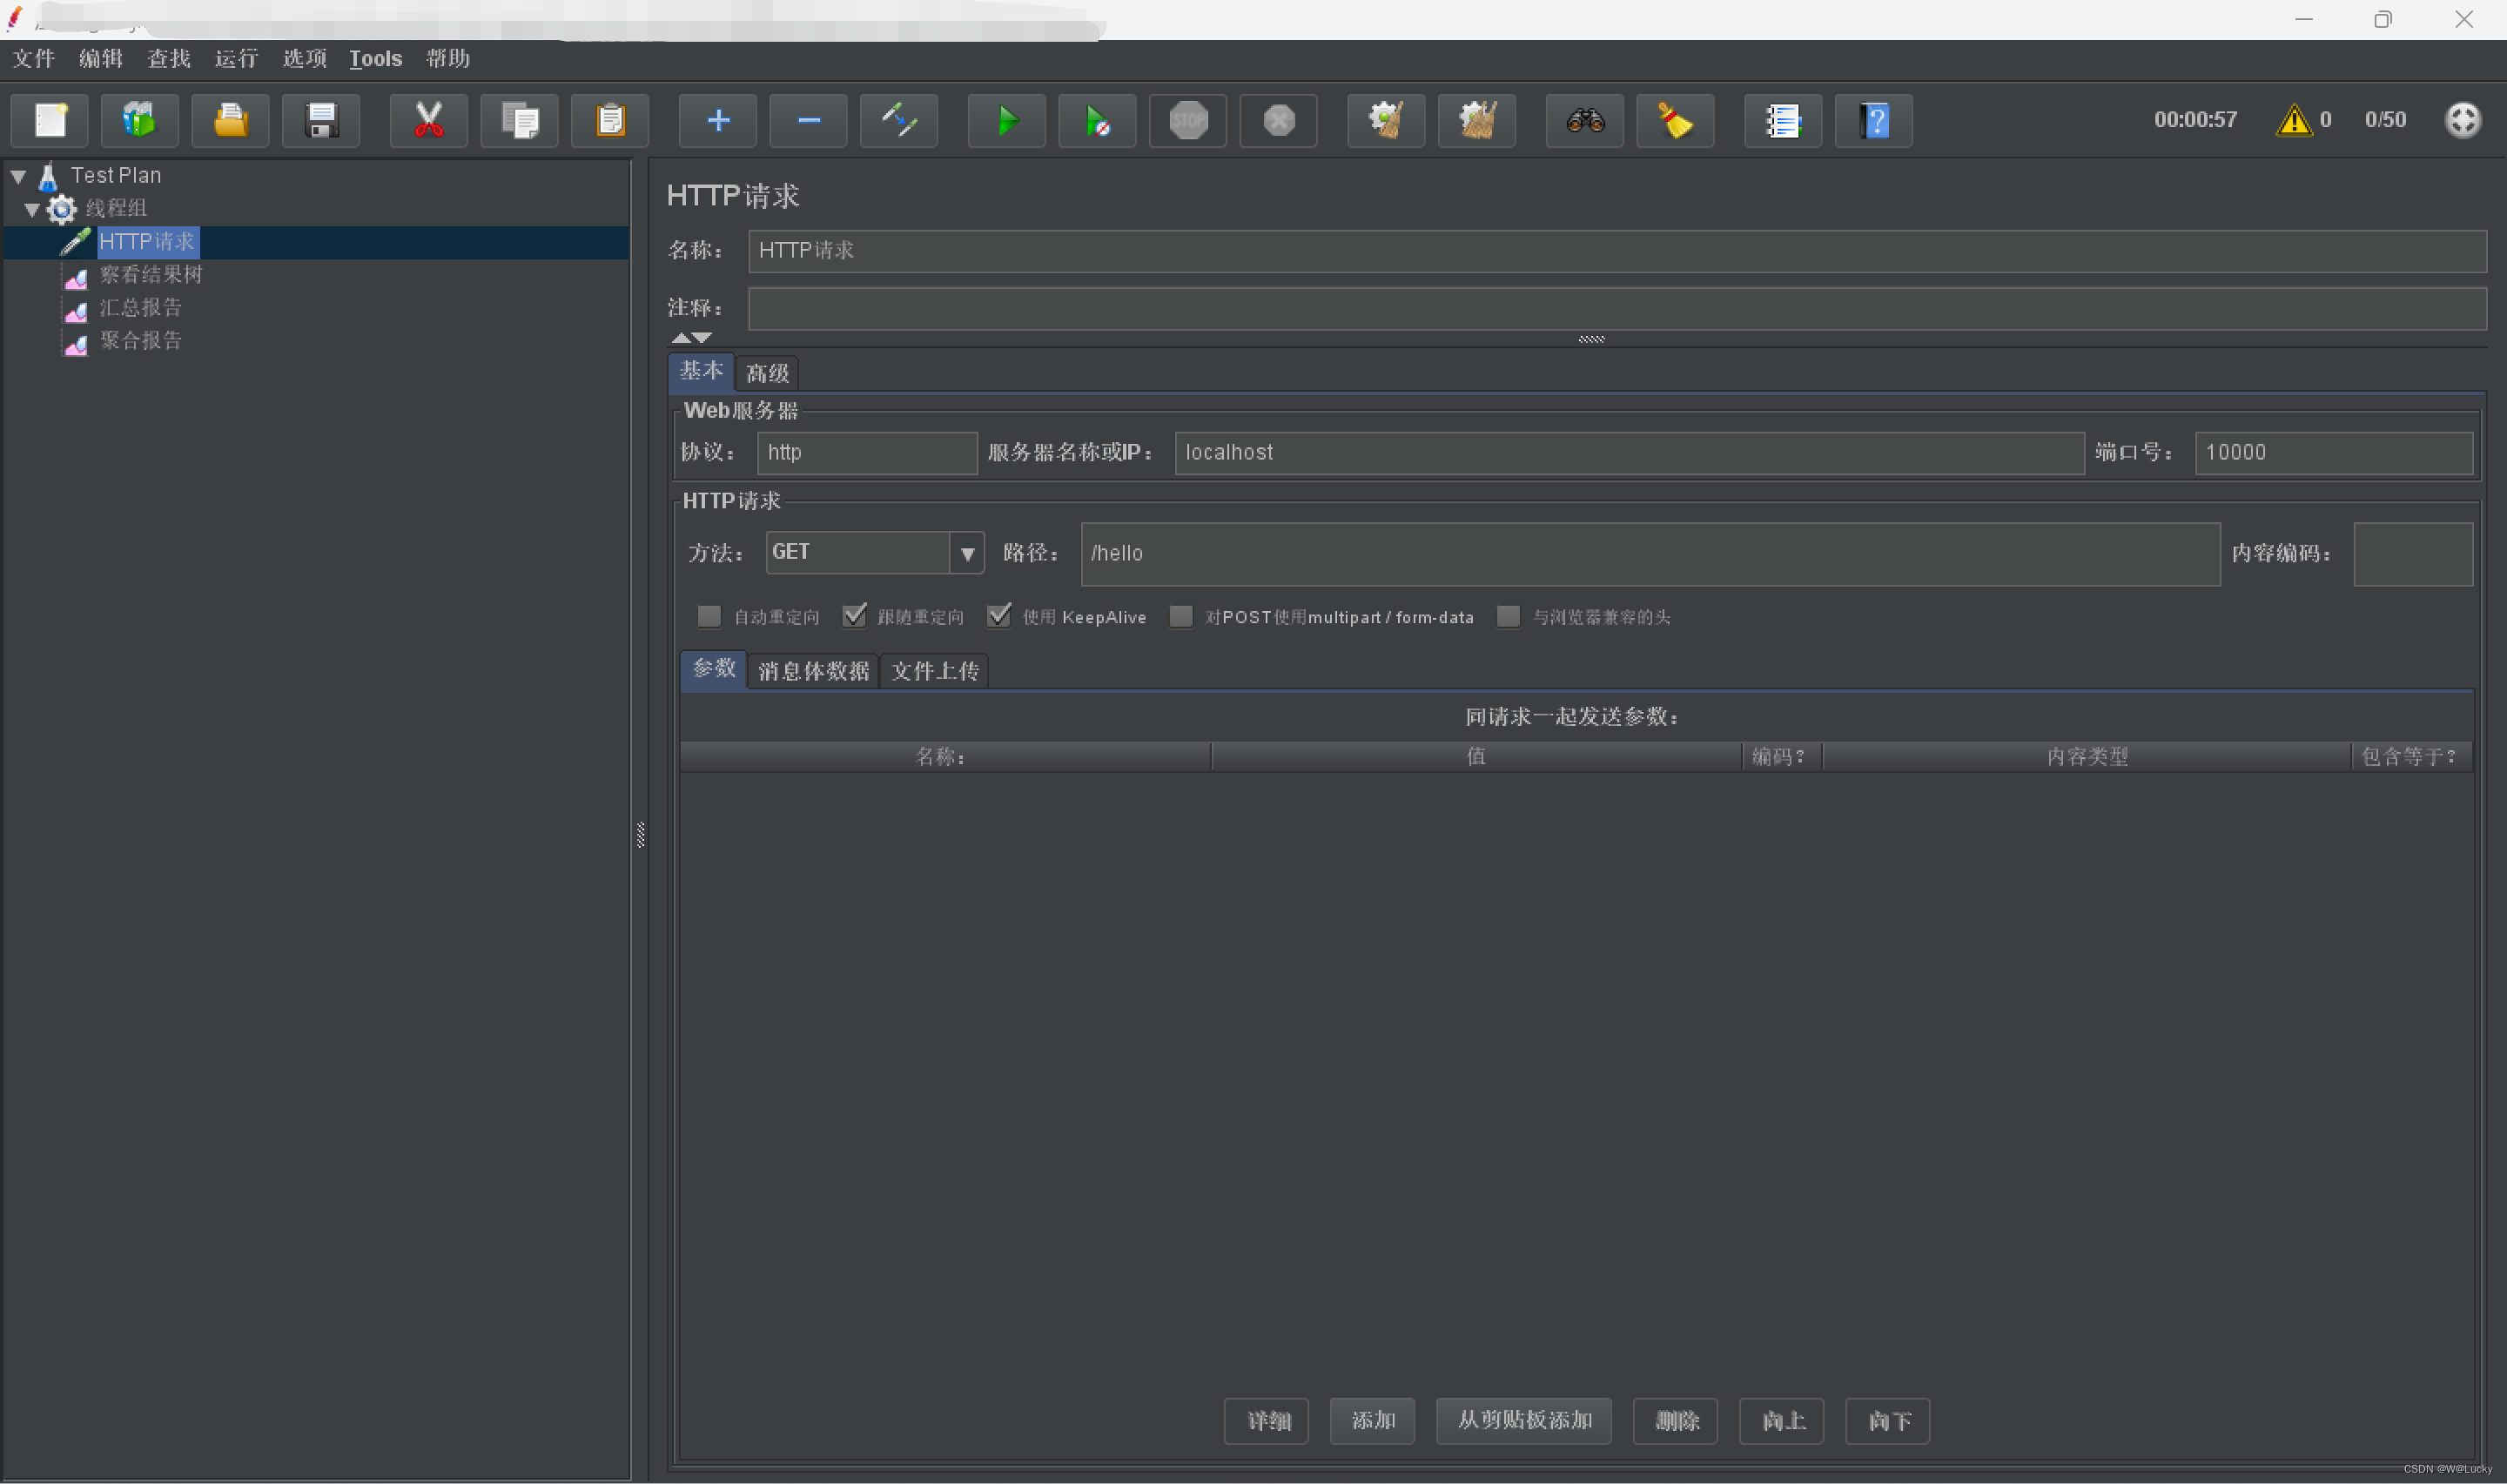
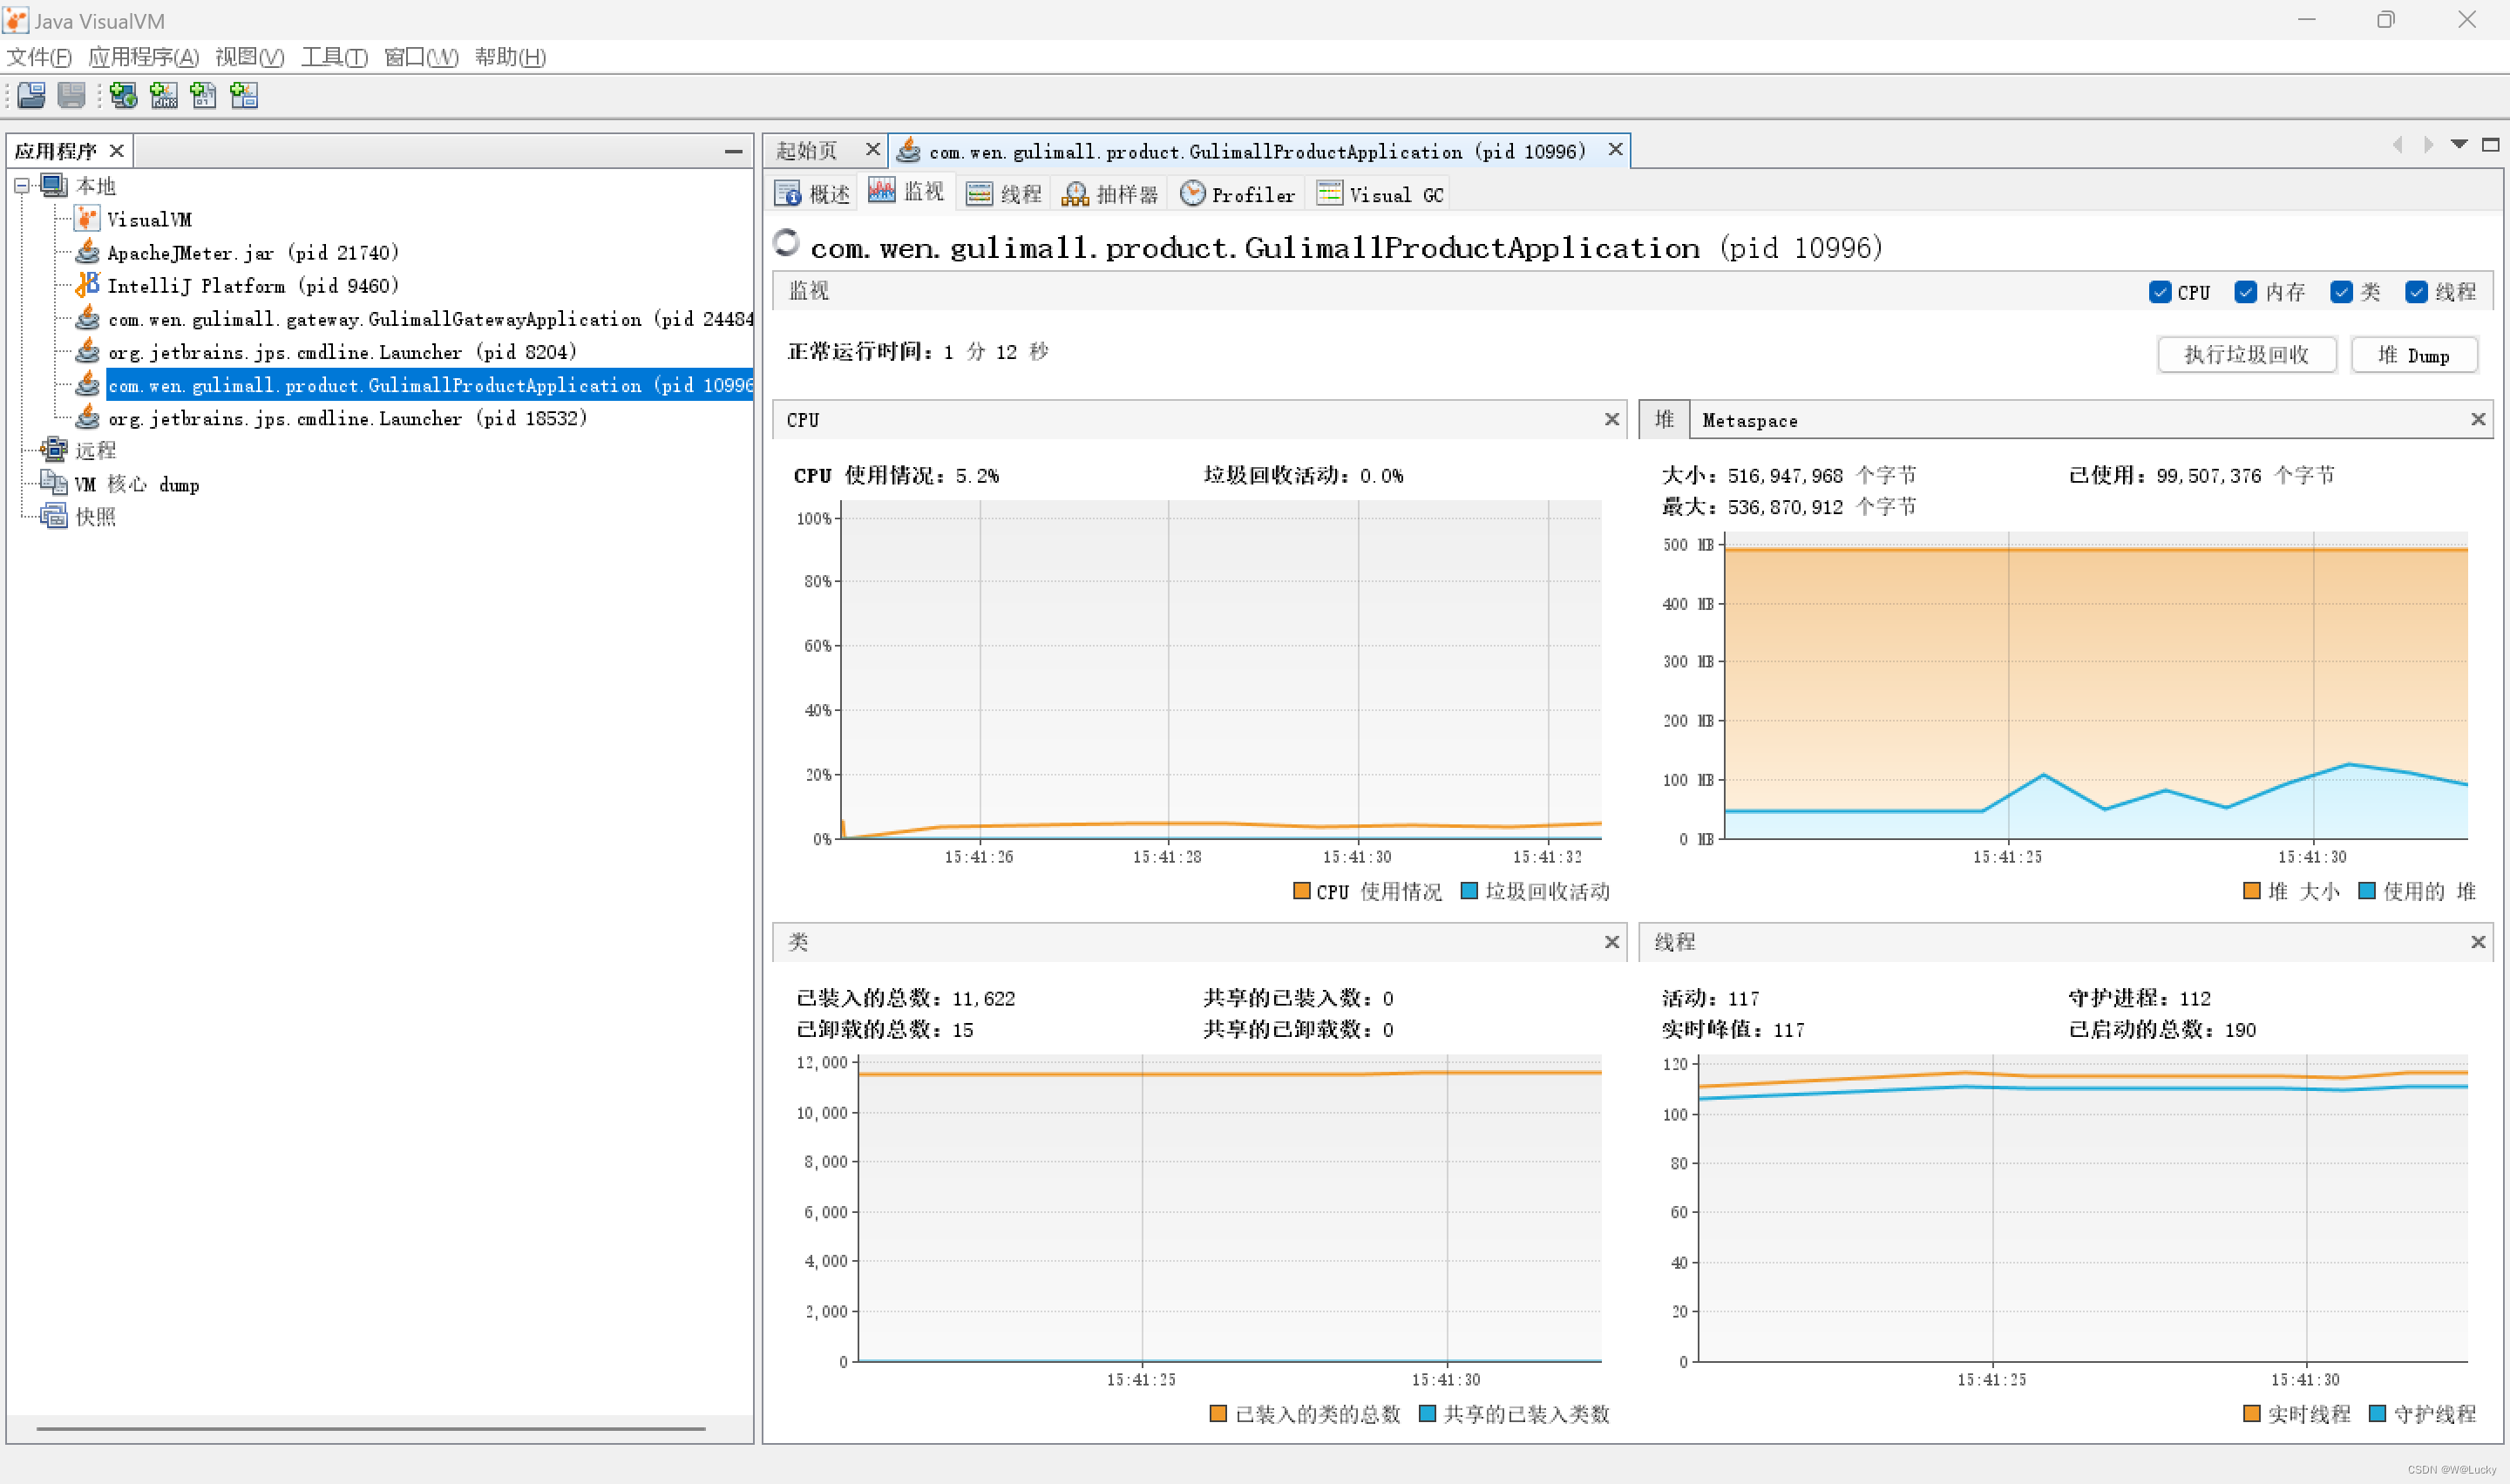
4. 对 Gateway+简单服务 进行压测
修改网关商品服务的路由配置,添加/hello:
- id: product_route
  uri: lb://gulimall-product
  predicates:
    - Path=/api/product/**,/hello
  filters:
    # 去掉 api
    - RewritePath=/api/?(?<segment>.*), /$\{segment}
结论:
中间件越多,性能损失越大,大多都损失在网络交互了。
5. 对 全链路 进行压测
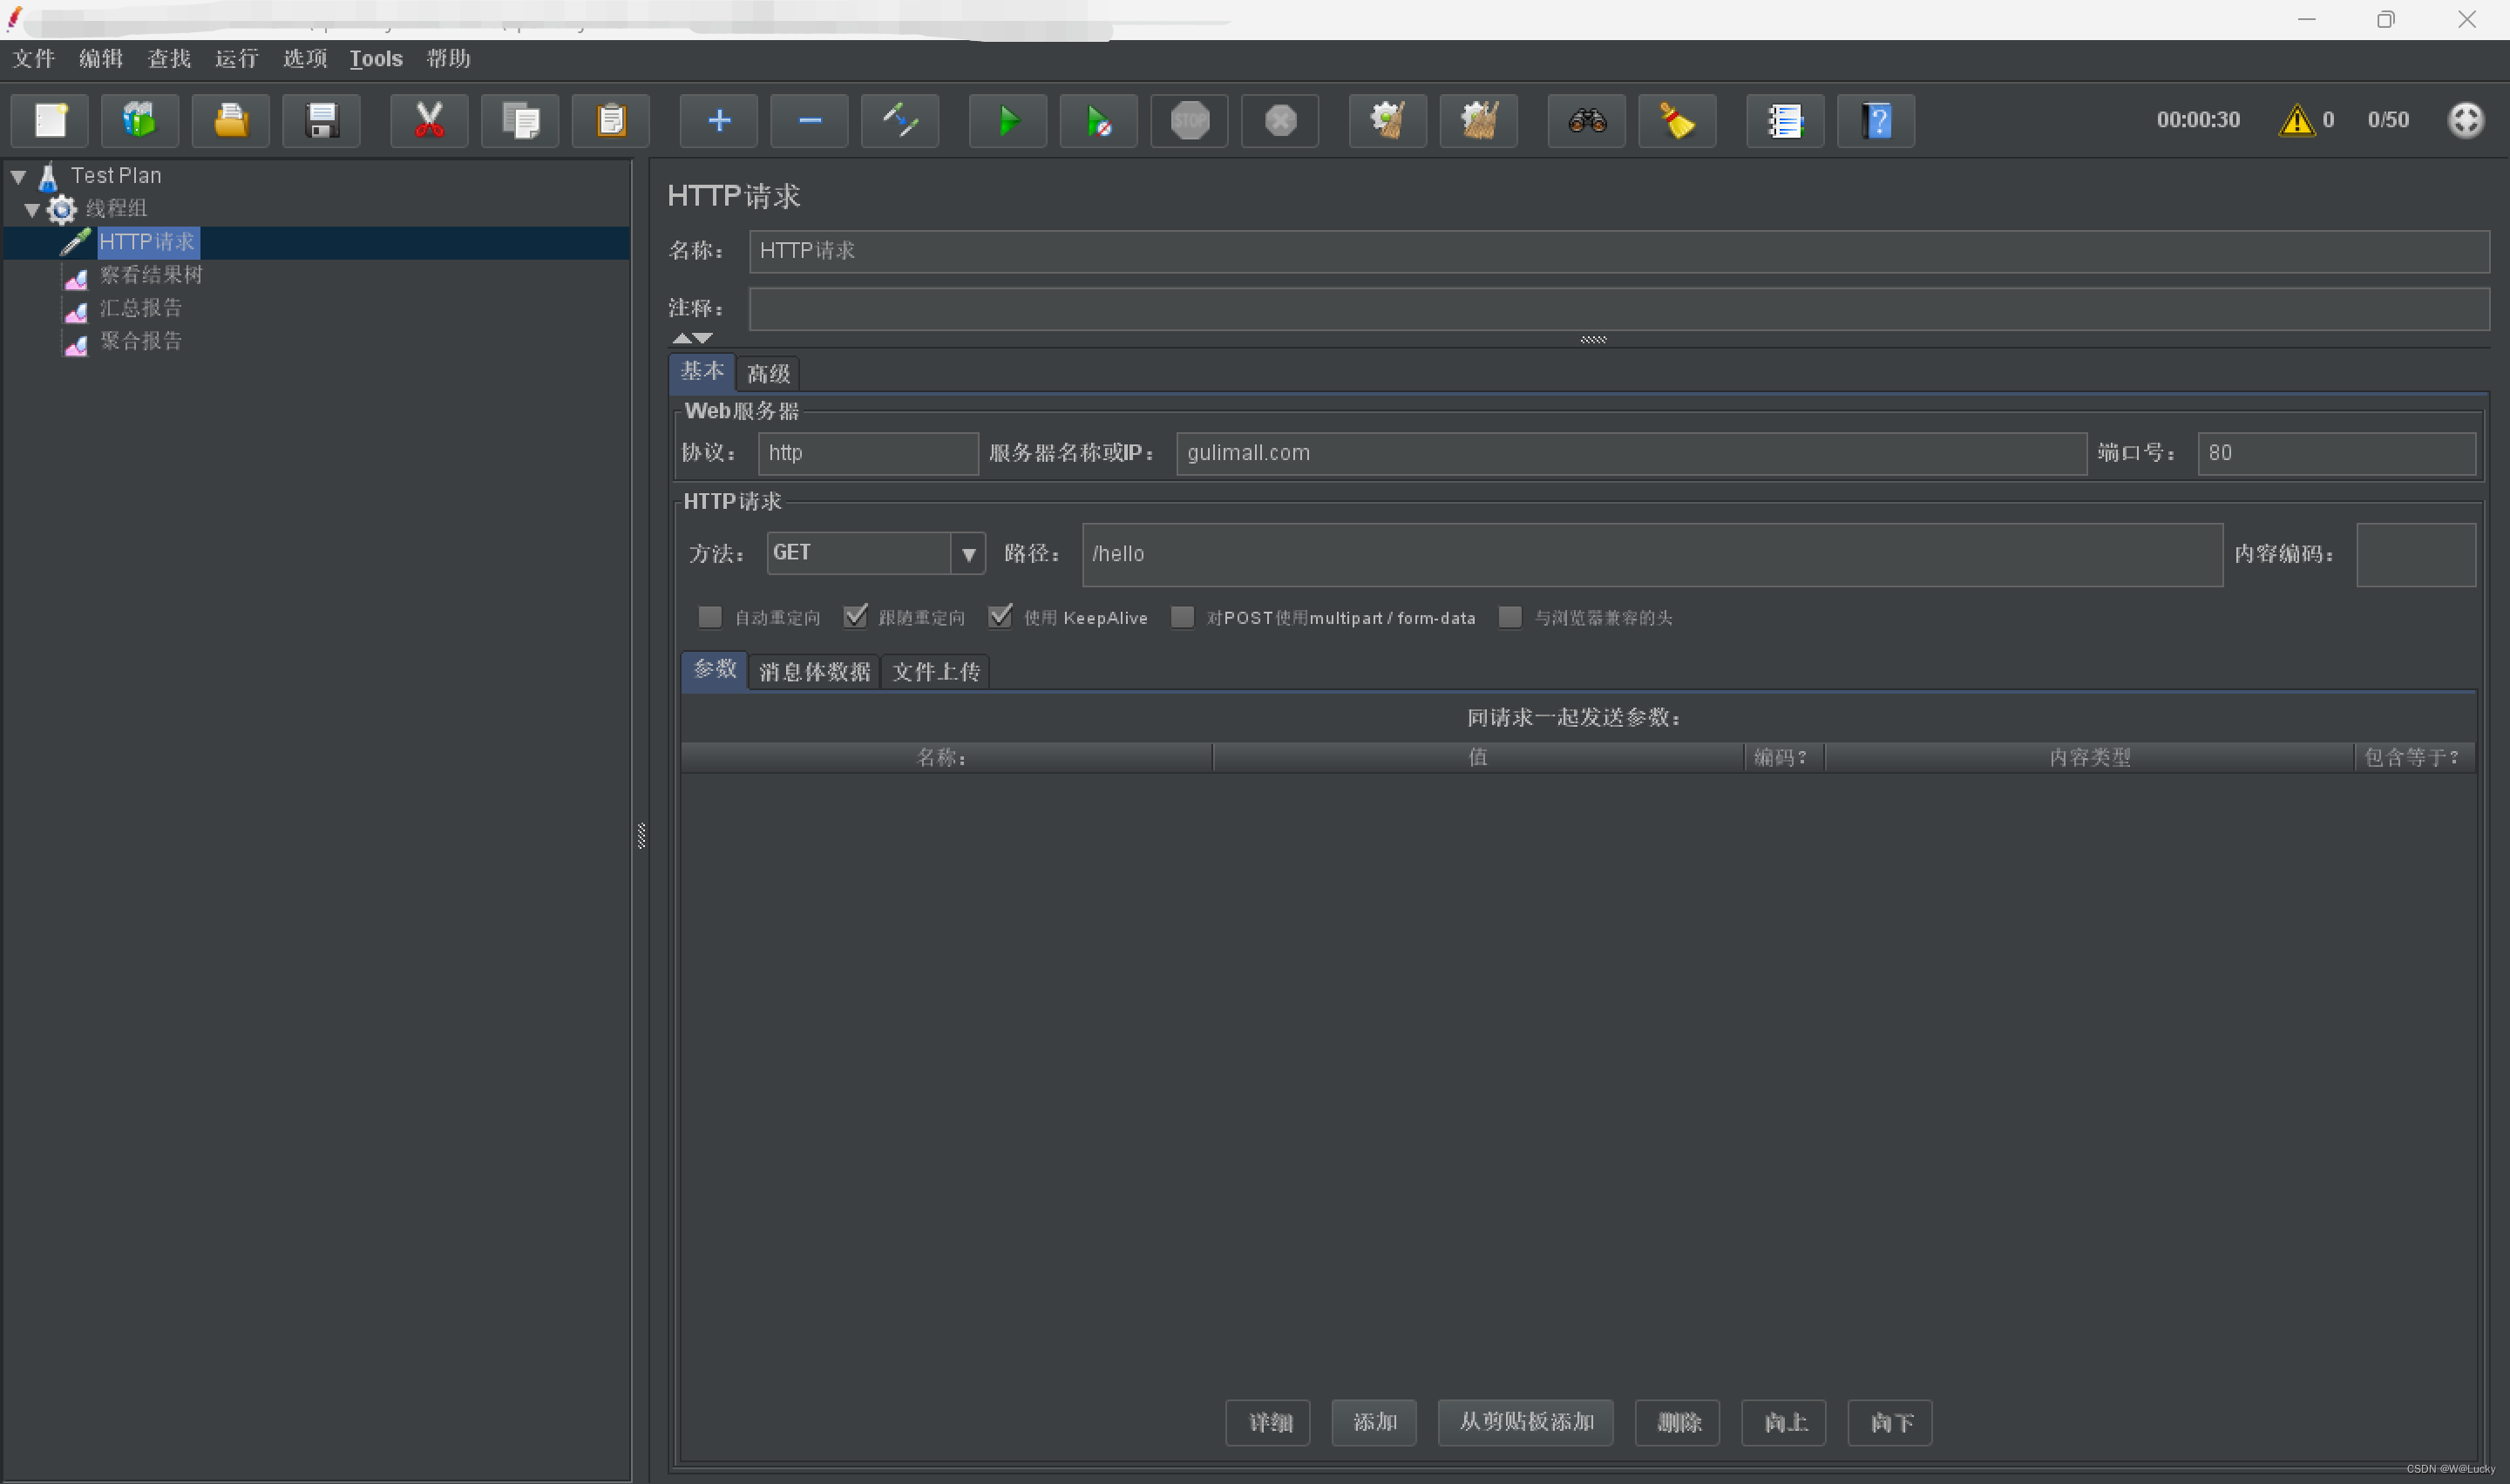
4.3.2 简答优化吞吐量测试
1. 对 首页一级菜单渲染 进行压测
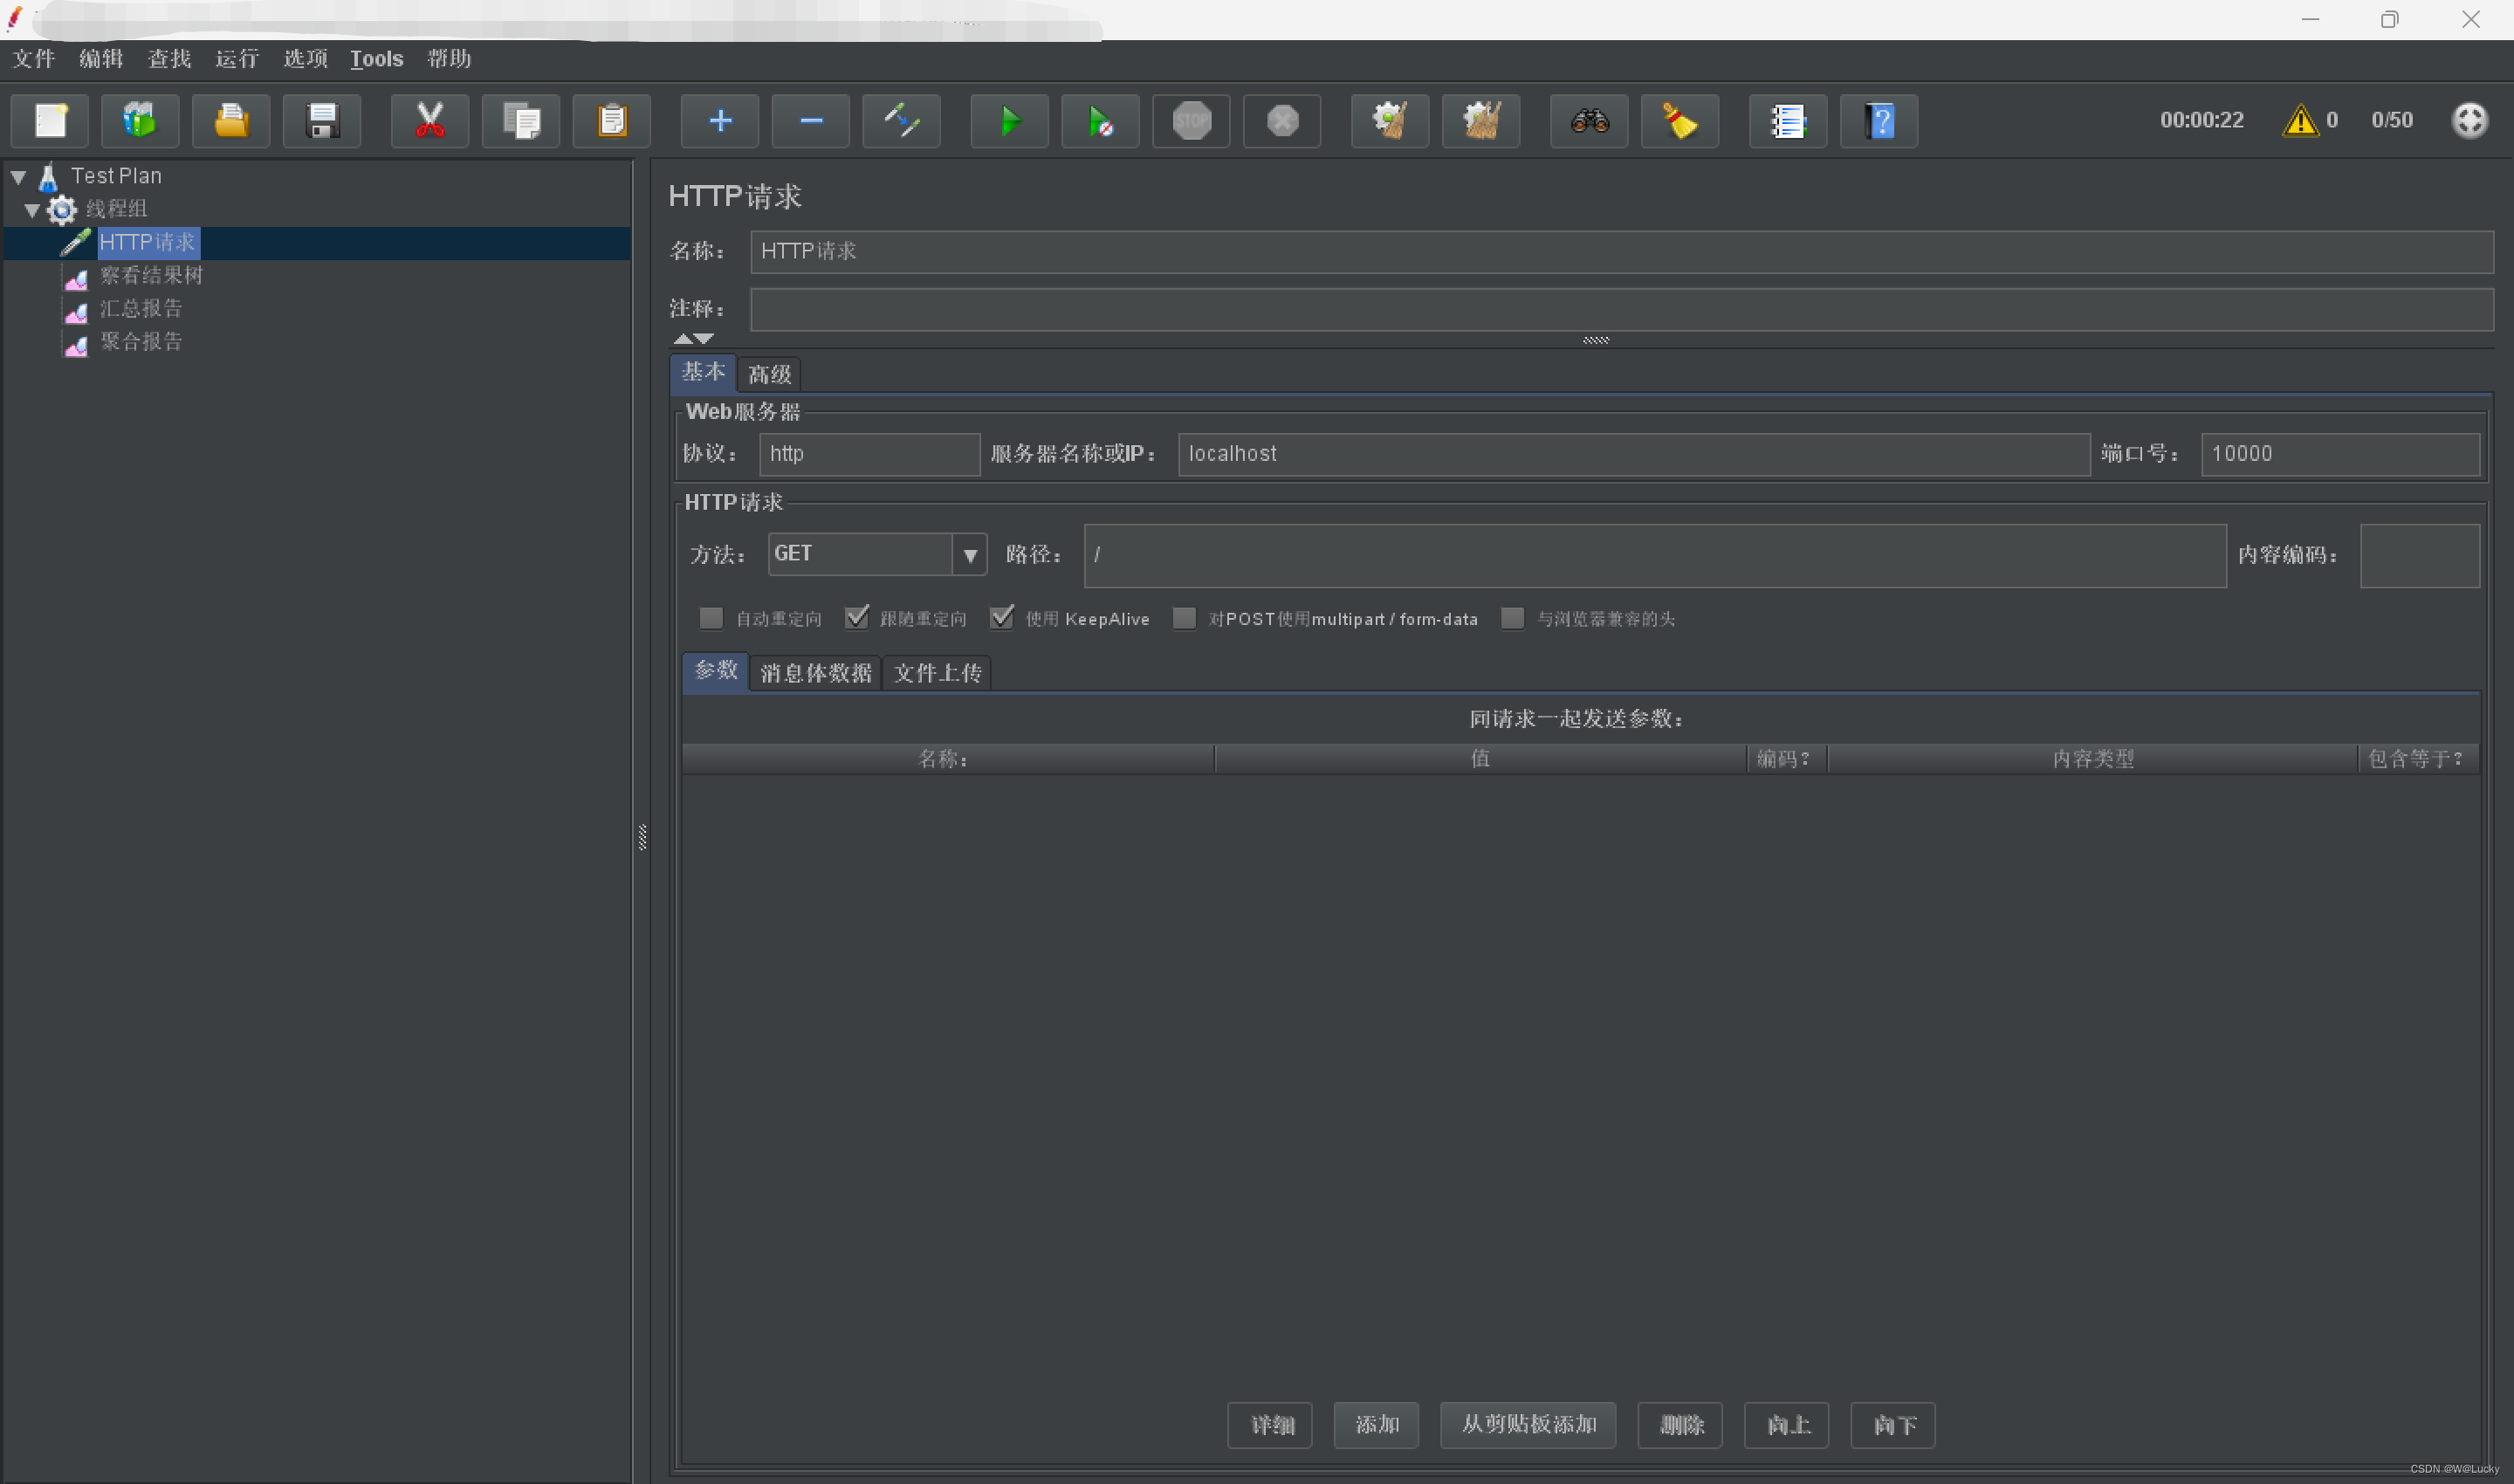
2. 对 三级分类数据获取 进行压测
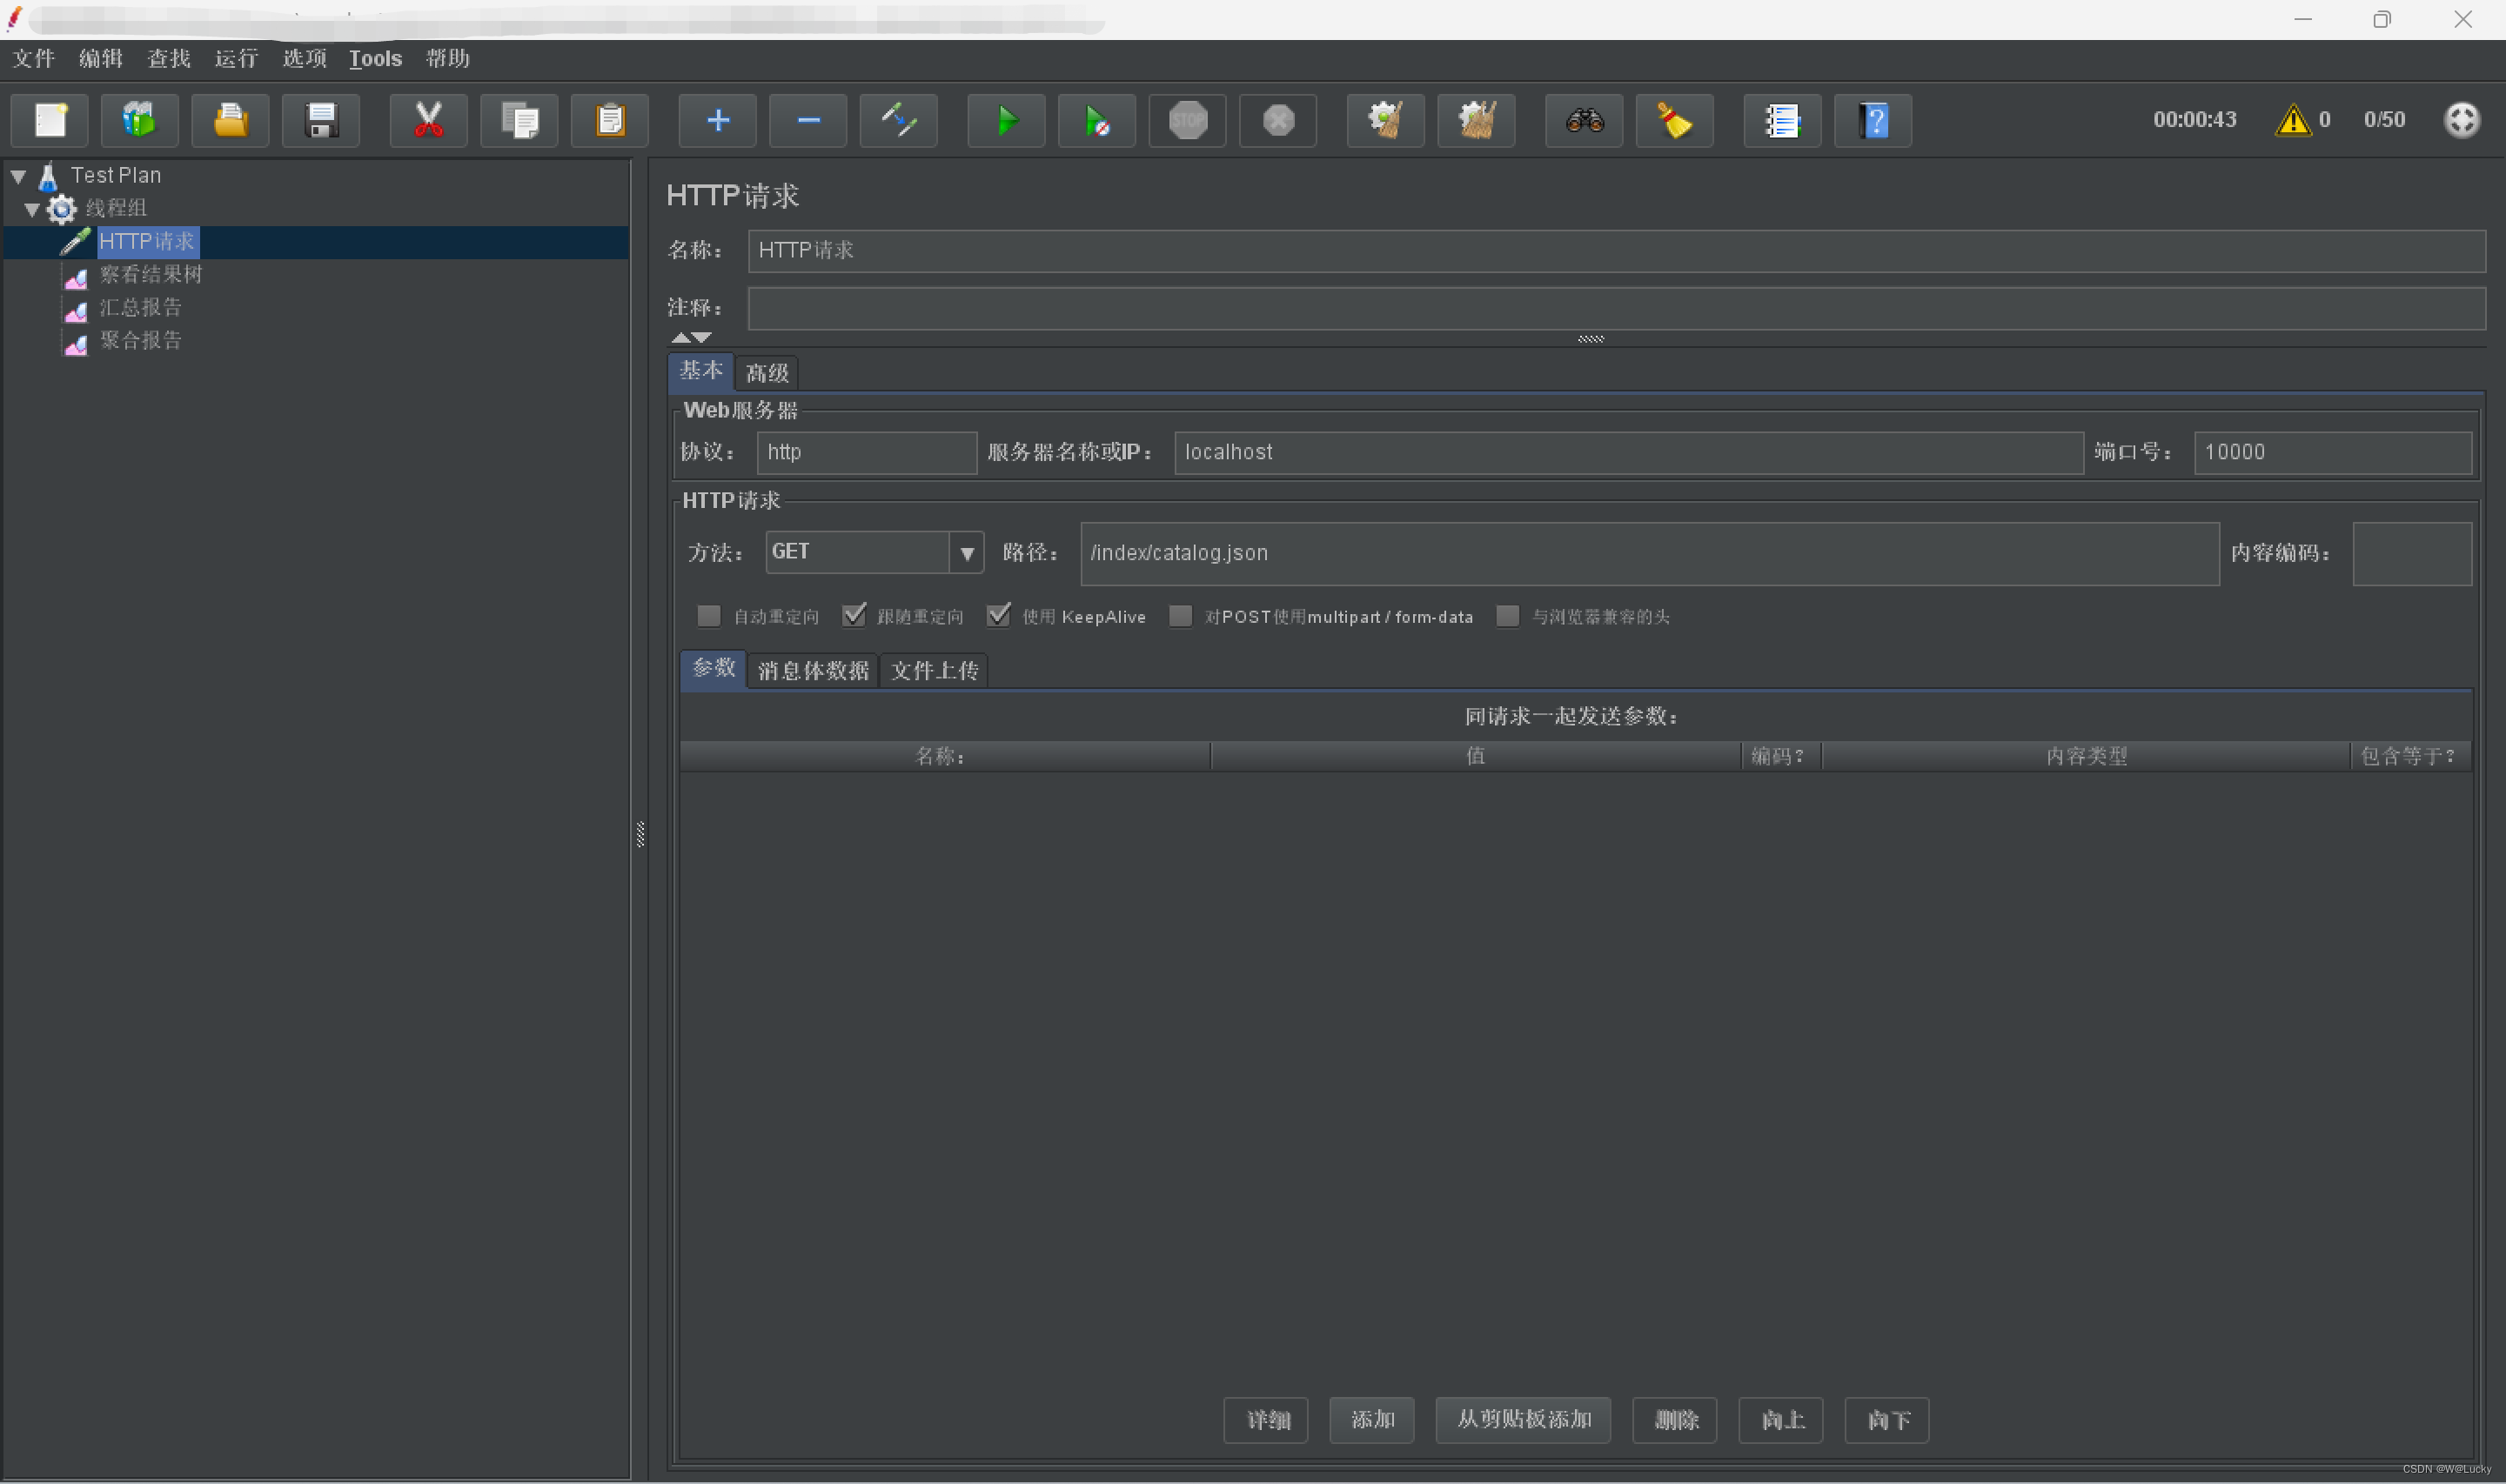
3. 对 首页全量数据获取 进行压测
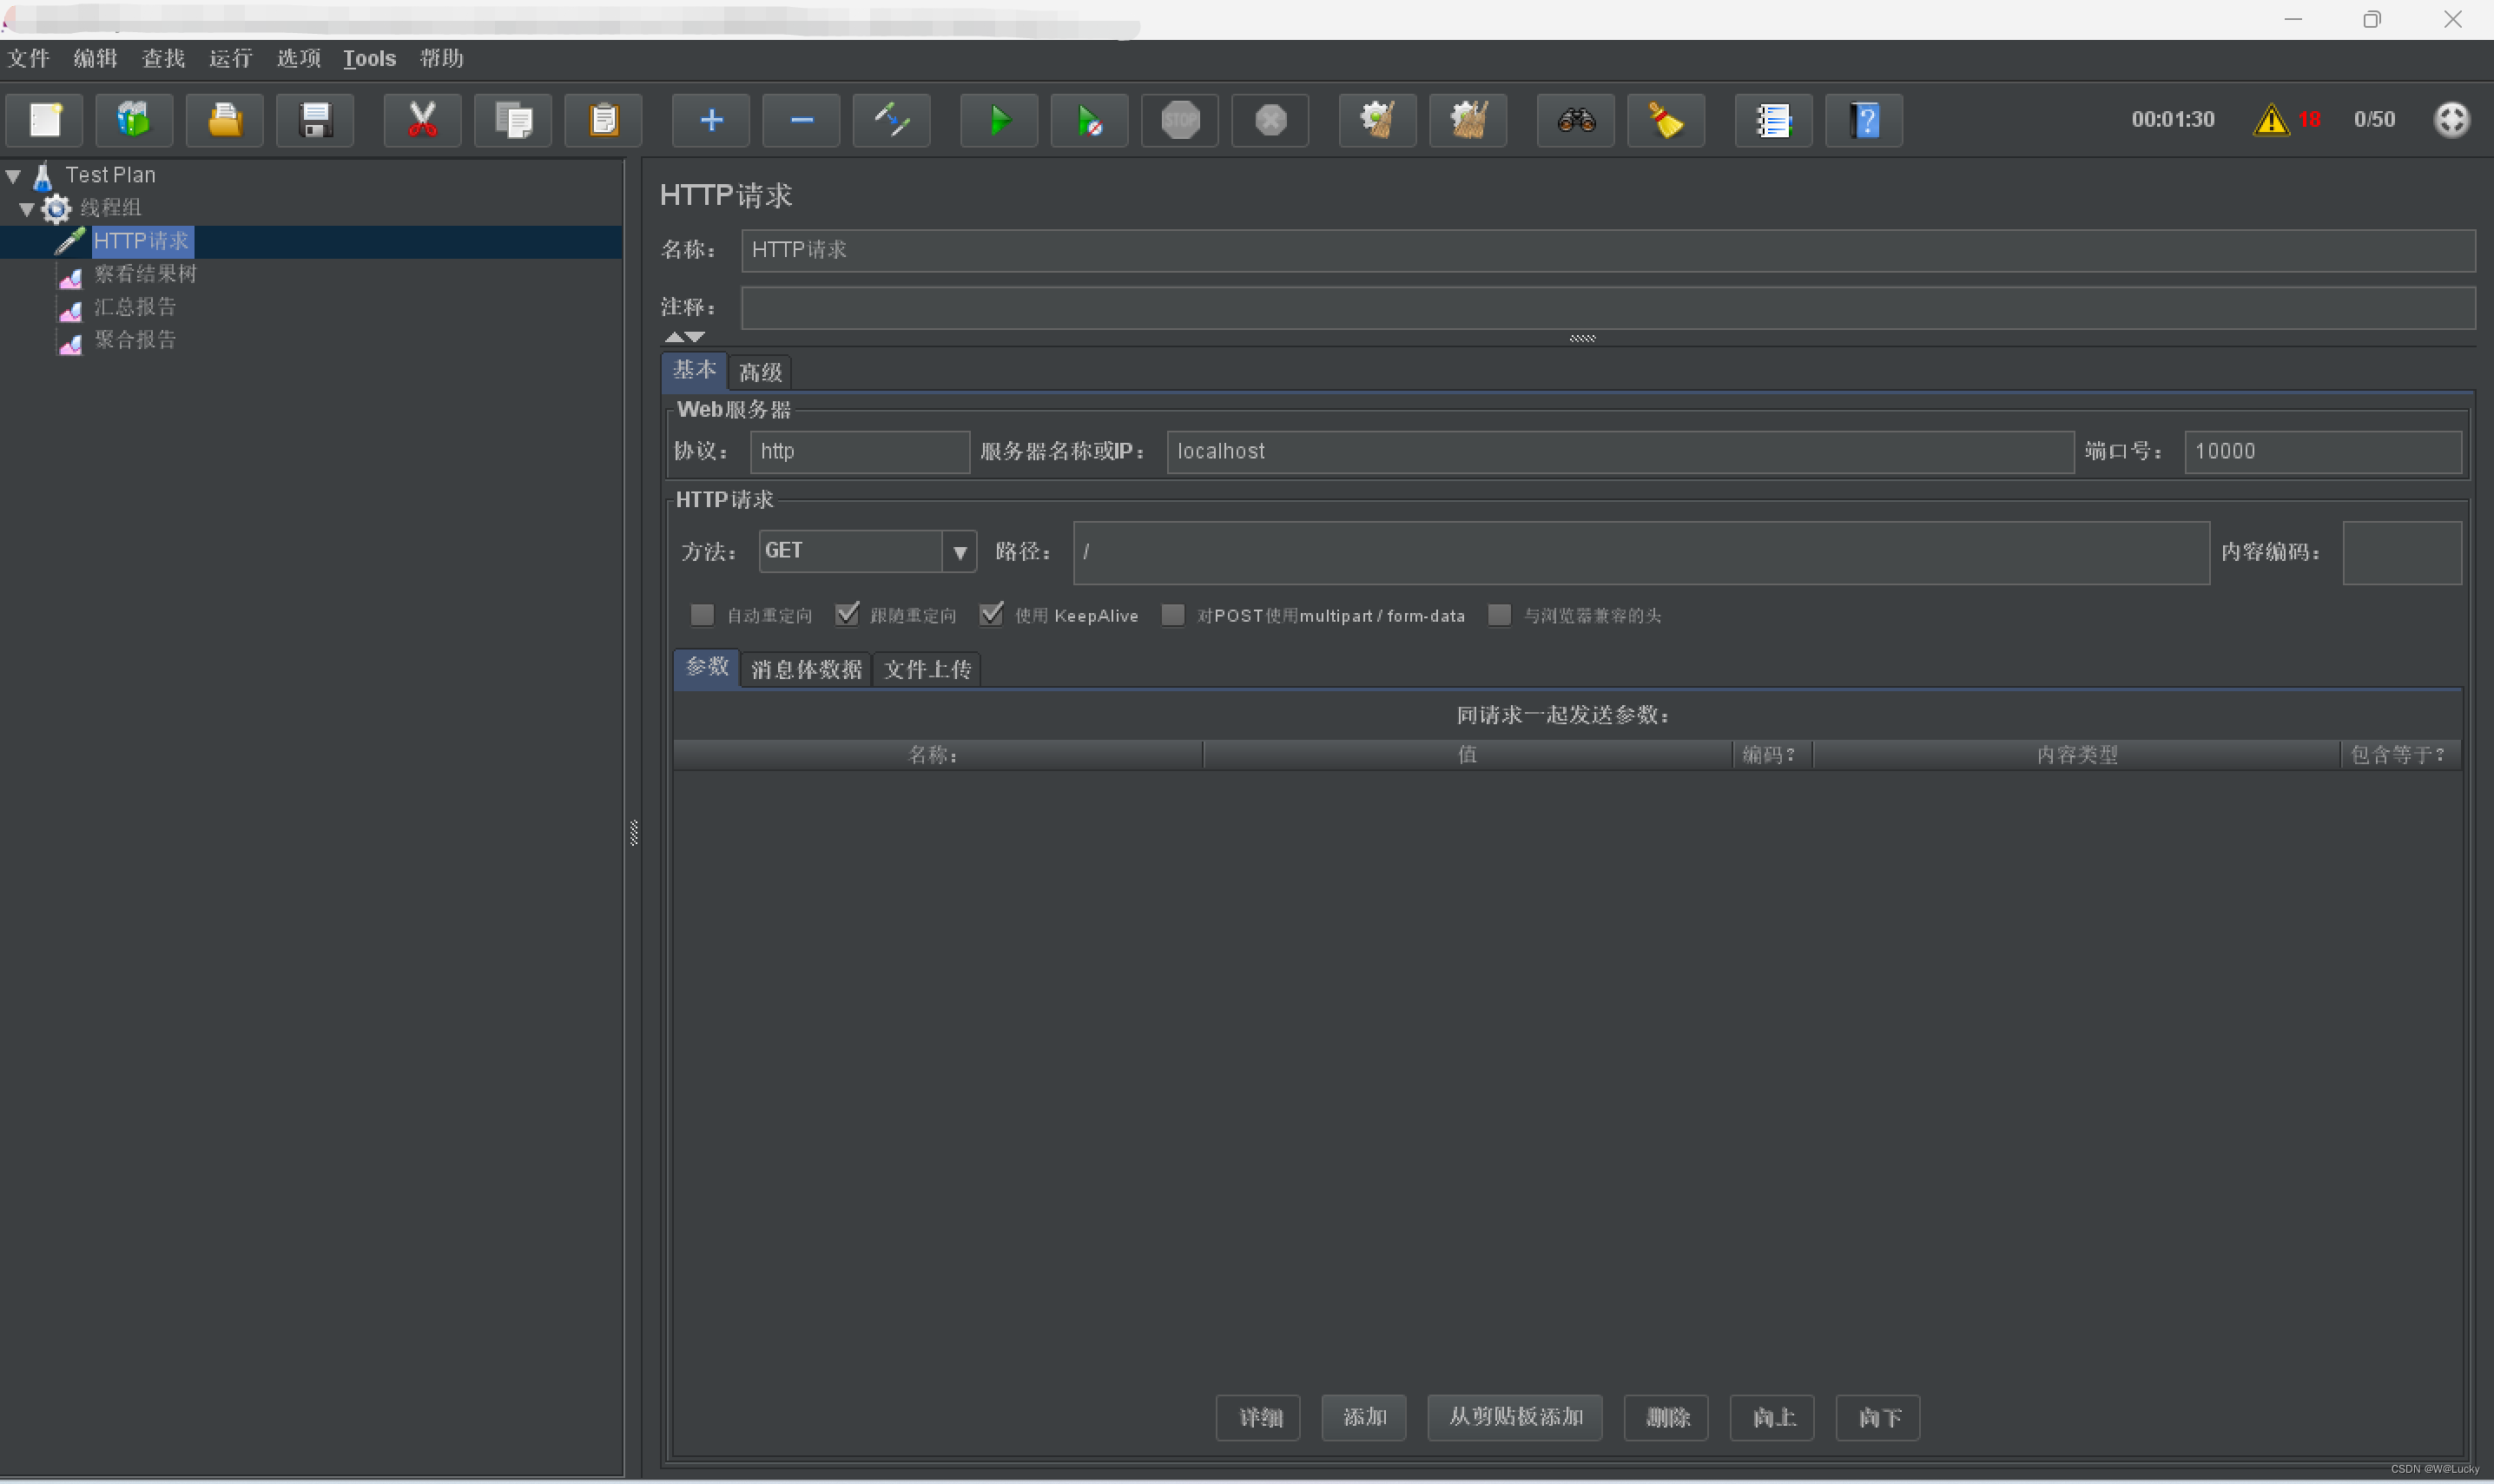
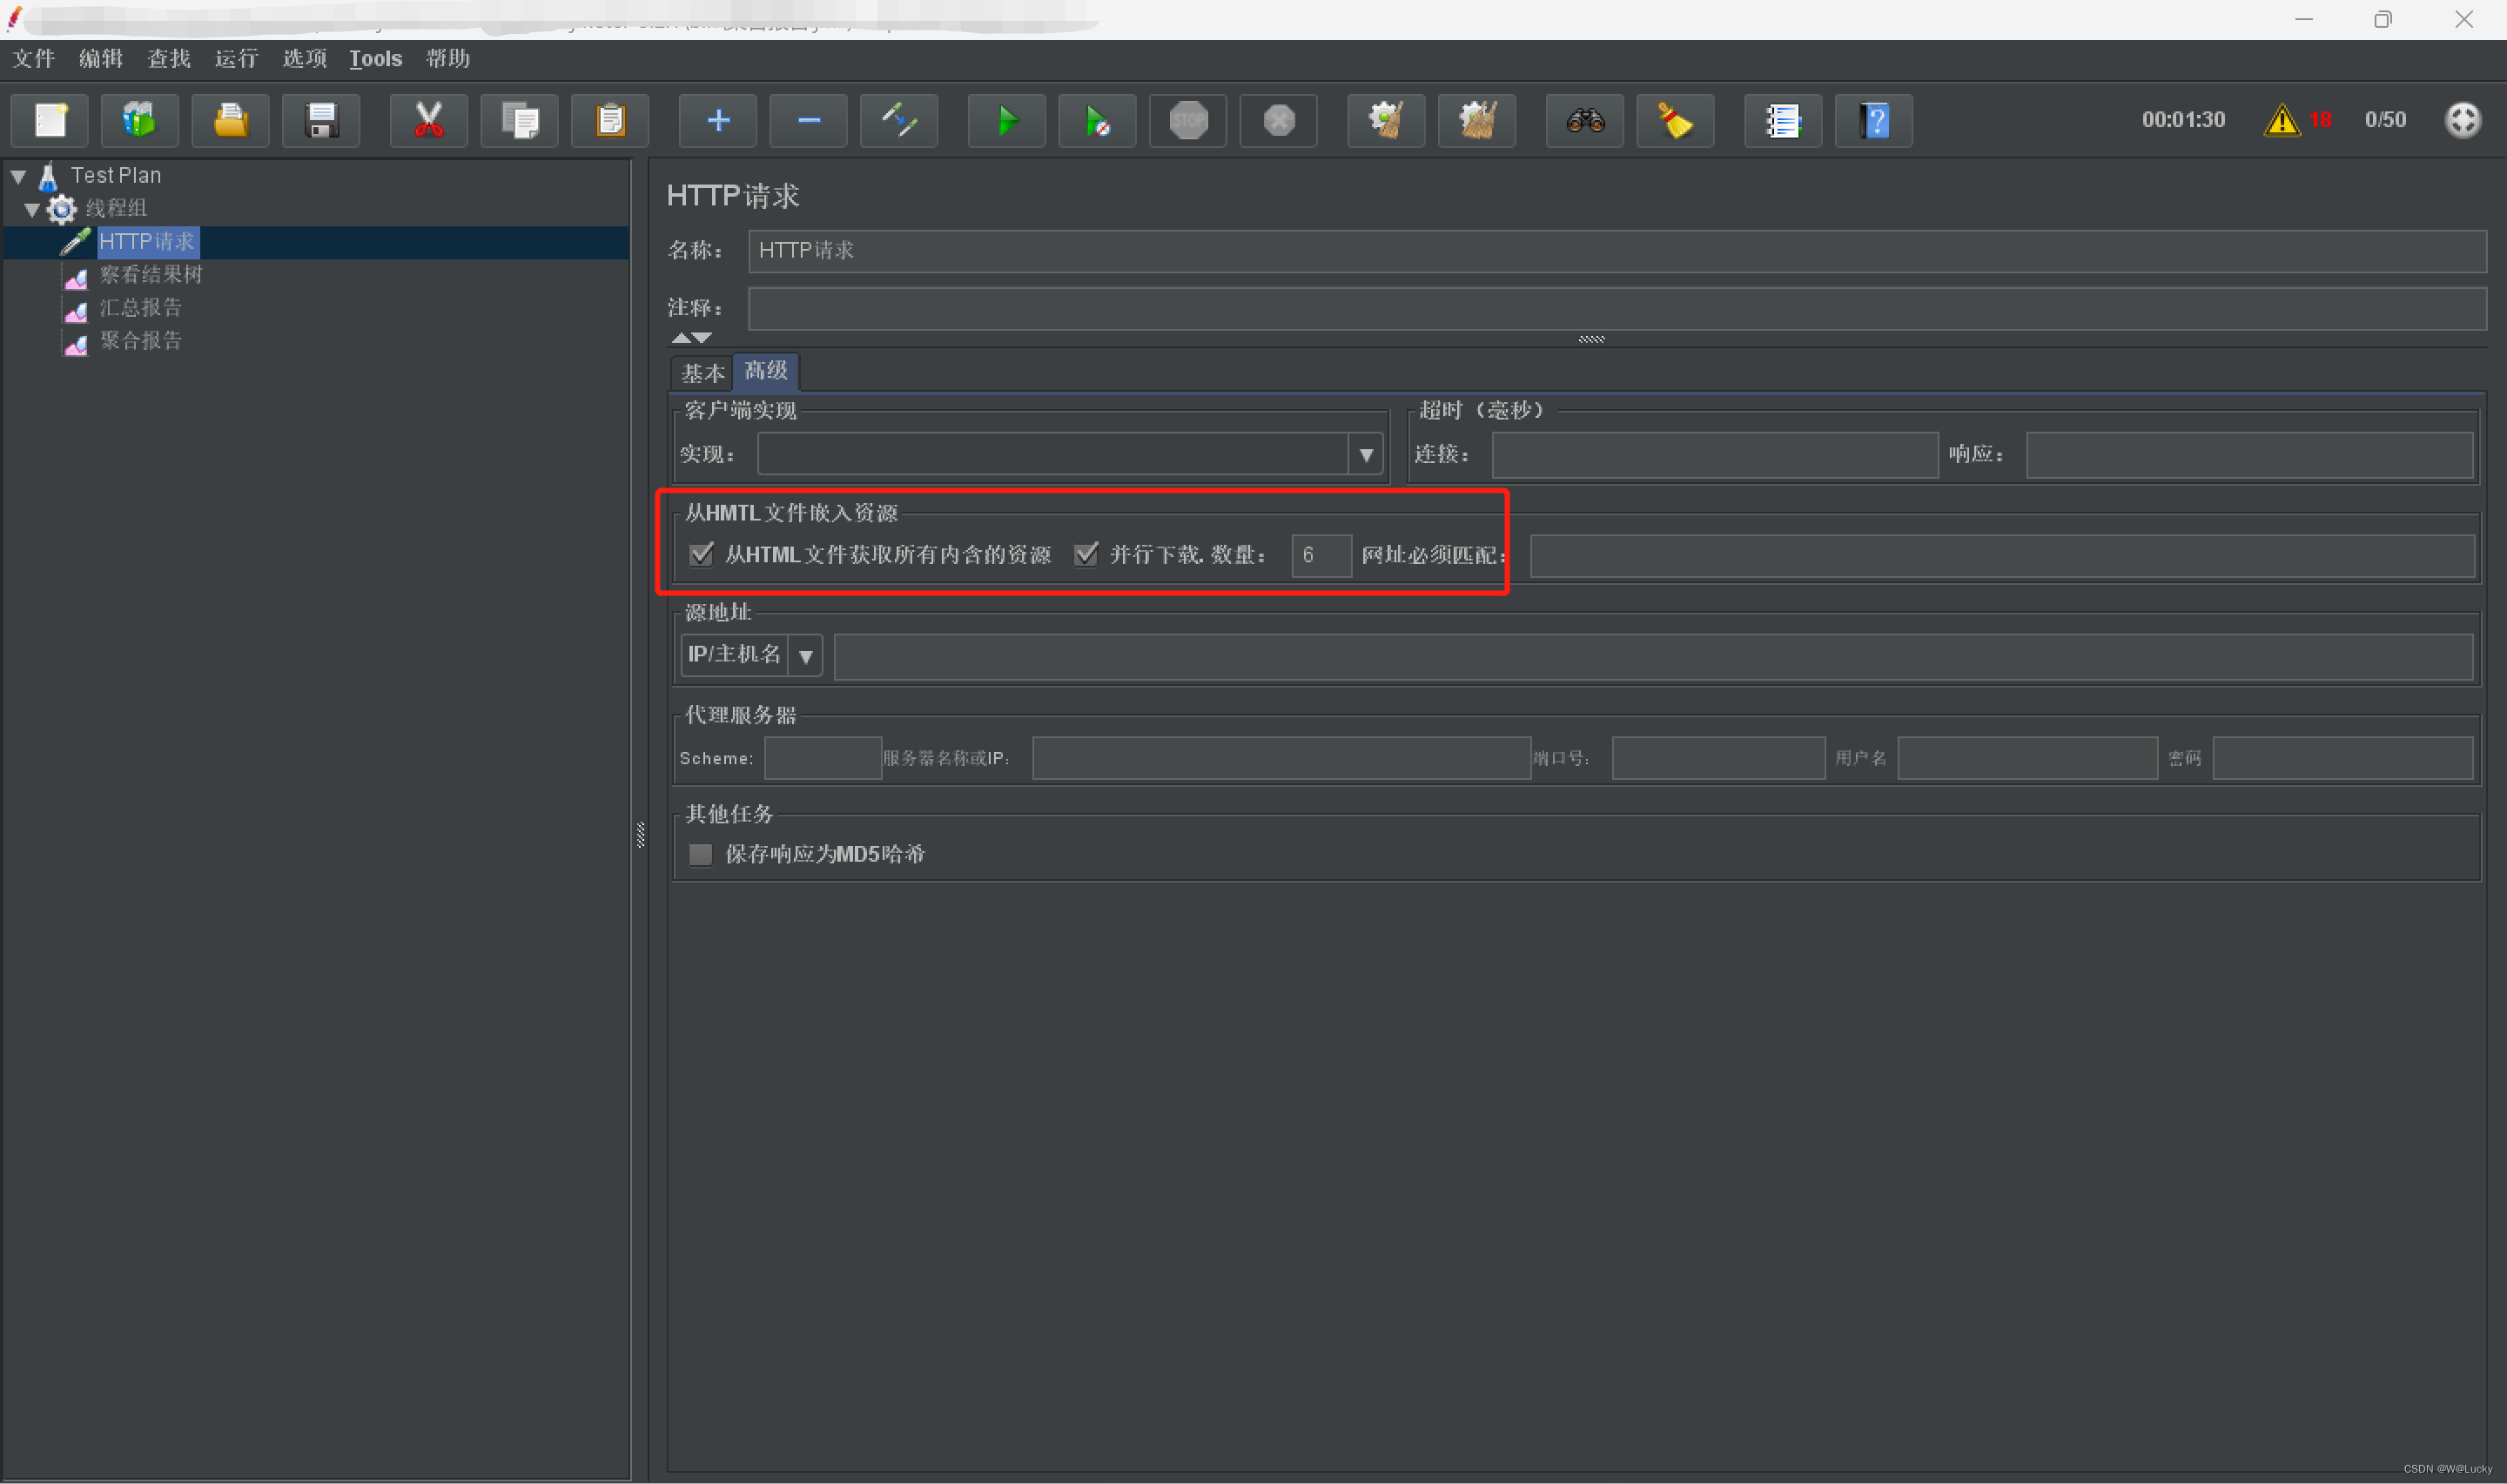
4. 对 首页渲染(开缓存) 进行压测

5. 对 首页渲染(开缓存、优化数据库、关日志) 进行压测
- 开缓存
  thymeleaf:
cache: true- 优化数据库(对表pms_category的parent_cid字段加索引)

- 关日志
logging:
  level:
    com.wen.gulimall: error
6. 对 三级分类数据获取(加索引) 进行压测
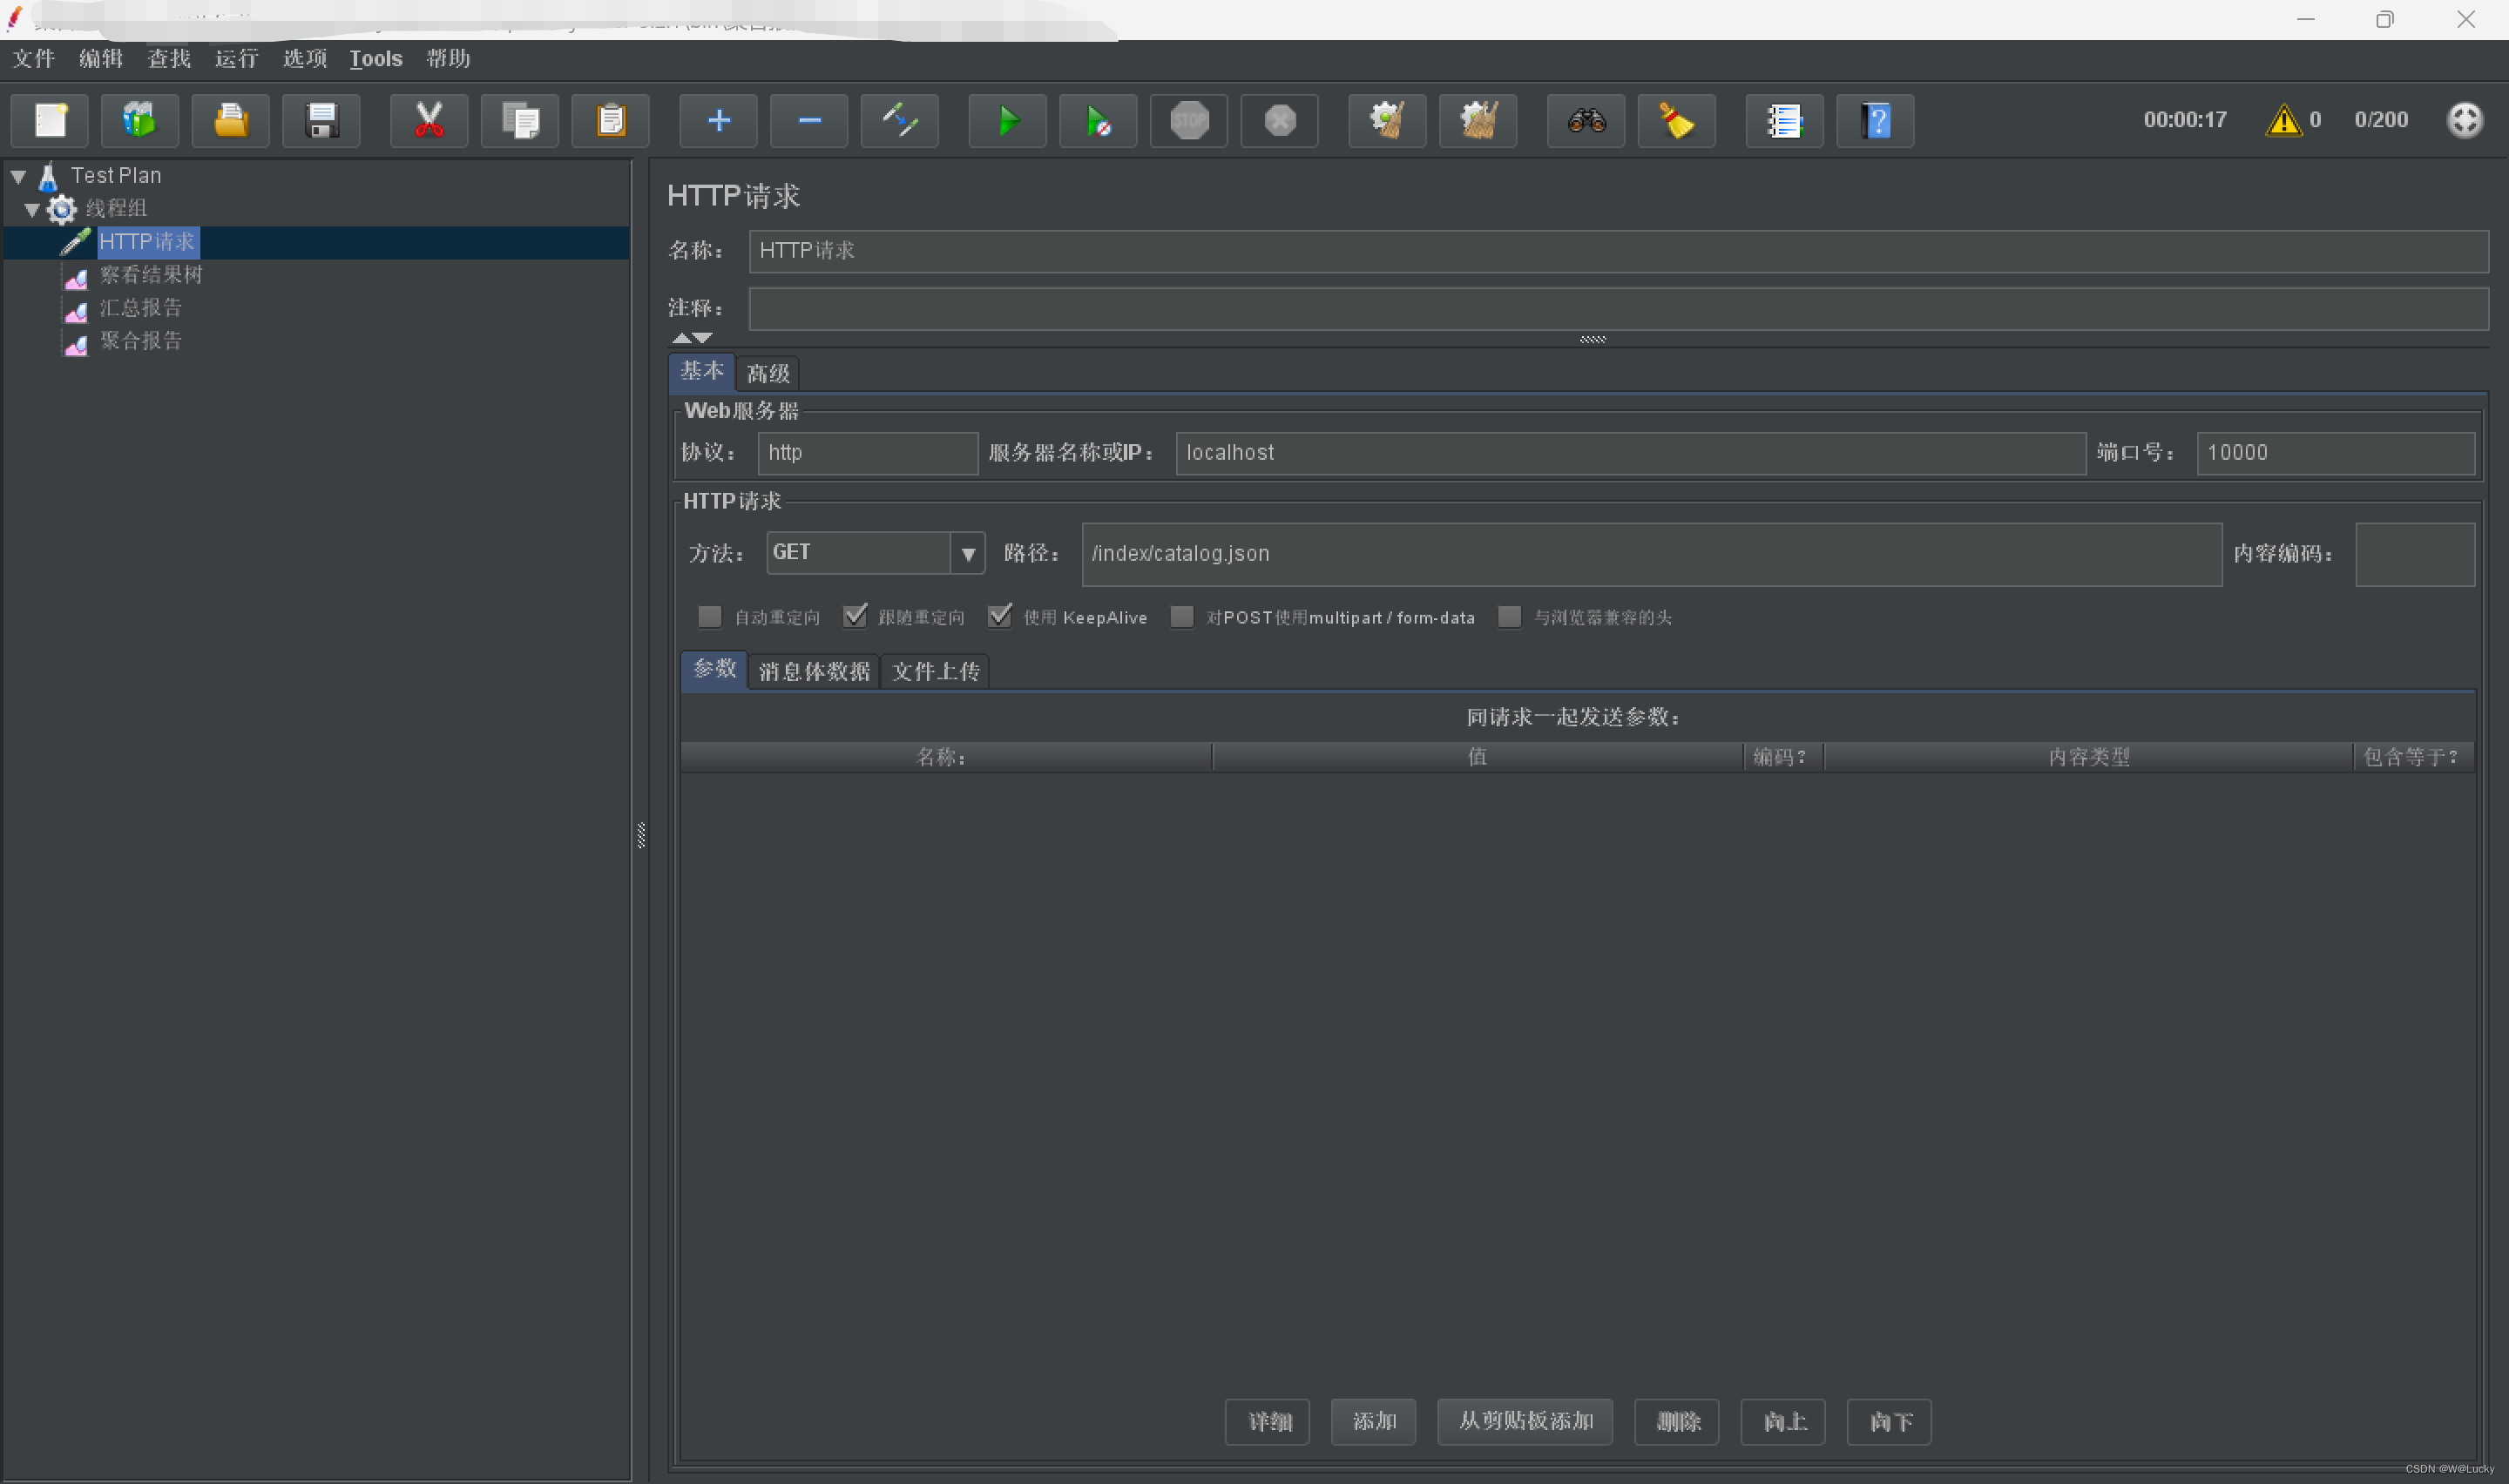
7. 对 全量数据获取(开缓存、优化数据库、关日志) 进行压测
4.3.3 nginx动静分离
1. 为什么要动静分离?

为什么动静分离?
    静态资源放到服务端,后台不但要处理动态请求还要处理静态请求,静态请求耗费了大量后台资源(后台大部分性能都用于处理静态资源)。
    为了降低服务器压力,可以将js、css、img等静态资源放到nginx,静态资源直接由nginx返回,后台只处理动态请求。
2. 进行动静分离
(1)在虚拟机/root/docker/nginx/html/目录下创建static文件夹,用于存放静态资源:
# 进入nginx/html文件夹下
cd /root/docker/nginx/html
# 创建static文件夹
mkdir static
(2)将gulimall-product服务src/main/resources/static下的index文件夹放到上一步创建的static文件夹下,并删除服务端的静态资源:
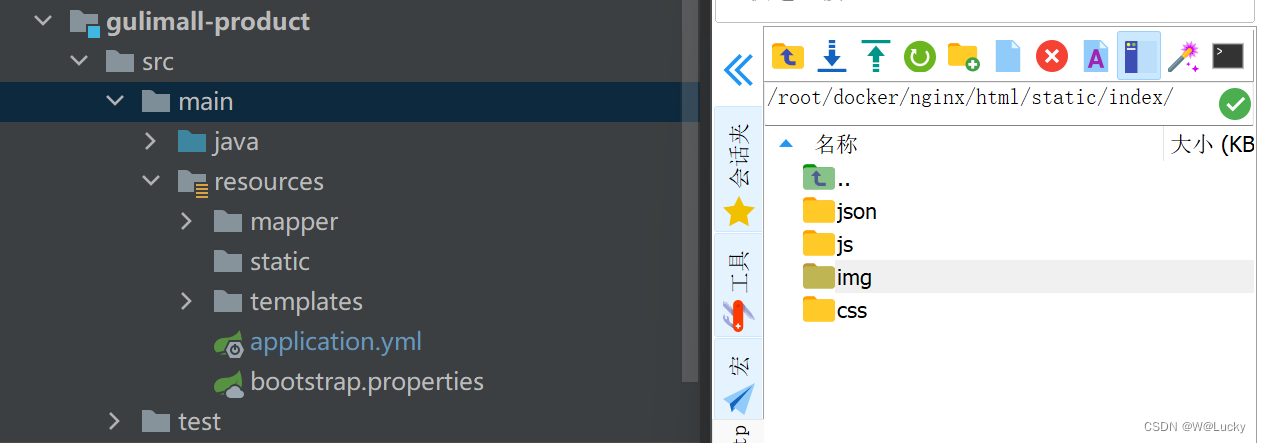
(3) 修改nginx配置gulimall.conf,添加静态资源的路径映射
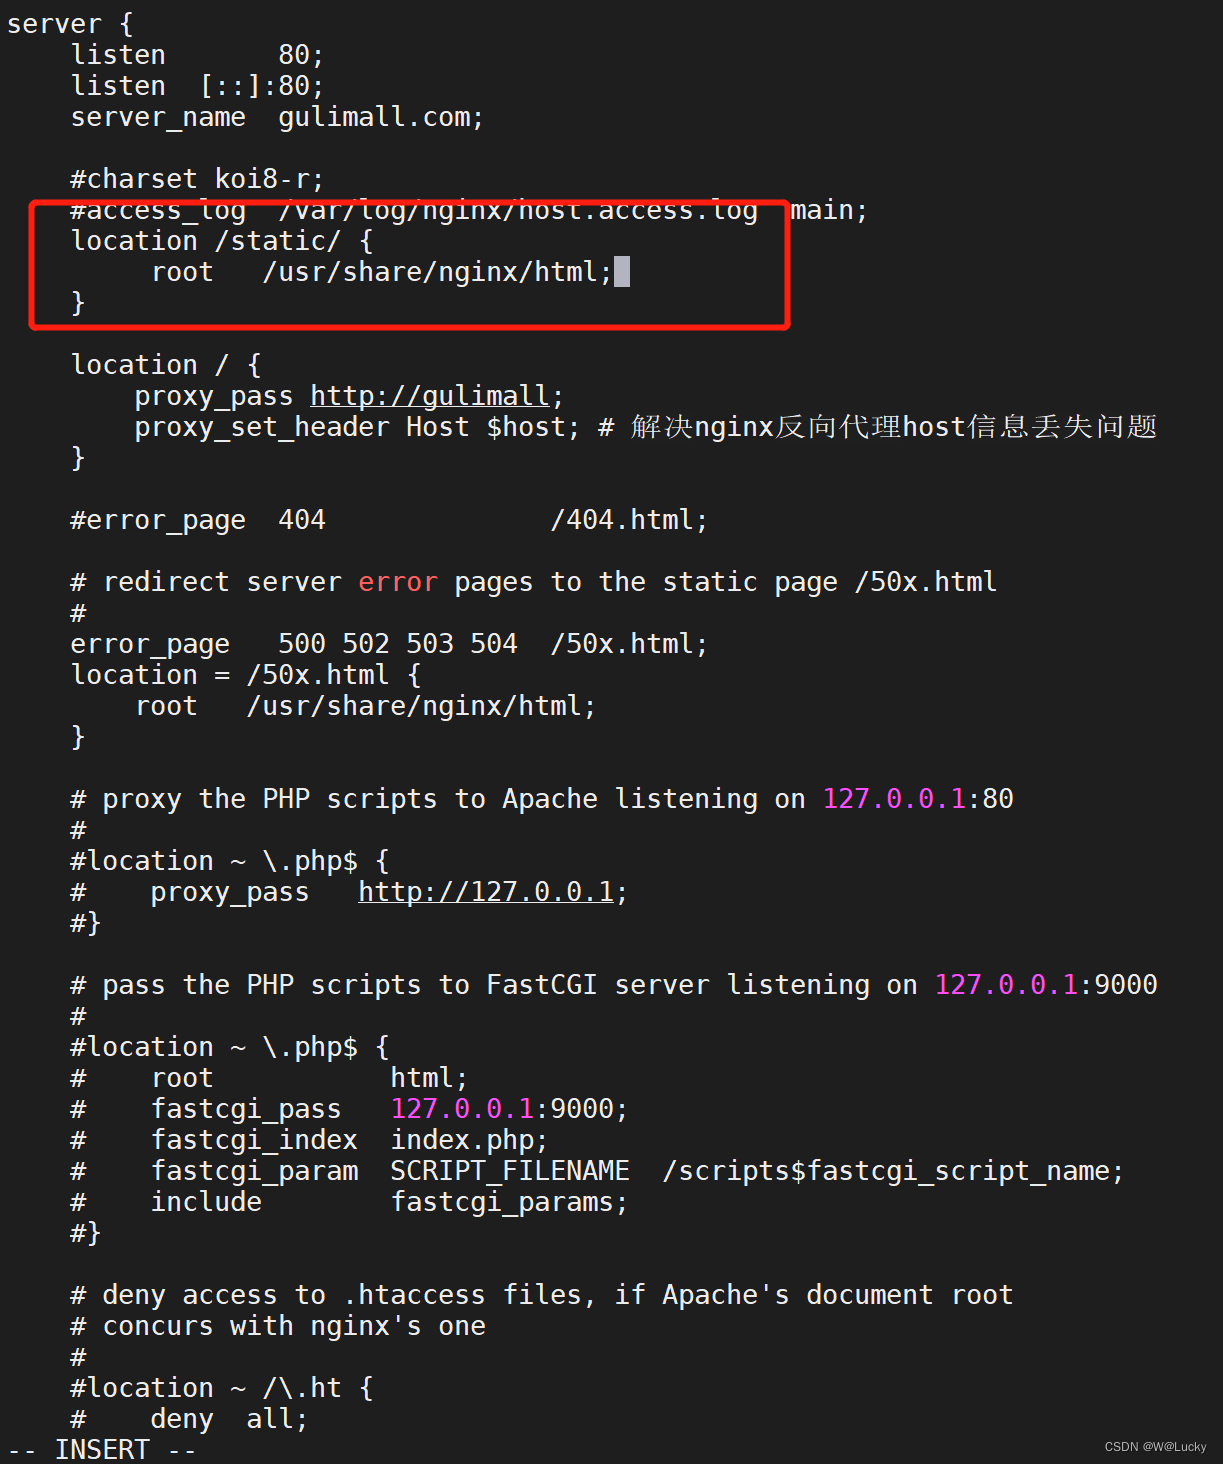
(4) 重启nginx
docker restart nginx(5)修改gulimall-product/src/main/resources/templates/index.html中之前的静态资源路径:
<!DOCTYPE html>
<html lang="en" xmlns:th="http://www.thymeleaf.org">
<head>
<meta charset="UTF-8">
<meta name="viewport" content="width=device-width, initial-scale=1.0">
<meta http-equiv="X-UA-Compatible" content="ie=edge">
<title>Document</title>
<link rel="stylesheet" href="/static/index/css/swiper-3.4.2.min.css">
<link rel="stylesheet" href="/static/index/css/GL.css">
<script src="/static/index/js/jquery-3.1.1.min.js" type="text/javascript" charset="utf-8"></script>
<script src="/static/index/js/swiper-3.4.2.jquery.min.js" type="text/javascript" charset="utf-8"></script>
<script src="/static/index/js/swiper-3.4.2.min.js"></script>
</head>
<body>
<div class="top_find">
<div class="top_find_son">
<img src="/static/index/img/top_find_logo.png" alt="">
<div class="input_find">
<input type="text" placeholder="卸妆水" />
<span style="background: url('/static/index/img/img_12.png') 0 -1px;"></span>
<a href="/static/#"><img src="/static/index/img/img_09.png" /></a>
</div>
</div>
</div>
<ul class="left_floor">
<li class="left_floor_xiang">享品质</li>
<li class="left_floor_fu">服饰美妆</li>
<li class="left_floor_jia">家电手机</li>
<li class="left_floor_dian">电脑数码</li>
<li class="left_floor_3C">3C运动</li>
<li class="left_floor_ai">爱吃</li>
<li class="left_floor_mu">母婴家居</li>
<li class="left_floor_tu">图书汽车</li>
<li class="left_floor_you">游戏金融</li>
<li class="left_floor_lv">旅行健康</li>
<li class="left_floor_hai">还没逛够</li>
<li class="left_floor_ding">顶部</li>
</ul>
<header>
<div class="head">
<a href="/static/#"><img src="/static/index/img/img_01.png" /></a>
<p>X</p>
</div>
<!--头部-->
<div class="header_head">
<div class="header_head_box">
<a href="/static/#" class="img"><img src="/static/index/img/logo.jpg" /></a>
<b class="header_head_p">
<a href="/static/#">
<img src="/static/index/img/img_05.png" style="border-radius: 50%;"/>
<!--<span class="glyphicon glyphicon-map-marker"></span>-->
北京</a>
<div class="header_head_p_cs">
<a href="#" style="background: #C81623;color: #fff;">北京</a>
<a href="/static/#">上海</a>
<a href="/static/#">天津</a>
<a href="/static/#">重庆</a>
<a href="/static/#">河北</a>
<a href="/static/#">山西</a>
<a href="/static/#">河南</a>
<a href="/static/#">辽宁</a>
<a href="/static/#">吉林</a>
<a href="/static/#">黑龙江</a>
<a href="/static/#">内蒙古</a>
<a href="/static/#">江苏</a>
<a href="/static/#">山东</a>
<a href="/static/#">安徽</a>
<a href="/static/#">浙江</a>
<a href="/static/#">福建</a>
<a href="/static/#">湖北</a>
<a href="/static/#">湖南</a>
<a href="/static/#">广东</a>
<a href="/static/#">广西</a>
<a href="/static/#">江西</a>
<a href="/static/#">四川</a>
<a href="/static/#">海南</a>
<a href="/static/#">贵州</a>
<a href="/static/#">云南</a>
<a href="/static/#">西藏</a>
<a href="/static/#">陕西</a>
<a href="/static/#">甘肃</a>
<a href="/static/#">青海</a>
<a href="/static/#">宁夏</a>
<a href="/static/#">新疆</a>
<a href="/static/#">港澳</a>
<a href="/static/#">台湾</a>
<a href="/static/#">钓鱼岛</a>
<a href="/static/#">海外</a>
</div>
</b>
<ul>
<li>
<a href="/static//登录页面\index.html">你好,请登录</a>
</li>
<li>
<a href="/static//注册页面\index.html" class="li_2">免费注册</a>
</li>
<span>|</span>
<li>
<a href="/static/#">我的订单</a>
</li>
</ul>
</div>
</div>
<!--搜索导航-->
<div class="header_sous">
<div class="header_form">
<input id="searchText" type="text" placeholder="" />
<span style="background: url('/static/index/img/img_12.png') 0 -1px;"></span>
<!--<button><i class="glyphicon"></i></button>-->
<a href="/static/#" ><img src="/static/index/img/img_09.png" onclick="search()" /></a>
</div>
<div class="header_ico">
<div class="header_gw">
<img src="/static/index/img/img_15.png" />
<span><a href="/static//购物车\One_JDshop.html">我的购物车</a></span>
<span>0</span>
</div>
<div class="header_ko">
<p>购物车中还没有商品,赶紧选购吧!</p>
</div>
</div>
<div class="header_form_nav">
<ul>
<li>
<a href="/static/#" class="aaaaa">满999减300</a>
</li>
<li>
<a href="/static/#">金立S11</a>
</li>
<li>
<a href="/static/#">农用物资</a>
</li>
<li>
<a href="/static/#">保暖特惠</a>
</li>
<li>
<a href="/static/#">洗衣机节</a>
</li>
<li>
<a href="/static/#">七度空间卫生巾</a>
</li>
<li>
<a href="/static/#">自动波箱油</a>
</li>
<li>
<a href="/static/#">超市</a>
</li>
</ul>
</div>
<nav>
<ul>
<li>
<a href="/static/#">秒杀</a>
</li>
<li>
<a href="/static/#">优惠券</a>
</li>
<li>
<a href="/static/#">闪购</a>
</li>
<li>
<a href="/static/#">拍卖</a>
</li>
</ul>
<div class="spacer">|</div>
<ul>
<li>
<a href="/static/#">服饰</a>
</li>
<li>
<a href="/static/#">超市</a>
</li>
<li>
<a href="/static/#">生鲜</a>
</li>
<li>
<a href="/static/#">全球购</a>
</li>
</ul>
<div class="spacer">|</div>
<ul>
<li>
<a href="/static/#">金融</a>
</li>
</ul>
</nav>
<div class="right">
<a href="/static/#"><img src="/static/index/img/img_21.png" /></a>
</div>
</div>
<!--轮播主体内容-->
<div class="header_main">
<div class="header_banner">
<div class="header_main_left">
<ul>
<!--/*@thymesVar id="categorys" type="com"*/-->
<li th:each="category : ${categorys}">
<a href="/static/#" class="header_main_left_a" ctg-data="3" th:attr="ctg-data=${category.catId}"><b th:text="${category.name}">家用电器</b></a>
</li>
</ul>
</div>
<div class="header_main_center">
<div class="swiper-container swiper1">
<div class="swiper-wrapper">
<div class="swiper-slide">
<a href="/static/#"><img src="/static/index/img/lunbo.png" /></a>
</div>
<div class="swiper-slide">
<a href="/static/#"><img src="/static/index/img/lunbo3.png" /></a>
</div>
<div class="swiper-slide">
<a href="/static/#"><img src="/static/index/img/lunbo6.png" /></a>
</div>
<div class="swiper-slide">
<a href="/static/#"><img src="/static/index/img/lunbo7.png" /></a>
</div>
</div>
<div class="swiper-pagination"></div>
<div class="swiper-button-next swiper-button-white"></div>
<div class="swiper-button-prev swiper-button-white"></div>
</div>
<div class="header_main_center_b">
<a href="/static/#"><img src="/static/index/img/5a13bf0bNe1606e58.jpg" /></a>
<a href="/static/#"><img src="/static/index/img/5a154759N5385d5d6.jpg" /></a>
</div>
</div>
<div class="header_main_right">
<div class="header_main_right_user">
<div class="user_info">
<div class="user_info_tou">
<a href="/static/#"><img class="" src="index/img/touxiang.png"></a>
</div>
<div class="user_info_show">
<p class="">Hi, 欢迎来到!</p>
<p>
<a href="/static/#" class="">登录</a>
<a href="/static/#" class="">注册</a>
</p>
</div>
</div>
<div class="user_info_hide">
<a href="/static/#">新人福利</a>
<a href="/static/#">PLUS会员</a>
</div>
</div>
<div class="header_main_right_new">
<div class="header_new">
<div class="header_new_t">
<p class="active">
<a href="/static/#">促销</a>
</p>
<p>
<a href="/static/#">公告</a>
</p>
<a href="/static/#">更多</a>
</div>
<div class="header_new_connter">
<div class="header_new_connter_1">
<ul>
<li>
<a href="/static/#">全民纸巾大作战</a>
</li>
<li>
<a href="/static/#">家具建材满999减300元</a>
</li>
<li>
<a href="/static/#">黑科技冰箱,下单立减千元</a>
</li>
<li>
<a href="/static/#">抢102减101神券!</a>
</li>
</ul>
</div>
<div class="header_new_connter_1" style="display: none;">
<ul>
<li>
<a href="/static/#">关于召回普利司通(天津)轮胎有限公司2个规格乘用车轮胎的公告</a>
</li>
<li>
<a href="/static/#">物流推出配送员统一外呼电话"95056”</a>
</li>
<li>
<a href="/static/#">天府大件运营中心开仓公告</a>
</li>
<li>
<a href="/static/#">大件物流“送装一体”服务全面升级!</a>
</li>
</ul>
</div>
</div>
</div>
</div>
<div class="header_main_right_ser">
<div class="ser_box">
<ul>
<li class="ser_box_item">
<a href="/static/#">
<img src="/static/index/img/huafei.png" />
<span>话费</span>
</a>
</li>
<li class="ser_box_item">
<a href="/static/#">
<img src="/static/index/img/jipiao.png" />
<span>机票</span>
</a>
</li>
<li class="ser_box_item">
<a href="/static/#">
<img src="/static/index/img/jiudian.png" />
<span>酒店</span>
</a>
</li>
<li class="ser_box_item">
<a href="/static/#">
<img src="/static/index/img/youxi.png" />
<span>游戏</span>
</a>
</li>
<li class="ser_box_item1">
<a href="/static/#">
<img src="/static/index/img/qiyegou.png" />
<span>企业购</span>
</a>
</li>
<li class="ser_box_item1">
<a href="/static/#">
<img src="/static/index/img/jiayouka.png" />
<span>加油卡</span>
</a>
</li>
<li class="ser_box_item1">
<a href="/static/#">
<img src="/static/index/img/dianyingpiao.png" />
<span>电影票</span>
</a>
</li>
<li class="ser_box_item1">
<a href="/static/#">
<img src="/static/index/img/huochepiao.png" style="height:20px;" />
<span>火车票</span>
</a>
</li>
<li class="ser_box_item1">
<a href="/static/#">
<img src="/static/index/img/zhongchou.png" />
<span>众筹</span>
</a>
</li>
<li class="ser_box_item1">
<a href="/static/#">
<img src="/static/index/img/licai.png" style="height:22px;" />
<span>理财</span>
</a>
</li>
<li class="ser_box_item1">
<a href="/static/#">
<img src="/static/index/img/lipinka.png" style="height:14px;" />
<span>礼品卡</span>
</a>
</li>
<li class="ser_box_item1">
<a href="/static/#">
<img src="/static/index/img/baitiao.png" style="height:20px;" />
<span>白条</span>
</a>
</li>
</ul>
<div class="ser_box_aaa">
<div class="ser_box_aaa_one">
<div class="ser_box_aaa_nav">
<ol>
<li class="active">
<a href="/static/#">话费</a>
</li>
<li>
<a href="/static/#">机票</a>
</li>
<li>
<a href="/static/#">酒店</a>
</li>
<li>
<a href="/static/#">游戏</a>
</li>
</ol>
<div class="ser_ol">
<div class="ser_ol_li">
<ul>
<div class="guanbi">X</div>
<a class="active">话费充值</a>
<a>流量充值</a>
<a>套餐变更</a>
<div class="ser_ol_div">
<p>号码<input type="text" /></p>
<p style="margin: 10px 0;">面值
<select name="">
<option value="">100元</option>
<option value="">20元</option>
<option value="">50元</option>
<option value="">10元</option>
<option value="">2元</option>
</select>
<span>¥98.0-¥100.0</span></p>
</div>
<button>快速充值</button>
<p class="p">抢99减50元话费</p>
</ul>
</div>
<div class="ser_ol_li">
<ul>
<div class="guanbi">X</div>
<a class="active">国际机票</a>
<a>国际/港澳</a>
<a>特惠活动</a>
<div class="ser_ol_div1">
<p>
<input type="radio" name="a" style="vertical-align:middle;" />单程
<input type="radio" name="a" style="vertical-align:middle;" />往返
</p>
<input type="text" placeholder="出发城市" />
<input type="text" placeholder="到达城市" />
<input type="text" placeholder="日期" />
</div>
<button>机票查询</button>
<span class="p">当季热门特惠机票</span>
</ul>
</div>
<div class="ser_ol_li">
<ul>
<div class="guanbi">X</div>
<a class="active" style="width: 50%;">国内港澳台</a>
<a style="width: 50%;">促销活动</a>
<div class="ser_ol_div1">
<input type="text" placeholder="出发城市" style="margin-top: 10px;" />
<input type="text" placeholder="到达城市" />
<input type="text" placeholder="日期" />
<input type="text" placeholder="酒店 商圈 地标" />
</div>
<button>酒店查询</button>
<span class="p">订酒店到</span>
</ul>
</div>
<div class="ser_ol_li">
<ul>
<div class="guanbi">X</div>
<a class="active">点卡</a>
<a>QQ</a>
<a>页游</a>
<div class="ser_ol_div1">
<input type="text" placeholder="游戏" style="margin-top: 15px;" />
<br />面值
<select name="" style="margin: 8px 0;">
<option value="">面值</option>
<option value="">面值</option>
<option value="">面值</option>
</select><span style="color: #C81623;">¥0.00</span>
<p>
<input type="radio" name="a" style="width: 15px;vertical-align:middle;" />直充
<input type="radio" name="a" style="width: 15px;vertical-align:middle;" />卡密
</p>
</div>
<button>快速充值</button>
<span class="p">吃鸡就要快人一步</span>
</ul>
</div>
</div>
</div>
</div>
</div>
</div>
</div>
</div>
</div>
<div class="header_banner1">
<a href="/static/#" class="a">
<img src="/static/index/img/5a1e5ce2N034ce344.png" class="aa" />
</a>
<div class="header_banner1_div">
<p>X</p>
</div>
</div>
</div>
</header>
<div class="section_second">
<!-- 第一层 -->
<div class="section_second_header">
<p class="section_second_header_img"></p>
<div class="section_second_header_left">
<p></p>
<span class="">秒杀</span>
<span>总有你想不到的低价</span>
<span>
</span>
</div>
<div class="section_second_header_right">
<p>当前场次</p>
<span class="section_second_header_right_hours">00</span>
<span class="section_second_header_right_mao">:</span>
<span class="section_second_header_right_minutes">00</span>
<span class="section_second_header_right_mao">:</span>
<span class="section_second_header_right_second">00</span>
<p>后结束</p>
</div>
</div>
<div class="section_second_list">
<div class="swiper-container swiper_section_second_list_left">
<div class="swiper-wrapper">
<div class="swiper-slide">
<ul>
<li>
<img src="/static/index/img/section_second_list_img1.jpg" alt="">
<p>花王 (Merries) 妙而舒 纸尿裤 大号 L54片 尿不湿(9-14千克) (日本官方直采) 花王 (Merries) 妙而舒 纸尿裤 大号 L54片 尿不湿(9-14千</p>
<span>¥83.9</span><s>¥99.9</s>
</li>
<li>
<img src="/static/index/img/section_second_list_img2.jpg" alt="">
<p>华为mate9 4GB+32GB版 月光银 移动联通电信4G手机 双卡</p>
<span>¥17.90</span><s>¥29.90</s>
</li>
<li>
<img src="/static/index/img/section_second_list_img3.jpg" alt="">
<p>超能 植翠低泡洗衣液(鲜艳亮丽)2kg/袋装(新老包装随机</p>
<span>¥20.70</span><s>¥44.90</s>
</li>
<li>
<img src="/static/index/img/section_second_list_img4.jpg" alt="">
<p>长城(GreatWall)红酒 特选5年橡木桶解百纳干红葡萄酒 整</p>
<span>¥399.00</span><s>¥599.00</s>
</li>
<li>
<img src="/static/index/img/section_second_list_img5.jpg" alt="">
<p>惠普(HP)暗影精灵2代Pro 15.6英寸游戏笔记本电脑(i5-7300H</p>
<span>¥5999.00</span><s>¥6499.00</s>
</li>
</ul>
</div>
<div class="swiper-slide">
<ul>
<li>
<img src="/static/index/img/section_second_list_img6.jpg" alt="">
<p>Apple iMac 21.5英寸一体机(2017新款四核Core i5 处理器/8GB内存/1TB/RP555显卡/4K屏 MNDY2CH/A) Apple iMac 21.5英寸一体机(2017新款四核Core i5 处理</p>
<span>¥9588.00</span><s>¥10288.00</s>
</li>
<li>
<img src="/static/index/img/section_second_list_img7.jpg" alt="">
<p>中柏(Jumper)EZpad 4S Pro 10.6英寸二合一平板电脑(X5 z</p>
<span>¥848.00</span><s>¥899.00</s>
</li>
<li>
<img src="/static/index/img/section_second_list_img8.jpg" alt="">
<p>飞利浦(PHILIPS)电动牙刷HX6761/03亮白型成人充电式声波震动牙刷粉色 飞利浦(PHILIPS)电动牙刷HX6761/03亮白型成人充电式声波
</p>
<span>¥379.00</span><s>¥698.00</s>
</li>
<li>
<img src="/static/index/img/section_second_list_img9.jpg" alt="">
<p>美的(Midea) 258升 变频智能三门冰箱 一级能效 风冷无霜 中门</p>
<span>¥3088.00</span><s>¥3299.00</s>
</li>
<li>
<img src="/static/index/img/section_second_list_img10.jpg" alt="">
<p>【第二件减50元】蒙羊 内蒙古羔羊羊肋排 2.4斤</p>
<span>¥99.90</span><s>¥199.00</s>
</li>
</ul>
</div>
</div>
<div class="swiper-button-prev second_list">
<p></p>
</div>
<div class="swiper-button-next second_list">
<p></p>
</div>
</div>
<ul class="section_second_list_right">
<li>
<img src="/static/index/img/section_second_list_right_img.jpg" alt="">
</li>
<li>
<img src="/static/index/img/section_second_list_right_img.png" alt="">
</li>
<div class="section_second_list_right_button">
<p class="section_second_list_right_button_active"></p>
<p></p>
</div>
</ul>
</div>
</div>
</body>
<script type="text/javascript">
function search() {
var keyword=$("#searchText").val()
window.location.href="http://search.gulimall.com/search.html?keyword="+keyword;
}
</script>
<script type="text/javascript" src="/static/index/js/text.js"></script>
<script type="text/javascript" src="/static/index/js/header.js"></script>
<script type="text/javascript" src="/static/index/js/secend.js"></script>
<script type="text/javascript" src="/static/index/js/zz.js"></script>
<script type="text/javascript" src="/static/index/js/index.js"></script>
<script type="text/javascript" src="/static/index/js/left,top.js"></script>
<script type="text/javascript" src="/static/index/js/catalogLoader.js"></script>
</html>
(5)重启gulimall-product服务,进行测试
静态资源加载成功。
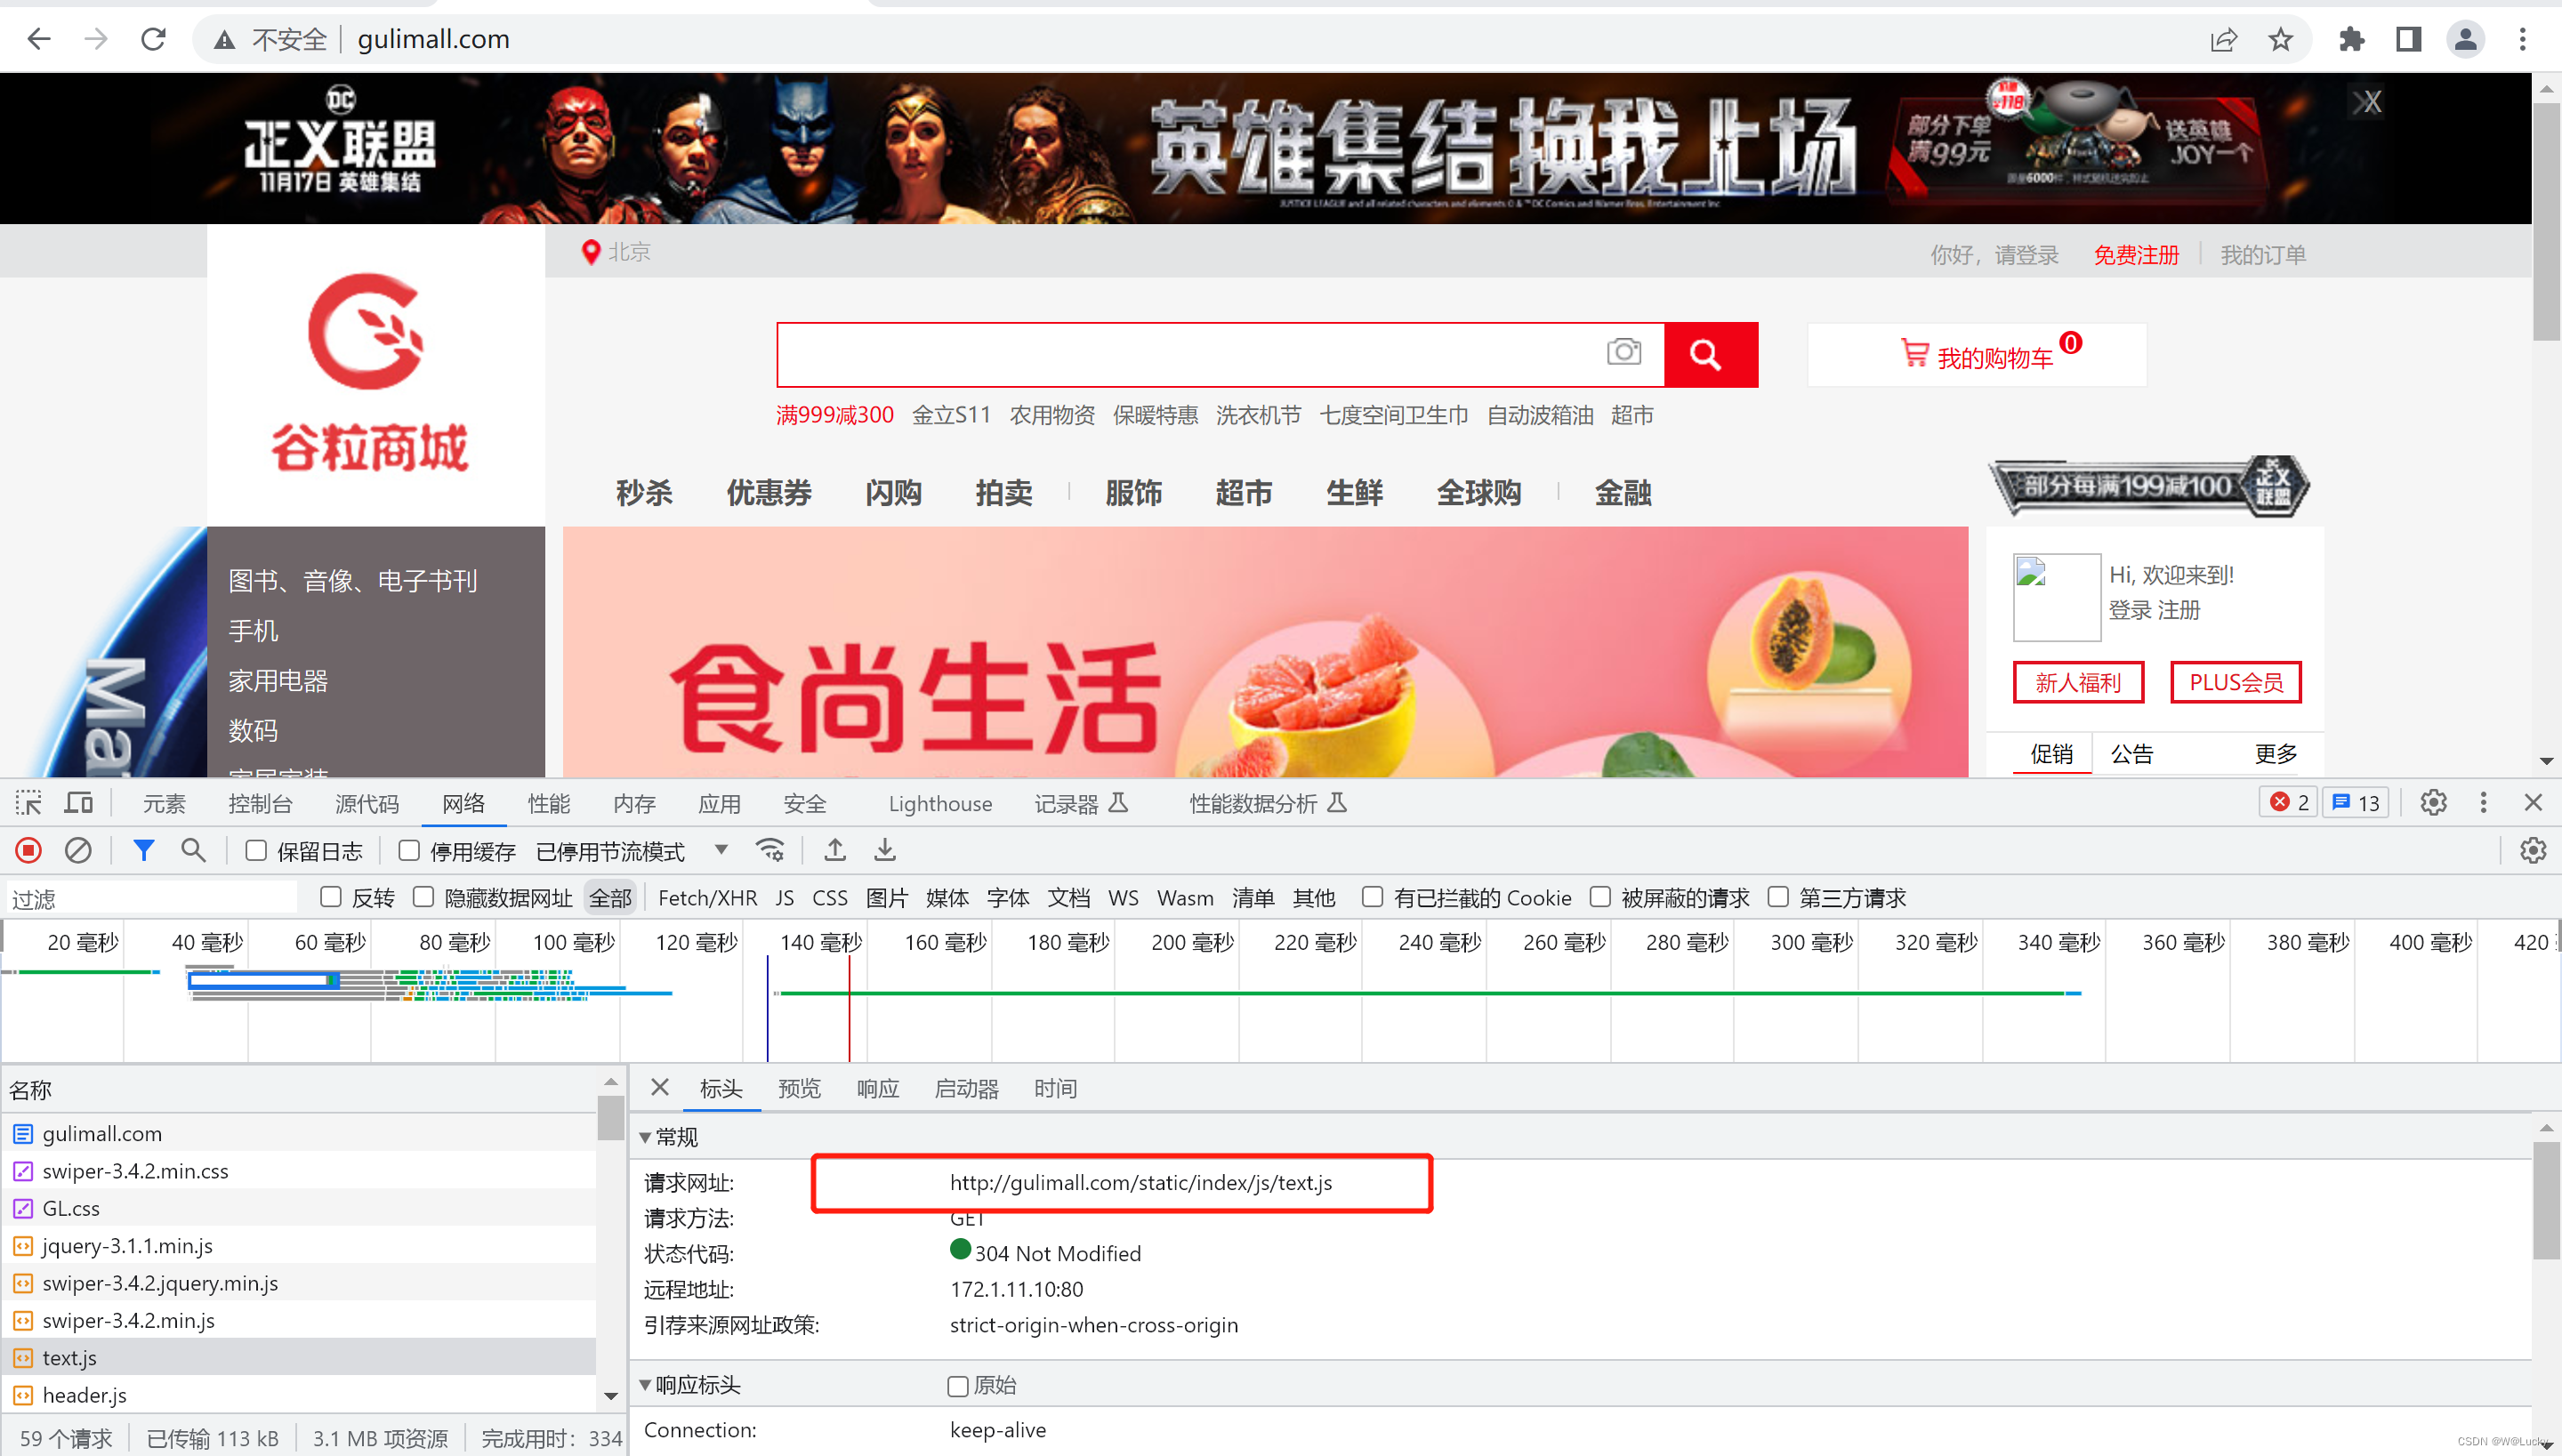
4.3.4 模拟线上应用内存崩溃宕机情况
通过nginx进行动静分离后,进行首页全量数据获取压力测试,吞吐量由原来的7/sec提升为10/sec,提升并不是很大。将线程数调制200,进行压力测试,堆内存溢出:

原因:
通过jvisualvm观察,由于服务堆内存分配的较小,导致新生代和老年代都是快满的状态,Eden区频繁gc,gc后也没有空间。

解决方案:调大堆内存
-Xmx1024m -Xms1024m -Xmn512m
-Xmx:堆内存的最大大小
-Xms:堆内存的初始大小
-Xmn:堆内存的新生代大小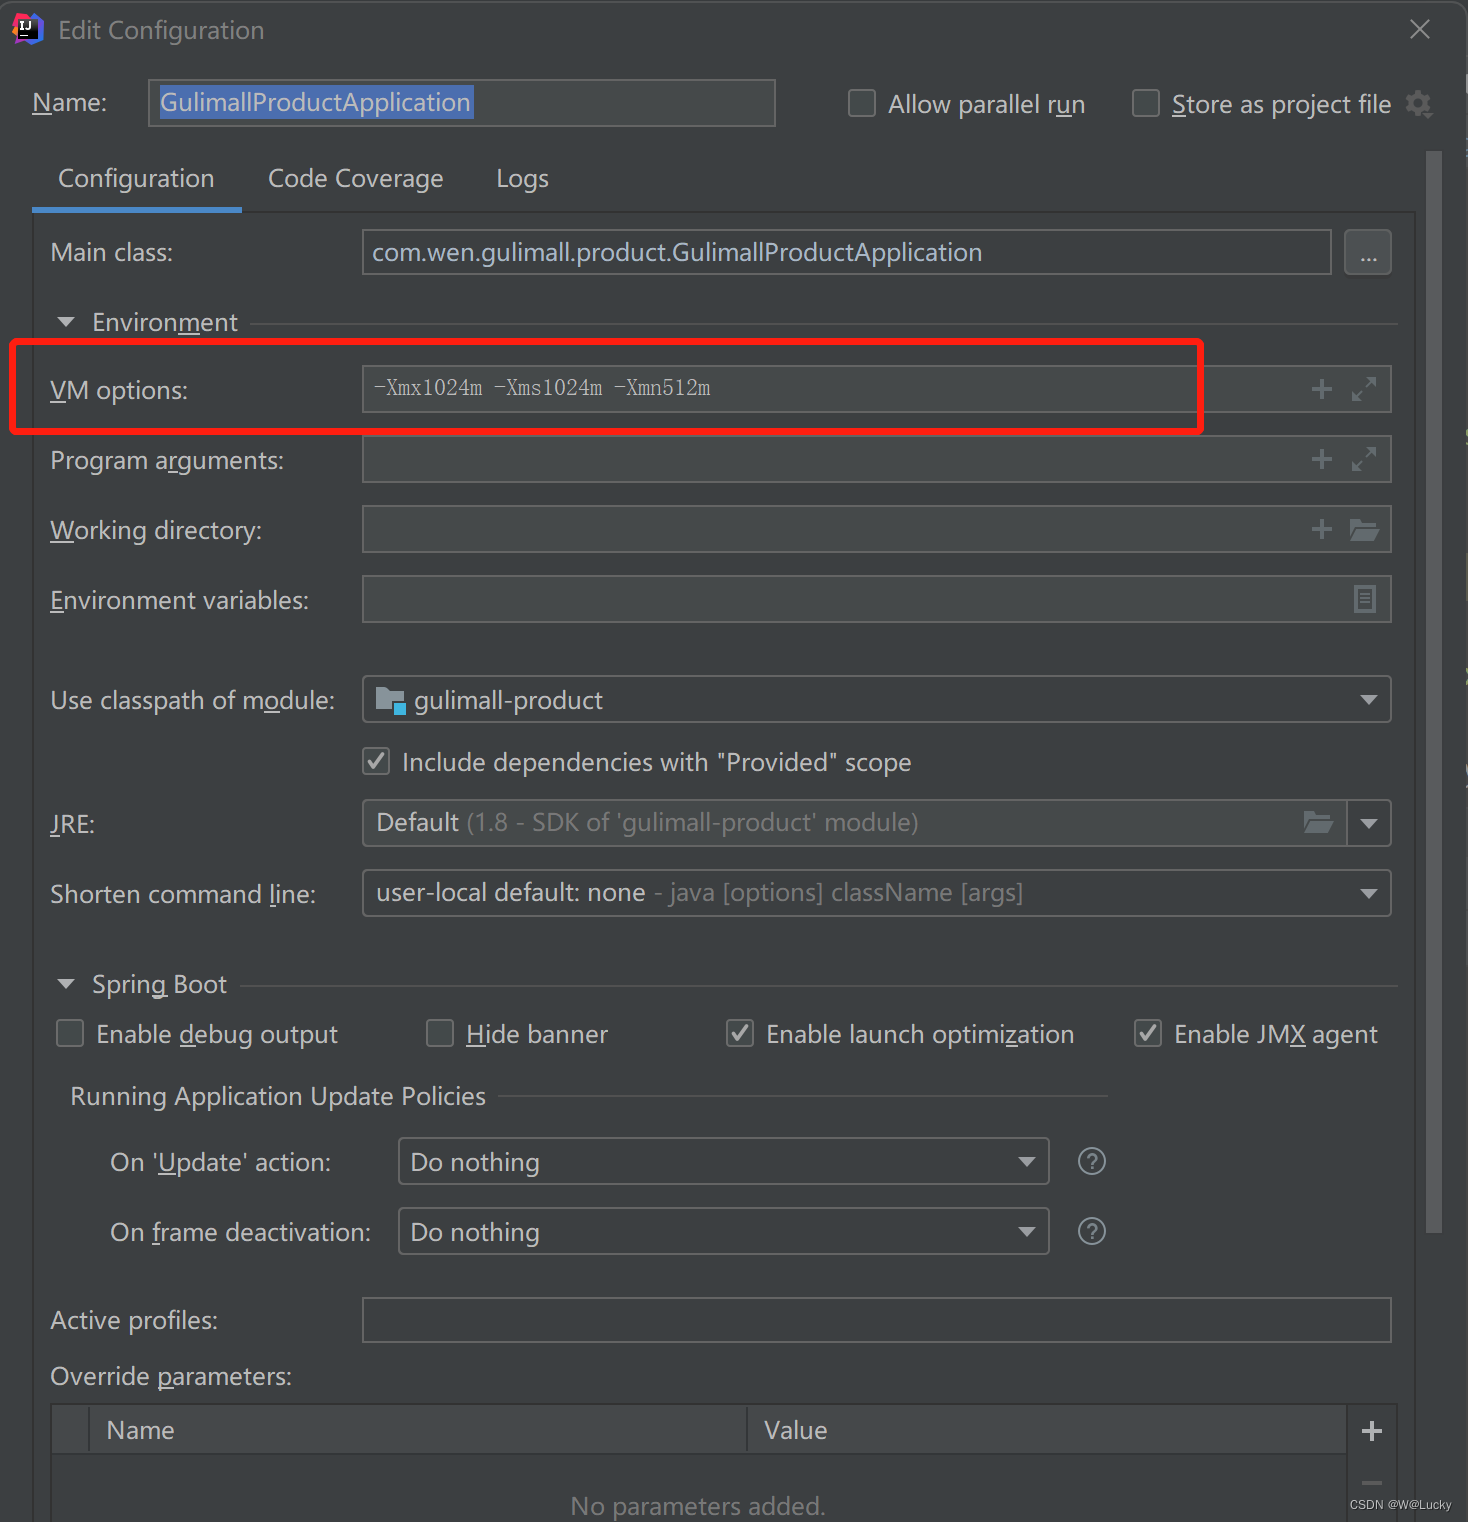
4.3.5 优化三级分类数据获取
1. 对 三级分类(优化业务) 进行压测
三级分类数据获取的相关接口getCatalogJson()优化业务:
(1)将数据库多次查询变为一次,查询出所有的三级分类;
(2)方法抽取,将baseMapper.selectList(new QueryWrapper().eq(“parent_cid”, level1.getCatId()));进行抽取,改为不在去数据库查询,而是从步骤(1)中通过parent_cid进行过滤;
(3)将一级分类也改为从步骤(1)中过滤,parent_cid=0L;
(4)重启gulimall-product,对三级分类数据获取进行压测。
@Override
public Map<String, List<Catelog2Vo>> getCatalogJson() {
/**
* 1. 将数据库的多次查询变为一次
*/
List<CategoryEntity> selectList = this.baseMapper.selectList(null);
// 查出所有的一级分类
List<CategoryEntity> level1Category = getParent_cid(selectList,0L);
// 封装数据
Map<String, List<Catelog2Vo>> collect = level1Category.stream().collect(Collectors.toMap(k -> k.getCatId().toString(), v -> {
// 1. 查询一级分类下的所有二级分类
List<CategoryEntity> categoryEntities = getParent_cid(selectList,v.getCatId());
List<Catelog2Vo> level2Category = null;
if (categoryEntities != null && categoryEntities.size() > 0) {
level2Category = categoryEntities.stream().map(l2 -> {
Catelog2Vo catelog2Vo = new Catelog2Vo(v.getCatId().toString(), null, l2.getCatId().toString(), l2.getName());
// 2. 找二级分类下的所有三级分类
List<CategoryEntity> level3Category = getParent_cid(selectList,l2.getCatId());
if (level3Category != null && level3Category.size() > 0) {
List<Catelog2Vo.Catelog3Vo> catelog3Vos = level3Category.stream().map(l3 -> {
// 封装成指定格式
Catelog2Vo.Catelog3Vo catelog3Vo = new Catelog2Vo.Catelog3Vo(l2.getCatId().toString(), l3.getCatId().toString(), l3.getName());
return catelog3Vo;
}).collect(Collectors.toList());
catelog2Vo.setCatalog3List(catelog3Vos);
}
return catelog2Vo;
}).collect(Collectors.toList());
}
return level2Category;
}));
return collect;
}
/**
*
* @param selectList 所有的三级分类
* @param parent_cid 父id
* @return
*/
private List<CategoryEntity> getParent_cid(List<CategoryEntity> selectList, Long parent_cid) {
return selectList.stream().filter(item -> item.getParentCid().longValue() == parent_cid).collect(Collectors.toList());
}
| 压测内容 | 压测线程数 | 吞吐量/s | 90%响应时间 | 99%响应时间 |
|---|---|---|---|---|
| Nginx | 50 | 8109 | 9 | 16 |
| Gateway | 50 | 19779 | 2 | 55 |
| 简单服务 | 50 | 46956 | 2 | 4 |
| 首页一级菜单渲染 | 50 | 875(db,thymeleaf) | 98 | 182 |
| 首页渲染(开缓存) | 50 | 897 | 73 | 110 |
| 首页渲染(开缓存、优化数据库、关日志) | 50 | 2655 | 36 | 127 |
| 三级分类数据获取 | 50 | 5(db) | ...(不具参考意义) | ... |
| 三级分类(加索引) | 50 | 20 | ... | ... |
| 三级分类(优化业务) | 50 | 264 | 1872 | 4430 |
| 首页全量数据获取 | 50 | 7(静态资源) | ... | ... |
| 全量数据获取(开缓存、优化数据库、关日志) | 50 | 12 | ... | ... |
| Gateway+简单服务 | 50 | 8426 | 9 | 18 |
| 全链路 | 50 | 835 | 88 | 122 |
发现对三级分类业务进行优化后,虽然有很大的提升,200多的吞吐量也并不高,接下来学习性能提升大神器(缓存),合理运用缓存,性能会有很大的提升。5. 缓存与分布式锁
5.1 缓存使用
为了系统性能的提升,我们一般都会将部分数据放入缓存中,加速访问。而db承担数据落盘工作。
哪些数据适合放入缓存?
- 即时性、数据一致性要求不高的
- 访问量大且更新频率不高的数据(读多,写少)
举例: 电商类应用, 商品分类, 商品列表等适合缓存并加一个失效时间(根据数据更新频率来定), 后台如果发布一个商品, 买家需要 5 分钟才能看到新的商品一般还是可以接受的。
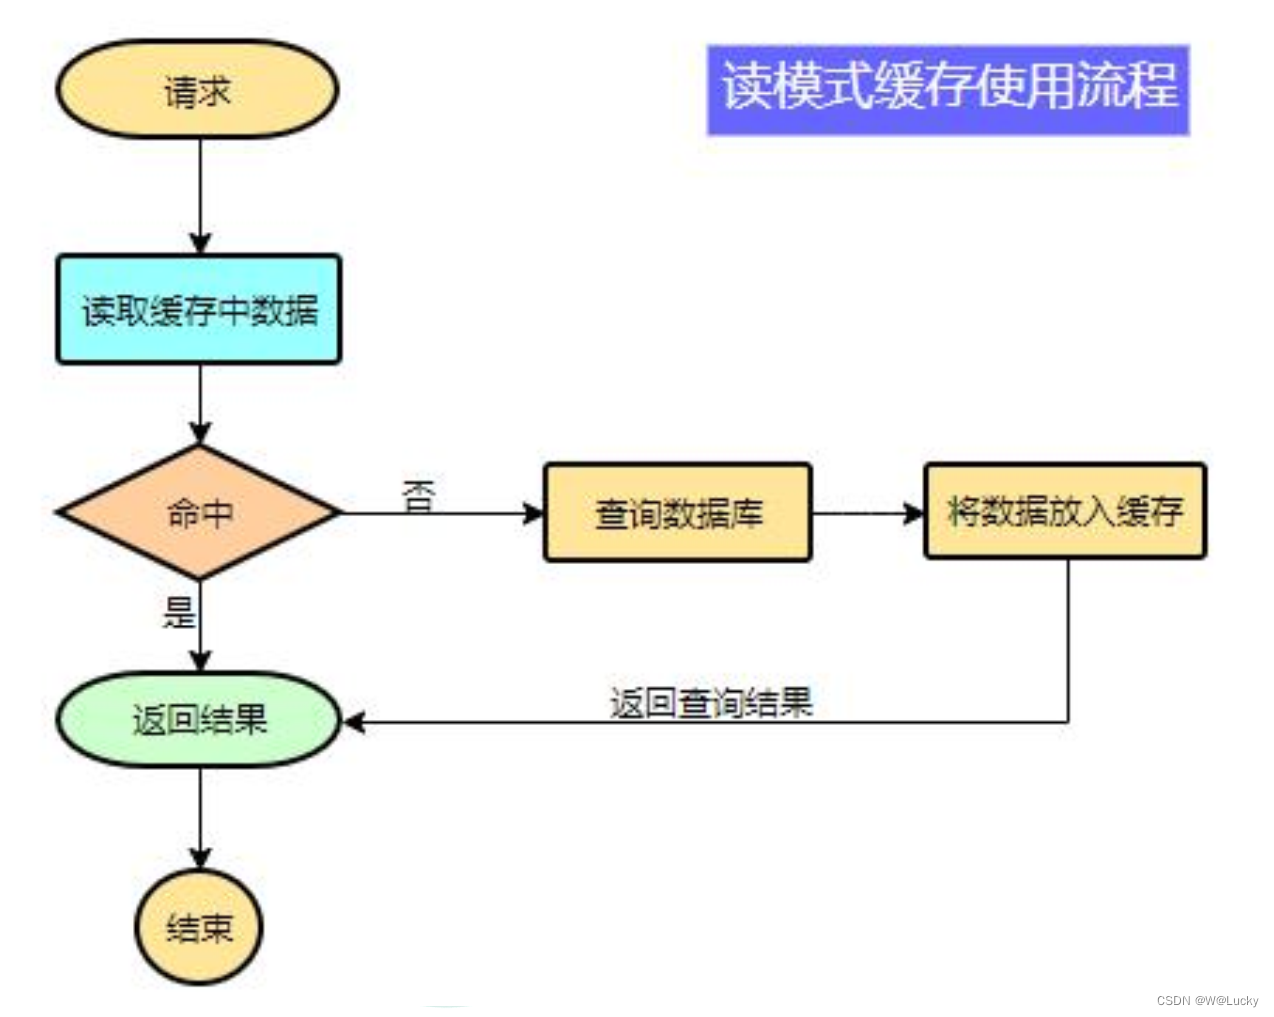
data = cache.load(id); // 从缓存中加载数据
if(data == null){
    data = db.load(id); // 从数据库中加载数据
    cache.put(id,data); // 保存到cache中
}
return data;
5.1.1 本地缓存
1. 本地缓存实现:
    本地缓存用map实现,将需要缓存的数据以key-value的形式存放到map,查询时先判断map中对应key的value是否为空,不为空从map中获取,为空去数据库中查询并存入map,下次就可以直接从map中获取无需查询数据库。

2. 什么是本地缓存?
    本地缓存是指与当前代码属于同一进程,它们运行在同一个项目在同一个jvm,只相当于在本地保存一个副本,称为本地缓存。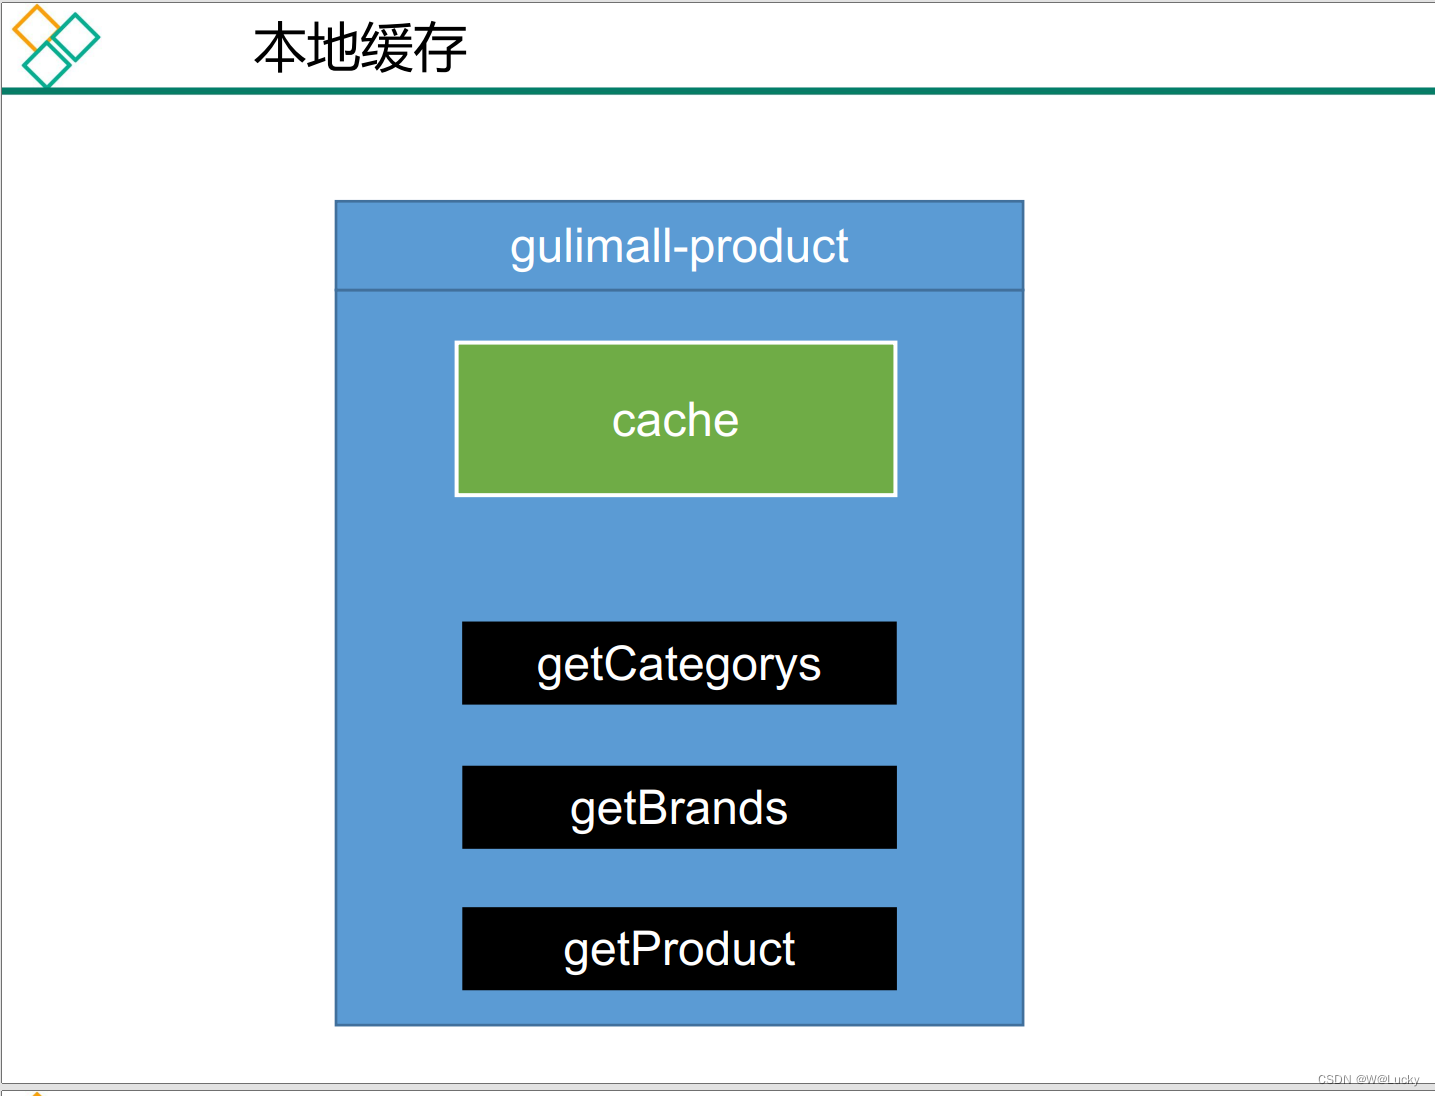
3. 分布式缓存--本地缓存在分布式下的问题
    (1)集群情况下,本地缓存不共享,存在与jvm(负载均衡到新的服务器需要重新查询);
    (2)数据一致性问题:一台服务器修改了数据库数据更新了缓存,但其他集群服务器缓存未修改,所以集群情况下不使用本地缓存。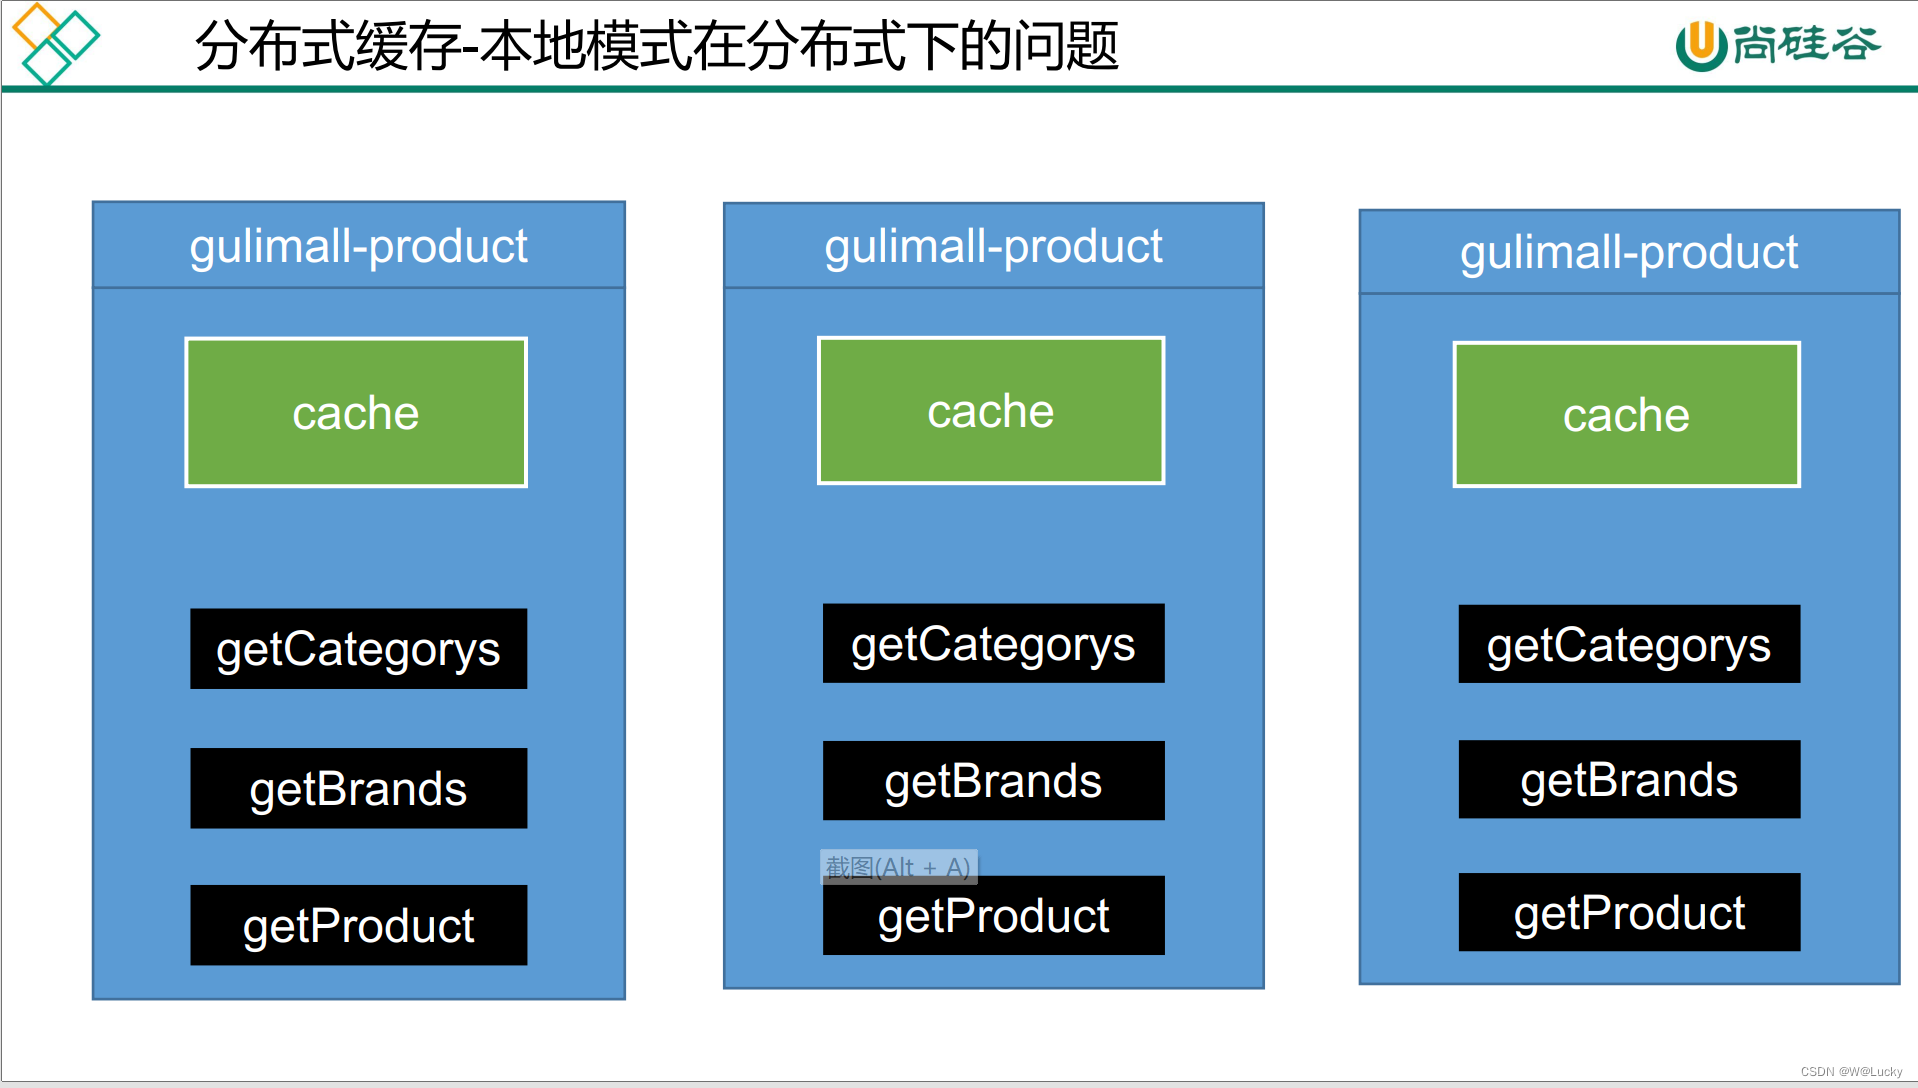
5.1.2 分布式缓存
可以使用缓存中间件redis,数据量大时可以进行集群+分片。
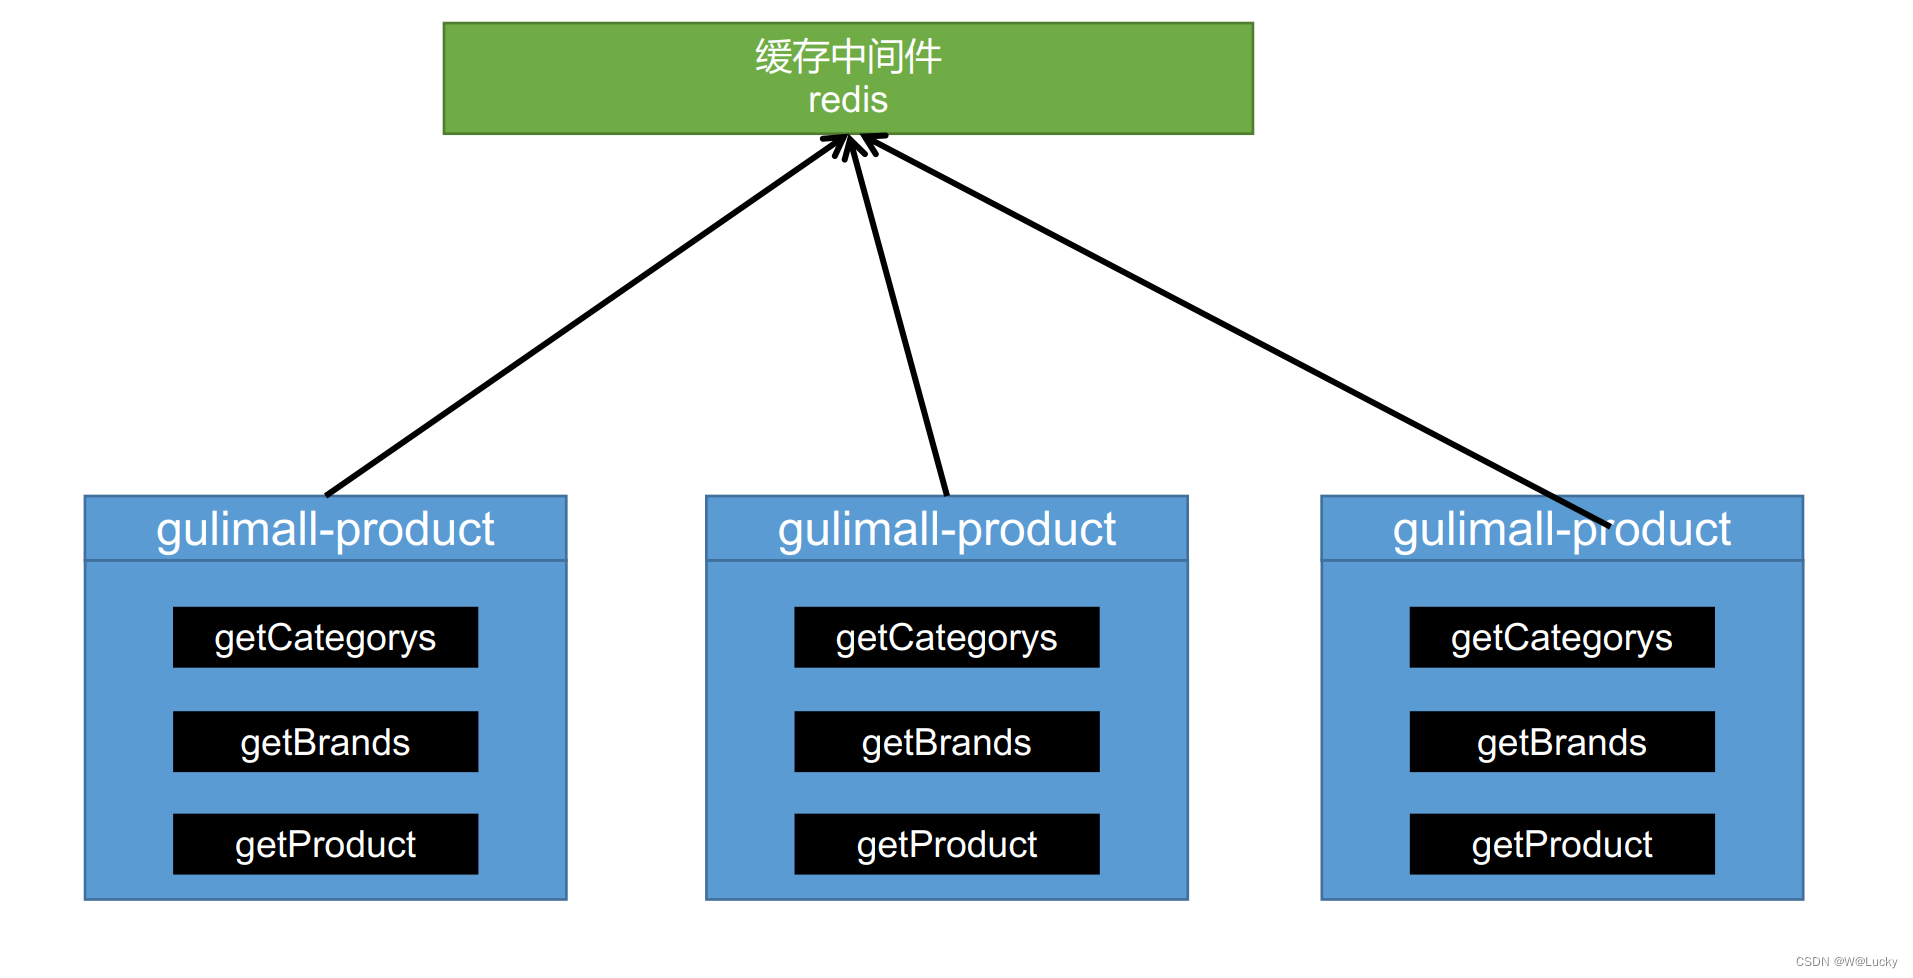
5.1.3 整合redis
1. 引入依赖
<!-- spring-boot-starter-data-redis -->
<dependency>
    <groupId>org.springframework.boot</groupId>
    <artifactId>spring-boot-starter-data-redis</artifactId>
</dependency>
2. yml中配置redis的host等
spring:
  redis:
    host: 172.1.11.10
    port: 6379
3. redis自动配置源码
@AutoConfiguration
@ConditionalOnClass(RedisOperations.class)
@EnableConfigurationProperties(RedisProperties.class)
@Import({ LettuceConnectionConfiguration.class, JedisConnectionConfiguration.class })
public class RedisAutoConfiguration {

	@Bean
	@ConditionalOnMissingBean(name = "redisTemplate")
	@ConditionalOnSingleCandidate(RedisConnectionFactory.class)
	public RedisTemplate<Object, Object> redisTemplate(RedisConnectionFactory redisConnectionFactory) {
		RedisTemplate<Object, Object> template = new RedisTemplate<>();
		template.setConnectionFactory(redisConnectionFactory);
		return template;
	}

	@Bean
	@ConditionalOnMissingBean
	@ConditionalOnSingleCandidate(RedisConnectionFactory.class)
	public StringRedisTemplate stringRedisTemplate(RedisConnectionFactory redisConnectionFactory) {
		return new StringRedisTemplate(redisConnectionFactory);
	}

}
4. 测试
@Slf4j
@SpringBootTest
class GulimallProductApplicationTests {

    @Resource
    private StringRedisTemplate stringRedisTemplate;

    @Test
    void testStringRedisTemplate(){
        ValueOperations<String, String> ops = stringRedisTemplate.opsForValue();
        ops.set("hello","world"+ UUID.randomUUID().toString());
        String hello = ops.get("hello");
        System.out.println(hello);
    }
}

注意变量名的编写如果写redisTemplate就用@Autowired注入,如果使用@Resource会报错,应为RedisTemplate注入到容器的名称时redisTemplate。5.1.4 改造三级分类业务(使用redis缓存)
@Service("categoryService")
public class CategoryServiceImpl extends ServiceImpl<CategoryDao, CategoryEntity> implements CategoryService {

    ...

    @Autowired
    private StringRedisTemplate redisTemplate;

     @Override
    public Map<String, List<Catelog2Vo>> getCatalogJson() {
        // 给缓存中放json串,拿出json串,还能逆转为能用的对象类型【序列化、反序列化】

        // 1. 加入缓存逻辑,缓存中存的数据是json串
        // JSON跨语言,跨平台
        String catalogJson = redisTemplate.opsForValue().get("catalogJson");
        if(StringUtils.isEmpty(catalogJson)){
            // 2. 缓存中没有,查询数据库
            Map<String, List<Catelog2Vo>> catalogJsonFromDb = getCatalogJsonFromDb();
            // 3. 查询到的数据再放入缓存,将对象转化为json放到缓存中
            String s = JSON.toJSONString(catalogJsonFromDb);
            redisTemplate.opsForValue().set("catalogJson",s);
            return catalogJsonFromDb;
        }
        // 转化为指定对象 复杂类型使用TypeReference,TypeReference对应方法是受保护的以匿名内部类的方式使用
        Map<String, List<Catelog2Vo>> result = JSON.parseObject(catalogJson, new TypeReference<Map<String, List<Catelog2Vo>>>() {});
        return result;
    }

    // 从数据库查询并封装分类数据
    public Map<String, List<Catelog2Vo>> getCatalogJsonFromDb() {
        /**
         * 1. 将数据库的多次查询变为一次
         */
        List<CategoryEntity> selectList = this.baseMapper.selectList(null);

        // 查出所有的一级分类
        List<CategoryEntity> level1Category = getParent_cid(selectList,0L);
        // 封装数据
        Map<String, List<Catelog2Vo>> collect = level1Category.stream().collect(Collectors.toMap(k -> k.getCatId().toString(), v -> {
            // 1. 查询一级分类下的所有二级分类
            List<CategoryEntity> categoryEntities = getParent_cid(selectList,v.getCatId());
            List<Catelog2Vo> level2Category = null;
            if (categoryEntities != null && categoryEntities.size() > 0) {
                level2Category = categoryEntities.stream().map(l2 -> {
                    Catelog2Vo catelog2Vo = new Catelog2Vo(v.getCatId().toString(), null, l2.getCatId().toString(), l2.getName());
                    // 2. 找二级分类下的所有三级分类
                    List<CategoryEntity> level3Category = getParent_cid(selectList,l2.getCatId());
                    if (level3Category != null && level3Category.size() > 0) {
                        List<Catelog2Vo.Catelog3Vo> catelog3Vos = level3Category.stream().map(l3 -> {
                            // 封装成指定格式
                            Catelog2Vo.Catelog3Vo catelog3Vo = new Catelog2Vo.Catelog3Vo(l2.getCatId().toString(), l3.getCatId().toString(), l3.getName());
                            return catelog3Vo;
                        }).collect(Collectors.toList());
                        catelog2Vo.setCatalog3List(catelog3Vos);
                    }
                    return catelog2Vo;
                }).collect(Collectors.toList());
            }
            return level2Category;
        }));

        return collect;
    }

    /**
     *
     * @param selectList  所有的三级分类
     * @param parent_cid  父id
     * @return
     */
    private List<CategoryEntity> getParent_cid(List<CategoryEntity> selectList, Long parent_cid) {
        return selectList.stream().filter(item -> item.getParentCid().longValue() == parent_cid).collect(Collectors.toList());
    }
}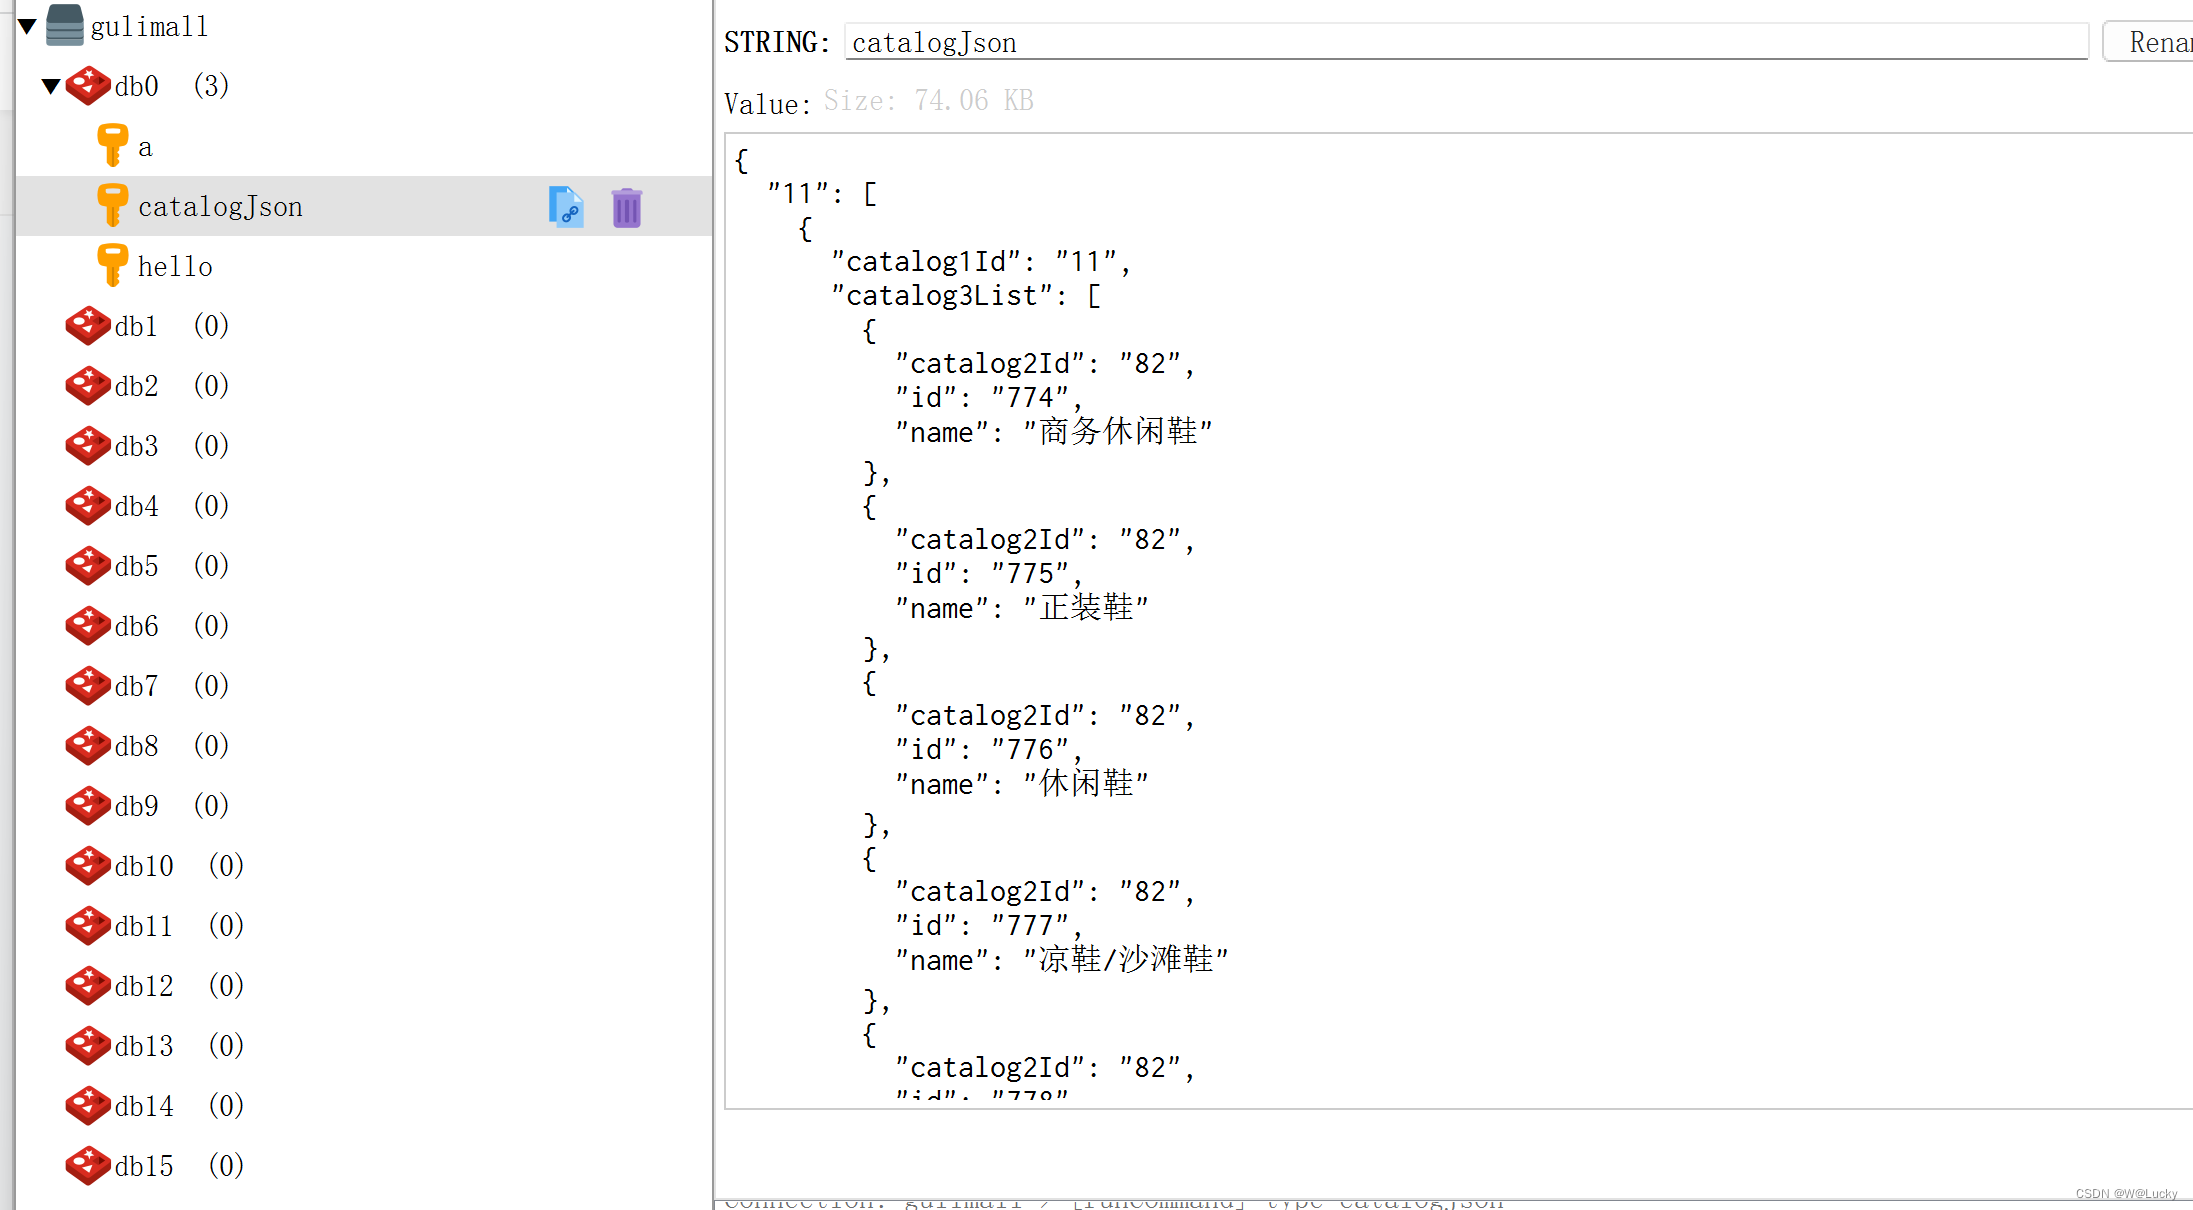
5.1.5 压力测试出的内存泄露及解决
对使用redis缓存的三级分类数据获取进行压力测试,使用低版本的lettuce会出现产生堆外内存溢出(OutOfDirectMemoryError)。

1.SpringBoot2.0以后默认使用lettuce作为操作redis的客户端。它使用netty作为网络通信。
2. lettuce的bug导致netty堆外内存溢出 (指定-Xmx300m) ;netty如果没有指定堆外内存,默认使用 -Xmx300m
    可以通过-Dio.netty.maxDirectMemory进行设置
解决方案:
    1)升级lettuce客户端;【2.3.2已解决】【lettuce使用netty吞吐量很大】
    2)切换使用jedis。【这里学习一下如何使用jedis,但是最后不选用】


我这里使用的lettuce6.1.10.RELEASE版本对应netty4.1.82.Final版本,没有出现堆外内存溢出。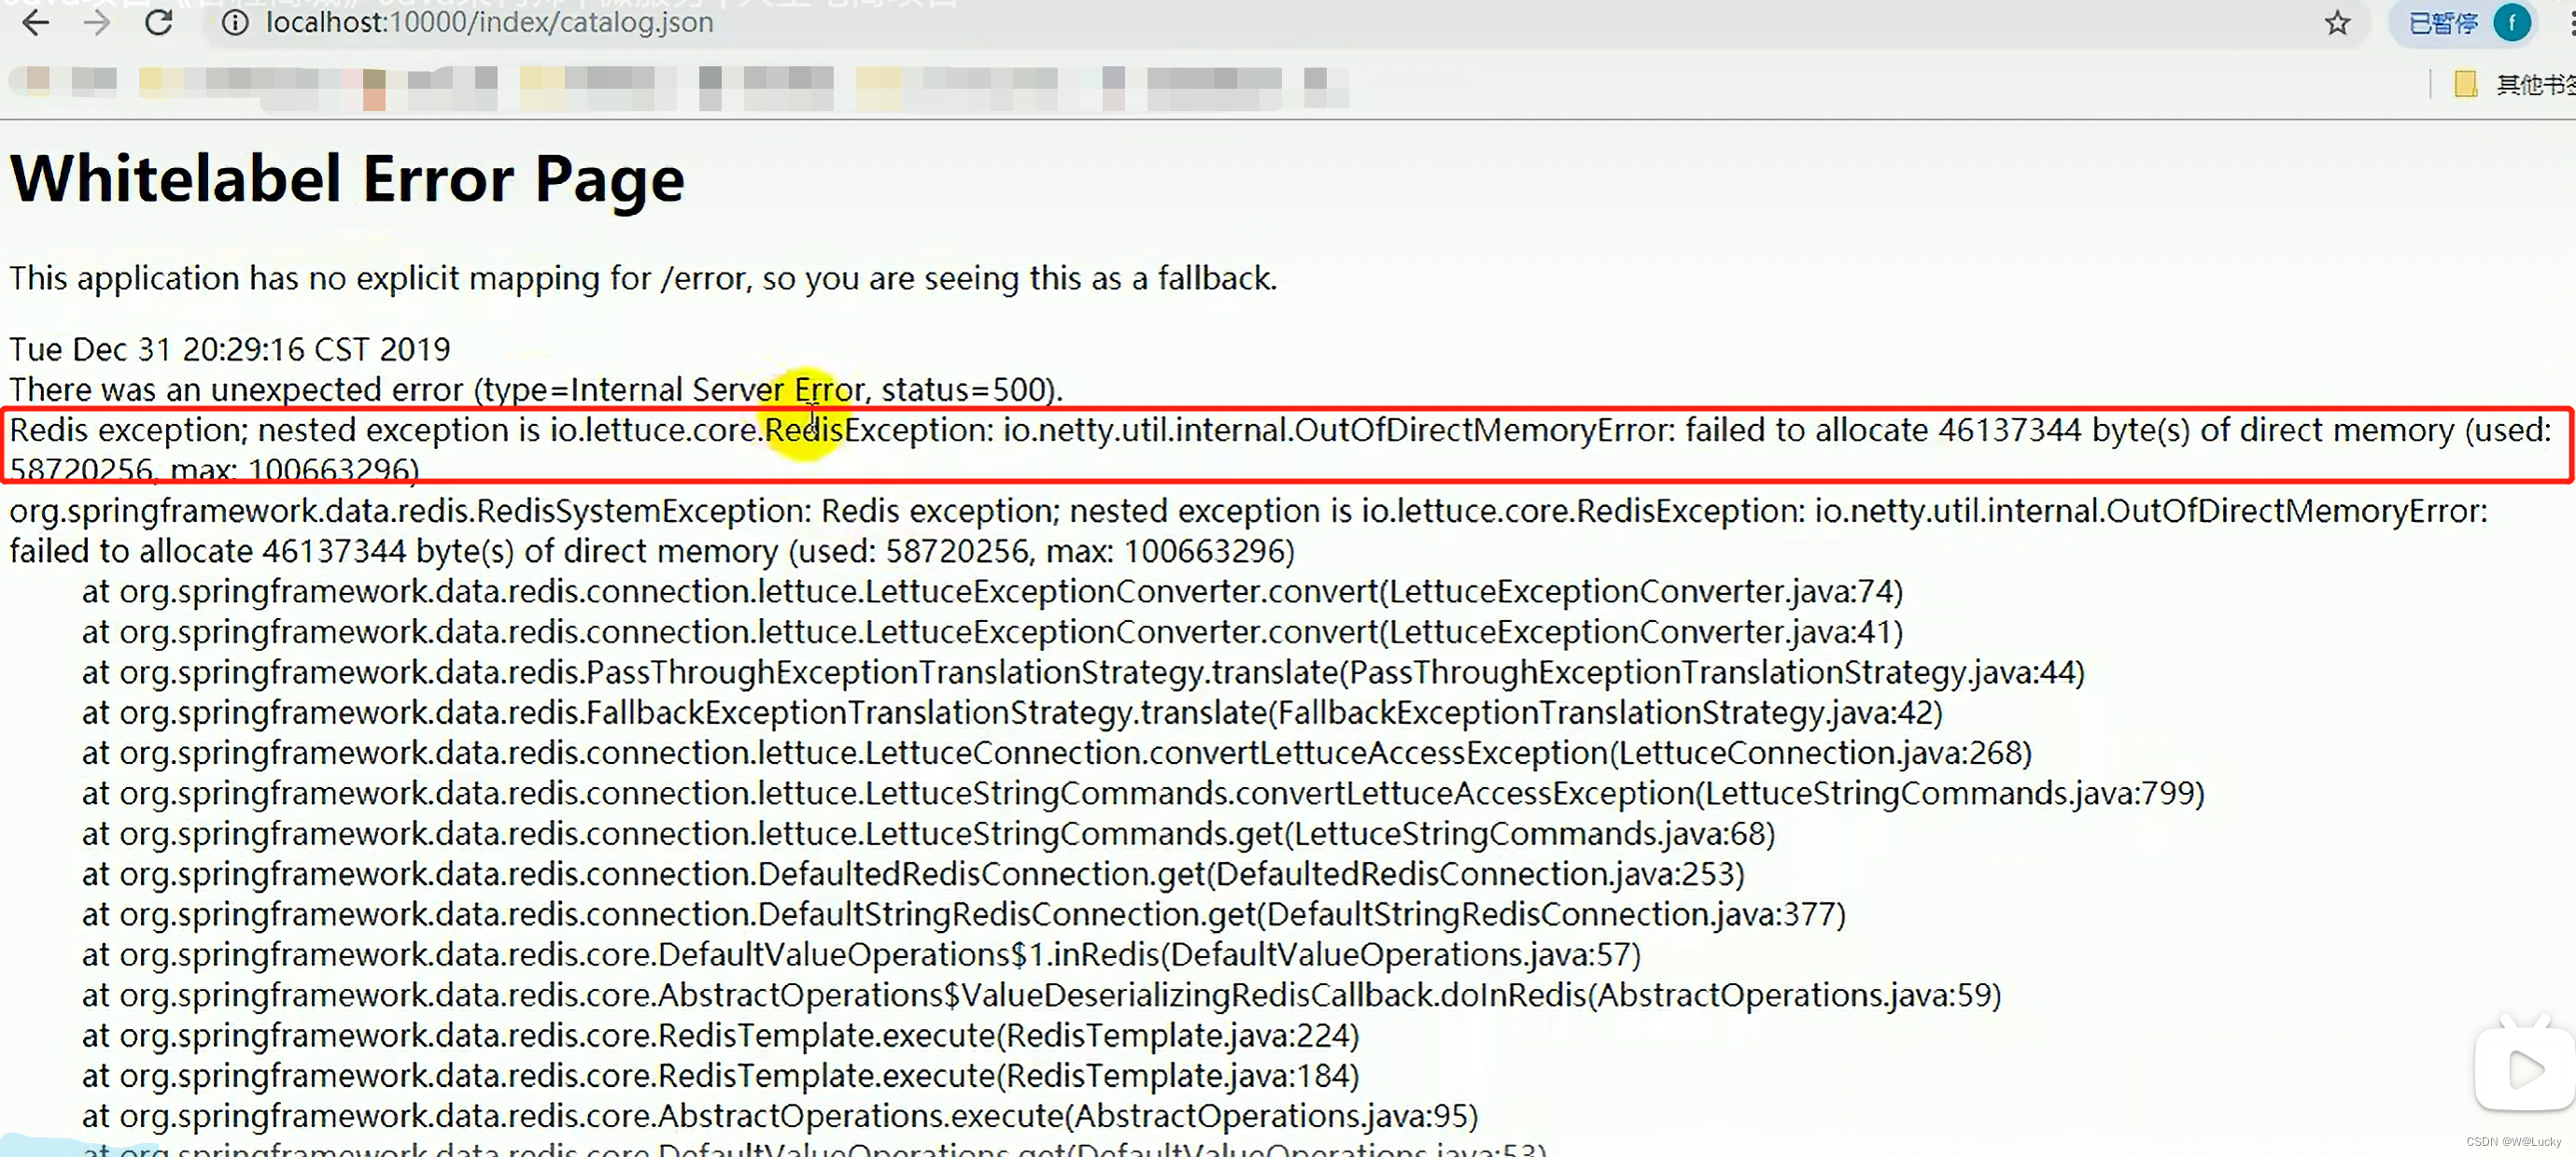
使用jedis解决OutOfDirectMemoryError问题。
(1) spring-boot-starter-data-redis排除lettuce;
(2) 添加jedis依赖;
(3) 重启gulimall-product进行压测。

         <!-- spring-boot-starter-data-redis -->
        <dependency>
            <groupId>org.springframework.boot</groupId>
            <artifactId>spring-boot-starter-data-redis</artifactId>
            <exclusions>
                <exclusion>
                    <groupId>io.lettuce</groupId>
                    <artifactId>lettuce-core</artifactId>
                </exclusion>
            </exclusions>
        </dependency>

        <dependency>
            <groupId>redis.clients</groupId>
            <artifactId>jedis</artifactId>
        </dependency>
RedisTemplate底层原理:
1. lettuce、jedis是操作redis的底层客户端。Spring再次封装redisTemplate;
2. RedisAutoConfiguration自动配置类导入了lettuce和jedis的配置类;
3. JedisConnectionConfiguration配置类会使用@Bean将redisConnectionFactory注册到容器中。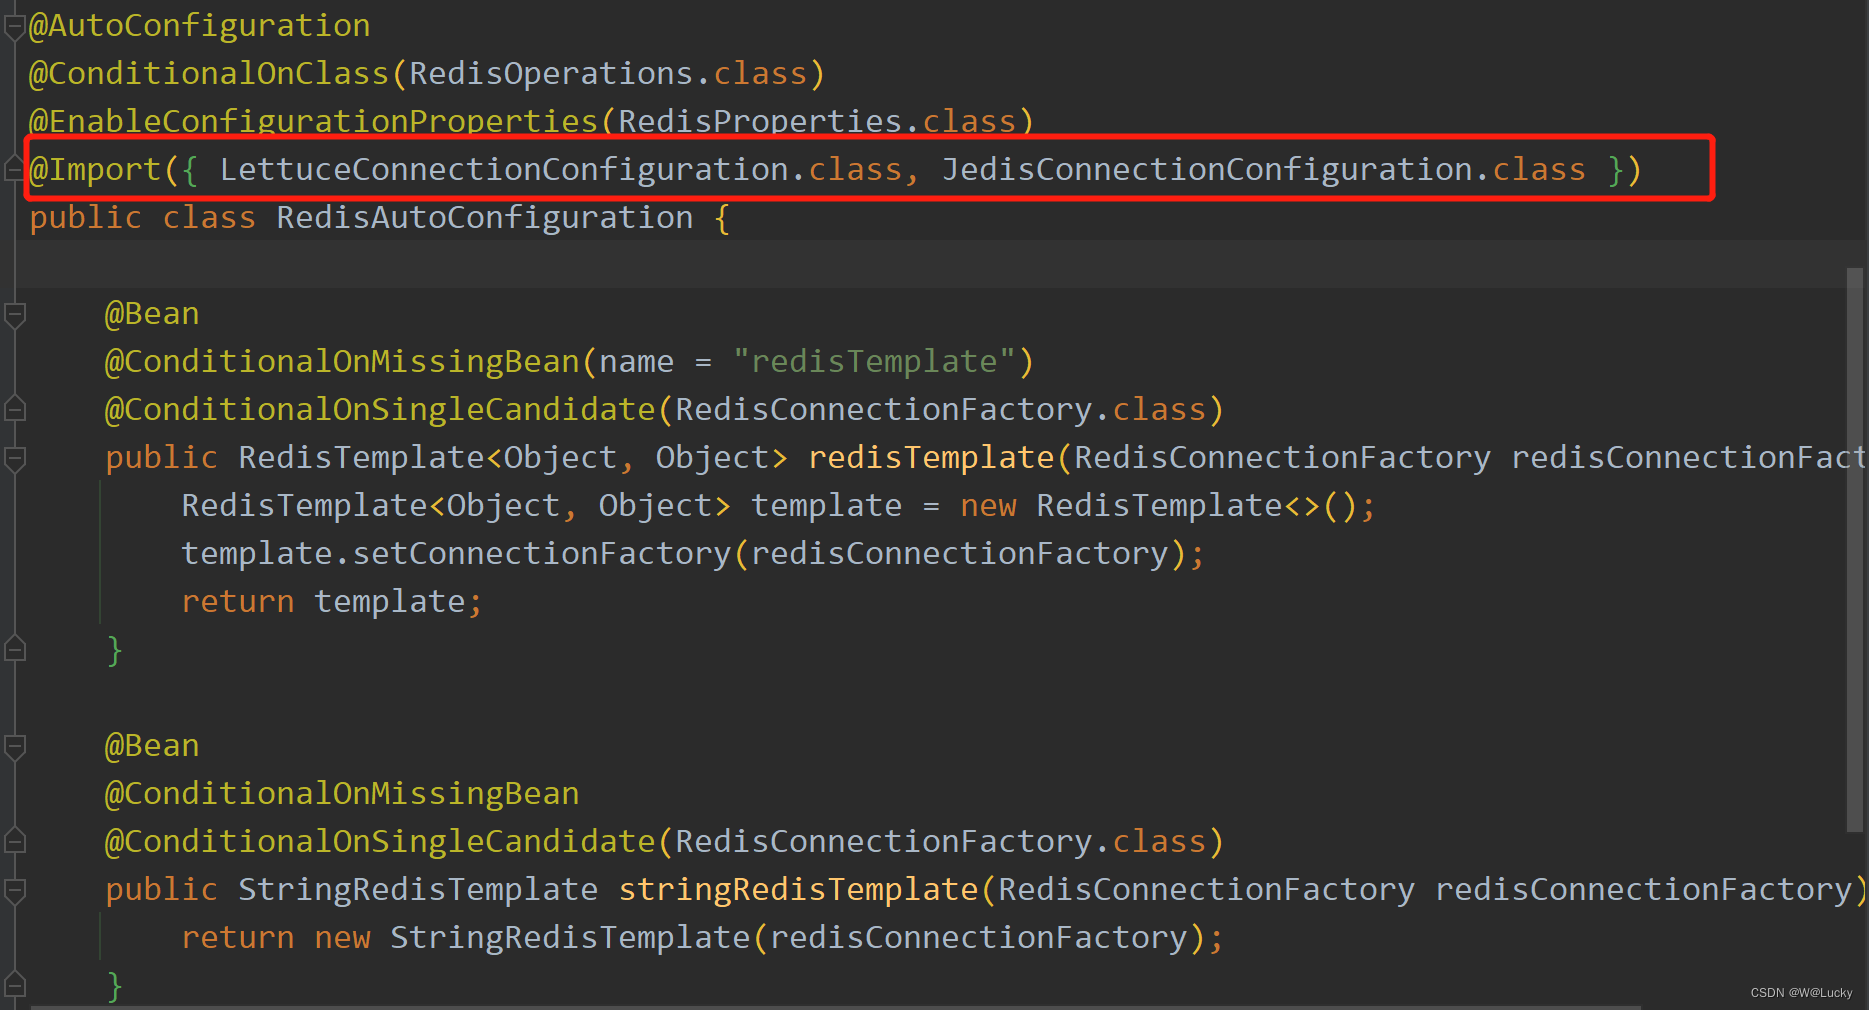
5.1.6 高并发下缓存失效问题---缓存击穿、缓存穿透、缓存雪崩
高并发下缓存失效问题:
(1)缓存穿透(缓存和数据库中都不存在的数据,有大量请求进来)
解决方案:空结果缓存。
(2)缓存雪崩(大量的key采用的相同的过期时间,同时有大量请求进来)
解决方案:设置过期时间加随机值。
(3)缓存击穿(某个热点key过期,突然有大量请求进来)
解决方案:加锁。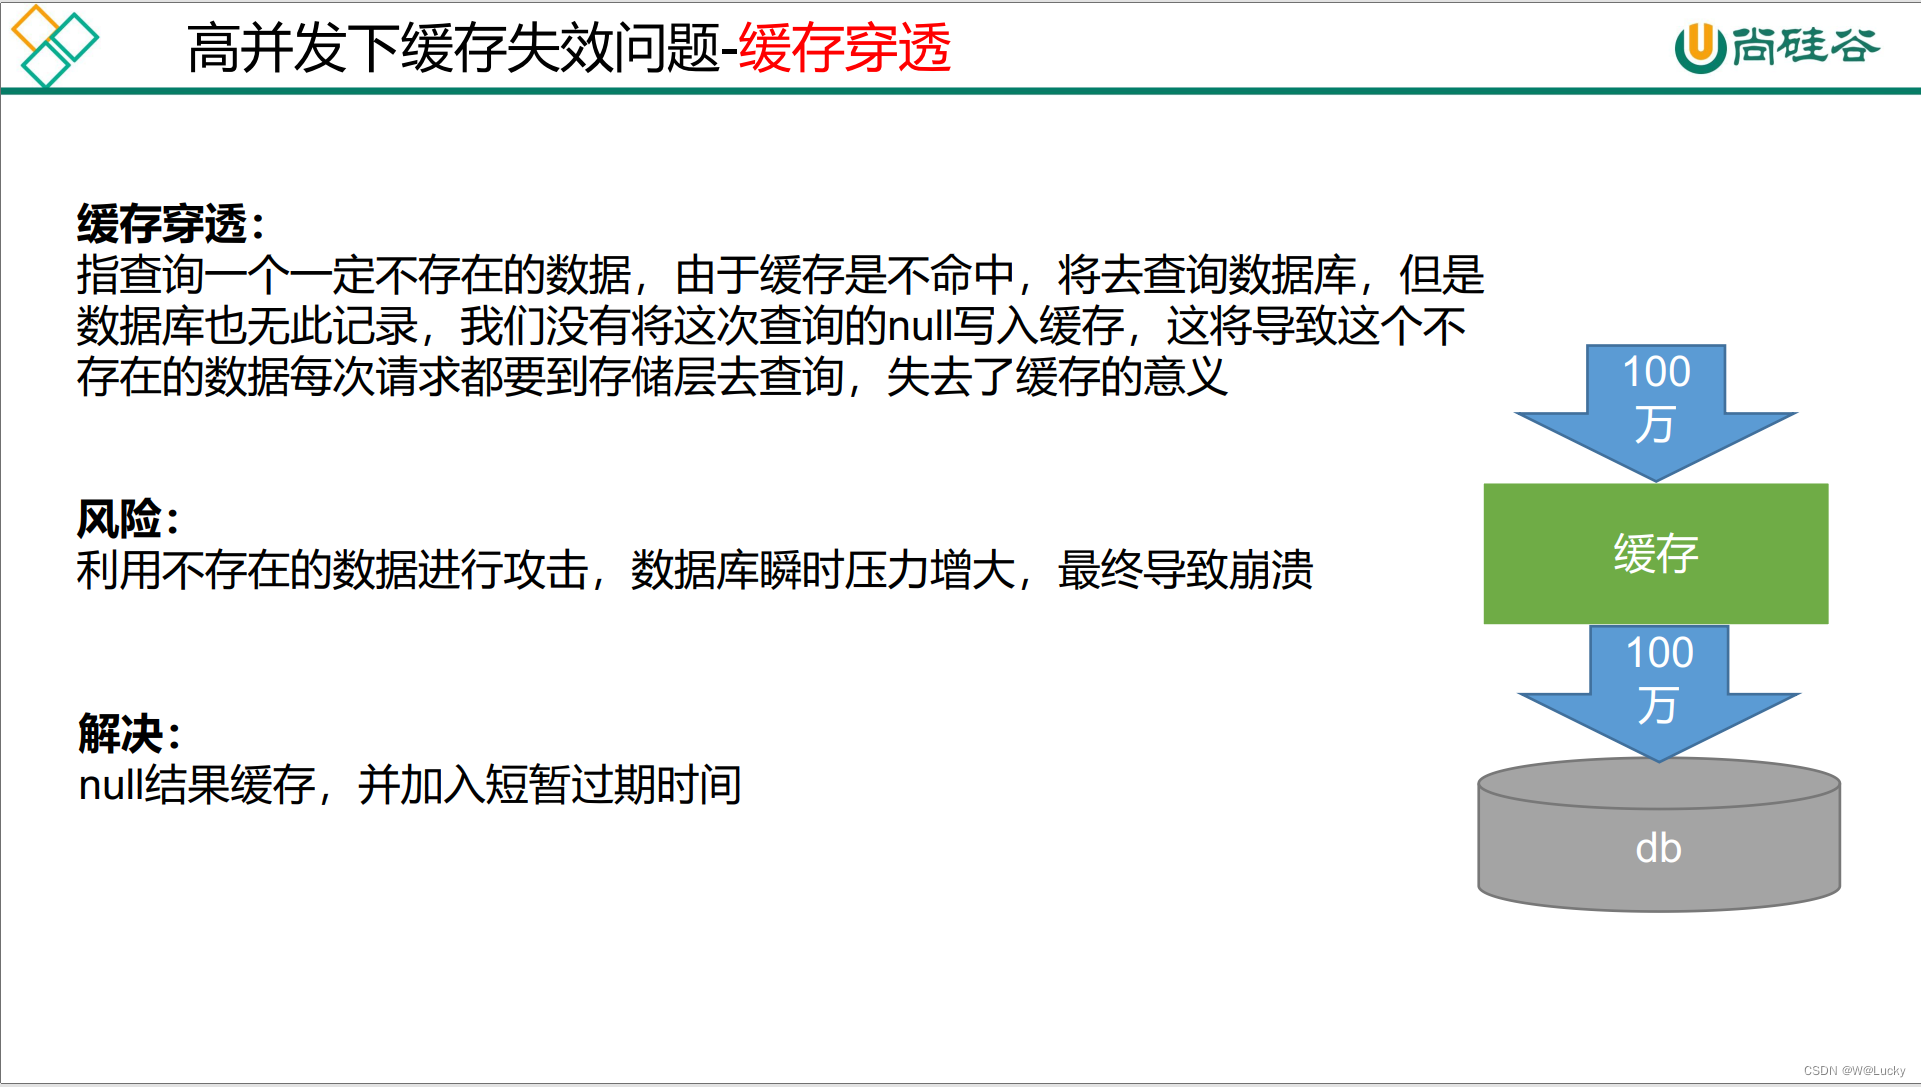
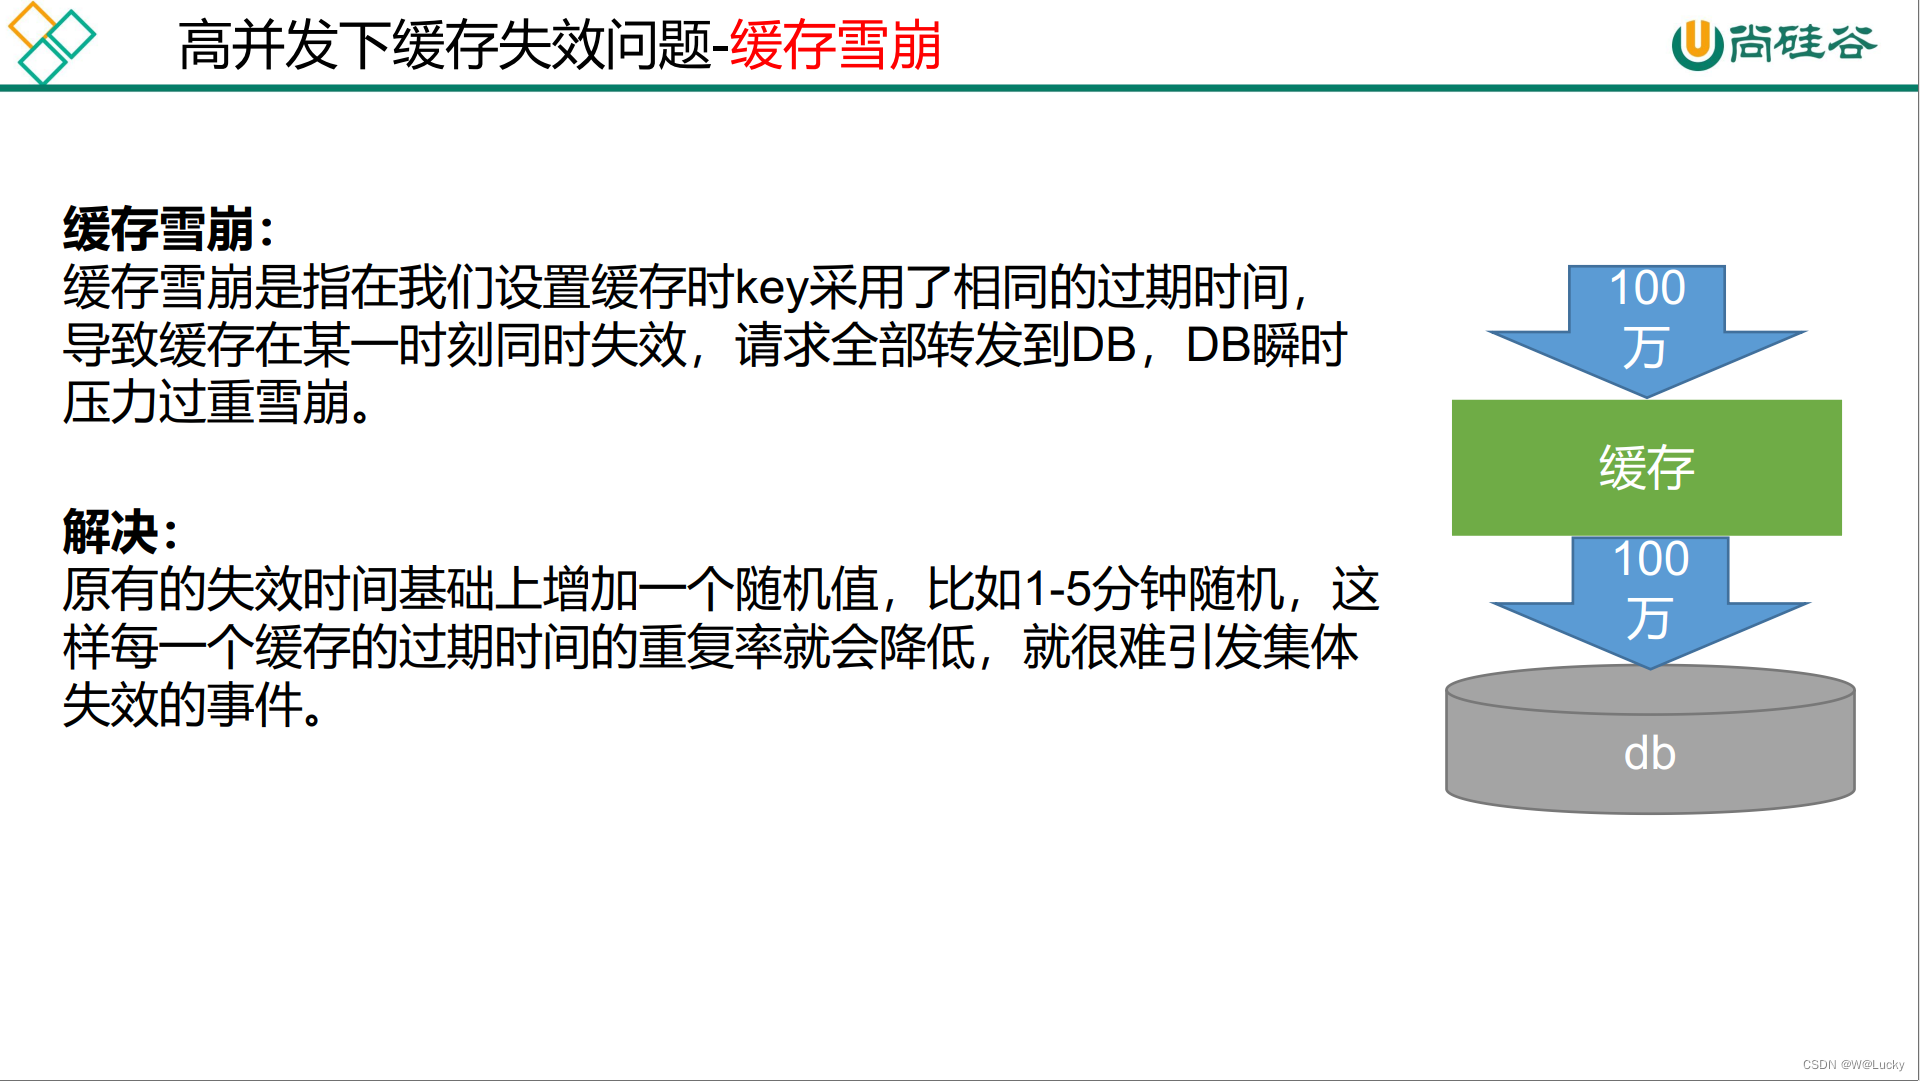
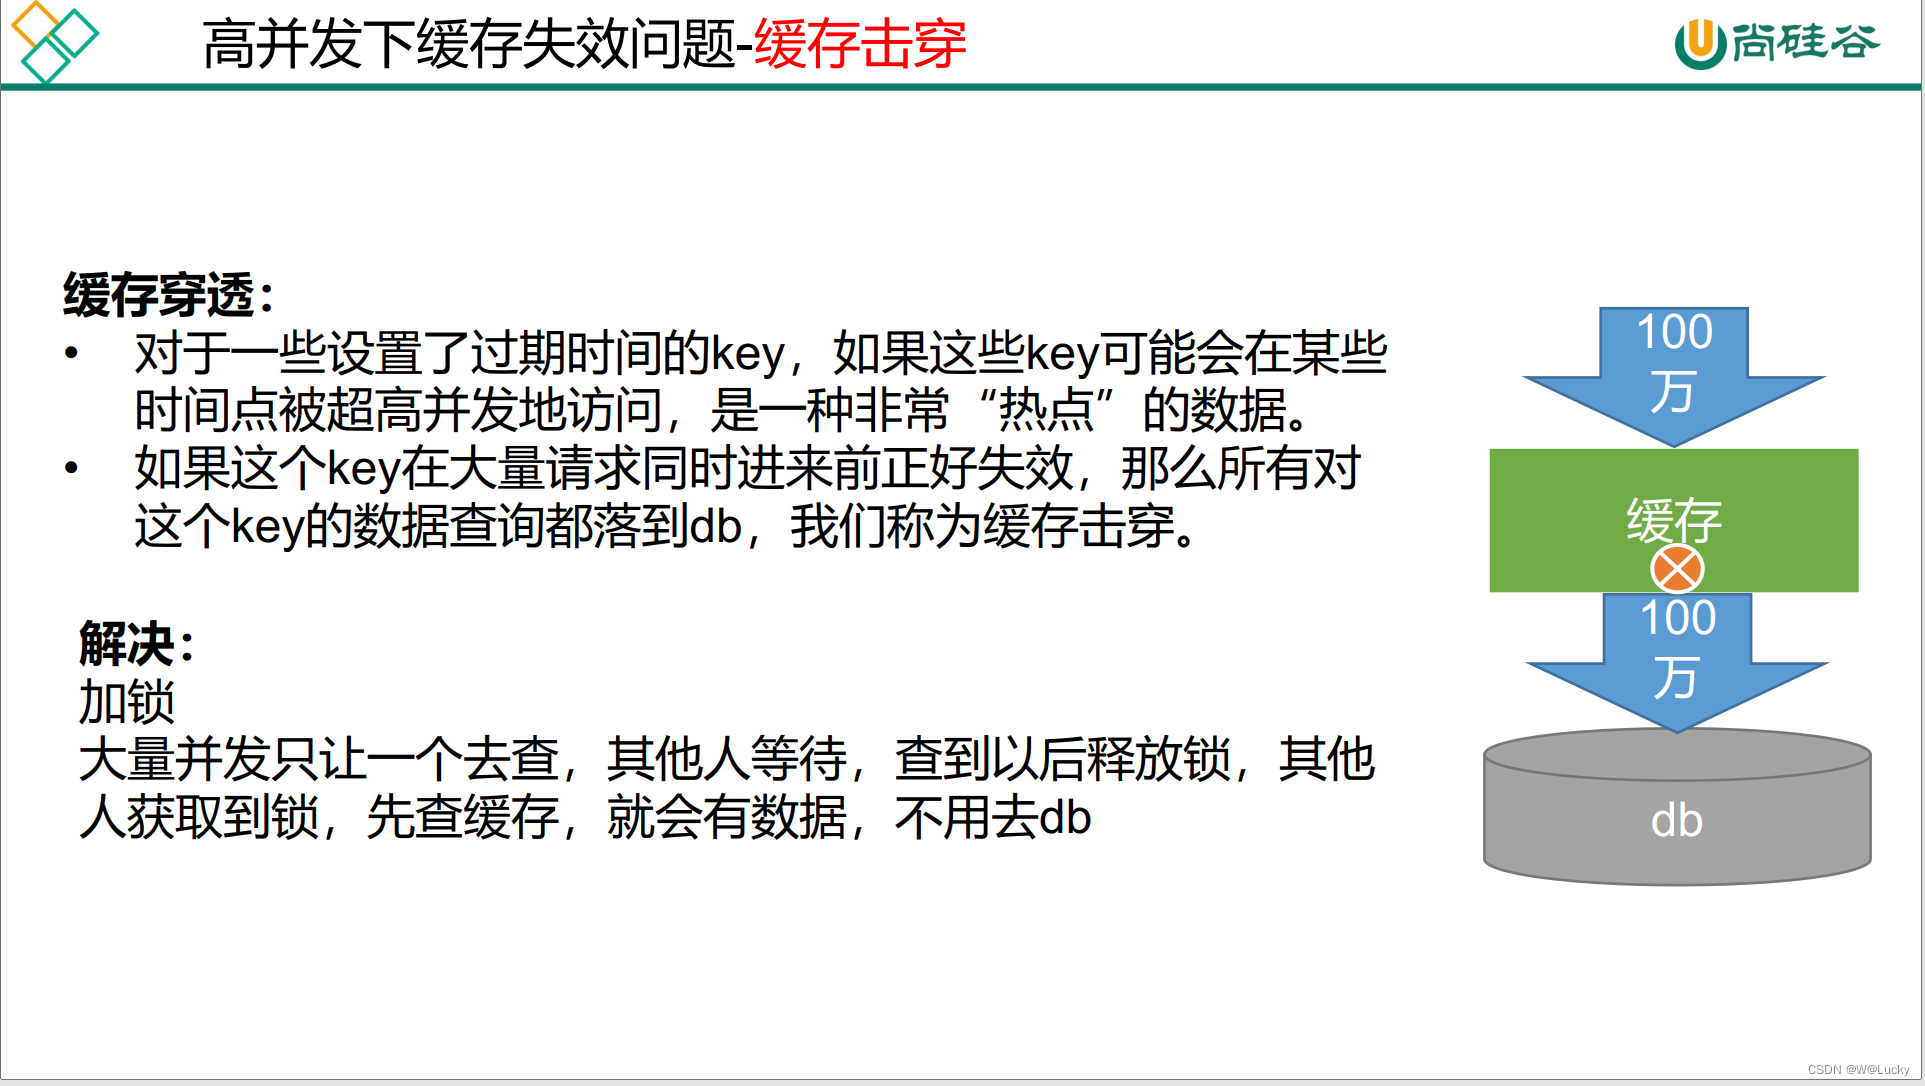
5.1.7 本地锁synchronized----加锁解决缓存击穿问题
使用同步锁synchronized,代码改造如下:
@Override
    public Map<String, List<Catelog2Vo>> getCatalogJson() {
        // 给缓存中放json串,拿出json串,还能逆转为能用的对象类型【序列化、反序列化】

        /**
         * 1. 空结果缓存:解决缓存穿透
         * 2. 设置过期时间(加随机值):解决缓存雪崩
         * 3. 加锁:解决缓存击穿
         */

        // 1. 加入缓存逻辑,缓存中存的数据是json串
        // JSON跨语言,跨平台
        String catalogJson = redisTemplate.opsForValue().get("catalogJson");
        if(StringUtils.isEmpty(catalogJson)){
            System.out.println("缓存未命中....查询数据库...");
            // 2. 缓存中没有,查询数据库
            Map<String, List<Catelog2Vo>> catalogJsonFromDb = getCatalogJsonFromDb();
            // 3. 查询到的数据再放入缓存,将对象转化为json放到缓存中
            String s = JSON.toJSONString(catalogJsonFromDb);
            redisTemplate.opsForValue().set("catalogJson",s);
            return catalogJsonFromDb;
        }
        System.out.println("缓存命中....直接返回...");
        // 转化为指定对象 复杂类型使用TypeReference,TypeReference对应方法是受保护的以匿名内部类的方式使用
        Map<String, List<Catelog2Vo>> result = JSON.parseObject(catalogJson, new TypeReference<Map<String, List<Catelog2Vo>>>() {});
        return result;
    }
// 从数据库查询并封装分类数据
public Map<String, List<Catelog2Vo>> getCatalogJsonFromDb() {
// 只要是同一把锁,就能锁住需要这个锁的所有线程
// 1.synchronized (this):SpringBoot所有组件容器都是单例的。
// todo 本地锁:synchronized、JUC(Lock)
synchronized (this){
// 得到锁之后,应该再去缓存中确定一次,如果没有才需要继续查询
String catalogJson = redisTemplate.opsForValue().get("catalogJson");
if(!StringUtils.isEmpty(catalogJson)){
// 缓存不为null直接返回
Map<String, List<Catelog2Vo>> result = JSON.parseObject(catalogJson, new TypeReference<Map<String, List<Catelog2Vo>>>() {});
return result;
}
System.out.println("查询了数据库....");
/**
* 1. 将数据库的多次查询变为一次
*/
List<CategoryEntity> selectList = this.baseMapper.selectList(null);
// 查出所有的一级分类
List<CategoryEntity> level1Category = getParent_cid(selectList,0L);
// 封装数据
Map<String, List<Catelog2Vo>> collect = level1Category.stream().collect(Collectors.toMap(k -> k.getCatId().toString(), v -> {
// 1. 查询一级分类下的所有二级分类
List<CategoryEntity> categoryEntities = getParent_cid(selectList,v.getCatId());
List<Catelog2Vo> level2Category = null;
if (categoryEntities != null && categoryEntities.size() > 0) {
level2Category = categoryEntities.stream().map(l2 -> {
Catelog2Vo catelog2Vo = new Catelog2Vo(v.getCatId().toString(), null, l2.getCatId().toString(), l2.getName());
// 2. 找二级分类下的所有三级分类
List<CategoryEntity> level3Category = getParent_cid(selectList,l2.getCatId());
if (level3Category != null && level3Category.size() > 0) {
List<Catelog2Vo.Catelog3Vo> catelog3Vos = level3Category.stream().map(l3 -> {
// 封装成指定格式
Catelog2Vo.Catelog3Vo catelog3Vo = new Catelog2Vo.Catelog3Vo(l2.getCatId().toString(), l3.getCatId().toString(), l3.getName());
return catelog3Vo;
}).collect(Collectors.toList());
catelog2Vo.setCatalog3List(catelog3Vos);
}
return catelog2Vo;
}).collect(Collectors.toList());
}
return level2Category;
}));
return collect;
}
}注意:在单机情况下使用synchronized加锁是可以的,本地锁只能锁住当前线程,分布式情况下需要分布式锁。
5.1.8 本地锁时序问题
问题:加锁没有完全锁住线程线程
对通过synchronized加锁后的三级分类数据获取,发现存在超过一次的查询数据库。
原因:当缓存中没有数据时,一个线程去查询数据库,查询完数据库后释放锁,还没有将数据放到缓存中,下一个线程获得锁发现缓存中没有数据进行再次查询,所以会打印多次 查询了数据库....。
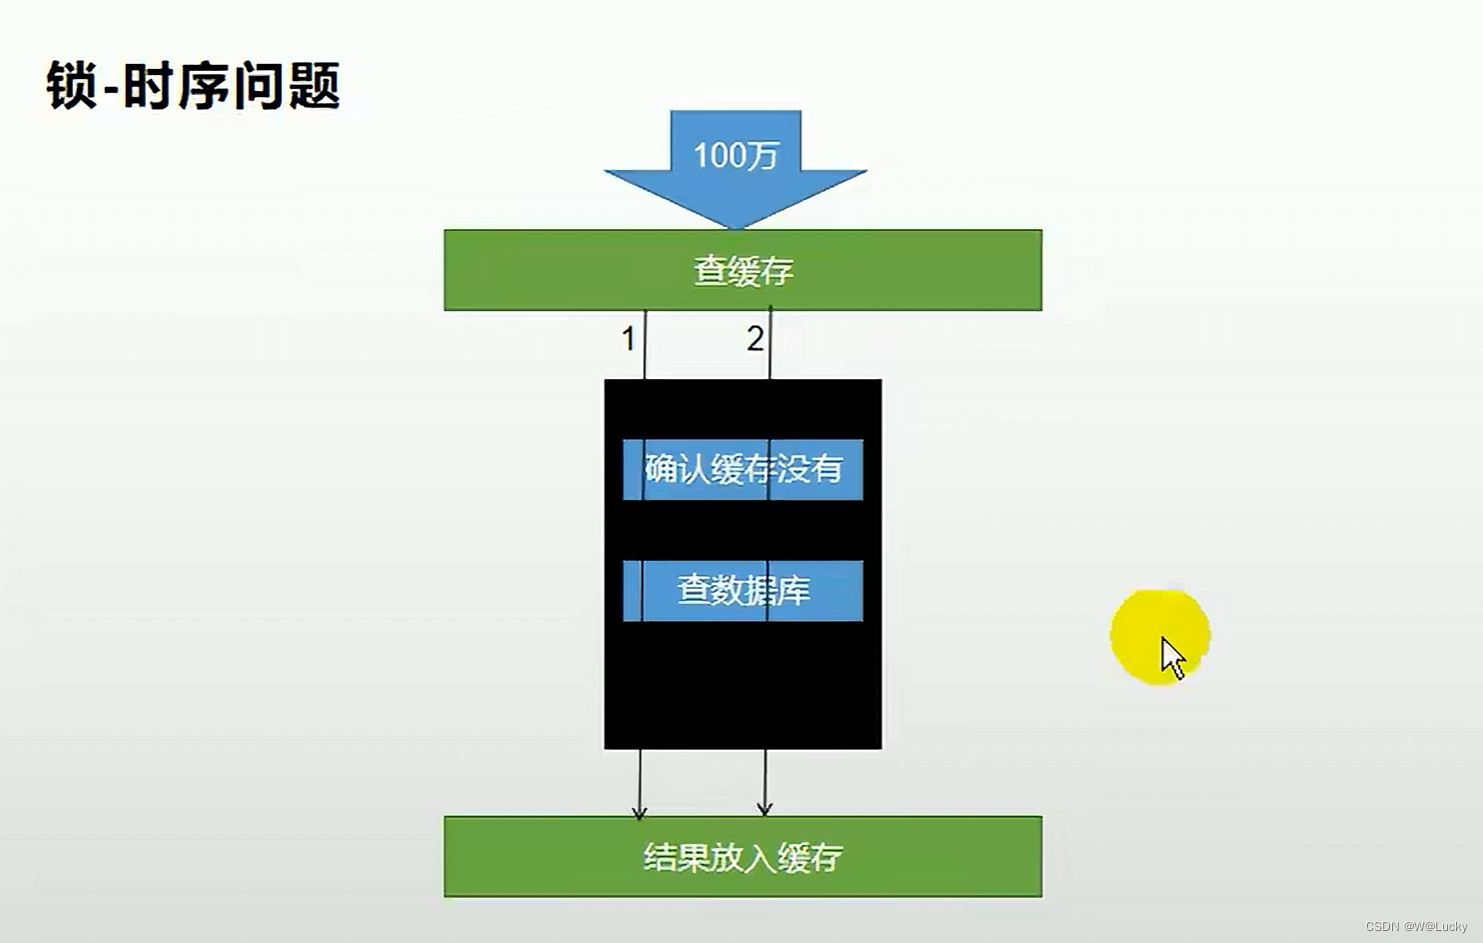
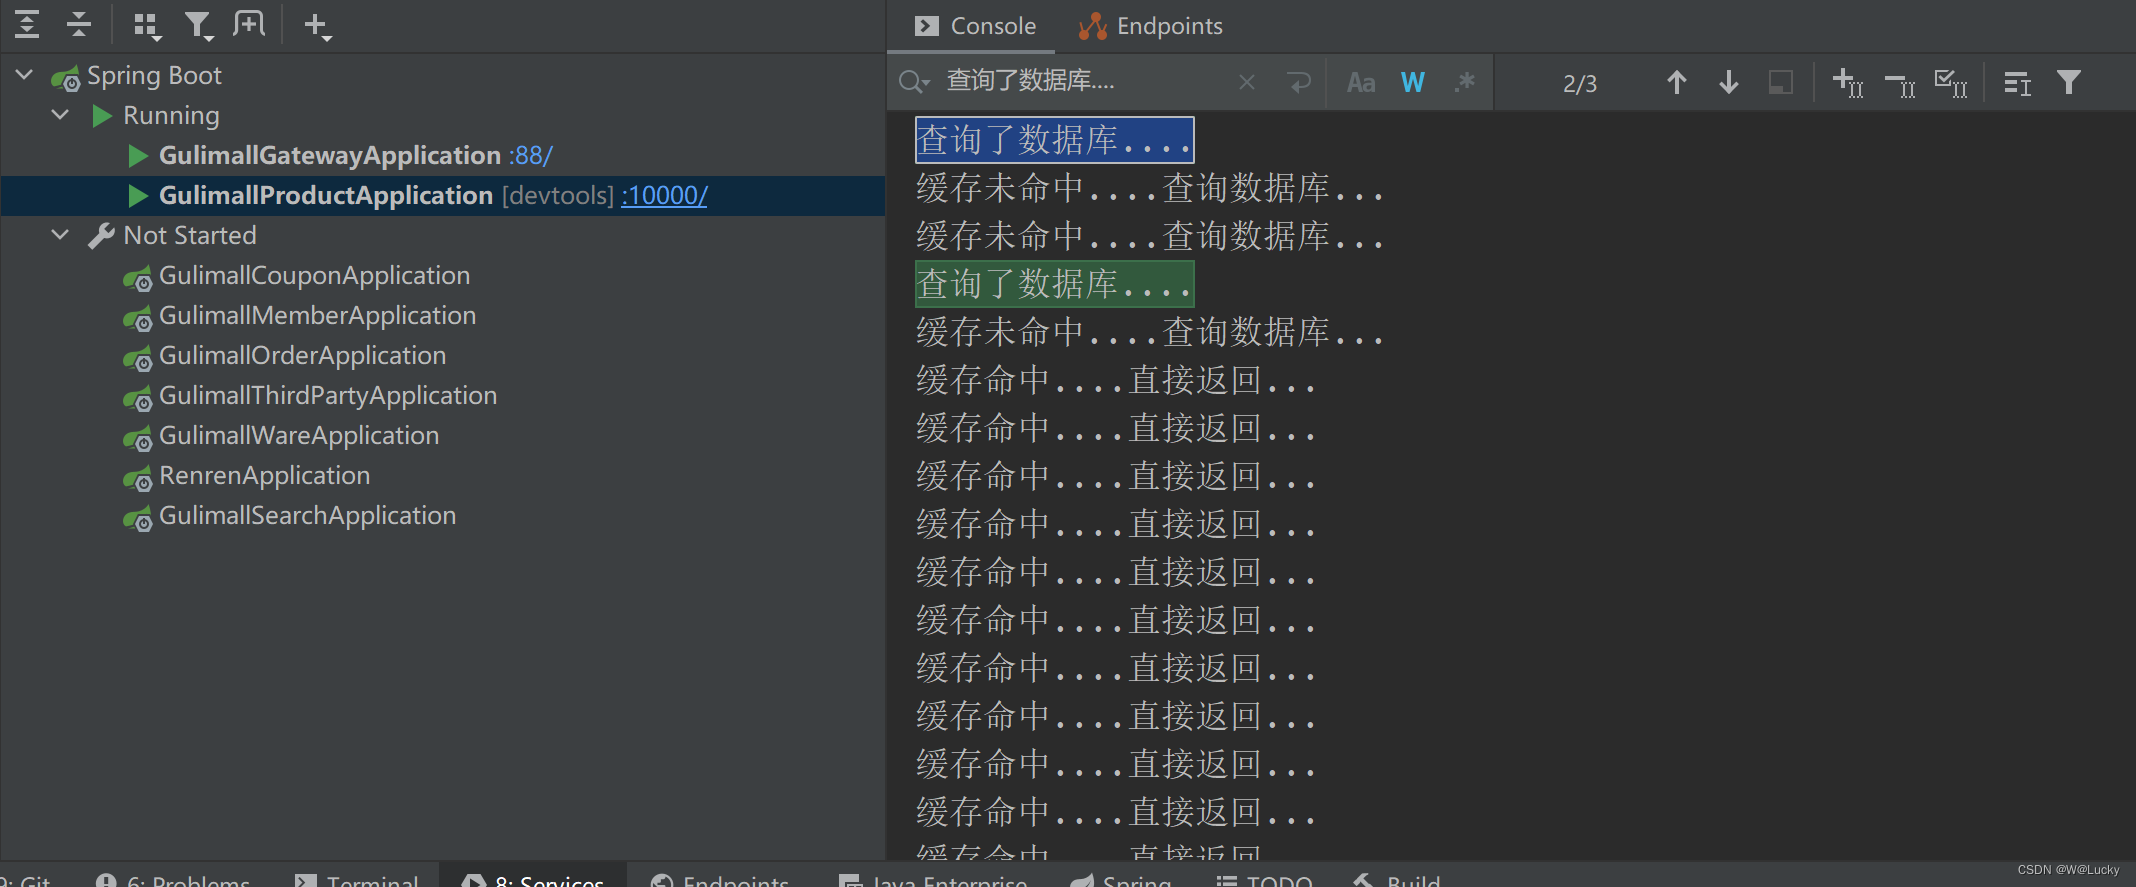
解决方案:将结果放入缓存放在锁中
保证查询数据库和放入缓存的原子性。
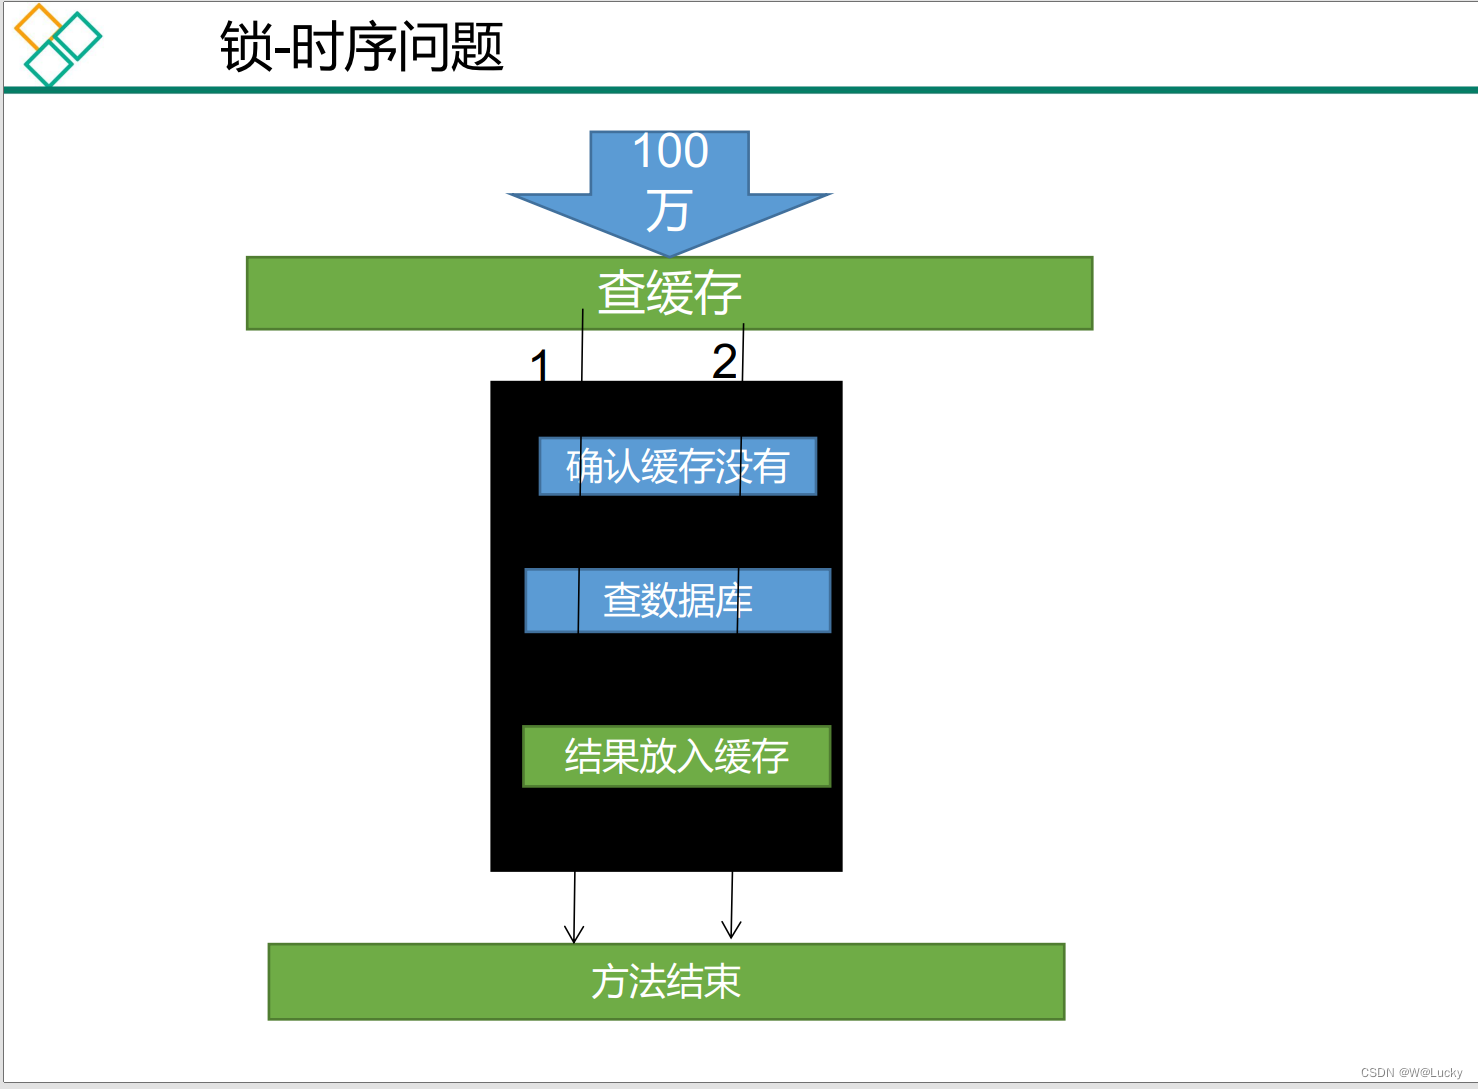
代码优化:
@Override
public Map<String, List<Catelog2Vo>> getCatalogJson() {
    // 给缓存中放json串,拿出json串,还能逆转为能用的对象类型【序列化、反序列化】

    /**
     * 1. 空结果缓存:解决缓存穿透
     * 2. 设置过期时间(加随机值):解决缓存雪崩
     * 3. 加锁:解决缓存击穿
     */

    // 1. 加入缓存逻辑,缓存中存的数据是json串
    // JSON跨语言,跨平台
    String catalogJson = redisTemplate.opsForValue().get("catalogJson");
    if(StringUtils.isEmpty(catalogJson)){
        System.out.println("缓存未命中....查询数据库...");
        // 2. 缓存中没有,查询数据库
        Map<String, List<Catelog2Vo>> catalogJsonFromDb = getCatalogJsonFromDb();
        // 3. 查询到的数据再放入缓存,将对象转化为json放到缓存中

        return catalogJsonFromDb;
    }
    System.out.println("缓存命中....直接返回...");
    // 转化为指定对象 复杂类型使用TypeReference,TypeReference对应方法是受保护的以匿名内部类的方式使用
    Map<String, List<Catelog2Vo>> result = JSON.parseObject(catalogJson, new TypeReference<Map<String, List<Catelog2Vo>>>() {});
    return result;
}

// 从数据库查询并封装分类数据
public Map<String, List<Catelog2Vo>> getCatalogJsonFromDb() {
    // 只要是同一把锁,就能锁住需要这个锁的所有线程
    // 1.synchronized (this):SpringBoot所有组件容器都是单例的。
    // todo 本地锁:synchronized、JUC(Lock)
    synchronized (this){
        // 得到锁之后,应该再去缓存中确定一次,如果没有才需要继续查询
        String catalogJson = redisTemplate.opsForValue().get("catalogJson");
        if(!StringUtils.isEmpty(catalogJson)){
            // 缓存不为null直接返回
            Map<String, List<Catelog2Vo>> result = JSON.parseObject(catalogJson, new TypeReference<Map<String, List<Catelog2Vo>>>() {});
            return result;
        }
        System.out.println("查询了数据库....");
        /**
         * 1. 将数据库的多次查询变为一次
         */
        List<CategoryEntity> selectList = this.baseMapper.selectList(null);

        // 查出所有的一级分类
        List<CategoryEntity> level1Category = getParent_cid(selectList,0L);
        // 封装数据
        Map<String, List<Catelog2Vo>> collect = level1Category.stream().collect(Collectors.toMap(k -> k.getCatId().toString(), v -> {
            // 1. 查询一级分类下的所有二级分类
            List<CategoryEntity> categoryEntities = getParent_cid(selectList,v.getCatId());
            List<Catelog2Vo> level2Category = null;
            if (categoryEntities != null && categoryEntities.size() > 0) {
                level2Category = categoryEntities.stream().map(l2 -> {
                    Catelog2Vo catelog2Vo = new Catelog2Vo(v.getCatId().toString(), null, l2.getCatId().toString(), l2.getName());
                    // 2. 找二级分类下的所有三级分类
                    List<CategoryEntity> level3Category = getParent_cid(selectList,l2.getCatId());
                    if (level3Category != null && level3Category.size() > 0) {
                        List<Catelog2Vo.Catelog3Vo> catelog3Vos = level3Category.stream().map(l3 -> {
                            // 封装成指定格式
                            Catelog2Vo.Catelog3Vo catelog3Vo = new Catelog2Vo.Catelog3Vo(l2.getCatId().toString(), l3.getCatId().toString(), l3.getName());
                            return catelog3Vo;
                        }).collect(Collectors.toList());
                        catelog2Vo.setCatalog3List(catelog3Vos);
                    }
                    return catelog2Vo;
                }).collect(Collectors.toList());
            }
            return level2Category;
        }));
        String s = JSON.toJSONString(collect);
        redisTemplate.opsForValue().set("catalogJson",s);
        return collect;
    }

}
再次压测:(只有一次查询数据库)

5.1.9 本地锁在分布式下的问题
本地锁只能锁住当前线程。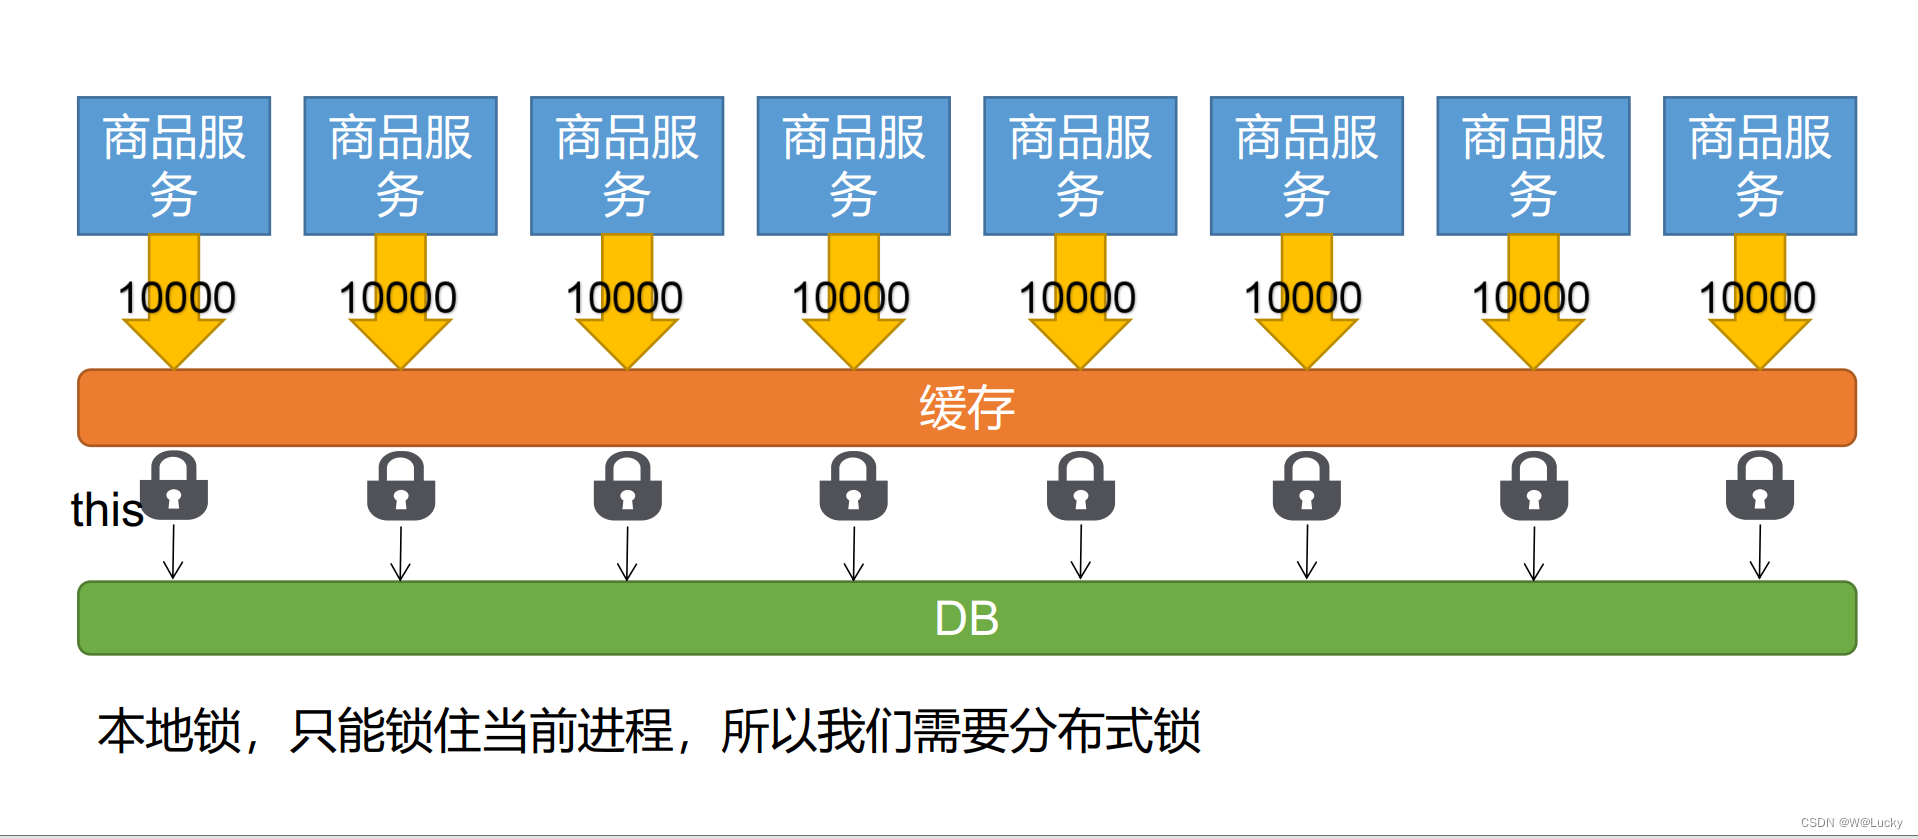
新增几台服务器,进行压测,观察本地所在分布式情况下的问题。
(1)新增端口为10001、10002、10003三台,加上10000总共四台;
(2)进行压测,通过nginx反向代理到网关,网关转发到商品服务,100个线程循环5次,100*5;
(3)观察压测结果。

结论:每个服务都对数据库进行了一次查询操作,得出结论本地锁只能锁本地服务。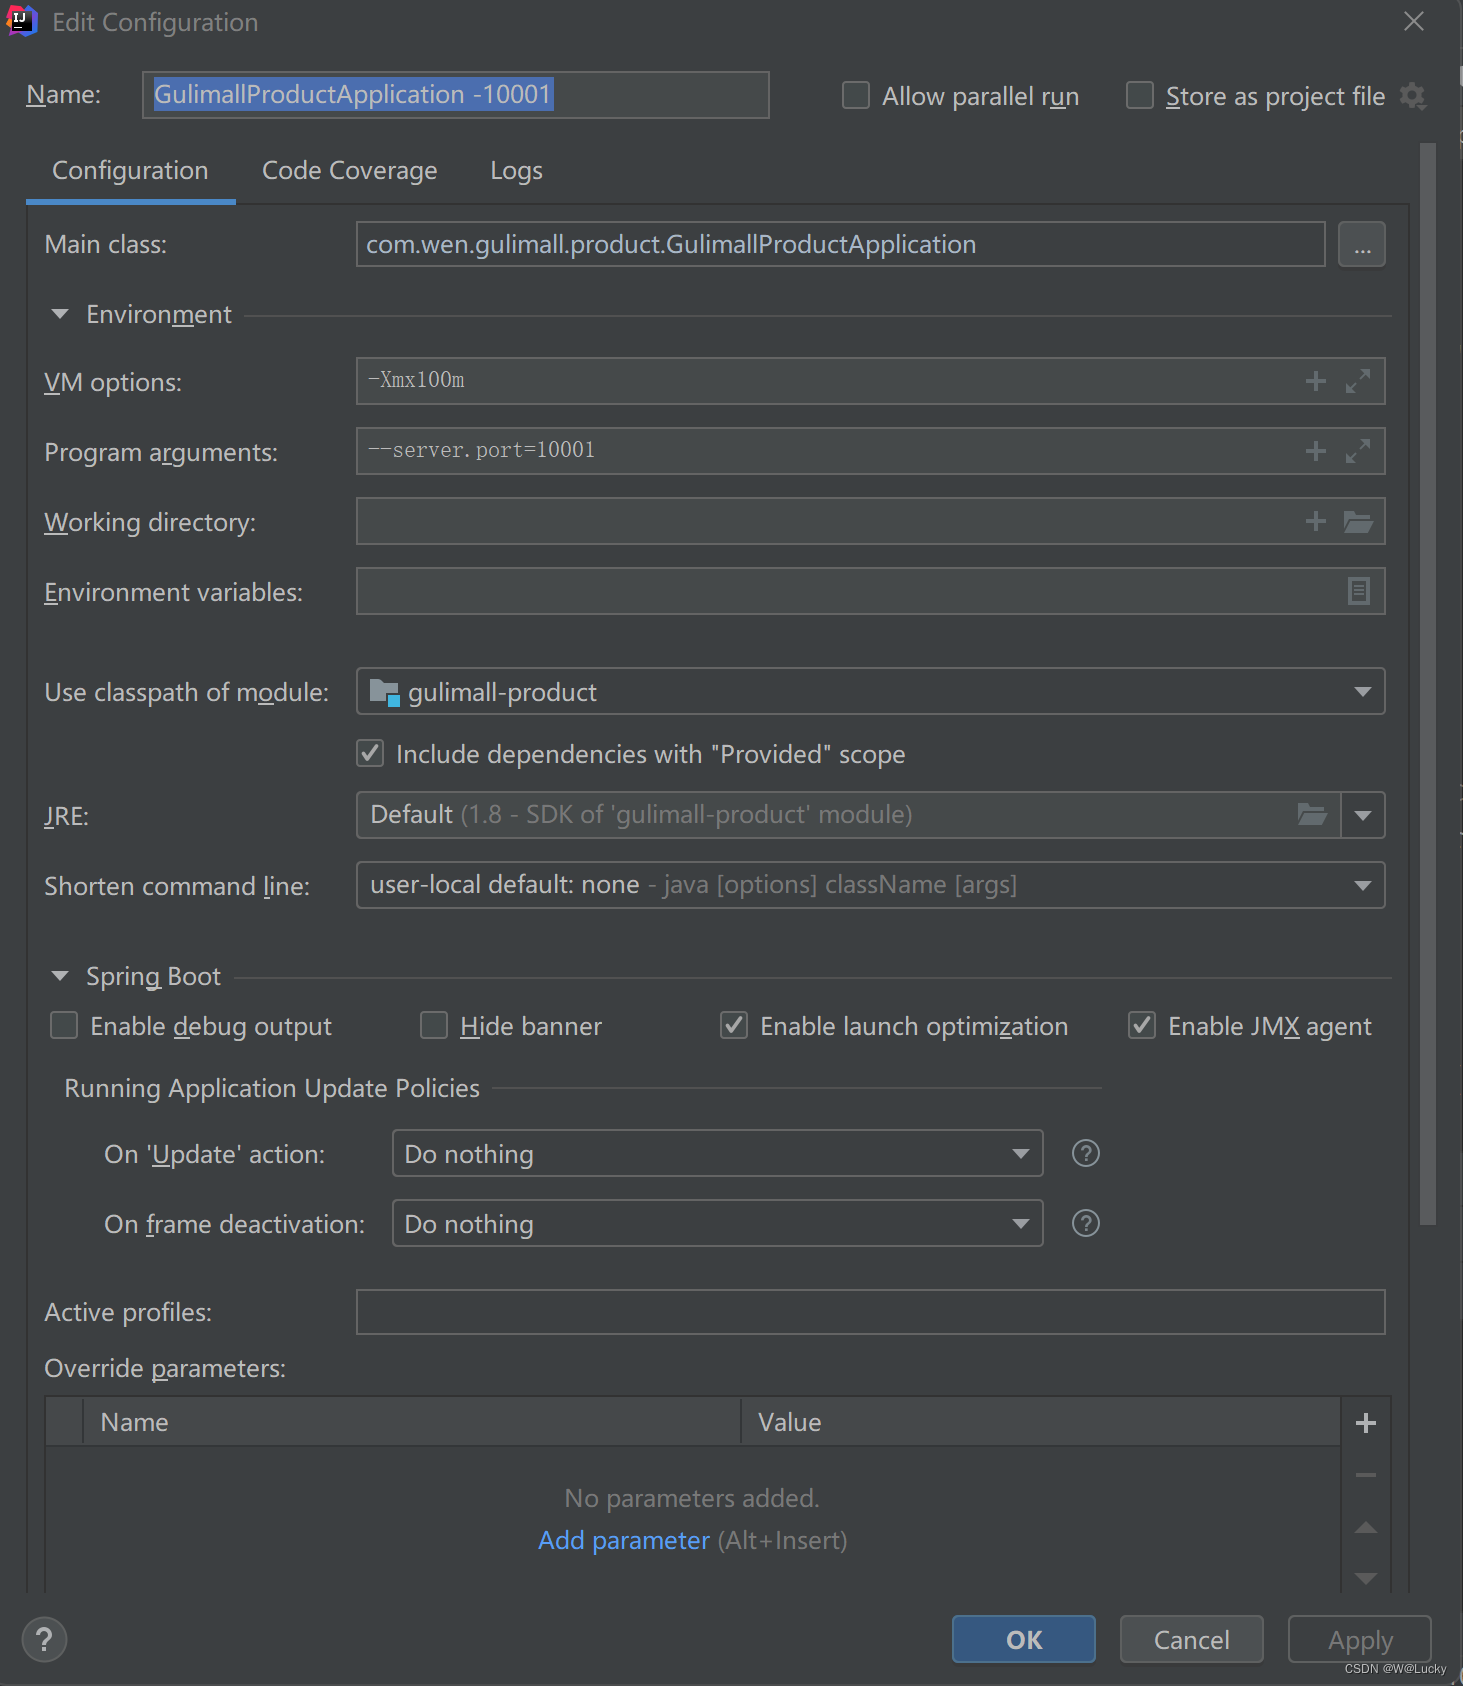
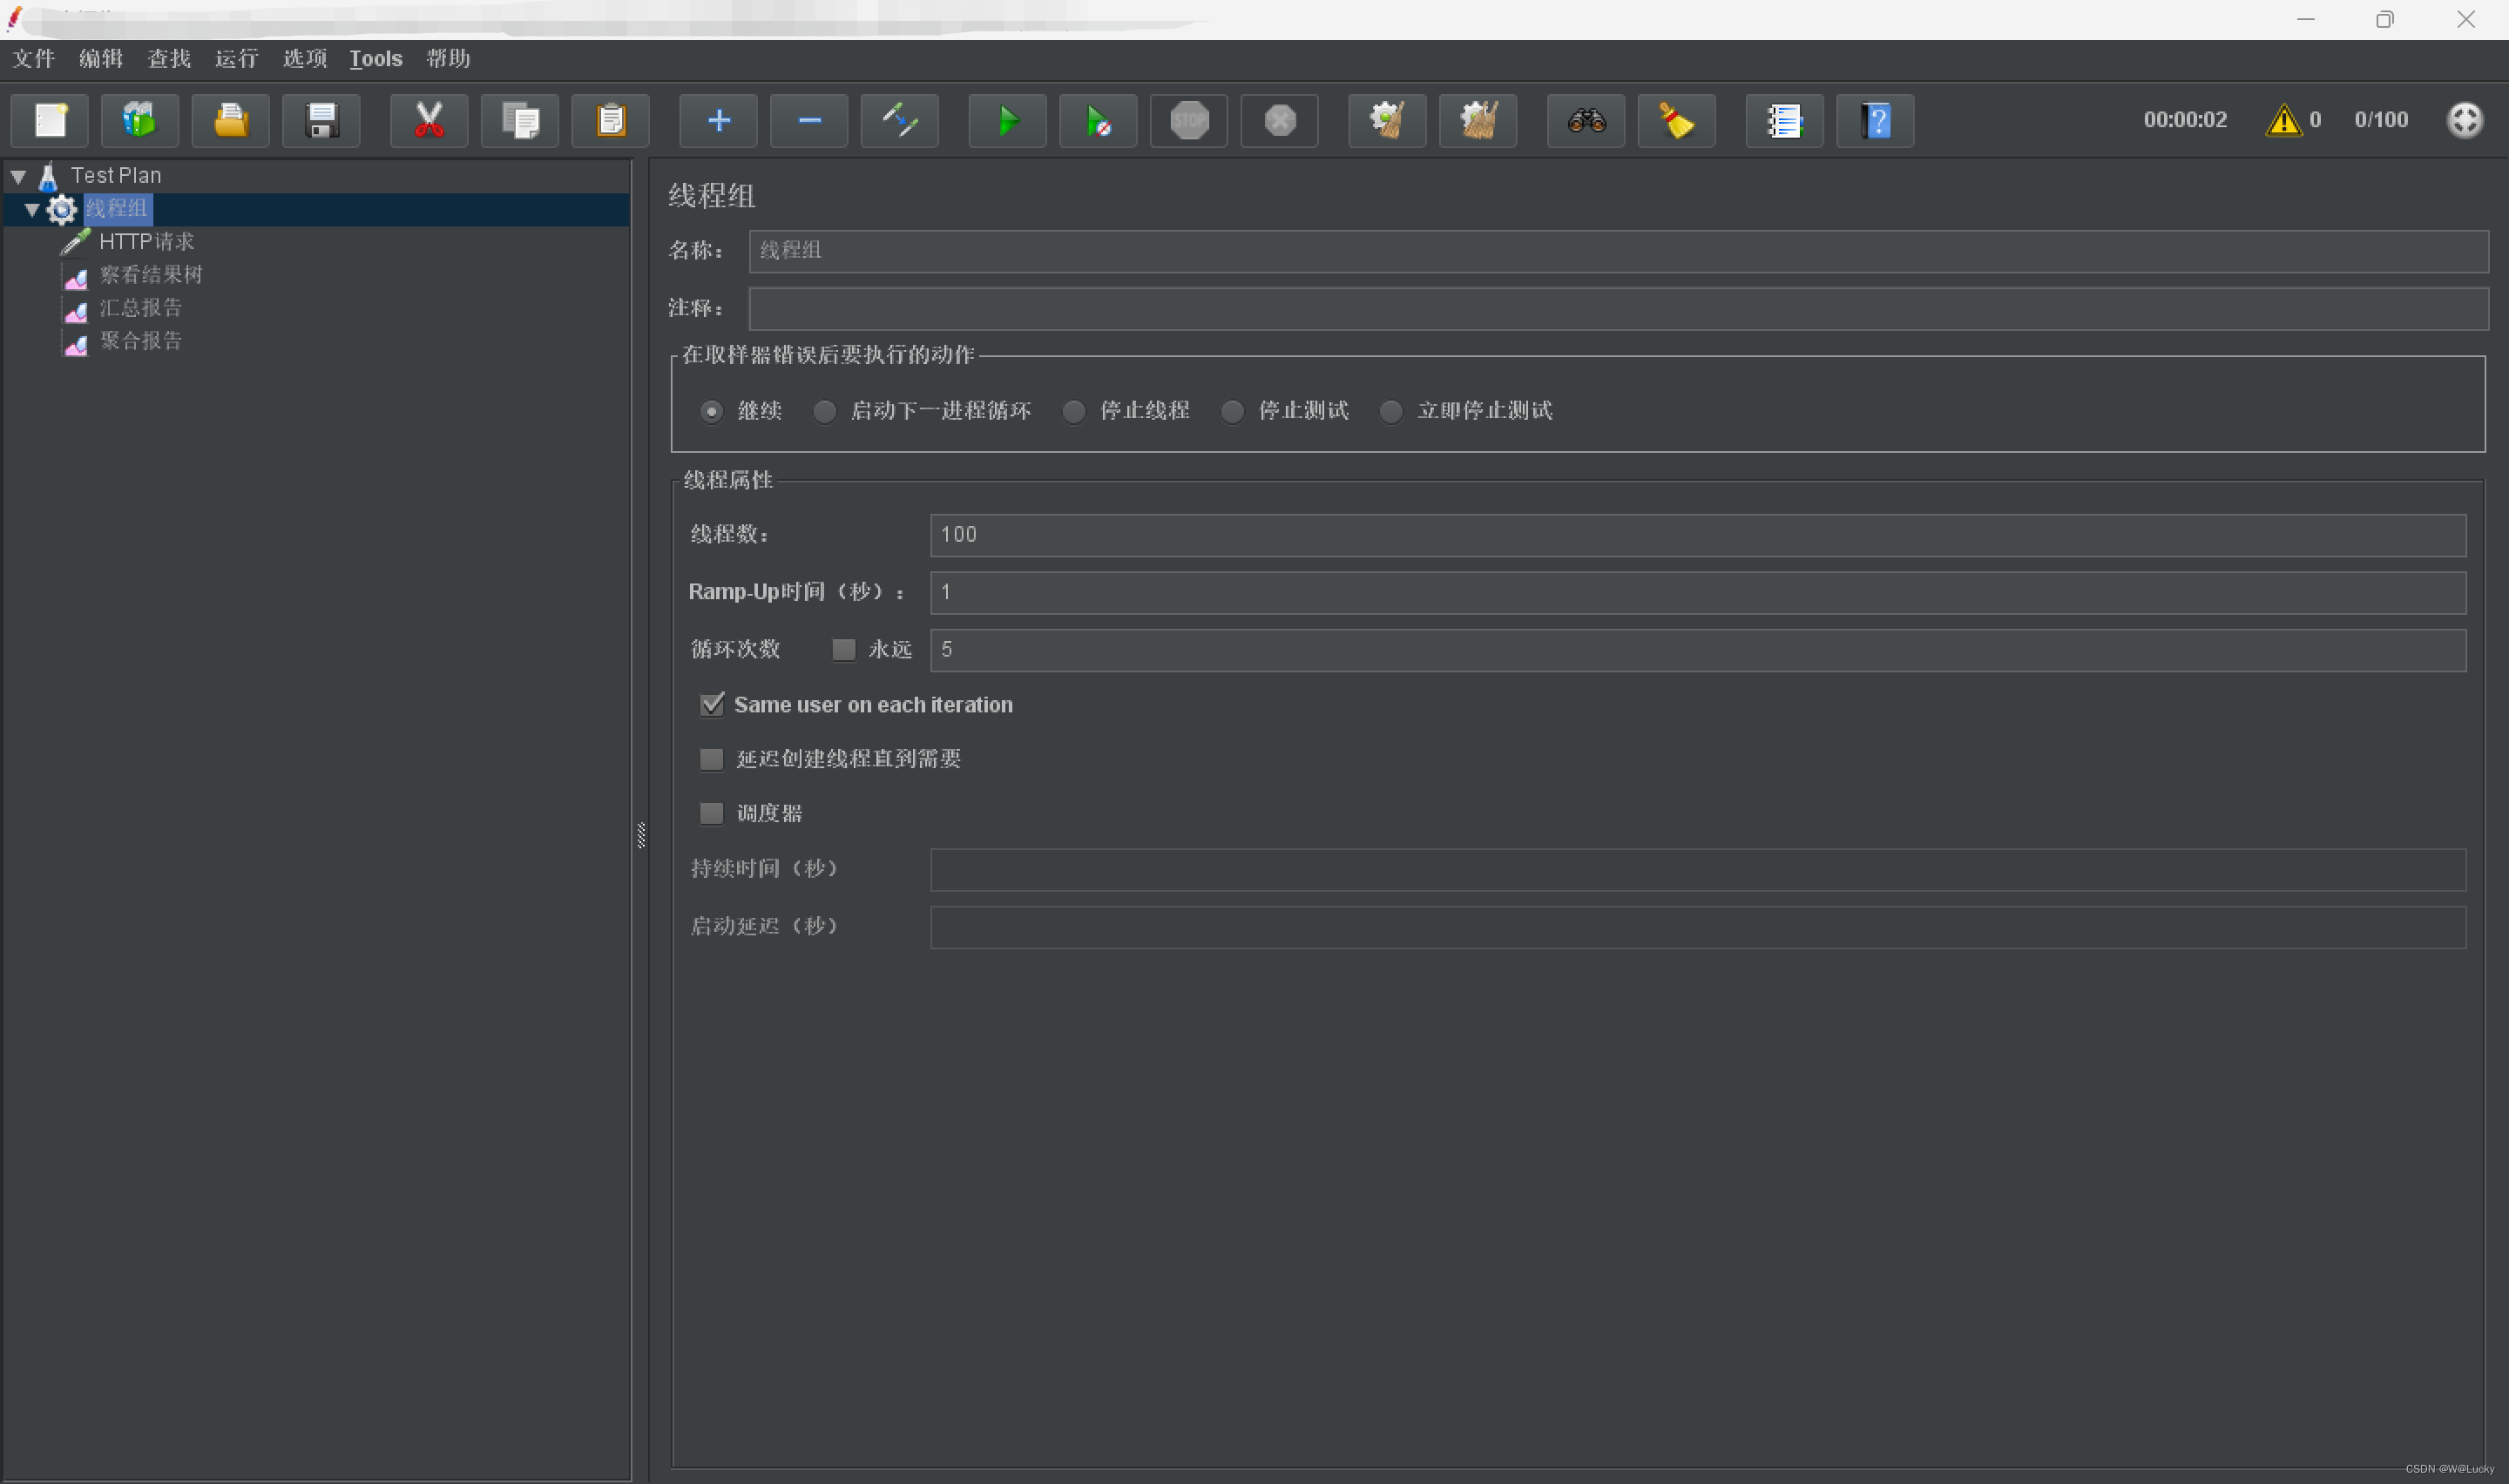
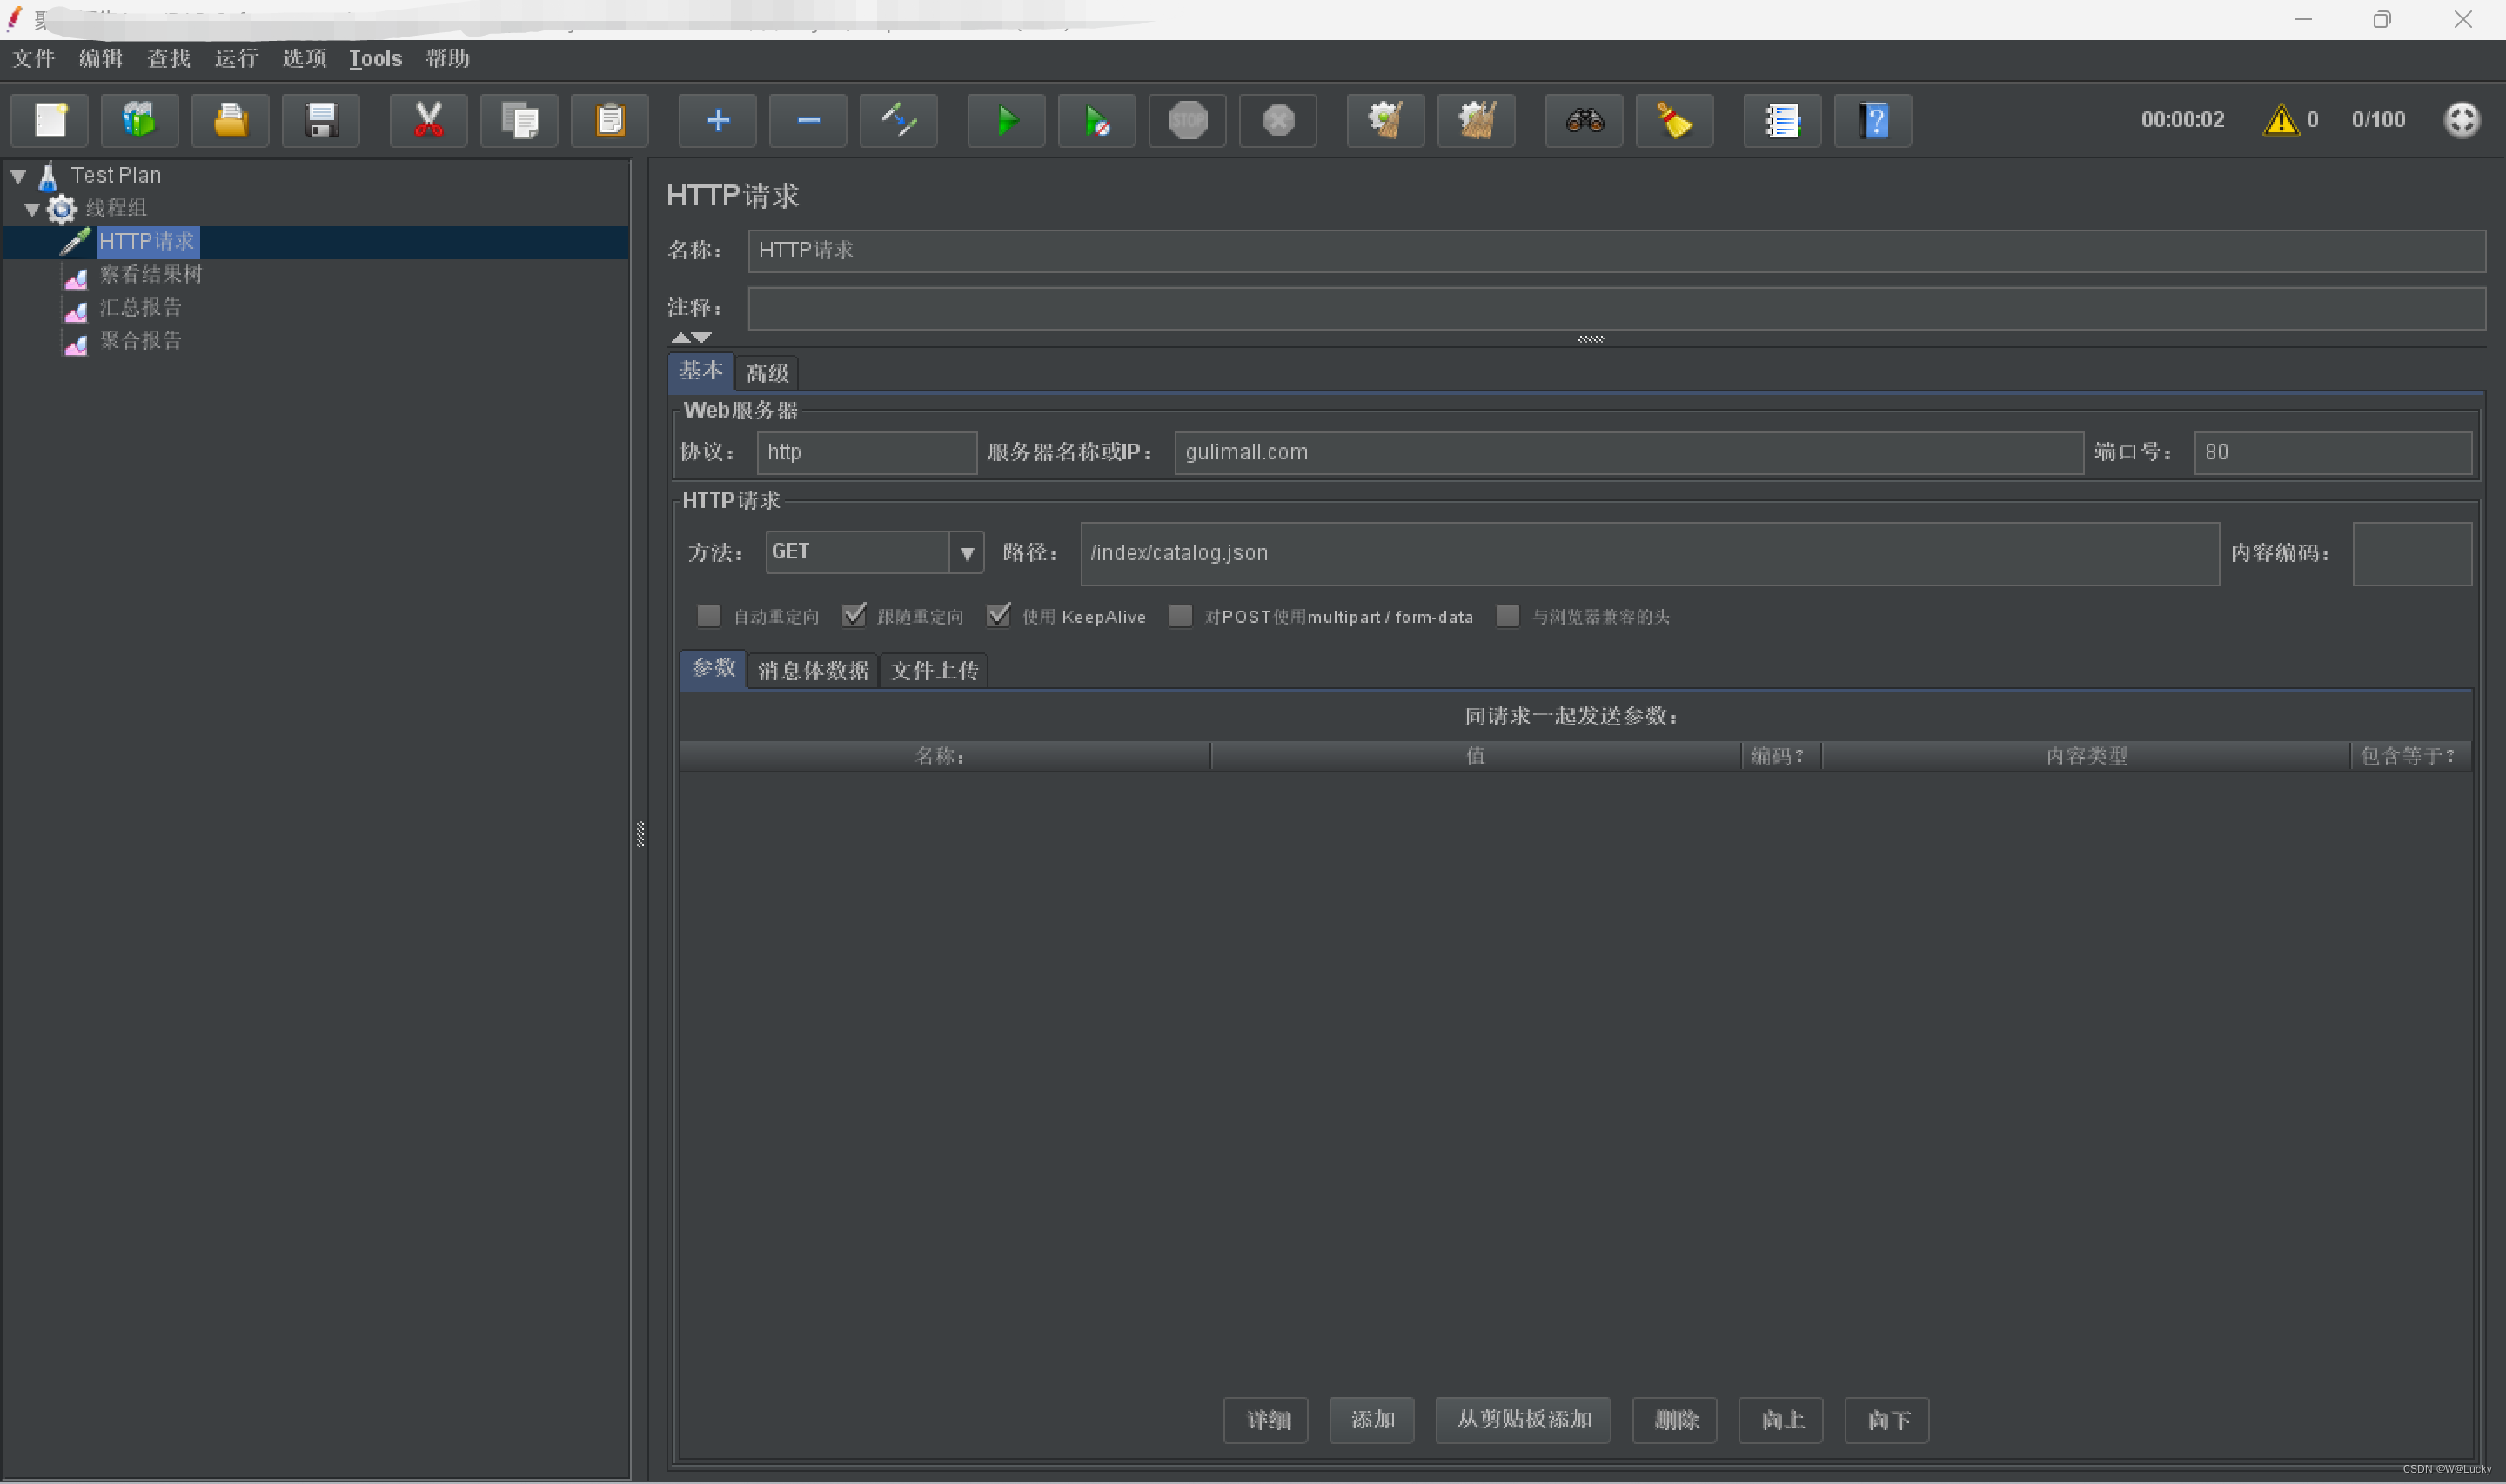


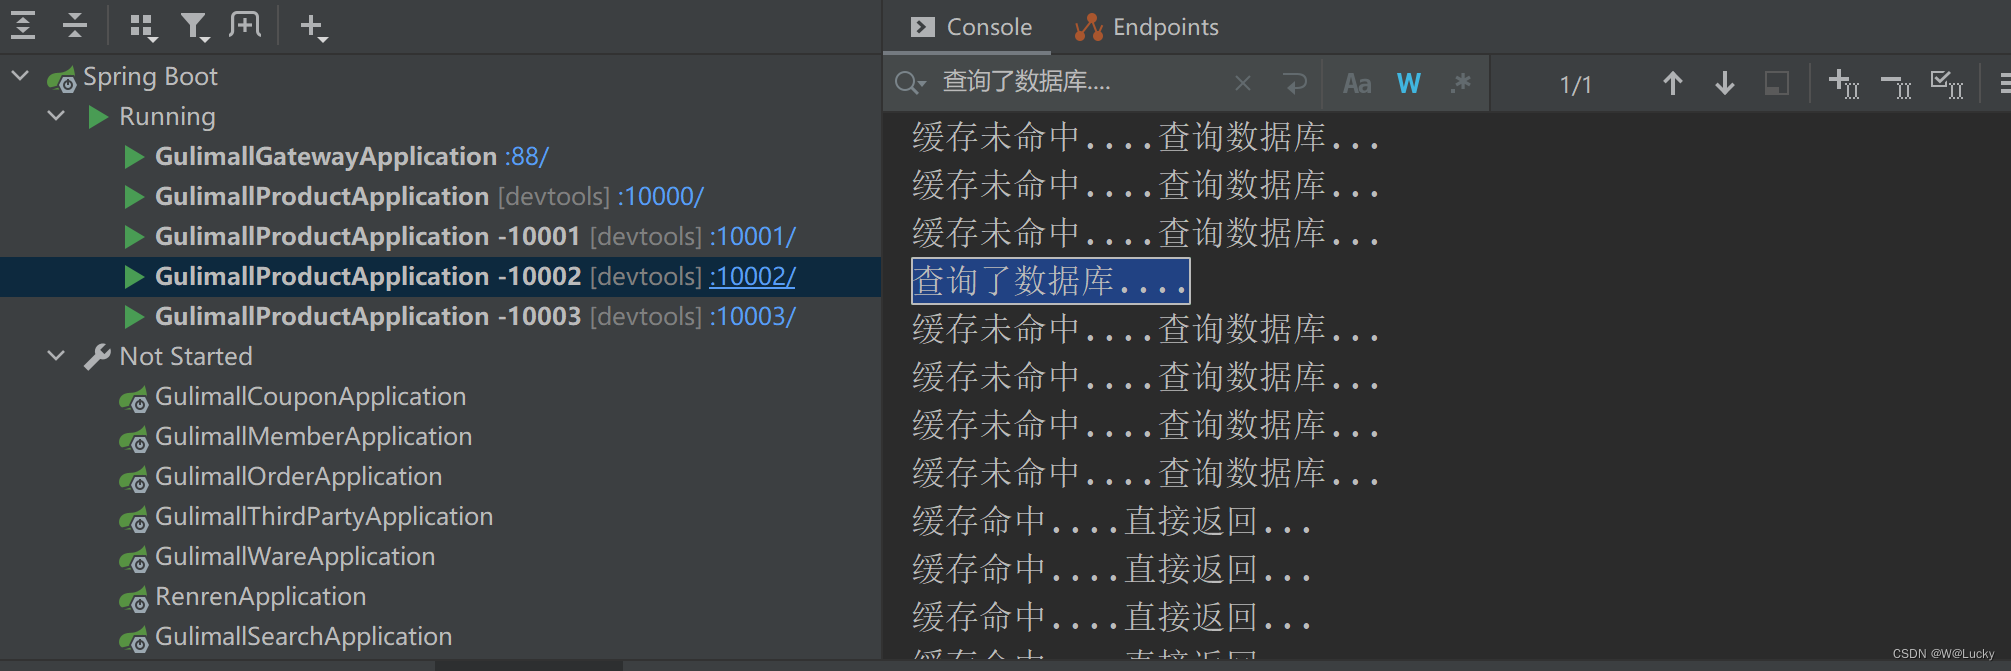

5.2 分布式锁
5.2.1 分布式锁原理与使用
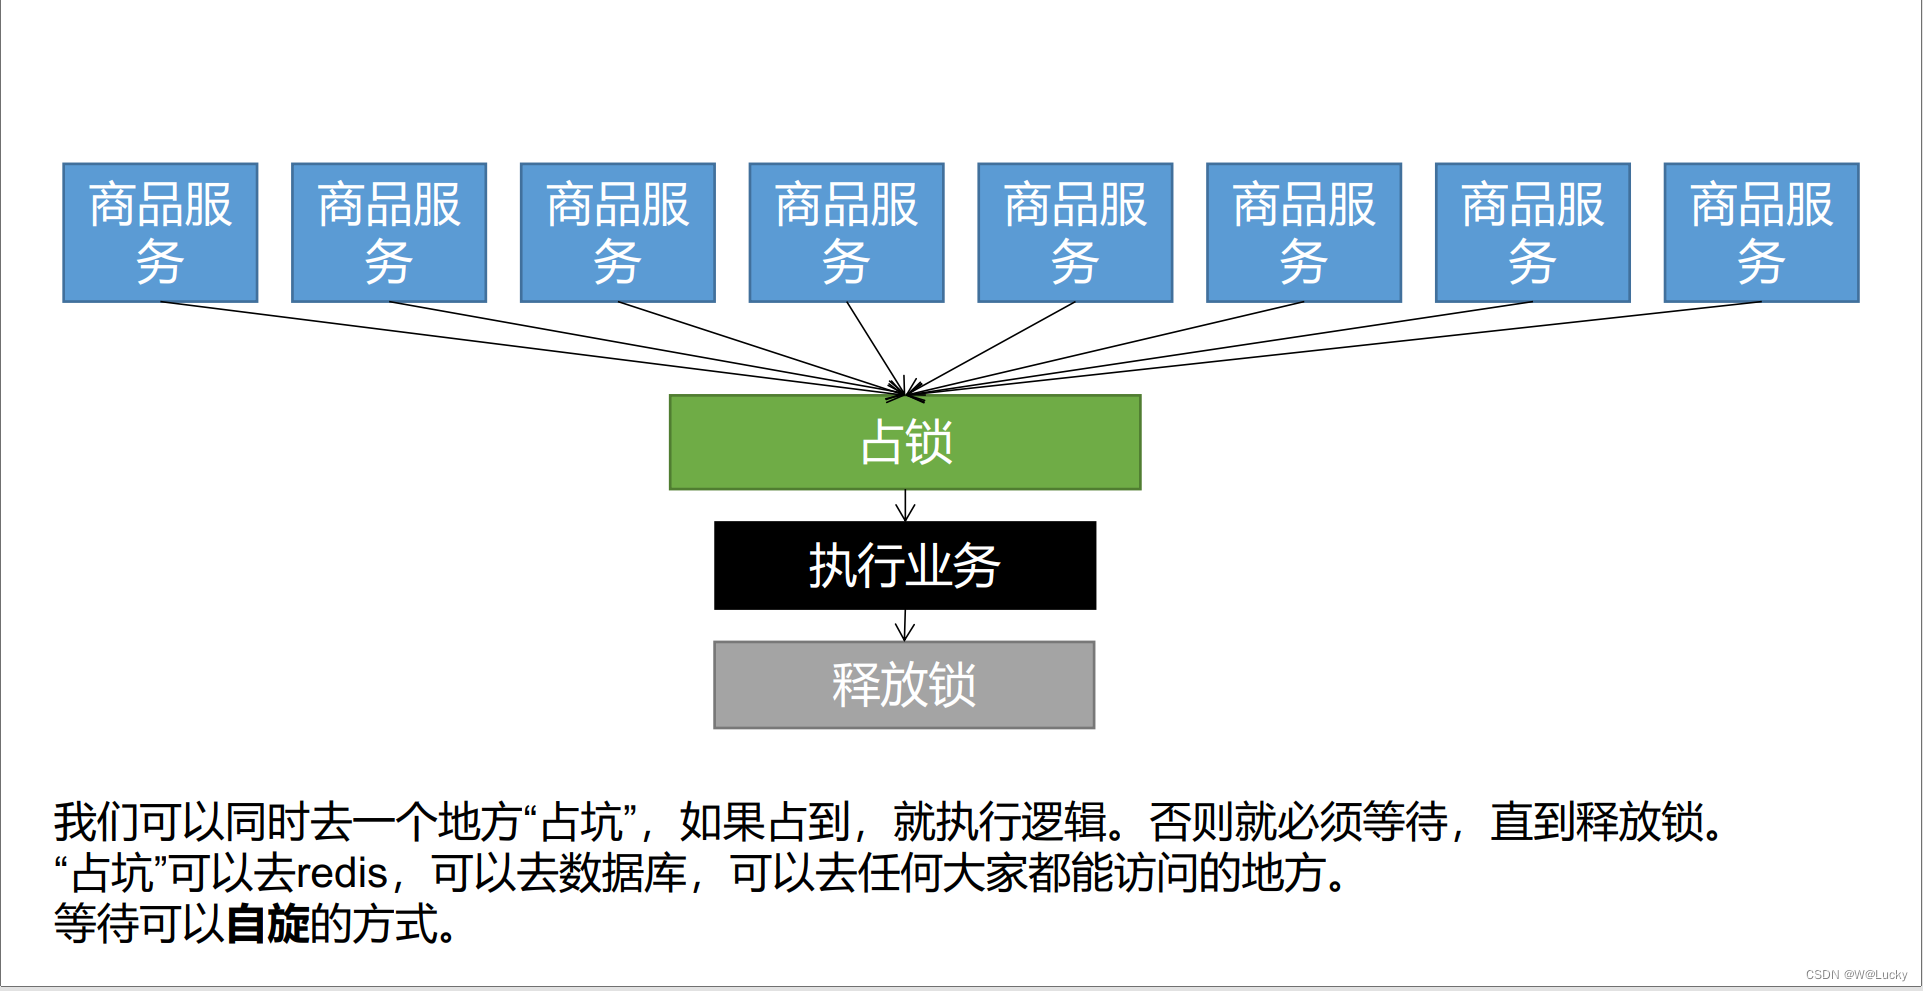 5.2.1.1 redis set NX命令实现占锁
使用redis set NX命令实现占锁
5.2.1.2 redis set NX命令测试,新增几个虚拟会话
set 命令 -- Redis中国用户组(CRUG)
分布式锁基于redis的set NX(只有键key不存在的时候才会设置key的值)命令来做的,这个命令是原子性的。// 进入redis命令行
docker exec -it redis redis-cli
// 测试set NX命令
set lock hahah NX
由上面的测试结果可知,只有第三个会话返回了OK,NX实现了原子加锁。5.2.1.3 分布式锁演进
5.2.1.3.1 分布式锁演进-阶段一
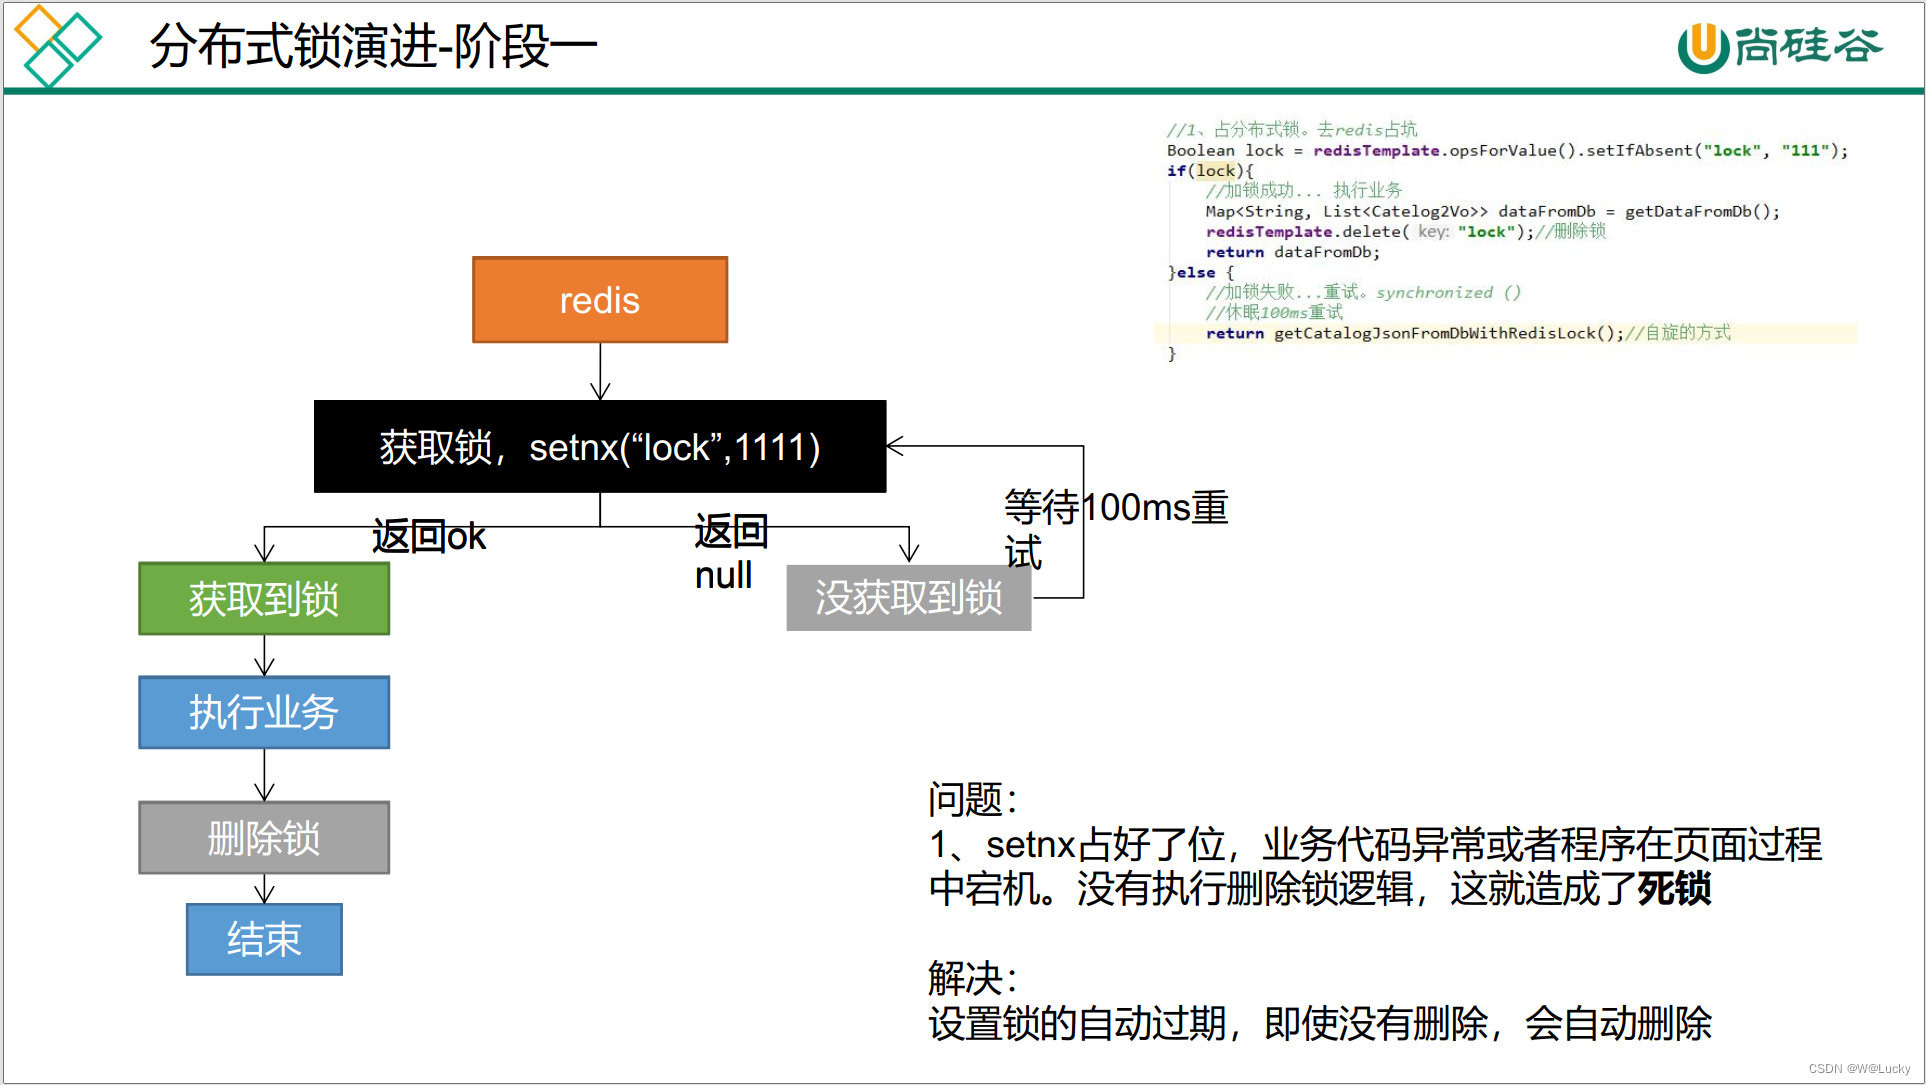
占分布式锁,去redis占坑
(1)抽取从数据库获取三级分类 getDataFromDb();
(2)问题:使用setnx占好了位,业务代码异常或者程序在页面中宕机。没有执行删除锁逻辑,就造成死锁;
(3)解决:设置锁的自动过期,即使没有删除,会自动删除(阶段二解决)。
优化后的代码如下:
    @Override
    public Map<String, List<Catelog2Vo>> getCatalogJson() {
        // 给缓存中放json串,拿出json串,还能逆转为能用的对象类型【序列化、反序列化】

        /**
         * 1. 空结果缓存:解决缓存穿透
         * 2. 设置过期时间(加随机值):解决缓存雪崩
         * 3. 加锁:解决缓存击穿
         */

        // 1. 加入缓存逻辑,缓存中存的数据是json串
        // JSON跨语言,跨平台
        String catalogJson = redisTemplate.opsForValue().get("catalogJson");
        if(StringUtils.isEmpty(catalogJson)){
            System.out.println("缓存未命中....查询数据库...");
            // 2. 缓存中没有,查询数据库
            Map<String, List<Catelog2Vo>> catalogJsonFromDb = getCatalogJsonFromDbWithRedisLock();

            return catalogJsonFromDb;
        }
        System.out.println("缓存命中....直接返回...");
        // 转化为指定对象 复杂类型使用TypeReference,TypeReference对应方法是受保护的以匿名内部类的方式使用
        Map<String, List<Catelog2Vo>> result = JSON.parseObject(catalogJson, new TypeReference<Map<String, List<Catelog2Vo>>>() {});
        return result;
    }
    // 分布式锁
    public Map<String, List<Catelog2Vo>> getCatalogJsonFromDbWithRedisLock() {
        // 1. 占分布式锁,去redis占坑
        Boolean lock = redisTemplate.opsForValue().setIfAbsent("lock", "1111");
        if(lock){
            // 加锁成功,执行业务
            Map<String, List<Catelog2Vo>> dataFromDb = getDataFromDb();
            // 删除锁
            redisTemplate.delete("lock");
            return dataFromDb;
        }else {
            // 加锁失败...重试。synchronized()
            // 休眠100ms重试
            return getCatalogJsonFromDbWithRedisLock(); // 自旋的方式
        }


    }

    private Map<String, List<Catelog2Vo>> getDataFromDb() {
        String catalogJson = redisTemplate.opsForValue().get("catalogJson");
        if (!StringUtils.isEmpty(catalogJson)) {
            // 缓存不为null直接返回
            Map<String, List<Catelog2Vo>> result = JSON.parseObject(catalogJson, new TypeReference<Map<String, List<Catelog2Vo>>>() {
            });
            return result;
        }
        System.out.println("查询了数据库....");
        /**
         * 1. 将数据库的多次查询变为一次
         */
        List<CategoryEntity> selectList = this.baseMapper.selectList(null);

        // 查出所有的一级分类
        List<CategoryEntity> level1Category = getParent_cid(selectList, 0L);
        // 封装数据
        Map<String, List<Catelog2Vo>> collect = level1Category.stream().collect(Collectors.toMap(k -> k.getCatId().toString(), v -> {
            // 1. 查询一级分类下的所有二级分类
            List<CategoryEntity> categoryEntities = getParent_cid(selectList, v.getCatId());
            List<Catelog2Vo> level2Category = null;
            if (categoryEntities != null && categoryEntities.size() > 0) {
                level2Category = categoryEntities.stream().map(l2 -> {
                    Catelog2Vo catelog2Vo = new Catelog2Vo(v.getCatId().toString(), null, l2.getCatId().toString(), l2.getName());
                    // 2. 找二级分类下的所有三级分类
                    List<CategoryEntity> level3Category = getParent_cid(selectList, l2.getCatId());
                    if (level3Category != null && level3Category.size() > 0) {
                        List<Catelog2Vo.Catelog3Vo> catelog3Vos = level3Category.stream().map(l3 -> {
                            // 封装成指定格式
                            Catelog2Vo.Catelog3Vo catelog3Vo = new Catelog2Vo.Catelog3Vo(l2.getCatId().toString(), l3.getCatId().toString(), l3.getName());
                            return catelog3Vo;
                        }).collect(Collectors.toList());
                        catelog2Vo.setCatalog3List(catelog3Vos);
                    }
                    return catelog2Vo;
                }).collect(Collectors.toList());
            }
            return level2Category;
        }));
        String s = JSON.toJSONString(collect);
        redisTemplate.opsForValue().set("catalogJson", s, 1, TimeUnit.DAYS);
        return collect;
    }
5.2.1.3.2 分布式锁演进-阶段二

加锁后,设置锁的过期时间
(1)执行业务之前设置锁的过期时间;
 public Map<String, List<Catelog2Vo>> getCatalogJsonFromDbWithRedisLock() {
        // 1. 占分布式锁,去redis占坑
        Boolean lock = redisTemplate.opsForValue().setIfAbsent("lock", "1111");
        if(lock){
            // 2. 设置过期时间 突然断电
            redisTemplate.expire("lock",30,TimeUnit.SECONDS);
            // 加锁成功,执行业务
            Map<String, List<Catelog2Vo>> dataFromDb = getDataFromDb();
            // 删除锁
            redisTemplate.delete("lock");
            return dataFromDb;
        }else {
            // 加锁失败...重试。synchronized()
            // 休眠100ms重试
            return getCatalogJsonFromDbWithRedisLock(); // 自旋的方式
        }


    }
(2)问题:setnx设置好,正要去设置过期时间,宕机,又死锁。
(3)解决:设置过期时间和占位必须是原子的。redis支持使用setnx ex。占锁和过期时间是原子的。
优化代码,保证占锁和设置过期时间是原子的,如下:
 public Map<String, List<Catelog2Vo>> getCatalogJsonFromDbWithRedisLock() {
        // 1. 占分布式锁,去redis占坑
        Boolean lock = redisTemplate.opsForValue().setIfAbsent("lock", "1111",300,TimeUnit.SECONDS);
        if(lock){
            // 2. 设置过期时间 突然断电
            //redisTemplate.expire("lock",30,TimeUnit.SECONDS);
            // 加锁成功,执行业务
            Map<String, List<Catelog2Vo>> dataFromDb = getDataFromDb();
            // 删除锁
            redisTemplate.delete("lock");
            return dataFromDb;
        }else {
            // 加锁失败...重试。synchronized()
            // 休眠100ms重试
            return getCatalogJsonFromDbWithRedisLock(); // 自旋的方式
        }


    }
5.2.1.3.3 分布式锁演进-阶段三
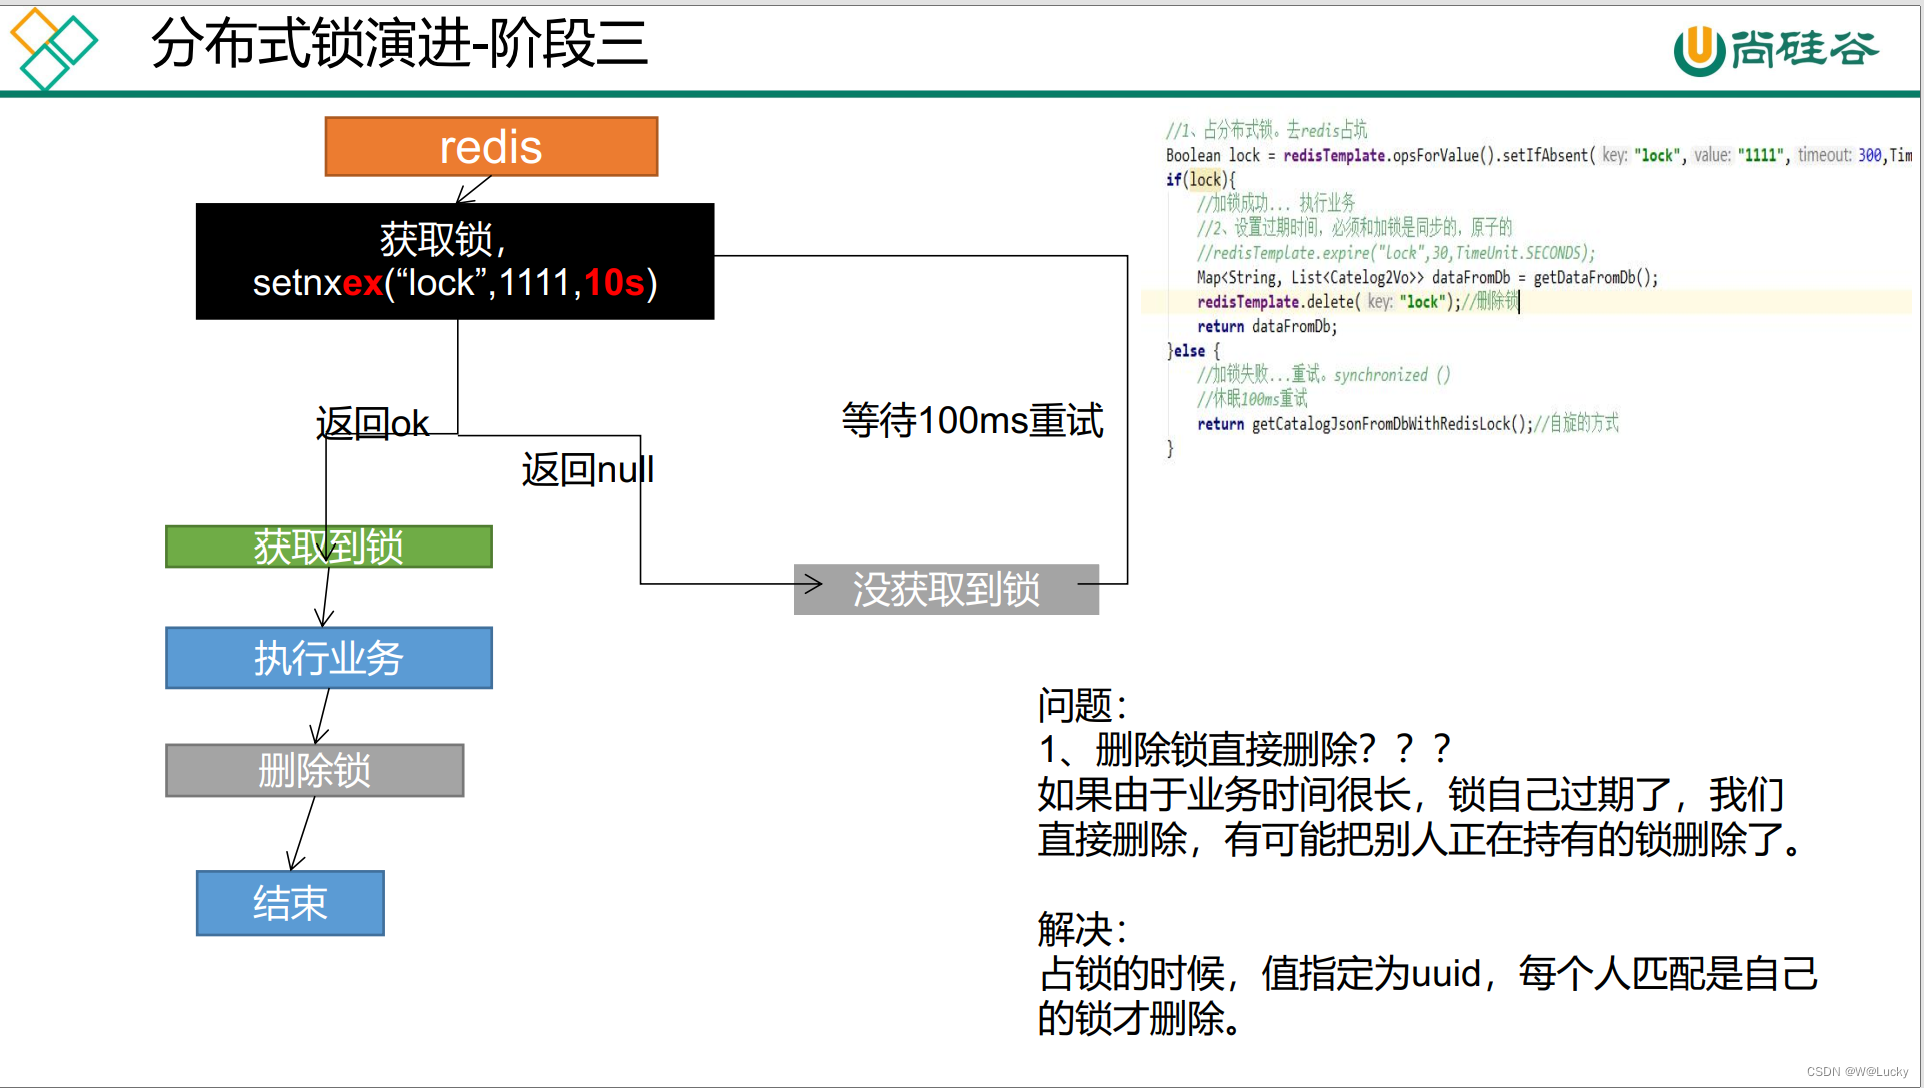
删锁的坑:
(1)问题:删除锁直接删除???
          如果由于业务处理时间很长,锁自己过期了,我们直接删除,有可能把别人正在持有的锁删除了。
(2)解决:占锁的时候,值指定为uuid,每个人匹配是自己的锁才删除。
5.2.1.3.4 分布式锁演进-阶段四
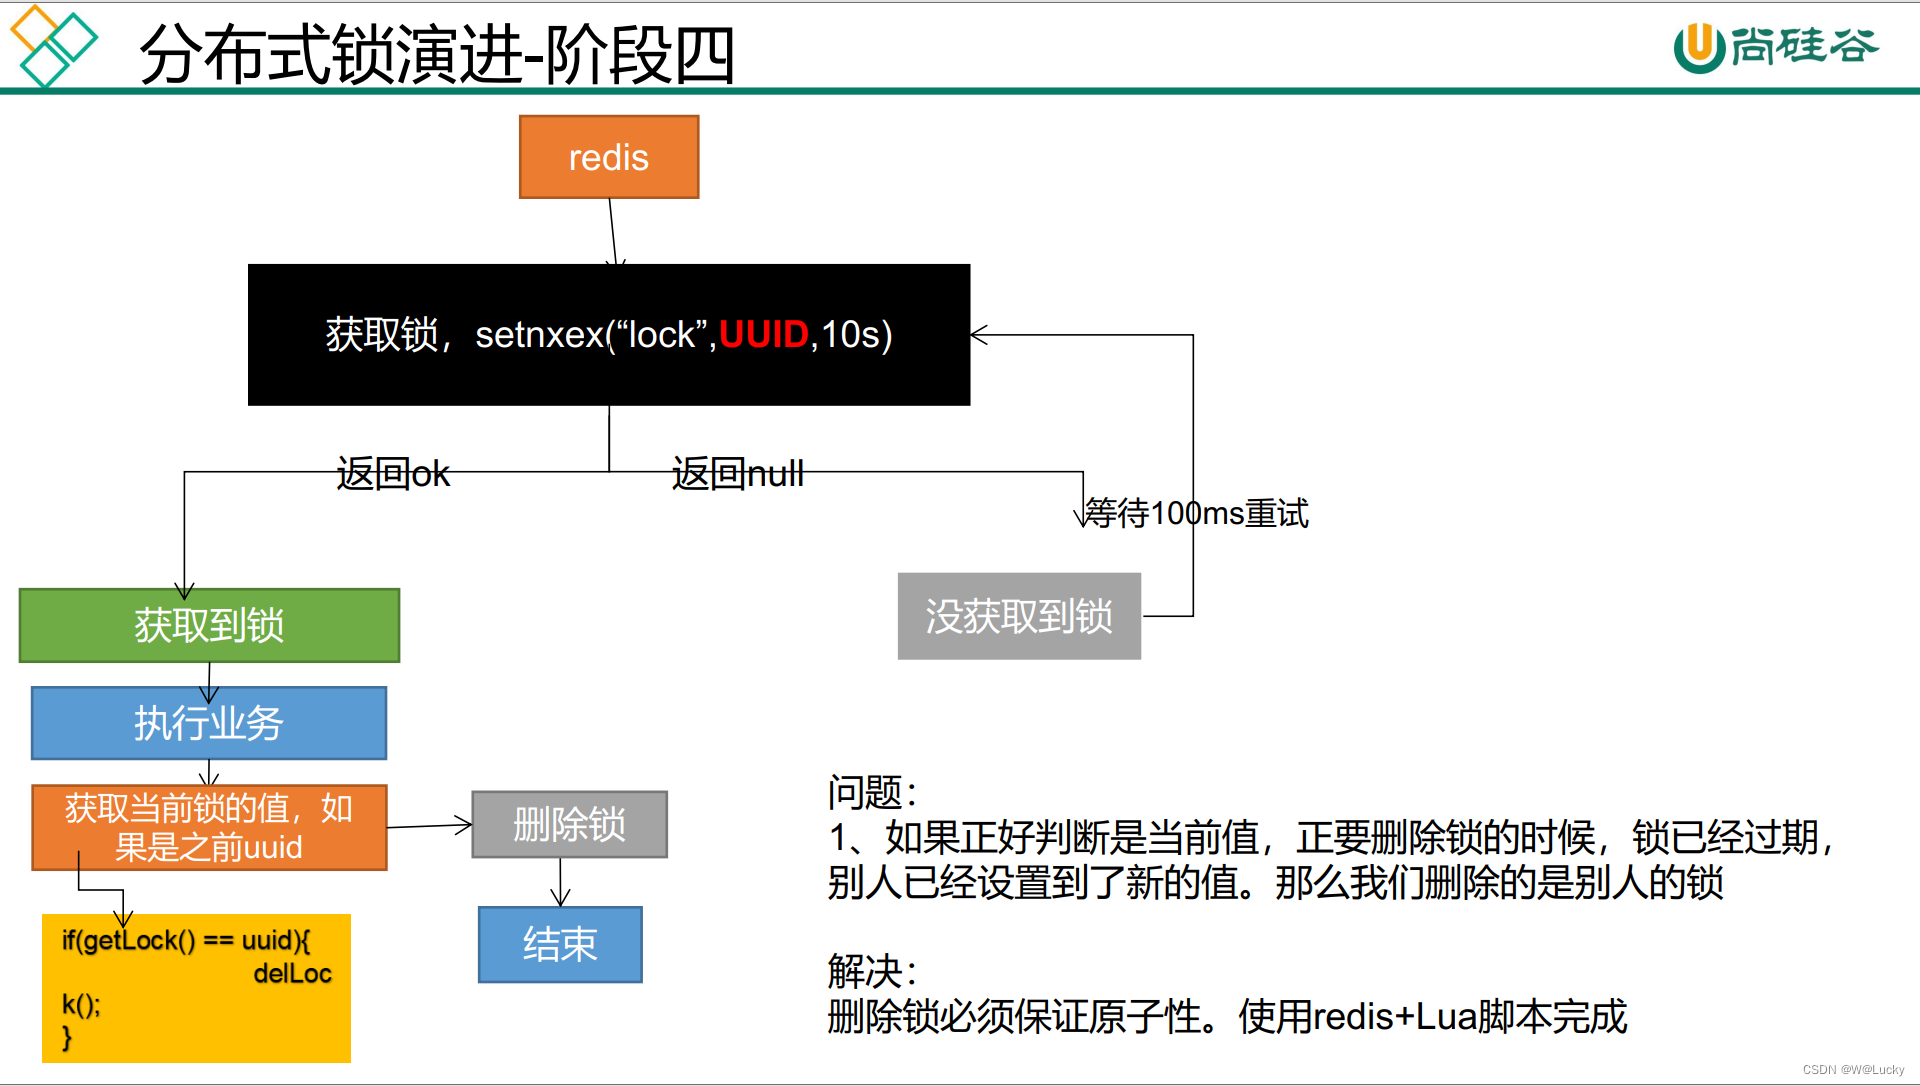
占锁时,值指定为uuid,删锁
(1)问题:如果正好判断是当前值,正要删除锁的时候,锁已经过期,别人已经设置到了新的值。那么我们删的是别人的锁。
(2)解决:删除锁必须保证原子性。使用redis+Lua脚本完成。(阶段五解决)
注意:Lua脚本可以去redis官网查看,如下:

if redis.call("get",KEYS[1]) == ARGV[1]
then
    return redis.call("del",KEYS[1])
else
    return 0
end

优化代码,值指定为uuid,如下:
public Map<String, List<Catelog2Vo>> getCatalogJsonFromDbWithRedisLock() {
        // 1. 占分布式锁,去redis占坑
        String uuid = UUID.randomUUID().toString();
        Boolean lock = redisTemplate.opsForValue().setIfAbsent("lock", uuid,300,TimeUnit.SECONDS);
        if(lock){
            // 2. 设置过期时间 突然断电
            //redisTemplate.expire("lock",30,TimeUnit.SECONDS);
            // 加锁成功,执行业务
            Map<String, List<Catelog2Vo>> dataFromDb = getDataFromDb();
            // 删除锁
            //redisTemplate.delete("lock");
            // 获取值对比+对比成功删除
            String lockValue = redisTemplate.opsForValue().get("lock");
            if(uuid.equals(lockValue)){
                // 删除自己锁
                redisTemplate.delete("lock");
            }

            return dataFromDb;
        }else {
            // 加锁失败...重试。synchronized()
            // 休眠100ms重试
            return getCatalogJsonFromDbWithRedisLock(); // 自旋的方式
        }
    }
5.2.1.3.5 分布式锁演进-阶段五
lua脚本解锁保证了解锁的原子性

保证加锁【占位+过期时间】和删除锁【判断+删除】的原子性。更难的事情,锁的自动续期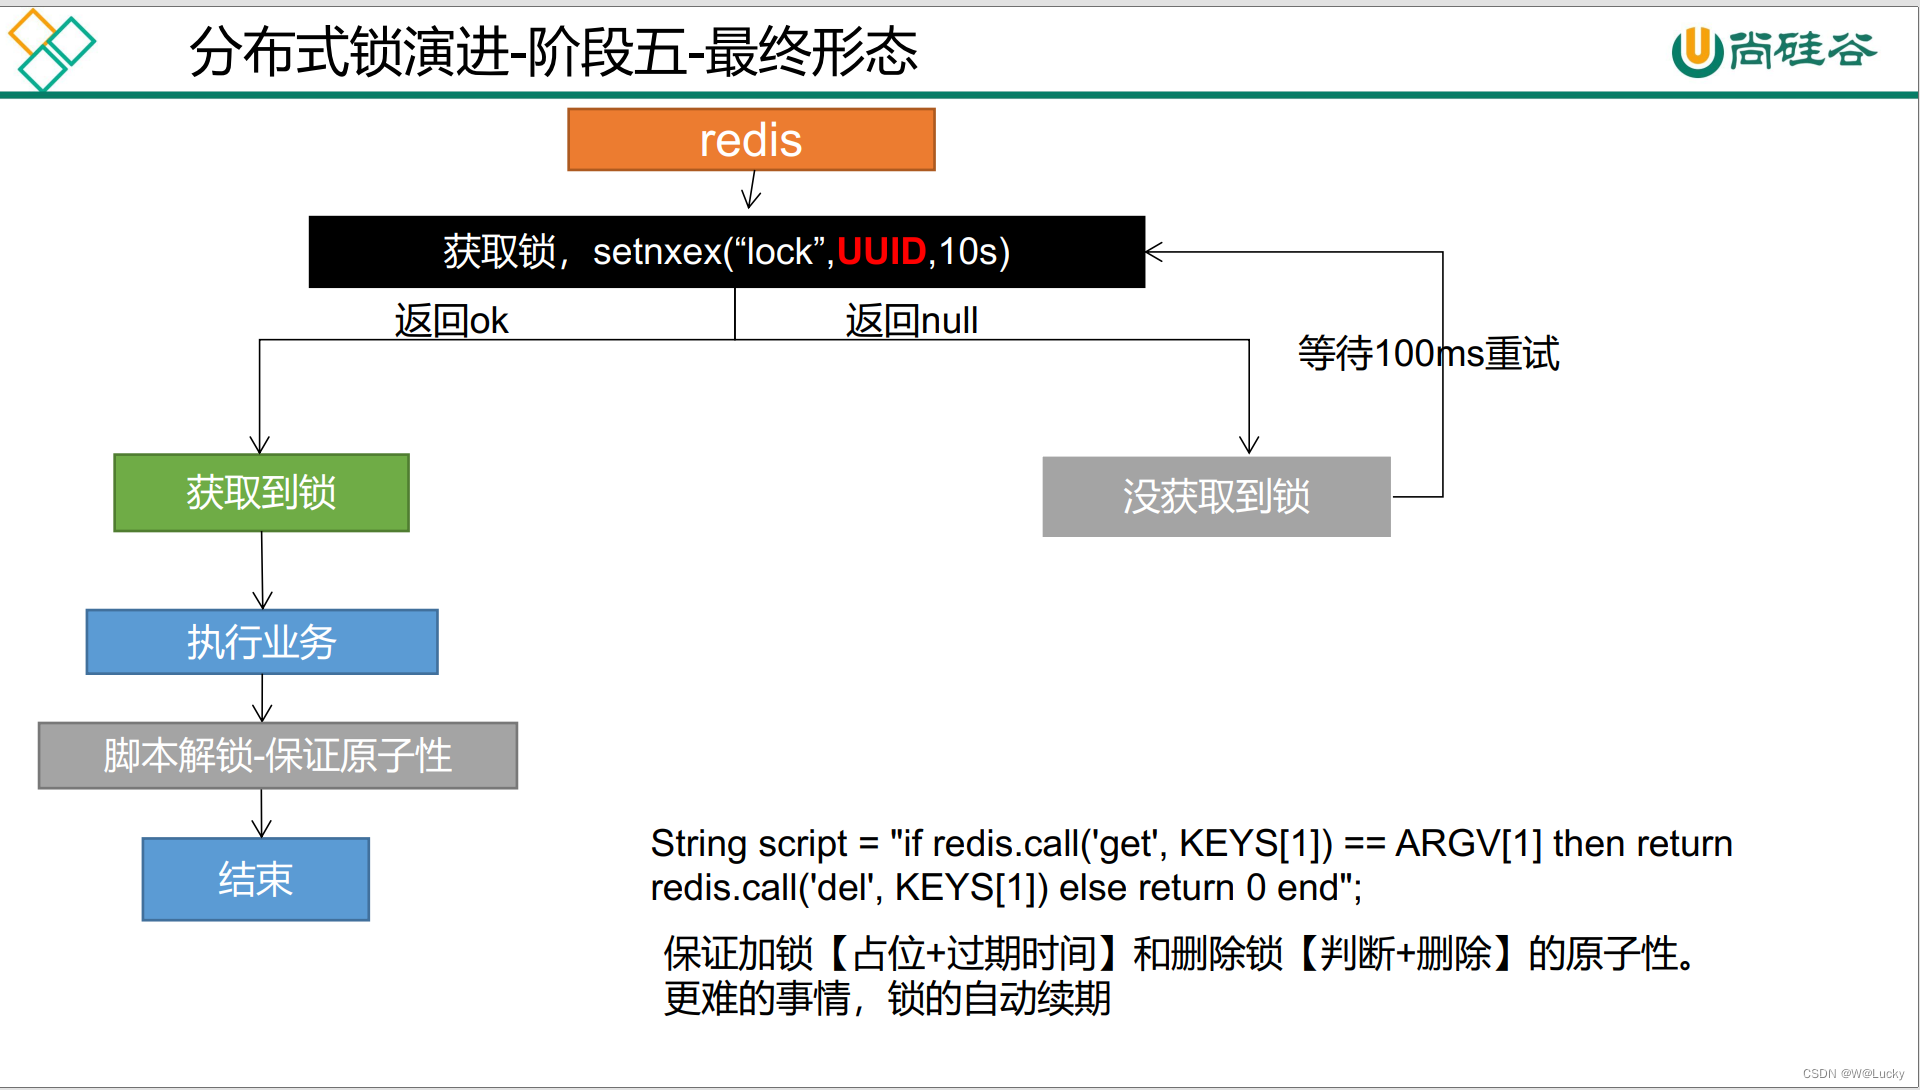
使用redis脚本,保证删除锁【判断+删除】的原子性
(1)修改代码,使用redis脚本删除锁;
(2)进行压力测试,看是否只有一次“查询了数据库”。
注意:锁的续期较难,业务逻辑时间较长可以延长过期时间。
完整代码如下:
 @Override
    public Map<String, List<Catelog2Vo>> getCatalogJson() {
        // 给缓存中放json串,拿出json串,还能逆转为能用的对象类型【序列化、反序列化】

        /**
         * 1. 空结果缓存:解决缓存穿透
         * 2. 设置过期时间(加随机值):解决缓存雪崩
         * 3. 加锁:解决缓存击穿
         */

        // 1. 加入缓存逻辑,缓存中存的数据是json串
        // JSON跨语言,跨平台
        String catalogJson = redisTemplate.opsForValue().get("catalogJson");
        if(StringUtils.isEmpty(catalogJson)){
            System.out.println("缓存未命中....查询数据库...");
            // 2. 缓存中没有,查询数据库
            Map<String, List<Catelog2Vo>> catalogJsonFromDb = getCatalogJsonFromDbWithRedisLock();

            return catalogJsonFromDb;
        }
        System.out.println("缓存命中....直接返回...");
        // 转化为指定对象 复杂类型使用TypeReference,TypeReference对应方法是受保护的以匿名内部类的方式使用
        Map<String, List<Catelog2Vo>> result = JSON.parseObject(catalogJson, new TypeReference<Map<String, List<Catelog2Vo>>>() {});
        return result;
    }
    // 分布式锁
    public Map<String, List<Catelog2Vo>> getCatalogJsonFromDbWithRedisLock() {
        // 1. 占分布式锁,去redis占坑
        String uuid = UUID.randomUUID().toString();
        Boolean lock = redisTemplate.opsForValue().setIfAbsent("lock", uuid,300,TimeUnit.SECONDS);
        if(lock){
            System.out.println("获取分布式锁成功。。。");
            // 2. 设置过期时间 突然断电
            //redisTemplate.expire("lock",30,TimeUnit.SECONDS);
            // 加锁成功,执行业务
            Map<String, List<Catelog2Vo>> dataFromDb;
            try {
                dataFromDb = getDataFromDb();
            }finally {
                String script = "if redis.call('get',KEYS[1]) == ARGV[1] then return redis.call('del',KEYS[1]) else return 0 end";
                // 执行脚本,删锁
                Long lock1 = redisTemplate.execute(new DefaultRedisScript<Long>(script, Long.class), Arrays.asList("lock"), uuid);
            }

            // 删除锁
            //redisTemplate.delete("lock");
            // 获取值对比+对比成功删除
            //String lockValue = redisTemplate.opsForValue().get("lock");
            //if(uuid.equals(lockValue)){
            //    // 删除自己锁
            //    redisTemplate.delete("lock");
            //}

            return dataFromDb;
        }else {
            // 加锁失败...重试。synchronized()
            // 休眠100ms重试
            System.out.println("获取分布式锁失败。。。等待重试");
            try {
                Thread.sleep(200);
            } catch (InterruptedException e) {
                e.printStackTrace();
            }
            return getCatalogJsonFromDbWithRedisLock(); // 自旋的方式
        }
    }
压力测试:
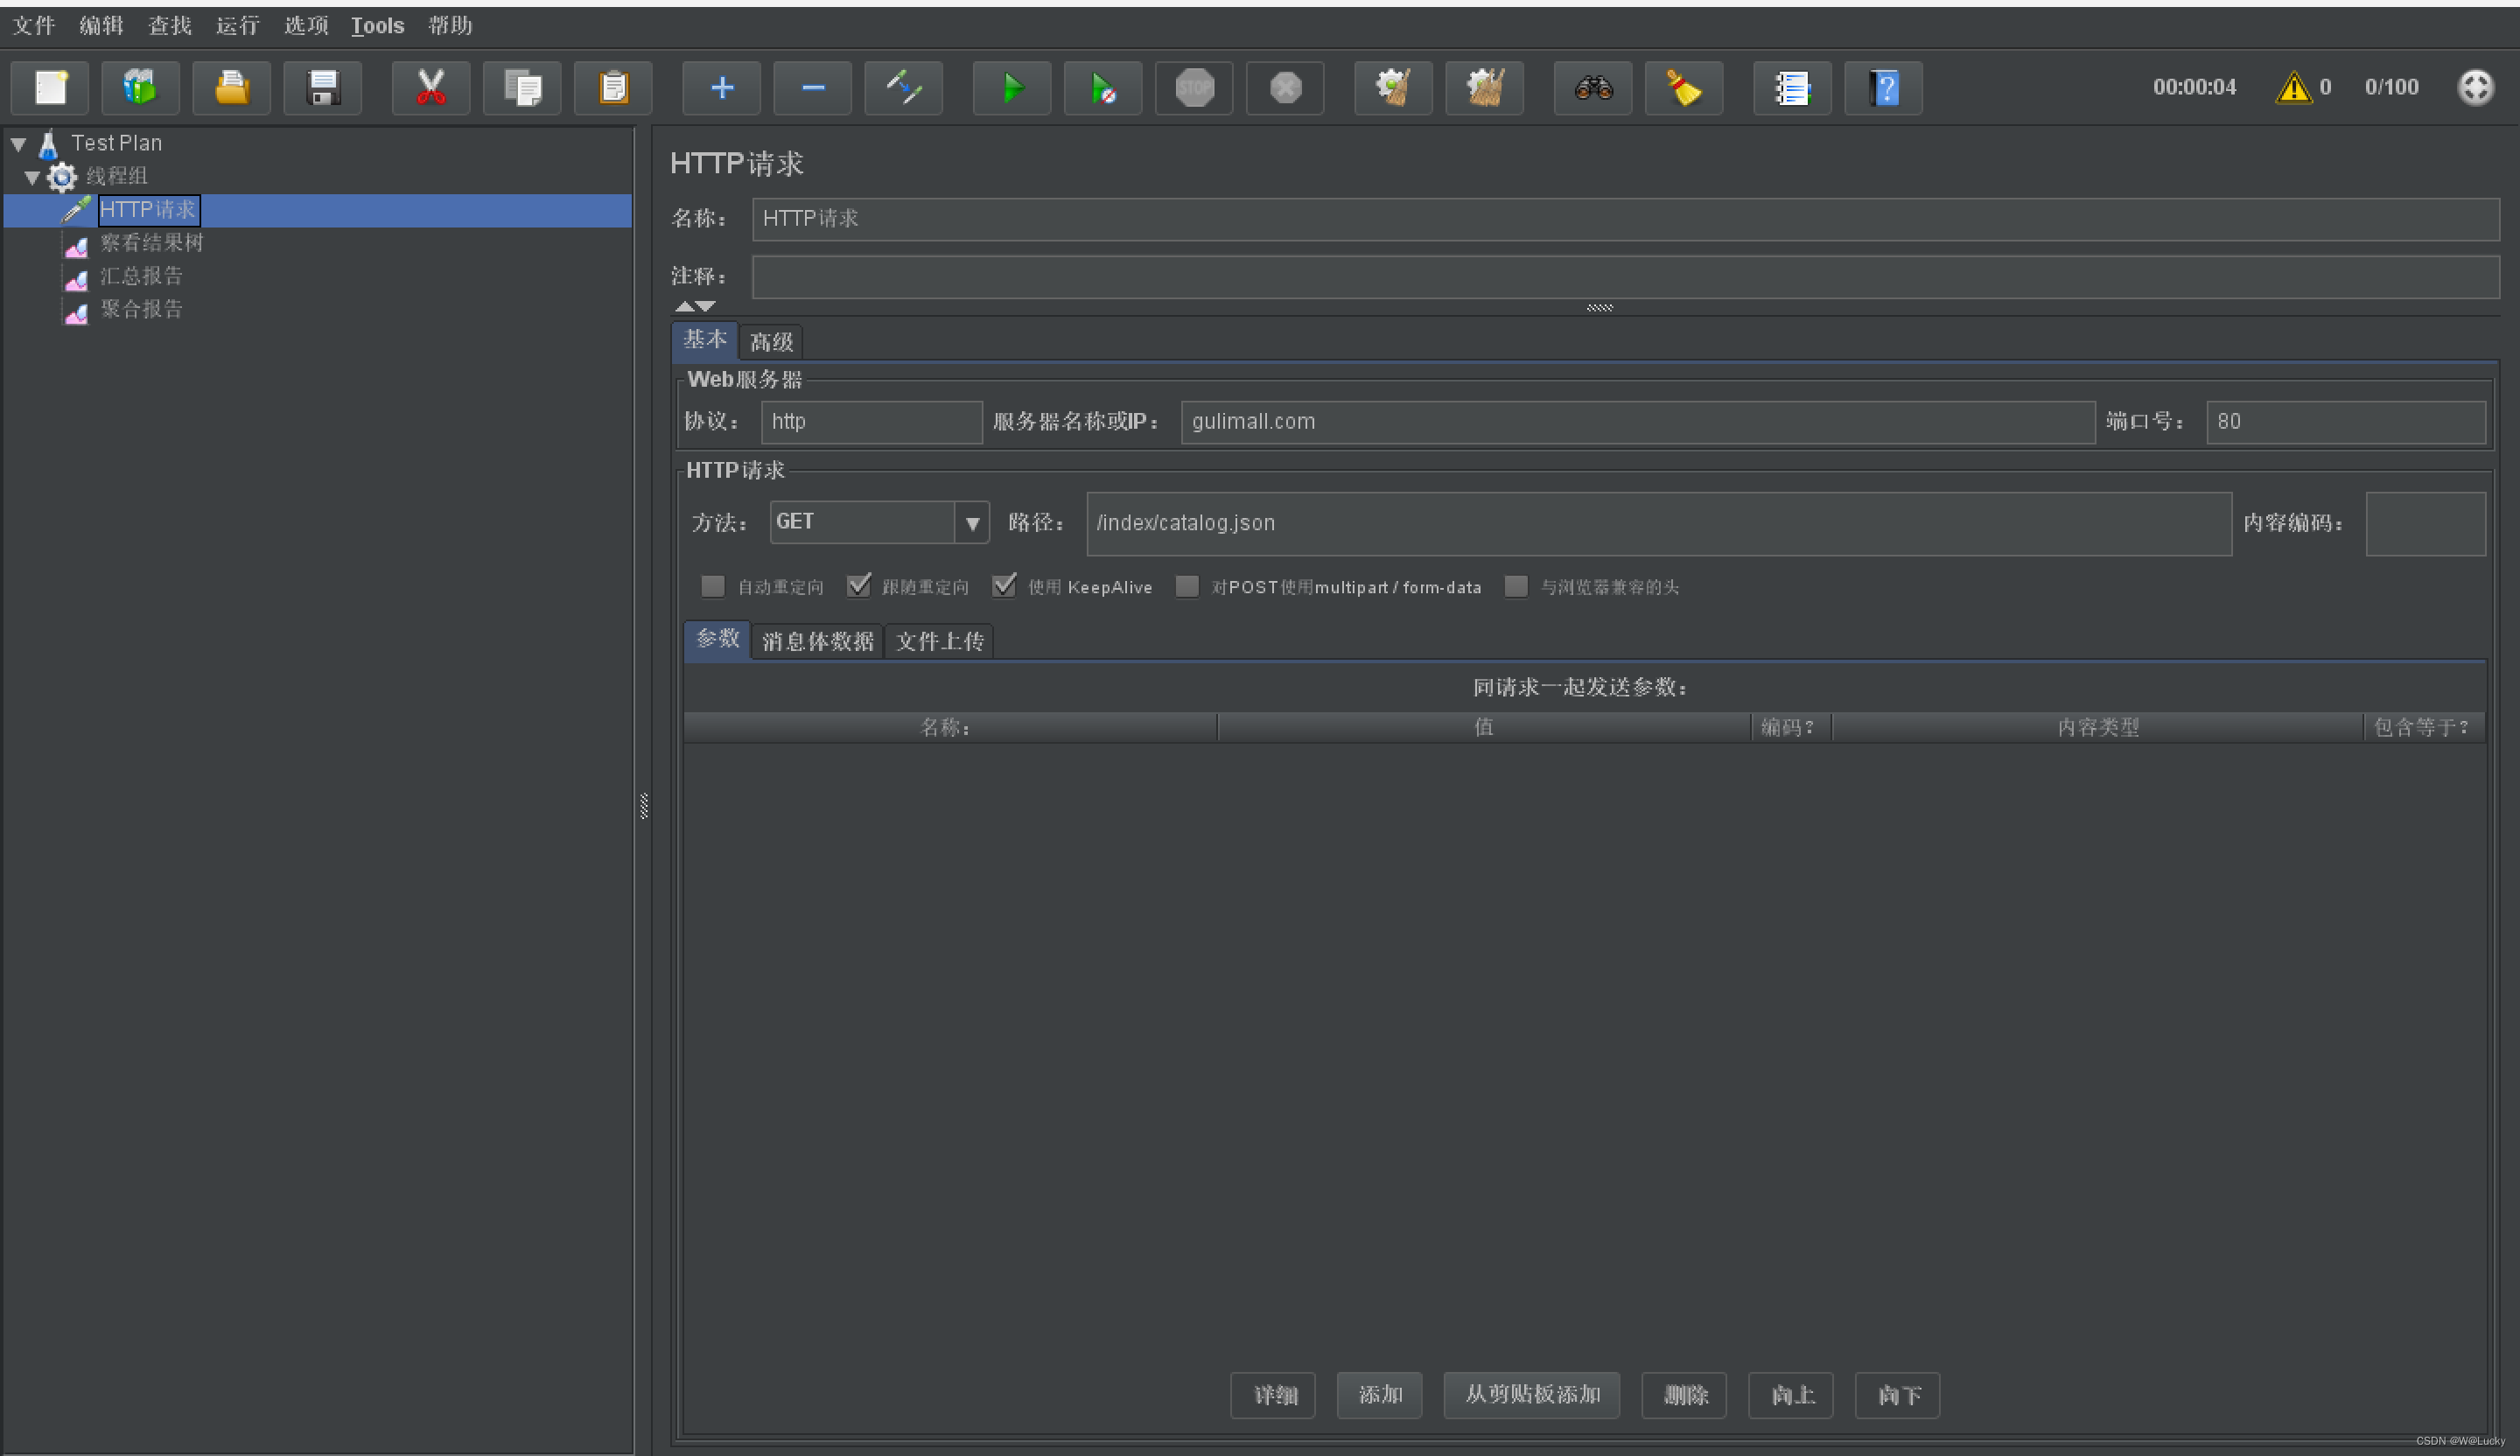 测试结果:(只有一次查询数据库)

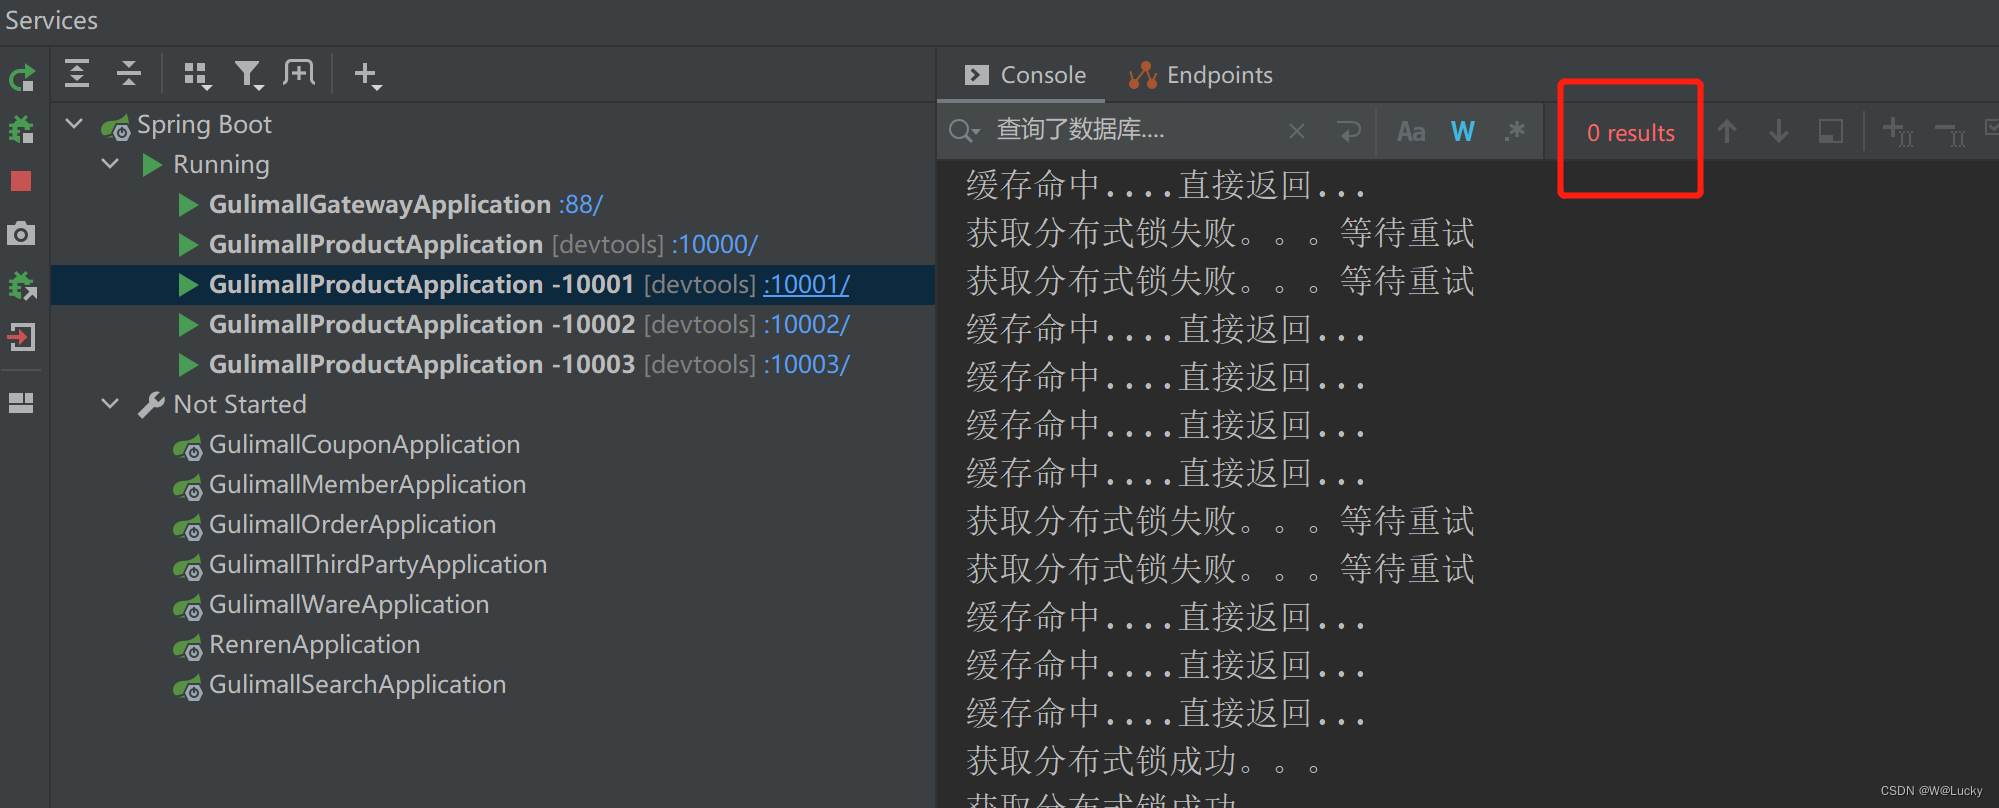


5.2.2 Redisson(分布式锁)简介&整合
5.2.2.1 Redisson概述
Redisson是一个在Redis的基础上实现的Java驻内存数据网格(In-Memory Data Grid)。它不仅提供了一系列的分布式的Java常用对象,还提供了许多分布式服务。其中包括(BitSet, Set, Multimap, SortedSet, Map, List, Queue, BlockingQueue, Deque, BlockingDeque, Semaphore, Lock, AtomicLong, CountDownLatch, Publish / Subscribe, Bloom filter, Remote service, Spring cache, Executor service, Live Object service, Scheduler service) Redisson提供了使用Redis的最简单和最便捷的方法。Redisson的宗旨是促进使用者对Redis的关注分离(Separation of Concern),从而让使用者能够将精力更集中地放在处理业务逻辑上。
具体细节可以去Redisson相关网站查看:Redisson相关网站
5.2.2.2 SpringBoot整合Redisson
- 引入依赖(gulimall-product)
<!-- 以后使用redisson作为所有的分布式锁,分布式对象等功能框架 -->
<dependency>
    <groupId>org.redisson</groupId>
    <artifactId>redisson</artifactId>
    <version>3.12.0</version>
</dependency>
- Redisson单节点配置,集群可以参照官网
redisson官方文档中文版.md
@Configuration
public class MyRedissonConfig {

    /**
     * 所有Redisson的使用都是通过RedissonClient
     * @return
     * @throws IOException
     */
    @Bean(destroyMethod="shutdown")
    public RedissonClient redisson() throws IOException {
        // 1. 创建配置
        // Redis url should start with redis:// or rediss:// (for SSL connection)
        Config config = new Config();
        config.useSingleServer().setAddress("redis://172.1.11.10:6379");

        // 2. 根据Config创建出RedissonClient实例
        RedissonClient redissonClient = Redisson.create(config);
        return redissonClient;
    }
}
- 测试
@Slf4j
@SpringBootTest
class GulimallProductApplicationTests {

    ...

    @Resource
    private RedissonClient redissonClient;
    @Test
    void redisson(){
        System.out.println(redissonClient);
    }
}
5.2.3 Redisson--lock锁测试
使用RedissonClient完成分布式锁功能。5.2.3.1 可重入锁(Reentrant Lock)
(1)可重入锁定义:
    当a业务包含b业务时,并且a业务与b业务都需要抢占统一资源,当a业务执行到b业务时,b业务发现该资源已上锁,如果是可重入锁b业务就可拿到锁,执行业务;反之如果此时b业务拿不到资源,就是不可重入锁,这样程序就会死锁。
(2)大家都知道,如果负责储存这个分布式锁的Redisson节点宕机以后,而且这个锁正好处于锁住的状态时,这个锁会出现锁死的状态。为了避免这种情况的发生,Redisson内部提供了一个监控锁的看门狗,它的作用是在Redisson实例被关闭前,不断的延长锁的有效期。默认情况下,看门狗的检查锁的超时时间是30秒钟,也可以通过修改Config.lockWatchdogTimeout来另行指定。
(3)开启两个product服务,当10000服务加锁成功时关闭服务,访问观察10001服务,查看加锁情况。
结论:解锁代码没有运行,redisson不会出现死锁。10001服务加锁成功。
(4)本次测试中初始过期时间TTL为30s,业务没有完成,每当20s(经过三分之一看门狗时间)会自动续期为30s。
/**
* @author WangWenwen
* @createDate 2023/5/18 17:19
* @description 商城系统首页
*/
@Controller
public class IndexController {
...
@Resource
private RedissonClient redisson;
...
@ResponseBody
@GetMapping("/hello")
public String hello(){
// 1. 获取一把锁,只要锁的名字一样,就是同一把锁
RLock lock = redisson.getLock("my-lock");
// 2. 加锁
lock.lock(); // 阻塞式等待,默认加的锁都是30s时间
// 1)、锁的自动续期,如果业务超长,运行期间自动给锁续上新的30s。不用担心业务时间长,锁自动过期被删掉
// 2)、加锁的业务只要运行完成,就不会给当前锁续期,即使不手动解锁,锁默认在30s后自动删除。
try {
System.out.println("加锁成功,执行业务..."+Thread.currentThread().getId());
Thread.sleep(30000);
} catch (InterruptedException e) {
e.printStackTrace();
}finally {
// 3. 解锁 假设解锁代码没有运行,redisson不会出现死锁
System.out.println("释放锁..."+Thread.currentThread().getId());
lock.unlock();
}
return "hello";
}
}成功加锁:

解锁代码没有运行,不会出现死锁:

 锁自动续期:


5.2.4 Redisson--lock看门狗原理--redisson如何解决死锁
lock方法的两大特点:
(1)有看门狗机制,在业务运行期间,锁会自动续期;
(2)为了防止死锁,默认过期时间为30s,即使业务宕机,没有手动调用解锁代码,过了30s的时间,redis也会对它自动解锁。


lock.lock(10, TimeUnit.SECONDS); // 10s自动解锁,自动解锁的时间一定要大于业务的执行时间
问题:lock.lock(10, TimeUnit.SECONDS); 在锁时间到后,不会自动续期
1、如果我们指定了锁的超时时间,就发送给redis脚本,进行占锁,默认超时就是我们指定的时间;
2、如果我们未指定锁的超时时间,就使用30000【lockWatchdogTimeout看门狗的默认时间】
    只要占锁成功,就会启动一个定时任务【重新给锁设置过期时间,新的过期时间就是看门狗的默认时间】,每隔10s就会自动再次续期,internalLockLeaseTime【看门狗时间】 / 3 = 10s


最佳实战
1)、 lock.lock(10, TimeUnit.SECONDS); 省掉了整个续期操作。手动解锁
5.2.5 Redisson--读写锁(ReadWriteLock)
读写锁简介:
    基于Redis的Redisson分布式可重入读写锁RReadWriteLock Java对象实现了java.util.concurrent.locks.ReadWriteLock接口。其中读锁和写锁都继承了RLock接口。

分布式可重入读写锁允许同时有多个读锁和一个写锁处于加锁状态。
// 保证一定能读到最新数据,修改期间,写锁是一个排它锁(互斥锁、独享锁)。读锁是一个共享锁。
// 写锁没释放读就必须等待
// 读 + 读: 相当于无锁,并发读,只会在redis中记录好,所有当前的读锁。他们都会同时加锁成功
// 写 + 读: 等待写锁释放
// 写 + 写: 阻塞方式
// 读 + 写: 有读锁。写锁也要等待。
// 只要有写存在,都必须等待
@ResponseBody
@GetMapping("/write")
public String writeValue(){
// 获取读写锁
RReadWriteLock lock = redisson.getReadWriteLock("rw-lock");
// 获取写锁
RLock rLock = lock.writeLock();
String s = "";
try {
// 改数据加写锁,读数据加读锁
rLock.lock();
System.out.println("写锁加锁成功..."+Thread.currentThread().getId());
s = UUID.randomUUID().toString();
Thread.sleep(30000);
redisTemplate.opsForValue().set("wirteValue",s);
} catch (InterruptedException e) {
e.printStackTrace();
}finally {
rLock.unlock();
System.out.println("写锁释放..."+Thread.currentThread().getId());
}
return s;
}
@ResponseBody
@GetMapping("/read")
public String readValue(){
// 获取读写锁
RReadWriteLock lock = redisson.getReadWriteLock("rw-lock");
String s = "";
// 加读锁
RLock rLock = lock.readLock();
rLock.lock();
try {
System.out.println("读锁加锁成功..."+Thread.currentThread().getId());
s = redisTemplate.opsForValue().get("wirteValue");
Thread.sleep(30000);
} catch (Exception e) {
e.printStackTrace();
}finally {
rLock.unlock();
System.out.println("读锁释放..."+Thread.currentThread().getId());
}
return s;
}加锁时redis的状态,显示锁的类型和锁的个数

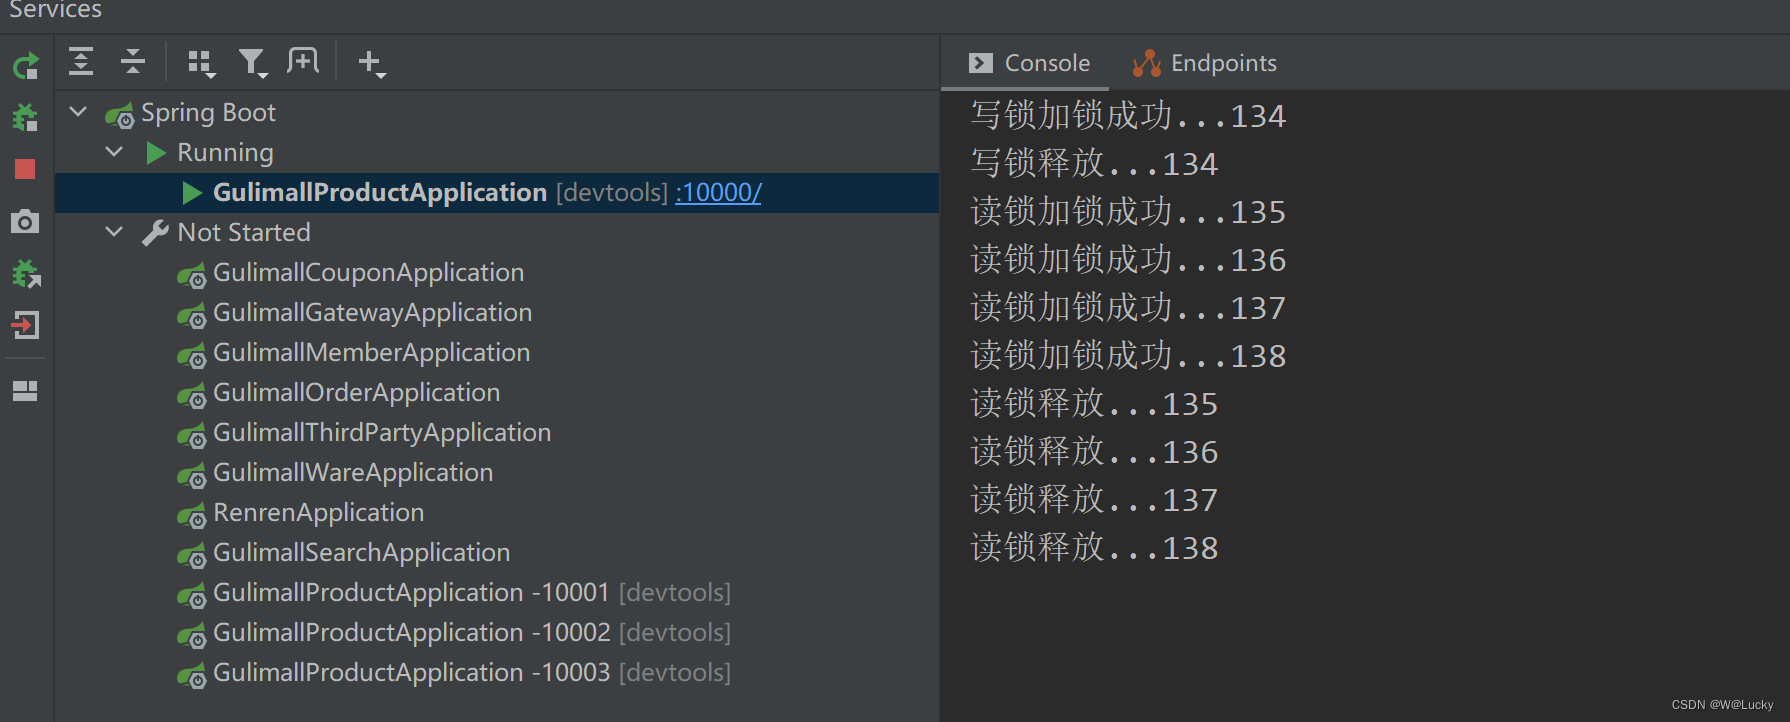
5.2.6 Redisson--信号量测试
信号量(Semaphore),有时被称为信号灯,是在多线程环境下使用的一种设施, 它负责协调各个线程, 以保证它们能够正确、合理的使用公共资源。
一个计数信号量。从概念上讲,信号量维护了一个许可集。如有必要,在许可可用前会阻塞每一个 acquire(),然后再获取该许可。每个 release() 添加一个许可,从而可能释放一个正在阻塞的获取者。但是,不使用实际的许可对象,Semaphore 只对可用许可的号码进行计数,并采取相应的行动。拿到信号量的线程可以进入代码,否则就等待。通过acquire()和release()获取和释放访问许可。
信号量为存储在redis中一个数字,当数据大于0时,可以调用acquire()减少一个数字,调用release添加一个数字。数字为0等待阻塞,直至数字大于0。
   /**
     * (信号量)  信号量也可以用做分布式限流
     * 场景:车库停车
     * 3个车位
     * @return
     */
    @ResponseBody
    @GetMapping("/park")
    public String park() throws InterruptedException {
        RSemaphore park = redisson.getSemaphore("park");
        //park.acquire();// 获取一个信号,获取一个值,占一个车位 (阻塞式)
        boolean b = park.tryAcquire();
        if(b){
            // 执行业务
        }else {
            return "error";
        }
        return "ok=>"+b;
    }

    @ResponseBody
    @GetMapping("/go")
    public String go() throws InterruptedException {
        RSemaphore park = redisson.getSemaphore("park");
        park.release();// 释放一个车位

        return "ok";
    }
5.2.7 Redisson--闭锁测试
闭锁是一种同步工具类,可以延迟线程的进度直到其到达终止状态。
闭锁相当于一扇门,在闭锁结束之前,这扇门一直关闭,没有任何线程能够通过;当闭锁结束时,这扇门打开,所有的线程均可通过
闭锁状态包括一个计数器,该计数器初始化为一个正数,表示需要等待的事件数量。countDown方法递减计数器,表示一个事件已经发生,如果计数器非零,则await方法等待计数器为零,或等待中的线程中断或者等待超时。
闭锁是一次性对象,一旦进入终止状态,就不能被重置。
代码中gogogo()方法执行5次后lockDoor()方法才能继续执行。
 /**
     *
     * 放假锁门
     * 1班没人了
     * 5个班都走了才可以锁门
     * @return
     * @throws InterruptedException
     */
    @ResponseBody
    @GetMapping("/lockDoor")
    public String lockDoor() throws InterruptedException {
        RCountDownLatch door = redisson.getCountDownLatch("door");
        door.trySetCount(5);
        door.await(); // 等待闭锁都完成
        return "放假了。。。";
    }

    @GetMapping("/gogogo/{id}")
    public String gogogo(@PathVariable Long id){
        RCountDownLatch door = redisson.getCountDownLatch("door");
        door.countDown();// 计数减一

        return id+"班的人都走了";
    }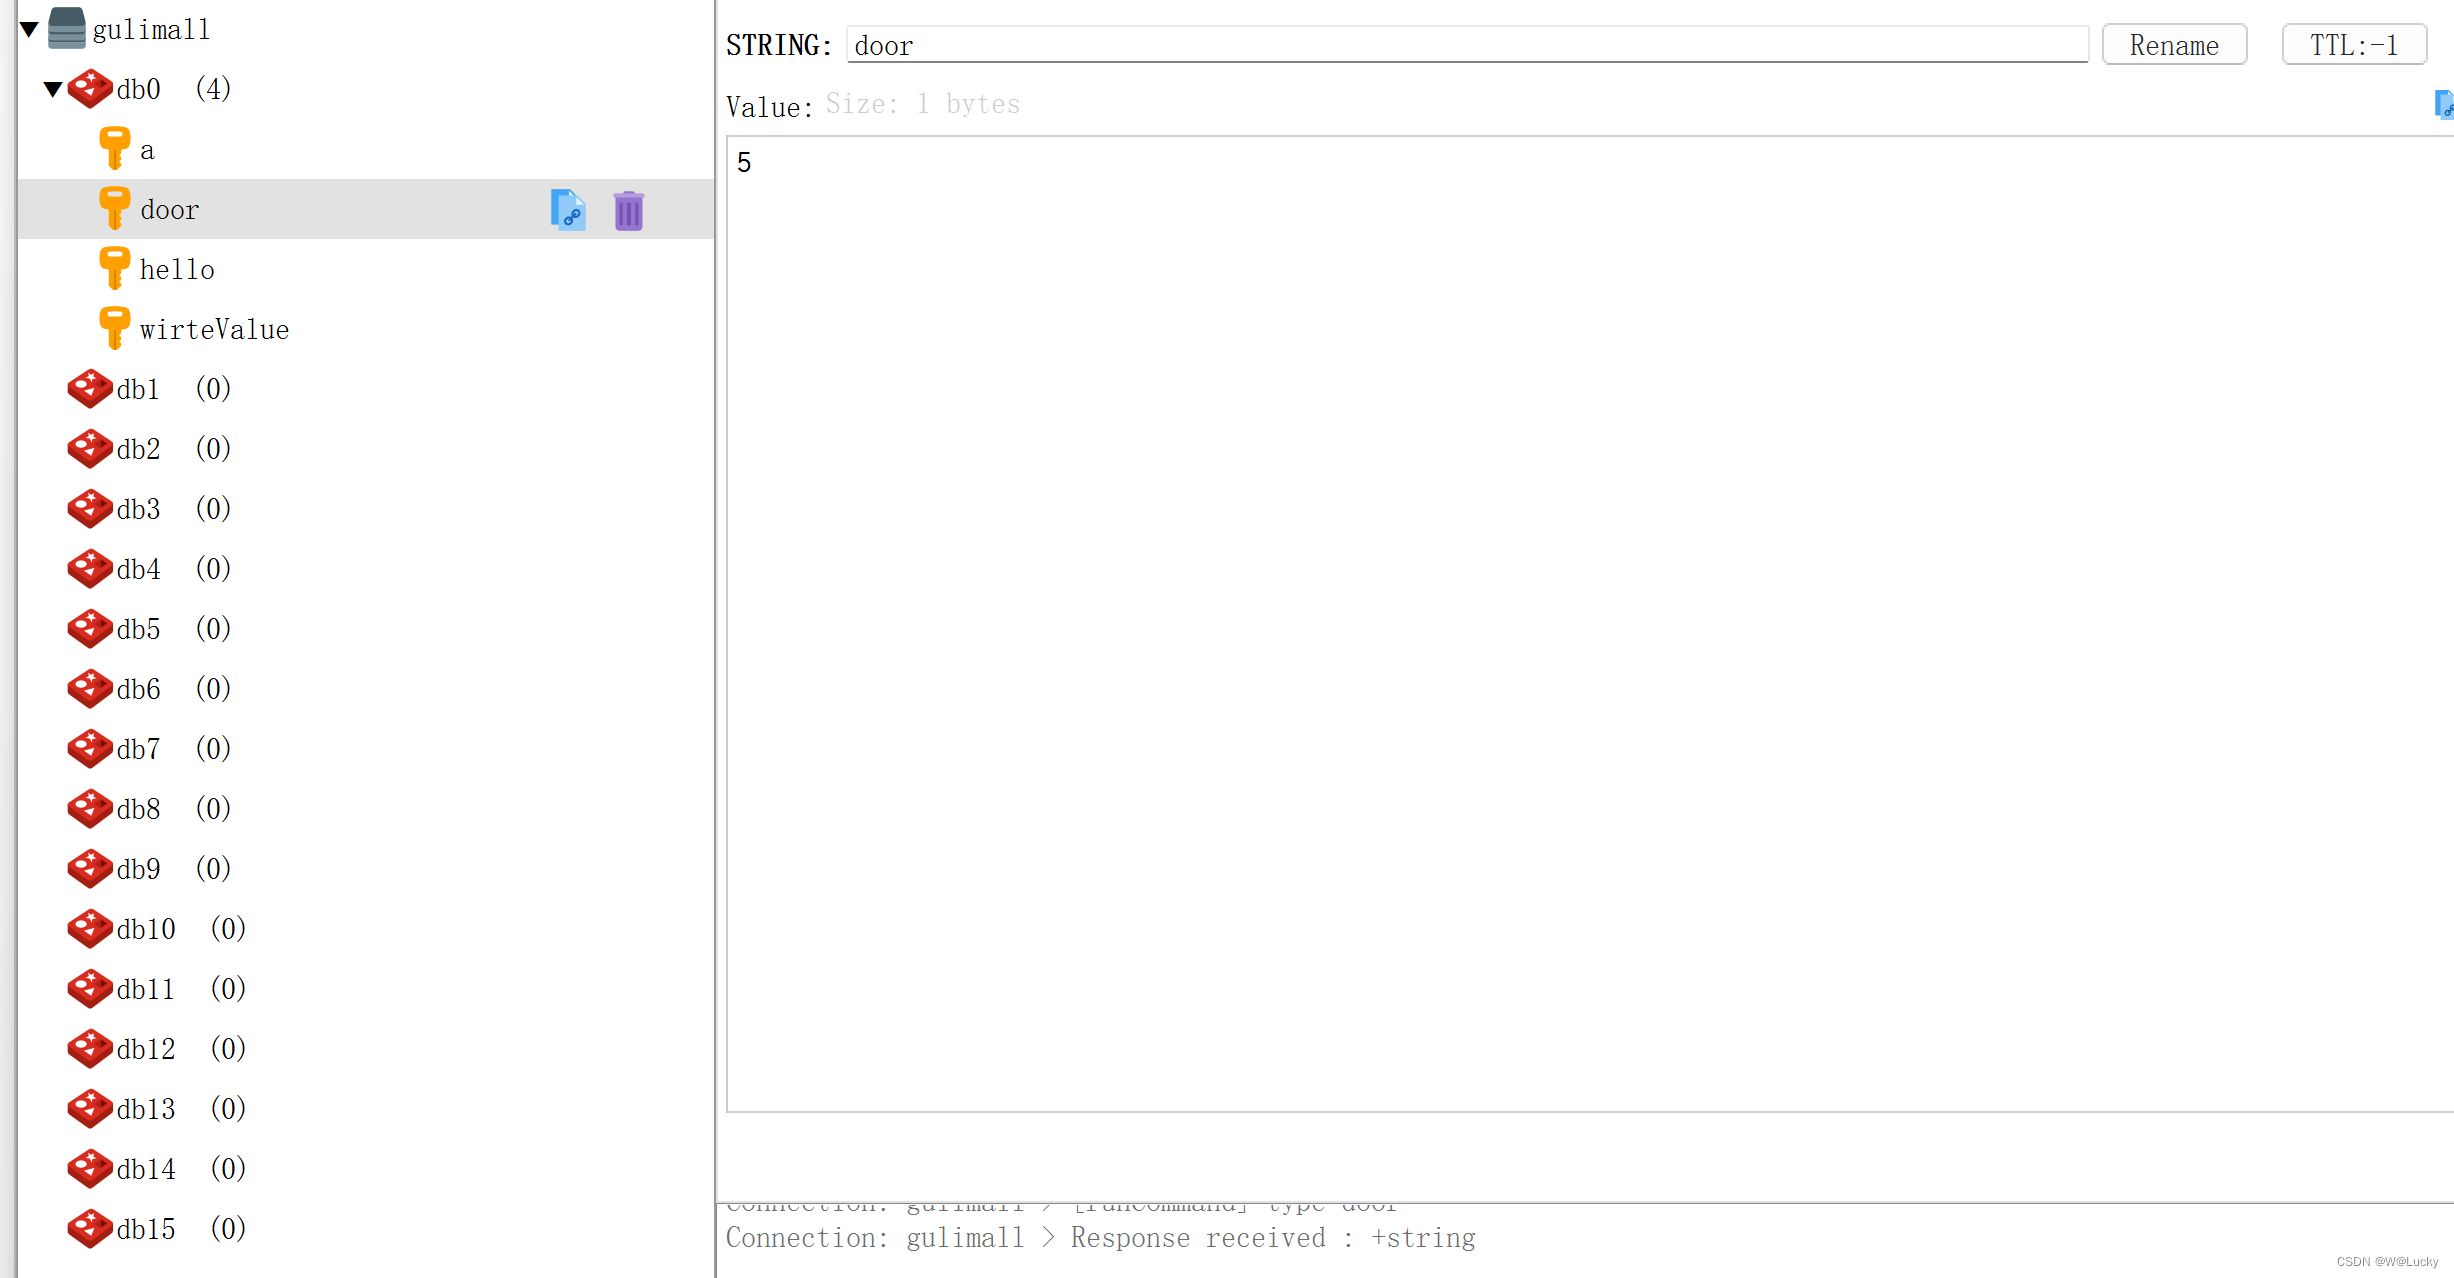
5.2.8 缓存一致性解决(必须满足最终一致性)
使用Redisson分布式锁,优化三级分类代码,如下:

 public Map<String, List<Catelog2Vo>> getCatalogJsonFromDbWithRedissonLock() {
        // 锁的名字一样就是同一把锁。锁的粒度,越细越快。
        // 锁的粒度:具体缓存的是某个数据,11-号商品 product-11-lock product-12-lock  product-lock
        RLock lock = redisson.getLock("catalogJson-lock");
        lock.lock(); // 加锁
        Map<String, List<Catelog2Vo>> dataFromDb;
        try {
            dataFromDb = getDataFromDb();
        } finally {
            lock.unlock(); // 解锁
        }
        return dataFromDb;
    }
5.2.8.1 双写模式

1. 双写模式:
    在数据库进行写操作的同时对缓存也进行写操作,确保缓存数据与数据库数据的一致性。

2. 问题:
    两个线程同时进行写操作时由于缓存是存储在redis,写缓存时需要发送网络请求,导致虽然线程一先发送写缓存的网络请求但是比线程二发送的写缓存的网络请求后到达redis,造成数据被覆盖。

3. 解决方法:
(1)加锁:对写数据库和写缓存进行加一把锁。
(2)设置缓存过期时间:缓存过期以后,又能得到最新的正确数据。
以上读到的最新数据有延迟:最终一致性。
5.2.8.2 失效模式

1. 失效模式:
    在数据库进行更新操作时,删除原来的缓存,再次查询数据库就可以更新最新数据。
2. 问题:
    当两个请求同时修改数据库,一个请求已经更新成功并删除缓存时又有读数据的请求进来,这时候发现缓存中无数据就去数据库中查询并放入缓存,在放入缓存前第二个更新数据库的请求成功,这时候留在缓存中的数据依然是第一次数据更新的数据。
3. 解决方案:
(1)缓存的所有数据都有过期时间,数据过期下一次查询触发主动更新。
(2)读写数据的时候,加上分布式的读写锁。
        经常写,经常读
5.2.8.3 解决方案
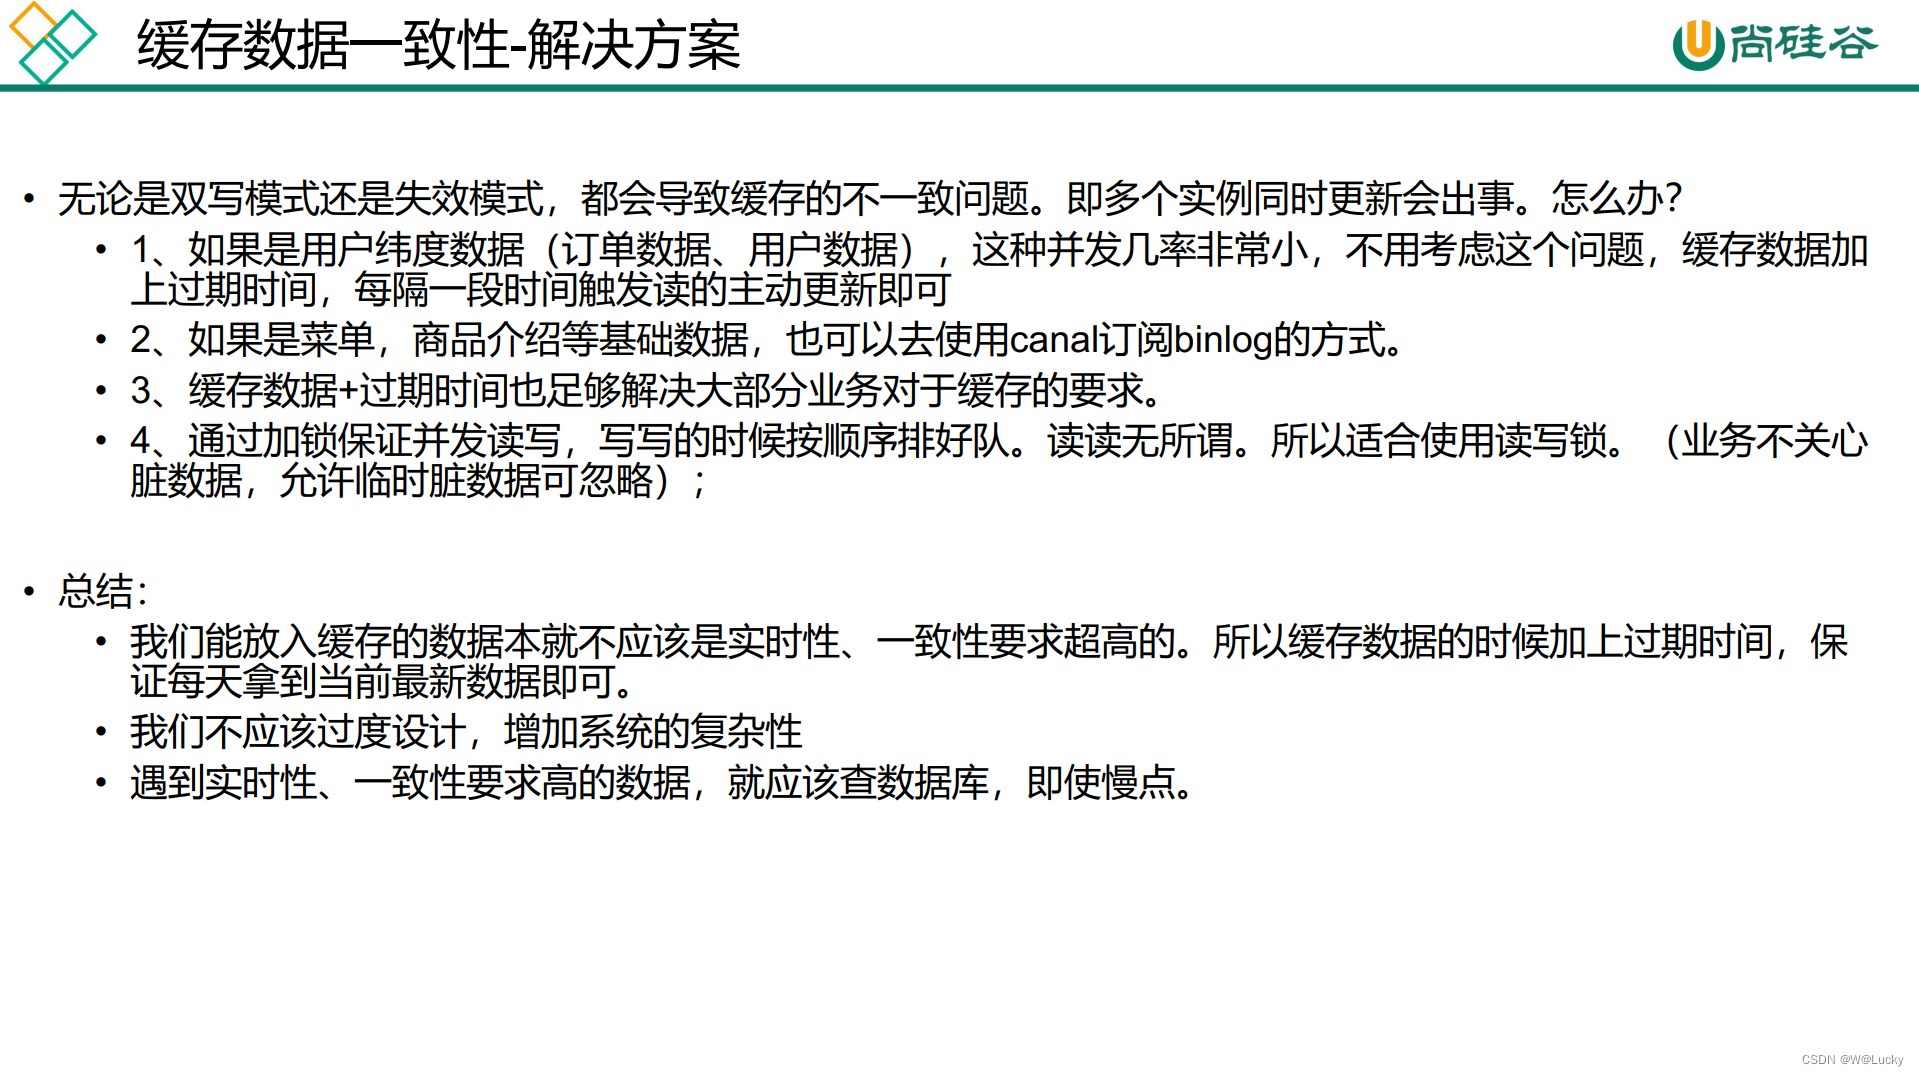

5.3 SpringCache
SpringCache官方文档
每次(先从缓存里读,缓存没有,去数据库查询,写入缓存,返回数据)太麻烦了,引入SpringCache。
5.3.1 简介
- Spring 从 3.1 开始定义了 org.springframework.cache.Cache和 org.springframework.cache.CacheManager 接口来统一不同的缓存技术;并支持使用 JCache(JSR-107) 注解简化我们开发;
- Cache 接口为缓存的组件规范定义, 包含缓存的各种操作集合;Cache 接 口 下 Spring 提 供 了 各 种 xxxCache 的 实 现 ; 如 RedisCache , EhCacheCache ,ConcurrentMapCache 等;
- 每次调用需要缓存功能的方法时, Spring 会检查检查指定参数的指定的目标方法是否已经被调用过; 如果有就直接从缓存中获取方法调用后的结果, 如果没有就调用方法并缓存结果后返回给用户。 下次调用直接从缓存中获取。
- 使用 Spring 缓存抽象时我们需要关注以下两点:
1、 确定方法需要被缓存以及他们的缓存策略
2、 从缓存中读取之前缓存存储的数据
5.3.2 基础概念
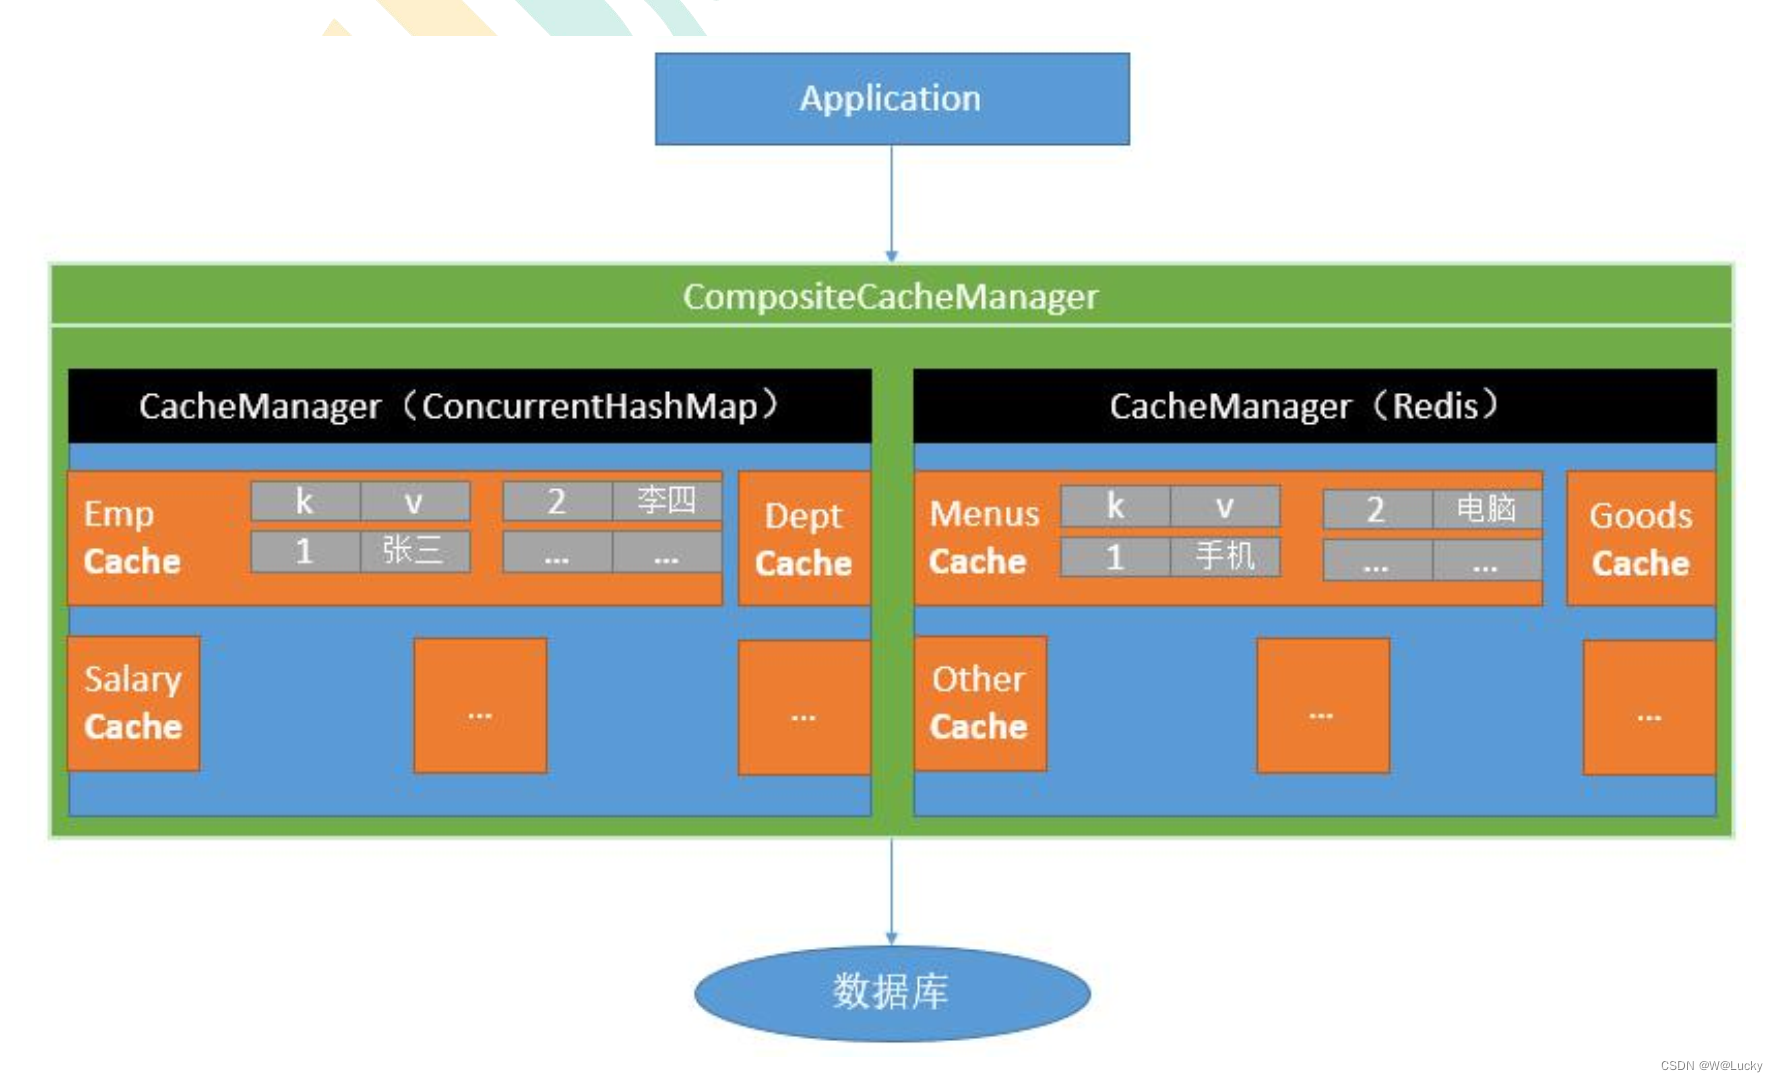
5.3.3 注解
| Cache | 缓存接口,定义缓存操作.实现有:RedisCache,RhCacheCache,ConcurrentMapCache等 |
| CacheManager | 缓存管理器,管理各种缓存组件 |
| @Cacheable | 主要针对方法配置,能够根据方法的请求参数对其结果进行缓存 |
| @CacheEvict | 清空缓存 |
| @CachePut | 保证方法被调用,又希望结果被缓存 |
| @Caching | 组合上面三个注解多个操作 |
| @EnableCaching | 开启基于注解的缓存 |
| @CacheConfig | 在类级别分享缓存的相同配置 |
| keyGenerator | 缓存数据是key生成策略 |
| serialize | 缓存数据是value序列化策略 |
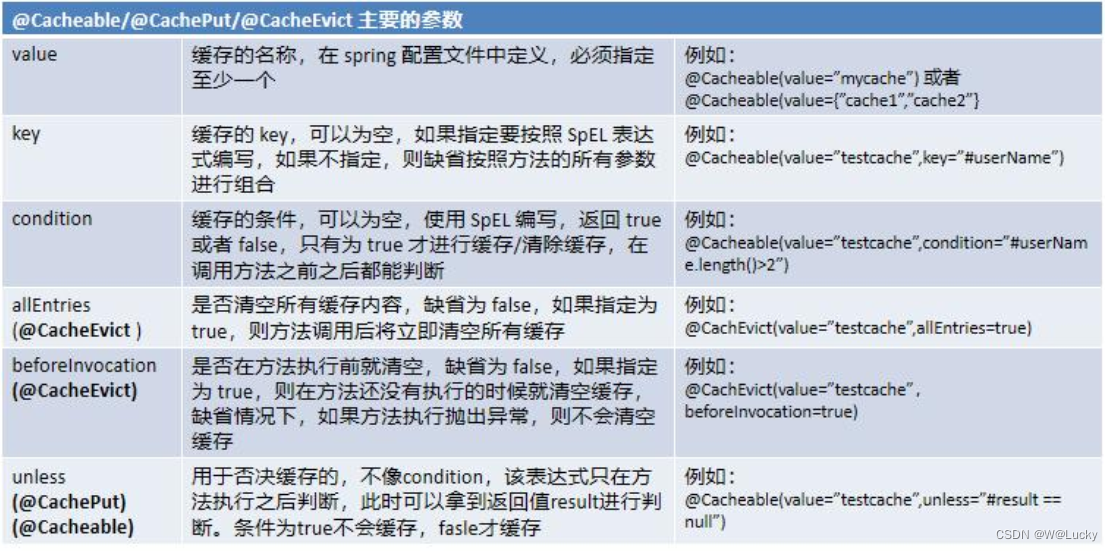
5.3.4 表达式语法

5.3.5 整合SpringCache & 体验@Cacheable
1. 引入依赖
<!-- spring-boot-starter-data-redis -->
<dependency>
    <groupId>org.springframework.boot</groupId>
    <artifactId>spring-boot-starter-data-redis</artifactId>
</dependency>

<!--  SpringCache  -->
<dependency>
    <groupId>org.springframework.boot</groupId>
    <artifactId>spring-boot-starter-cache</artifactId>
</dependency>
2. 配置使用redis作为缓存
spring:
  cache:
    type: redis
3. 开启缓存 @EnableCaching
4. 使用缓存注解
*  @Cacheable: Triggers cache population :触发将数据保存的缓存的操作。
*  @CacheEvict: Triggers cache eviction :触发将数据从缓存删除的操作。
*  @CachePut: Updates the cache without interfering with the method execution: 不影响方法执行更新缓存。
*  @Caching: Regroups multiple cache operations to be applied on a method : 组合以上多个操作。
*  @CacheConfig: Shares some common cache-related settings at class-level : 在类级别共享缓存的相同配置。
5. 测试
查询一级分类使用缓存:getLevel1Category()使用@Cacheable({"category"})
1. 每个需要缓存的数据我们都来指定要放到哪个名字的缓存。【缓存的分区(按照业务类型分)】
2. 代表当前方法的结果需要缓存,如果缓存中有,方法不用调用。如果缓存中没有,会调用方法,
最后将方法的结果放入缓存。
3. 默认行为
    (1)如果缓存中有,方法不用调用
    (2)key默认自动生成:缓存的名字::SimpleKey [] (category::SimpleKey [])
    (3)缓存的value值,默认使用jdk序列化机制,将序列化后的数据存到redis
    (4)默认ttl时间 -1
@Cacheable({"category"})
@Override
public List<CategoryEntity> getLevel1Category() {
//
System.out.println("getLevel1Category......");
long l = System.currentTimeMillis();
List<CategoryEntity> categoryEntities = this.baseMapper.selectList(new QueryWrapper<CategoryEntity>().eq("parent_cid", 0));
System.out.println("花费时间:" + (System.currentTimeMillis() - l));
return categoryEntities;
}
第一次从数据库中查询分类放入缓存,当再次查询三级分类从缓存中获取。5.3.6 @Cacheable细节设置
1. 指定key
/**
     * 查询一级分类
     * parent_cid=0或者cat_level=1
     *
     */
//    @Cacheable(value = {"category"},key = "'level1Categorys'")
    @Cacheable(value = {"category"},key = "#root.method.name")
    @Override
    public List<CategoryEntity> getLevel1Categorys() {
        //
        System.out.println("getLevel1Category......");
        long l = System.currentTimeMillis();
        List<CategoryEntity> categoryEntities = this.baseMapper.selectList(new QueryWrapper<CategoryEntity>().eq("parent_cid", 0));
        System.out.println("花费时间:" + (System.currentTimeMillis() - l));
        return categoryEntities;
    }
2. 指定过期时间
spring:
  cache:
    type: redis
    redis:
      # 毫秒为单位
      time-to-live: 3600000
3. 测试
(1)缓存的过期时间自定义值3600000ms;
(2)缓存的key为方法名。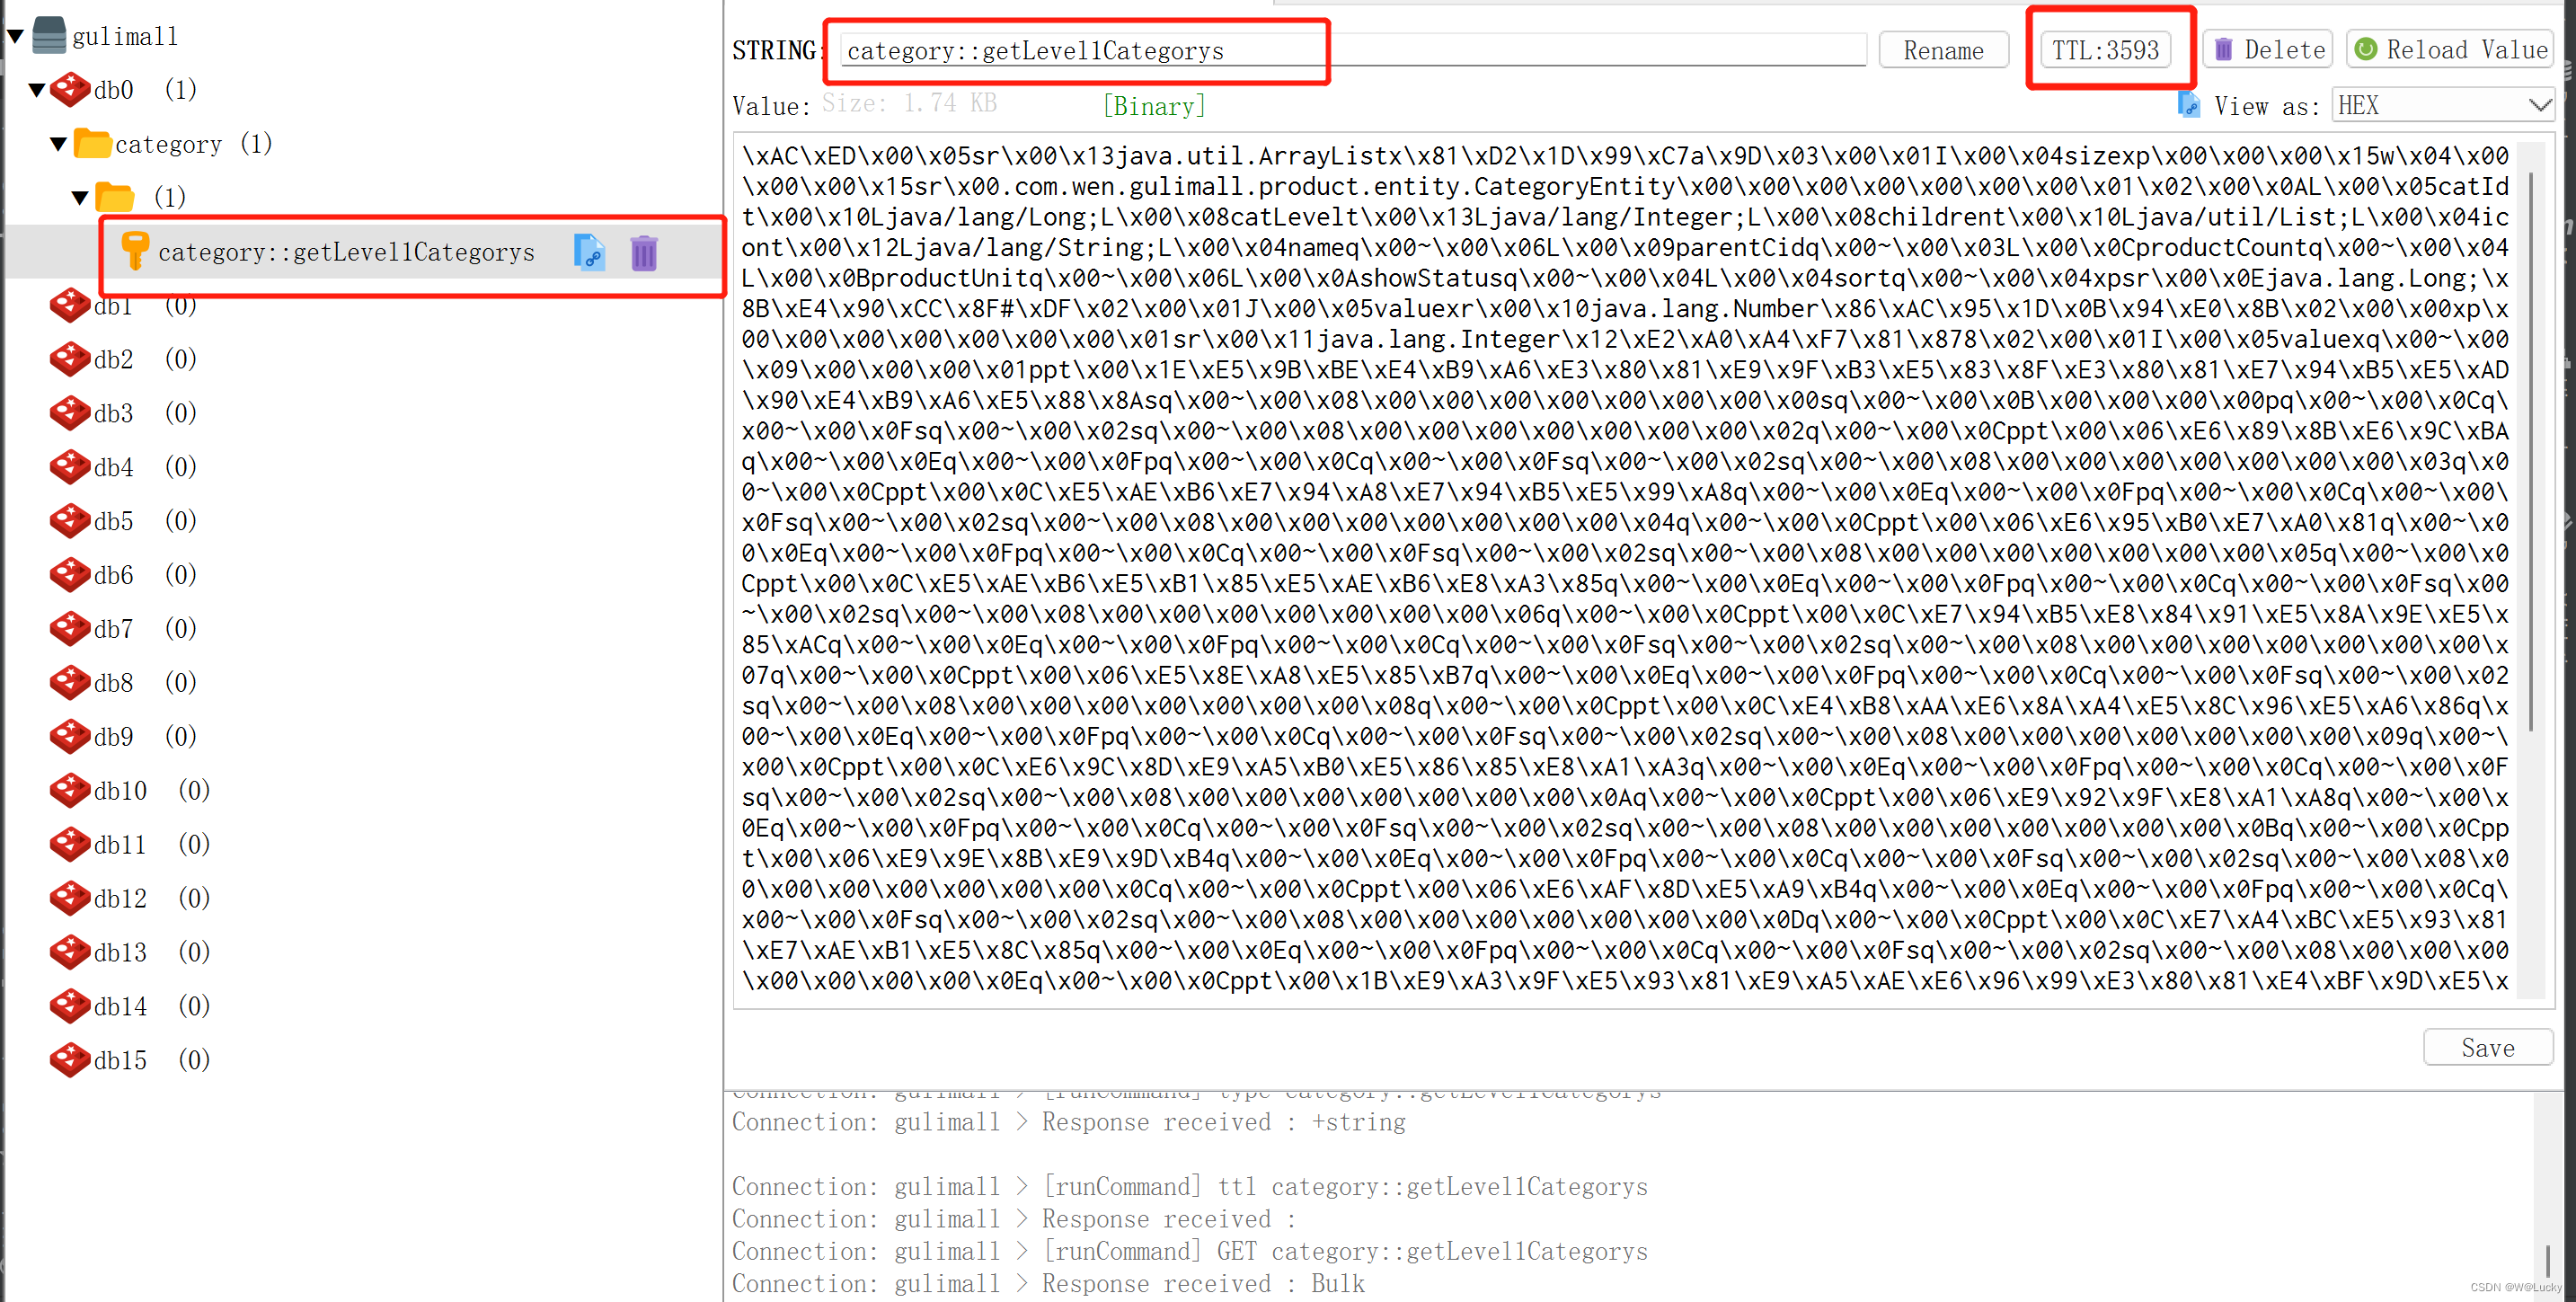
5.3.7 自定义缓存配置
5.3.7.1 相关源码解析
1. 从CacheAutoConfiguration类的内部类CacheConfigurationImportSelector(缓存配置导入选择器)
可以根据配置文件中指定的缓存的类型,使用相关的配置,这里我们使用redis。
2. org.springframework.data.redis.cache.RedisCacheConfiguration默认不在容器中,默认使用
org.springframework.data.redis.cache.RedisCacheConfiguration.defaultCacheConfig()默认
配置,如下:
/**
	 * Default {@link RedisCacheConfiguration} using the following:
	 * <dl>
	 * <dt>key expiration</dt>
	 * <dd>eternal</dd>
	 * <dt>cache null values</dt>
	 * <dd>yes</dd>
	 * <dt>prefix cache keys</dt>
	 * <dd>yes</dd>
	 * <dt>default prefix</dt>
	 * <dd>[the actual cache name]</dd>
	 * <dt>key serializer</dt>
	 * <dd>{@link org.springframework.data.redis.serializer.StringRedisSerializer}</dd>
	 * <dt>value serializer</dt>
	 * <dd>{@link org.springframework.data.redis.serializer.JdkSerializationRedisSerializer}</dd>
	 * <dt>conversion service</dt>
	 * <dd>{@link DefaultFormattingConversionService} with {@link #registerDefaultConverters(ConverterRegistry) default}
	 * cache key converters</dd>
	 * </dl>
	 *
	 * @return new {@link RedisCacheConfiguration}.
	 */
	public static RedisCacheConfiguration defaultCacheConfig() {
		return defaultCacheConfig(null);
	}
如果容器中有RedisCacheConfiguration,使用容器中的,可以通过自定义缓存配置实现。
1. CacheAutoConfiguration.java (缓存的自动配置)
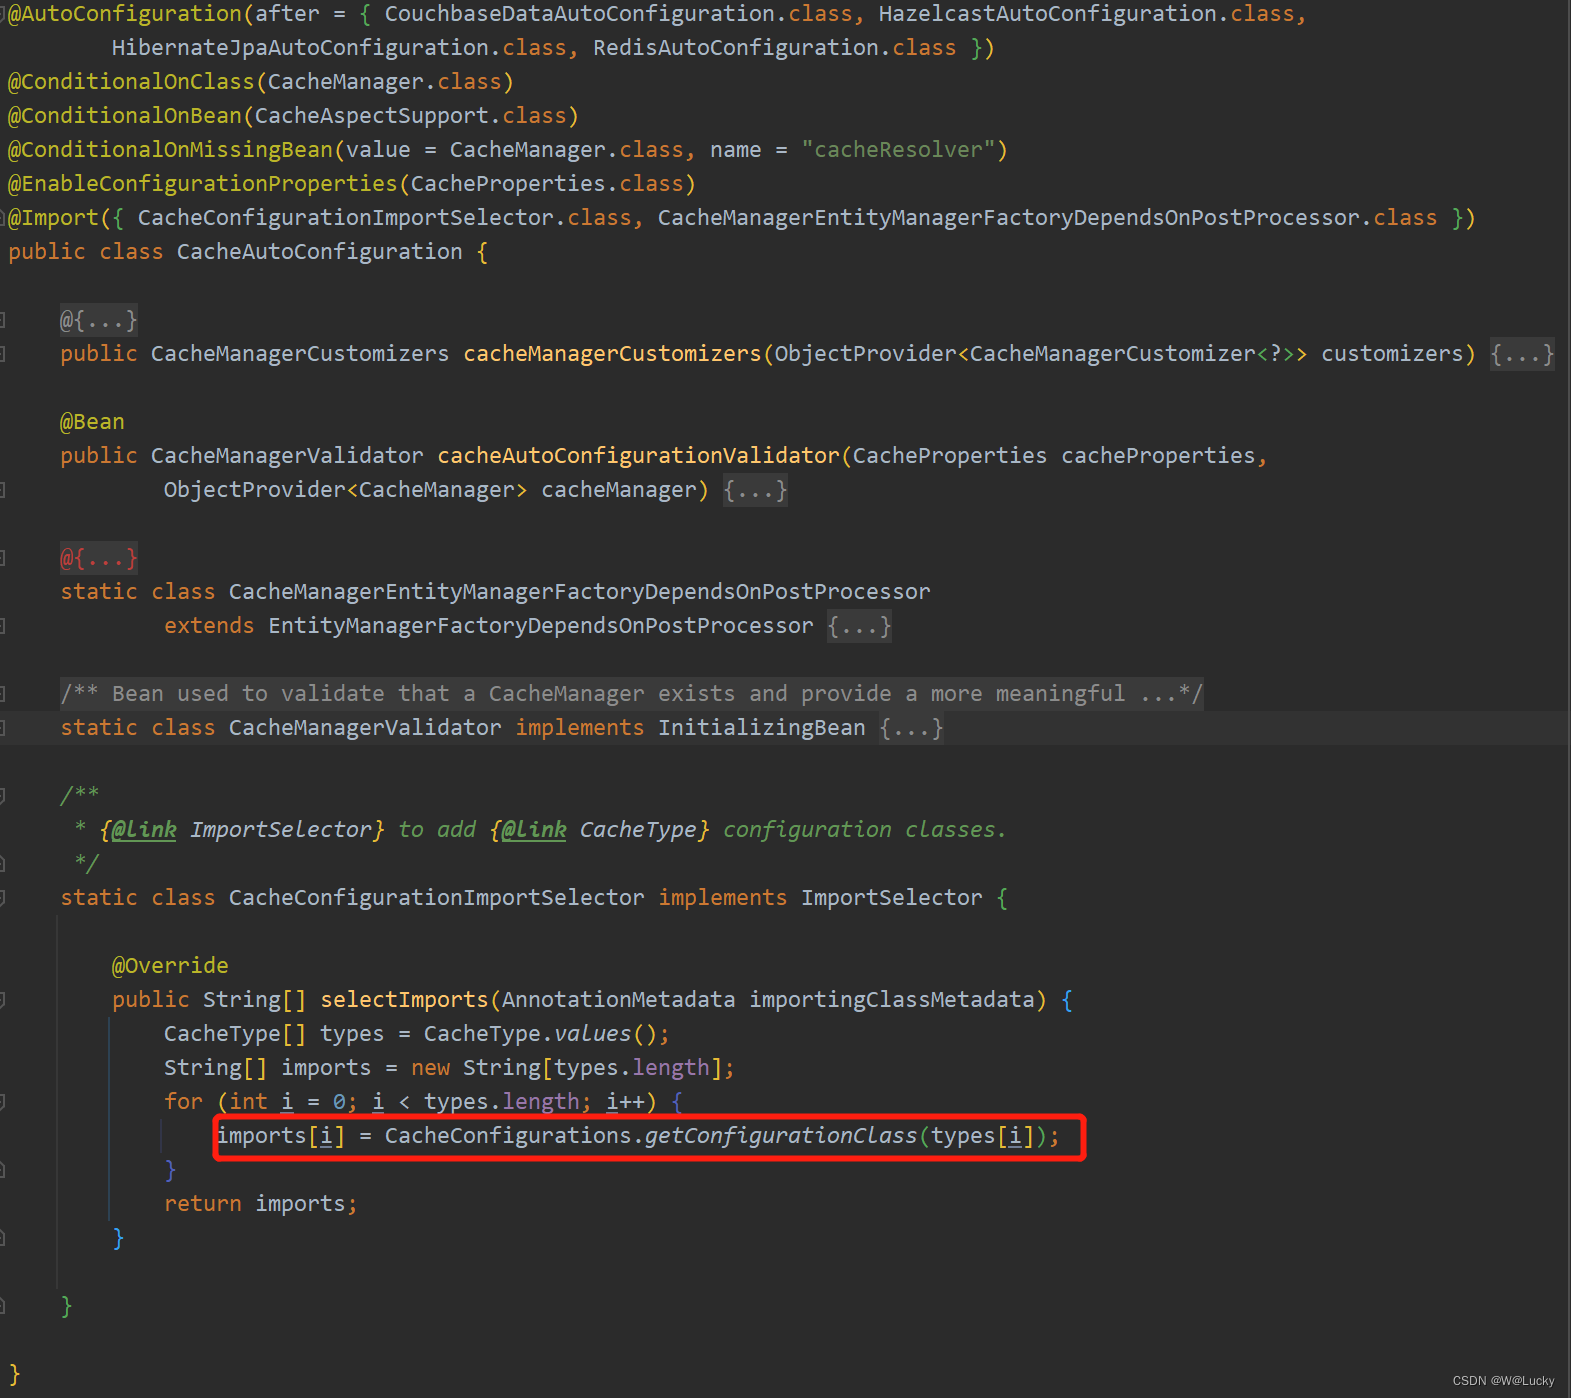
2. CacheConfigurations.java (缓存的所有配置)
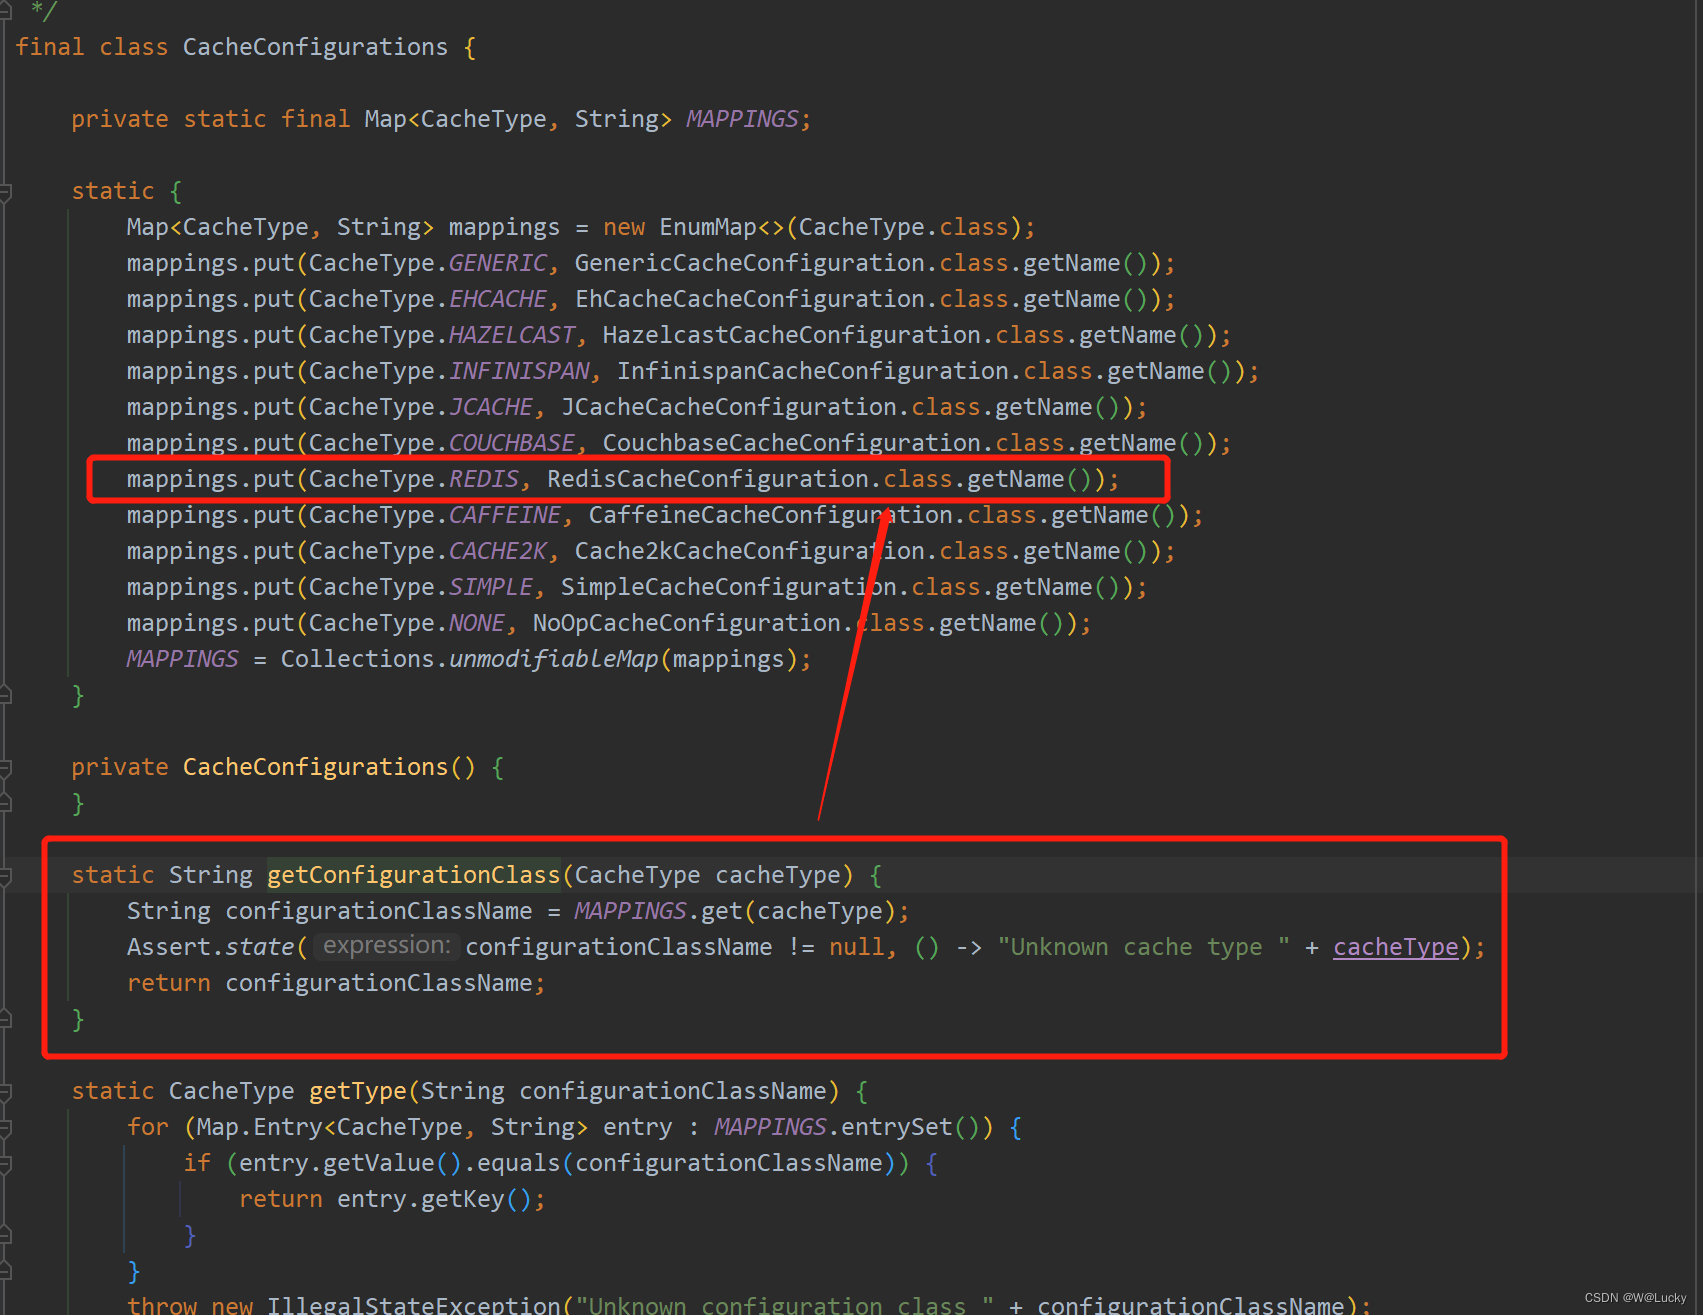
3. RedisCacheConfiguration.java (Redis缓存配置)
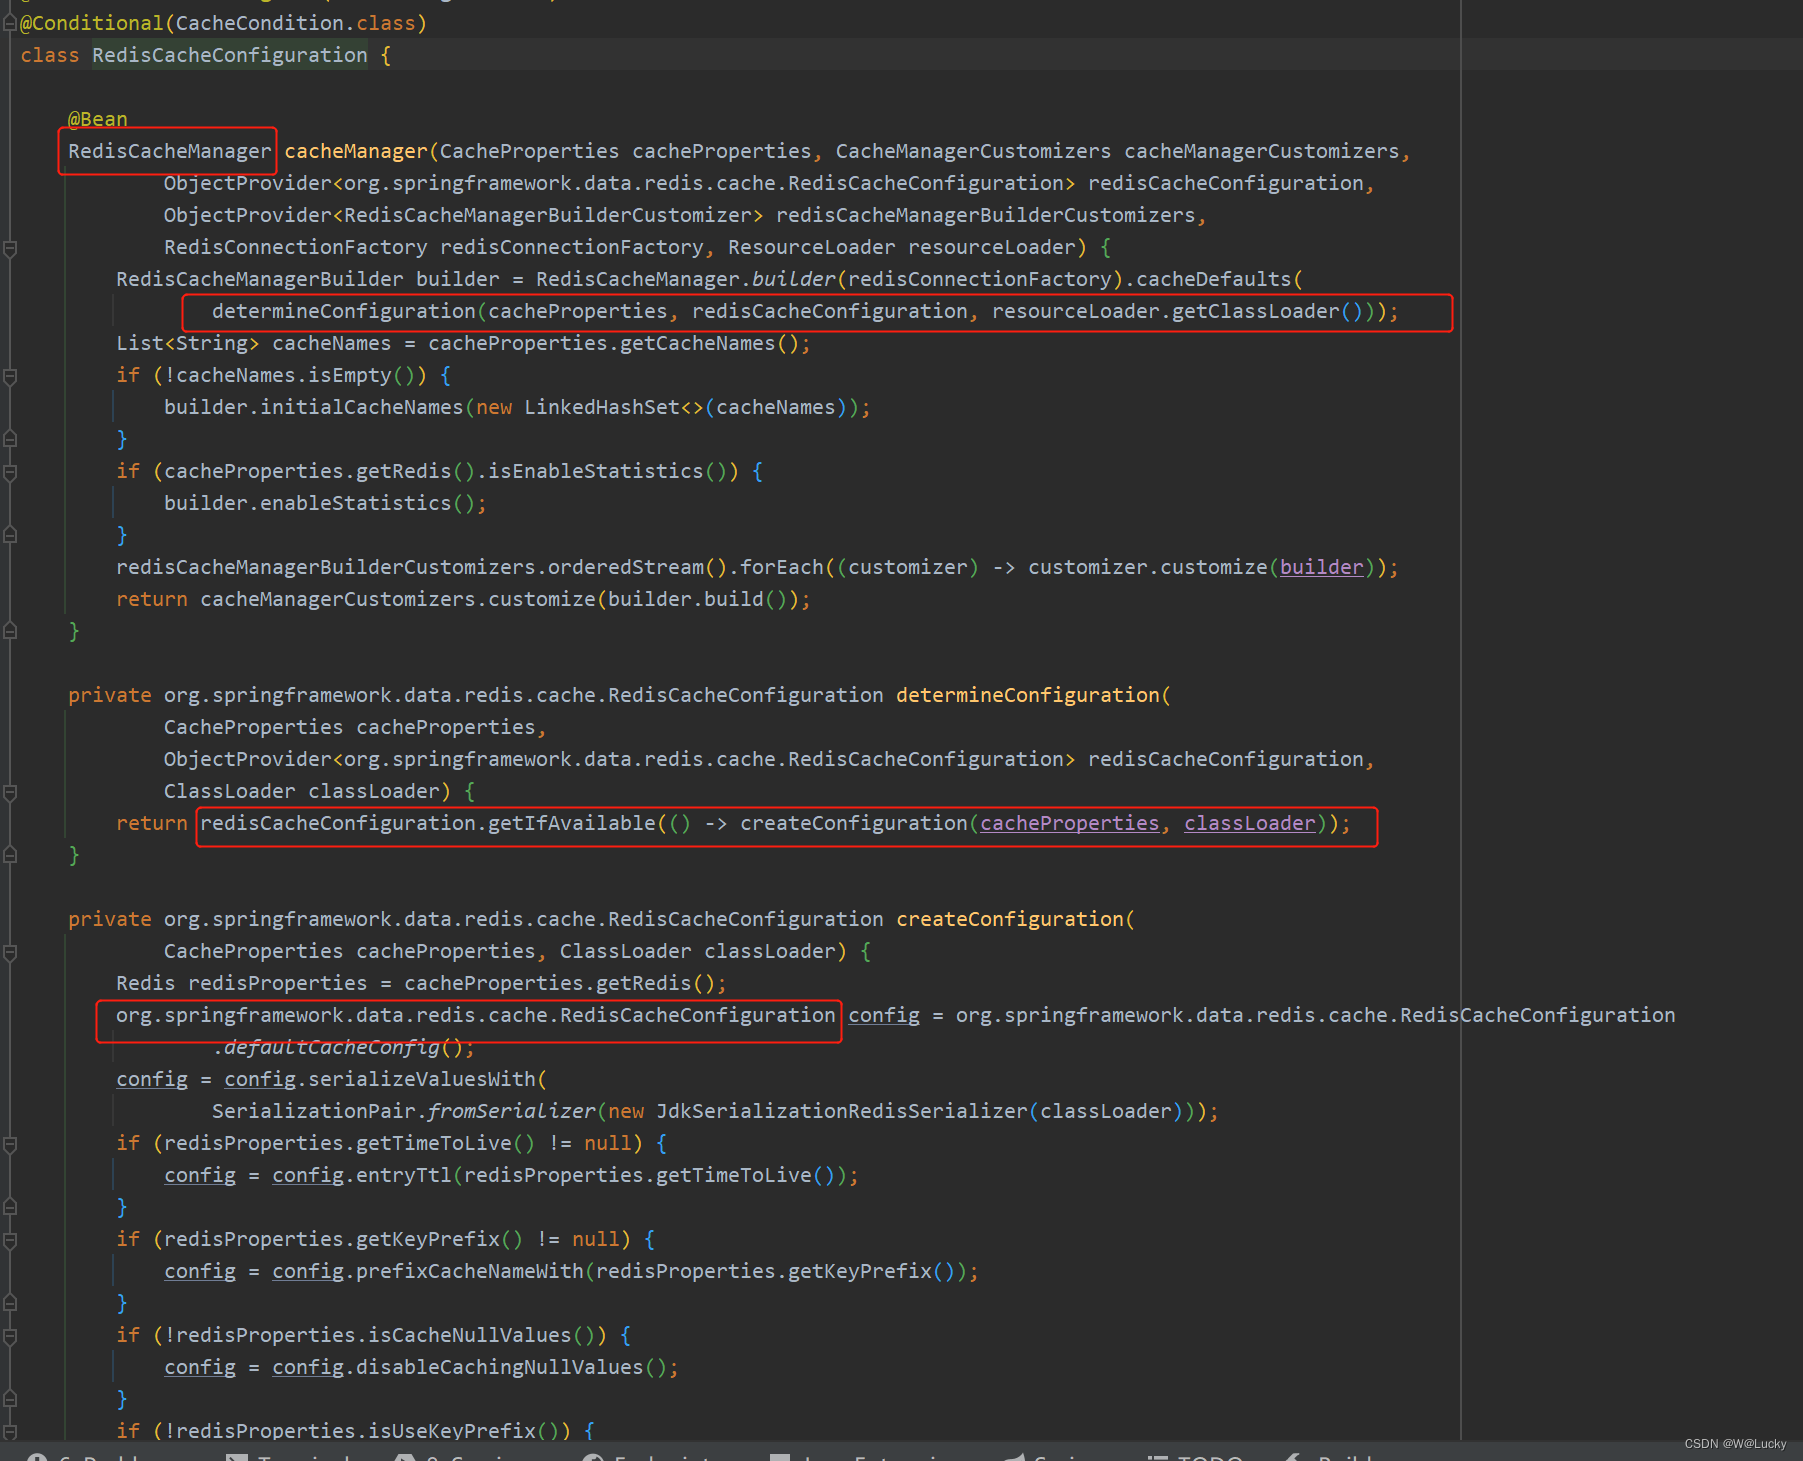
5.3.7.2 自定义缓存配置
1. 自定义配置类
@Configuration
@EnableCaching
@EnableConfigurationProperties(CacheProperties.class)
public class MyCacheConfig {

//    @Resource
//    CacheProperties cacheProperties;
    /**
     * RedisCacheConfiguration 默认情况下容器中是没有的
     *
     * 配置文件中的东西没有用上
     * 1. 原来和配置文件绑定的配置类是这样的
     *      @ConfigurationProperties(prefix = "spring.cache")
     *      public class CacheProperties
     * 2. 让它生效
     *  1) @EnableConfigurationProperties(CacheProperties.class)
     *  2) 注入就可以使用了 @Autowired CacheProperties cacheProperties;
     *  3) 直接在方法参数上加入属性参数redisCacheConfiguration(CacheProperties redisProperties)
     *     动从IOC容器中找
     * @return
     */
    @Bean
    RedisCacheConfiguration redisCacheConfiguration(CacheProperties cacheProperties){
        RedisCacheConfiguration config = RedisCacheConfiguration.defaultCacheConfig();
        // 这些方法会返回新的 RedisCacheConfiguration,所以需要赋值给已有的
        config = config.serializeKeysWith(RedisSerializationContext.SerializationPair.fromSerializer(new StringRedisSerializer()));
        // 指定缓存序列化方式为json
        config = config.serializeValuesWith(RedisSerializationContext.SerializationPair.fromSerializer(new GenericJackson2JsonRedisSerializer()));

        CacheProperties.Redis redisProperties = cacheProperties.getRedis();

        // 将配置文件中所有的配置生效
        if (redisProperties.getTimeToLive() != null) {
            config = config.entryTtl(redisProperties.getTimeToLive());
        }
        if (redisProperties.getKeyPrefix() != null) {
            config = config.prefixCacheNameWith(redisProperties.getKeyPrefix());
        }
        if (!redisProperties.isCacheNullValues()) {
            config = config.disableCachingNullValues();
        }
        if (!redisProperties.isUseKeyPrefix()) {
            config = config.disableKeyPrefix();
        }
        return config;
    }
}
2. yml相关配置
spring:
  cache:
    type: redis
    redis:
      # 毫秒为单位
      time-to-live: 3600000
      # 如果指定前缀就是用指定的前缀+缓存的名字,如果没有默认使用缓存的名字作为前缀
      key-prefix: CACHE_
      use-key-prefix: false
      # 是否缓存空值,防止缓存穿透
      cache-null-values: true
3. 测试
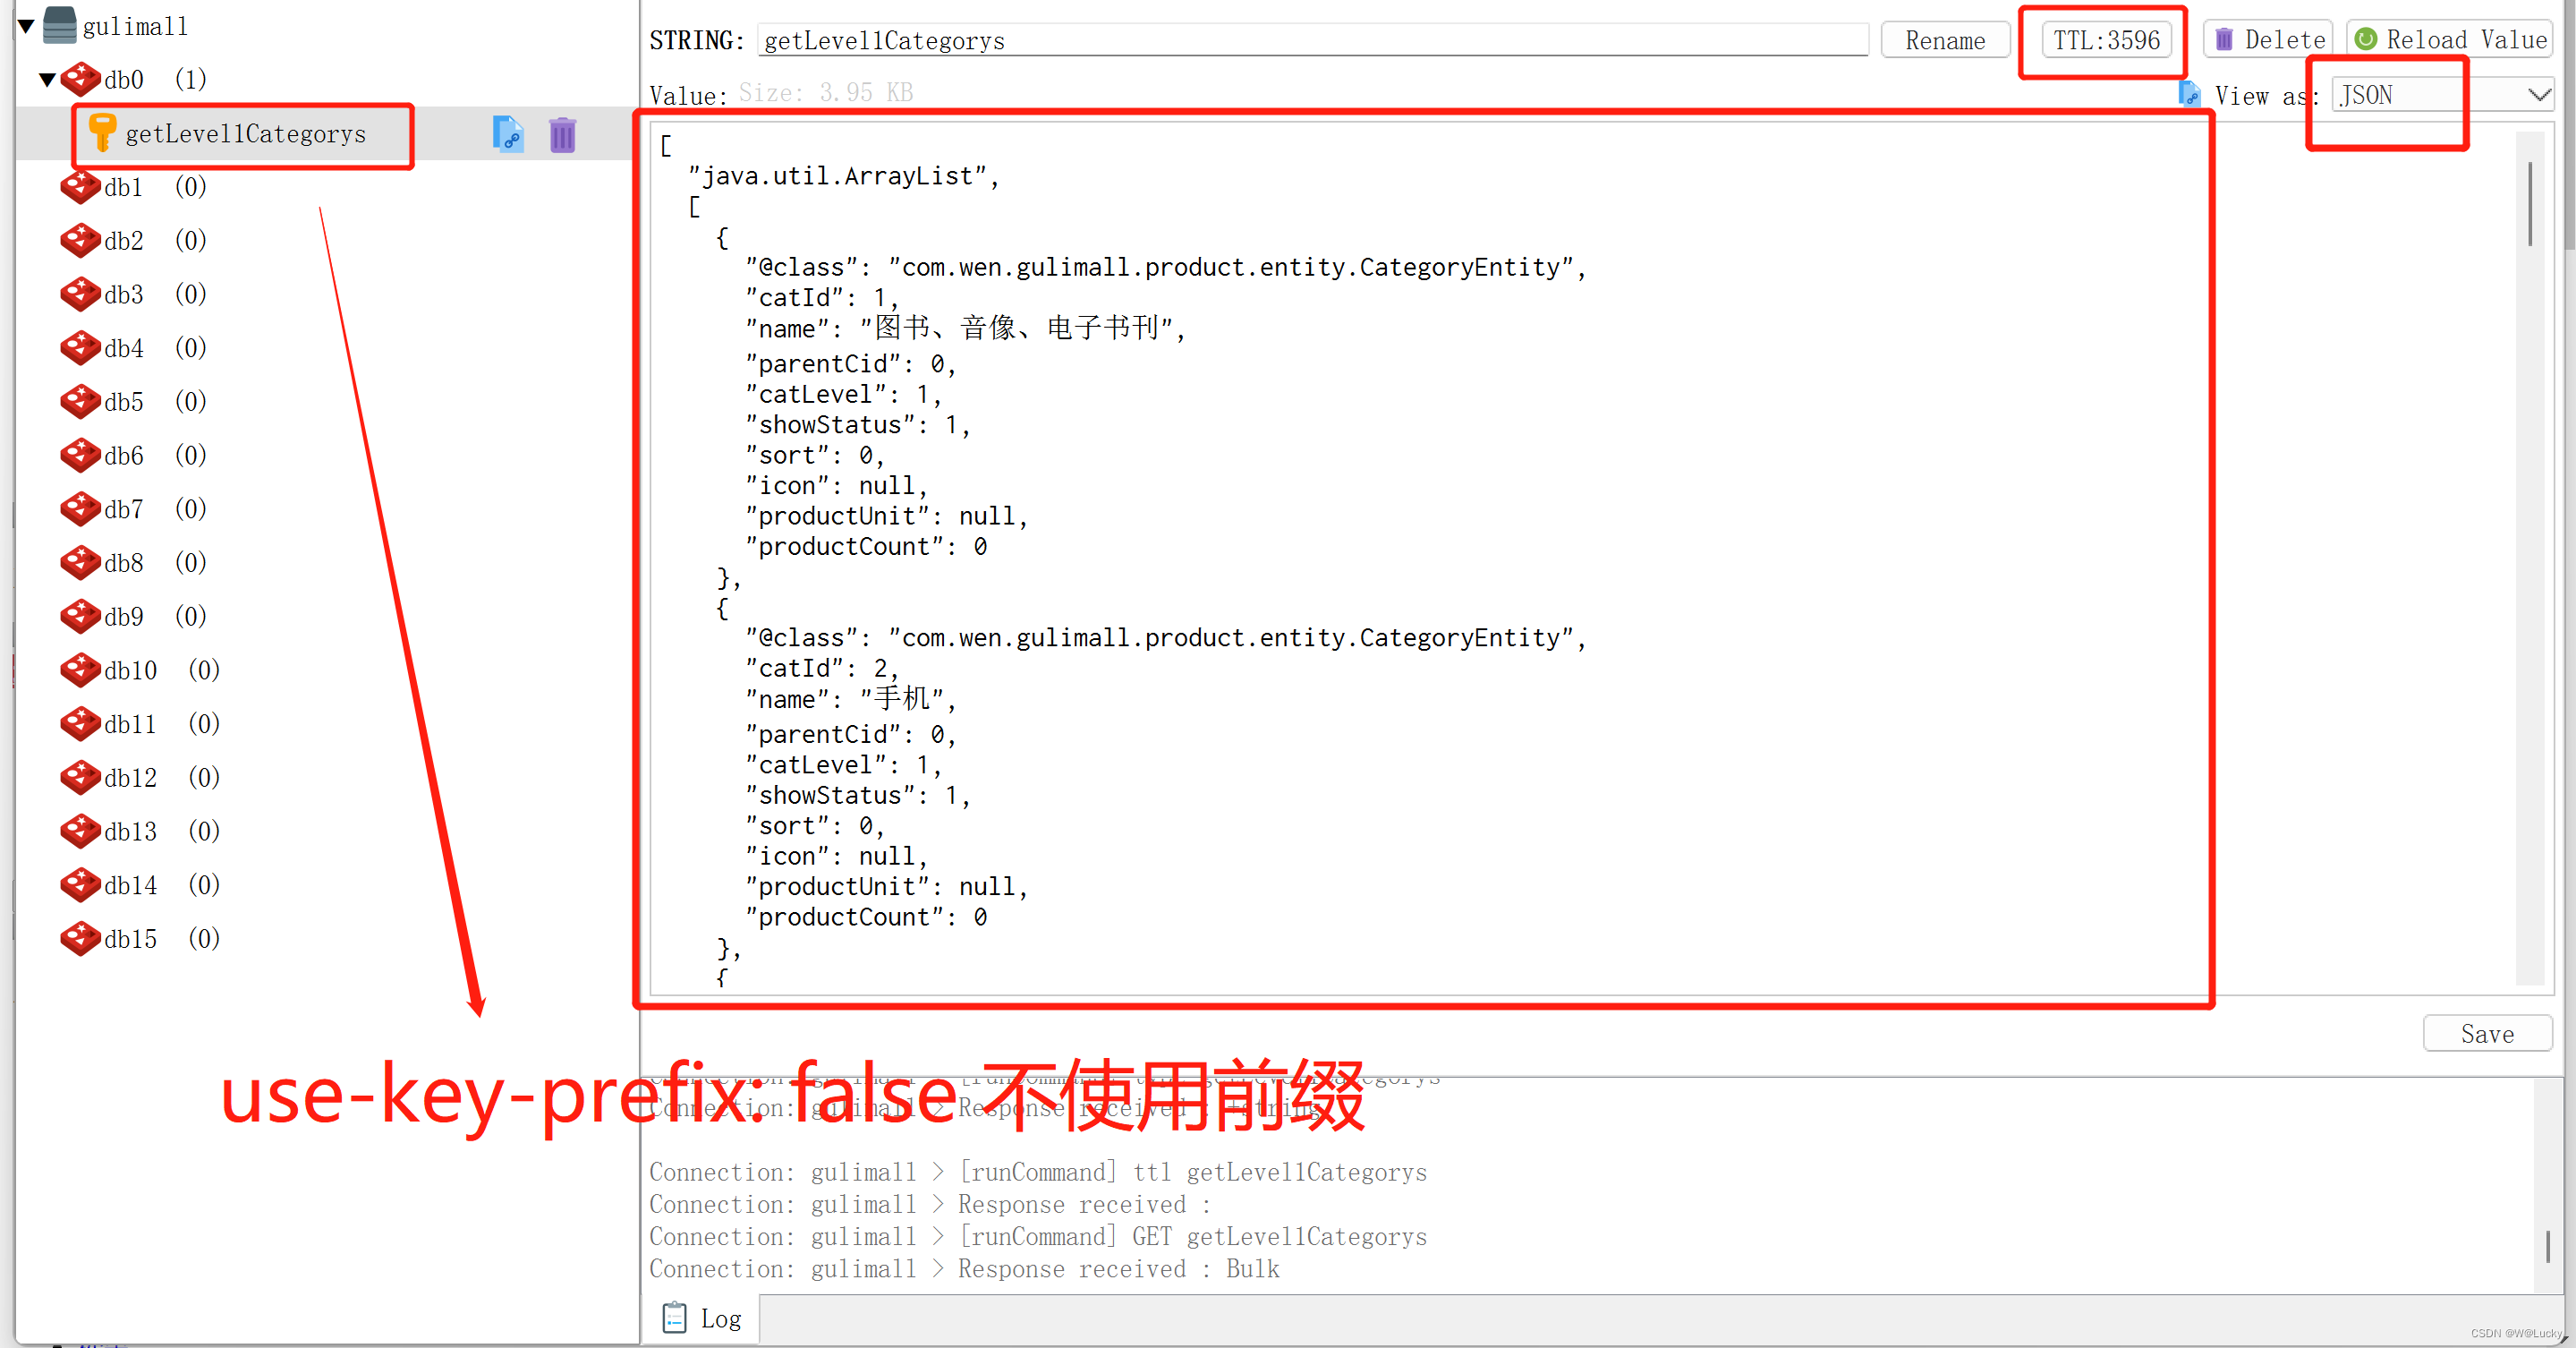
5.3.8 @CacheEvict
1. 跟新三级分类,会删除指定key的缓存
@CacheEvict(value = "category",key = "'getLevel1Categorys'")

2. 测试步骤:
(1)将@CacheEvict(value = "category",key = "'getLevel1Categorys'")放在更新操作的代码上,如下:
(2)重启代码;
(3)访问获取一级分类接口getLevel1Categorys(),查看缓存中数据;
(4)修改三级分类,查看缓存中是否还存在key为getLevel1Categorys的数据。
@CacheEvict(value = "category",key = "'getLevel1Categorys'") // 删除指定key的值
@Transactional(rollbackFor = Exception.class)
@Override
public void updateCascade(CategoryEntity category) {
    this.updateById(category);
    if (!StringUtils.isEmpty(category.getName())) {
        categoryBrandRelationService.updateCategory(category.getCatId(), category.getName());
    }

    // 同时修改缓存中的数据
    //redis.del("catalogJson"); // 等待下次主动查询进行更新
}
升级用法:(删除带category前缀的所有缓存allEntries = true)
1. 修改获取三级分类的方法getCatalogJson()也使用@Cacheable(value = "category",key = "#root.methodName"),不在使用传统的方式。代码如下:
2. 修改三级分类方法updateCascade(CategoryEntity category)使用注解@CacheEvict(value = "category",allEntries = true)
3. 重启代码,访问gulimall.com,查看缓存中是否有key为getLevel1Categorys和key为getCatalogJson的数据
4. 修改三级分类,查看缓存。
相关yml配置:(使用key前缀)
spring:
cache:
type: redis
redis:
# 毫秒为单位
time-to-live: 3600000
# 如果指定前缀就是用指定的前缀+缓存的名字,如果没有默认使用缓存的名字作为前缀
# key-prefix: CACHE_
use-key-prefix: true
# 是否缓存空值,防止缓存穿透
cache-null-values: truegetCatalogJson()方法优化:
@Cacheable(value = "category",key = "#root.methodName")
@Override
public Map<String, List<Catelog2Vo>> getCatalogJson() {
    System.out.println("查询了数据库....");
    /**
     * 1. 将数据库的多次查询变为一次
     */
    List<CategoryEntity> selectList = this.baseMapper.selectList(null);

    // 查出所有的一级分类
    List<CategoryEntity> level1Category = getParent_cid(selectList, 0L);
    // 封装数据
    Map<String, List<Catelog2Vo>> collect = level1Category.stream().collect(Collectors.toMap(k -> k.getCatId().toString(), v -> {
        // 1. 查询一级分类下的所有二级分类
        List<CategoryEntity> categoryEntities = getParent_cid(selectList, v.getCatId());
        List<Catelog2Vo> level2Category = null;
        if (categoryEntities != null && categoryEntities.size() > 0) {
            level2Category = categoryEntities.stream().map(l2 -> {
                Catelog2Vo catelog2Vo = new Catelog2Vo(v.getCatId().toString(), null, l2.getCatId().toString(), l2.getName());
                // 2. 找二级分类下的所有三级分类
                List<CategoryEntity> level3Category = getParent_cid(selectList, l2.getCatId());
                if (level3Category != null && level3Category.size() > 0) {
                    List<Catelog2Vo.Catelog3Vo> catelog3Vos = level3Category.stream().map(l3 -> {
                        // 封装成指定格式
                        Catelog2Vo.Catelog3Vo catelog3Vo = new Catelog2Vo.Catelog3Vo(l2.getCatId().toString(), l3.getCatId().toString(), l3.getName());
                        return catelog3Vo;
                    }).collect(Collectors.toList());
                    catelog2Vo.setCatalog3List(catelog3Vos);
                }
                return catelog2Vo;
            }).collect(Collectors.toList());
        }
        return level2Category;
    }));
    return collect;
}
updateCascade(CategoryEntity category)方法:
/**
 * 级联更新所有关联的数据
 *  key 必须使用SpEL表达式,如果是普通字符串需要加单引号 ''
 *  @CacheEvict:失效模式
 *  1. 同时进行多种缓存操作 @Caching
 *  2. 指定删除某个分区下的所有数据 @CacheEvict(value = "category",allEntries = true)
 *  3. 存储同一类型的数据,都可以指定成同一个分区。分区名默认就是缓存的前缀
 * @param category
 */
//@CacheEvict(value = "category",key = "'getLevel1Categorys'")
//    @Caching(evict = {
//            @CacheEvict(value = "category",key = "'getLevel1Categorys'"),
//            @CacheEvict(value = "category",key = "'getCatalogJson'")
//    })
//    @CachePut // 双写模式,该方法没有返回值不支持双写模式
@CacheEvict(value = "category",allEntries = true)
@Transactional(rollbackFor = Exception.class)
@Override
public void updateCascade(CategoryEntity category) {
    this.updateById(category);
    if (!StringUtils.isEmpty(category.getName())) {
        categoryBrandRelationService.updateCategory(category.getCatId(), category.getName());
    }

    // 同时修改缓存中的数据
    //redis.del("catalogJson"); // 等待下次主动查询进行更新
}
测试:
(1)访问gulimall.com,查看缓存。

(2)修改任意三级分类,修改成功后,发现前缀为category的缓存均被删除。
5.3.9 @Caching
同时进行多种缓存操作@Caching。@Caching(evict = {
@CacheEvict(value = "category",key = "'getLevel1Categorys'"),
@CacheEvict(value = "category",key = "'getCatalogJson'")
})
@Transactional(rollbackFor = Exception.class)
@Override
public void updateCascade(CategoryEntity category) {
this.updateById(category);
if (!StringUtils.isEmpty(category.getName())) {
categoryBrandRelationService.updateCategory(category.getCatId(), category.getName());
}
// 同时修改缓存中的数据
//redis.del("catalogJson"); // 等待下次主动查询进行更新
}5.3.10 双写模式&失效模式
(1) @Cacheable: 触发将数据保存的缓存的操作。
(2) @CacheEvict: 触发将数据从缓存删除的操作。【失效模式】
(3) @CachePut: 不影响方法执行更新缓存。【双写模式】 方法需要有返回值
(4) @Caching: 组合以上多个操作。
(5) @CacheConfig: 在类级别共享缓存的相同配置。
5.3.11 SpringCache原理与不足
原理:
RedisCacheManager类的createRedisCache()方法 -> RedisCache类
lookup(Object key)
get(Object key, Callable<T> valueLoader) 根据key获取值,未加锁
getSynchronized(Object key, Callable<T> valueLoader) 根据key获取值,使用synchronized加锁
put(Object key, @Nullable Object value)
evict(Object key)
等方法。
不使用sync = true,获取缓存中数据时走的是lookup();使用sync = true,获取缓存中数据走的是get(Object key, Callable<T> valueLoader),如果缓存中无相关数据会调用加锁的方法getSynchronized(Object key, Callable<T> valueLoader)防止缓存击穿。

SpringCache的不足:
1)读模式:
    缓存穿透:查询一个缓存和数据库中都没有的数据。解决:缓存空数据 cache-null-values: true。
    缓存击穿:大量并发进来同时查询一个正好过期的数据。解决:加锁 ;默认是无加锁的 ;sync = true【get()方法加同步锁】。
    缓存雪崩:大量的key同时过期。解决:加随机时间。加上过期时间。spring.cache.redis.time-to-live:3600000。
2)写模式:(缓存与数据库一致性)(没有解决)
    (1)读写加锁。适用与读多写少。
    (2)引入Canal,感知 Mysql的更新去更新缓存。
    (3)读多写多,直接去数据库查询就行。
总结:
    常规数据 (读多写少,及时性,一致性要求不高的数据):完全可以使用SpringCache;写模式(只要缓存的数据有过期时间就可以)。
    特殊数据:特殊设计。


