环境介绍
PC
操作系统:Ubuntu 22
内存:32GB
Python:3.8
开发板
华为Atlas 200I DK A2
内存:4G
NPU:昇腾310B
环境准备
只需要一台Linux 系统的PC机即可
Python版本需要3.7、3.8、3.9
准备CANN ToolKit
下载CANN ToolKit
这边为了和目前手上的200I DK A2开发板版本保持一致所以我使用了CANN 6.2 RC1版本的ToolKit
wget https://ascend-repo.obs.cn-east-2.myhuaweicloud.com/CANN/CANN%206.2.RC1/Ascend-cann-toolkit_6.2.RC1_linux-x86_64.run
安装CANN ToolKit
chmod a+x Ascend-cann-toolkit_6.2.RC1_linux-x86_64.run
./Ascend-cann-toolkit_6.2.RC1_linux-x86_64.run --full
设置环境变量
vim ~/.bashrc
在文件末尾添加如下
source /usr/local/Ascend/ascend-toolkit/set_env.sh
libascend_hal.so: cannot open shared object file:No such…解决办法
确认文件是否存在
进入到CANN ToolKit目录,例如/usr/local/Ascend/或者/home/用户名/Ascend/具体根据实际环境
find . -name libascend_hal.so
查看输出结果得到文件路径
./ascend-toolkit/6.2.RC1/x86_64-linux/devlib/libascend_hal.so
./ascend-toolkit/6.2.RC1/runtime/lib64/stub/libascend_hal.so
./ascend-toolkit/latest/x86_64-linux/devlib/libascend_hal.so
拷贝文件到/usr/local/lib/
cp ./ascend-toolkit/6.2.RC1/x86_64-linux/devlib/libascend_hal.so /usr/local/lib/
进入“/etc/ld.so.conf”,并将“/usr/local/lib”添加至文件最后一行
vim /etc/ld.so.conf
另起一行添加以下内容:
/usr/local/lib/
资源生效
ldconfig
使用atc命令验证
atc
输出结果
ATC start working now, please wait for a moment.
ATC run failed, Please check the detail log, Try 'atc --help' for more information
E10054: The requied parameter [--model] for ATC is empty. Another possible reason is that the value of some parameter is not enclosed by quotation marks ("").
说明安装完成
克隆代码仓
git clone https://gitee.com/HUAWEI-ASCEND/ascend-devkit
将ChatBOT代码拷贝出来
cp -r src/E2E-Sample/ChatBot/ModelConvert ./
模型导出流程
原理介绍
为了能够在4G内存下运行大型语言模型,我们需要把在线推理的模型权重转化为离线推理模型。
在转化为ONNX离线推理模型之后,我们会对模型进行剪裁,并对decoder与lm_head部分进行int8量化
安装依赖包
pip install -r ./requirements.txt
导出模型
导出CHatYuan-Large-V2模型
导出encoder部分模型
python export_encoder.py --version=v2
导出第一次自回归的decoder与lm_head部分模型
python export_decoder_first.py --version=v2
导出第2-N次自回归的decoder与lm_head部分模型
python export_decoder_iter.py --version=v2
注:如果需要导出V1版本的模型将--version设置为v1即可
模型剪裁
这里我们可以使用onnxsim工具来剪裁一些不必要的算子。onnxsim运行需要较长时间,请耐心等待。
剪裁encoder部分模型
onnxsim ./encoder.onnx ./encoder_sim.onnx
剪裁第一次自回归的decoder与lm_head部分模型
onnxsim ./decoder_first.onnx ./decoder_first_sim.onnx
剪裁第2-N次自回归的decoder与lm_head部分模型
onnxsim ./decoder_iter.onnx ./decoder_iter_sim.onnx
对decoder部分模型进行int8量化
在4G内存设备上运行此Demo必须执行此步骤
python quant_decoder.py
使用ATC工具将encoder部分模型转换为混合精度的om模型
注意: 为防止OOM问题,请在内存大于10G的设备上执行此命令。
atc --model=encoder_sim.onnx \
--framework=5 \
--soc_version=Ascend310B1 \
--output=encoder \
--input_format=ND \
--input_shape="input_ids:1,768;attention_mask:1,768" \
--precision_mode=allow_fp32_to_fp16
运行ChatBot
环境准备
关闭OOM Killer
使用root用户登录,在/etc/rc.local文件中删除或注释掉以下内容:
echo 1 > /proc/sys/vm/enable_oom_killer
echo 0 > /sys/fs/cgroup/memory/usermemory/memory.oom_control
修改/sys/fs/cgroup/memory/usermemory/memory.oom_control配置,这个操作是disable oom_killer
echo 1 > /sys/fs/cgroup/memory/usermemory/memory.oom_control
在打开了内存控制的用户下,在~/.bashrc文件中将以下代码注释掉:
echo $$ > /sys/fs/cgroup/memory/usermemory/tasks
重启系统
init 6
挂载swap分区
通过free -h命令查看内存使用情况,如果内存总量小于4G,则需要挂载swap分区
free -h
申请一个2.5G的文件作为swap分区【推荐2.5G以上,请提前预留足够的空间】
sudo fallocate -l 2.5G /swapfile
修改文件权限
sudo chmod 600 /swapfile
创建swap分区
sudo mkswap /swapfile
挂载swap分区
sudo swapon /swapfile
通过 free -h查看swap分区是否挂载成功
free -h
运行
安装依赖
pip install -r requirements.txt
拷贝模型
请将dist_chatbot_standalone.zip、models.zip、tokenizer_file.zip解压后放入对应目录
运行
python main.py
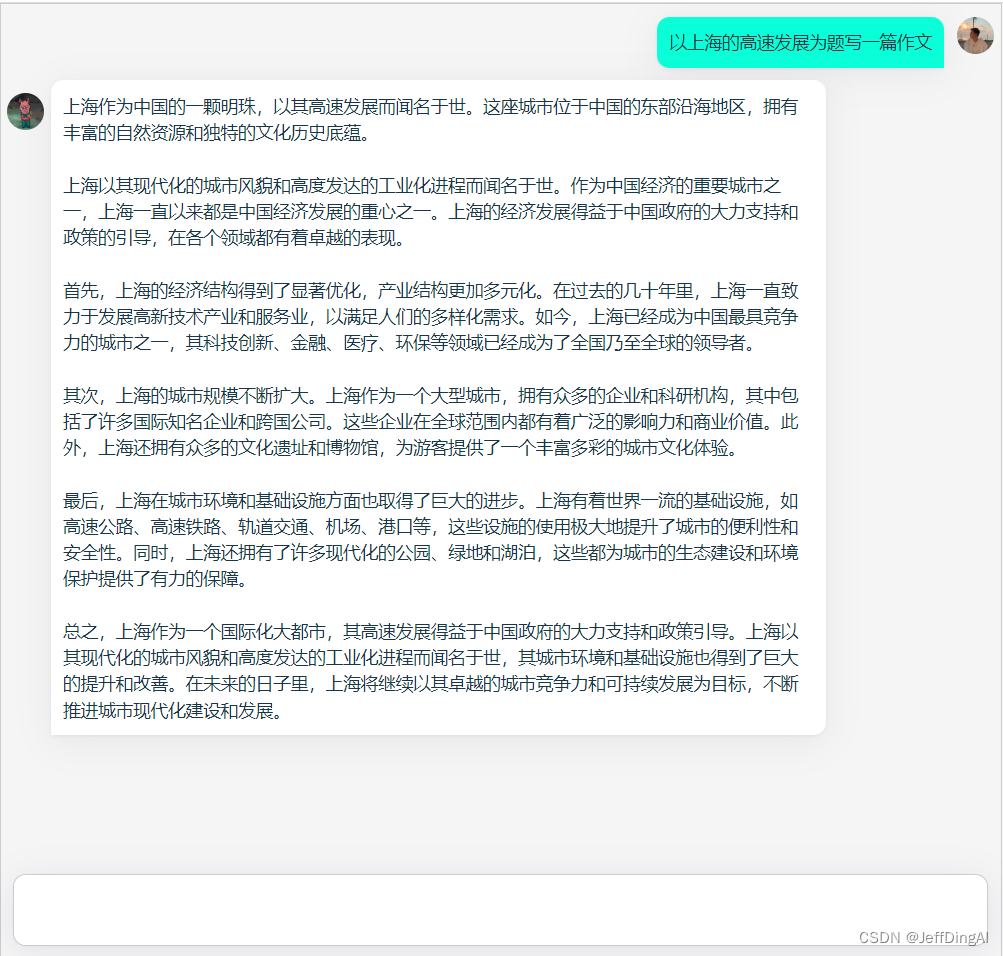
运行截图:
相关资源的下载地址
| 资源名称 | 下载地址 |
|---|---|
| dist_chatbot_standalone | https://ascend-repo.obs.cn-east-2.myhuaweicloud.com/Atlas%20200I%20DK%20A2/DevKit/samples/23.0.RC1/e2e-samples/ChatBot/dist_chatbot_standalone.zip |
| models(V1版本) | https://ascend-repo.obs.cn-east-2.myhuaweicloud.com/Atlas%20200I%20DK%20A2/DevKit/samples/23.0.RC1/e2e-samples/ChatBot/models.zip |
| models(V2版本) | 前面在PC机上完成生成的文件 |
| tokenizer_file | https://ascend-repo.obs.cn-east-2.myhuaweicloud.com/Atlas%20200I%20DK%20A2/DevKit/samples/23.0.RC1/e2e-samples/ChatBot/tokenizer_file.zip |

