前言
因为本人不是搞python和AI的,所以部署这个项目是耗时耗力,本地部署还是挺麻烦的,发现了很多问题,关键就是权限和源代码路径问题,经历了14天(大部分时间扔在做系统,装环境,代码阅读上了),尝试了很多种方式方法,系统安装了不知道多少遍,才本地部署成功,记录下过程中出现的问题,和最合理的安装流程,方便以后的二次开发。
落地的就是这个试验了,里面包含了训练、合成,项目传送门:【有手就行】使用你自己的声音做语音合成 - 飞桨AI Studio
系统选择
Windows Server 2012 R2、Centos7.6、Ubuntu18.0.4,官方的建议是使用Linux系统。
1.Windows Server 2012 R2
Windows,安装环境等过程都是很顺利的,但是最后还是失败了,主要是MFA的环境问题和MFA相关的程序对现有环境使用的问题,都不是从面上能轻易解决的,所以最后还是放弃了。
2.Centos7.6
这是我最早使用的部署系统,使用了Docker和直接安装两种方式,也失败了,但是后来在ubuntu解决问题的过程中,也发现Centos出现的问题也是可以解决的,所以等有空了,我会在尝试一次在Centos中部署下,并制作成Docker。
3.Ubuntu18.04.6
选用18版本,就是考虑兼容的问题,而且我用的是桌面版,因为在语音合成项目中使用了streamlit进行发布,桌面版可以使用浏览器直接本地访问,不用在其他电脑上打开网页,桌面版还可以打开很多工具,比如性能监控、系统备份(用于制作镜像备用)等等。
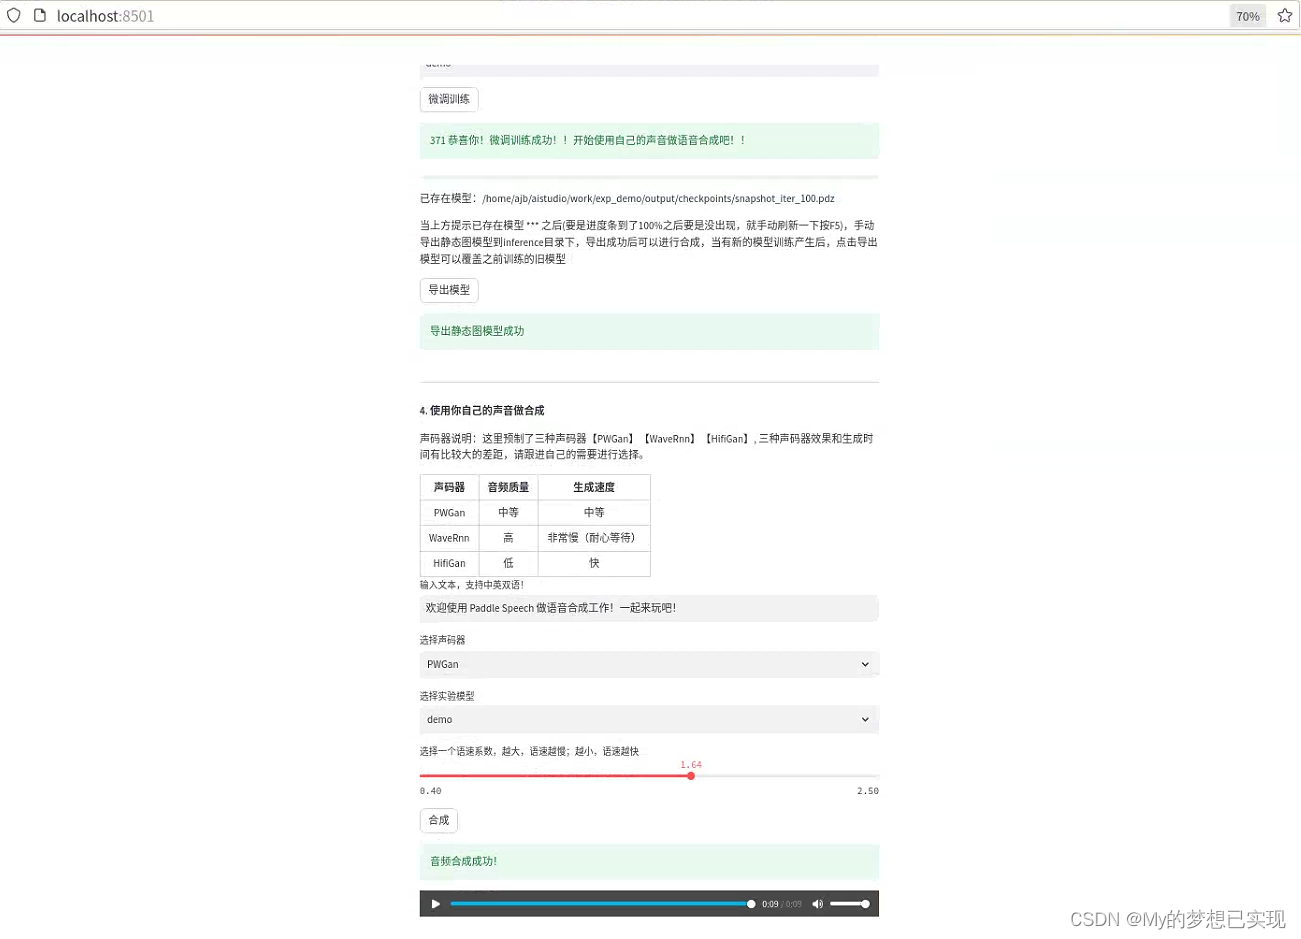
本地部署成功案例截图
前端截图
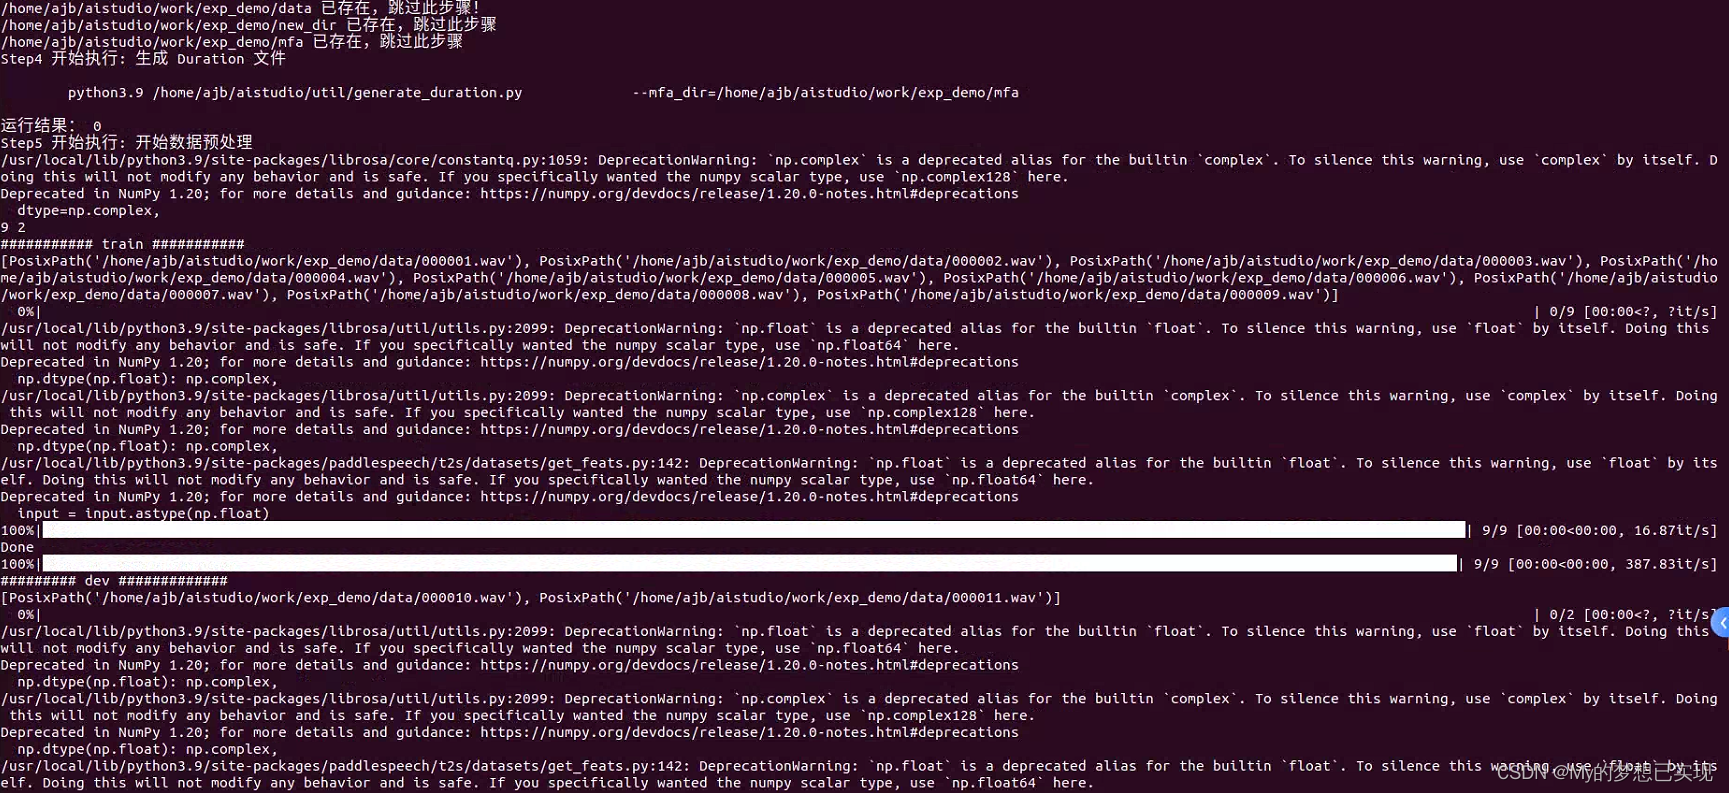
 这是在执行微调训练成功的后台打印输出截图
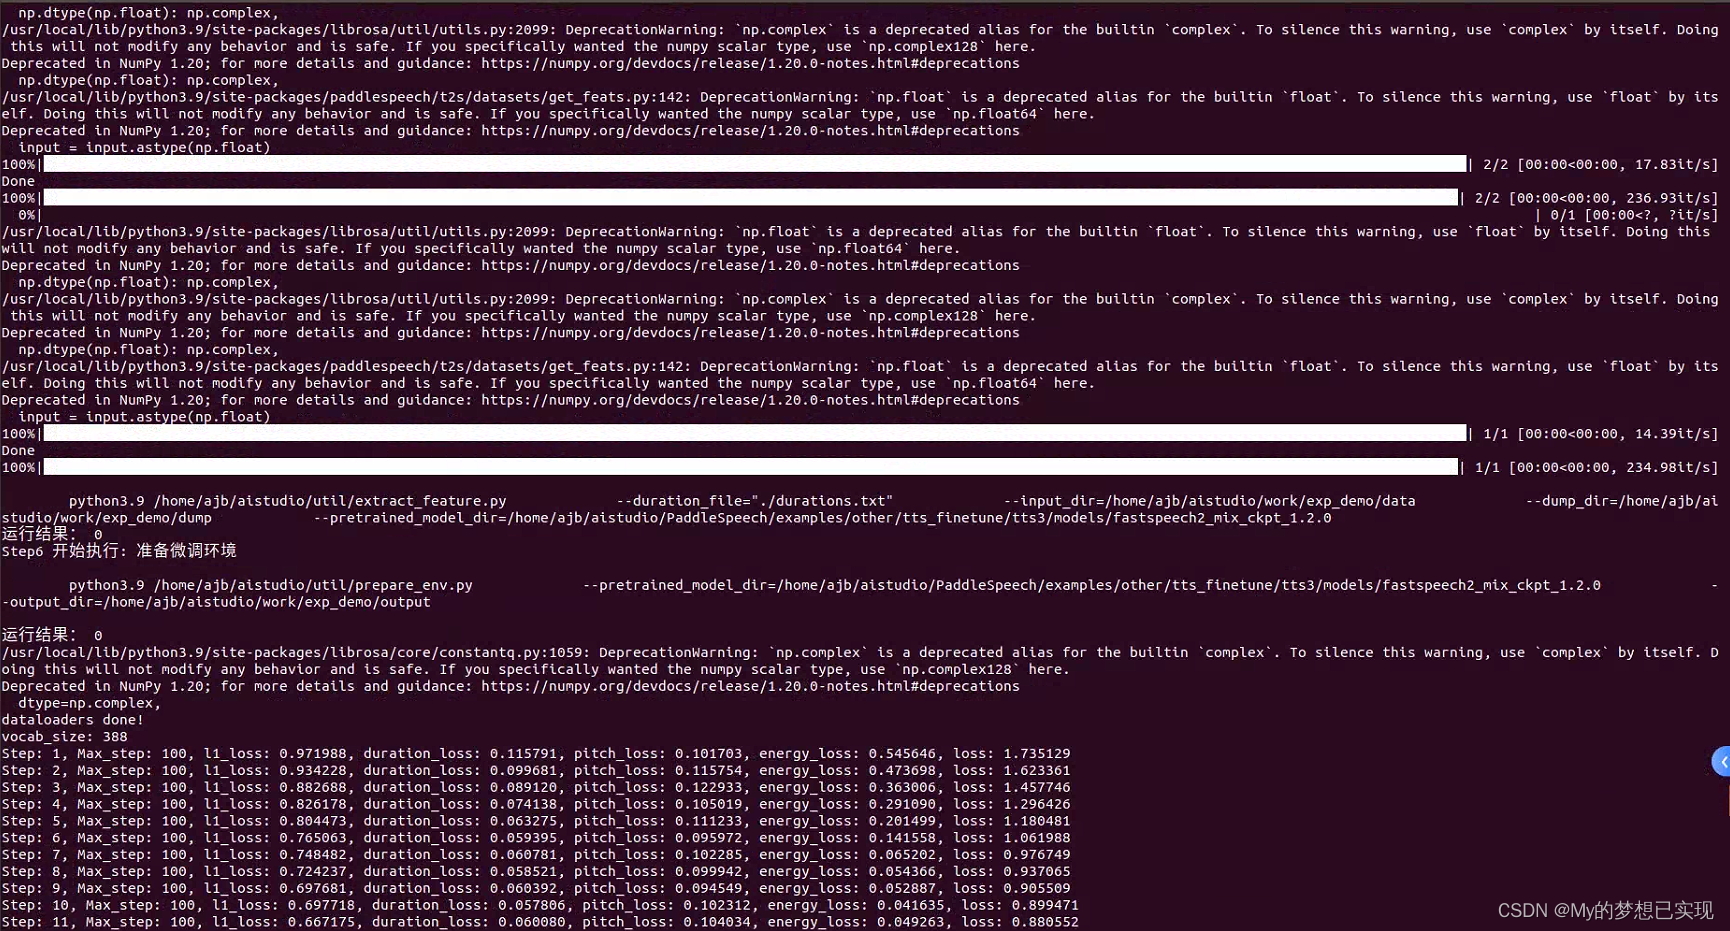
这是音频合成的后台输出截图
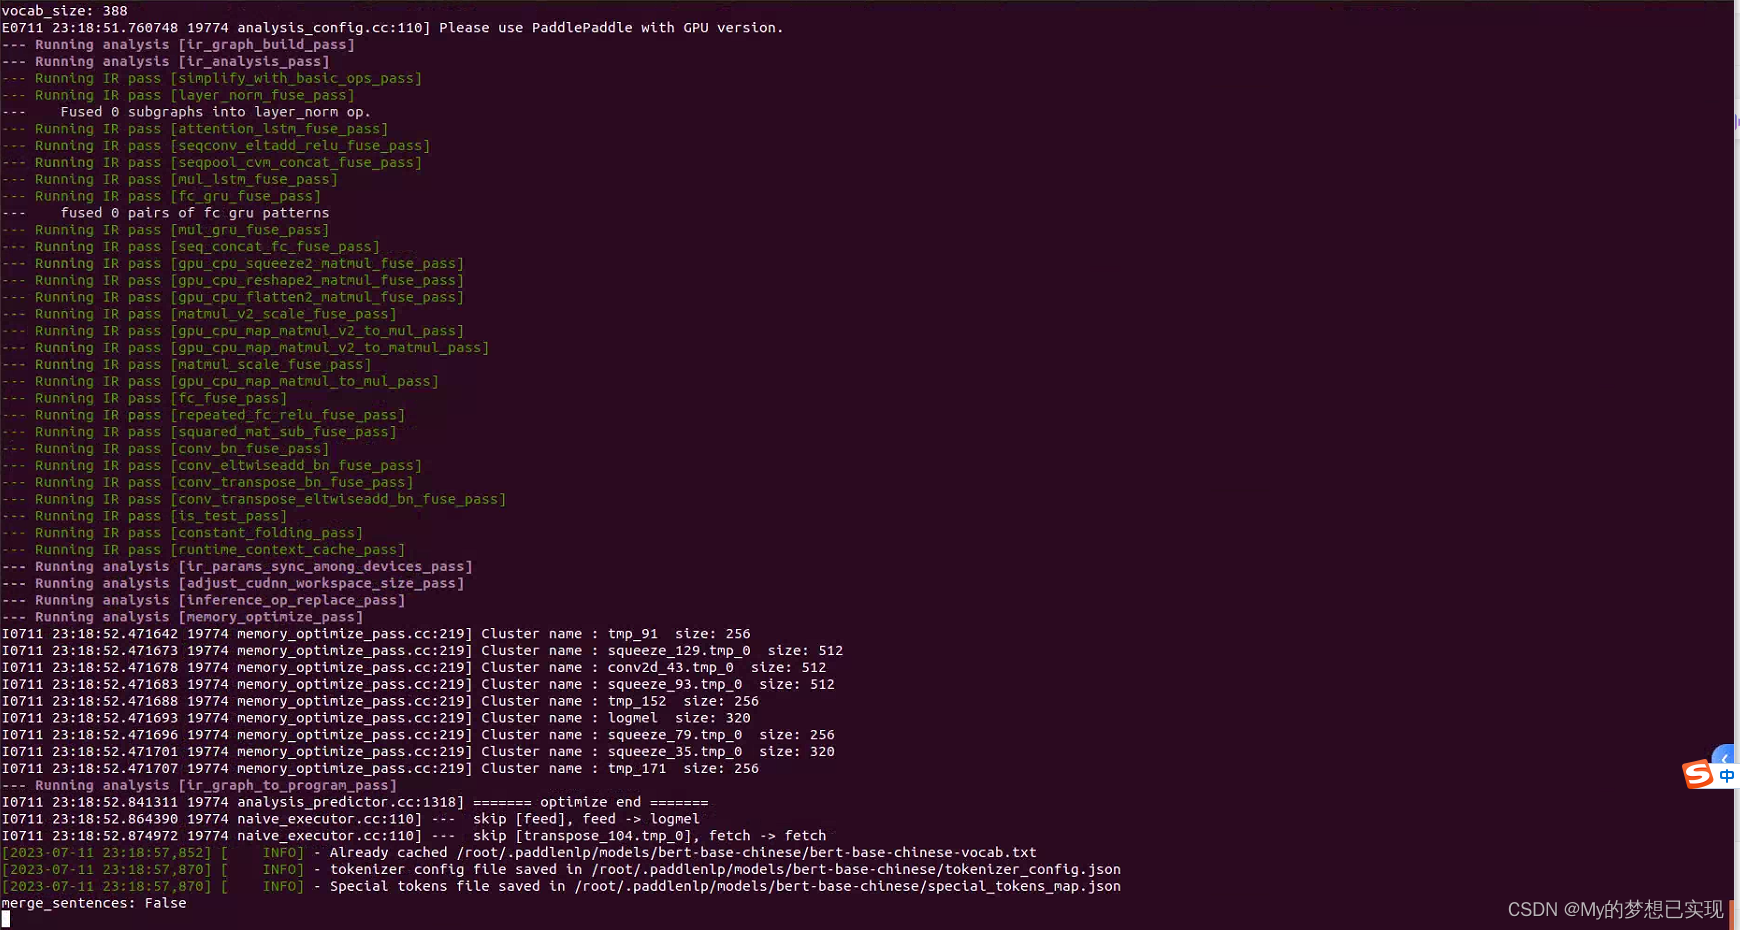
环境安装
一、下载Ubuntu18.04.6
Ubuntu 18.04.6 LTS (Bionic Beaver)
我使用的是英文版的,中文补丁自行百度吧。英文版的用起来其实更方便。
在安装的时候有个用户名,我填写的ajb(本人名字拼音缩写而已)后续会有很多地方用到。
二、进入桌面系统
这里注意下,Ubuntu的默认root密码是随机的,所以,要进入ROOT模式还需要执行以下命令
sudo passwd root重新设置下root的密码,后续的所有操作要使用root用户来执行,否则会出现权限问题,非常难解决,就是因为一开始没使用root权限,出现的问题千奇百怪,总结下来就是因为权限不足导致的。
再执行:
su root输入刚才设置的密码,就可以登录到ROOT模式了。
三、安装环境的准备
注:之前我用了Anaconda来管理应用环境,但也因为权限的问题部署失败了,也是我对系统了解有点一知半解了,所以在这里放弃使用了Anaconda。直接在系统上安装环境。
修改下载源
#更换到清华源上,原来的较慢

找到/etc/apt/sources.list进行一下备份: sudo cp /etc/apt/sources.list /etc/apt/sources_init.list
vim /etc/apt/sources.list 写入阿里源

deb https://mirrors.tuna.tsinghua.edu.cn/ubuntu/ bionic main restricted universe multiverse
deb-src https://mirrors.tuna.tsinghua.edu.cn/ubuntu/ bionic main restricted universe multiverse
deb https://mirrors.tuna.tsinghua.edu.cn/ubuntu/ bionic-updates main restricted universe multiverse
deb-src https://mirrors.tuna.tsinghua.edu.cn/ubuntu/ bionic-updates main restricted universe multiverse
deb https://mirrors.tuna.tsinghua.edu.cn/ubuntu/ bionic-backports main restricted universe multiverse
deb-src https://mirrors.tuna.tsinghua.edu.cn/ubuntu/ bionic-backports main restricted universe multiverse
deb https://mirrors.tuna.tsinghua.edu.cn/ubuntu/ bionic-security main restricted universe multiverse
deb-src https://mirrors.tuna.tsinghua.edu.cn/ubuntu/ bionic-security main restricted universe multiverse
deb https://mirrors.tuna.tsinghua.edu.cn/ubuntu/ bionic-proposed main restricted universe multiverse
deb-src https://mirrors.tuna.tsinghua.edu.cn/ubuntu/ bionic-proposed main restricted universe multiverse

#再执行
sudo apt-get update
sudo apt-get -f install
sudo apt-get upgrade
执行 sudo apt-get update 可能出现的问题:
有可能会遇到“由于没有公钥,无法验证下列签名:NO_PUBKEY 3B4FE6ACC0B21F32”提示报错,经过谷歌发现是密钥的问题,这时需要执行
sudo apt-key adv --keyserver keyserver.ubuntu.com --recv-keys 3B4FE6ACC0B21F32
注意提示的密钥和你上述命令中的密钥是一样的,每个人的电脑都不一样 加速部分出处:解决ubuntu apt-get下载慢问题
四、安装基础环境
Ubuntu18默认是默认安装Python3.6的,输入 命令:python3会有提示。python默认是没有被使用的。但是本次安装中,我们使用的是命令:python3.9,也不会占用默认python。也就是说互不干扰吧。
步骤开始:
1.安装构建工具
sudo apt-get install build-essential libssl-dev libffi-dev python3-dev2.安装相关依赖包(逐一执行)都是必须安装的,否则后期还要补
sudo apt-get install gcc make zlib1g-dev

sudo apt-get install libbz2-dev

sudo apt-get install libsqlite3-dev

sudo apt-get install python3-dev libxml2-dev libffi-dev libssl-dev libxslt1-dev
3.python3.9.12安装
#先切换目录
cd /home

#下载
wget https://cdn.npm.taobao.org/dist/python/3.9.12/Python-3.9.12.tgz

#解压
tar -xf Python-3.9.12.tgz

#切换到源码目录
cd Python-3.9.12

#编译指令
./configure --enable-optimizations

#-j8参数表示使用8个线程同时编译源代码,可以根据自己的电脑配置进行调整。
make -j8

#安装 altinstall命令会在系统中安装Python 3.9.12,而不会覆盖系统默认的Python版本
sudo make altinstall

#检查Python版本:在终端中运行以下命令检查Python版本:
python3.9 -V
五、安装PaddlePaddle
以下所有的pip安装都会加上 python3.9 -m,不会安错地方。
我这里选择的是CPU版。
python3.9 -m pip install paddlepaddle==2.4.2 -i https://pypi.tuna.tsinghua.edu.cn/simple如果提醒pip版本需要更新,则执行:
python3.9 -m pip install -i https://pypi.tuna.tsinghua.edu.cn/simple --upgrade pip这里基本不会出现什么问题,无论是windows还是linux都会很流畅的就完成了。
六、安装PaddleSpeech
1.安装中会出现kaldiio安转出错的问题,建议首先安装pytest-runner
python3.9 -m pip install pytest-runner -i https://pypi.tuna.tsinghua.edu.cn/simple2.安装PaddleSpeech
python3.9 -m pip install paddlepaddle -i https://mirror.baidu.com/pypi/simple3.安装streamlit,运行页面使用
python3.9 -m pip install streamlit -i https://pypi.tuna.tsinghua.edu.cn/simple4.安装ffmpeg,在试验中的第二步(检验数据)需要用到
sudo apt-get install ffmpeg七、下载代码
1.项目传送门:【有手就行】使用你自己的声音做语音合成 - 飞桨AI Studio

2.启动项目,并进入
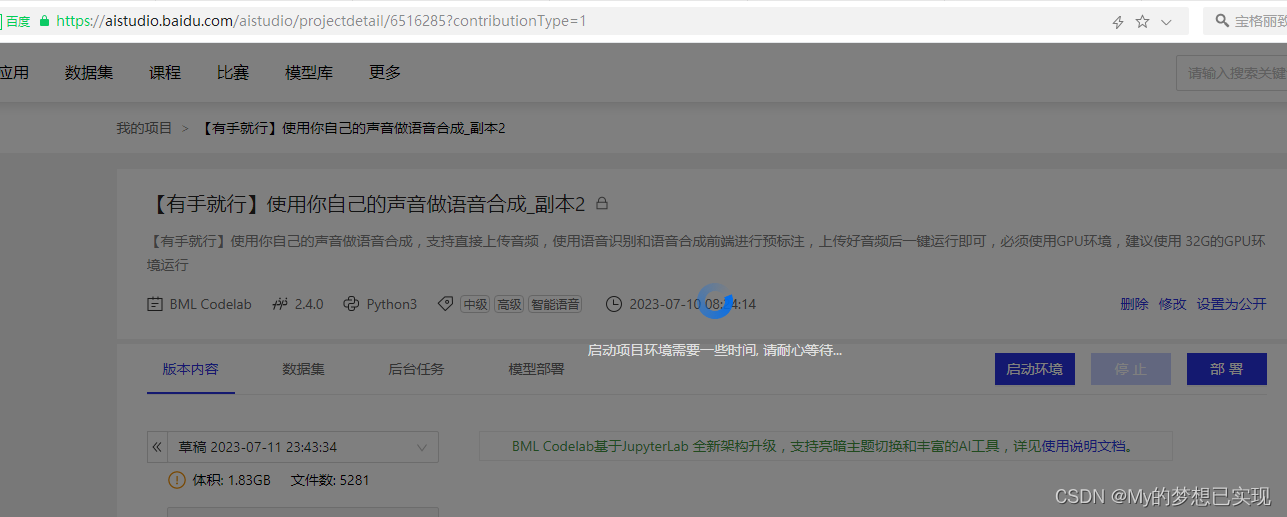
3.选择性下载
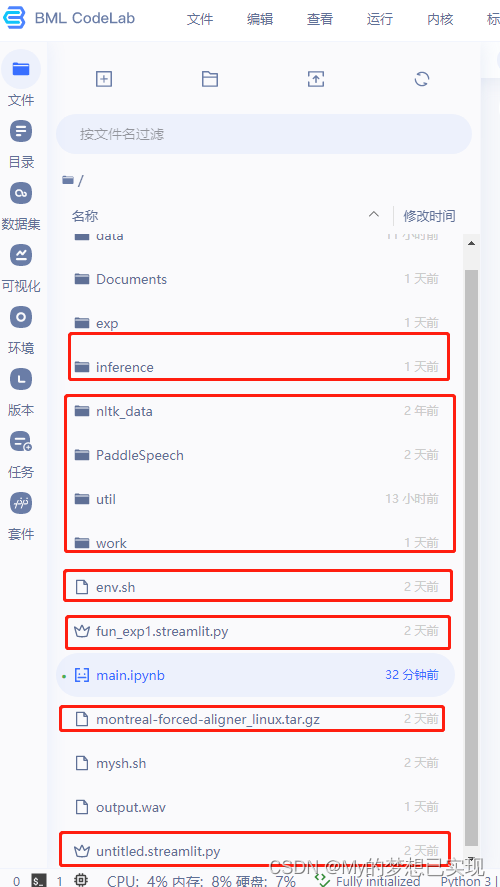
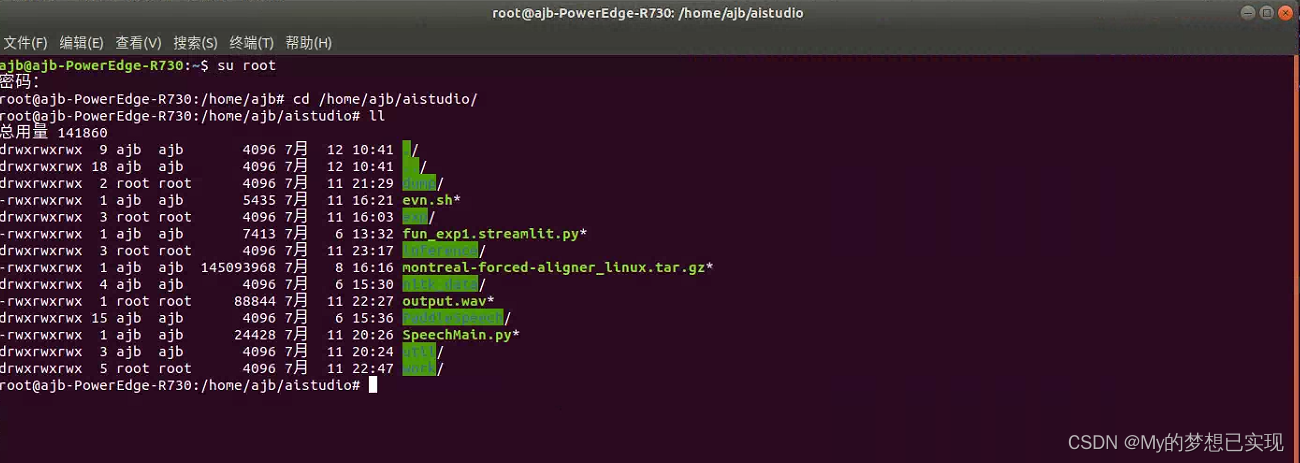
文件说明(自己研究的,不对请指正):
inference:目录(空的),用于存放自己生成的训练模型,进行合成用。
nltk_data:让程序自动下载会很慢,而且有可能下载不全,执行程序的时候会出现bad zip file的错误。将整个目录放到 ubuntu用户(登录root,就放到root下)的目录下,比如:我的是放到了/root/nltk_data。root登录到控制台,可以执行下面的拷贝命令:
cp -r /home/ajb/aistudio/nltk_data/ /root/PaddleSpeech:工具包、源码、一大堆都在这里。
util:此项目的一些处理代码。
env.sh:项目的自动环境配置脚本,跑一遍是必要的,而且要给权限去跑,还要修改相关的路径。
#权限
cd /home/ajb/aisdudio
sudo chmod 777 ./env.sh
# 安装 PaddleSpeech
if [ ! -d "/home/ajb/aistudio/PaddleSpeech" ];then
# PaddleSpeech 不存在
echo "PaddleSpeech 不存在,从bos下载PaddleSpeech"
cd /home/ajb/aistudio \
&& wget https://paddlespeech.bj.bcebos.com/demos/speech_web/PaddleSpeech.zip \
&& unzip PaddleSpeech.zip \
&& rm PaddleSpeech.zip
else
echo "PaddleSpeech exits"
fi
# 下载 nltk 依赖
if [ ! -d "/home/ajb/aistudio/nltk_data" ];then
echo "nltk_data 不存在,从bos下载 nltk_data"
cd /home/ajb/aistudio \
&& wget https://paddlespeech.bj.bcebos.com/Parakeet/tools/nltk_data.tar.gz \
&& tar zxvf nltk_data.tar.gz \
&& rm nltk_data.tar.gz
else
echo "nltk_data exits"
fi
# 删除死链
find -L /home/ajb/aistudio -type l -delete
# pip 安装依赖库
cd /home/ajb/aistudio/PaddleSpeech \
&& pip install pytest-runner -i https://mirror.baidu.com/pypi/simple \
&& pip install . -i https://mirror.baidu.com/pypi/simple \
&& pip install paddlespeech-ctcdecoders -i https://mirror.baidu.com/pypi/simple \
&& pip install uvicorn==0.18.3 -i https://mirror.baidu.com/pypi/simple
# 下载预训练模型
if [ ! -d "/home/ajb/aistudio/.paddlespeech/models" ];then
if [ -f "/home/ajb/aistudio/data/data180142/paddlespeech_env.zip" ];then
# 存在挂载数据集
echo "36 存在挂载环境,复制环境数据"
cd /home/ajb/aistudio/data/data180142 \
&& unzip paddlespeech_env.zip \
&& mkdir -p /home/ajb/aistudio/.paddlespeech \
&& mv conf /home/ajb/aistudio/.paddlespeech \
&& mv datasets /home/ajb/aistudio/.paddlespeech \
&& mv models /home/ajb/aistudio/.paddlespeech
else
# 不存在挂载数据集
echo "不存在挂载环境,从bos下载 .paddlespeech 预训练模型"
paddlespeech tts --input "你好,欢迎使用百度飞桨深度学习框架!" --output output.wav \
&& paddlespeech asr --lang zh --input output.wav --yes \
&& rm output.wav
fi
else
echo "paddlespeech 预训练模型已下载"
fi
# 配置 MFA 环境
if [ ! -d "/home/ajb/aistudio/PaddleSpeech/examples/other/tts_finetune/tts3/tools" ];then
echo "开始配置 tools 环境"
cd /home/ajb/aistudio/PaddleSpeech/examples/other/tts_finetune/tts3 \
&& mkdir -p tools/aligner \
&& cd tools \
&& cp /home/ajb/aistudio/montreal-forced-aligner_linux.tar.gz ./ \
&& tar xvf montreal-forced-aligner_linux.tar.gz \
&& cd montreal-forced-aligner/lib \
&& ln -snf libpython3.6m.so.1.0 libpython3.6m.so \
&& cd /home/ajb/aistudio/PaddleSpeech/examples/other/tts_finetune/tts3/tools/aligner \
&& wget https://paddlespeech.bj.bcebos.com/MFA/ernie_sat/aishell3_model.zip \
&& wget https://paddlespeech.bj.bcebos.com/MFA/AISHELL-3/with_tone/simple.lexicon \
&& unzip aishell3_model.zip
else
echo "第二次开始配置 tools 环境"
cd /home/ajb/aistudio/PaddleSpeech/examples/other/tts_finetune/tts3 \
&& mkdir -p tools/aligner \
&& cd tools \
&& cp /home/ajb/aistudio/montreal-forced-aligner_linux.tar.gz ./ \
&& tar xvf montreal-forced-aligner_linux.tar.gz \
&& cd montreal-forced-aligner/lib \
&& ln -snf libpython3.6m.so.1.0 libpython3.6m.so \
&& cd /home/ajb/aistudio/PaddleSpeech/examples/other/tts_finetune/tts3/tools/aligner \
&& wget https://paddlespeech.bj.bcebos.com/MFA/ernie_sat/aishell3_model.zip \
&& wget https://paddlespeech.bj.bcebos.com/MFA/AISHELL-3/with_tone/simple.lexicon \
&& unzip aishell3_model.zip
echo "MFA 环境已存在"
fi
# 下载微调需要的训练模型
if [ ! -d "/home/ajb/aistudio/PaddleSpeech/examples/other/tts_finetune/tts3/models" ];then
if [ -f "/home/ajb/aistudio/data/data180142/models.zip" ];then
# 存在挂载数据集
echo "74 存在挂载环境,复制环境数据"
cd /home/ajb/aistudio/data/data180142 \
&& unzip models.zip \
&& mkdir -p /home/ajb/aistudio/PaddleSpeech/examples/other/tts_finetune/tts3/models \
&& mv fastspeech2_mix_ckpt_1.2.0 /home/ajb/aistudio/PaddleSpeech/examples/other/tts_finetune/tts3/models \
&& mv hifigan_aishell3_static_1.1.0 /home/ajb/aistudio/PaddleSpeech/examples/other/tts_finetune/tts3/models \
&& mv pwgan_aishell3_static_1.1.0 /home/ajb/aistudio/PaddleSpeech/examples/other/tts_finetune/tts3/models \
&& mv wavernn_csmsc_static_0.2.0 /home/ajb/aistudio/PaddleSpeech/examples/other/tts_finetune/tts3/models
else
# 未挂载数据集
echo "不存在挂载环境,从bos下载微调模型"
cd /home/ajb/aistudio/PaddleSpeech/examples/other/tts_finetune/tts3 \
&& mkdir models \
&& cd models \
&& wget https://paddlespeech.bj.bcebos.com/t2s/chinse_english_mixed/models/fastspeech2_mix_ckpt_1.2.0.zip \
&& unzip fastspeech2_mix_ckpt_1.2.0.zip \
&& wget https://paddlespeech.bj.bcebos.com/Parakeet/released_models/pwgan/pwgan_aishell3_static_1.1.0.zip \
&& unzip pwgan_aishell3_static_1.1.0.zip \
&& wget https://paddlespeech.bj.bcebos.com/Parakeet/released_models/hifigan/hifigan_aishell3_static_1.1.0.zip \
&& unzip hifigan_aishell3_static_1.1.0.zip \
&& wget https://paddlespeech.bj.bcebos.com/Parakeet/released_models/wavernn/wavernn_csmsc_static_0.2.0.zip \
&& unzip wavernn_csmsc_static_0.2.0.zip
fi
else
echo "预训练模型下载完成"
fifun_exp1.streamlit.py:趣味实验室:帧级别控制
montreal-forced-aligner_linux.tar.gz:对准器压缩包,会被程序自动安装
untitled.streamlit.py:这就是主程序了,在我的项目中,我改了名字叫SpeechMain.py
work:程序执行后,放置生成的模型、音频等等。。。默认是空的,后续如果没有在此文件夹下生成任何文件,那就是程序的权限问题。我在这个问题上纠结了很久。
4.拷贝代码
拷贝到/home/ajb/aistudio目录下面,用登录桌面的普通用户拷贝也可以,后面我们是用的root用户来访问他们的。
桌面查看:
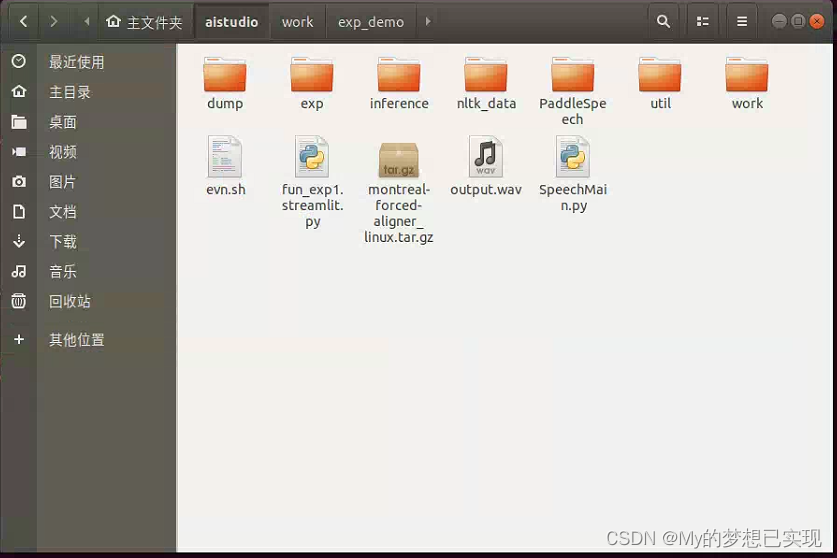
命令行查看:
 八、运行,解决问题
先说,我部署的时候是一个干净的项目,对照aistudio云实验室来一步一步的排除问题,尤其经常碰到no such file or directory 这种情况,就是因为没有写入成功。所以说,运行失败的大部分原因是因为权限和路径。
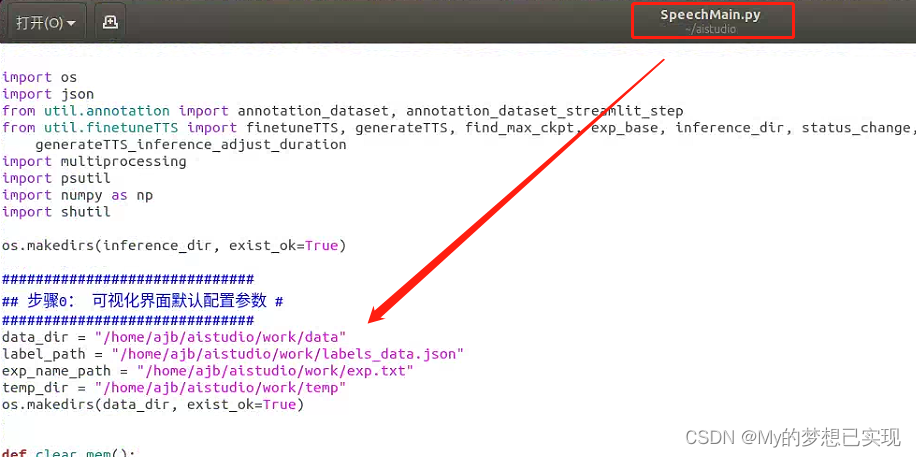
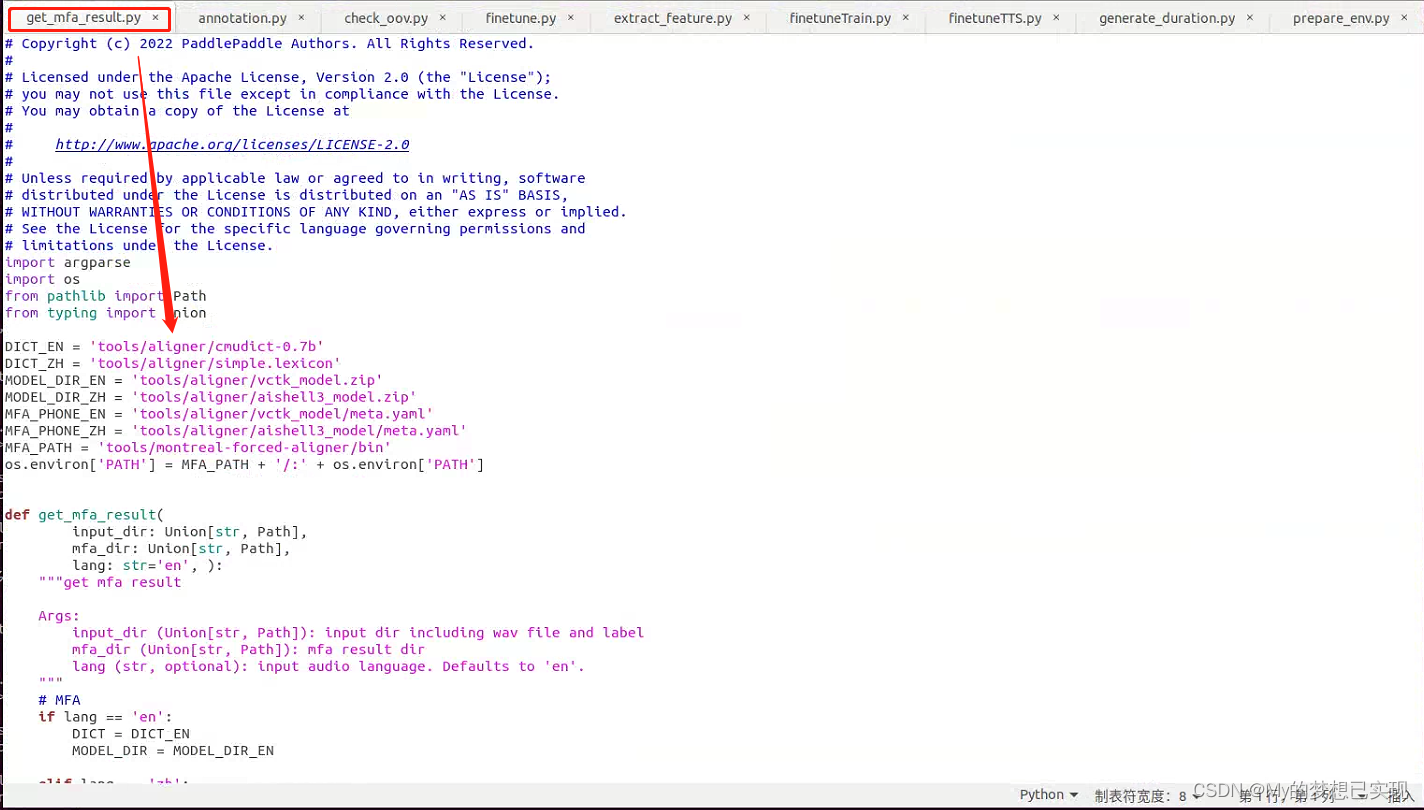
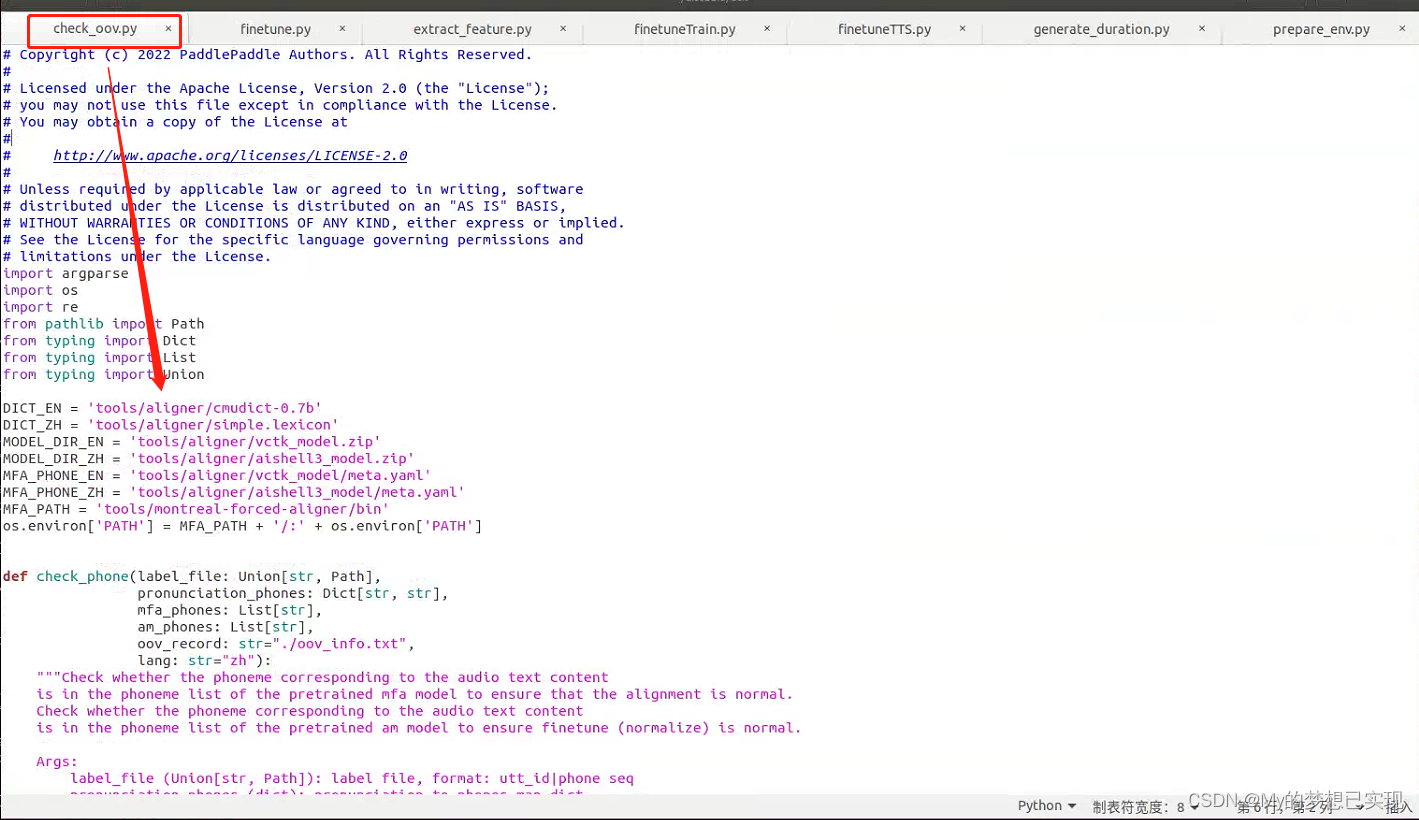
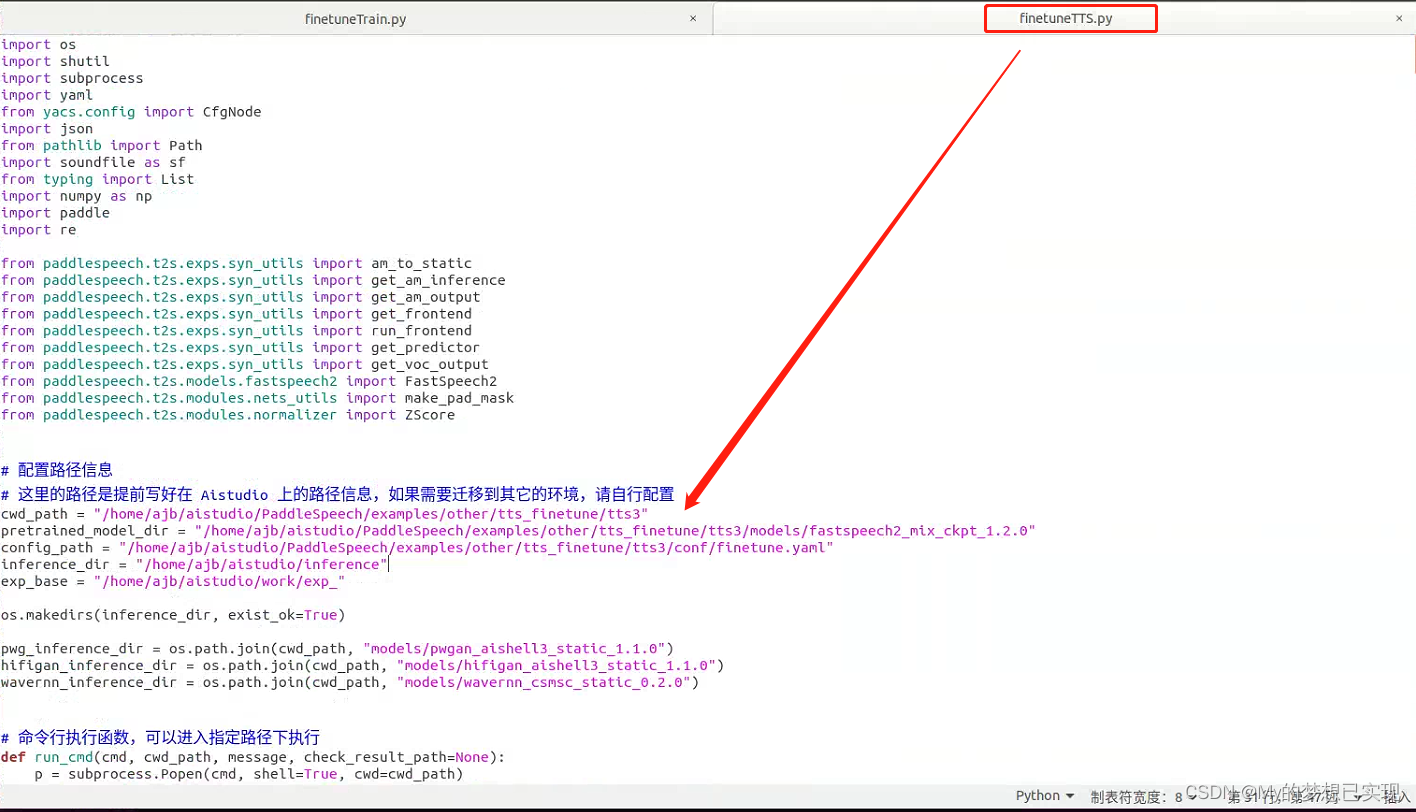
先解决路径问题,需要修改的文件我列在下面:
修改路径
SpeechMain.py,请自行搜索/home/aistudio ,一定要改成自己的项目目录。
util/get_mfa_result.py,同上
util/check_oov.py
util/generate_duration.py
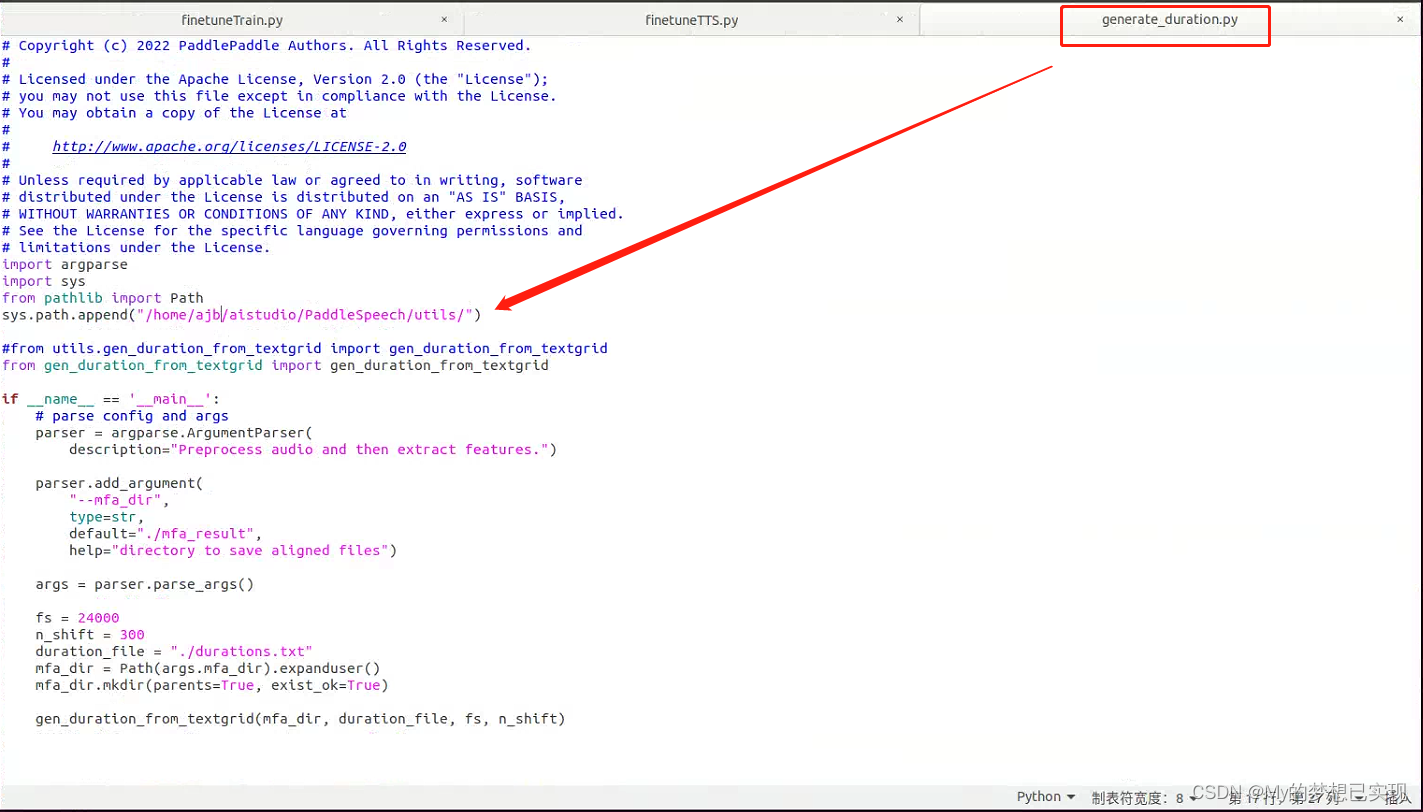 util/finetuneTTS.py,这个文件重点说下,不光光是我图中标示的,其他位置也有,自己搜索。
还有就是 文件里有相关python的命令行,需要修改
这个文件里有很多这样的地方,原文是 python3 /home/aistudio/xxxxxxxx,但是我们python3可是系统自己带的python3.6啊,而且没安装相关插件环境,不出错才怪呢,路径也不对,自行搜索修改吧,不多。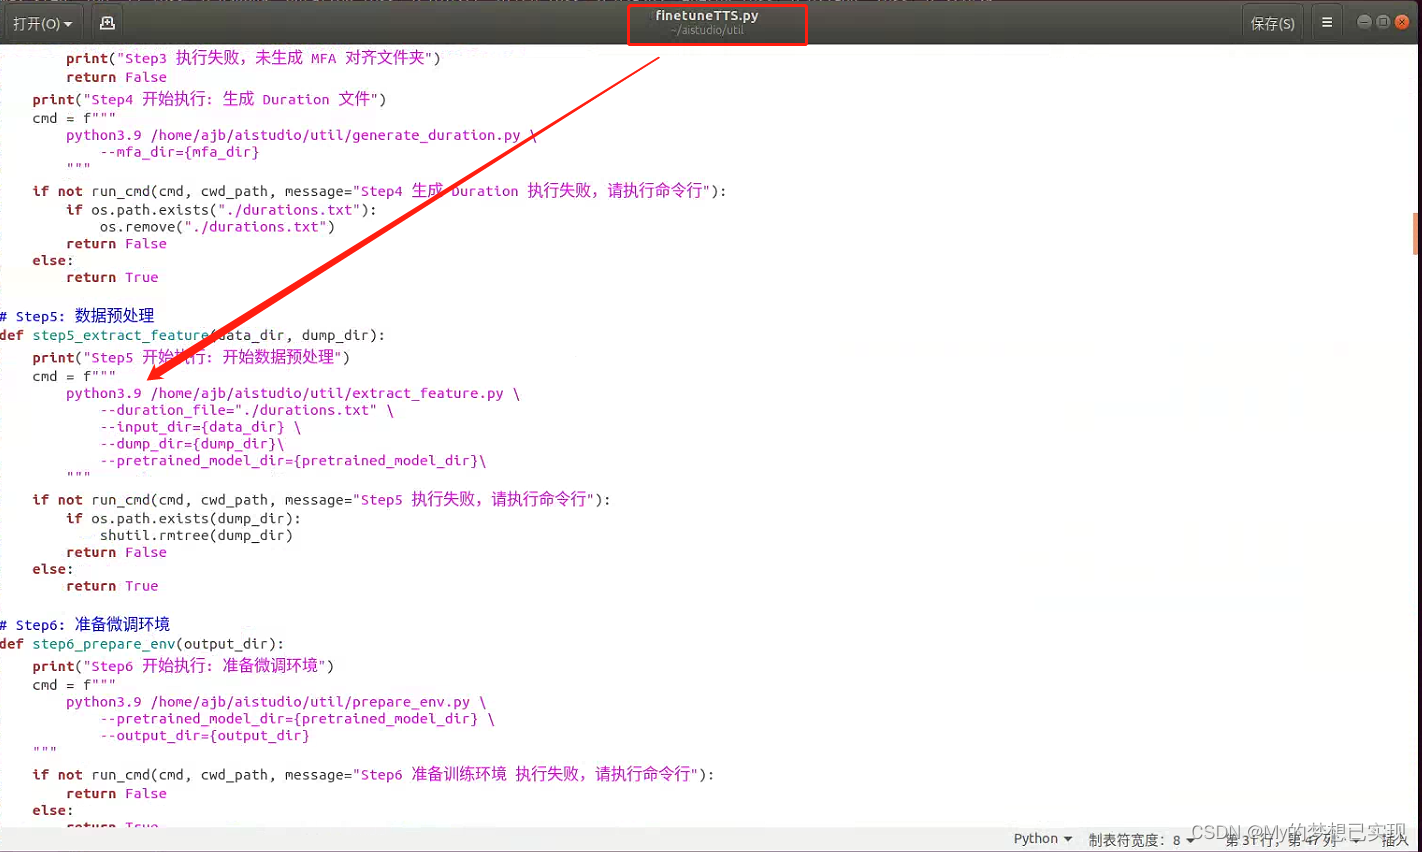
改完这些再去执行启动吧,有很多问题自然就消失了,下面是启动后的一些大概率出现的问题。
执行启动
streamlit run SpeechMain.py问题:./evn.sh的时候,出现git错误,要处理,有环境要下载
解决:sudo apt-get install git
问题:[nltk_data] Downloading package averaged_perceptron_tagger to
[nltk_data] /root/nltk_data... 卡在这里
解决:
把aistudio项目里的直接下载或者复制过去,我是复制过去的。
cp -r /home/ajb/aistudio/nltk_data/ /root/
问题:zipfile.BadZipFile: File is not a zip file
解决:cp -r /home/ajb/aistudio/nltk_data/ /root/
问题:AttributeError: module 'numpy' has no attribute 'complex'.
解决:numpy版本高了,降低下
python3.9 -m pip install numpy==1.21.6 -i https://pypi.tuna.tsinghua.edu.cn/simple
问题:
File "/home/sysadmin/.local/lib/python3.9/site-packages/paddlespeech/t2s/datasets/data_table.py", line 45, in __init__
assert len(data) > 0, "This dataset has no examples"
AssertionError: This dataset has no examples
解决:计算MFCC时的问题: 向 aishell3 里添加自己的音频数据进行训练 · Issue #2319 · PaddlePaddle/PaddleSpeech · GitHub
删除原有libopenblas,重新安装
rm /home/ajb/aistudio/PaddleSpeech/examples/other/tts_finetune/tts3/tools/montreal-forced-aligner/lib/thirdparty/bin/libopenblas.so.0
sudo apt-get install libopenbals
问题:这个问题和上一个是相关联的
Traceback (most recent call last):
File "/home/sysadmin/aistudio/util/extract_feature.py", line 350, in <module>
extract_feature(
File "/home/sysadmin/aistudio/util/extract_feature.py", line 224, in extract_feature
sentences, vocab_phones, vocab_speaker = get_map(
File "/home/sysadmin/aistudio/util/extract_feature.py", line 75, in get_map
sentences, speaker_set = get_phn_dur(duration_file)
File "/home/sysadmin/.local/lib/python3.9/site-packages/paddlespeech/t2s/datasets/preprocess_utils.py", line 26, in get_phn_dur
f = open(file_name, 'r')
FileNotFoundError: [Errno 2] No such file or directory: './durations.txt'
解决:
#这是一段网上的解决办法
打开/home/sysadmin/.local/lib/python3.9/site-packages/paddlespeech/t2s/datasets/preprocess_utils.py修改第26行代码,with_open(加上str即可。
#其中:/home/sysadmin/.local 这个目录 对应的应该是我们的/root/local,因为我们用的是root用户
#这样是没办法解决根本问题的。
#解决办法在这里
#只要删除'r'这个参数就可以了,在python2.6之后,为了避免程序员的错误,可以不写第二个参数
#原作者这个处理办法 只能生效一次,而且不会完成目录和文件的写任务,项目文件夹里不会生成任何东西,也会卡住项目。
#前面的 删除so和安装libopenblas还是要作的。
问题:导出模型时,报错:FileNotFoundError: [Errno 2] No such file or directory: '/home/sysadmin/aistudio/work/exp_demo/dump/speaker_id_map.txt'
解决:代码问题,这就是上一步那个open函数导致的,再一个就是权限问题了,要用root用户。
就到这里了,解决了重要的问题,如果有其他问题可以留言。
最后感谢 蜉蝣的 Ubuntu系统本地搭建百度飞浆语音合成 - 知乎 一问中的诸多解决办法。
可以参考我对上文的转载和备注修改 (转载)Ubuntu系统本地搭建百度飞浆语音合成(修正原作者处理过程中的不当之处,但是非常感谢原作者,所有问题都解决了)_My的梦想已实现的博客-CSDN博客


