目录
今日必会
项目环境搭建
医院设置模块搭建
配置使用Swagger2
统一返回结果
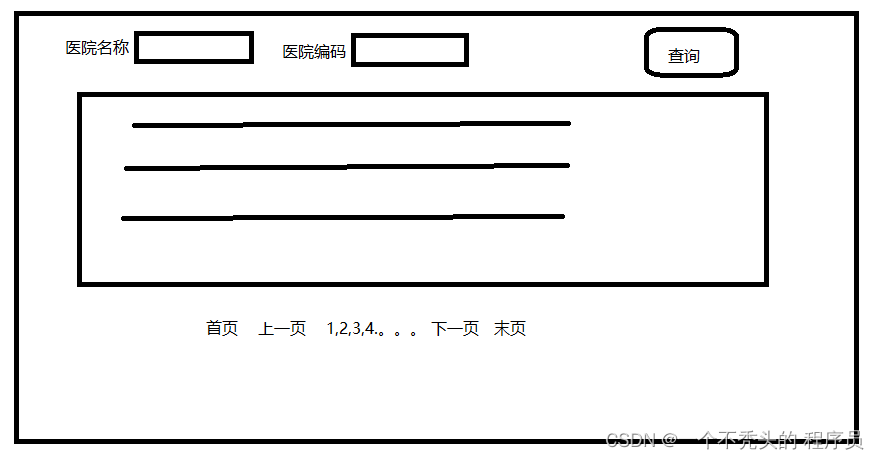
实现带条件带分页查询接口
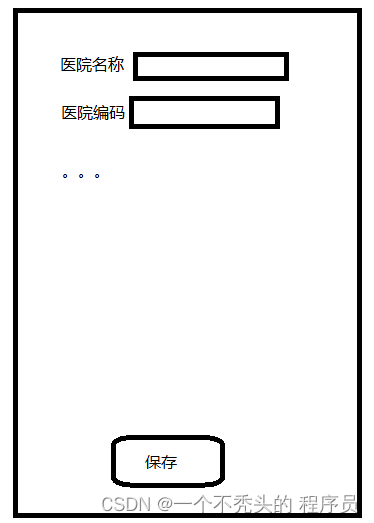
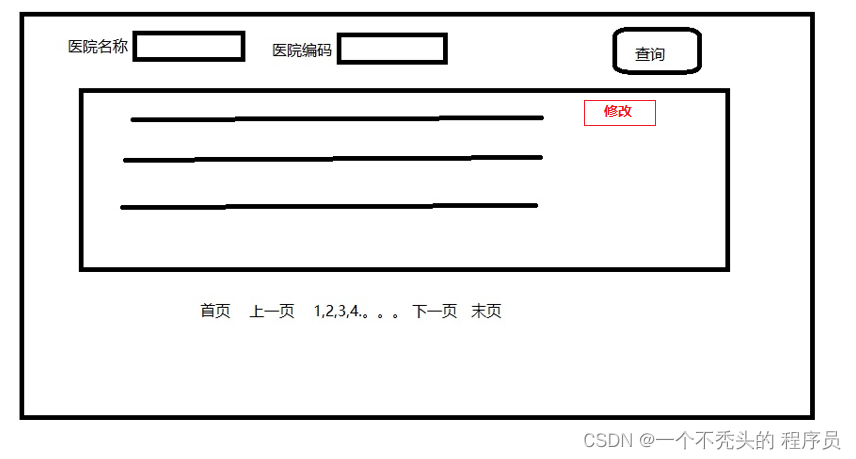
新增、修改接口开发
批量删除、锁定医院设置
统一异常处理
![]()
今日必会
1.简单的搭建环境。要明白什么时候是pom/war/jar
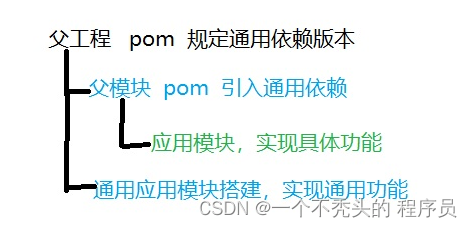
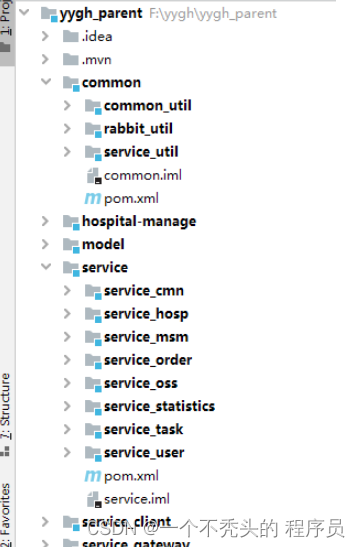
yygh_parent <pom>
common <pom>
model 无
service <pom>
2.各个模块的作用
common:工具类,所有的模块都要依赖他。
common_utils:用于返回结果的封装。
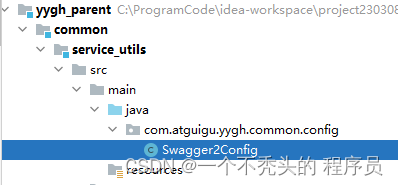
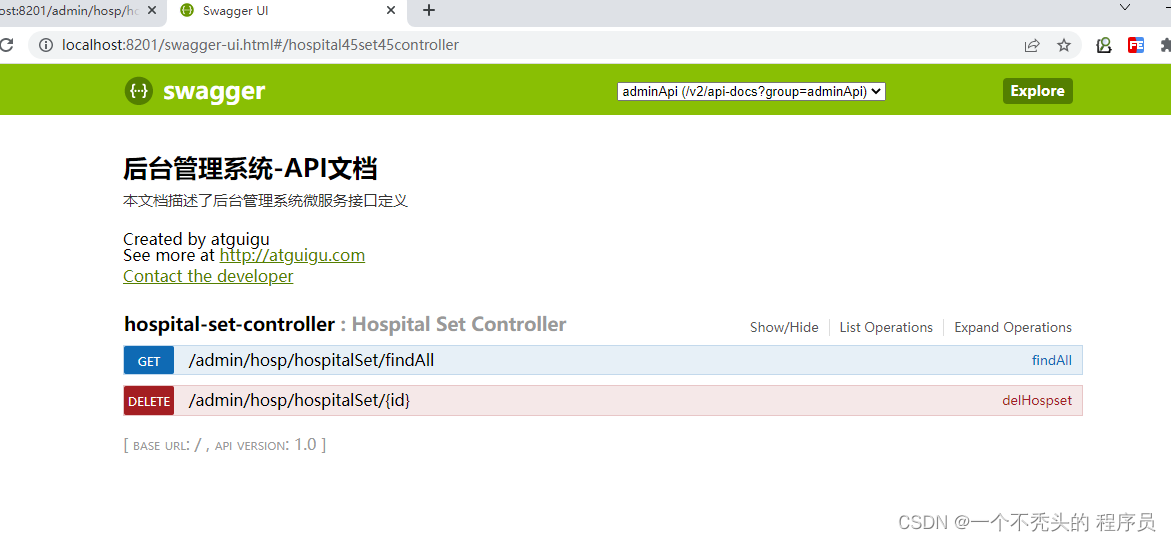
service_utils:用于swagger的配置,还配置了统一处理异常,所以引入了common_utils
model :实体类
service:api接口服务
service_hosp:医院api接口
1. config:配置类,他是mapper的配置类说白了就是dao层配置(数据库和后台)里面有分页插件。
2.controller:这是前台地址第一次到达的地方,处理HTTP请求,并将请求的数据传递给其他层进行处理。里面有CRUD。
3.mapper:Mapper层负责处理数据的持久化和访问。
4. service:本层起到了连接Controller层和Mapper层的桥梁作用,负责实现业务逻和数据操作的协调,是实现系统功能的关键部分。
3.了解每个接口的参数和返回值
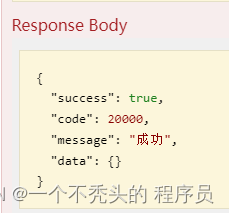
※新增:参数:hospitalset 返回值:R.ok()
※修改:要先进行数据回显,
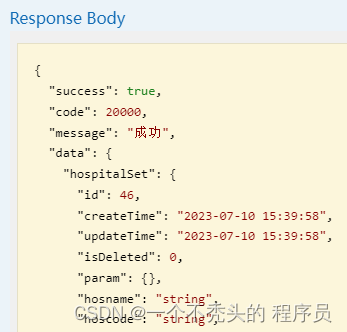
根据id查询信息, 参数:id 返回值:R(HospitalSet)
然后修改医院设置(保存接口) 参数: HospitalSet 返回值:R.ok()
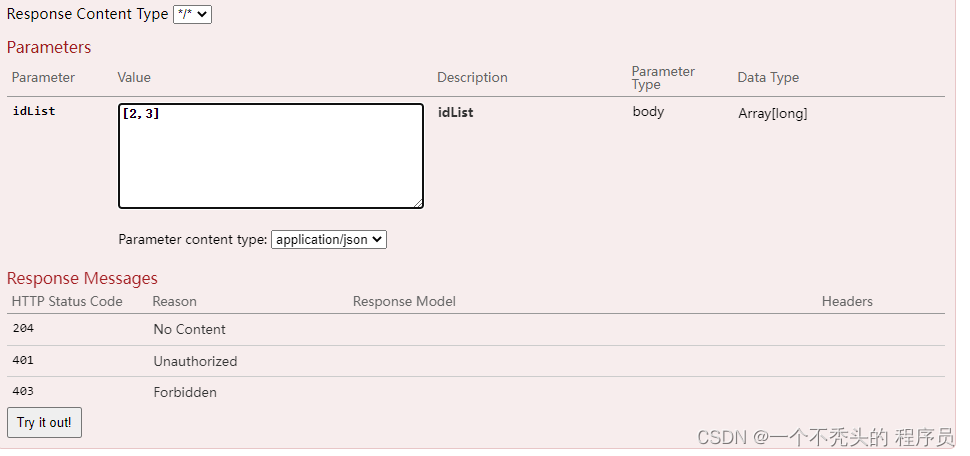
※批量删除 参数:list<long>idlis 返回值:R.ok()
※锁定医院 参数:id ,status 返回值:R.ok()
4.了解分页的逻辑
5.了解get/post/delete mapping
以下代码必须全会敲
//医院设置接口
@RestController
@RequestMapping("/admin/hosp/hospitalSet")
public class HospitalSetController {
    @Autowired
    private HospitalSetService hospitalSetService;

    //chaxun
    //查询所有医院设置
    //查询所有医院设置
    @ApiOperation(value = "医院设置列表")
    @GetMapping("findAll")
    public R findAll() {
        List<HospitalSet> list = hospitalSetService.list();
        return R.ok().data("list",list);
    }

    @ApiOperation(value = "医院设置删除")
    @DeleteMapping("{id}")
    public R removeById(@ApiParam(name = "id", value = "讲师ID", required = true) @PathVariable String id){
        hospitalSetService.removeById(id);
        return R.ok();
    }

 @ApiOperation(value="分页查询")
    @GetMapping("pageQuery/{page}/{limit}")
    public R  pageQuery(@PathVariable Long page,@PathVariable Long limit){

        //1.封装分页参数
     Page<HospitalSet> pageparm = new Page<>(page,limit);
       //2.实现分页查询
      hospitalSetService.page(pageparm);
      //3.取出结果
      List<HospitalSet> recods = pageparm.getRecords();
      Long total = pageparm.getTotal();
      //4.封装返回
      return R.ok().data("recods",recods).data("total",total);
 }

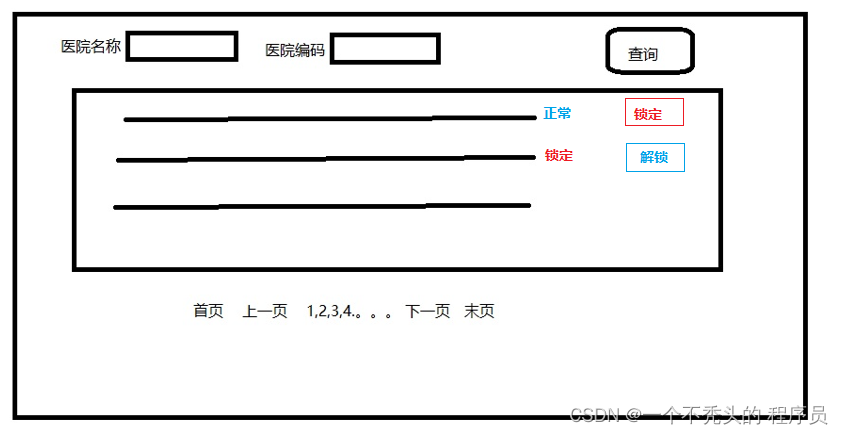
    @ApiOperation(value="分页查询加条件")
    @GetMapping("pageQuer/{page}/{limit}")
    public R  pagelist(@PathVariable Long page, @PathVariable Long limit, @RequestBody HospitalSetQueryVo hospitalSetQueryVo){
      //1.
        String hosname = hospitalSetQueryVo.getHosname();
        String hoscode = hospitalSetQueryVo.getHoscode();
        QueryWrapper<HospitalSet> wrapper = new QueryWrapper<>();
        if(!StringUtils.isEmpty(hosname)){

            wrapper.like("hosname",hosname);


        }
        if (!StringUtils.isEmpty(hoscode)){

            wrapper.eq("hoscode",hoscode);

        }
        //1.封装分页参数
        Page<HospitalSet> pageparm = new Page<>(page,limit);
        //2.实现分页查询
        hospitalSetService.page(pageparm,wrapper);
        //3.取出结果
        List<HospitalSet> recods = pageparm.getRecords();
        Long total = pageparm.getTotal();
        //4.封装返回
        return R.ok().data("records",recods).data("total",total);
    }

    @ApiOperation(value = "新增医院设置")
    @PostMapping("save")
    public R save(@RequestBody HospitalSet hospitalSet){
        boolean save = hospitalSetService.save(hospitalSet);
        if(save){
            return R.ok();
        }else {
            return R.error();
        }
    }

// 新增加 新加
    @ApiOperation(value = "根据id查询信息")
    @GetMapping("getById/{id}")
    public R getById(@PathVariable Long id){
        HospitalSet hospitalSet = hospitalSetService.getById(id);
        return R.ok().data("hospitalSet",hospitalSet);
    }
//修改医院设置

    @ApiOperation(value = "修改医院设置")
    @PostMapping("update")
    public R update(@RequestBody HospitalSet hospitalSet)
    {
        boolean update = hospitalSetService.updateById(hospitalSet);
        if(update){
            return R.ok();
        }else {
            return R.error();
        }
    }
// 1.
    @ApiOperation(value = "根据id集合批量删除")
    @DeleteMapping("delByIds")
    public R delByIds(@RequestBody  List<Long> idList){
        boolean remove = hospitalSetService.removeByIds(idList);
        if(remove){
            return R.ok();
        }else {
            return R.error();
        }
    }


//2.
@ApiOperation(value = "医院设置锁定和解锁")
@PutMapping("lockHospitalSet/{id}/{status}")
public R lockHospitalSet(@PathVariable Long id,
                         @PathVariable Integer status) {
    //1根据id查询数据
    HospitalSet hospitalSet = hospitalSetService.getById(id);
    //2修改数据
    hospitalSet.setStatus(status);
    hospitalSetService.updateById(hospitalSet);
    return R.ok();
}
项目环境搭建
| 1、项目开发方式 前后端分离
2、后端工程分层 (1)分类 *jar:java工程 *war:web工程 *pom:父工程 (2)分层
3、数据库搭建 (1)建库建表脚本
(2)数据库设计规范 *公司有规范,遵循公司规范 *公司没有规范,遵循行业规范《阿里巴巴Java开发手册》 3、工程结构介绍
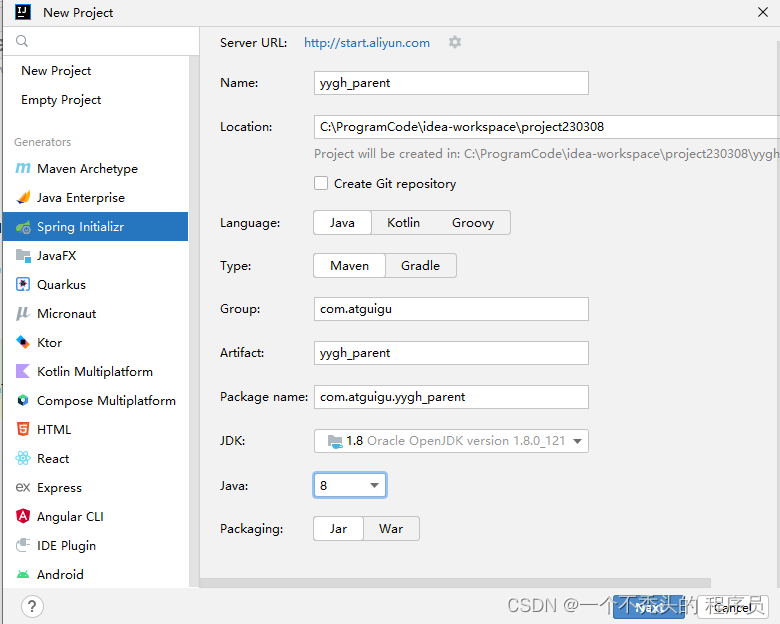
4、创建父工程 (1)创建springboot工程yygh_parent
(2)修改pom.xml
<?xml version="1.0" encoding="UTF-8"?>

  <project xmlns="http://maven.apache.org/POM/4.0.0" xmlns:xsi="http://www.w3.org/2001/XMLSchema-instance"

         xsi:schemaLocation="http://maven.apache.org/POM/4.0.0 https://maven.apache.org/xsd/maven-4.0.0.xsd">

    <modelVersion>4.0.0</modelVersion>


    <parent>

        <groupId>org.springframework.boot</groupId>

        <artifactId>spring-boot-starter-parent</artifactId>

        <version>2.2.1.RELEASE</version>

        <relativePath/> <!-- lookup parent from repository -->

    </parent>

    <groupId>com.atguigu</groupId>

    <artifactId>yygh_parent</artifactId>

    <packaging>pom</packaging>

    <version>0.0.1-SNAPSHOT</version>

    <name>yygh_parent</name>

    <description>Demo project for Spring Boot</description>

    <properties>

        <java.version>1.8</java.version>

        <cloud.version>Hoxton.RELEASE</cloud.version>

        <alibaba.version>2.2.0.RELEASE</alibaba.version>

        <mybatis-plus.version>3.3.1</mybatis-plus.version>

        <mysql.version>5.1.46</mysql.version>

        <swagger.version>2.7.0</swagger.version>

        <jwt.version>0.7.0</jwt.version>

        <fastjson.version>1.2.29</fastjson.version>

        <httpclient.version>4.5.1</httpclient.version>

        <easyexcel.version>2.2.0-beta2</easyexcel.version>

        <aliyun.version>4.1.1</aliyun.version>

        <oss.version>3.9.1</oss.version>

        <jodatime.version>2.10.1</jodatime.version>

    </properties>


    <!--配置dependencyManagement锁定依赖的版本-->

    <dependencyManagement>

        <dependencies>

            <dependency>

                <groupId>org.springframework.cloud</groupId>

                <artifactId>spring-cloud-dependencies</artifactId>

                <version>${cloud.version}</version>

                <type>pom</type>

                <scope>import</scope>

            </dependency>


            <dependency>

                <groupId>com.alibaba.cloud</groupId>

                <artifactId>spring-cloud-alibaba-dependencies</artifactId>

                <version>${alibaba.version}</version>

                <type>pom</type>

                <scope>import</scope>

            </dependency>


            <!--mybatis-plus 持久层-->

            <dependency>

                <groupId>com.baomidou</groupId>

                <artifactId>mybatis-plus-boot-starter</artifactId>

                <version>${mybatis-plus.version}</version>

            </dependency>


            <dependency>

                <groupId>mysql</groupId>

                <artifactId>mysql-connector-java</artifactId>

                <version>${mysql.version}</version>

            </dependency>


            <!--swagger-->

            <dependency>

                <groupId>io.springfox</groupId>

                <artifactId>springfox-swagger2</artifactId>

                <version>${swagger.version}</version>

            </dependency>

            <!--swagger ui-->

            <dependency>

                <groupId>io.springfox</groupId>

                <artifactId>springfox-swagger-ui</artifactId>

                <version>${swagger.version}</version>

            </dependency>


            <dependency>

                <groupId>io.jsonwebtoken</groupId>

                <artifactId>jjwt</artifactId>

                <version>${jwt.version}</version>

            </dependency>


            <dependency>

                <groupId>org.apache.httpcomponents</groupId>

                <artifactId>httpclient</artifactId>

                <version>${httpclient.version}</version>

            </dependency>


            <dependency>

                <groupId>com.alibaba</groupId>

                <artifactId>fastjson</artifactId>

                <version>${fastjson.version}</version>

            </dependency>


            <dependency>

                <groupId>com.alibaba</groupId>

                <artifactId>easyexcel</artifactId>

                <version>${easyexcel.version}</version>

            </dependency>


            <dependency>

                <groupId>com.aliyun</groupId>

                <artifactId>aliyun-java-sdk-core</artifactId>

                <version>${aliyun.version}</version>

            </dependency>


            <dependency>

                <groupId>com.aliyun.oss</groupId>

                <artifactId>aliyun-sdk-oss</artifactId>

                <version>${oss.version}</version>

            </dependency>


            <!--日期时间工具-->

            <dependency>

                <groupId>joda-time</groupId>

                <artifactId>joda-time</artifactId>

                <version>${jodatime.version}</version>

            </dependency>

        </dependencies>

    </dependencyManagement>


    <build>

        <plugins>

            <plugin>

                <groupId>org.springframework.boot</groupId>

                <artifactId>spring-boot-maven-plugin</artifactId>

            </plugin>

        </plugins>

    </build>


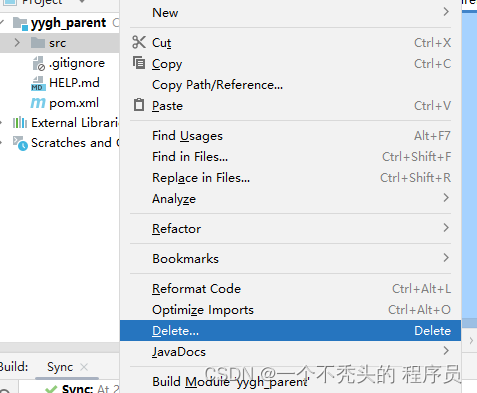
</project> (3)删除src
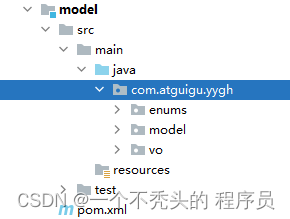
5、搭建model模块 (1)在父工程yygh_parent下面创建模块model
(2)添加项目需要的依赖 <dependencies>
<dependency>
<groupId>org.projectlombok</groupId>
<artifactId>lombok</artifactId>
</dependency>
<!--mybatis-plus-->
<dependency>
<groupId>com.baomidou</groupId>
<artifactId>mybatis-plus-boot-starter</artifactId>
<scope>provided </scope>
</dependency>
<!--swagger-->
<dependency>
<groupId>io.springfox</groupId>
<artifactId>springfox-swagger2</artifactId>
<scope>provided </scope>
</dependency>
<dependency>
<groupId>com.alibaba</groupId>
<artifactId>easyexcel</artifactId>
<scope>provided </scope>
</dependency>
<dependency>
<groupId>org.springframework.boot</groupId>
<artifactId>spring-boot-starter-data-mongodb</artifactId>
<scope>provided </scope>
</dependency>
<dependency>
<groupId>com.alibaba</groupId>
<artifactId>fastjson</artifactId>
<scope>provided </scope>
</dependency>
</dependencies> (3)复制项目实体类和VO类
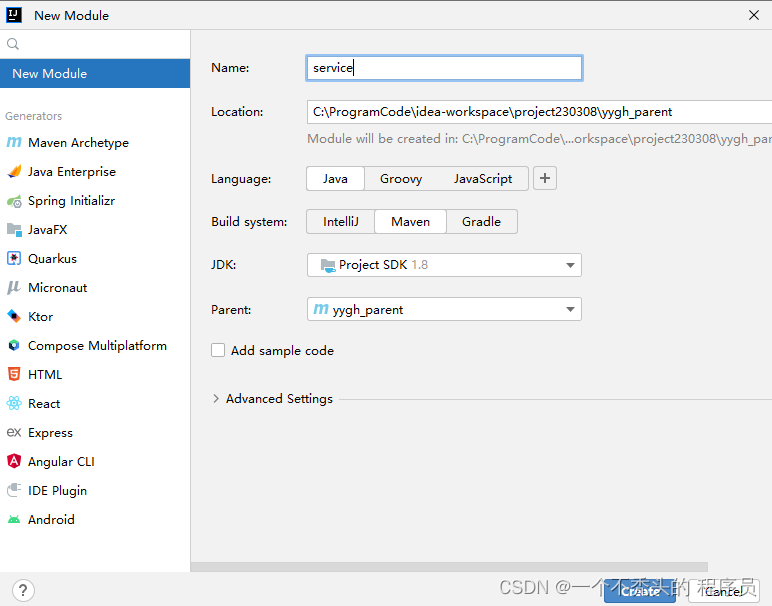
6、搭建service模块 (1)在父工程yygh_parent下面创建模块service
(2)修改pom、添加通用依赖
<dependencies>

    <dependency>

        <groupId>com.atguigu</groupId>

        <artifactId>model</artifactId>

        <version>0.0.1-SNAPSHOT</version>

    </dependency>

    <!--web-->

    <dependency>

        <groupId>org.springframework.boot</groupId>

        <artifactId>spring-boot-starter-web</artifactId>

    </dependency>

    <!--mybatis-plus-->

    <dependency>

        <groupId>com.baomidou</groupId>

        <artifactId>mybatis-plus-boot-starter</artifactId>

    </dependency>

    <!--mysql-->

    <dependency>

        <groupId>mysql</groupId>

        <artifactId>mysql-connector-java</artifactId>

    </dependency>

    <!--开发者工具-->

    <dependency>

        <groupId>org.springframework.boot</groupId>

        <artifactId>spring-boot-devtools</artifactId>

        <optional>true</optional>

    </dependency>

    <!-- 服务调用feign

    <dependency>

        <groupId>org.springframework.cloud</groupId>

        <artifactId>spring-cloud-starter-openfeign</artifactId>

    </dependency>-->

    <!-- 服务注册

    <dependency>

        <groupId>com.alibaba.cloud</groupId>

        <artifactId>spring-cloud-starter-alibaba-nacos-discovery</artifactId>

    </dependency>-->

  </dependencies>
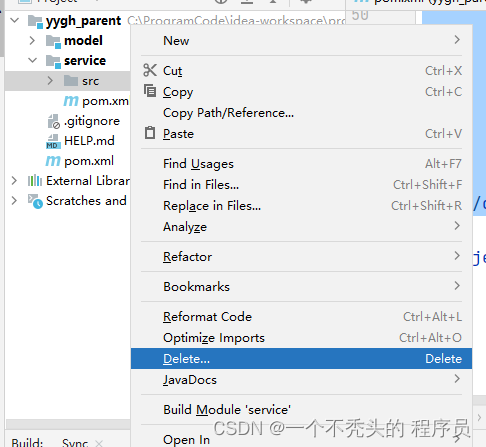
(3)删除src
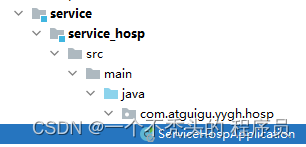
7、搭建医院模块service_hosp模块 (1)在父模块·service模块下面创建子模块service_hosp
|
医院设置模块搭建
医院设置主要是用来保存开通医院的一些基本信息,每个医院一条信息,保存了医院编号(平台分配,全局唯一)和接口调用相关的签名key等信息,是整个流程的第一步,只有开通了医院设置信息,才可以上传医院相关信息。我们所开发的功能就是基于单表的一个CRUD、锁定/解锁和发送签名信息这些基本功能。 2、改造service_hosp模块 (1)resources目录下创建文件 application.properties # 服务端口
server.port=8201
# 服务名
spring.application.name=service-hosp
# 环境设置:dev、test、prod
spring.profiles.active=dev
# mysql数据库连接
spring.datasource.driver-class-name=com.mysql.jdbc.Driver
spring.datasource.url=jdbc:mysql://localhost:3306/yygh_hosp?characterEncoding=utf-8&useSSL=false
spring.datasource.username=root
spring.datasource.password=123123
#返回json的全局时间格式
spring.jackson.date-format=yyyy-MM-dd HH:mm:ss
spring.jackson.time-zone=GMT+8
#mybatis日志
mybatis-plus.configuration.log-impl=org.apache.ibatis.logging.stdout.StdOutImpl (2)创建主目录、启动类
@SpringBootApplication

  public class ServiceHospApplication {

    public static void main(String[] args) {

        SpringApplication.run(ServiceHospApplication.class,args);

    }

  }
3、搭建MP框架 (1)确认实体
(2)搭建mapper
public interface HospitalSetMapper extends BaseMapper<HospitalSet> {

}
(3)搭建service
public interface HospitalSetService extends IService<HospitalSet> {

}
@Service
public class HospitalSetServiceImpl
extends ServiceImpl<HospitalSetMapper, HospitalSet>
implements HospitalSetService {
}
(4)搭建controller //医院设置接口
@RestController
@RequestMapping("/admin/hosp/hospitalSet")
public class HospitalSetController {
@Autowired
private HospitalSetService hospitalSetService;
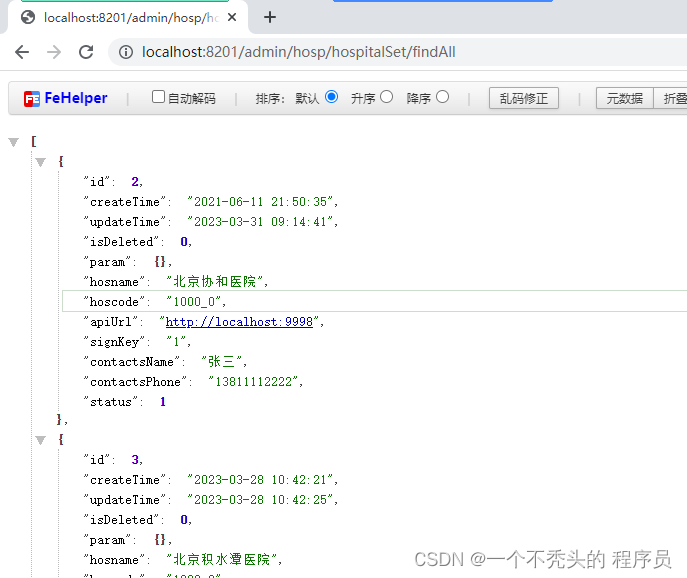
@GetMapping("findAll")
public List<HospitalSet> findAll(){
List<HospitalSet> list = hospitalSetService.list();
return list;
}
}
(5)创建配置类 @Configuration
@EnableTransactionManagement
@MapperScan("com.atguigu.yygh.hosp.mapper")
public class HospConfig {
}
(6)启动测试
(7)实现删除
@DeleteMapping("{id}")

  public boolean delHospset(@PathVariable Long id){

    boolean remove = hospitalSetService.removeById(id);

    return remove;

  }
配置使用Swagger2
统一返回结果
实现带条件带分页查询接口
新增、修改接口开发
批量删除、锁定医院设置
统一异常处理
|

