Vue之router和vuex
在学习之前,我们可以先安装一个插件,是一个浏览器插件,这个插件的作用是可以让我们更好的观察到数据的变化和状态的变更
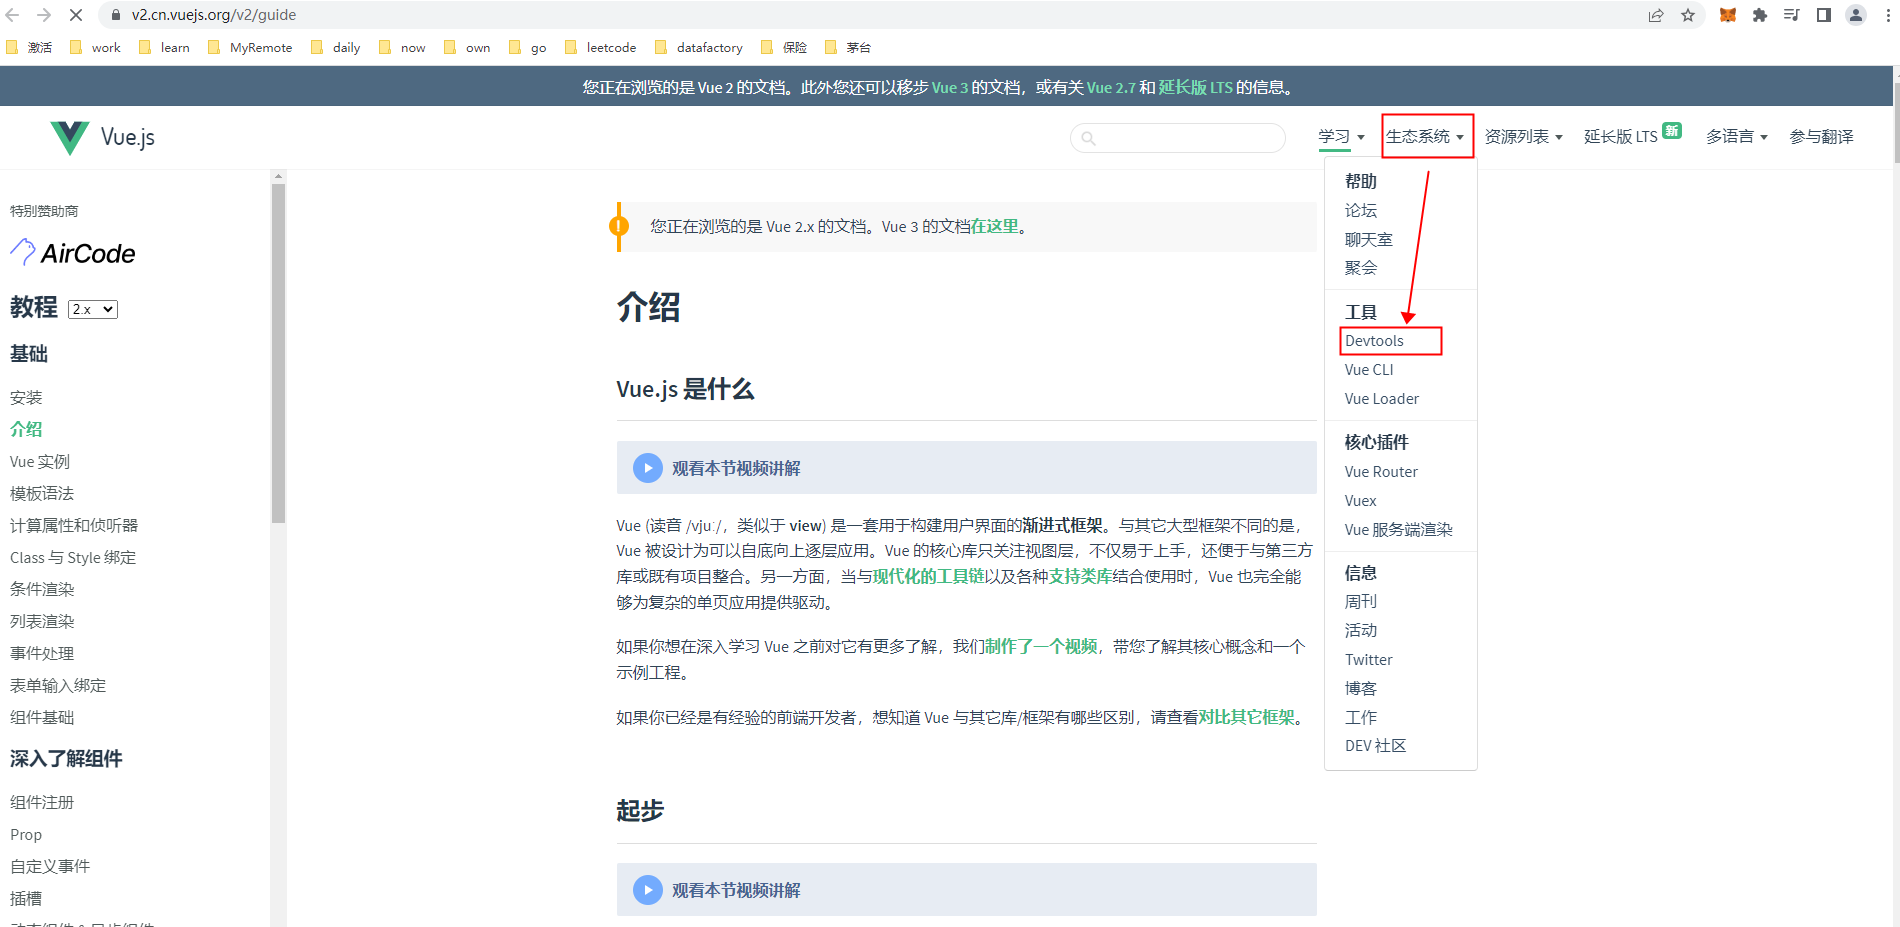
他是一个github的链接,如果你没办法科学上网的话,也可以在
插件下载
上面这个链接下载后安装,安装就不讲了吧
对于router和vuex的安装,可以在创建项目的时候安装,也可以后续再加插件,比较无脑的办法就是启动cmd,启动vue的ui管理
vue ui
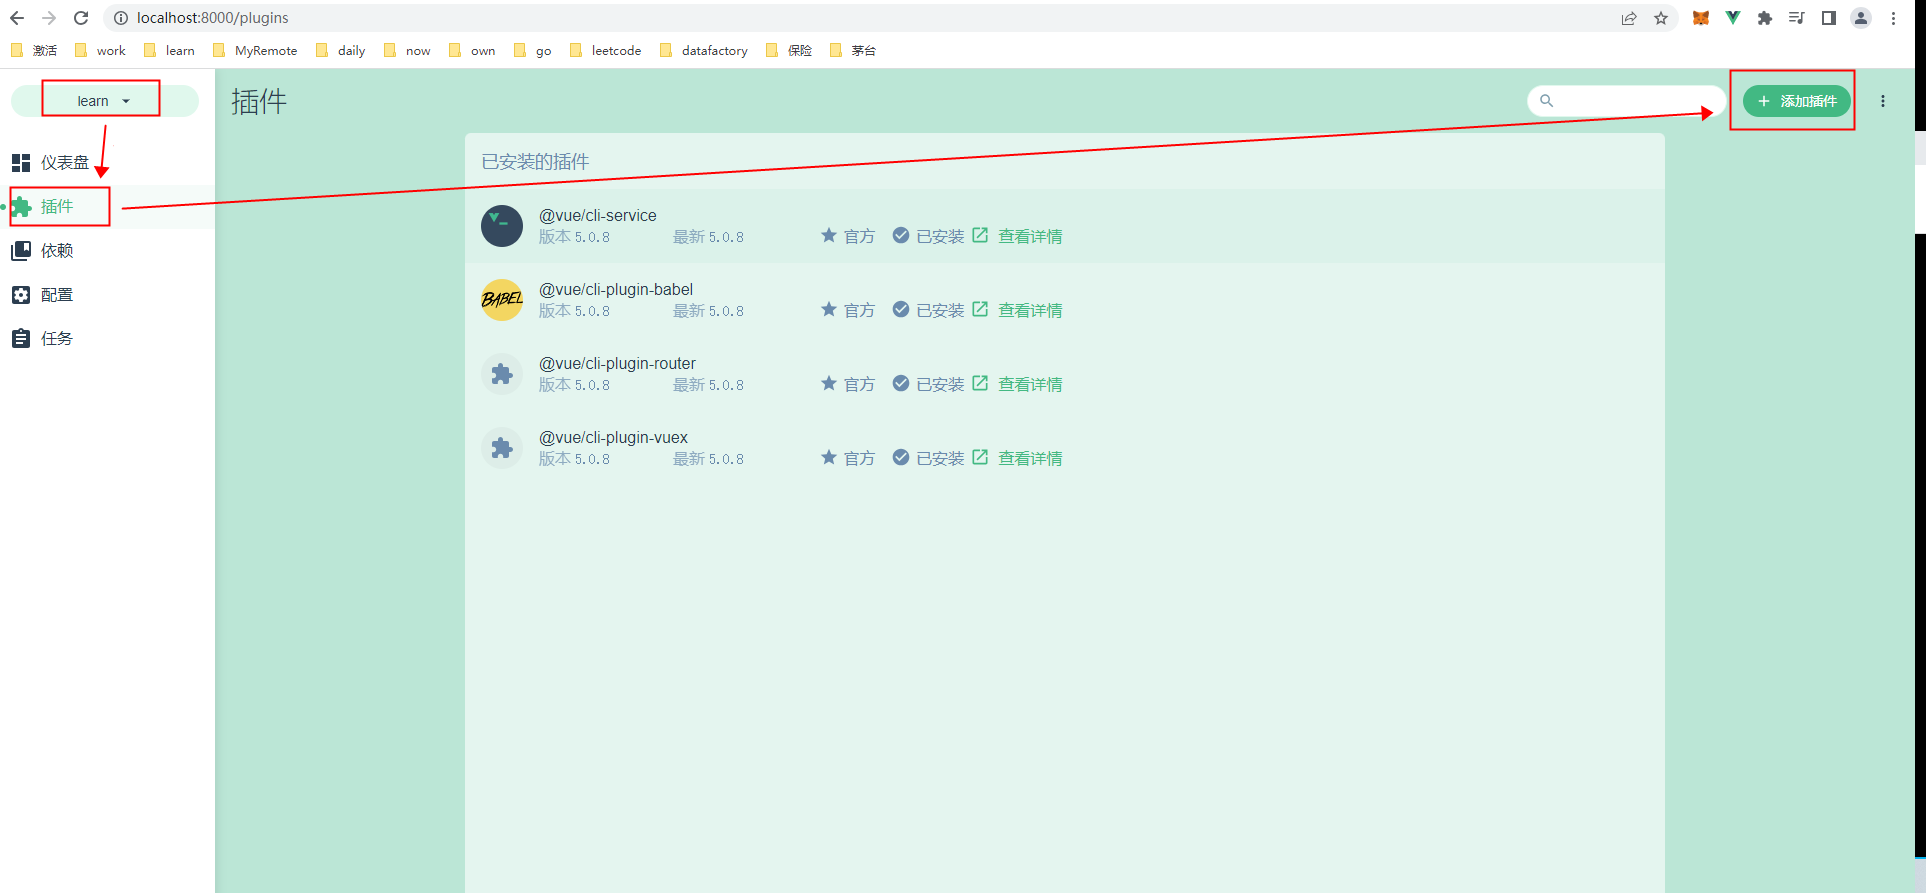
然后搜索安装即可
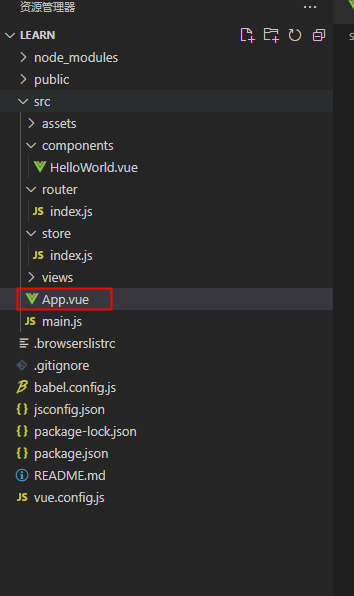
安装完成后会有这两个文件夹
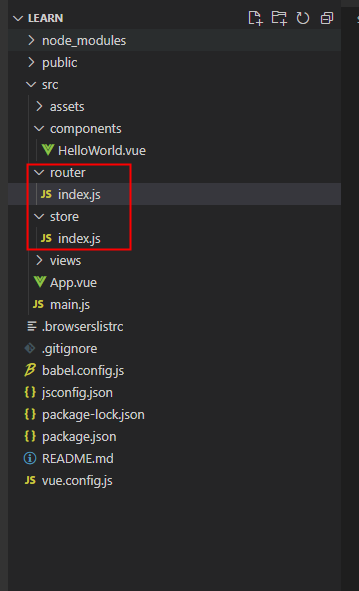
我们先来看一下这两个文件
router/index.js
import Vue from 'vue'
import VueRouter from 'vue-router'  //1、引用了VueRouter这个库,就是咱们在创建项目的时候选择了VueRouter即可
import HomeView from '../views/HomeView.vue'

Vue.use(VueRouter) //2、引入了VueRouter这个官方插件

const routes = [
  {
    path: '/',
    name: 'home',
    component: HomeView
  },
  {
    path: '/about',
    name: 'about',
    // route level code-splitting
    // this generates a separate chunk (about.[hash].js) for this route
    // which is lazy-loaded when the route is visited.
    component: () => import(/* webpackChunkName: "about" */ '../views/AboutView.vue')
  }
]
//3、new VueRouter,创建了一个VueRouter的实例
const router = new VueRouter({
  routes
})
//4、导出这个实例,供项目使用
export default router
再来看store/index.js
import Vue from 'vue'
import Vuex from 'vuex'

Vue.use(Vuex)
//和router/index.js是类似的
export default new Vuex.Store({
  state: {
  },
  getters: {
  },
  mutations: {
  },
  actions: {
  },
  modules: {
  }
})
那么,被创建的router和vuex的实例在哪里使用的呢
答案是根目录的main.js
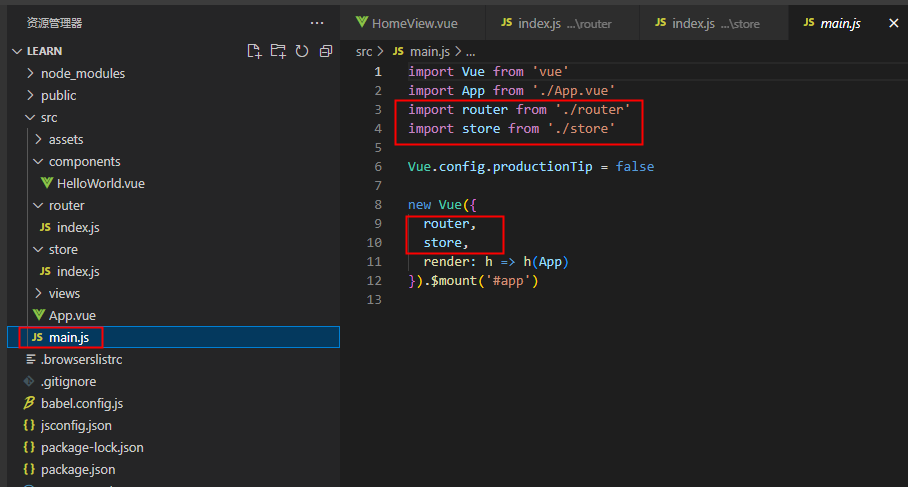
这个时候,整个Vue项目就有了router个vuex的功能了
router
基础使用
接下来我们先讲解一下router基础的功能
import Vue from 'vue'
import VueRouter from 'vue-router'
import HomeView from '../views/HomeView.vue'

Vue.use(VueRouter)
const routes = [
  {
    // 3、path就是你跳转的路径
    path: '/',
    //4、这个name参数,是在比如说你的path很长的时候,例如 '/xxxx/eeee/cccc/vvv/vvv/ggg',可以通过name的value,也就是home来替代path,就比较方便跳转
    name: 'home',
    //5、这个地址对应的显示的组件是哪个,就由这个参数来决定,这个路径是通过import HomeView from '../views/HomeView.vue' import的方式来引用的
    component: HomeView
  },
  {
    path: '/about',
    name: 'about',
    //6、这个是通过异步的方式,里面还有一个webpack的魔法注释,是为了让webpack打包的时候可以让多个组件统一打包
    component: () => import(/* webpackChunkName: "about" */ '../views/AboutView.vue')
  }
]
const router = new VueRouter({
  //1、history,看起来更好看,IE10及以上支持,一下需要单独处理
  //mode设置为空.默认是hash模式的,或者设置成 mode: 'hash'  也可以,这种模式的优点在于兼容性更好
  mode: 'history',
  //2、这个routes就是上面const routes定义的变量,里面存放的是真正的路由信息
  routes
})
export default router
针对第一点
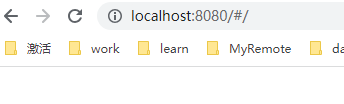
history模式
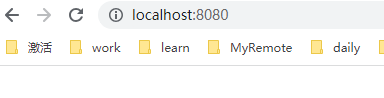
hash或者默认模式
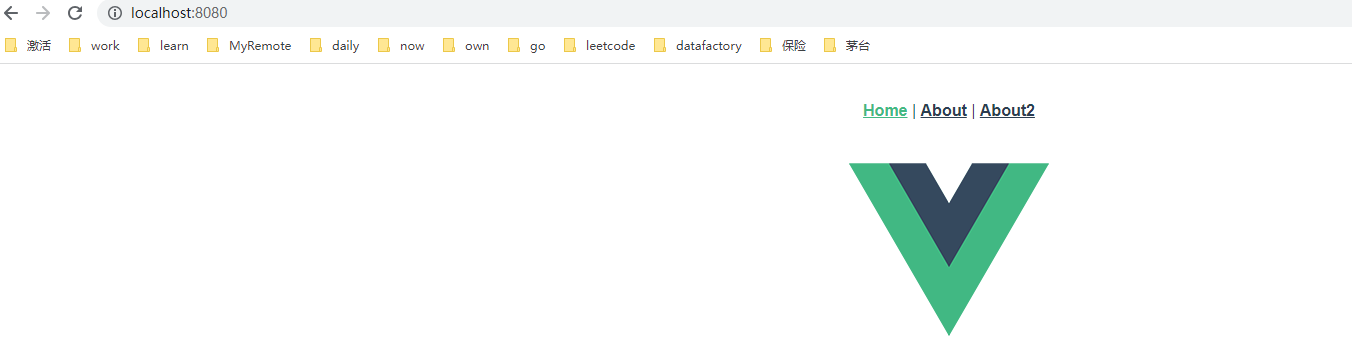
针对第三点和第四点,包括这些组件是在哪里定义的,我们来看一下
<template>
  <div id="app">
    <nav>
      <!-- 1、这是一个链接的标签,外面显示的名字时Home,点击后,就根据router/index.js设置的路由跳转到了Home这个组件 -->
      <router-link to="/">Home</router-link> |
      <!-- 2、相应的,这个就是跳转到了AboutView这个组件 -->
      <router-link to="/about">About</router-link> |
      <!-- 3、还记得router/index.js的第三点和第四点,我们可以通过下面这种方式来替换上面的跳转方式,通过 :to来绑定,{name: 'about'}的name,就是表示我要用name的方式来跳转,后面的about就是router/index.js的第4点的name的value -->
      <router-link :to="{name: 'about'}">About2</router-link>
    </nav>
    <!-- 4、那上面这两个跳转的了对应的组件页面,展示在哪里呢,就是展示router-view标签的位置,也就是App这个组件,在这里留了一块地方,供子组件使用
    它没有展示在上面,而是展示在了跳转链接的下面,就是在这里定义的-->
    <router-view/>
  </div>
</template>

<style>
#app {
  font-family: Avenir, Helvetica, Arial, sans-serif;
  -webkit-font-smoothing: antialiased;
  -moz-osx-font-smoothing: grayscale;
  text-align: center;
  color: #2c3e50;
}

nav {
  padding: 30px;
}

nav a {
  font-weight: bold;
  color: #2c3e50;
}

nav a.router-link-exact-active {
  color: #42b983;
}
</style>
接下来我们可以自己写一个页面
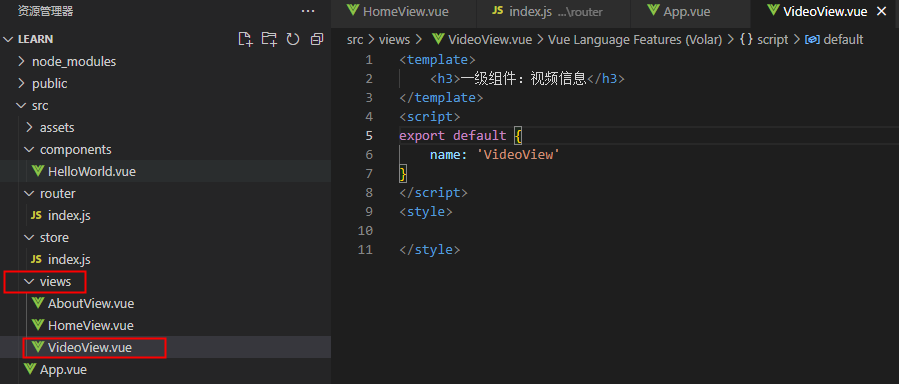
<template>
    <h3>一级组件:视频信息</h3>
</template>
<script>
export default {
    name: 'VideoView'
}
</script>
<style>

</style>
router/index.js
import Vue from 'vue'
import VueRouter from 'vue-router'
import HomeView from '../views/HomeView.vue'
// 1、引入我们新写的页面
import VideoView from '../views/VideoView.vue'

Vue.use(VueRouter)
const routes = [
  {
    path: '/',
    name: 'home',
    component: HomeView
  },
  {
    path: '/about',
    name: 'about',
    component: () => import(/* webpackChunkName: "about" */ '../views/AboutView.vue')
  },
  // 2、配置好跳转信息
  {
    path:'/video',
    name:'video',
    component: VideoView
  }
]
const router = new VueRouter({
  mode: 'history',
  routes
})
export default router
App.vue
<template>
  <div id="app">
    <nav>
      <router-link to="/">Home</router-link> |
      <router-link to="/about">About</router-link> |
      <!-- 1、配置好跳转链接 -->
      <router-link :to="{name: 'video'}">Video</router-link>
    </nav>
    <router-view/>
  </div>
</template>

<style>
#app {
  font-family: Avenir, Helvetica, Arial, sans-serif;
  -webkit-font-smoothing: antialiased;
  -moz-osx-font-smoothing: grayscale;
  text-align: center;
  color: #2c3e50;
}

nav {
  padding: 30px;
}

nav a {
  font-weight: bold;
  color: #2c3e50;
}

nav a.router-link-exact-active {
  color: #42b983;
}
</style>

动态路由
上面这些都是基本的使用,下面我们来讲一下动态路由
比如说上面我们新建的视频组件,那我们可能有第一个视频第二个视频第三个视频
  {
    path:'/video/323',
    name:'video',
    component: VideoView
  }
就像上面一样,组件的内容是一样的,只是要处理的视频的id不一样,类似于商品id
我们首先对router/index.js修改
import Vue from 'vue'
import VueRouter from 'vue-router'
import HomeView from '../views/HomeView.vue'
import VideoView from '../views/VideoView.vue'

Vue.use(VueRouter)
const routes = [
  {
    path: '/',
    name: 'home',
    component: HomeView
  },
  {
    path: '/about',
    name: 'about',
    component: () => import(/* webpackChunkName: "about" */ '../views/AboutView.vue')
  },
  {
    // 1、当后面有:的时候,就代表是动态的,就是动态路由
    path:'/video/:id',
    name:'video',
    component: VideoView,
    // 2、当动态路由设置好之后,如果你想要在组件内部访问到这个id的话,就需要配置如下内容
    props: true
  }
]
const router = new VueRouter({
  mode: 'history',
  routes
})
export default router
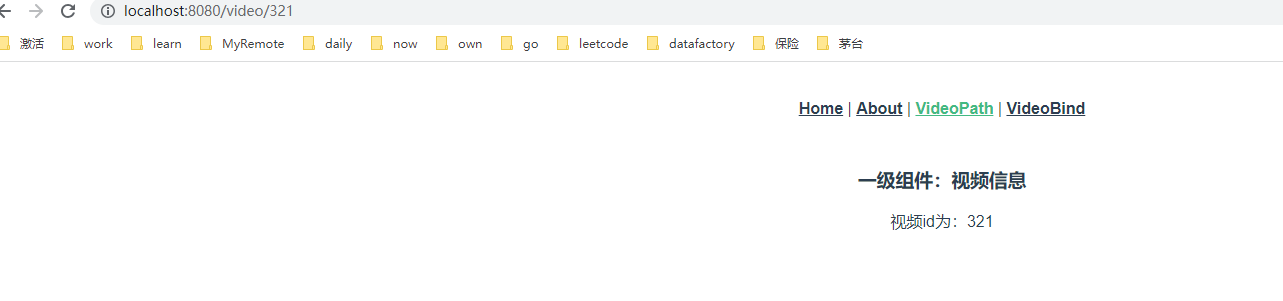
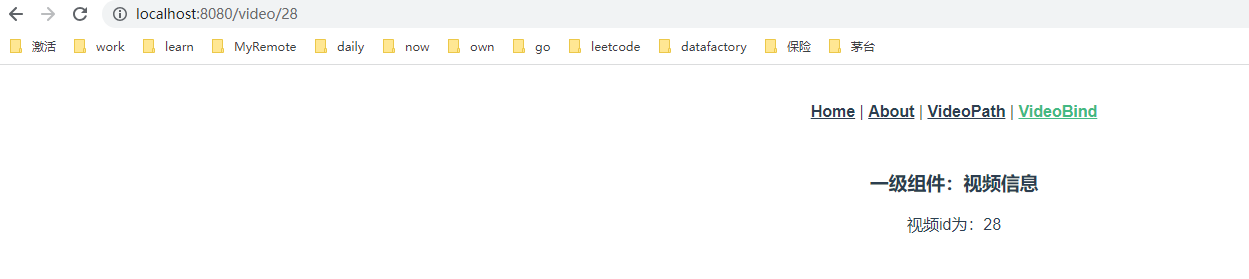
再修改对应的组件VideoView.vue
<template>
    <div>
        <h3>一级组件:视频信息</h3>
        <!-- 2、这里只是为了方便展示而已,在这里打印出来 -->
        <p>视频id为:{{ id }}</p>
    </div>
</template>
<script>
export default {
    name: 'VideoView',
    // 1、在组件中通过props来承接链接中传进来的id这个值
    props:['id']
}
</script>
<style>

</style>
最后修改父组件传递动态信息
<template>
  <div id="app">
    <nav>
      <router-link to="/">Home</router-link> |
      <router-link to="/about">About</router-link> |
      <!-- 1、如果通过path的方式来传递值的话,就直接在路径中拼好 -->
      <router-link to="/video/321">VideoPath</router-link> |
      <!-- 2、通过:to的方式绑定的话, 需要通过params这个参数来传递值-->
      <router-link :to="{name: 'video',params:{id:28}}">VideoBind</router-link>
    </nav>
    <router-view/>
  </div>
</template>

<style>
#app {
  font-family: Avenir, Helvetica, Arial, sans-serif;
  -webkit-font-smoothing: antialiased;
  -moz-osx-font-smoothing: grayscale;
  text-align: center;
  color: #2c3e50;
}

nav {
  padding: 30px;
}

nav a {
  font-weight: bold;
  color: #2c3e50;
}

nav a.router-link-exact-active {
  color: #42b983;
}
</style>
嵌套路由
比如说对于28这个视频id,我还要对这个视频进行一些分析,比如说点赞信息,还有二级功能,说人话就是
例如
视频的路径是 ‘video/30’
点赞信息的路径是’/video/30/info’
对于路径来说 ‘video/30’,这段是根基,info是在根基的基础上跳转的
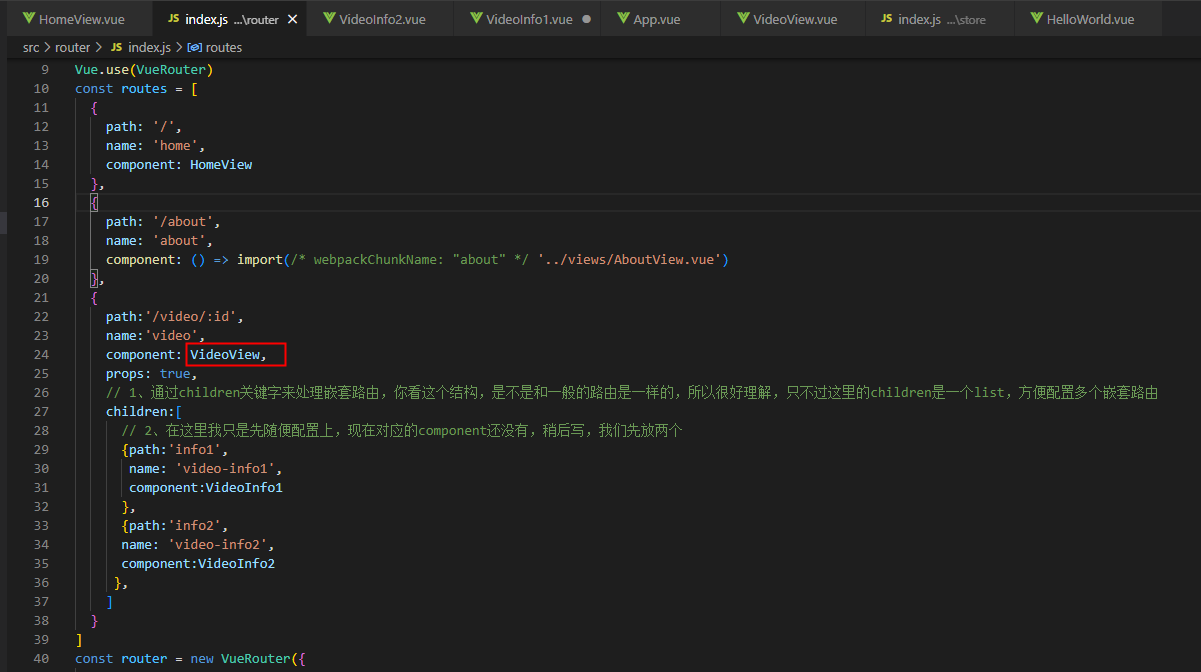
我们先来修改router/index.js
import Vue from 'vue'
import VueRouter from 'vue-router'
import HomeView from '../views/HomeView.vue'
import VideoView from '../views/VideoView.vue'
// 3、我们在这里也先引入,然后根据这个信息去写对应的component
import VideoInfo1 from '../views/video/VideoInfo1.vue'
import VideoInfo2 from '../views/video/VideoInfo2.vue'

Vue.use(VueRouter)
const routes = [
  {
    path: '/',
    name: 'home',
    component: HomeView
  },
  {
    path: '/about',
    name: 'about',
    component: () => import(/* webpackChunkName: "about" */ '../views/AboutView.vue')
  },
  {
    path:'/video/:id',
    name:'video',
    component: VideoView,
    props: true,
    // 1、通过children关键字来处理嵌套路由,你看这个结构,是不是和一般的路由是一样的,所以很好理解,只不过这里的children是一个list,方便配置多个嵌套路由
    children:[
      // 2、在这里我只是先随便配置上,现在对应的component还没有,稍后写,我们先放两个
      {path:'info1',
       name: 'video-info1',
       component:VideoInfo1
      },
      {path:'info2',
      name: 'video-info2',
      component:VideoInfo2
     },
    ]
  }
]
const router = new VueRouter({
  mode: 'history',
  routes
})
export default router
接下来写对应的组件

<template>
    <div>
        <h3>二级组件:点赞情况分析</h3>
    </div>
</template>
<script>
export default {
    name: 'VideoInfo1'
}
</script>
<style>

</style>
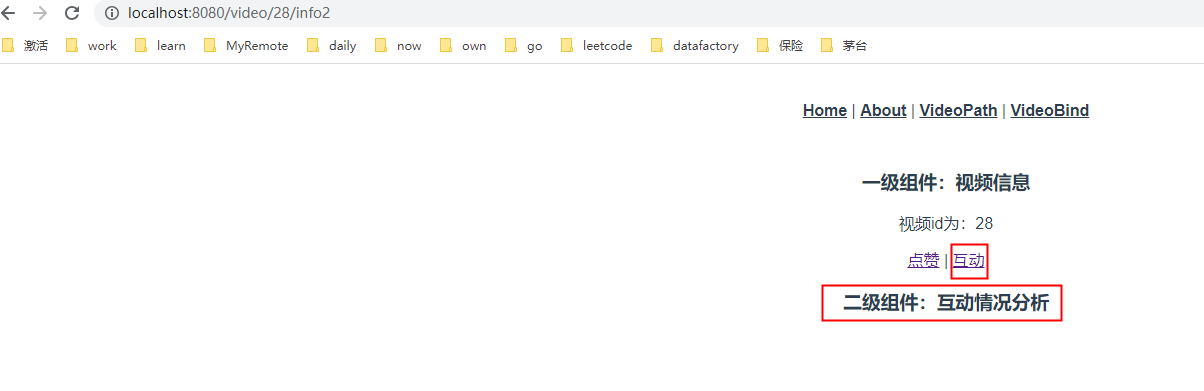
<template>
    <div>
        <h3>二级组件:互动情况分析</h3>
    </div>
</template>
<script>
export default {
    name: 'VideoInfo2'
}
</script>
<style>

</style>
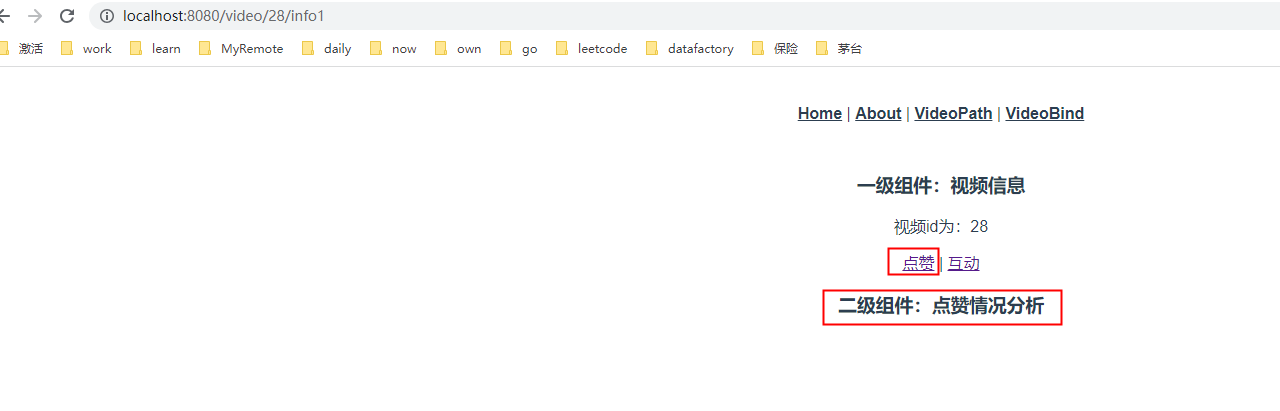
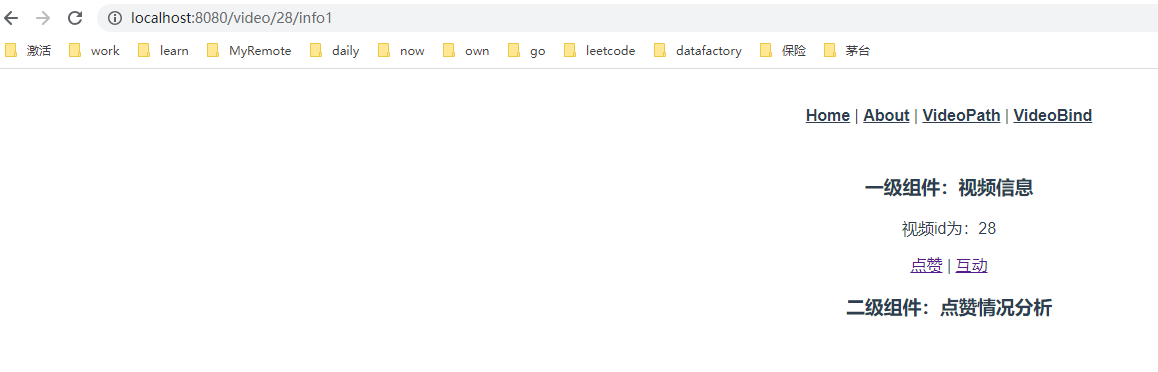
写好了,我们放在哪里了,当然是放到子路由对应的父路由的组件上,也就是
<template>
    <div>
        <h3>一级组件:视频信息</h3>
        <p>视频id为:{{ id }}</p>
        <!-- 1、在这里配置好跳转的地方,这个params可以不传,毕竟咱们也没用,但是如果要传值的话,正常情况下是应该传的,要不你怎么知道是哪个视频的点赞呢,对不对,使用的方式就和动态路由一致 -->
        <router-link :to="{name: 'video-info1',params:{id:28}}">点赞</router-link> |
        <router-link :to="{name: 'video-info2',params:{id:28}}">互动</router-link>
        <!-- 2、我们的子组件总要有展示的地方对不对,就需要router-view来确定位置 -->
        <router-view/>
    </div>
</template>
<script>
export default {
    name: 'VideoView',
    props:['id']
}
</script>
<style>

</style>
效果如下
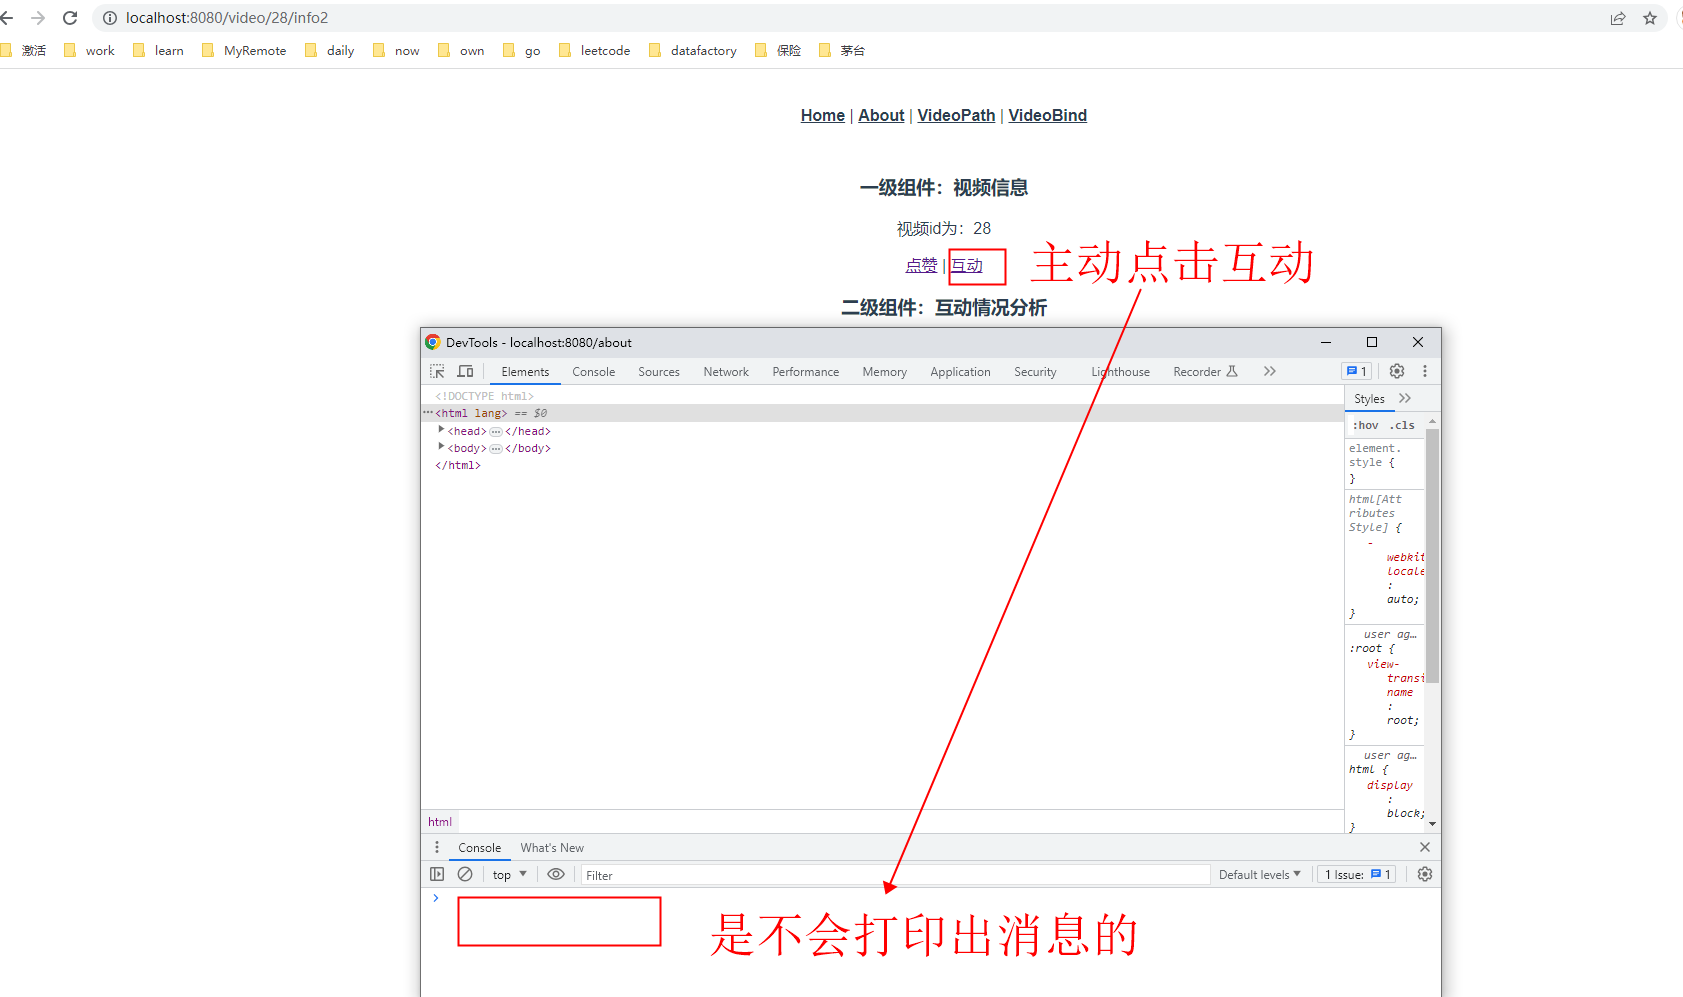
编程式导航的处理方式
我们刚刚实现的是通过手动点击的方式来跳转的,那如果类似于你登录信息过期了,你再点击这个互动链接,就应该给你跳转到登录页面让你去登录,也就是主动跳转
<template>
    <div>
        <h3>二级组件:点赞情况分析</h3>
    </div>
</template>
<script>
export default {
    name: 'VideoInfo1',
    // 1、created()涉及到了生命周期的内容,可以去看看,大致就是当组件创建完毕以后会执行的一个声明周期钩子
    created(){
        // 2、如果你要使用router的功能,可以通过this.$router访问到router实例,通过push去跳转到对应的地方,比如说我们就是跳转到了about页面,至于setTimeout,其实就是为了三秒后再跳转,要不直接跳转到的不就看不到过程了么
        setTimeout(()=>{
            this.$router.push({name:'about'})
        },3000)
    }
}
</script>
<style>

</style>
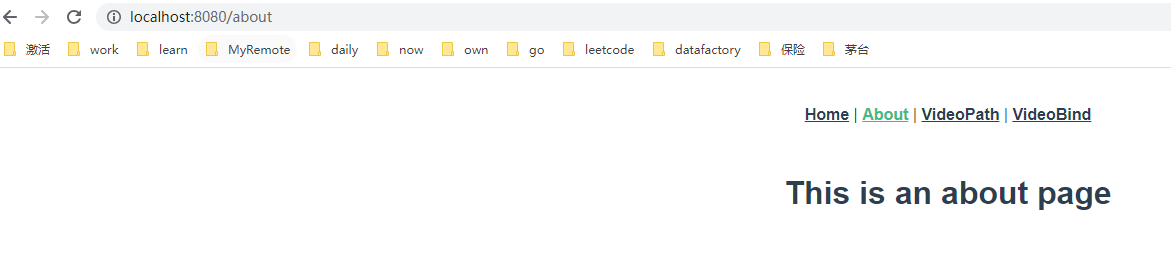
效果,我就不做动图了
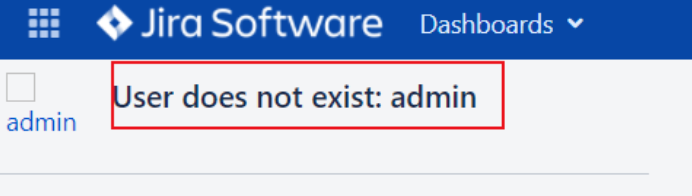
下面这张是刚开始点击的样子
3秒钟后自动跳转
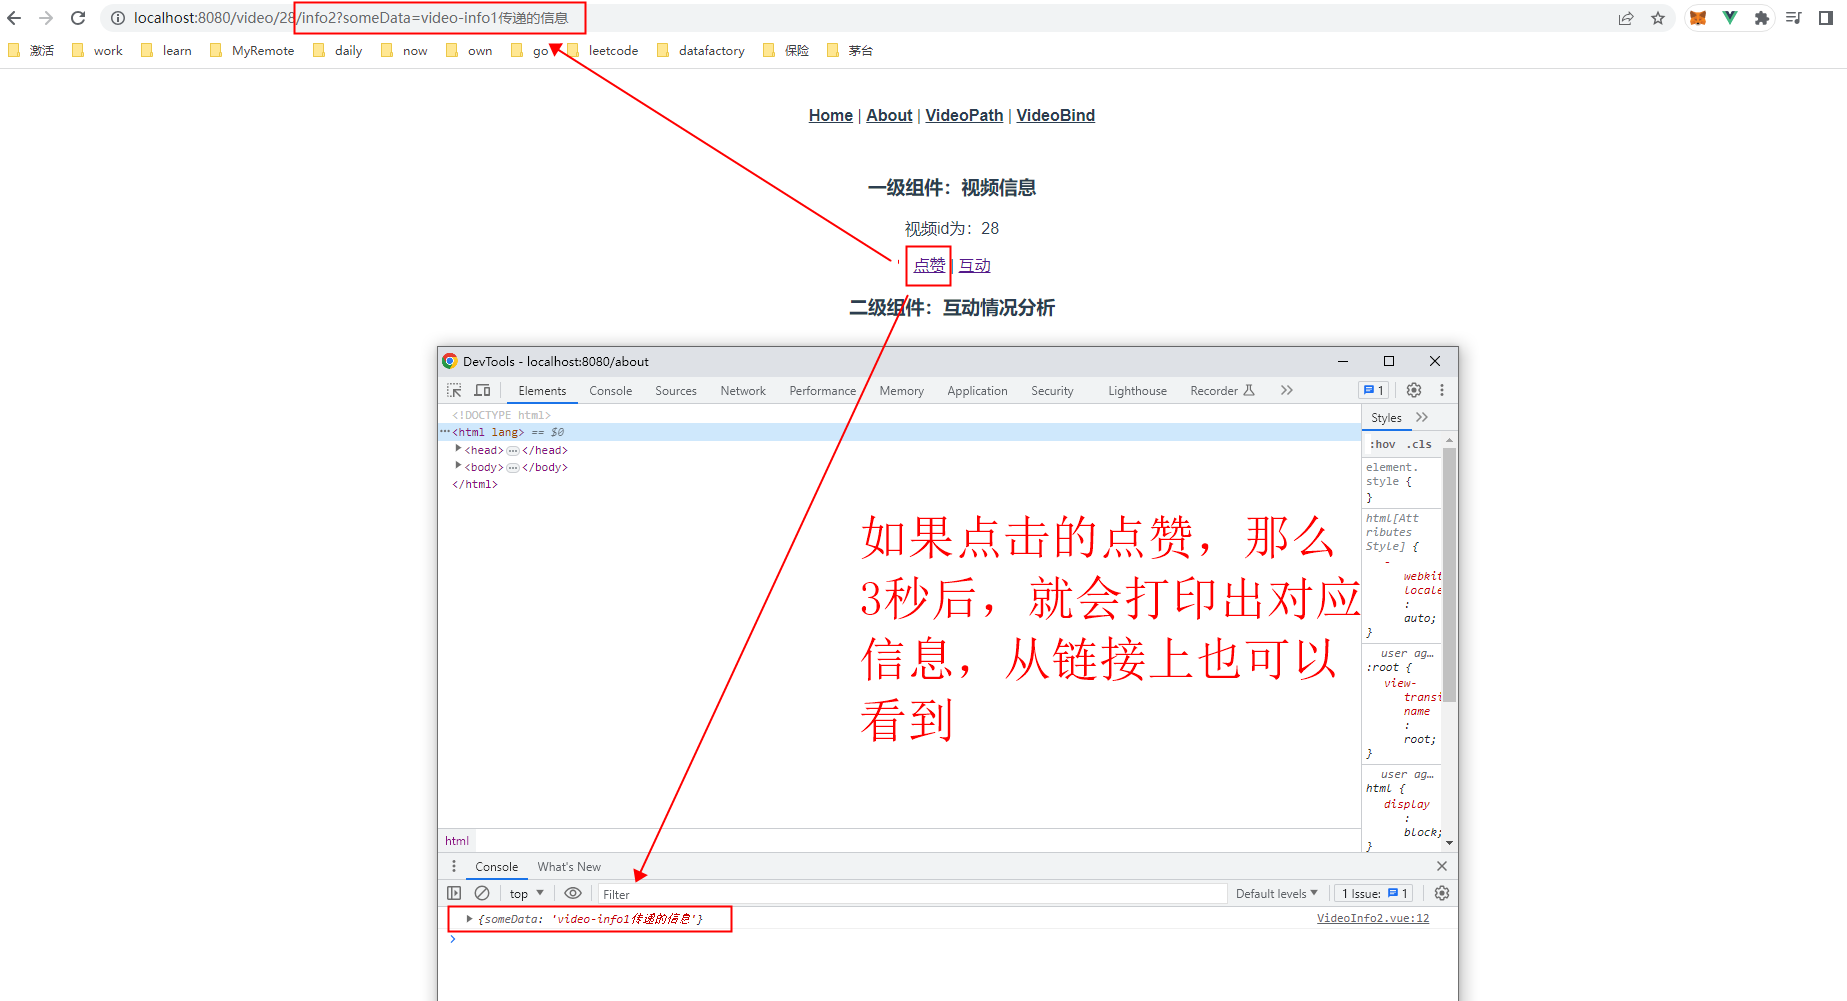
那我们在跳转的时候我还要做数据的传递怎么办
我们先看来数据如何传递
<template>
    <div>
        <h3>二级组件:点赞情况分析</h3>
    </div>
</template>
<script>
export default {
    name: 'VideoInfo1',
    created(){
        setTimeout(()=>{
            // 1、我们这次修改为跳转到video-info2,然后通过query的方式来传递信息,也就是3秒后会跳转到video-info2,并做一些数据传递
            this.$router.push({name:'video-info2',query:{someData:'video-info1传递的信息'}})
        },3000)
    }
}
</script>
<style>

</style>
接下来看数据的接收
<template>
    <div>
        <h3>二级组件:互动情况分析</h3>
    </div>
</template>
<script>
export default {
    name: 'VideoInfo2',
    created(){
        // 1、如果你要操作路由的话,那就是router,但是如果你要看路由相关的数据,例如地址呀,响应的参数呀,通过route来操作,就是在这里接收数据的
        // 但是需要注意的是,只有通过info1跳转过来的时候加了,其他的位置是没有加的
        console.log(this.$route.query)
    }
}
</script>
<style>

</style>
导航守卫
import Vue from 'vue'
import VueRouter from 'vue-router'
import HomeView from '../views/HomeView.vue'
import VideoView from '../views/VideoView.vue'
import VideoInfo1 from '../views/video/VideoInfo1.vue'
import VideoInfo2 from '../views/video/VideoInfo2.vue'
Vue.use(VueRouter)
const routes = [
{
path: '/',
name: 'home',
component: HomeView
},
{
path: '/about',
name: 'about',
component: () => import(/* webpackChunkName: "about" */ '../views/AboutView.vue')
},
{
path:'/video/:id',
name:'video',
component: VideoView,
props: true,
children:[
{path:'info1',
name: 'video-info1',
component:VideoInfo1
},
{path:'info2',
name: 'video-info2',
component:VideoInfo2
},
]
}
]
const router = new VueRouter({
mode: 'history',
routes
})
// 比如说我要在每次路由跳转的时候都做一些操作,比如说加一个进度条啊什么的,那么就需要这个导航守卫,导航守卫有三个参数,to,from,next,to代表去哪里,from代表来自哪里,next,如果你不加next就不会跳转页面,也就什么都不渲染
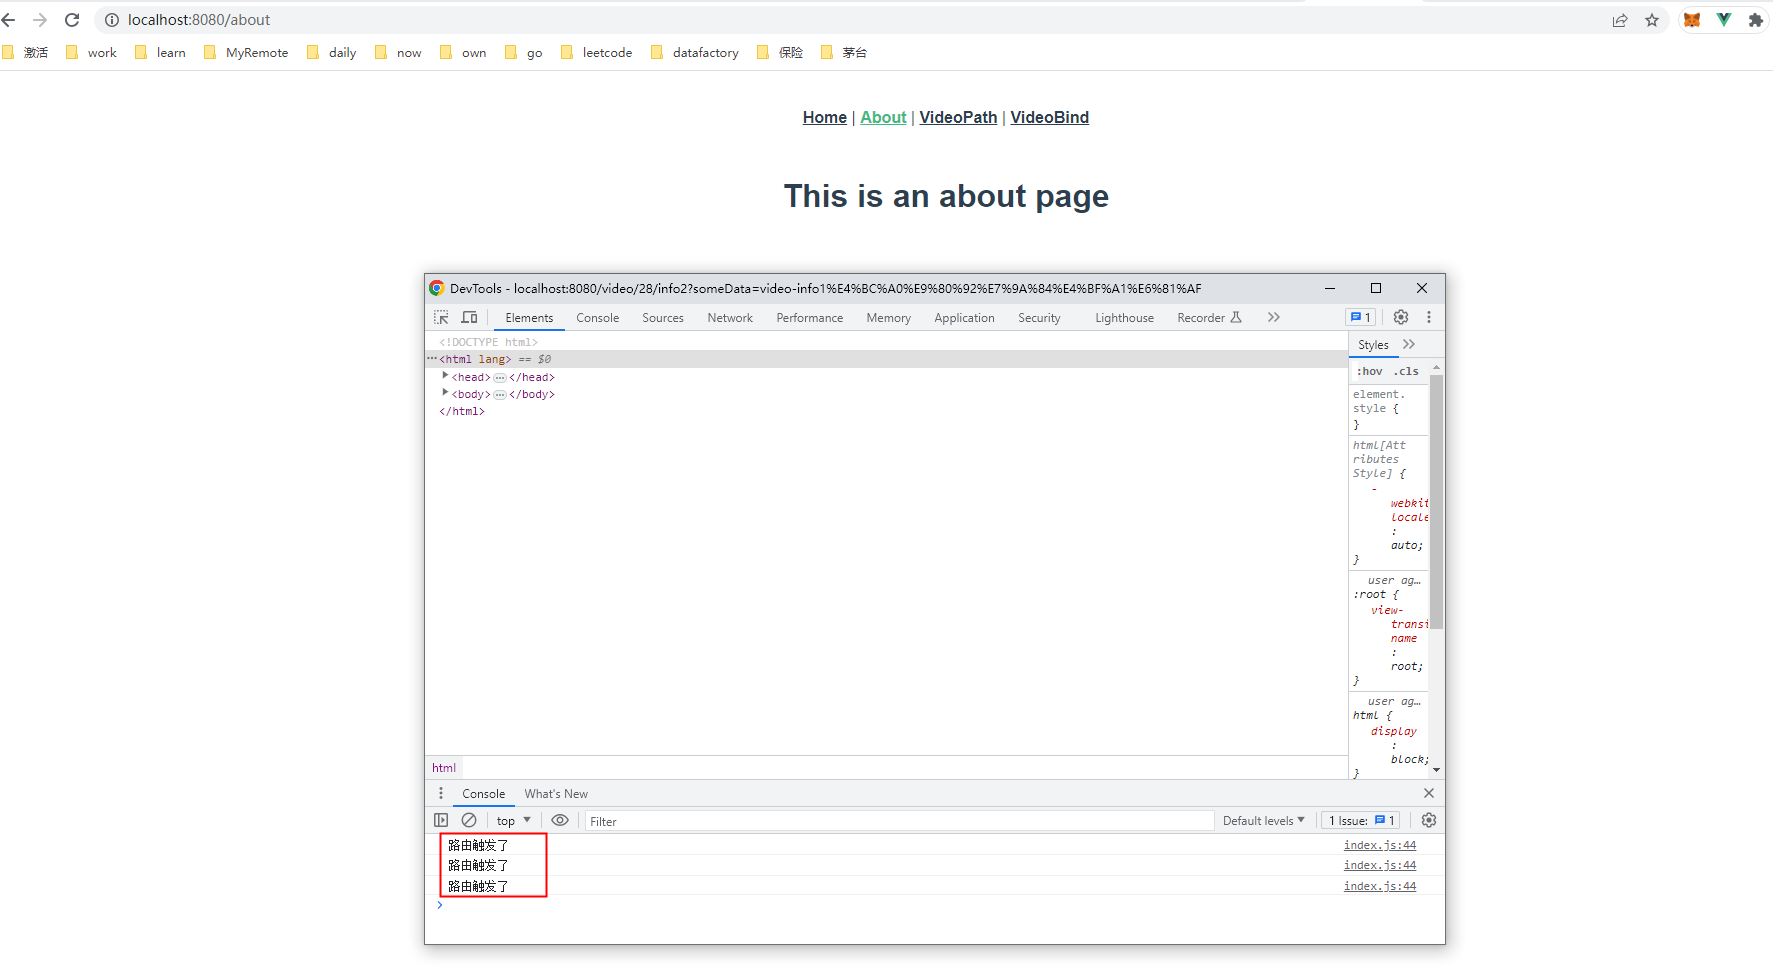
router.beforeEach((to,from,next)=>{
console.log('路由触发了')
next()
})
export default router
结果就是每跳转一次路由,都会出发守卫
vuex
就是一个统一的数据存储方式,一共就提供了五个功能
数据的存储
store/index.js文件
import Vue from 'vue'
import Vuex from 'vuex'

Vue.use(Vuex)
//和router/index.js是类似的
export default new Vuex.Store({
  // state,存储数据的地方,全局数据,其他任意组件的位置都可以来访问,但是建议将官方的注释掉,用下面这种方式
  // state: {
  // },
  state(){
    return{
      loginStatus:'用户已经登录'
    }
  },
  getters: {
  },
  mutations: {
  },
  actions: {
  },
  modules: {
  }
})
那我们想要访问的话,比如说我想要在video-info1里访问
<template>
    <div>
        <h3>二级组件:点赞情况分析</h3>
    </div>
</template>
<script>
export default {
    name: 'VideoInfo1',
    created(){
        // 通过this.$store来访问store
        console.log(this.$store.state.loginStatus)
    }
}
</script>
<style>

</style>

数据的变更
import Vue from 'vue'
import Vuex from 'vuex'

Vue.use(Vuex)
export default new Vuex.Store({
  state(){
    return{
      loginStatus:'用户已经登录',
      // 1、新增一个count值,方便后续修改操作
      count: 0
    }
  },
  getters: {
  },
  //2、 如果你要修改数据的话,就在mutations里操作,因为虽然可以直接通过赋值的方式来修改,但是不建议这么做,因为如果数据变了,有N个组件,你不知道是哪个组件变更了这个数据,不好维护全局的状态数据
  // 这个里面就是一个个方法,封装了对每一个state中存储的全局变量做变更的方法供所有组件使用,就相当于一个method
  mutations: {
    // 3、这个state就是上面的state,存储数据的state,你看得vue的组件里,我们都是用this.来访问组件里的数据,但是在vuex里,我们用的是state来代替this
    changeCount(state,num){
      // 4、这里就是传入多少,就为count加多少
      state.count+=num
      console.log('mutations执行了,count的值为:',state.count)
    }
  },
  actions: {
  },
  modules: {
  }
})
在哪里调用呢
<template>
    <div>
        <h3>二级组件:点赞情况分析</h3>
        <button v-on:click="handler">调用全局方法</button>
    </div>
</template>
<script>
export default {
    name: 'VideoInfo1',
    created(){
        console.log(this.$store.state.loginStatus)
    },
    methods:{
        // 1、我们加methods,因为全局变量一般都是在主逻辑的某一个地方,要用的时候才去使用,比如说点击了某个按钮
        handler(){
            // 2、注意,不是直接去访问mutations,而是通过commit的方式来做一个提交,第一个参数是方法的名称,第二个参数就是方法的入参了
            this.$store.commit('changeCount',1)
            this.$store.commit('changeCount',1)
            this.$store.commit('changeCount',1)
        }
    }
}
</script>
<style>

</style>
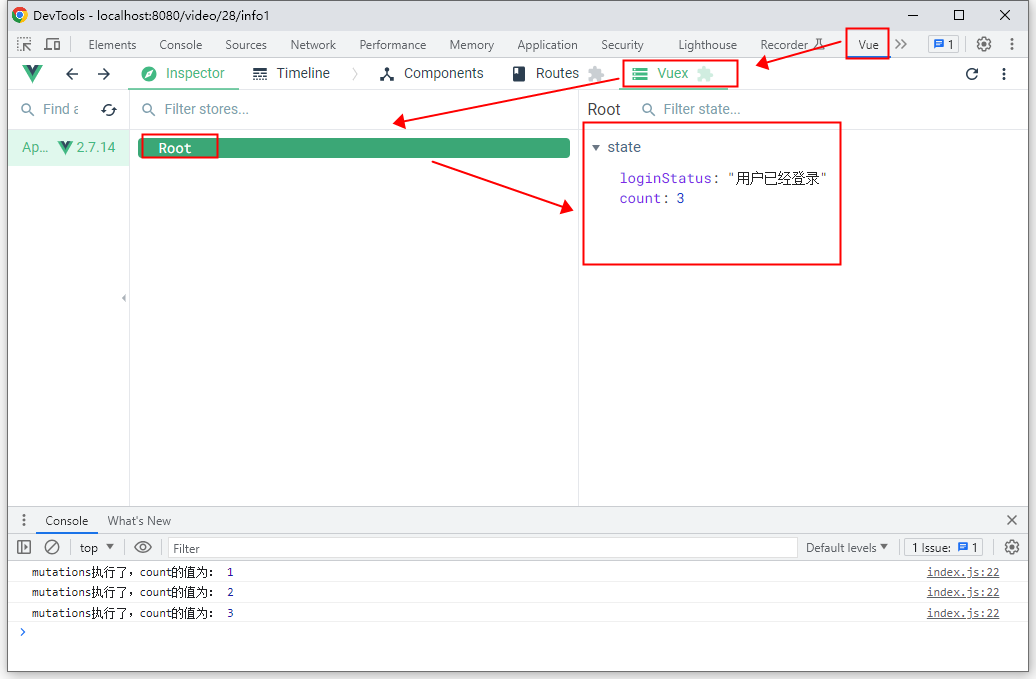
结果
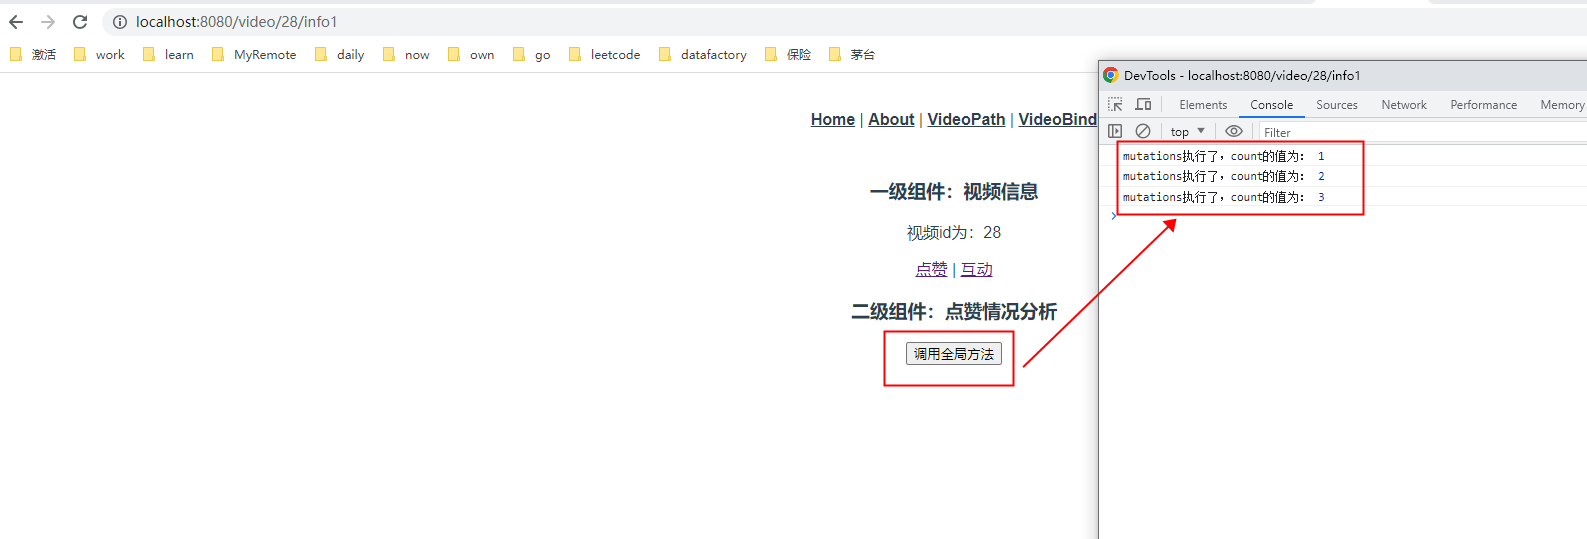
还记得当时安装的插件么,现在可以用上了
里面还有一个重要的功能叫TimeLine
比如我们先刷新一下页面
再点击按钮,观察TimeLine

它记录了状态的变更,以及对应的时间,但是只能记录同步的,如果是异步的话,就只能记录一个结果
异步结果的变更
import Vue from 'vue'
import Vuex, { Store } from 'vuex'

Vue.use(Vuex)
export default new Vuex.Store({
  state(){
    return{
      loginStatus:'用户已经登录',
      count: 0
    }
  },
  getters: {
  },
  mutations: {
    changeCount(state,num){
      state.count+=num
      console.log('mutations执行了,count的值为:',state.count)
    }
  },
  actions: {
    delayChangeCount(store,num){
      // 1、还记得上面说的,要修改数据,只能在mutations里,而且是通过commit的方式,那actions也不例外,和组件一样,也是调用mutations的方法  ,action里面全是异步的操作
      setTimeout(()=>{
        store.commit('changeCount',num)
      },3000)
    }
  },
  modules: {
  }
})
我们还在VideoInfo1中使用
<template>
    <div>
        <h3>二级组件:点赞情况分析</h3>
        <button v-on:click="handler">调用全局方法</button>
    </div>
</template>
<script>
export default {
    name: 'VideoInfo1',
    created(){
        console.log(this.$store.state.loginStatus)
    },
    methods:{
        handler(){
            this.$store.commit('changeCount',1)
            this.$store.commit('changeCount',2)
            // 这次不是用commit了,而是用dispatch,执行、发送的意思
            this.$store.dispatch('delayChangeCount',10)
            this.$store.commit('changeCount',3)
        }
    }
}
</script>
<style>

</style>
结果
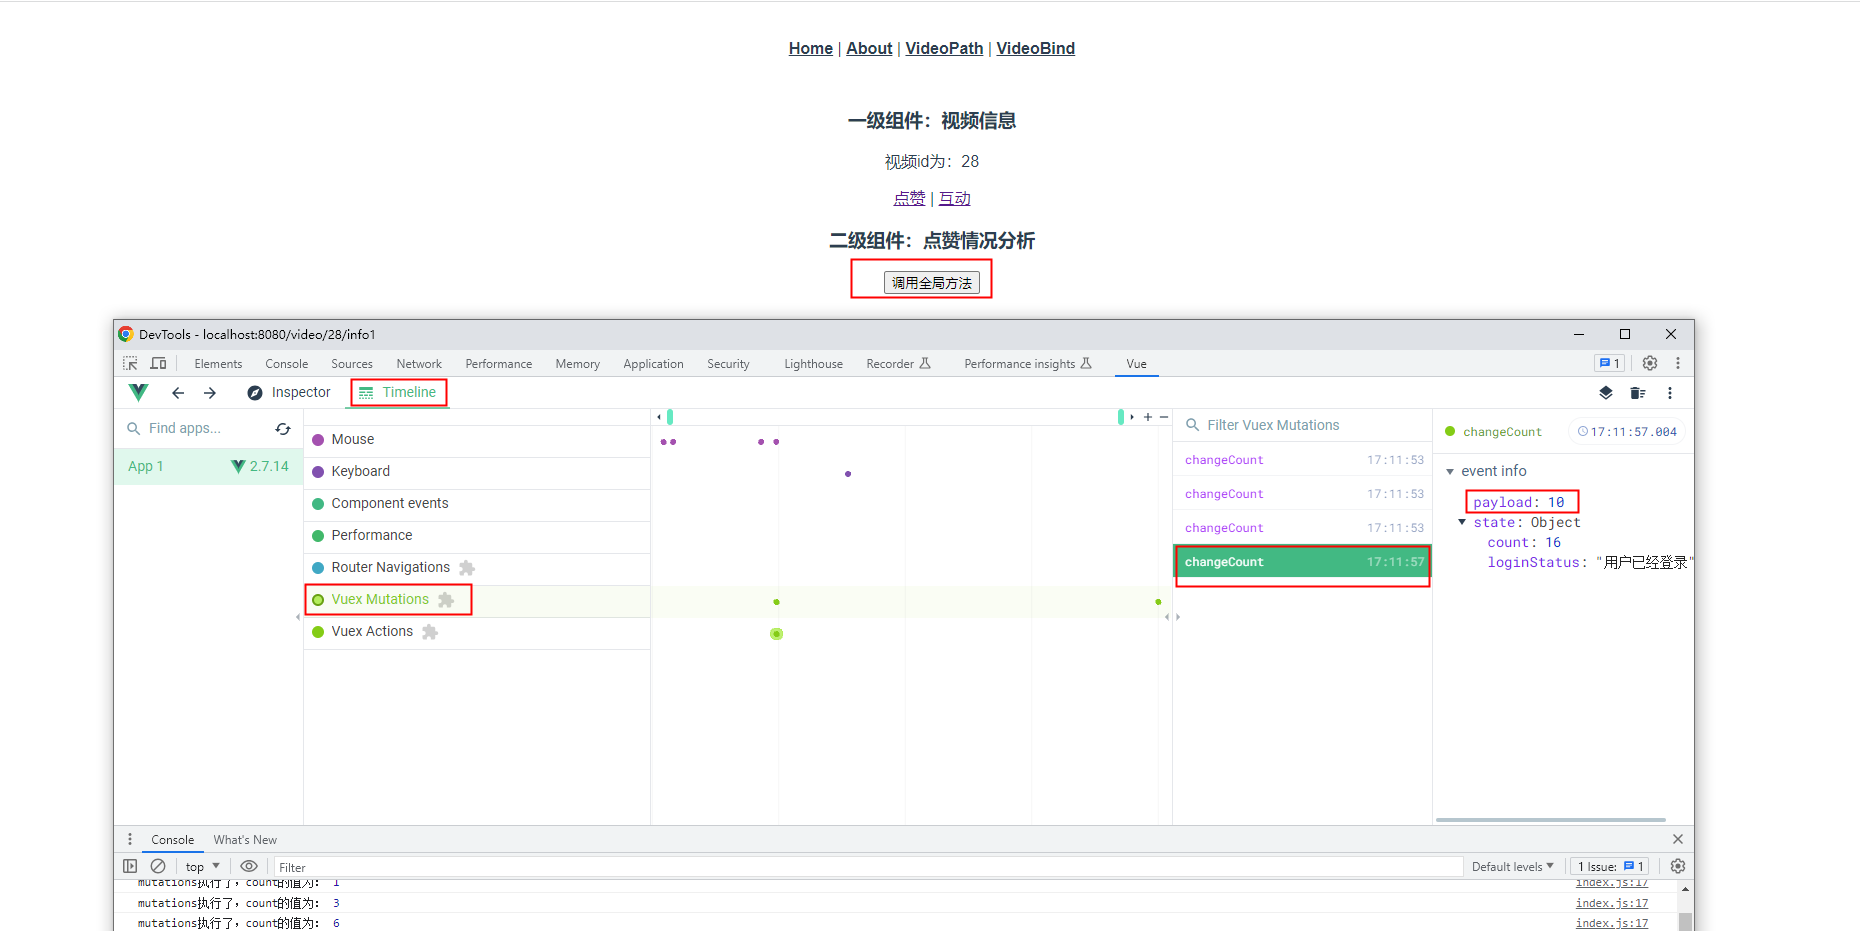
顺序是,先调用了2次changeCount,然后执行第三个也就是异步方法delayChangeCount的时候,需要等待三秒,就先执行了第四次changeCount,等三秒,执行了delayChangeCount方法里的changeCount,通过参数也可以看到
计算属性
import Vue from 'vue'
import Vuex, { Store } from 'vuex'

Vue.use(Vuex)
export default new Vuex.Store({
  state(){
    return{
      loginStatus:'用户已经登录',
      count: 0
    }
  },
  // 1、就相当于我们的计算属性,是带有缓存属性的,就像插件的computed方法,如果参数不变,不管调用几次,只计算一次
  getters: {
    len(state){
      console.log('getters执行了')
      // 2、返回了state.loginStatus的长度
      return state.loginStatus.length
    }
  },
  mutations: {
    changeCount(state,num){
      state.count+=num
      console.log('mutations执行了,count的值为:',state.count)
    }
  },
  actions: {
    delayChangeCount(store,num){
      setTimeout(()=>{
        store.commit('changeCount',num)
      },3000)
    }
  },
  modules: {
  }
})
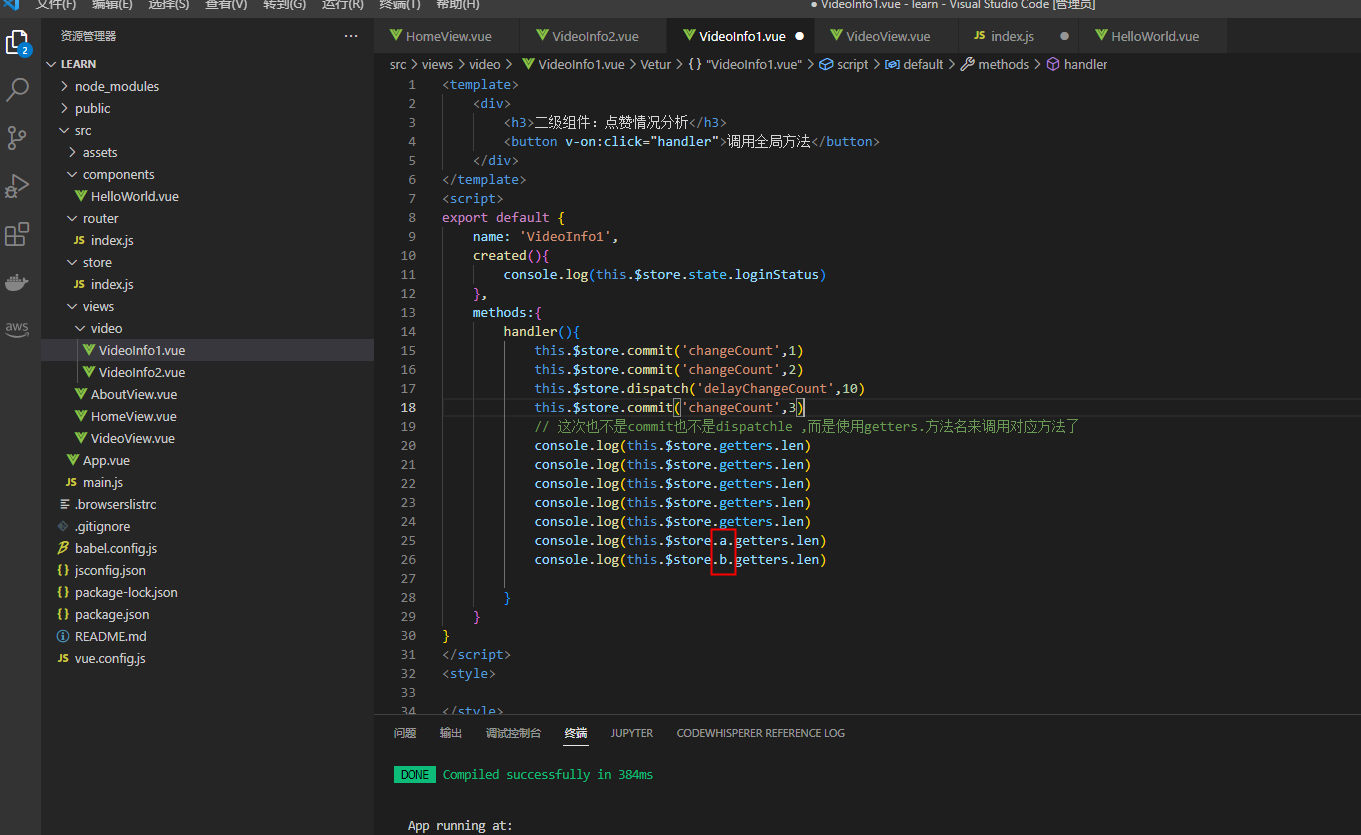
调用方法
<template>
    <div>
        <h3>二级组件:点赞情况分析</h3>
        <button v-on:click="handler">调用全局方法</button>
    </div>
</template>
<script>
export default {
    name: 'VideoInfo1',
    created(){
        console.log(this.$store.state.loginStatus)
    },
    methods:{
        handler(){
            this.$store.commit('changeCount',1)
            this.$store.commit('changeCount',2)
            this.$store.dispatch('delayChangeCount',10)
            this.$store.commit('changeCount',3)
            // 这次也不是commit也不是dispatchle ,而是使用getters.方法名来调用对应方法了
            console.log(this.$store.getters.len)
            console.log(this.$store.getters.len)
            console.log(this.$store.getters.len)
            console.log(this.$store.getters.len)
            console.log(this.$store.getters.len)
        }
    }
}
</script>
<style>

</style>
结果
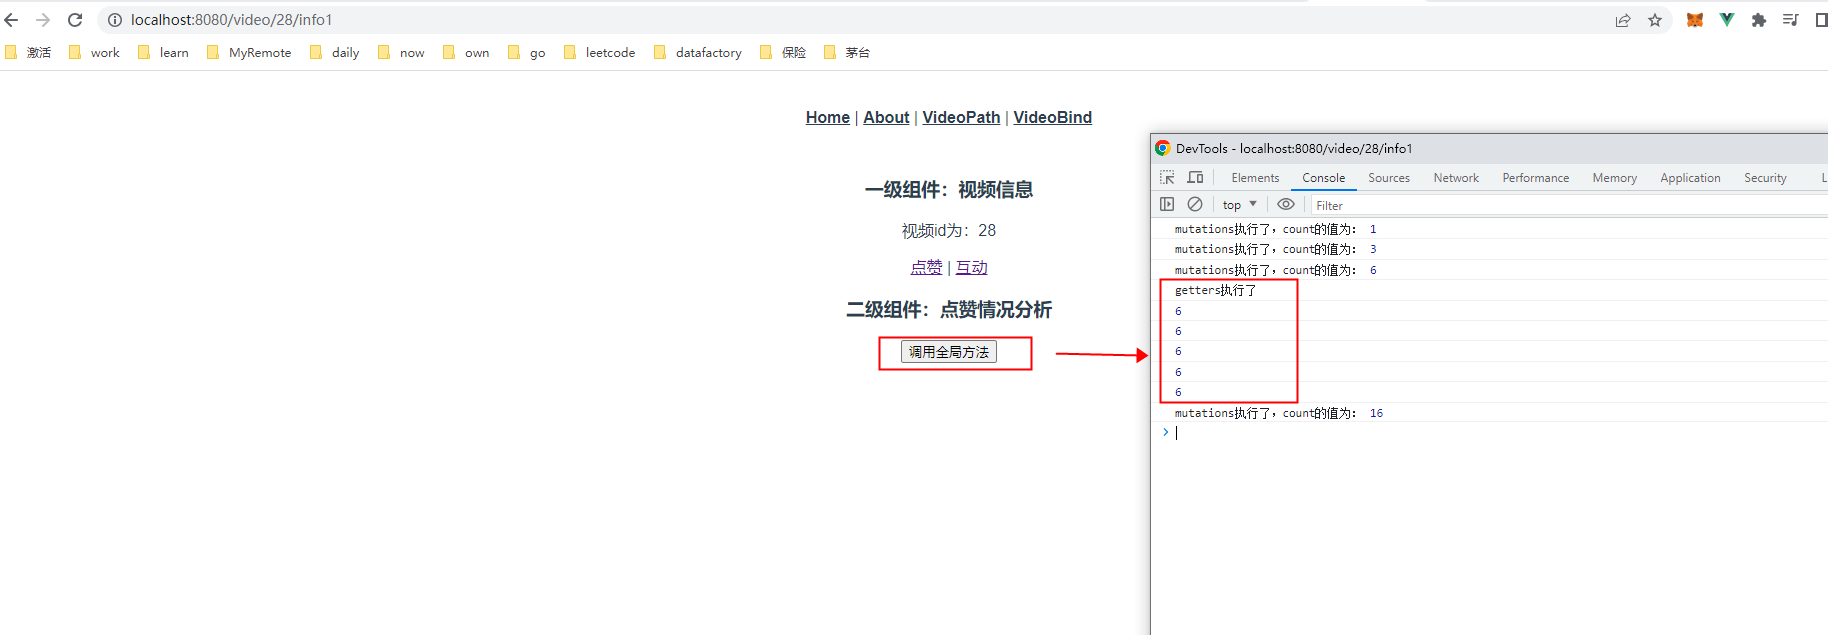
打印了5次,没错,但真正调用只调用了一次
模块管理
import Vue from 'vue'
import Vuex, { Store } from 'vuex'

Vue.use(Vuex)
export default new Vuex.Store({
  state(){
    return{
      loginStatus:'用户已经登录',
      count: 0
    }
  },
  getters: {
    len(state){
      console.log('getters执行了')
      return state.loginStatus.length
    }
  },
  mutations: {
    changeCount(state,num){
      state.count+=num
      console.log('mutations执行了,count的值为:',state.count)
    }
  },
  actions: {
    delayChangeCount(store,num){
      setTimeout(()=>{
        store.commit('changeCount',num)
      },3000)
    }
  },
  modules: {
    // 1、比如说state中的两个值,可能只是和user有关的,在一个app里很多功能,比如购物功能等,那如果不同的功能有不同的全局处理,比如说a里面有两个值,这两个值又不想被b用,这种情况下为乐避免混乱,
    //让数据更好管理,就需要使用模块,也就是modules
    a:{
      state,
      getters,
      mutations,
      actions,
      modules
    },
    // 2、里面的内容就和store/index.js几乎是一样的,按需添加
    b:{
      state,
      getters,
      mutations,
      actions,
      modules
    }
  }
})
使用
调用前,加上对应模块的名称即可
但是既然已经模块化了,那就索性再模块一下,在store模块下面再新建一个modules文件夹,下面新建a.js、b.js, 里面的内容替换掉modules中对应模块的内容