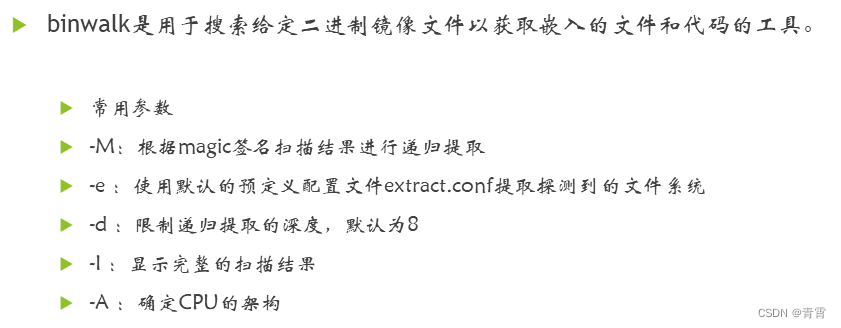
一、binwalk介绍
二、安装binwalk
# 1. 安装依赖和binwalk
git clone https://github.com/ReFirmLabs/binwalk.git
cd binwalk
sudo python ./setup.py uninstall # 如果您有以前安装的 Binwalk 版本,建议您在升级之前将其卸载
sudo ./deps.sh # 安装依赖项
sudo python ./setup.py install
# 2. 对于 python2.x,还需要安装以下的库
sudo -H pip install git+https://github.com/ahupp/python-magic
sudo -H pip install git+https://github.com/sviehb/jefferson
# 3. 测试是否安装成功
hzy@ubuntu:~$ binwalk

Binwalk v2.1.2-c036535
Craig Heffner, ReFirmLabs
https://github.com/ReFirmLabs/binwalk

Usage: binwalk [OPTIONS] [FILE1] [FILE2] [FILE3] ...

Disassembly Scan Options:
    -Y, --disasm                 Identify the CPU architecture of a file using the capstone disassembler
... ...
    -s, --status=<int>           Enable the status server on the specified port

hzy@ubuntu:~$
三、binwalk工具的使用帮助
root@node1:/home/binwalk# binwalk -h
Binwalk v2.2.1+e0f9bf7   # 版本号
Craig Heffner, ReFirmLabs
https://github.com/ReFirmLabs/binwalk
Usage: binwalk [OPTIONS] [FILE1] [FILE2] [FILE3] ...
Disassembly Scan Options:
    -Y, --disasm                 Identify the CPU architecture of a file using the capstone disassembler
    -T, --minsn=<int>            Minimum number of consecutive instructions to be considered valid (default: 500)
    -k, --continue               Don't stop at the first match

Signature Scan Options:
    -B, --signature              Scan target file(s) for common file signatures 扫描目标文件以获取常见文件签名
    -R, --raw=<str>              Scan target file(s) for the specified sequence of bytes 扫描目标文件的指定字符序列
    -A, --opcodes                Scan target file(s) for common executable opcode signatures 扫描目标文件中常见可执行代码
    -m, --magic=<file>           Specify a custom magic file to use 指定要使用的自定义签名文件
    -b, --dumb                   Disable smart signature keywords  禁用智能签名关键字
    -I, --invalid                Show results marked as invalid 显示完整的扫描结果
    -x, --exclude=<str>          Exclude results that match <str>  排除与<str>匹配的结果
    -y, --include=<str>          Only show results that match <str> 只显示与<str>匹配的结果

Extraction Options:
    -e, --extract                Automatically extract known file types  自动提取已知的文件类型
    -D, --dd=<type[:ext[:cmd]]>  Extract <type> signatures (regular expression), give the files an extension of <ext>, and execute <cmd> 提取<type>签名,为文件扩展名为<ext>,然后执行<cmd>,比如:binwalk -D 'png image:png' firmware.bin
    -M, --matryoshka             Recursively scan extracted files 递归扫描提取的文件
    -d, --depth=<int>            Limit matryoshka recursion depth (default: 8 levels deep) 递归深度
    -C, --directory=<str>        Extract files/folders to a custom directory (default: current working directory) 将文件/文件夹提取到自定义目录(默认:当前工作目录)
    -j, --size=<int>             Limit the size of each extracted file 限制每个提取文件的大小
    -n, --count=<int>            Limit the number of extracted files 限制提取文件的数量
    -r, --rm                     Delete carved files after extraction 清理零大小文件和提取工具在提取期间无法处理的文件。仅当与--extract或--dd一起使用时有效。有助于清除提取期间从目标文件中复制的误报文件
    -z, --carve                  Carve data from files, but don't execute extraction utilities 从文件中读取数据,但不执行提取实用程序
    -V, --subdirs                Extract into sub-directories named by the offset

Entropy Options:
    -E, --entropy                Calculate file entropy 计算文件熵,熵分析可以帮助识别固件映像中有趣的数据部分
    -F, --fast                   Use faster, but less detailed, entropy analysis
    -J, --save                   Save plot as a PNG  自动将 --entropy 生成的熵图保存到 PNG 文件中,而不是显示它
    -Q, --nlegend                Omit the legend from the entropy plot graph 从熵图中省略图例
    -N, --nplot                  Do not generate an entropy plot graph  不生成熵图
    -H, --high=<float>           Set the rising edge entropy trigger threshold (default: 0.95)  设置上升沿熵触发阈值
    -L, --low=<float>            Set the falling edge entropy trigger threshold (default: 0.85)  设置下升沿熵触发阈值

Binary Diffing Options:
    -W, --hexdump                Perform a hexdump / diff of a file or files 比较文件
    -G, --green                  Only show lines containing bytes that are the same among all files
    -i, --red                    Only show lines containing bytes that are different among all files
    -U, --blue                   Only show lines containing bytes that are different among some files
    -u, --similar                Only display lines that are the same between all files
    -w, --terse                  Diff all files, but only display a hex dump of the first file
Raw Compression Options:
    -X, --deflate                Scan for raw deflate compression streams
    -Z, --lzma                   Scan for raw LZMA compression streams 通过暴力破解识别可能的原始 LZMA 压缩数据流
    -P, --partial                Perform a superficial, but faster, scan
    -S, --stop                   Stop after the first result
General Options:
    -l, --length=<int>           Number of bytes to scan
    -o, --offset=<int>           Start scan at this file offset
    -O, --base=<int>             Add a base address to all printed offsets
    -K, --block=<int>            Set file block size
    -g, --swap=<int>             Reverse every n bytes before scanning
    -f, --log=<file>             Log results to file  将结果记录到文件
    -c, --csv                    Log results to file in CSV format
    -t, --term                   Format output to fit the terminal window
    -q, --quiet                  Suppress output to stdout  禁止输出到标准输出
    -v, --verbose                Enable verbose output  详细输出
    -h, --help                   Show help output
    -a, --finclude=<str>         Only scan files whose names match this regex
    -p, --fexclude=<str>         Do not scan files whose names match this regex
    -s, --status=<int>           Enable the status server on the specified port 启用指定端口上的状态服务器
四、binwalk工具的基本用法介绍
4.1、获取帮助信息 -h

4.2、固件分析扫描


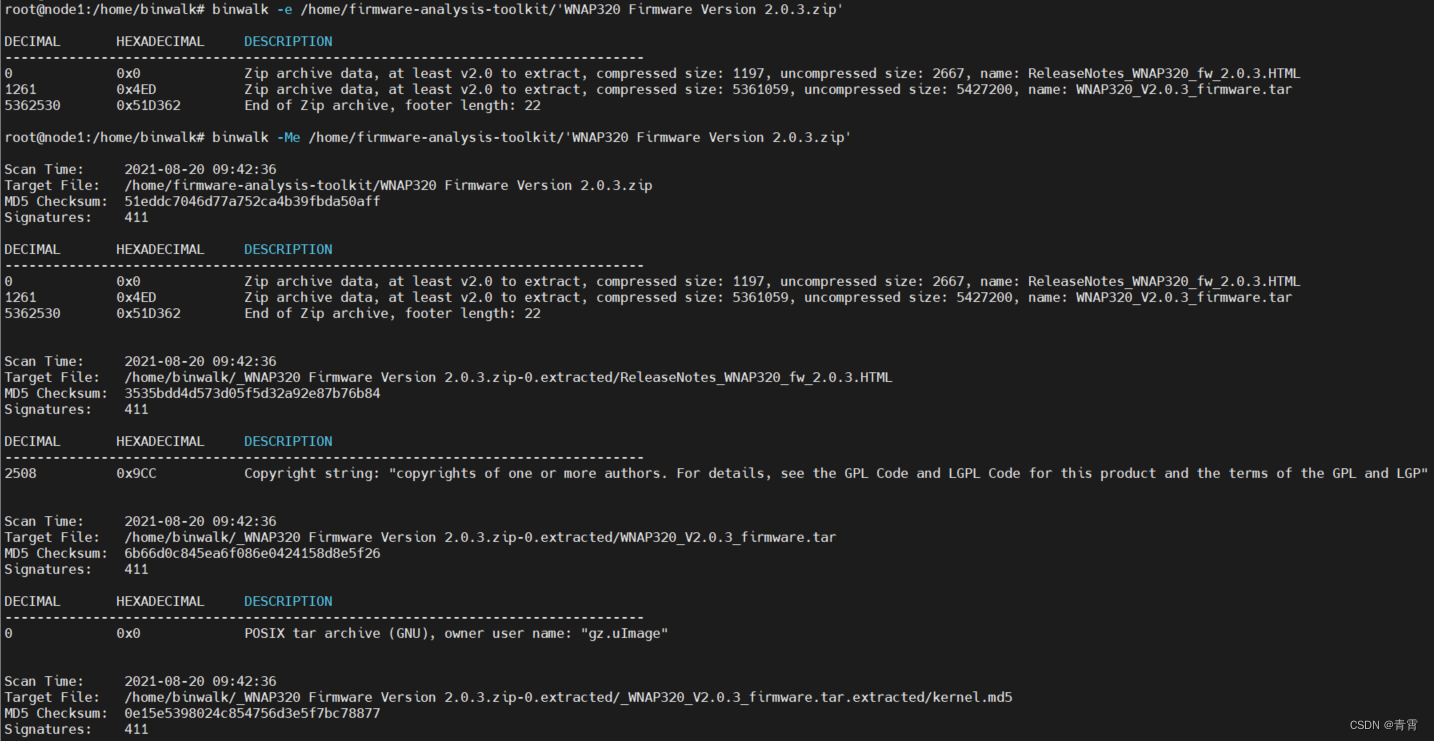
4.3、提取文件系统 -e -M -d
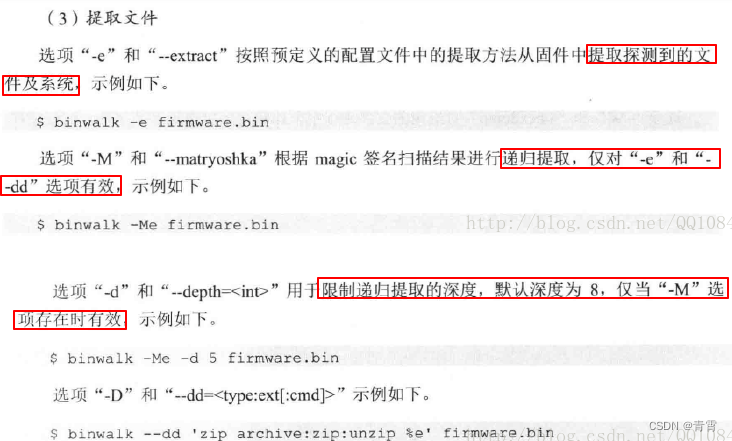
# 使用默认的预定义配置文件extract.conf
$ binwalk -e firmware.bin
# 使用指定自定义的配置文件my_extract.conf
$ binwalk --extract=./my_extract.conf firmware.bin
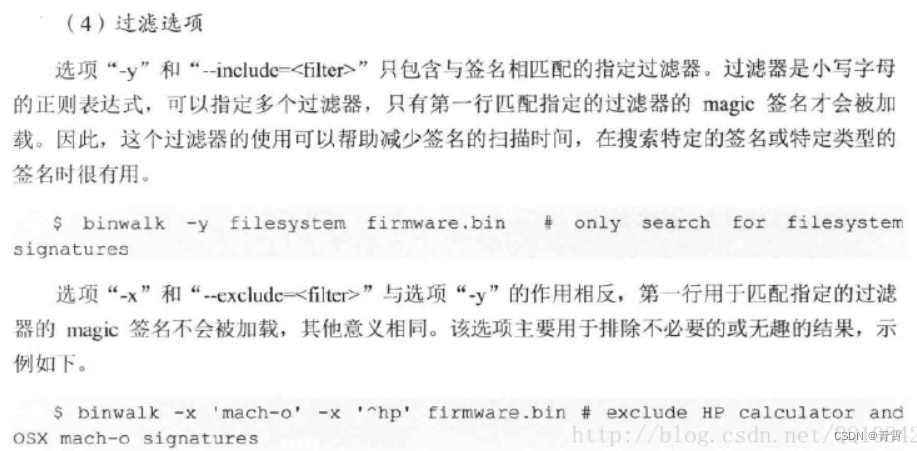
4.4、设置过滤选项 -y -x
4.5、显示完整的扫描结果 -I

4.6、固件文件的比较 -W


4.7、日志记录 -f

4.8、指令系统分析 -A


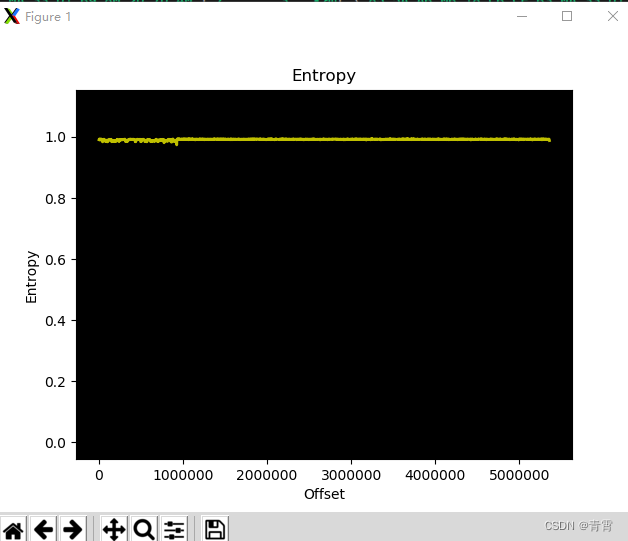
4.9、熵分析 -E


4.10、启发式分析 -H

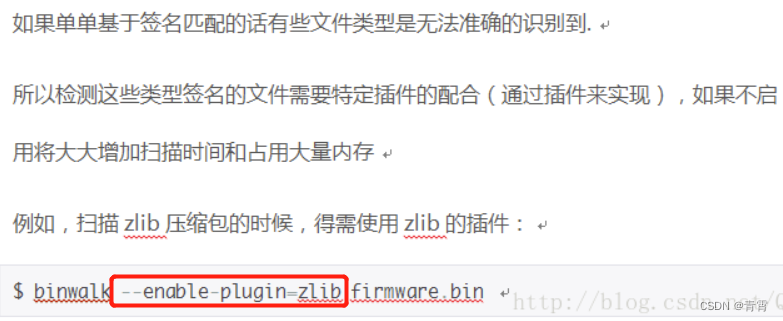
4.11、使用指定插件分析扫描固件(已经去掉)
4.12、手动提取文件
-D, --dd=<type[:ext[:cmd]]>
提取在--signature扫描过程中识别的文件。可以指定多个--dd选项。
-
type:是包含在签名描述中的*小写*字符串(支持正则表达式)
-
ext:是保存数据磁盘时要使用的文件扩展名(默认为none)
-
cmd:是在数据保存到磁盘后执行的可选命令
默认情况下,文件名是找到签名的十六进制偏移量,除非在签名本身中指定了备用文件名。
以下示例演示使用--dd选项指定提取规则,该规则将提取包含文件扩展名为“zip”的字符串“zip archive”的任何签名,然后执行“unzip”命令。此外,PNG图像以“PNG”文件扩展名原样提取。
$ binwalk -D 'zip archive:zip:unzip %e' -D 'png image:png' firmware.bin
# 请注意“%e”占位符的使用。执行unzip命令时,此占位符将替换为提取文件的相对路径
在最新版的binwalk工具中关于插件的功能已经没有了,下图是原来有的插件功能。

五、python使用binwalk
python3 -m pip install git+https://github.com/ReFirmLabs/binwalk
binwalk.scan返回对象列表。每个对象对应于运行的模块。例如,如果您指定了 --signature和 --entropy,那么signature模块和entropy模块都将被执行,并且将返回一个包含两个对象的列表。
每个对象
最感兴趣的两个属性是结果和错误对象
。每个都是 binwalk.core.module.Result 和 binwalk.core.module.Error的实例。每个Result或Error实例可能包含每个模块设置的自定义属性,但保证至少具有以下属性(尽管不需要模块来填充所有属性):
|
Attribute
|
Description
|
|
offset
|
The file offset of the result/error (usually unused for errors)
|
|
description
|
The result/error description, as displayed to the user
|
|
module
|
Name of the module that generated the result/error
|
|
file
|
The file object of the scanned file
|
|
valid
|
Set to True if the result is valid, False if invalid (usually unused for errors)
|
|
display
|
Set to True to display the result to the user, False to hide it (usually unused for errors)
|
|
extract
|
Set to True to flag this result for extraction (not used for errors)
|
|
plot
|
Set to False to exclude this result from entropy plots (not used for errors)
|
binwalk.core.module.Error has the additional guaranteed attribute:
|
Attribute
|
Description
|
|
exception
|
Contains the Python exception object if the encountered error was an exception
|
因此,可以很容易地通过编程访问扫描结果和错误:
import binwalk
for module in binwalk.scan('firmware1.bin', 'firmware2.bin', signature=True, quiet=True): # --quiet选项,它阻止binwalk模块将其正常输出打印到屏幕
    print ("%s Results:" % module.name)
    for result in module.results:
        print ("\t%s    0x%.8X    %s" % (result.file.path, result.offset, result.description))
唯一应该引发的异常是binwalk.ModuleException异常。仅当所需模块遇到致命错误(例如,无法打开指定的目标文件之一)时,才会引发此异常:
try:
    binwalk.scan()
except binwalk.ModuleException as e:
    print ("Critical failure:", e)
六、参考
路由器逆向分析------binwalk工具的详细使用说明_binwalk unzip报错_Fly20141201的博客-CSDN博客
https://github.com/devttys0/binwalk/wiki/Usage 用法
https://github.com/ReFirmLabs/binwalk/wiki/Quick-Start-Guide 安装
Scripting With the Python API · ReFirmLabs/binwalk Wiki · GitHub python调用binwalk
Pip install causes: ModuleNotFoundError: No module named 'binwalk.core.version' · Issue #352 · ReFirmLabs/binwalk · GitHub





![[Container]Hadoop集群镜像打包](https://img-blog.csdnimg.cn/a63b7b84180b43478375159128d1916b.png)
