MIT 6.S081 Lab Seven -- 多线程
- 引言
- Multithreading
- Uthread: switching between threads (moderate)
- 代码解析
- 补充
- Using threads (moderate)
- 代码解析
- Barrier(moderate)
- 代码解析
引言
本文为 MIT 6.S081 2020 操作系统 实验七解析。
MIT 6.S081课程前置基础参考: 基于RISC-V搭建操作系统系列
Multithreading
本实验将使您熟悉多线程。您将在用户级线程包中实现线程之间的切换,使用多个线程来加速程序,并实现一个屏障。
在编写代码之前,您应该确保已经阅读了xv6手册中的“第7章: 调度”,并研究了相应的代码。
要启动实验,请切换到thread分支:
$ git fetch
$ git checkout thread
$ make clean
Uthread: switching between threads (moderate)
在本练习中,您将为用户级线程系统设计上下文切换机制,然后实现它。为了让您开始,您的xv6有两个文件:
- user/uthread.c和user/uthread_switch.S
- 以及一个规则:运行在Makefile中以构建
uthread程序。 - uthread.c包含大多数用户级线程包,以及三个简单测试线程的代码。
- 线程包缺少一些用于创建线程和在线程之间切换的代码。
YOUR JOB
- 您的工作是提出一个创建线程和保存/恢复寄存器以在线程之间切换的计划,并实现该计划。完成后,
make grade应该表明您的解决方案通过了uthread测试。
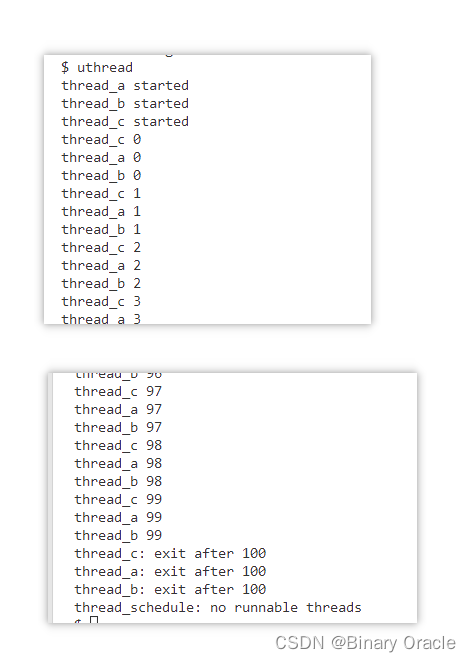
完成后,在xv6上运行uthread时应该会看到以下输出(三个线程可能以不同的顺序启动):
$ make qemu
...
$ uthread
thread_a started
thread_b started
thread_c started
thread_c 0
thread_a 0
thread_b 0
thread_c 1
thread_a 1
thread_b 1
...
thread_c 99
thread_a 99
thread_b 99
thread_c: exit after 100
thread_a: exit after 100
thread_b: exit after 100
thread_schedule: no runnable threads
$
该输出来自三个测试线程,每个线程都有一个循环,该循环打印一行,然后将CPU让出给其他线程。
然而在此时还没有上下文切换的代码,您将看不到任何输出。
您需要将代码添加到user/uthread.c中的thread_create()和thread_schedule(),以及user/uthread_switch.S中的thread_switch。
- 一个目标是确保当
thread_schedule()第一次运行给定线程时,该线程在自己的栈上执行传递给thread_create()的函数。 - 另一个目标是确保
thread_switch保存被切换线程的寄存器,恢复切换到线程的寄存器,并返回到后一个线程指令中最后停止的点。 - 您必须决定保存/恢复寄存器的位置;修改
struct thread以保存寄存器是一个很好的计划。 - 您需要在
thread_schedule中添加对thread_switch的调用;您可以将需要的任何参数传递给thread_switch,但目的是将线程从t切换到next_thread。
提示:
thread_switch只需要保存/还原被调用方保存的寄存器(callee-save register,参见LEC5使用的文档《Calling Convention》)。为什么?- 您可以在user/uthread.asm中看到
uthread的汇编代码,这对于调试可能很方便。 - 这可能对于测试你的代码很有用,使用
riscv64-linux-gnu-gdb的单步调试通过你的thread_switch,你可以按这种方法开始:
(gdb) file user/_uthread
Reading symbols from user/_uthread...
(gdb) b uthread.c:60
这将在uthread.c的第60行设置断点。断点可能会(也可能不会)在运行uthread之前触发。为什么会出现这种情况?
一旦您的xv6 shell运行,键入“uthread”,gdb将在第60行停止。现在您可以键入如下命令来检查uthread的状态:
(gdb) p/x *next_thread
使用“x”,您可以检查内存位置的内容:
(gdb) x/x next_thread->stack
您可以跳到thread_switch 的开头,如下:
(gdb) b thread_switch
(gdb) c
您可以使用以下方法单步执行汇编指令:
(gdb) si
gdb的在线文档在这里。
代码解析
本实验是在给定的代码基础上实现用户级线程切换,相比于XV6中实现的内核级线程,这个要简单许多。因为是用户级线程,不需要设计用户栈和内核栈,用户页表和内核页表等等切换,所以本实验中只需要一个类似于context的结构,而不需要费尽心机的维护trapframe。
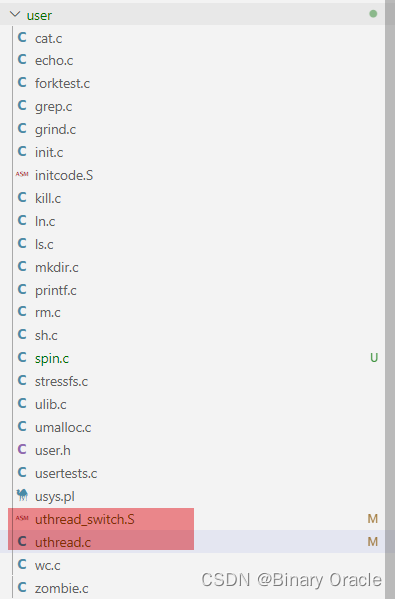
(1). 定义存储上下文的结构体tcontext
// 用户线程的上下文结构体
struct tcontext {
  uint64 ra;
  uint64 sp;

  // callee-saved
  uint64 s0;
  uint64 s1;
  uint64 s2;
  uint64 s3;
  uint64 s4;
  uint64 s5;
  uint64 s6;
  uint64 s7;
  uint64 s8;
  uint64 s9;
  uint64 s10;
  uint64 s11;
};
(2). 修改thread结构体,添加context字段
/* Possible states of a thread: */
#define FREE        0x0
#define RUNNING     0x1
#define RUNNABLE    0x2

#define STACK_SIZE  8192
#define MAX_THREAD  4

// user/uthread.c
struct thread {
  char            stack[STACK_SIZE];  /* the thread's stack */
  int             state;              /* FREE, RUNNING, RUNNABLE */
  struct tcontext context;            /* 用户进程上下文 */
};
(3). 模仿kernel/swtch.S,在user/uthread_switch.S中写入如下代码
.text

/*
* save the old thread's registers,
* restore the new thread's registers.
*/

.globl thread_switch
thread_switch:
    /* YOUR CODE HERE */
    sd ra, 0(a0)
    sd sp, 8(a0)
    sd s0, 16(a0)
    sd s1, 24(a0)
    sd s2, 32(a0)
    sd s3, 40(a0)
    sd s4, 48(a0)
    sd s5, 56(a0)
    sd s6, 64(a0)
    sd s7, 72(a0)
    sd s8, 80(a0)
    sd s9, 88(a0)
    sd s10, 96(a0)
    sd s11, 104(a0)

    ld ra, 0(a1)
    ld sp, 8(a1)
    ld s0, 16(a1)
    ld s1, 24(a1)
    ld s2, 32(a1)
    ld s3, 40(a1)
    ld s4, 48(a1)
    ld s5, 56(a1)
    ld s6, 64(a1)
    ld s7, 72(a1)
    ld s8, 80(a1)
    ld s9, 88(a1)
    ld s10, 96(a1)
    ld s11, 104(a1)
    ret    /* return to ra */
(4). 修改thread_scheduler,添加线程切换语句
// 用户线程列表
struct thread all_thread[MAX_THREAD];
// 当前正在运行的用户线程
struct thread *current_thread;
// 用于用户线程切换
extern void thread_switch(uint64, uint64);
void
thread_init(void)
{
// main() is thread 0, which will make the first invocation to
// thread_schedule(). it needs a stack so that the first thread_switch() can
// save thread 0's state. thread_schedule() won't run the main thread ever
// again, because its state is set to RUNNING, and thread_schedule() selects
// a RUNNABLE thread.
current_thread = &all_thread[0];
current_thread->state = RUNNING;
}
void
thread_schedule(void)
{
struct thread *t, *next_thread;
/* Find another runnable thread. */
// 轮询策略
next_thread = 0;
t = current_thread + 1;
for(int i = 0; i < MAX_THREAD; i++){
//轮询重置
if(t >= all_thread + MAX_THREAD)
t = all_thread;
if(t->state == RUNNABLE) {
next_thread = t;
break;
}
t = t + 1;
}
if (next_thread == 0) {
printf("thread_schedule: no runnable threadsn");
exit(-1);
}
if (current_thread != next_thread) { /* switch threads? */
next_thread->state = RUNNING;
t = current_thread;
current_thread = next_thread;
/* YOUR CODE HERE
* Invoke thread_switch to switch from t to next_thread:
* thread_switch(??, ??);
*/
thread_switch((uint64)&t->context,(uint64)¤t_thread->context);
} else
next_thread = 0;
}
(5). 在thread_create中对thread结构体做一些初始化设定,主要是ra返回地址和sp栈指针,其他的都不重要
void
thread_create(void (*func)())
{
  struct thread *t;
  // 从用户线程列表挑选一个空位
  for (t = all_thread; t < all_thread + MAX_THREAD; t++) {
    if (t->state == FREE) break;
  }
  // 设置该用户线程状态为待调度状态
  t->state = RUNNABLE;
  // YOUR CODE HERE
  t->context.ra = (uint64)func;                   // 设定函数返回地址
  t->context.sp = (uint64)t->stack + STACK_SIZE;  // 设定栈指针
}
(6) . thread_yield函数是默认给我们提供好的,我们可以简单看一下他的实现
void
thread_yield(void)
{
  current_thread->state = RUNNABLE;
  thread_schedule();
}
(7). 测试程序
volatile int a_started, b_started, c_started;
volatile int a_n, b_n, c_n;

void
thread_a(void)
{
  int i;
  printf("thread_a startedn");
  a_started = 1;
  // 确保三个用户线程一起开始
  while(b_started == 0 || c_started == 0)
    thread_yield();
  // 每输出一个数字就让出当前CPU使用权
  for (i = 0; i < 100; i++) {
    printf("thread_a %dn", i);
    a_n += 1;
    thread_yield();
  }
  printf("thread_a: exit after %dn", a_n);
  // 设置当前用户线程终结
  current_thread->state = FREE;
  //调用thread_schedule进行任务切换
  thread_schedule();
}

//其余两个测试任务一样的操作

void
thread_b(void)
{
  int i;
  printf("thread_b startedn");
  b_started = 1;
  while(a_started == 0 || c_started == 0)
    thread_yield();

  for (i = 0; i < 100; i++) {
    printf("thread_b %dn", i);
    b_n += 1;
    thread_yield();
  }
  printf("thread_b: exit after %dn", b_n);

  current_thread->state = FREE;
  thread_schedule();
}

void
thread_c(void)
{
  int i;
  printf("thread_c startedn");
  c_started = 1;
  while(a_started == 0 || b_started == 0)
    thread_yield();

  for (i = 0; i < 100; i++) {
    printf("thread_c %dn", i);
    c_n += 1;
    thread_yield();
  }
  printf("thread_c: exit after %dn", c_n);

  current_thread->state = FREE;
  thread_schedule();
}

int
main(int argc, char *argv[])
{
  a_started = b_started = c_started = 0;
  a_n = b_n = c_n = 0;
  // main函数作为0号用户线程
  thread_init();
  thread_create(thread_a);
  thread_create(thread_b);
  thread_create(thread_c);
  // main函数中直接调用scheduler完成用户线程切换,此时不会设置0号线程的状态为RUNNABLE
  // 所以0号线程不会被调度,而是一直处于RUNNING状态
  thread_schedule();
  //下面这行代码不会执行到 -- 大家可以添加print语句进行验证
  exit(0);
}
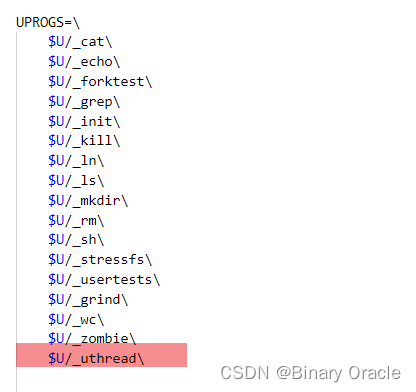
(8). 首先将uthread.c文件添加到用户程序编译选项中去,然后运行测试用例
补充
这里的线程相比现代操作系统中的线程而言,更接近一些语言中的“协程”(coroutine)。原因是这里的“线程”是完全用户态实现的,多个线程也只能运行在一个 CPU 上,并且没有时钟中断来强制执行调度,需要线程函数本身在合适的时候主动 yield 释放 CPU。这样实现起来的线程并不对线程函数透明,所以比起操作系统的线程而言更接近 coroutine。
这个实验其实相当于在用户态重新实现一遍 xv6 kernel 中的 scheduler() 和 swtch() 的功能,所以大多数代码都是可以借鉴的。
为什么uthread_switch.S中只需要保存一部分通用寄存器,而不是全部的通用寄存器呢?
- 内核调度器无论是通过时钟中断进入(usertrap),还是线程自己主动放弃 CPU(sleep、exit),最终都会调用到 yield 进一步调用 swtch。 由于上下文切换永远都发生在函数调用的边界(swtch 调用的边界),恢复执行相当于是 swtch 的返回过程,会从堆栈中恢复 caller-saved 的寄存器, 所以用于保存上下文的 context 结构体只需保存 callee-saved 寄存器,以及 返回地址 ra、栈指针 sp 即可。恢复后执行到哪里是通过 ra 寄存器来决定的(swtch 末尾的 ret 转跳到 ra)
- 而 trapframe 则不同,一个中断可能在任何地方发生,不仅仅是函数调用边界,也有可能在函数执行中途,所以恢复的时候需要靠 pc 寄存器来定位。 并且由于切换位置不一定是函数调用边界,所以几乎所有的寄存器都要保存(无论 caller-saved 还是 callee-saved),才能保证正确的恢复执行。 这也是内核代码中
struct trapframe中保存的寄存器比struct context多得多的原因。 - 另外一个,无论是程序主动 sleep,还是时钟中断,都是通过 trampoline 跳转到内核态 usertrap(保存 trapframe),然后再到达 swtch 保存上下文的。 恢复上下文都是恢复到 swtch 返回前(依然是内核态),然后返回跳转回 usertrap,再继续运行直到 usertrapret 跳转到 trampoline 读取 trapframe,并返回用户态。 也就是上下文恢复并不是直接恢复到用户态,而是恢复到内核态 swtch 刚执行完的状态。负责恢复用户态执行流的其实是 trampoline 以及 trapframe。
Using threads (moderate)
在本作业中,您将探索使用哈希表的线程和锁的并行编程。您应该在具有多个内核的真实Linux或MacOS计算机(不是xv6,不是qemu)上执行此任务。最新的笔记本电脑都有多核处理器。
这个作业使用UNIX的pthread线程库。您可以使用man pthreads在手册页面上找到关于它的信息,您可以在web上查看,例如这里、这里和这里。
文件notxv6/ph.c包含一个简单的哈希表,如果单个线程使用,该哈希表是正确的,但是多个线程使用时,该哈希表是不正确的。在您的xv6主目录(可能是~/xv6-labs-2020)中,键入以下内容:
$ make ph
$ ./ph 1
请注意,要构建ph,Makefile使用操作系统的gcc,而不是6.S081的工具。ph的参数指定在哈希表上执行put和get操作的线程数。运行一段时间后,ph 1将产生与以下类似的输出:
100000 puts, 3.991 seconds, 25056 puts/second
0: 0 keys missing
100000 gets, 3.981 seconds, 25118 gets/second
您看到的数字可能与此示例输出的数字相差两倍或更多,这取决于您计算机的速度、是否有多个核心以及是否正在忙于做其他事情。
ph运行两个基准程序。首先,它通过调用put()将许多键添加到哈希表中,并以每秒为单位打印puts的接收速率。之后它使用get()从哈希表中获取键。它打印由于puts而应该在哈希表中但丢失的键的数量(在本例中为0),并以每秒为单位打印gets的接收数量。
通过给ph一个大于1的参数,可以告诉它同时从多个线程使用其哈希表。试试ph 2:
$ ./ph 2
100000 puts, 1.885 seconds, 53044 puts/second
1: 16579 keys missing
0: 16579 keys missing
200000 gets, 4.322 seconds, 46274 gets/second
这个ph 2输出的第一行表明,当两个线程同时向哈希表添加条目时,它们达到每秒53044次插入的总速率。这大约是运行ph 1的单线程速度的两倍。这是一个优秀的“并行加速”,大约达到了人们希望的2倍(即两倍数量的核心每单位时间产出两倍的工作)。
然而,声明16579 keys missing的两行表示散列表中本应存在的大量键不存在。也就是说,puts应该将这些键添加到哈希表中,但出现了一些问题。请看一下notxv6/ph.c,特别是put()和insert()。
YOUR JOB
为什么两个线程都丢失了键,而不是一个线程?确定可能导致键丢失的具有2个线程的事件序列。在answers-thread.txt中提交您的序列和简短解释。
为了避免这种事件序列,请在notxv6/ph.c中的
put和get中插入lock和unlock语句,以便在两个线程中丢失的键数始终为0。相关的pthread调用包括:
pthread_mutex_t lock; // declare a lockpthread_mutex_init(&lock, NULL); // initialize the lockpthread_mutex_lock(&lock); // acquire lockpthread_mutex_unlock(&lock); // release lock当
make grade说您的代码通过ph_safe测试时,您就完成了,该测试需要两个线程的键缺失数为0。在此时,ph_fast测试失败是正常的。
不要忘记调用pthread_mutex_init()。首先用1个线程测试代码,然后用2个线程测试代码。您主要需要测试:
- 程序运行是否正确呢(即,您是否消除了丢失的键?)?
- 与单线程版本相比,双线程版本是否实现了并行加速(即单位时间内的工作量更多)?
在某些情况下,并发put()在哈希表中读取或写入的内存中没有重叠,因此不需要锁来相互保护。您能否更改ph.c以利用这种情况为某些put()获得并行加速?提示:每个散列桶加一个锁怎么样?
YOUR JOB
- 修改代码,使某些
put操作在保持正确性的同时并行运行。当make grade说你的代码通过了ph_safe和ph_fast测试时,你就完成了。ph_fast测试要求两个线程每秒产生的put数至少是一个线程的1.25倍。
代码解析
来看一下程序的运行过程:设定了五个散列桶,根据键除以5的余数决定插入到哪一个散列桶中,插入方法是头插法。
这个实验比较简单,首先是问为什么为造成数据丢失:
- 假设现在有两个线程T1和T2,两个线程都走到put函数,且假设两个线程中key%NBUCKET相等,即要插入同一个散列桶中。
- 两个线程同时调用insert(key, value, &table[i], table[i]),insert是通过头插法实现的。如果先insert的线程还未返回另一个线程就开始insert,那么前面的数据会被覆盖
因此只需要对插入操作上锁即可:
(1). 为每个散列桶定义一个锁,将五个锁放在一个数组中,并进行初始化
pthread_mutex_t lock[NBUCKET] = { PTHREAD_MUTEX_INITIALIZER }; // 每个散列桶一把锁
(2). 在put函数中对insert上锁
if(e){
    // update the existing key.
    e->value = value;
} else {
    pthread_mutex_lock(&lock[i]);
    // the new is new.
    insert(key, value, &table[i], table[i]);
    pthread_mutex_unlock(&lock[i]);
}
未加锁时测试结果:

加锁后测试结果:

Barrier(moderate)
在本作业中,您将实现一个屏障(Barrier):
- 应用程序中的一个点,所有参与的线程在此点上必须等待,直到所有其他参与线程也达到该点。您将使用pthread条件变量,这是一种序列协调技术,类似于xv6的
sleep和wakeup。
您应该在真正的计算机(不是xv6,不是qemu)上完成此任务。
文件notxv6/barrier.c包含一个残缺的屏障实现。
$ make barrier
$ ./barrier 2
barrier: notxv6/barrier.c:42: thread: Assertion `i == t' failed.
2指定了在屏障上同步的线程数(barrier.c中的nthread)。每个线程执行一个循环。在每次循环迭代中,线程都会调用barrier(),然后以随机微秒数休眠。如果一个线程在另一个线程到达屏障之前离开屏障将触发断言(assert)。期望的行为是每个线程在barrier()中阻塞,直到nthreads的所有线程都调用了barrier()。
YOUR JOB
您的目标是实现期望的屏障行为。除了在
ph作业中看到的lock原语外,还需要以下新的pthread原语;详情请看这里和这里。
// 在cond上进入睡眠,释放锁mutex,在醒来时重新获取pthread_cond_wait(&cond, &mutex);// 唤醒睡在cond的所有线程pthread_cond_broadcast(&cond);
确保您的方案通过make grade的barrier测试。
pthread_cond_wait在调用时释放mutex,并在返回前重新获取mutex。
我们已经为您提供了barrier_init()。您的工作是实现barrier(),这样panic就不会发生。我们为您定义了struct barrier;它的字段供您使用。
有两个问题使您的任务变得复杂:
- 你必须处理一系列的
barrier调用,我们称每一连串的调用为一轮(round)。bstate.round记录当前轮数。每次当所有线程都到达屏障时,都应增加bstate.round。 - 您必须处理这样的情况:一个线程在其他线程退出
barrier之前进入了下一轮循环。特别是,您在前后两轮中重复使用bstate.nthread变量。确保在前一轮仍在使用bstate.nthread时,离开barrier并循环运行的线程不会增加bstate.nthread。
使用一个、两个和两个以上的线程测试代码。
代码解析
首先简单看一下barrier.c文件中的代码逻辑:
static int nthread = 1;
static int round = 0;

// 互斥锁,条件变量,到达屏障的线程数,轮数
struct barrier {
  pthread_mutex_t barrier_mutex;
  pthread_cond_t barrier_cond;
  int nthread;      // Number of threads that have reached this round of the barrier
  int round;     // Barrier round
} bstate;

static void
barrier_init(void)
{
  assert(pthread_mutex_init(&bstate.barrier_mutex, NULL) == 0);
  assert(pthread_cond_init(&bstate.barrier_cond, NULL) == 0);
  bstate.nthread = 0;
}

//每个线程执行的函数
static void *
thread(void *xa)
{
  long n = (long) xa;
  long delay;
  int i;

  for (i = 0; i < 20000; i++) {
    int t = bstate.round;
    // 检查是否实现了所有线程共同到达屏障的效果
    assert (i == t);
    //等待所有线程到达屏障
    barrier();
    usleep(random() % 100);
  }

  return 0;
}

int
main(int argc, char *argv[])
{
  pthread_t *tha;
  void *value;
  long i;
  double t1, t0;

  if (argc < 2) {
    fprintf(stderr, "%s: %s nthread\n", argv[0], argv[0]);
    exit(-1);
  }
  // 参数指定线程数量
  nthread = atoi(argv[1]);
  tha = malloc(sizeof(pthread_t) * nthread);
  // srandom 是 C 标准库中的一个函数,用于设置伪随机数生成器(PRNG)的起始种子 -- 输出只是伪随机而不是真正的随机数
  srandom(0);

  barrier_init();
  //创建n个线程执行
  for(i = 0; i < nthread; i++) {
    assert(pthread_create(&tha[i], NULL, thread, (void *) i) == 0);
  }

  for(i = 0; i < nthread; i++) {
    assert(pthread_join(tha[i], &value) == 0);
  }
  printf("OK; passed\n");
}
我们需要实现屏障函数:
static void
barrier()
{
  // YOUR CODE HERE
  //
  // Block until all threads have called barrier() and
  // then increment bstate.round.
  //
}
这里代码比较简单,直接给出:
static void
barrier()
{
  // YOUR CODE HERE
  //
  // Block until all threads have called barrier() and
  // then increment bstate.round.
  // 申请持有锁
  pthread_mutex_lock(&bstate.barrier_mutex);

  bstate.nthread++;
  if(bstate.nthread == nthread) {
    // 所有线程已到达
    bstate.round++;
    bstate.nthread = 0;
    pthread_cond_broadcast(&bstate.barrier_cond);
  } else {
    // 等待其他线程
    // 调用pthread_cond_wait时,mutex必须已经持有
    pthread_cond_wait(&bstate.barrier_cond, &bstate.barrier_mutex);
  }
  // 释放锁
  pthread_mutex_unlock(&bstate.barrier_mutex);
}
测试:

