【 声明:版权所有,欢迎转载,请勿用于商业用途。 联系信箱:feixiaoxing @163.com】
所谓的full image制作,就是制作一个image,上面包含了所有的嵌入式软件、库和配置文件。之前虽然我们也构建了spi-nor、spi-nand、sd的image,但是上面缺少了一个关键的部分,也就是app代码的构建。这部分的内容今天也有必要加入进去。
另外,顺便借助这篇文章,我们可以顺便回忆一下之前uboot、kernel和rootfs是怎么编译的,这也非常重要。此外这一次构建的full image是spi-nor启动的,大家可以稍微注意下。
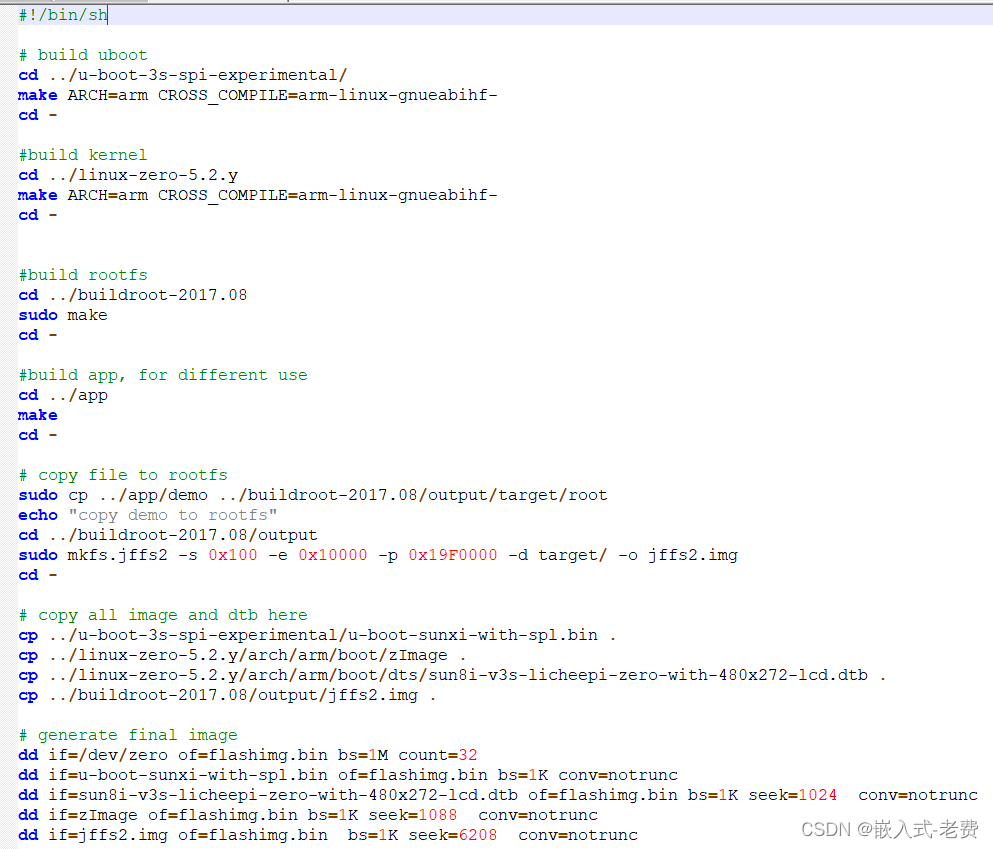
1、编译uboot代码
# build uboot
cd ../u-boot-3s-spi-experimental/
make ARCH=arm CROSS_COMPILE=arm-linux-gnueabihf-
cd -
2、编译内核
#build kernel
cd ../linux-zero-5.2.y
make ARCH=arm CROSS_COMPILE=arm-linux-gnueabihf-
cd -
3、编译rootfs
#build rootfs
cd ../buildroot-2017.08
sudo make
cd -
4、编译app代码
#build app, for different use
cd ../app
make
cd -
5、将app执行文件拷贝到rootfs,生成jffs2.img文件
# copy file to rootfs
sudo cp ../app/demo ../buildroot-2017.08/output/target/root
echo "copy demo to rootfs"
cd ../buildroot-2017.08/output
sudo mkfs.jffs2 -s 0x100 -e 0x10000 -p 0x19F0000 -d target/ -o jffs2.img
cd -
6、将所有的文件集中到一个目录下
# copy all image and dtb here
cp ../u-boot-3s-spi-experimental/u-boot-sunxi-with-spl.bin .
cp ../linux-zero-5.2.y/arch/arm/boot/zImage .
cp ../linux-zero-5.2.y/arch/arm/boot/dts/sun8i-v3s-licheepi-zero-with-480x272-lcd.dtb .
cp ../buildroot-2017.08/output/jffs2.img .
7、创建一个镜像文件,并且将之前copy过来的文件复制到镜像文件中去
# generate final image
dd if=/dev/zero of=flashimg.bin bs=1M count=32
dd if=u-boot-sunxi-with-spl.bin of=flashimg.bin bs=1K conv=notrunc
dd if=sun8i-v3s-licheepi-zero-with-480x272-lcd.dtb of=flashimg.bin bs=1K seek=1024  conv=notrunc
dd if=zImage of=flashimg.bin bs=1K seek=1088  conv=notrunc
dd if=jffs2.img of=flashimg.bin  bs=1K seek=6208  conv=notrunc
除了生成full image之外,我们还可以将之前开发过程中积累的文档资料整理归类一下,比方说像这样,
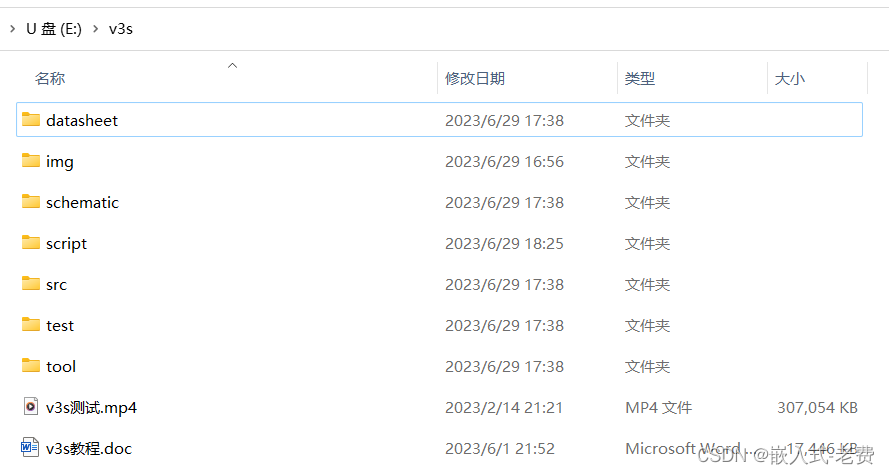
其中共包含了7个目录和2个文件。datasheet中包含了电路的主要元器件的手册文件,比如soc、nandflash、wifi模块等等。img包含了可以直接烧入的镜像文件。schematic则包含了主要的原理图文件。script则保存了full image的生成脚本。src是源代码区域,里面包含了uboot、kernel、buildroot、tinyalsa等开源代码。test是上位机代码和程序的位置。tool保存了使用中遇到的各种工具,比如virtualbox、ubuntu、notepad++、sunxi-fel、xfel、zadig、PhonixSuit软件等等。
保存好了这些资料,后续再次学习和使用的时候就很方便了。
