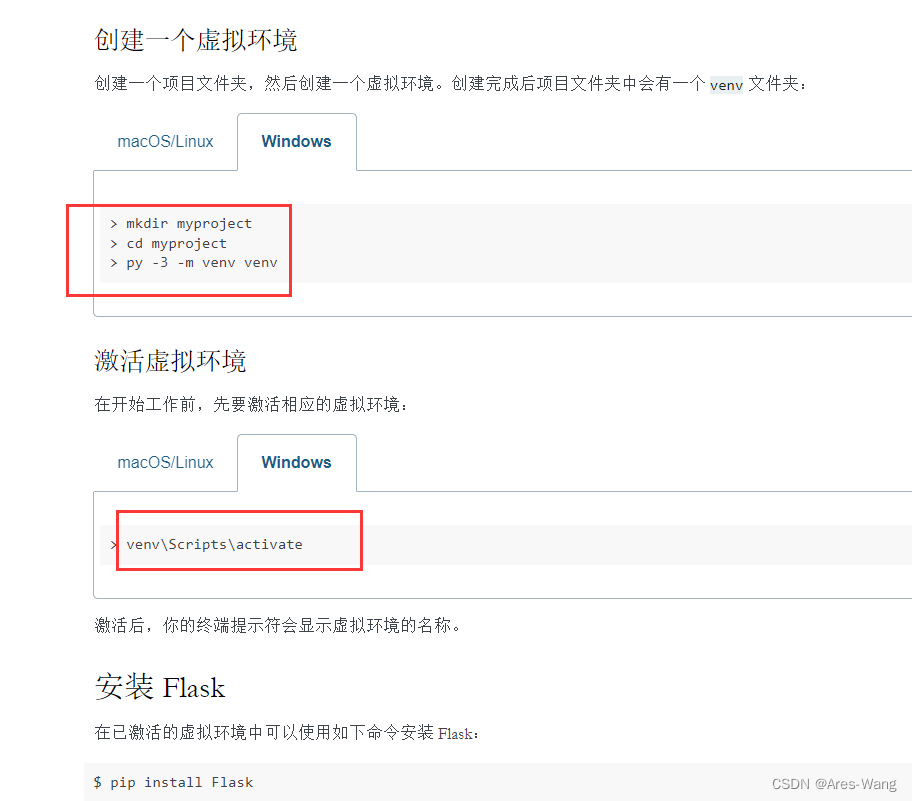
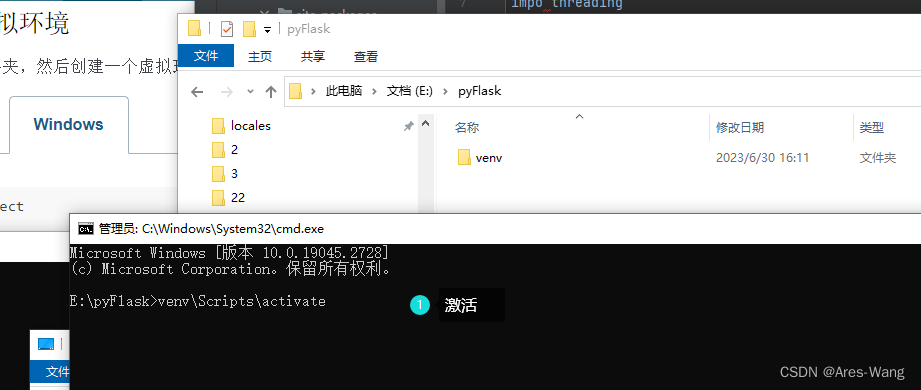
创建安装虚拟环境
两种方法
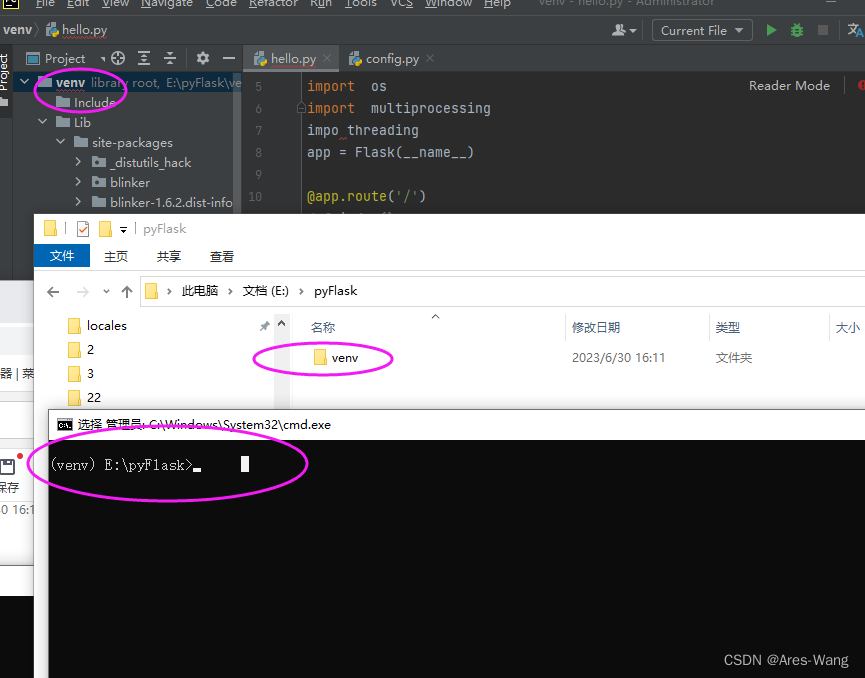
第二种
# 先打开cmd 中断
# 查看virtual是否安装过
pip show virtualenv
# 安装
pip install virtualenvwrapper-win
# workon 查看虚拟环境
vorkon
# 切换虚拟环境
# workon 虚拟环境
# mkvirtualenv 创建新的虚拟环境
mkvirtualenv falsk2env
# 删除虚拟环境
#rmvirtualenv flask2env
#进入虚拟环境
workon flask2env


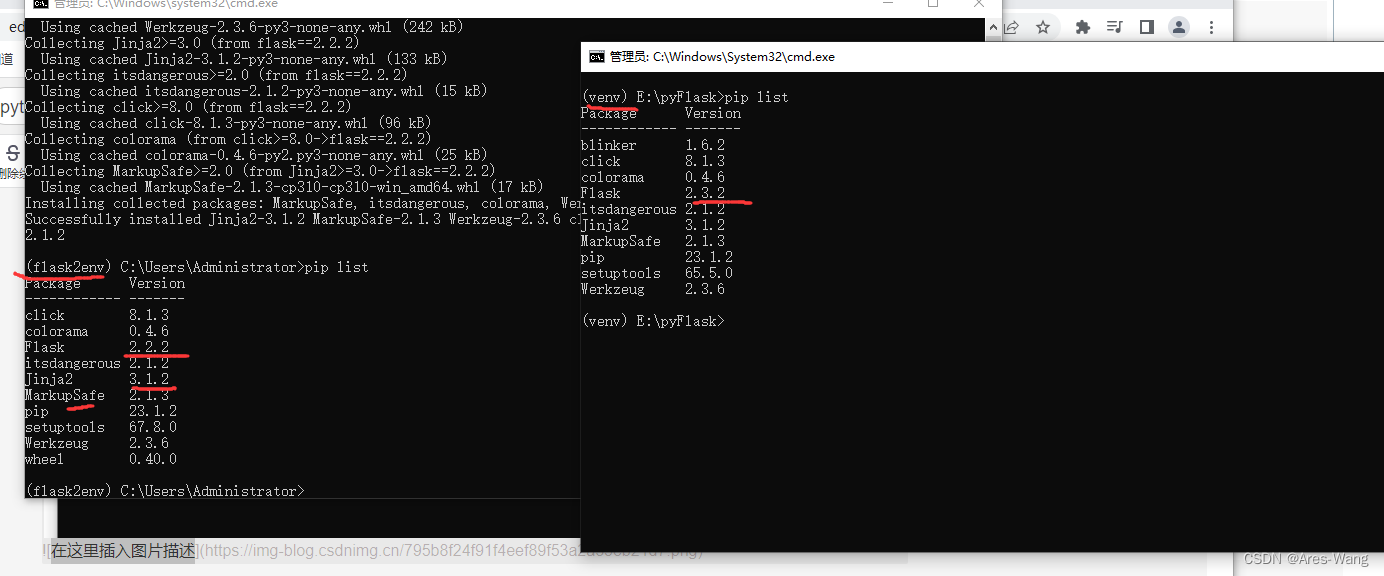
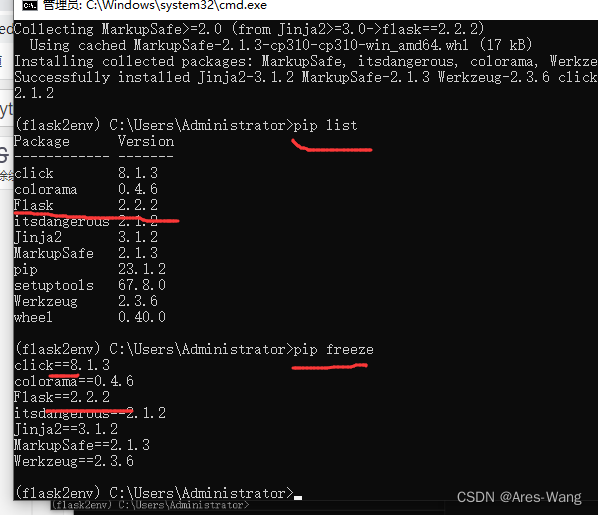
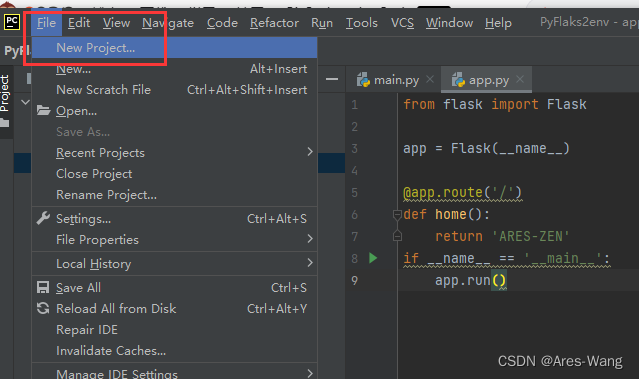
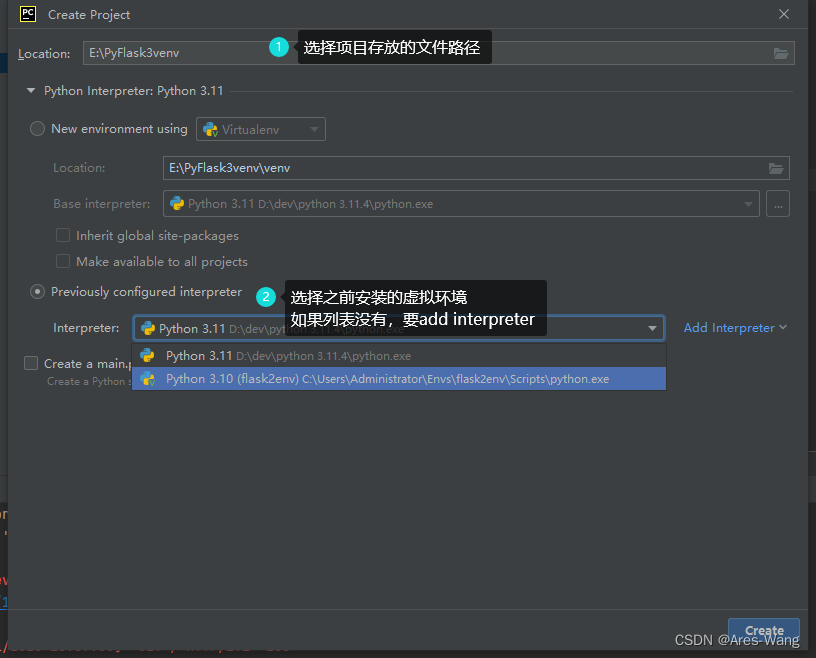
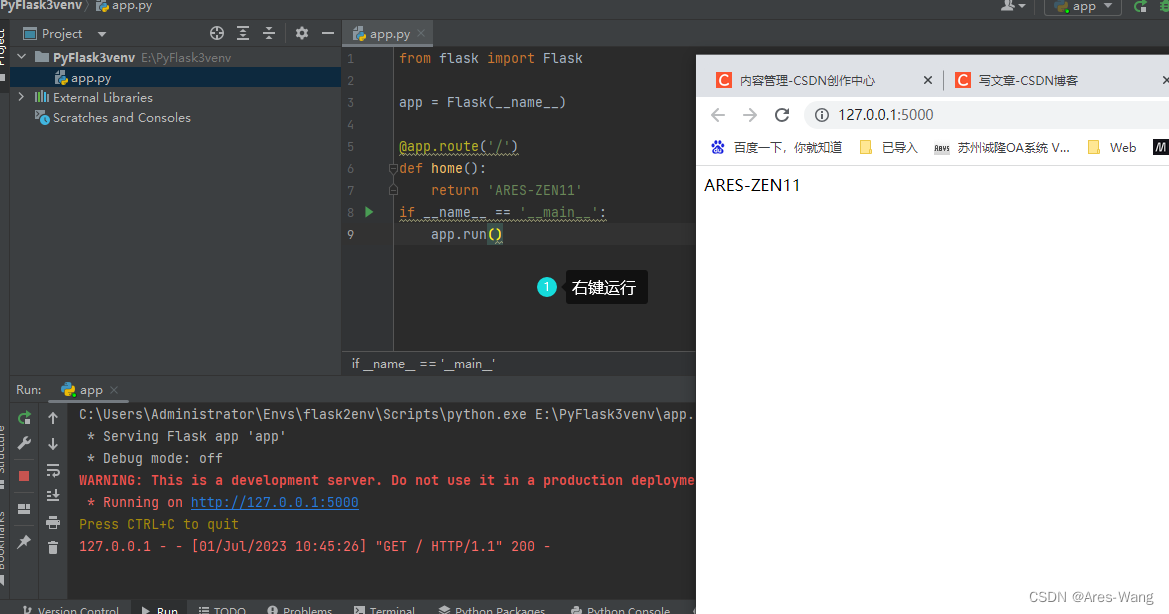
创建Flask 项目
专业版pychram
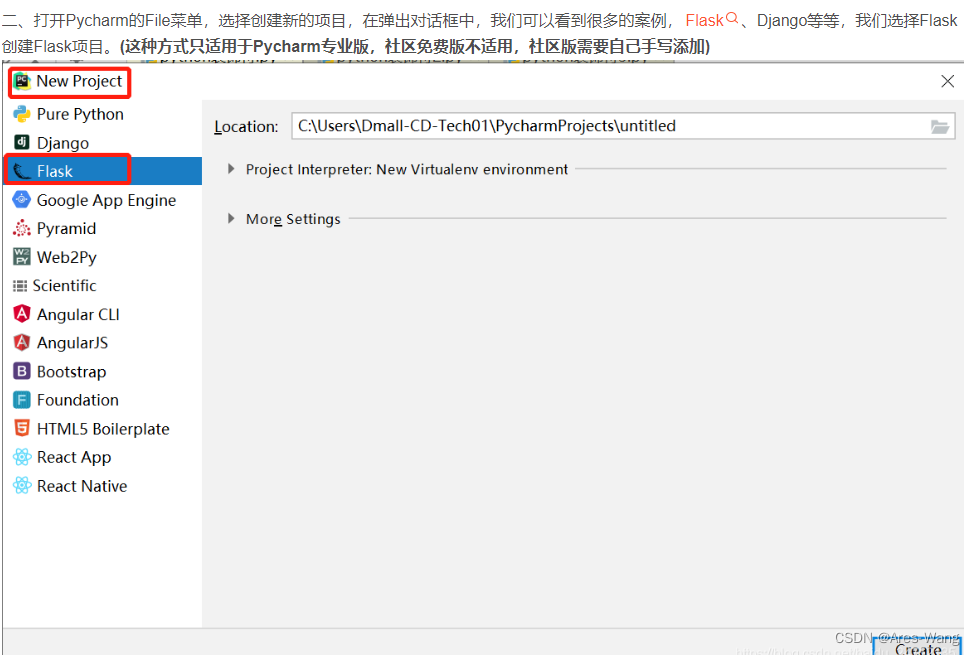
社区版 要手动创建

from flask import Flask, render_template, jsonify

app = Flask(__name__)
# 路由可以多个对一个视图函数的
@app.route('/')
@app.route('/index/')
def index():
    # 返回值
    # 直接返回
    # return '<b>ZEN</b>'
    # 模板渲染
    # return render_template('index.html',name='123')
    # 返回json对象
    # return {'name':'Ares-Wang','Sex':'男'}
    # 返回json序列化
    return jsonify({'name':'Ares-Wang','Sex':'男'})

@app.route('/')
def home():
    return 'ARES-ZEN'
if __name__ == '__main__':
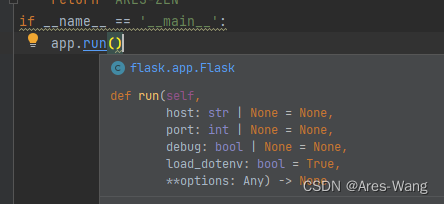
    app.run(host='0.0.0.0',debug=True)

<!-- 引入css样式表    相对路径, 从根目录 -->
<!--    <link rel="stylesheet" href="../static/index.css">-->
<!--    <link rel="stylesheet" href="/static/index.css">-->
    <link rel="stylesheet" href="{{url_for('static',filename='index.css')}}">
Flask 项目拆分
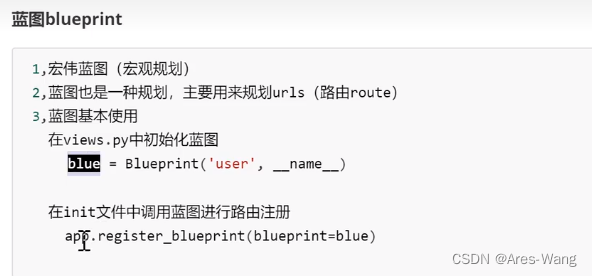
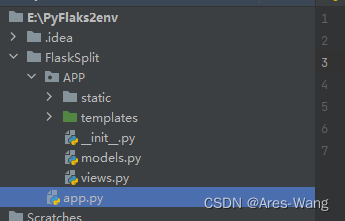
# app.py
from APP import Create_App
app = Create_App()
if __name__ == '__main__':
    app.run(host='0.0.0.0',debug=True)


# views.py
# views.py   路径  +   视图函数
from flask import Blueprint
from .models import *
blue = Blueprint('BlueName', __name__)
@blue.route('/')
def Home():
    return 'SPlIT'


# __init__.py
# __init__.py :初始化文件、创建Flask应用
from flask import Flask
from .views import blue
def Create_App():
    # 返回Flask对象
    app = Flask(__name__)
    # 注册蓝图
    app.register_blueprint(blueprint=blue)
    return app
路由参数
@app.route(‘/xxx/converter:variable_name’)
converter:参数类型
string:接受任何没有斜杠’/'的字符串 默认参数类型
int:接受整数
float:接受浮点数
path 接受路径, 可接受斜杠(’/‘)的字符串
uuid 只能接受uuid字符串,唯一码,一种生成规则 根GUID一样的
any 可以同时指定多种路径,进行限定
@app.route(‘/student//’) 与 @app.route(‘/student/string:username/’) 一样
@app.route(‘/student/int:id/’)
@app.route(‘/student/uuid:id/’)
@app.route(‘/student/float:num/’)
@app.route(‘/student/path:path/’)
@app.route(‘/student/<any(‘男’,女)>/’)
请求方法 常见POST GET
Flask 默认支持GET,不支持POST请求的
@app.route(‘/student/’)
同时支持get 、post 请求
@app.route(‘/student/’,methods=[‘GET’, ‘POST’])
请求对象和响应对象 request response
request
服务器在接受客户端的请求后,会自动创建Request对象,有FLask框架创建,request对象不可修改
# requests 爬虫测试下面的请求对象
import requests
request = requests.get('http://127.0.0.1:5000/index/?user=123')
request = requests.post('http://127.0.0.1:5000/index/',data={'user':3456})
print(request.text)
from flask import Flask,request
@app.route('/index/>',methods=['GET',  'POST'])
def get_index():
	# 获取请求方式
	print(request.method)
	# url 完整请求地址
	print(request.url)   		# http://127.0.0.1:5000/index/?user=123'
	# base_url   去掉get参数的url
	print(rquest.base_url)		# http://127.0.0.1:5000/index/
	# host_url   只有主机名和端口号
	print(rquest.host_url)		# http://127.0.0.1:5000/
	# remote_addr   请求的客户端地址
	print(request.remote_addr)   #IP地址
	# files 文件上传
	print(request.files)
	# 用户代理, 包括浏览器和操作系统的信息  反爬用的    类似 python-requests/2.31.0
	print(request.user_agent)
	# headers 请求头
	print(request.headers)
	# headers 请求中的cookie
	print(request.cookies)
	# 获取请求参数  get 请求
	print(request.args.get(key))
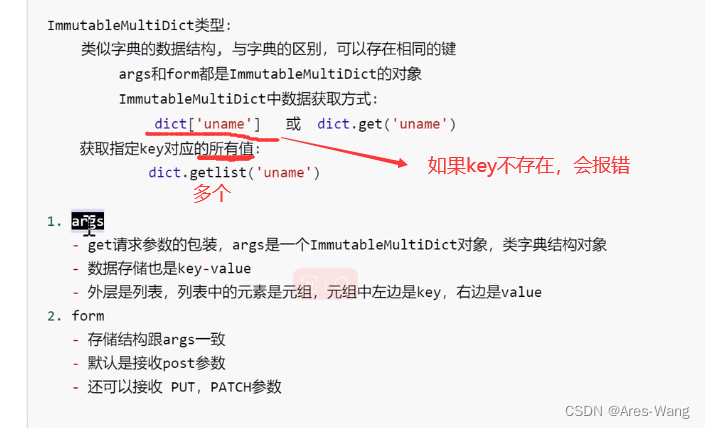
	# 返回是ImmutableMultiDict类型
	print(request.args)
	# 获取请求参数  post 请求
	print(request.from.get(key))
	#返回是ImmutableMultiDict类型
	print(request.from)
ImmutableMultiDict类型
Respone响应
# 导入模板渲染用的包
from flask import render_template, jsonify, make_response,Response
@app.route('/response/')
def  get_Response():
	# 响应的几种方式
	# 1、返回字符串(不常用)
	return 'AresZEN'
	# 2、模板渲染(前后端分离) 在templates中创建模板 xx.html  中jinja2语法 {{}}
	return render_template('xx.html',param1='' , param2='')
	# 3、返回json数据(前后端分离)
	return {'name':'Ares','age':30}
	# jsonify()  序列号    josn=>字符串
	return jsonify({'name':'Ares','age':30})
	# 4、自定义Response对象
	html= render_template('xx.html',param1='' , param2='')
	# 返回字符串(html格式的字符串)
	print(html,type(html))
	#  导入包make_response(返回的数据,状态码)
	res=make_response(html,200)
	res = Response(html)
	res.set_cookie()  #  设置cookie
	#  上面任意一个都可以
	return res
Redirect 重定向
@blue.route('redirect')
def make_redirect():
	# 重定向的几种方式
	# return redirect('https://www.baidu.com')
	# return redirect('/路由/')   #  在程序中跳转

	# url_for():反向解析,通过视图函数名反过来找路由
	# url_for('蓝图名称.视图函数名')  #  注意是蓝图名称 ,不是蓝图对象   blue对象 = Blueprint('BlueName蓝图名称', __name__)
	# ret = url_for('蓝图名称.视图函数名')
	# return redirect(rect)

	# url_for 传参
	ret= url_for('蓝图名称.视图函数名',参数名=Value,参数名2=Value2)
	return redirect(rect2)
会话技术 Cookie和Session
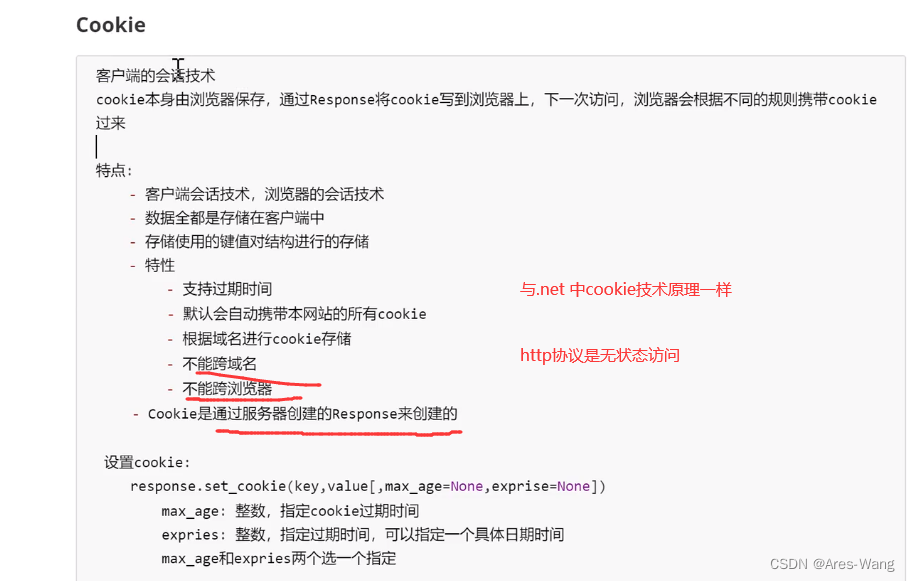
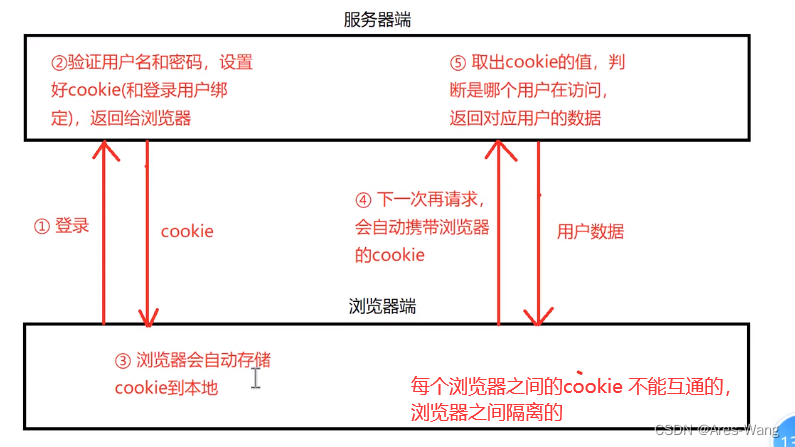
设置cookie
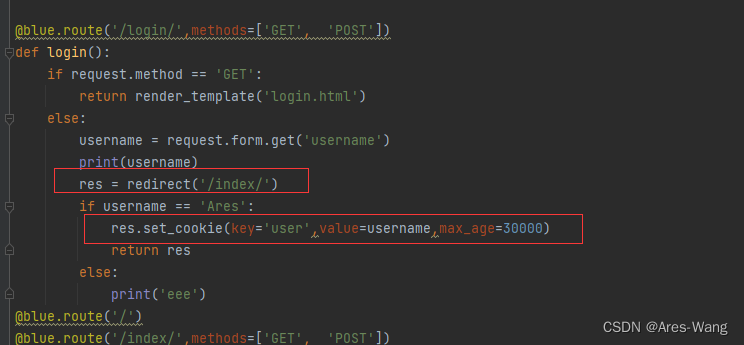
获取cookie
request.cookies.get(key)
删除cookie
response.delete_cookie(key)
cookie不能存中文


