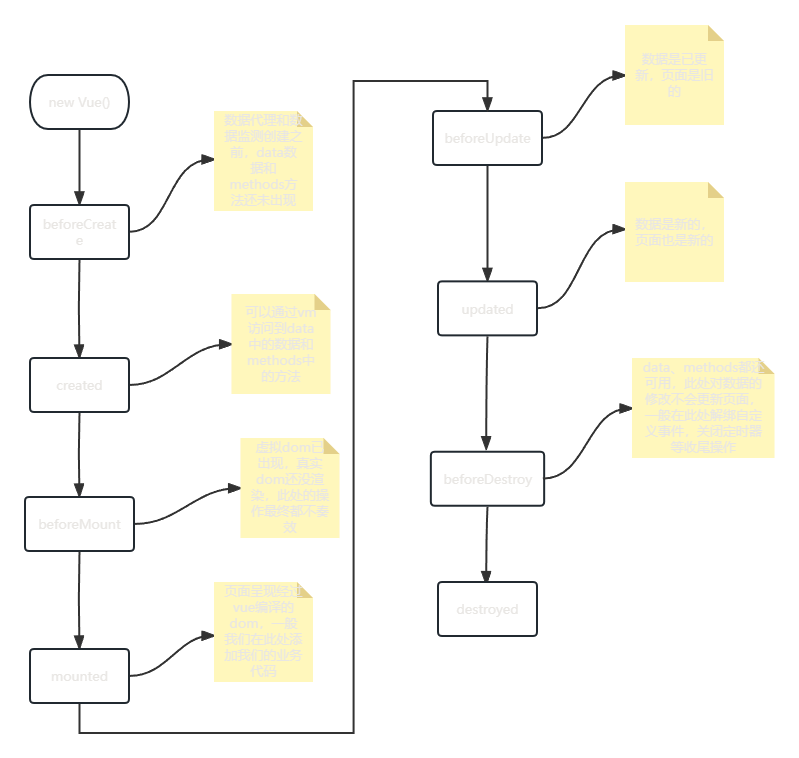
vue的生命周期:
借鉴react
钩子函数:
change() 挂载完毕,vue完成模板解析,并把初始的真实的dom元素放入到页面后执行
beforeCreate() {
    // 数据代理和数据监测创建之前
    console.log('beforeCreate')
},
created() {
    console.log('created')
},
beforeMount() {
    console.log('beforeMount')
},
mounted() {
    console.log('mounted')
},
beforeUpdate() {
    console.log('beforeUpdate')
},
updated() {
    console.log('updated')
},
beforeDestroy() {
    console.log('beforeDestroy')
},
destroyed() {
    console.log('destroyed')
}
组件化:
单页面项目
传统的写法:
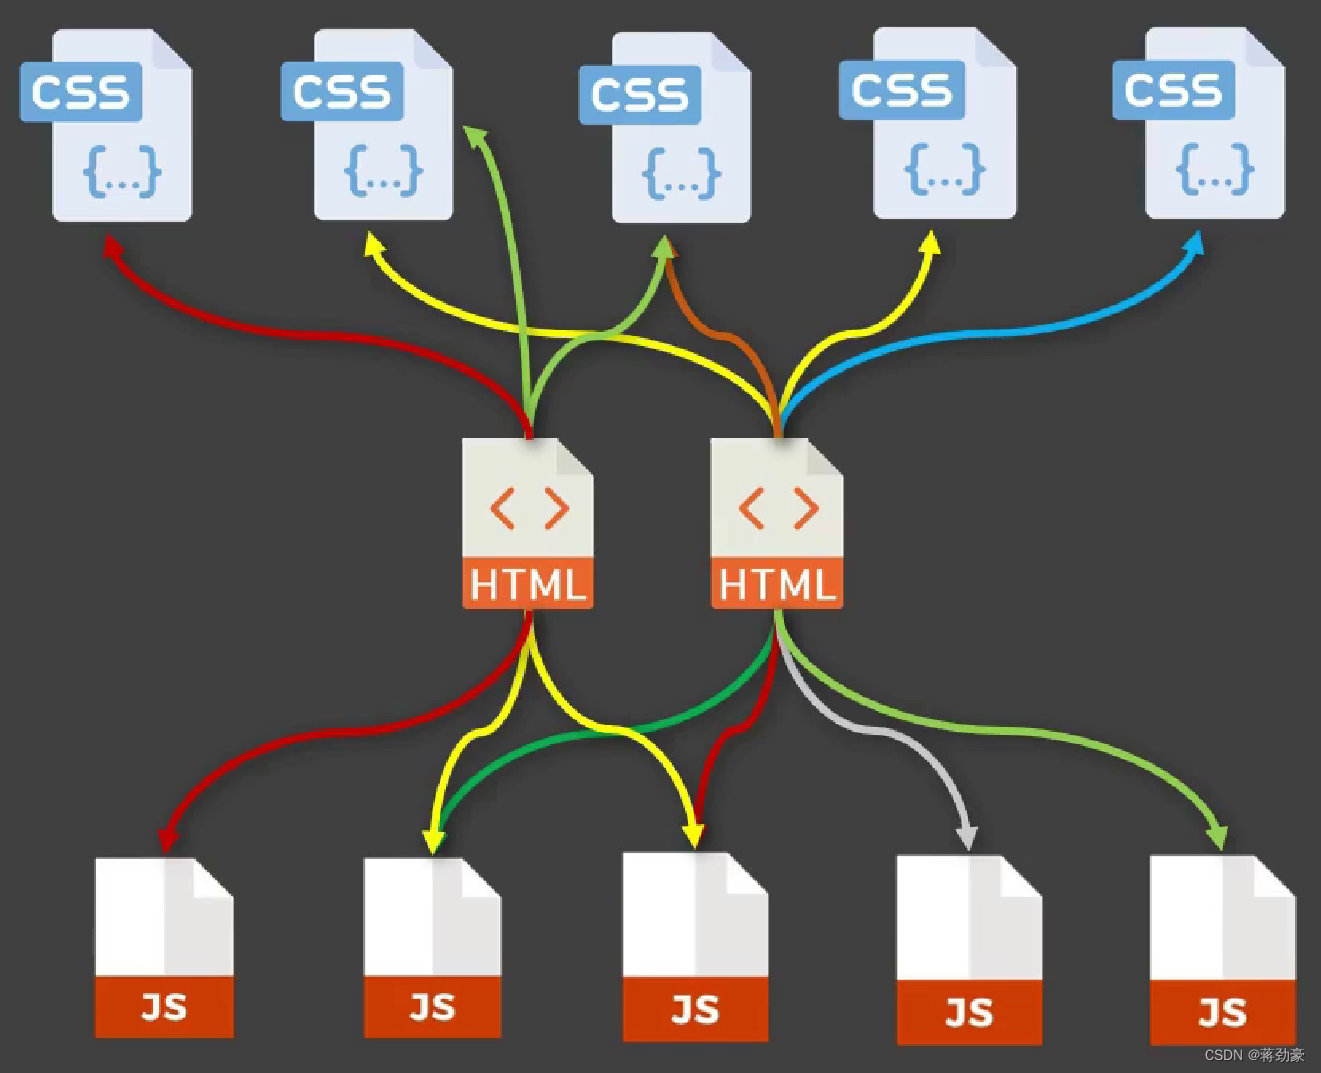
组件方式:

模块化:
一个大的js文件拆分成很多个文件
1、创建组件(非单文件组件):
// 创建组件
const school = Vue.extend({
    // 不用写el配置项,因为组件由vm管理
    template: `
      <div>
        <div>{{ school.name }}</div>
        <div>{{ school.address }}</div>
      </div>
    `,
    data() {
        return {
            student: {
                name: 'tom',
                age: '18'
            }
        }
    }
})
超级简写:
const school = {
    template: `
      <div>
          <div>{{ school.name }}</div>
          <div>{{ school.address }}</div>
          <div>
                <button @click="showName">点我</button>
          </div>
      </div>
    `,
    data() {
        return {
            school: {
                name: '尚硅谷',
                address: '北京'
            }
        }
    },
    methods: {
        showName() {
            console.log(this.school.name)
        }
    }
}
2、注册组件(局部注册):
const vm = new Vue({
    el: '#app',
    components: {
        school: school,
        student: student
    }
})
全局注册组件:
Vue.component('hello',hello)3、使用组件:
<div id="app">
    <school></school>
</div>
组件的命名方式:
my-school
MySchool 只能在脚手架里用
参考视频:尚硅谷Vue2.0+Vue3.0全套教程丨vuejs从入门到精通_哔哩哔哩_bilibili


