使用gradio,只需在原有的代码中增加几行,快速部署机器学习模型,就能自动化生成交互式web页面,并支持多种输入输出格式,比如图像分类中的图>>标签,超分辨率中的图>>图等。
同时还支持生成能外部网络访问的链接,能够迅速让你的朋友,同事体验你的算法。
参考
- https://gradio.app/demos/
- https://www.machinelearningnuggets.com/gradio-tutorial/
- https://gradio.app/quickstart/
文章目录
- 参考
- 安装
- 简单的欢迎界面分析——(输入文字UI+ 函数处理+输出文字)
- UI操作效果
- 分析
- 使用控件函数设置控件的参数
- 多UI控件输入、输出
- 计算机视觉相关
- 对上传图片,直接处理
- 分类模型UI部署 (需要安装pytorch环境)
- 下载模型界面(可手动)
- 代码
- 附录
- 端口被占用 [Errno 10048] error while attempting to bind on address
- 解决方法1 (指定打开的端口)
- 解决方法2
- 找到占用端口+杀死
安装
注意,不要把python文件与
pip install gradio
简单的欢迎界面分析——(输入文字UI+ 函数处理+输出文字)
逻辑:输入UI中的参数,提交后自动传入绑定的函数,
其中 “text” 表示输入输出UI控件是文本框。
import gradio as gr

def greet(name):
    return "Hello " + name + "!"

demo = gr.Interface(fn=greet,inputs="text", outputs="text")
demo.launch()
UI操作效果
默认启动 ,如果7860已经占用,自动变为7861,如果端口无法启动 。。 端口被占用时,可指定端口
demo.launch(server_port=30001)
http://127.0.0.1:7860/
动效

分析
在上面的例子中,我们看到一个简单的基于文本的函数
gr.InterfaceInterface 核心类使用三个必需参数进行初始化:Interface
fn:将 UI 包裹起来的函数,该函数可以是任何功能,从音乐生成器到税收计算器,再到预训练机器学习模型的预测函数
inputs:用于输入的组件(例如,或"text",“image”,“audio”)
outputs:用于输出的组件(例如,或"text",“image”,“label”)
使用控件函数设置控件的参数
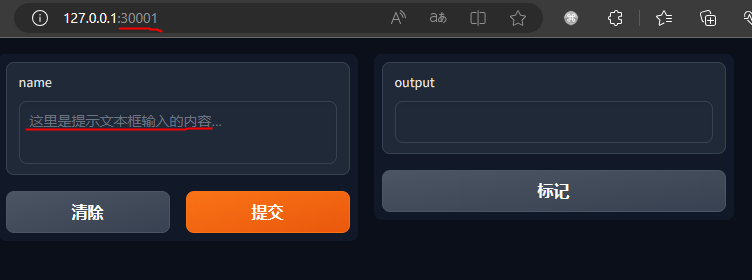
设置2行文本宽度,文本框的内的提示词
import gradio as gr

def greet(name):
    return "Hello " + name + "!"

demo = gr.Interface(
    fn=greet,
    inputs=gr.Textbox(lines=2, placeholder="这里是提示文本框输入的内容..."),
    outputs="text",
)
demo.launch()
UI界面
多UI控件输入、输出
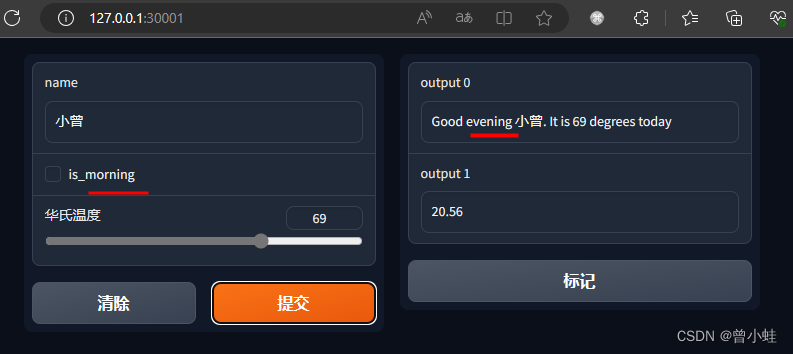
3个UI控件作为输入,2个输出,
输入名字,是否是早晨,今天的温度,
自动输入问候以及华氏温度与摄氏温度的转换
import gradio as gr

def greet(name, is_morning, temperature):
    # salutation表示致意、问候
    salutation = "Good morning" if is_morning else "Good evening"
    greeting = f"{salutation} {name}. It is {temperature} degrees today"
    # 摄氏温度 = (华氏温度 – 32) ÷ 1.8
    celsius = (temperature - 32) * 5 / 9
    return greeting, round(celsius, 2)

demo = gr.Interface(
    fn=greet,
    inputs=["text", "checkbox", gr.Slider(0, 100,label="华氏温度")],
    outputs=["text", "number"],
)
demo.launch(server_port=30001)
计算机视觉相关
对上传图片,直接处理
上传一张图片,输入为灰度图像,其中处理函数可以修改为自己的。
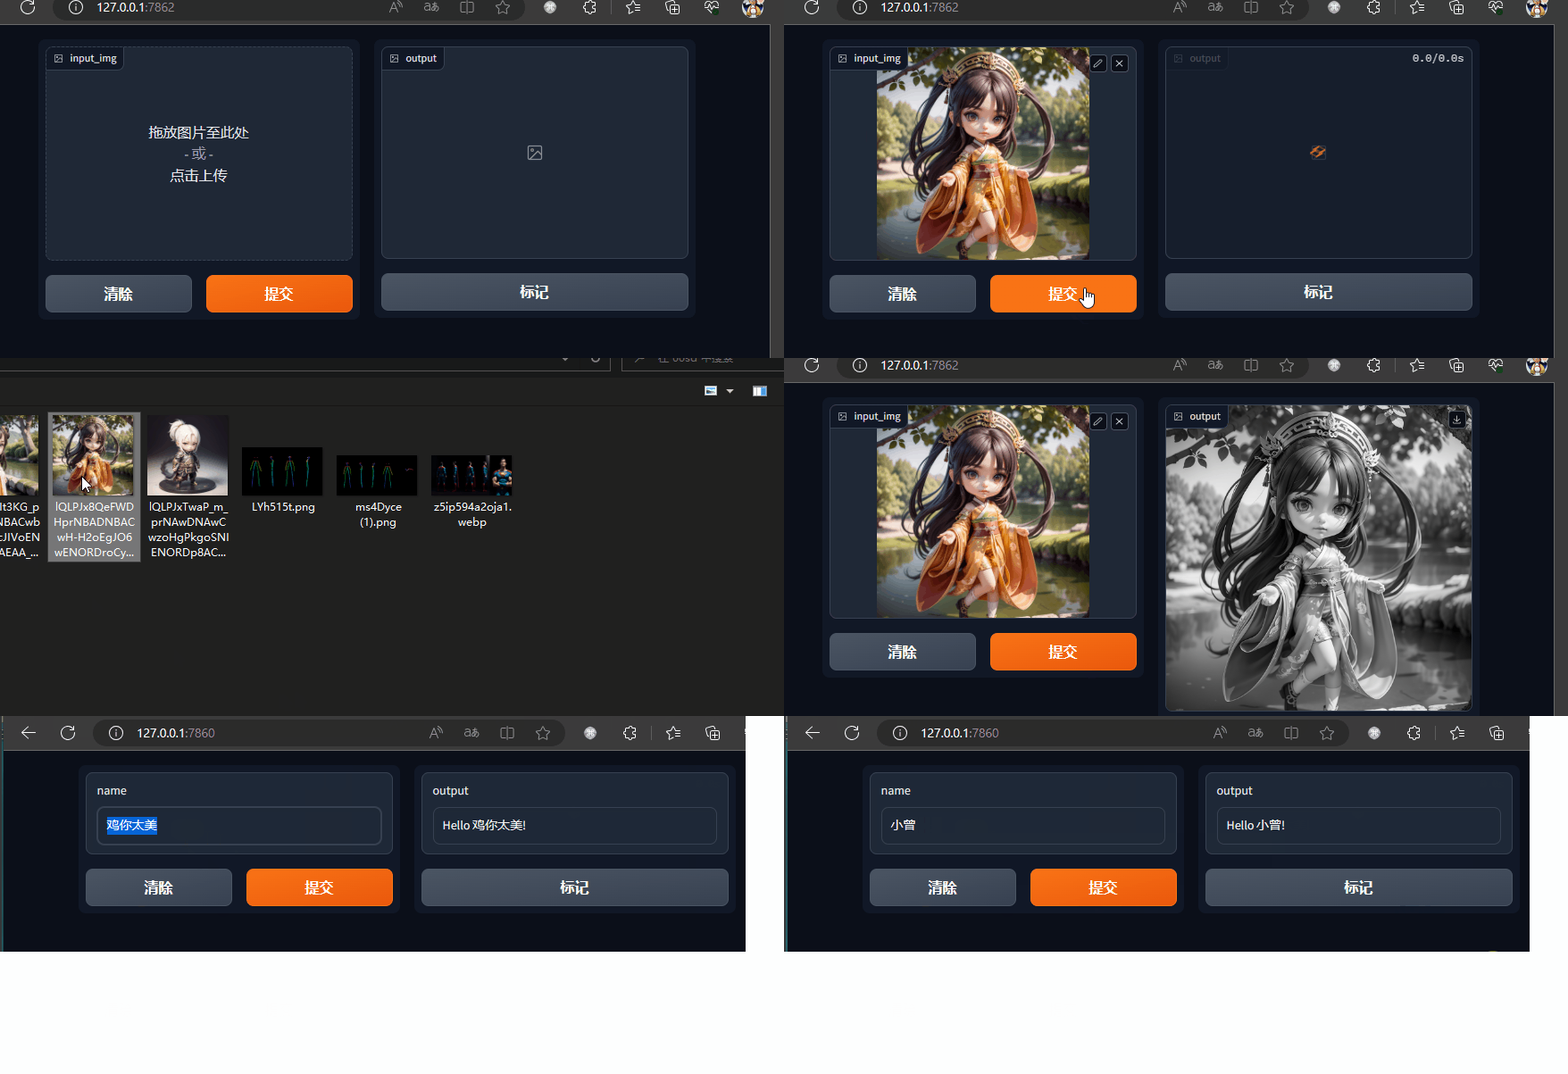 ### 完整代码
import numpy as np
import gradio as gr
from PIL import Image

def gray(input_img):
    # 灰度值 = 0.2989 * R + 0.5870 * G + 0.1140 * B
    # image[..., :3]表示提取图像的前三个通道(即R、G、B通道)
    # 省略号可以在索引中表示对应维度的完整范围。
    gray = np.dot(input_img[..., :3], [0.2989, 0.5870, 0.1140])
    gray = gray.astype(np.uint8)  # 将灰度图像转换为无符号整型 ,如果不加一般会报错
    # pil_image = Image.fromarray(gray)  # 将灰度图像数组转换为PIL图像对象
    return gray

demo = gr.Interface(gray, gr.inputs.Image(), outputs="image")
demo.launch(server_port=7862)
分类模型UI部署 (需要安装pytorch环境)
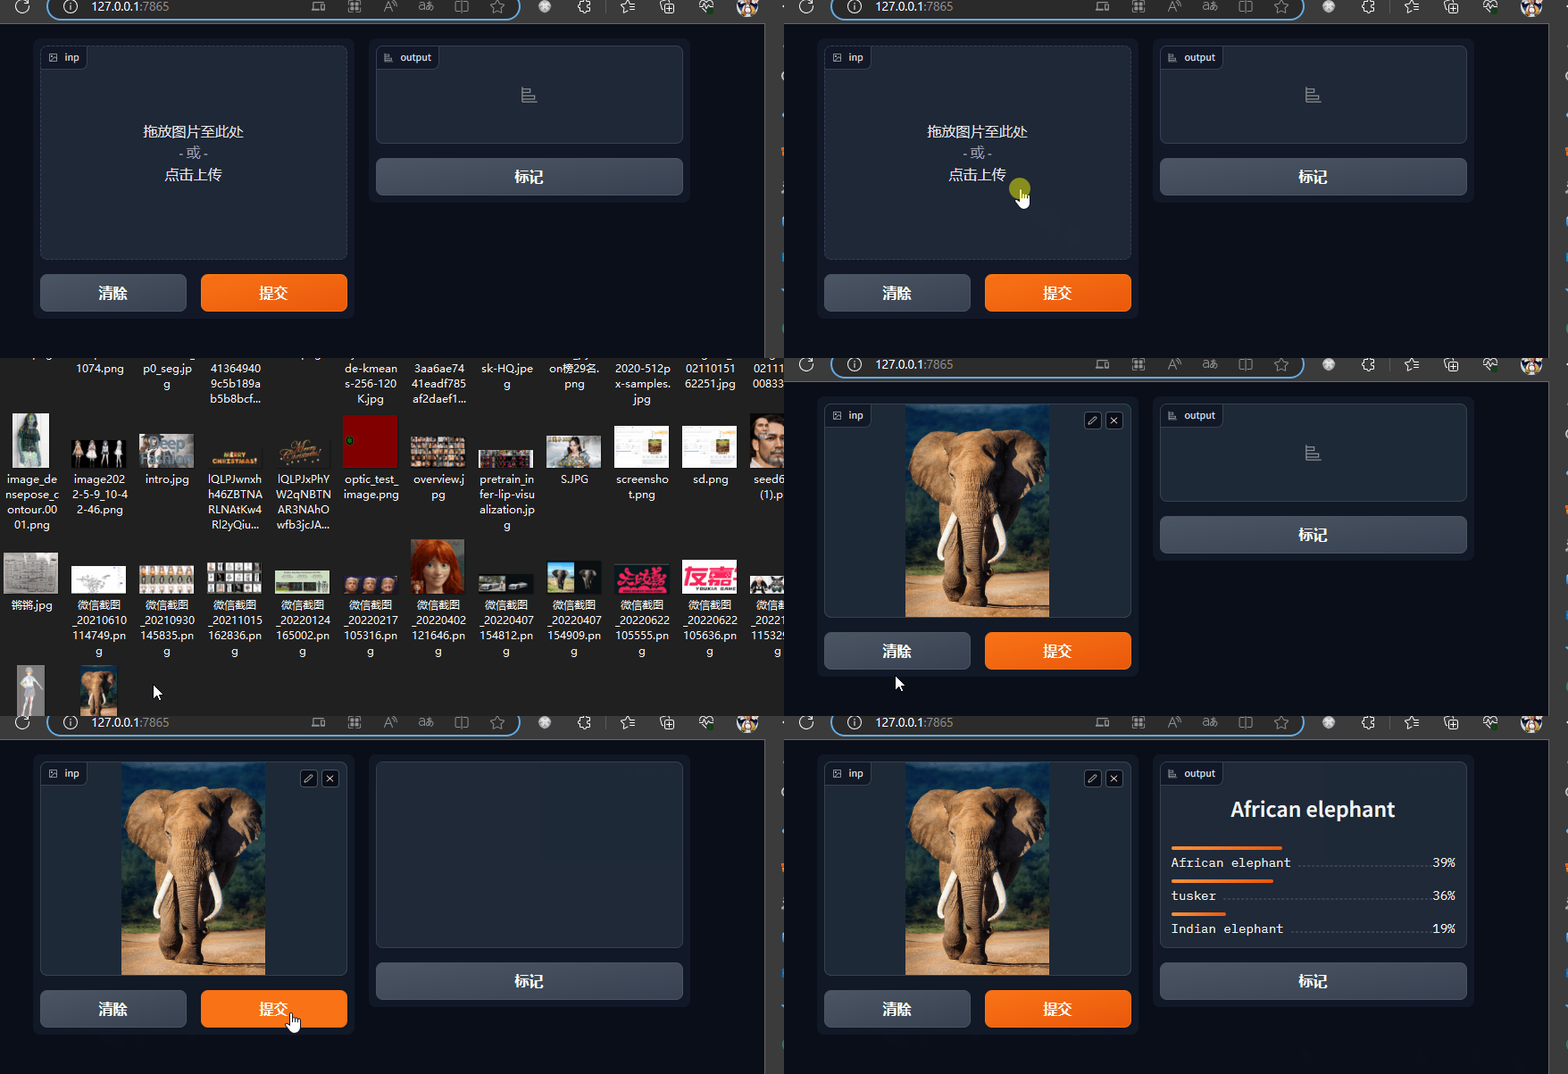
下载模型界面(可手动)
Downloading: “https://github.com/pytorch/vision/zipball/v0.6.0” to C:\Users\admin/.cache\torch\hub\v0.6.0.zip
Downloading: “https://download.pytorch.org/models/resnet18-f37072fd.pth” to C:\Users\admin/.cache\torch\hub\checkpoints\resnet18-f37072fd.pth
代码
import gradio as gr
import torch
import requests
from torchvision import transforms

model = torch.hub.load('pytorch/vision:v0.6.0', 'resnet18', pretrained=True).eval()
response = requests.get("https://git.io/JJkYN")
labels = response.text.split("\n")
print('labels',labels)

def predict(inp):
  inp = transforms.ToTensor()(inp).unsqueeze(0)
  with torch.no_grad():
    prediction = torch.nn.functional.softmax(model(inp)[0], dim=0)
    confidences = {labels[i]: float(prediction[i]) for i in range(1000)}
  return confidences

demo = gr.Interface(fn=predict,
             inputs=gr.inputs.Image(type="pil"),
             outputs=gr.outputs.Label(num_top_classes=3),
             # examples=[["cheetah.jpg"]],
             )

demo.launch(server_port=7865)
附录
端口被占用 [Errno 10048] error while attempting to bind on address
ERROR: [Errno 10048] error while attempting to bind on address (‘127.0.0.1’, 7860): 通常每个套接字地址(协议/网络地址/端口)只允许使用一次。
解决方法1 (指定打开的端口)
server_port=xxx
...........
demo.launch(server_port=30001)
解决方法2
打开命令端
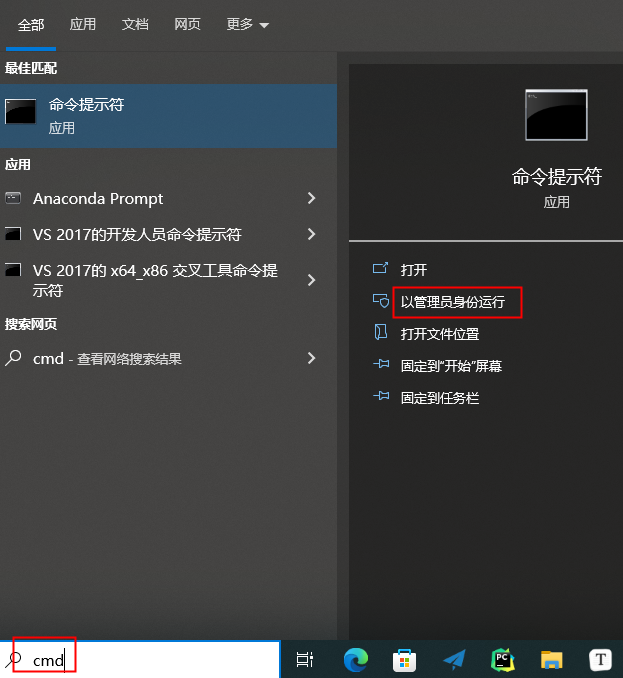
找到占用端口+杀死
netstat -ano|findstr "7860"
taskkill  -F -PID your_id

