Unity 工具 之 Azure OpenAI 功能接入到Unity 中的简单整理
目录
Unity 工具 之 Azure OpenAI 功能接入到Unity 中的简单整理
一、简单介绍
二、实现原理
三、注意实现
四、简单实现步骤
五、关键代码
六、附加
创建新的 .NET Core ,获取 Azure.AI.OpenAI dll 包
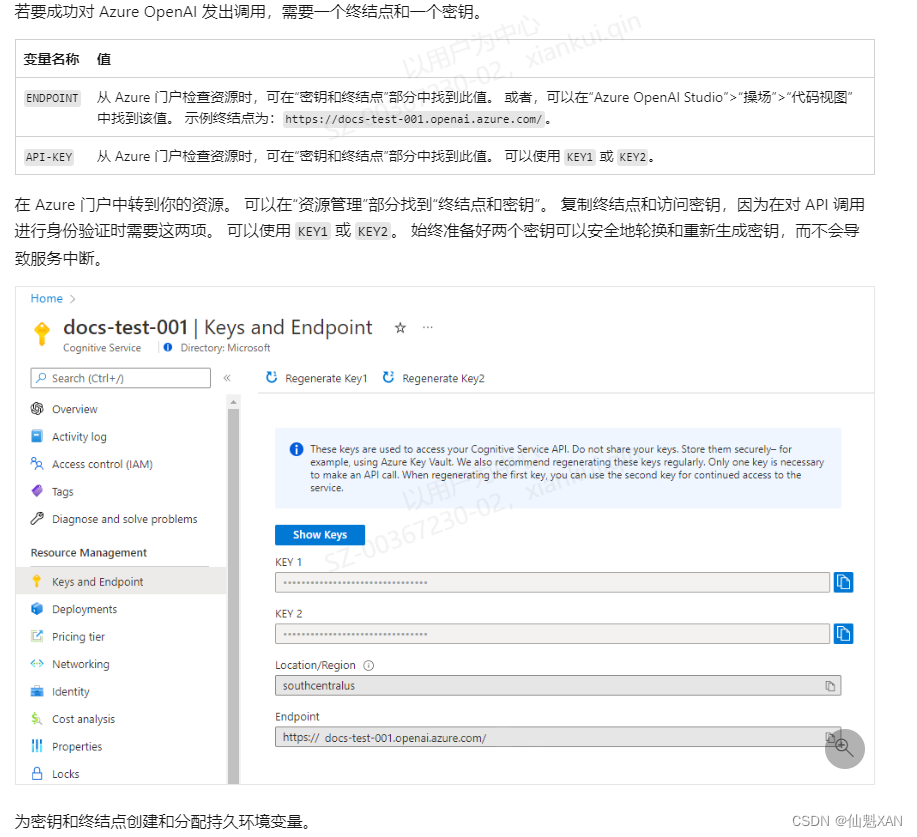
检索密钥和终结点
一、简单介绍
Unity 工具类,自己整理的一些游戏开发可能用到的模块,单独独立使用,方便游戏开发。
本节介绍,这里在使用微软的Azure 把Azue.AI.OpenAI 接入到Unity中,在Unity中直接调用 Azue.AI.OpenAI 接口函数,实现简单聊天功能,这里简单说明,如果你有更好的方法,欢迎留言交流。
二、实现原理
1、官网申请得到Azure OpenAI 对应的 AZURE_OPENAI_ENDPOINT 和 AZURE_OPENAI_KEY,以及对应的模型名 DeploymentOrModelName
2、把相关的 dll 引入进来,主要有 Azure.AI.OpenAI、 Azure.Core 等等
3、创建客户端 OpenAIClient = new(new Uri(AZURE_OPENAI_ENDPOINT ), new AzureKeyCredential(AZURE_OPENAI_KEY));
OpenAIClient .GetChatCompletionsXXAsync (DeploymentOrModelName,prompt)
来发起请求
三、注意实现
1、这里使用 Async 来异步获取数据,避免发起请求时卡顿
2、由于使用 Async ,各种对应的数据事件进行必要的 Loom.QueueOnMainThread 处理,不然可能会报入的错误: Net.WebException : Error: NameResolutionFailure
3、使用 CancellationTokenSource 来终止 Async 造成的 Task 任务
4、ChatCompletionsOptions 的 MaxTokens 可能可以控制Stream的速度和接收的内容
四、简单实现步骤
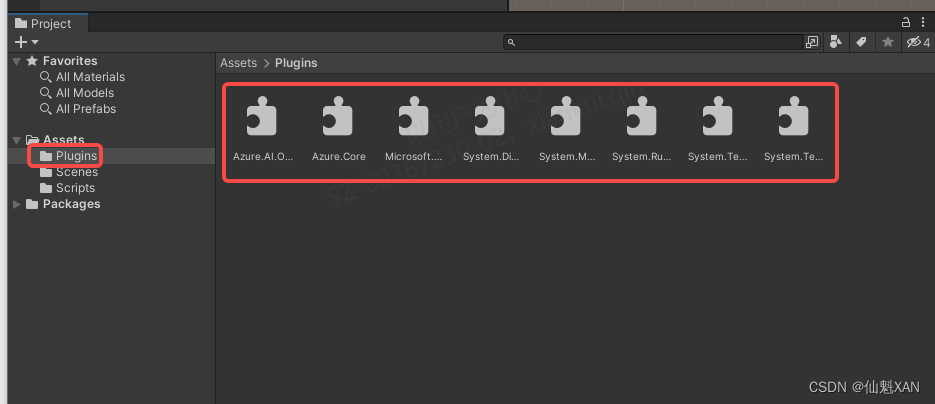
1、根据 Azure OpenAI 的 官网的操作下载 Azure.AI.OpenAI 相关 dll 包,然后导入到Unity Plugins (目前对应的是当前最新版的 netstandard2.0 或者 netstandard2.1 的dll 包,根据需要选择,dll (dotnet add package)下载默认路径为 C:\Users\YOUR_USER_NAME\.nuget\packages)
快速入门 - 开始通过 Azure OpenAI 服务使用 ChatGPT 和 GPT-4 - Azure OpenAI Service | Microsoft Learn
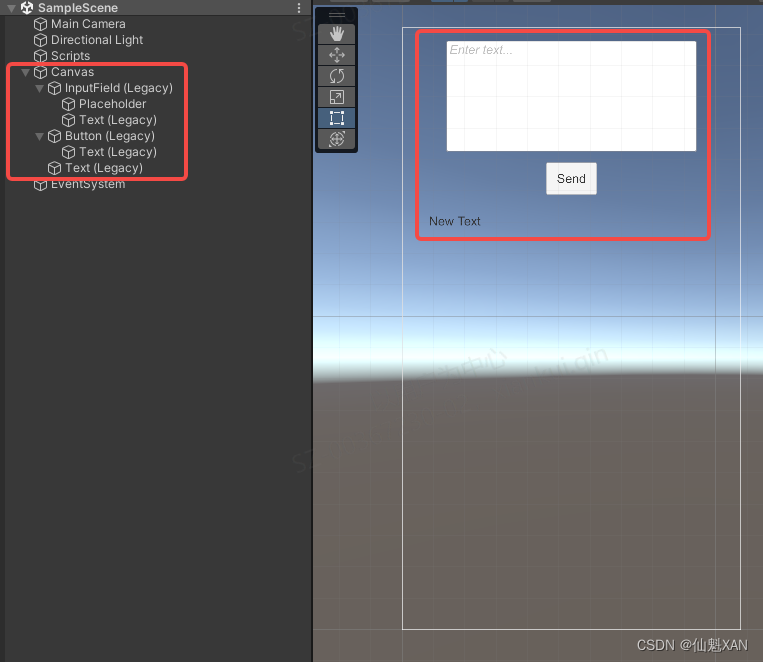
2、 简单的搭建场景
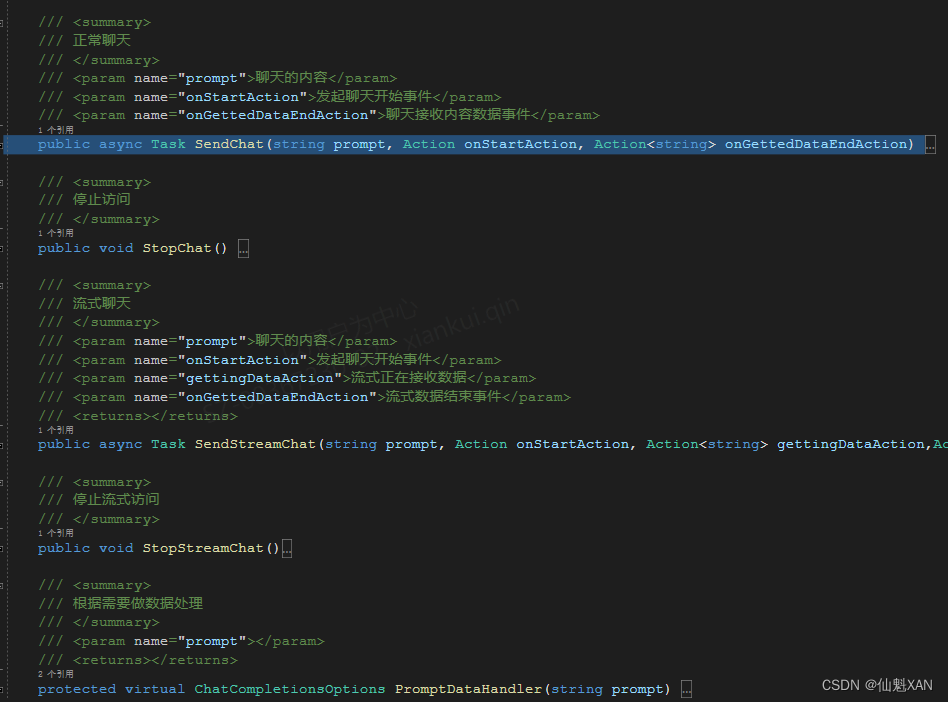
3、简单的封装一下AzureOpenAIQueryHandler接口
4、添加测试脚本 TestAzureOpenAI
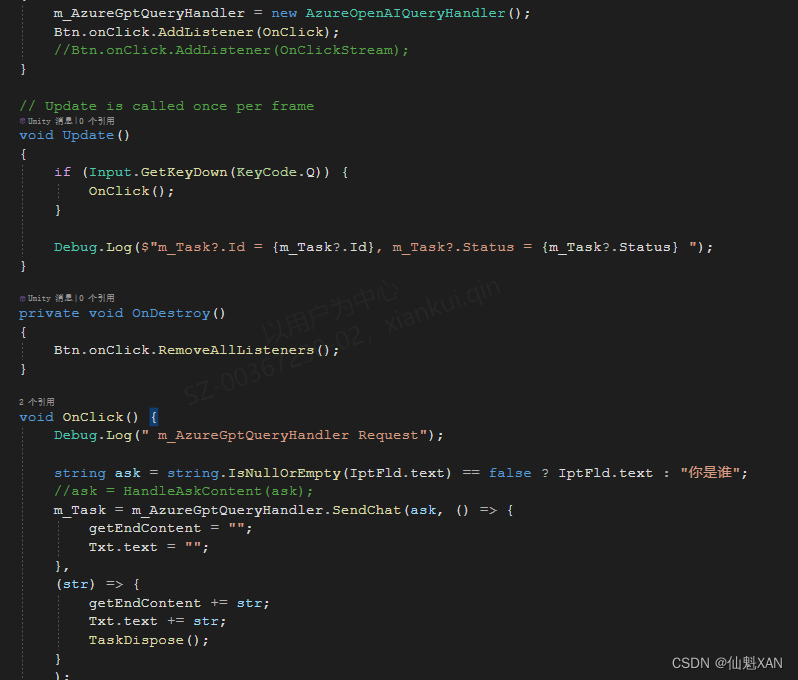
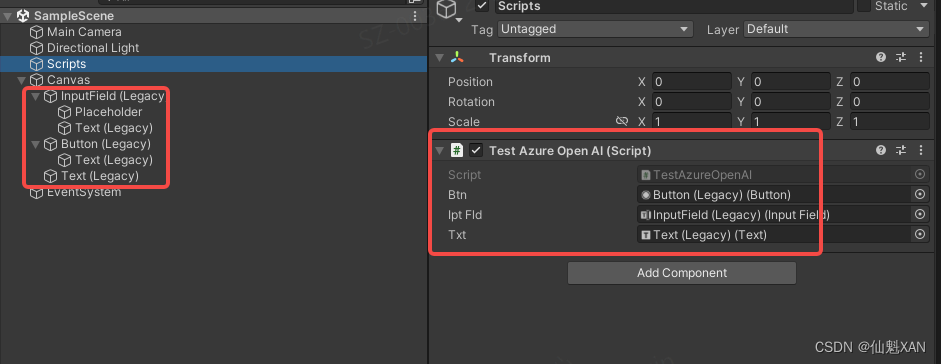
5、对应挂载脚本TestAzureOpenAI 到场景中,并对应赋值
6、运行场景、效果如下
五、关键代码
1、AzureOpenAIQueryHandler
using Azure.AI.OpenAI;
using Azure;
using System;
using UnityEngine;
using System.Threading.Tasks;
using System.Threading;

public class AzureOpenAIQueryHandler
{
    const string END_POINT = "AZURE_OPENAI_ENDPOINT ";
    const string KEY = "AZURE_OPENAI_KEY";
    const string DeploymentOrModelName = "DeploymentOrModelName";

    OpenAIClient m_Client;
    StreamingChatCompletions m_StreamingChatCompletions;

    private CancellationTokenSource m_CancellationTokenSource;
    private CancellationTokenSource m_StreamCancellationTokenSource;

    public AzureOpenAIQueryHandler() {
        m_Client = new(new Uri(END_POINT), new AzureKeyCredential(KEY));
    }
    ~AzureOpenAIQueryHandler() {
        m_StreamingChatCompletions?.Dispose();
        m_StreamingChatCompletions = null;
        m_Client = null;
    }

    /// <summary>
    /// 正常聊天
    /// </summary>
    /// <param name="prompt">聊天的内容</param>
    /// <param name="onStartAction">发起聊天开始事件</param>
    /// <param name="onGettedDataEndAction">聊天接收内容数据事件</param>
    public async Task SendChat(string prompt, Action onStartAction, Action<string> onGettedDataEndAction) {
        StopChat();
        CancellationTokenSource cancellationTokenSource = new CancellationTokenSource();
        m_CancellationTokenSource = cancellationTokenSource;
        Loom.QueueOnMainThread(() =>
        {
            onStartAction?.Invoke();
        });
        if (cancellationTokenSource?.IsCancellationRequested == false) {
            Response<ChatCompletions>  response = await m_Client.GetChatCompletionsAsync(
            deploymentOrModelName: DeploymentOrModelName,
            PromptDataHandler(prompt));

            if (cancellationTokenSource?.IsCancellationRequested == false)
            {
                string content = response.Value.Choices[0].Message.Content;
                Loom.QueueOnMainThread(() =>
                {
                    onGettedDataEndAction?.Invoke(content);
                });
            }
        }
    }

    /// <summary>
    /// 停止访问
    /// </summary>
    public void StopChat() {
        if (m_CancellationTokenSource != null)
        {
            m_CancellationTokenSource.Cancel();
            m_CancellationTokenSource.Dispose();
            m_CancellationTokenSource = null;
        }
    }

    /// <summary>
    /// 流式聊天
    /// </summary>
    /// <param name="prompt">聊天的内容</param>
    /// <param name="onStartAction">发起聊天开始事件</param>
    /// <param name="gettingDataAction">流式正在接收数据</param>
    /// <param name="onGettedDataEndAction">流式数据结束事件</param>
    /// <returns></returns>
    public async Task SendStreamChat(string prompt, Action onStartAction, Action<string> gettingDataAction,Action onGettedDataEndAction) {

        StopStreamChat();
        CancellationTokenSource cancellationTokenSource = new CancellationTokenSource();
        m_StreamCancellationTokenSource = cancellationTokenSource;
        Debug.Log(" Start ");
        Loom.QueueOnMainThread(() =>
        {
            onStartAction?.Invoke();
        });

        if (m_StreamingChatCompletions != null) { Debug.Log(" streamingChatCompletions.Dispose "); m_StreamingChatCompletions.Dispose(); }
        Response<StreamingChatCompletions> response = await m_Client.GetChatCompletionsStreamingAsync(
            deploymentOrModelName: DeploymentOrModelName,
            PromptDataHandler(prompt));
        if (cancellationTokenSource?.IsCancellationRequested==false)
        {
            using (m_StreamingChatCompletions = response.Value)
            {

                await foreach (StreamingChatChoice choice in m_StreamingChatCompletions.GetChoicesStreaming())
                {
                    await foreach (ChatMessage message in choice.GetMessageStreaming())
                    {
                        if (cancellationTokenSource?.IsCancellationRequested == false) {
                            Loom.QueueOnMainThread(() =>
                            {
                                //Debug.Log(message.Content);
                                gettingDataAction?.Invoke(message.Content);
                            });
                        }
                    }
                }
            }
        }

        if (cancellationTokenSource?.IsCancellationRequested == false) {
            Debug.Log(" End ");
            Loom.QueueOnMainThread(() => {
                onGettedDataEndAction?.Invoke();
            });
        }
    }

    /// <summary>
    /// 停止流式访问
    /// </summary>
    public void StopStreamChat()
    {
        if (m_StreamCancellationTokenSource != null)
        {
            m_StreamCancellationTokenSource.Cancel();
            m_StreamCancellationTokenSource.Dispose();
            m_StreamCancellationTokenSource = null;
        }
    }

    /// <summary>
    /// 根据需要做数据处理
    /// </summary>
    /// <param name="prompt"></param>
    /// <returns></returns>
    protected virtual ChatCompletionsOptions PromptDataHandler(string prompt) {
        ChatCompletionsOptions chatCompletionsOptions = new ChatCompletionsOptions()
        {
            Messages =
            {
                new ChatMessage(ChatRole.System, "你是聊天高手,可以聊天说地"),
                new ChatMessage(ChatRole.User, prompt),
            },
            MaxTokens = 200, //速度和内容显示

        };

        return chatCompletionsOptions;
    }
}
2、TestAzureOpenAI
using System.Threading.Tasks;
using UnityEngine;
using UnityEngine.UI;

public class TestAzureOpenAI : MonoBehaviour
{
    AzureOpenAIQueryHandler m_AzureGptQueryHandler;

    public Button Btn;
    public InputField IptFld;
    public Text Txt;

    string getEndContent;
    Task m_Task;
    // Start is called before the first frame update
    void Start()
    {
        m_AzureGptQueryHandler = new AzureOpenAIQueryHandler();
        //Btn.onClick.AddListener(OnClick);
        Btn.onClick.AddListener(OnClickStream);
    }

    // Update is called once per frame
    void Update()
    {
        if (Input.GetKeyDown(KeyCode.Q)) {
            OnClick();
        }

        Debug.Log($"m_Task?.Id = {m_Task?.Id}, m_Task?.Status = {m_Task?.Status} ");
    }

    private void OnDestroy()
    {
        Btn.onClick.RemoveAllListeners();
    }

    void OnClick() {
        Debug.Log(" m_AzureGptQueryHandler Request");

        string ask = string.IsNullOrEmpty(IptFld.text) == false ? IptFld.text : "你是谁";
        m_Task = m_AzureGptQueryHandler.SendChat(ask, () => {
            getEndContent = "";
            Txt.text = "";
        },
        (str) => {
            getEndContent += str;
            Txt.text += str;
            TaskDispose();
        }
        );
    }

    void OnClickStream() {
        Debug.Log(" m_AzureGptQueryHandler Request");
        string ask = string.IsNullOrEmpty(IptFld.text) == false ? IptFld.text : "你是谁";
        //ask =HandleAskContent(ask);
        m_Task = m_AzureGptQueryHandler.SendStreamChat(ask, () => {
            getEndContent = "";
            Txt.text = "";
        },
        (str) => {
            getEndContent += str;
            Txt.text += str;
        },
        () => {
            Debug.Log(getEndContent);
            TaskDispose();
        }
        );

    }

    void TaskDispose() {
        m_Task?.Dispose();
        m_Task = null;
    }


}
六、附加
案例工程项目源码:https://download.csdn.net/download/u014361280/87950232
创建新的 .NET Core ,获取 Azure.AI.OpenAI dll 包
1、在控制台窗口(例如 cmd、PowerShell 或 Bash)中,使用 dotnet new 命令创建名为 azure-openai-quickstart 的新控制台应用。 此命令将创建包含单个 C# 源文件的简单“Hello World”项目:Program.cs。
命令:dotnet new console -n azure-openai-quickstart

2、将目录更改为新创建的应用文件夹。 可使用以下代码生成应用程序:
命令:dotnet build

3、使用以下项安装 OpenAI .NET 客户端库
命令:dotnet add package Azure.AI.OpenAI --prerelease

dll 默认下载到如下路径文件夹

检索密钥和终结点
