文章目录
- 一、简介
- 二、核心介绍
- 三、自定义页面背景色
- 三、设置页面背景图(web_accessible_resources)
- 四、设置徽章(Badge)
- 五、桌面通知
- 六、消息通信
- 七、自定义右键菜单(添加、更新、删除)
- 八、Omnibox
- 九、浏览器交互
- 十、根据 url 匹配 popup 窗口能否打开
- 十一、点击插件跳转至扩展页
- 十二、项目地址
一、简介
Chrome 插件(浏览器右上角的扩展插件)实际上是是更底层的浏览器功能扩展,是一个用Web技术开发、用来增强浏览器功能的软件,它其实就是一个由HTML、CSS、JS、图片等资源组成的一个.crx后缀的压缩包;
提供两个文档(内容可能不都是最新的)
文档:http://chrome.cenchy.com/tabs.html
文档:https://developer.mozilla.org/zh-CN/docs/Mozilla/Add-ons/WebExtensions/manifest.json
二、核心介绍
🚨 manifest.json
这是一个 Chrome 插件最重要也是必不可少的文件,用来配置所有和插件相关的配置,必须放在根目录。其中,manifest_version、name、version 这三个是必不可少的,description 和 icons 是推荐的;
下面给出的是一些常见的配置项,均有中文注释;
| 字段名 | 说明 |
|---|---|
| manifest_version | 清单文件的版本,这个必须写,我们这里写 3 |
| name | 插件的名称 |
| version | 插件的版本 |
| description | 插件描述 |
| icons | 图标 |
| background | 配置插件在后台运行的js代码 |
| content_scripts | 定义一系列匹配规则,当URL被匹配时,自动执行js |
| permissions | 插件运行需要的权限 |
| action | 浏览器右上角图标设置 |
| options_page | 右键插件图标的 -> 选项页面,允许用户进行个性化设置 |
| omnibox | 向地址栏注册一个关键字以提供搜索建议,只能设置一个关键字 |
| web_accessible_resources | 用来指定可从扩展程序中访问的资源,包括 HTML、图片、CSS、JavaScript 等文件 |
| theme | 主题配置 |
Chrome 插件没有严格的项目结构要求,只要保证本目录有一个 manifest.json 即可,我们来创建一个插件的清单;
然后创建 icons 文件夹,用来存放所用到的图标;
{
    "name": "CustChromePlug",
    "version": "1.0",
    "manifest_version": 3,
    "description": "Customize Google plug-in demo !",
    "icons": {
        "16": "icons/icon16.png",
        "32": "icons/icon32.png",
        "48": "icons/icon48.png",
        "64": "icons/icon64.png",
        "128": "icons/icon128.png"
    }
}
加载扩展插件
加载扩展插件可以通过 Chrome 进行本地源码加载,也可以直接将生成的 crm 拖拽加载,或者注册 Chrome 扩展开发者上传商店,通过商店加载扩展程序;
- 当前来说我们可以点击 浏览器右上角菜单 > 更多工具 > 扩展程序进入 插件管理页面,也可以直接在地址栏输入 chrome://extensions 访问;
- 右上角开启 - 开发者模式;
- 左上角点击 - 加载已解压的扩展程序,选择我们刚刚创建的项目;
- 浏览器右上角有一个碎片标识可以管理所有的扩展程序,我们可以将我们新创建的程序固定到浏览器右上角(现在可以看到插件已经加载完成,但是图标是灰色,不着急我们接着向下走);

🚨 content-scripts
所谓 content-scripts,其实就是 Chrome 插件中向页面注入脚本的一种形式(虽然名为script,其实还可以包括 css 的),借助content-scripts 我们可以实现通过配置的方式轻松向指定页面注入 JS 和 CSS(如果需要动态注入,可以参考下文);通过使用标准的 DOM,它们可以获取浏览器所访问页面的详细信息,并可以修改这些信息;
| 字段名 | 类型 | 说明 |
|---|---|---|
| matches | array of strings | 必须,定义哪些页面需要注入content script,具体见匹配模式 |
| css | array of strings | 可选,需要向匹配页面中注入的CSS文件,按照定义的顺序依次注入 |
| js | array of strings | 可选,需要向页面中注入的 javascript 文件,按定义顺序注入。 |
| run_at | string | 可选。 控制content script注入的时机。可以是document_start, document_end或者document_idle。默认是document_idle。如果是document_start, 文件将在所有CSS加载完毕,但是没有创建DOM并且没有运行任何脚本的时候注入。如果是document_end,则文件将在创建完DOM之后,但还没有加载类似于图片或frame等的子资源前立刻注入。如果是document_idle,浏览器会在document_end和发出window.onload事件之间的某个时机注入。具体的时机取决与文档加载的复杂度,为加快页面加载而优化 |
| include_globs | array of string | 可选(包含)。控制将content_script注入到哪些匹配的页面中 |
| exclude_globs | array of string | 可选(排除)。控制将content_script注入到哪些匹配的页面中 |
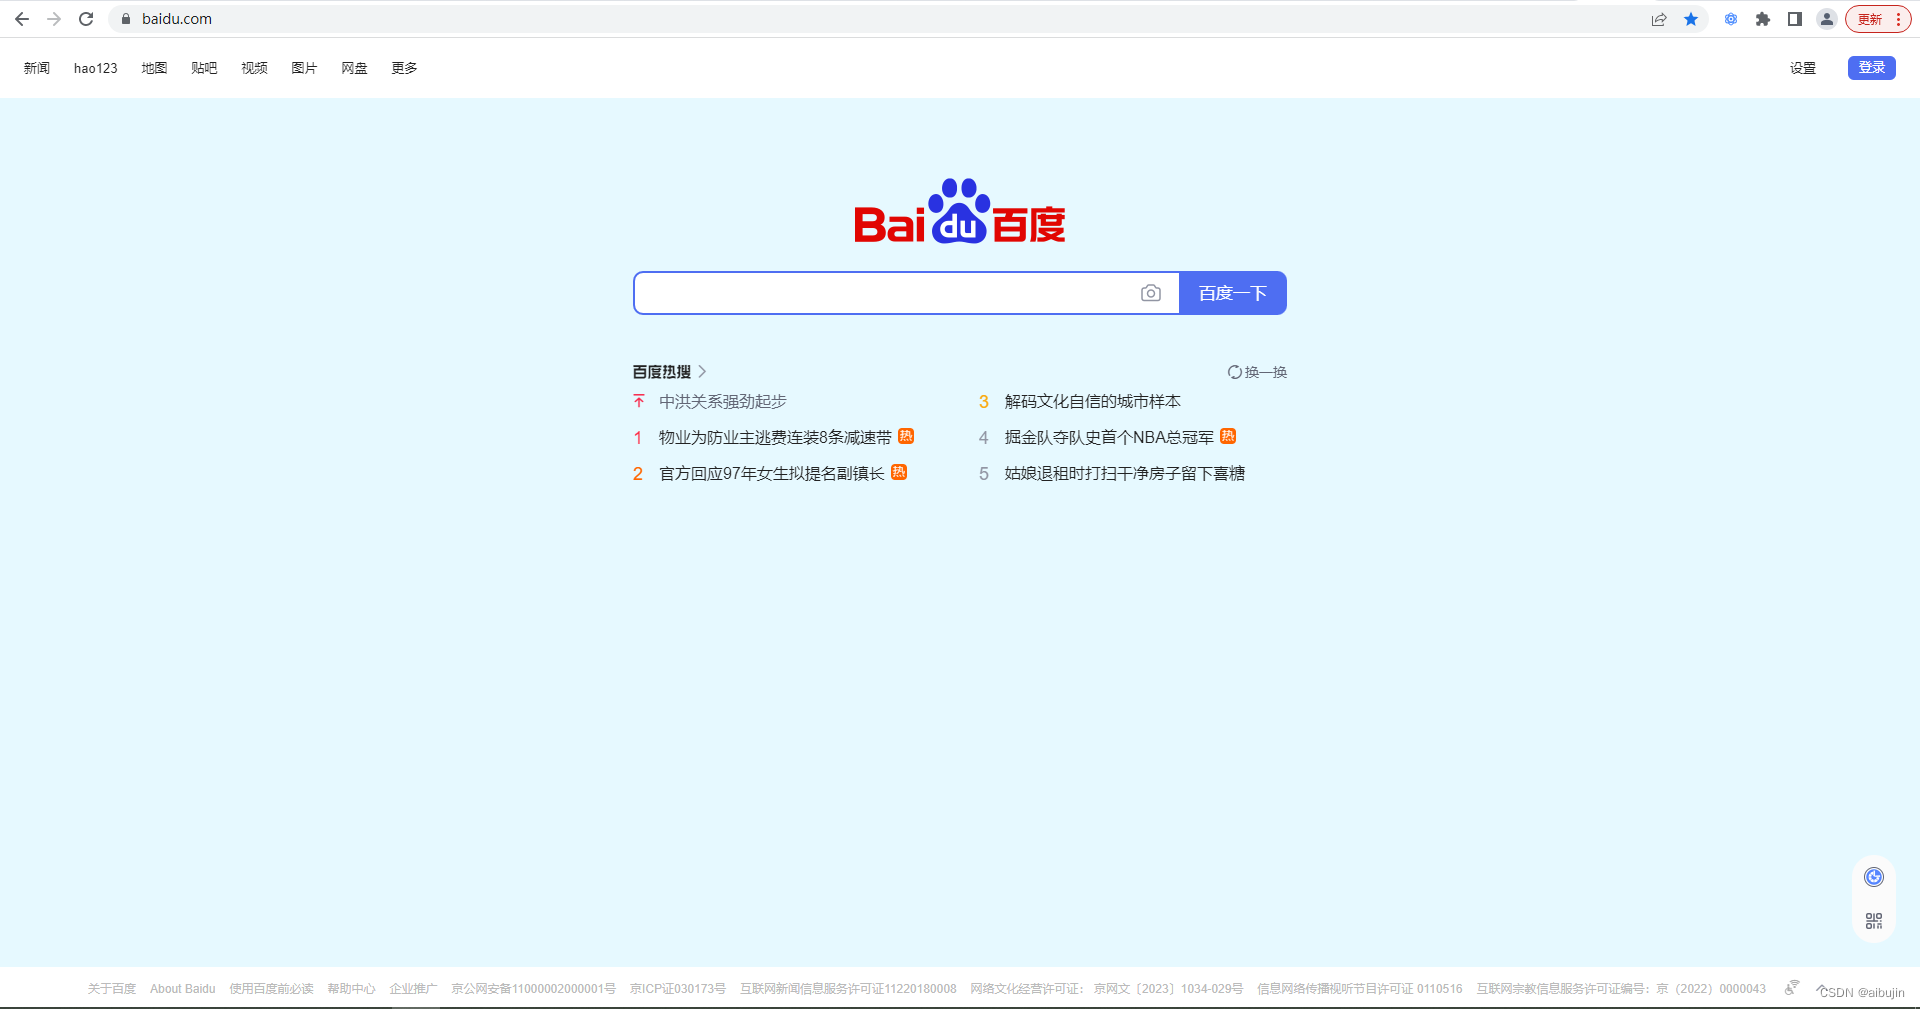
打开我们上面的创建的清单 manifest.json, 添加 content_scripts 配置,当访问 “百度” 的网页时我们添加一个背景色
{
    "content_scripts": [
        {
            "matches": [
                "https://www.baidu.com/*",
                "http://www.baidu.com/*"
            ],
            "js": [
                "js/baidu.js"
            ],
            "css": [],
            "run_at": "document_idle"
        }
    ]
}
创建 js 文件夹,编写 baidu.js 文件
let ghtml = document.getElementsByTagName('html')[0],
    gdiv = document.createElement('div');
gdiv.id = 'changdiv'
gdiv.style.position = 'fixed';
gdiv.style.width = '100%';
gdiv.style.height = '100%';
gdiv.style.top = '0px';
gdiv.style.left = '0px';
gdiv.style.opacity = '0.1';
gdiv.style.zIndex = '-1';
gdiv.style.backgroundColor = 'deepskyblue';

ghtml.appendChild(gdiv);
编写完成后,打开扩展程序,重新加载插件,然后访问百度页面,就可看到效果了;

🚨 popup
popup 是点击 action 图标时打开的一个小窗口网页,焦点离开网页就立即关闭,一般用来做一些临时性的交互;
popup 可以包含任意你想要的HTML内容,并且会自适应大小。可以通过 default_popup 字段来指定 popup 页面,也可以调用setPopup() 方法
打开我们上面的创建的清单 manifest.json, 配置 popup 页面
{
    "action": {
        "default_title": "CustChromePlug popup",
        "default_popup": "popup.html",
        "default_icon": {
            "16": "icons/icon16.png",
            "32": "icons/icon32.png",
            "48": "icons/icon48.png",
            "64": "icons/icon64.png",
            "128": "icons/icon128.png"
        }
    }
}
编写 popup.html
<!DOCTYPE html>
<html>

<head>
    <meta content="text/html; charset=utf-8" http-equiv="Content-Type">
</head>

<body>
    <div>我是 popup.html </div>
</body>

</html>
点击插件图标即可看到 popup 页面,同时插件 icon 也应该有颜色了;

🚨 background
background 是一个常驻的页面,它的生命周期是插件中所有类型页面中最长的,它随着浏览器的打开而打开,随着浏览器的关闭而关闭,所以通常把需要一直运行的、启动就运行的、全局的代码放在background里面;
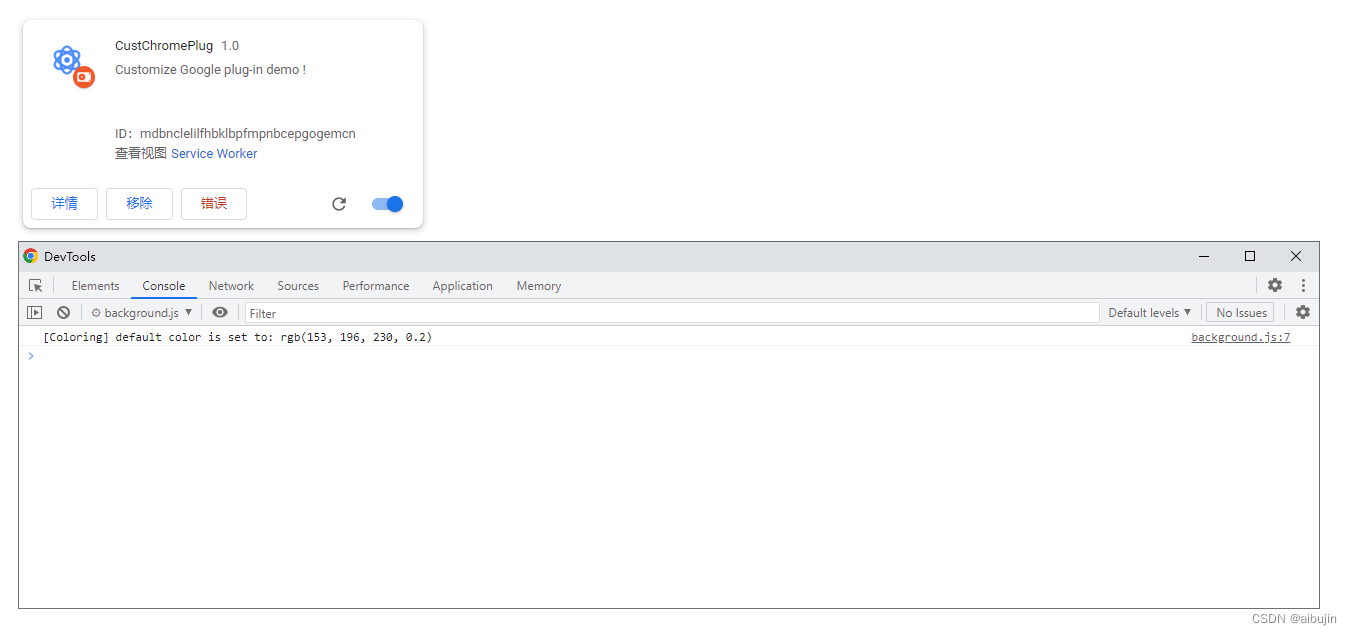
打开我们上面的创建的清单 manifest.json,配置 background, chrome.runtime.onInstalled 事件发生后,将颜色数据进行存储,存储成功后会在插件控制台页打印 “ [Coloring] default color is set to: …“
注意:chrome.runtime.onInstalled ,在 onInstalled 侦听器中,它只能在安装/更新后立即工作不到一分钟,所以需要长时间监听的动作/事件不要放在里面
"background": {
    "service_worker": "background.js"
},
编写 background.js
const color = "rgb(153, 196, 230, 0.2)";

chrome.runtime.onInstalled.addListener(() => {

    chrome.storage.sync.set({ color }, function () {
        // 缓存默认颜色
        console.log(`[Coloring] default color is set to: ${color}`);
    });

});
重新加载插件之后发现并没有输入,还有个错;
- 点击 Service Worker 可打开控制台
- 点击插件,弹出 popup 窗口网页,鼠标右击 > 检测,也可打开控制台
- 鼠标放大插件图标,鼠标右击 查看弹出元素,也可打开控制台
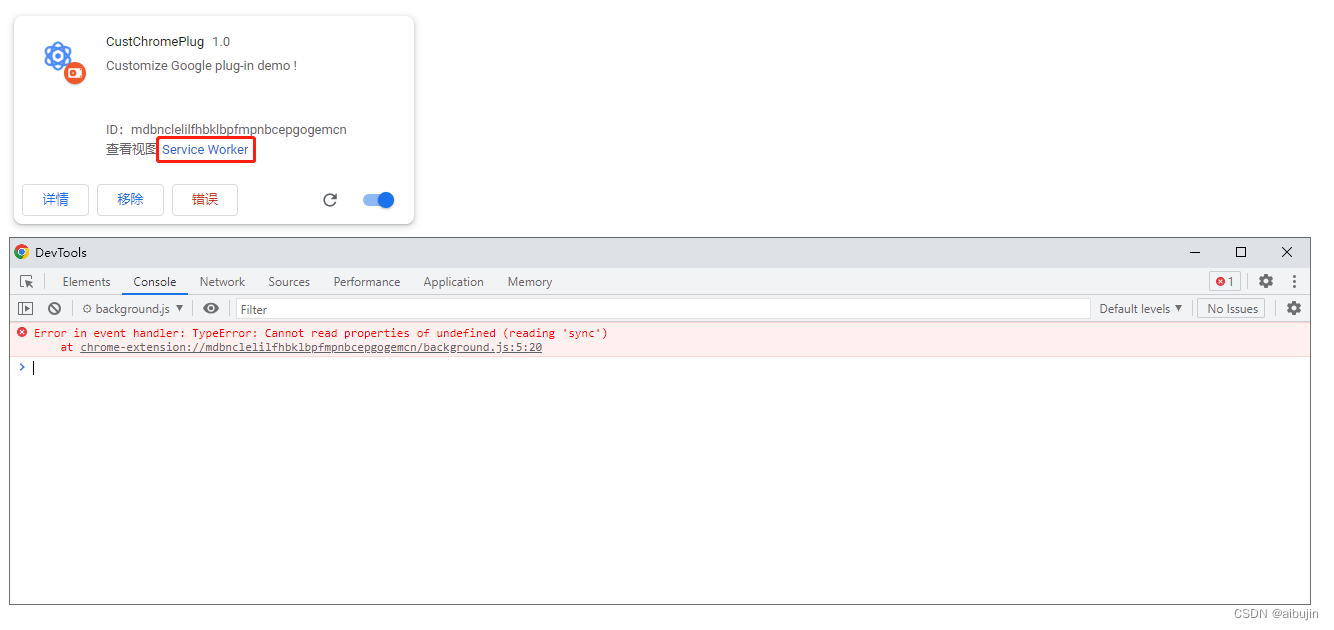
这个错是因为我们没有给与插件运行所需要的权限
"permissions": [
     "storage"
 ]
配置权限之后重新加载插件,即可看到打印信息(或者移除插件重新添加);
🚨 options_page
options_page 是为了让用户设定自己的扩展功能,而提供一个选项页;
打开我们上面的创建的清单 manifest.json,配置 options_page
"options_page": "options.html"
编写 options.html
<html>

<head>
    <meta content="text/html; charset=utf-8" http-equiv="Content-Type">
    <title>My Test Extension Options</title>
</head>

<body>
    <h1>测试扩展选项页面</h1>
</body>

</html>
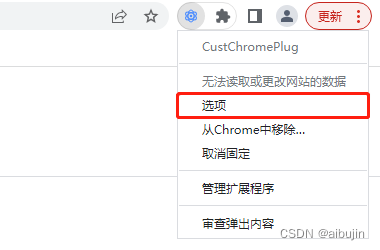
右击插件 > 点击 “选项” 即可以跳转 options.html(也可以点击插件直接跳转至选项页面,chrome.runtime.openOptionsPage(),这个方法放到下面的案例中演示)
🚨 theme
主题是一种特殊的扩展,可以用来改变整个浏览器的外观;主题和标准扩展的打包方式类似,但是主题中不能包含JavaScript或者HTML代码;
下面是示例代码,用来生成一个特定的主题,供大家参考;
"theme": {
    "images" : {
      "theme_frame" : "images/theme_frame_camo.png",
      "theme_frame_overlay" : "images/theme_frame_stripe.png",
      "theme_toolbar" : "images/theme_toolbar_camo.png",
      "theme_ntp_background" : "images/theme_ntp_background_norepeat.png",
      "theme_ntp_attribution" : "images/attribution.png"
    },
    "colors" : {
      "frame" : [71, 105, 91],
      "toolbar" : [207, 221, 192],
      "ntp_text" : [20, 40, 0],
      "ntp_link" : [36, 70, 0],
      "ntp_section" : [207, 221, 192],
      "button_background" : [255, 255, 255]
    },
    "tints" : {
      "buttons" : [0.33, 0.5, 0.47]
    },
    "properties" : {
      "ntp_background_alignment" : "bottom"
    }
  }
颜色使用 RGB 格式,即 [r, g, b] ;图片路径使用基于主题包根路径的相对路径;properties 定义了图片的位置和 repeat 属性;tints 定义了按钮、框架和后台标签页等某些部分的色调,使用HSL格式,取值范围为0到1的浮点型数据;
omnibox、web_accessible_resources 这两个配置放在下面的案例中演示;
三、自定义页面背景色
- 重写 popup.html
<!DOCTYPE html>
<html>

<head>
    <meta content="text/html; charset=utf-8" http-equiv="Content-Type">
    <link rel="stylesheet" href="css/popup.css">
</head>

<body>
    <div class="btn-container">
        <button class="button-1"></button>
        <button class="button-2"></button>
        <button class="button-3"></button>
        <button class="button-4"></button>
        <button class="button-5"></button>
        <button class="button-6"></button>
    </div>
    <script src="./js/popup.js"></script>
</body>

</html>
- 创建 css/popup.css,编写简单的样式,在popup.html 引入;
.btn-container {
    display: flex;
}

button {
    height: 30px;
    width: 30px;
    outline: none;
    margin: 10px;
    border: none;
    border-radius: 2px;
    cursor: pointer;
}

div {
    padding: 10px;
    cursor: pointer;
}

img {
    margin-right: 16px;
    width: 120px;
}

.button-1 {
    background: #FFCCCC;
}

.button-2 {
    background: #FFEE99;
}

.button-3 {
    background: #CCFF99;
}

.button-4 {
    background: #BBFFEE;
}

.button-5 {
    background: #CCCCFF;
}

.button-6 {
    background: #F0BBFF;
}
- 创建 js/popup.js,编写功能,在popup.html 引入;
const btnColor = ['#FFCCCC', '#FFEE99', '#CCFF99', '#BBFFEE', '#CCCCFF', '#F0BBFF']

const btnArr = document.getElementsByTagName('button')

for (let i = 0, len = btnArr.length; i < len; i++) {
    var btn = btnArr[i];
    btn.onclick = async (event) => {
        const index = event.target.className.split('-')[1]

        // 调用Chrome接口取出当前标签页
        const [tab] = await chrome.tabs.query({ active: true, currentWindow: true });

        // 以当前标签页为上下文,执行函数
        chrome.scripting.executeScript({
            target: { tabId: tab.id },
            args: [{ btnColor, index }],  // // 无法访问外面的数据,args 可传递外面的数据
            function: (event) => {
                document.body.style.backgroundColor = event.btnColor[event.index - 1]
            },
        });

    }
}
- 修改 manifest.json, permissions 中增加两个权限;
"permissions": [
    "storage",
    "activeTab",
    "scripting"
],
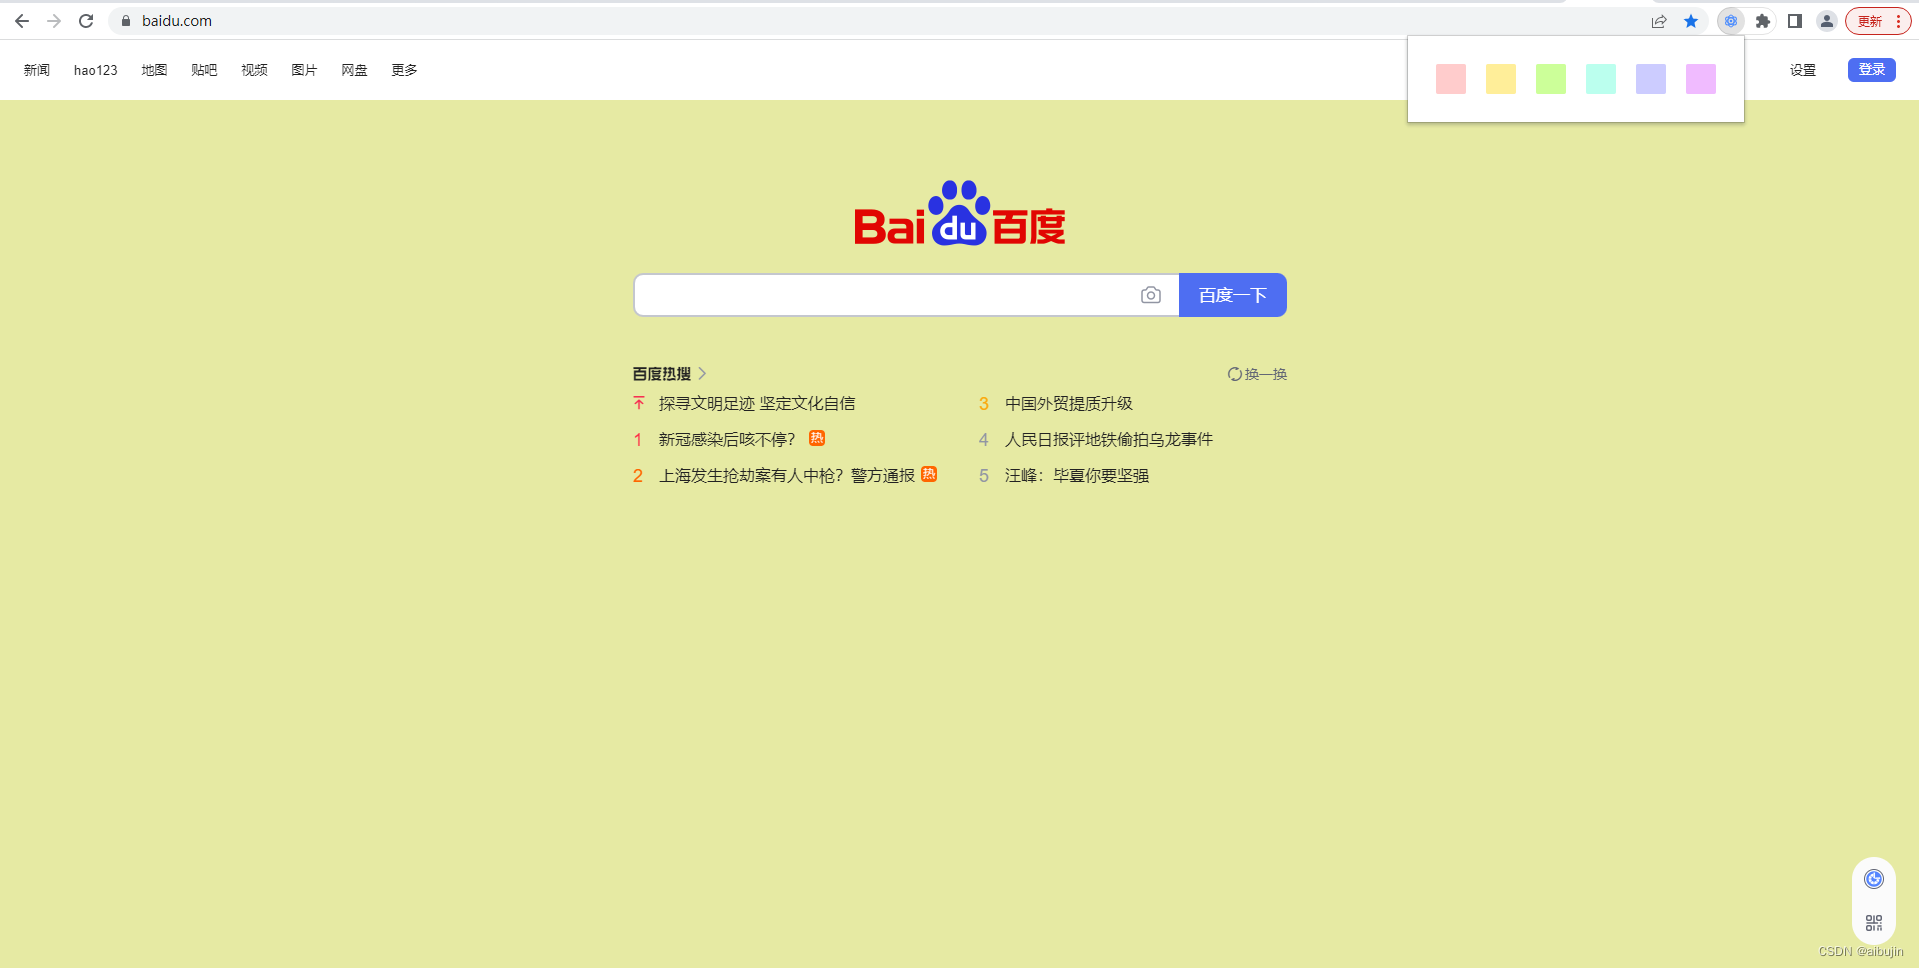
- 然后重新加载插件,跳转百度,即可随便更改背景色(访问别的网页也可以,如果未生效可自行打开控制台查看,背景色是否添加成功,或者样式权重等问题)
三、设置页面背景图(web_accessible_resources)
- 创建 image 文件夹,放入两张图片;
- 编辑 popup.html
<!DOCTYPE html>
<html>

<head>
    <meta content="text/html; charset=utf-8" http-equiv="Content-Type">
    <link rel="stylesheet" href="css/popup.css">
</head>

<body>
    <div class="btn-container">
        <button class="button-1"></button>
        <button class="button-2"></button>
        <button class="button-3"></button>
        <button class="button-4"></button>
        <button class="button-5"></button>
        <button class="button-6"></button>
    </div>
    <div class="img-container">
        <img id="img1" src="image/ed4ab51c81887ee4b3278addd252932d.png">
        <img id="img2" src="image/64d8c0109f9d8cc997e23b67eb9a2b7d.png">
    </div>
    <script src="./js/popup.js"></script>
</body>

</html>
- 编辑 popup.js,增加功能代码
// 点击更换背景色
document.getElementById("img1").onclick = async () => {
    var imgurl = chrome.runtime.getURL("image/ed4ab51c81887ee4b3278addd252932d.png");
    const [tab] = await chrome.tabs.query({ active: true, currentWindow: true });
    chrome.scripting.executeScript({
        target: { tabId: tab.id },
        args: [imgurl],
        function: (event) => {
            document.body.style.backgroundAttachment = 'fixed';
            document.body.style.backgroundSize = '100% 100%';
            document.body.style.backgroundImage = 'url(' + event + ')'
        },
    });
}

document.getElementById("img2").onclick = async () => {
    var imgurl = chrome.runtime.getURL("image/64d8c0109f9d8cc997e23b67eb9a2b7d.png");
    const [tab] = await chrome.tabs.query({ active: true, currentWindow: true });
    chrome.scripting.executeScript({
        target: { tabId: tab.id },
        args: [imgurl],
        function: changeBg,
    });
}

function changeBg(event) {
    document.body.style.backgroundAttachment = 'fixed';
    document.body.style.backgroundSize = '100% 100%';
    document.body.style.backgroundImage = 'url(' + event + ')'
}
- 修改 manifest.json, 配置 web_accessible_resources,否则图片无法访问;
"web_accessible_resources": [
    {
        "resources": [
            "image/*"
        ],
        "matches": [
            "http://*/*",
            "https://*/*"
        ]
    }
]
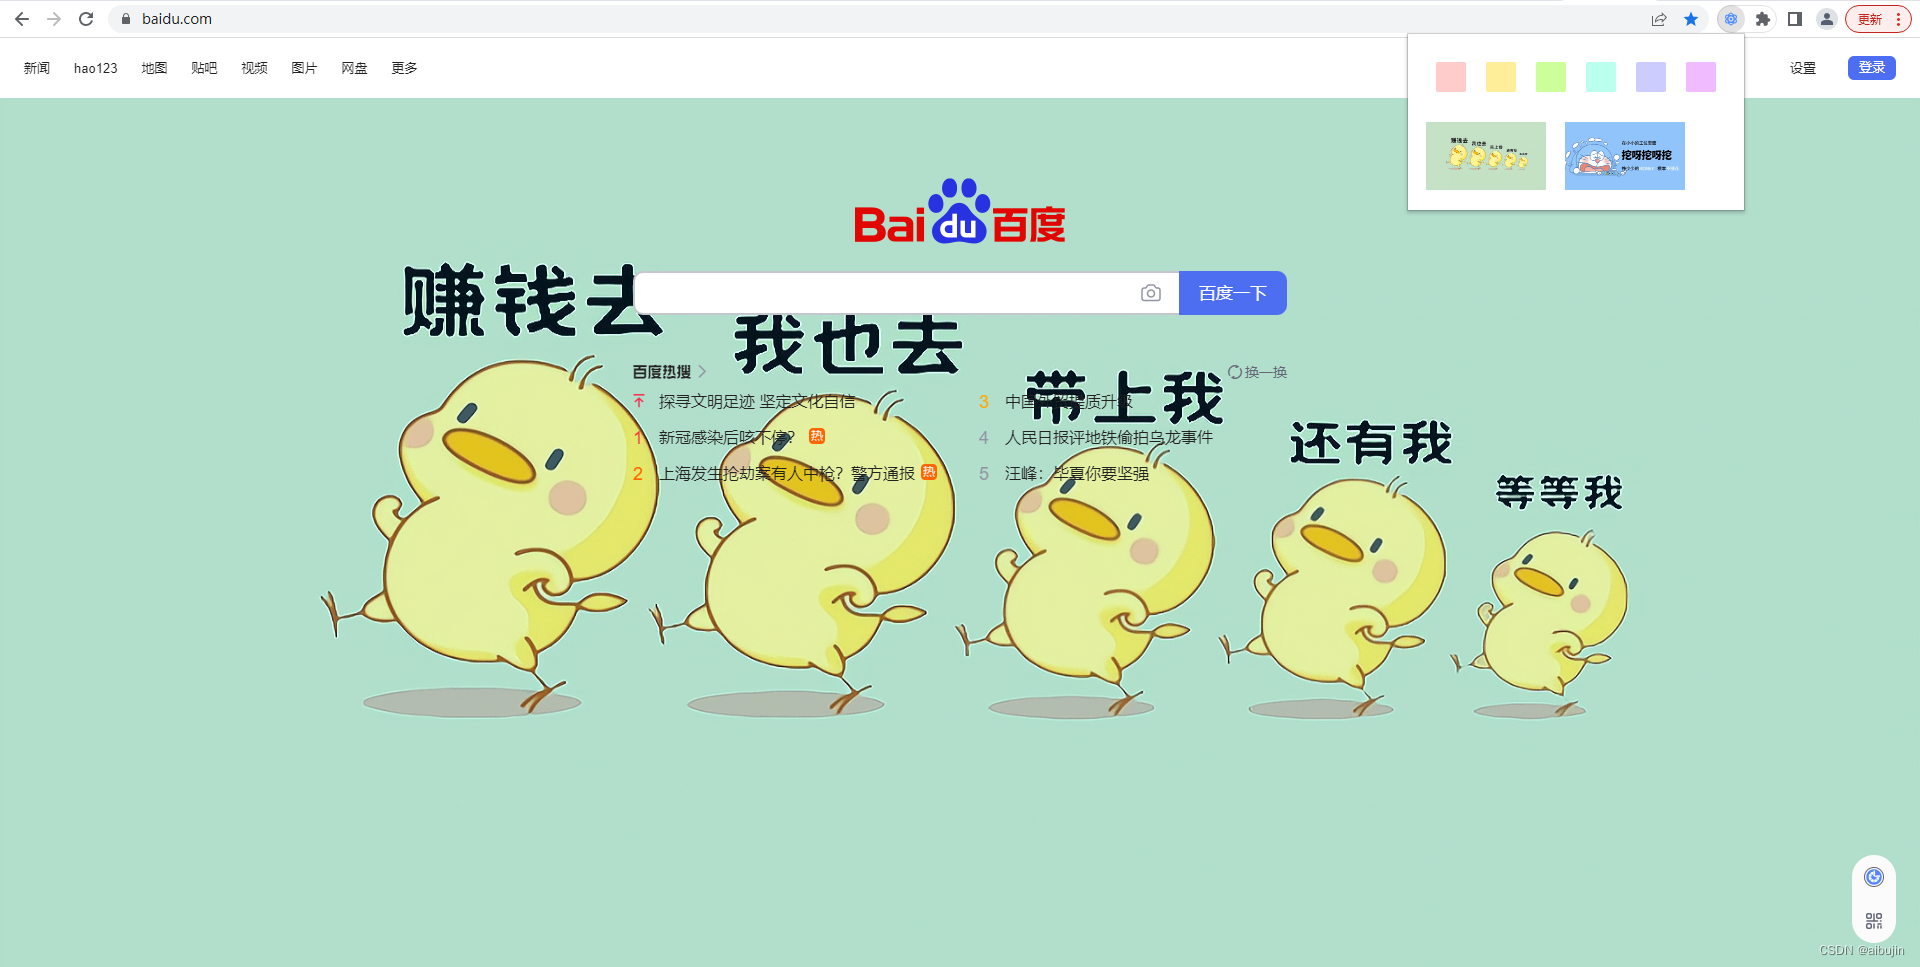
- 然后重新加载插件,跳转百度,即可随便设置背景图;
四、设置徽章(Badge)
- 编辑 popup.html
<!DOCTYPE html>
<html>

<head>
    <meta content="text/html; charset=utf-8" http-equiv="Content-Type">
    <link rel="stylesheet" href="css/popup.css">
</head>

<body>
    <div class="btn-container">
        <button class="button-1"></button>
        <button class="button-2"></button>
        <button class="button-3"></button>
        <button class="button-4"></button>
        <button class="button-5"></button>
        <button class="button-6"></button>
    </div>
    <div class="img-container">
        <img id="img1" src="image/ed4ab51c81887ee4b3278addd252932d.png">
        <img id="img2" src="image/64d8c0109f9d8cc997e23b67eb9a2b7d.png">
    </div>
    <div id="badgeText">设置徽章文本</div>
    <div id="badgeBg">设置徽章背景颜色</div>
    <script src="./js/popup.js"></script>
</body>

</html>
- 编辑 popup.js,增加功能代码
// 设置徽章文本
document.getElementById("badgeText").onclick = function () {
    // 设置徽章文本
    chrome.action.setBadgeText({ "text": '88' });
}

// 设置徽章背景颜色
document.getElementById("badgeBg").onclick = function () {
    // 设置徽章背景颜色
    // color 范围为[0,255]整数构成的结构(必须是整数),用来描述badge的RGBA颜色
    chrome.action.setBadgeBackgroundColor({ color: [153, 96, 230, 2] });
}
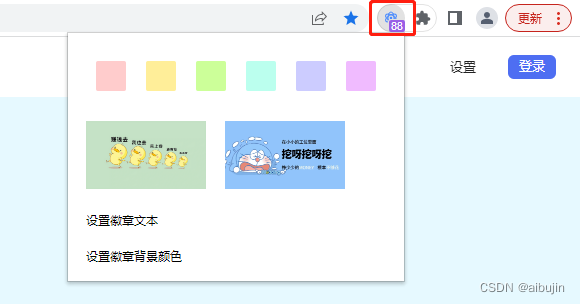
- 重新加载插件,即可看到效果;
五、桌面通知
- 通知用户发生了一些重要的事情,桌面通知会显示在浏览器窗口之外;
- 编辑 popup.html
<!DOCTYPE html>
<html>

<head>
    <meta content="text/html; charset=utf-8" http-equiv="Content-Type">
    <link rel="stylesheet" href="css/popup.css">
</head>

<body>
    <div class="btn-container">
        <button class="button-1"></button>
        <button class="button-2"></button>
        <button class="button-3"></button>
        <button class="button-4"></button>
        <button class="button-5"></button>
        <button class="button-6"></button>
    </div>
    <div class="img-container">
        <img id="img1" src="image/ed4ab51c81887ee4b3278addd252932d.png">
        <img id="img2" src="image/64d8c0109f9d8cc997e23b67eb9a2b7d.png">
    </div>
    <div id="badgeText">设置徽章文本</div>
    <div id="badgeBg">设置徽章背景颜色</div>
    <div id="notify">桌面通知</div>
    <script src="./js/popup.js"></script>
</body>

</html>
- 编辑 popup.js,增加功能代码
// 桌面通知
document.getElementById("notify").onclick = function () {
    notify()
    setTimeout(function (e) {
        // 清除桌面通知成功
        // 这里的id只要和创建的时候设置id值一样就行了,就可以清理对应id的通知了
        chrome.notifications.clear("id");
    }, 2000);
}

// 桌面通知
// id: 保证每个通知的唯一,这个id是字符串类型
// type: 通知类型,有basic(默认)、image、list、progress
// iconUrl: 图标的url
// imageUrl:"image"类型的通知的图片的URL
// appIconMaskUrl: 应用图标URL的掩码,用以规范URL,这个扩展应该是用不到
// title: 通知主标题
// message: 通知副标题
// contextMessage: 通知的备选内容,
// progress:进度
// buttons: [{title: '按钮1的标题', iconUrl:' icon.png'},{title: '按钮2的标题',iconUrl: 'icon.png'}],  最多两个按钮
// items: [{title: '消息1', message: '消息1'},{title: '消息2', message: '消息2'}], 通知列表,对应type是list时使用,只有title和message两个属性
// eventTime: Date.now() + 2000  通知的时间戳
function notify() {
    chrome.notifications.create("id", {
        type: 'basic',
        title: '桌面通知',
        message: '自定义桌面消息通知 !!!',
        iconUrl: 'icons/icon16.png',
        contextMessage: '2 秒后,清除桌面通知 !!!',
        buttons: [
            {
                title: '按钮标题',
                iconUrl: 'icons/icon16.png'
            }
        ],
        eventTime: Date.now() + 2000
    },
        (id) => console.log('111111111'));
}
- 修改 manifest.json, permissions 中增加权限;
"permissions": [
    "storage",
    "activeTab",
    "scripting",
    "notifications"
],
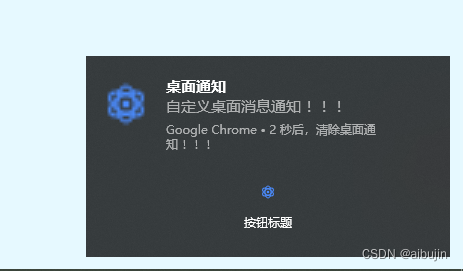
- 重新加载插件,即可看到效果;
六、消息通信
- 编辑 popup.html
<!DOCTYPE html>
<html>

<head>
    <meta content="text/html; charset=utf-8" http-equiv="Content-Type">
    <link rel="stylesheet" href="css/popup.css">
</head>

<body>
    <div class="btn-container">
        <button class="button-1"></button>
        <button class="button-2"></button>
        <button class="button-3"></button>
        <button class="button-4"></button>
        <button class="button-5"></button>
        <button class="button-6"></button>
    </div>
    <div class="img-container">
        <img id="img1" src="image/ed4ab51c81887ee4b3278addd252932d.png">
        <img id="img2" src="image/64d8c0109f9d8cc997e23b67eb9a2b7d.png">
    </div>
    <div id="badgeText">设置徽章文本</div>
    <div id="badgeBg">设置徽章背景颜色</div>
    <div id="notify">桌面通知</div>
    <div id="message">消息通信</div>
    <script src="./js/popup.js"></script>
</body>

</html>
- 编辑 popup.js,增加发送功能代码,同时接收来自 background.js 的回应;
document.getElementById("message").onclick = function () {
    chrome.runtime.sendMessage({ 'msg': 'Hello' }, function (event) {
        chrome.notifications.create("msg", {
            type: 'basic',
            title: '响应通知',
            message: `收到响应,响应报文: ${event.farewell}`,
            iconUrl: 'icons/icon16.png',
        })
    })
}
- 编辑 background.js,接收 popup 传递的消息
// chrome.runtime.onMessage.addListener(callback)
// 此处的callback为必选参数,为回调函数。
// callback接收到的参数有三个,分别是message、sender和sendResponse,即消息内容、消息发送者相关信息和相应函数。
// 其中sender对象包含4个属性,分别是tab、id、url和tlsChannelId,tab是发起消息的标签
chrome.runtime.onMessage.addListener(
    function (message, sender, sendResponse) {
        if (message.msg == 'Hello') {
            sendResponse({ farewell: "goodbye" });
        }
    }
);
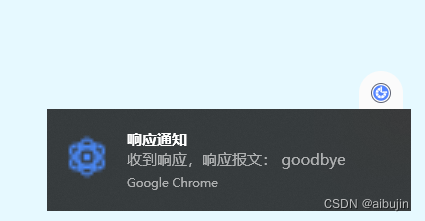
- 重新加载插件,即可看到效果;
七、自定义右键菜单(添加、更新、删除)
-
chrome.contextMenus 模块用于在 Chrome 的右键菜单中增加自己的菜单项;
你可以选择针对不同类型的对象(如图片,链接,页面)增加右键菜单项;
你可以根据需要添加多个右键菜单项。一个扩展里添加的多个右键菜单项会被Chrome自动组合放到对应扩展名称的二级菜单里。
右键菜单可以出现在任意文档(或文档中的框架)中,;若想控制右键菜单在不同文档中的显示,可以在调用 create(object createProperties, function callback) 和update(object createProperties, function callback) 时指定 documentUrlPatterns;
| 字段名 | 类型 | 说明 |
|---|---|---|
| type | optional enumerated string [“normal”, “checkbox”, “radio”, “separator”] | 右键菜单项的类型;默认为“normal” |
| title | optional string | 右键菜单项的显示文字;除非为“separator”类型,否则此参数是必须的。如果类型为“selection”,您可以在字符串中使用%s显示选定的文本;例如,如果参数的值为 “Translate ‘%s’ to Pig Latin”,而用户还选中了文本“cool”,那么显示在菜单中的将会是 “Translate ‘cool’ to Pig Latin” |
| checked | optional boolean | Checkbox或者radio的初始状态:true代表选中,false代表未选中;在给定的radio中只能有一个处于选中状态 |
| contexts | optional array of string [“all”, “page”, “frame”, “selection”, “link”, “editable”, “image”, “video”, “audio”] | 右键菜单项将会在这个列表指定的上下文类型中显示。默认为“page” |
| onclick | optional function | 当菜单项被点击时触发的函数;默认有两个参数,info ( OnClickData ) 右键菜单项被点击时相关的上下文信息,tab ( Tab ) 右键菜单项被点击时,当前标签的详细信息 |
| parentId | optional integer | 右键菜单项的父菜单项ID;指定父菜单项将会使此菜单项成为父菜单项的子菜单 |
| documentUrlPatterns | optional array of string | 这使得右键菜单只在匹配此模式的url页面上生效 |
| targetUrlPatterns | optional array of string | 类似于documentUrlPatterns,但是您可以针对img/audio/video标签的src属性和anchor标签的href做过滤 |
| enabled | optional boolean | 启用或者禁用此菜单项,启用为true,禁用为false;默认为true |
- 编辑 popup.html
<!DOCTYPE html>
<html>

<head>
    <meta content="text/html; charset=utf-8" http-equiv="Content-Type">
    <link rel="stylesheet" href="css/popup.css">
</head>

<body>
    <div class="btn-container">
        <button class="button-1"></button>
        <button class="button-2"></button>
        <button class="button-3"></button>
        <button class="button-4"></button>
        <button class="button-5"></button>
        <button class="button-6"></button>
    </div>
    <div class="img-container">
        <img id="img1" src="image/ed4ab51c81887ee4b3278addd252932d.png">
        <img id="img2" src="image/64d8c0109f9d8cc997e23b67eb9a2b7d.png">
    </div>
    <div id="badgeText">设置徽章文本</div>
    <div id="badgeBg">设置徽章背景颜色</div>
    <div id="notify">桌面通知</div>
    <div id="message">消息通信</div>
    <div id="contextMenus">自定义右键菜单</div>
    <script src="./js/popup.js"></script>
</body>

</html>
- 编辑 popup.js,向 background.js 发送创建菜单的消息,同时接收来自 background.js 的回应;
// 自定义右键菜单
document.getElementById("contextMenus").onclick = function () {
    chrome.runtime.sendMessage({ 'msg': 'contextMenus' }, function (event) {
        chrome.notifications.create("menus", {
            type: 'basic',
            title: '响应通知',
            message: `收到响应,响应报文: ${event.farewell}`,
            iconUrl: 'icons/icon16.png',
        })
    })
}
- 编辑 background.js,接收消息,创建菜单;
// chrome.runtime.onMessage.addListener(callback)
// 此处的callback为必选参数,为回调函数。
// callback接收到的参数有三个,分别是message、sender和sendResponse,即消息内容、消息发送者相关信息和相应函数。
// 其中sender对象包含4个属性,分别是tab、id、url和tlsChannelId,tab是发起消息的标签
chrome.runtime.onMessage.addListener(
    function (message, sender, sendResponse) {
        if (message.msg == 'Hello') {
            sendResponse({ farewell: "goodbye" });
        } else if (message.msg == 'contextMenus') {
            // 创建自定义右键菜单
            contextMenus()
            sendResponse({ farewell: "菜单创建成功 !!!" });
        }
    }
);


// 自定义右键菜单
function contextMenus() {
    chrome.contextMenus.create({
        title: "自定义右键快捷菜单", //菜单的名称
        id: '01', //一级菜单的id
        contexts: ['page'], // page表示页面右键就会有这个菜单,如果想要当选中文字时才会出现此右键菜单,用:selection
    });

    chrome.contextMenus.create({
        title: '百度', //菜单的名称
        id: '0101',//二级菜单的id
        parentId: '01',//表示父菜单是“右键快捷菜单”
        contexts: ['page'],
    });

    chrome.contextMenus.create({
        title: 'CSDN', //菜单的名称
        id: '0102',
        parentId: '01',//表示父菜单是“右键快捷菜单”
        contexts: ['page'],
    });

    chrome.contextMenus.create({
        title: '自定义选中文字跳转百度搜索', //菜单的名称
        id: '02',
        contexts: ['selection'],
    });

    chrome.contextMenus.onClicked.addListener((info, tab) => {
        if (info.menuItemId == '0101') {
            var createData = {
                url: "https://baidu.com",
                type: "popup",
                top: 200,
                left: 300,
                width: 1300,
                height: 800
            }
            // 创建(打开)一个新的浏览器窗口,可以提供大小、位置或默认 URL 等可选参数
            chrome.windows.create(createData);
        } else if (info.menuItemId == '02') {
            // 选中文字跳转百度检索
            chrome.tabs.create({ url: 'https://www.baidu.com/s?ie=utf-8&wd=' + encodeURI(info.selectionText) });
        } else if (info.menuItemId == '0102') {
            chrome.tabs.create({ url: 'https://www.csdn.net' });
        }
    })
}
- 修改 manifest.json, permissions 中增加权限;
"permissions": [
     "storage",
     "activeTab",
     "scripting",
     "notifications",
     "contextMenus"
 ],
- 重新加载插件,鼠标右击,即可看到效果;
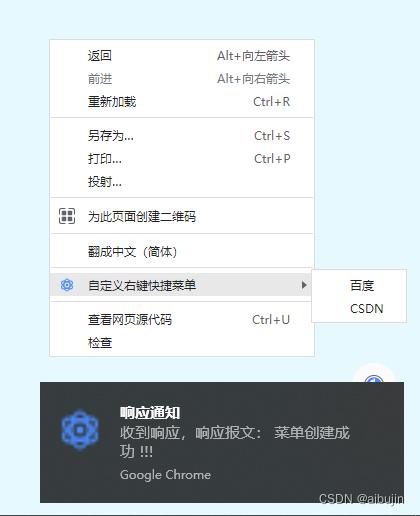
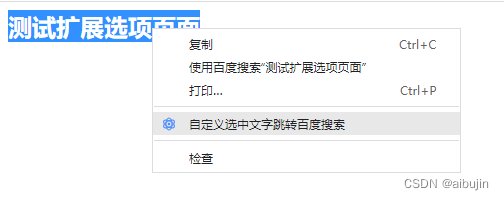
- 选中文字,鼠标右击,亦可直接跳转百度检索;
- 编辑 popup.html,增加更新、删除功能
<div id="removeContextMenus">删除第一个自定义右键菜单</div>
 <div id="updateContextMenus">更新第二个自定义右键菜单</div>
 <div id="removeAll">删除所有自定义右键菜单</div>
- 编辑 popup.js
// 移除自定义菜单
document.getElementById("removeAll").onclick = function () {
    chrome.contextMenus.removeAll(() => {
        chrome.notifications.create("removeAll", {
            type: 'basic',
            title: '移除自定义菜单',
            message: '移除自定义菜单 !!!',
            iconUrl: 'icons/icon16.png',
        })
    })
}

// 更新第二个自定义右键菜单
document.getElementById("updateContextMenus").onclick = function () {
    chrome.contextMenus.update('0102',
        {
            type: 'checkbox',
            checked: true,
            title: '我是更新后的菜单',
            parentId: '01',
            contexts: ['page'],

        }, () => {
            chrome.notifications.create("update", {
                type: 'basic',
                title: '更新第二个菜单',
                message: '更新第二个菜单 !!!',
                iconUrl: 'icons/icon16.png',
            })
        })
}

// 移除第一个菜单
document.getElementById("removeContextMenus").onclick = function () {
    chrome.contextMenus.remove('0101', () => {
        chrome.notifications.create("remove", {
            type: 'basic',
            title: '移除第一个菜单',
            message: '移除第一个右键菜单 !!!',
            iconUrl: 'icons/icon16.png',
        })
    })
}
八、Omnibox
-
omnibox 应用程序界面允许向Google Chrome的地址栏注册一个关键字,地址栏也叫 omnibox;
当用户输入你的扩展关键字,用户开始与你的扩展交互,每个击键都会发送给你的扩展,扩展提供建议作为相应的响应;
-
编辑 background.js,增加下面的代码;
// 用户在地址栏上输入了一个关键词(在 manifest.json / omnibox 中 keyword)然后按下tab键
// 当检测到特定的关键词与我们事先指定的关键词相匹配时将调用对应的插件

// 当用户按下tab chrome将输入交给插件,然后输入第一个字符之后触发此事件
chrome.omnibox.onInputStarted.addListener(() => {
    console.log("[" + new Date() + "] omnibox event: onInputStarted");
});

// 当用户的输入改变之后
// text 用户的当前输入
// suggest 调用suggest为用户提供搜索建议
chrome.omnibox.onInputChanged.addListener((text, suggest) => {
    console.log("[" + new Date() + "] omnibox event: onInputChanged, user input: " + text);
    // 为用户提供一些搜索建议
    suggest([
        {
            "content": text + "*",
            "description": "是否跳转 baidu 检索" + text + "检索相关内容?"
        },
        {
            "content": text + " abj",
            "description": "是否要查看“" + text + " abj” 有关的内容?"
        },
        {
            "content": text + " aibujn",
            "description": "是否要查看“" + text + " aibujn” 有关的内容?"
        }
    ]);
});

// 按下回车时事件,表示向插件提交了一个搜索
chrome.omnibox.onInputEntered.addListener((text, disposition) => {
    console.log("[" + new Date() + "] omnibox event: onInputEntered, user input: " + text + ", disposition: " + disposition);
    if (text.indexOf('*') != -1) {
        chrome.tabs.create({ url: 'https://www.baidu.com/s?ie=utf-8&wd=' + encodeURI(text) });
    }
});

// 取消输入时触发的事件,注意使用上下方向键在搜索建议列表中搜搜也会触发此事件
chrome.omnibox.onInputCancelled.addListener(() => {
    console.log("[" + new Date() + "] omnibox event: onInputCancelled");
});

// 当删除了搜索建议时触发的
chrome.omnibox.onDeleteSuggestion.addListener(text => {
    console.log("[" + new Date() + "] omnibox event: onDeleteSuggestion, text: " + text);
});

// 设置默认的搜索建议,会显示在搜索建议列表的第一行位置,content省略使用用户当前输入的text作为content
chrome.omnibox.setDefaultSuggestion({
    "description": "啥也不干,就是随便试试...."
})
- 修改 manifest.json,增加 omnibox 配置对应的关键词;
"omnibox": {
     "keyword": "aibujin"
 }
-
重新加载插件,在地址栏输入"aibujin",然后按 tab,即可看到效果;
参考地址:https://www.cnblogs.com/cc11001100/p/12353361.html
九、浏览器交互
- 编辑 popup.html
<!DOCTYPE html>
<html>

<head>
    <meta content="text/html; charset=utf-8" http-equiv="Content-Type">
    <link rel="stylesheet" href="css/popup.css">
</head>

<body>
    <div class="btn-container">
        <button class="button-1"></button>
        <button class="button-2"></button>
        <button class="button-3"></button>
        <button class="button-4"></button>
        <button class="button-5"></button>
        <button class="button-6"></button>
    </div>
    <div class="img-container">
        <img id="img1" src="image/ed4ab51c81887ee4b3278addd252932d.png">
        <img id="img2" src="image/64d8c0109f9d8cc997e23b67eb9a2b7d.png">
    </div>
    <div id="badgeText">设置徽章文本</div>
    <div id="badgeBg">设置徽章背景颜色</div>
    <div id="notify">桌面通知</div>
    <div id="message">消息通信</div>
    <div id="contextMenus">自定义右键菜单</div>
    <div id="removeContextMenus">删除第一个自定义右键菜单</div>
    <div id="updateContextMenus">更新第二个自定义右键菜单</div>
    <div id="removeAll">删除所有自定义右键菜单</div>
    <div id="capture">捕获窗口</div>
    <div id="linkBidu">跳转百度首页</div>
    <div id="openWindows">打开新窗口</div>
    <div id="createPopup">打开自定义窗口</div>
    <div id="windowsMax">窗口最大化</div>
    <div id="windowsMin">窗口最小化</div>
    <div id="currentTab">当前标签打开新网页</div>
    <div id="closeCurrentPage">关闭当前标签页</div>
    <div id="closeCurrentWindow">关闭浏览器</div>
    <script src="./js/popup.js"></script>
</body>

</html>
- 编辑 popup.js,增加下面的功能代码
// 捕获窗口
// chrome.tabs.captureVisibleTab(integer windowId, object options, function callback)
// windowId ( optional integer )
// 目标窗口,默认值为当前窗口.

// options ( optional object )
// 设置抓取图像参数。设置图像抓取的参数,比如生成的图像的格式。
//     format ( optional enumerated string [“jpeg”, “png”] )
//     生成的图像的格式。默认是jpeg。
//     quality ( optional integer )
//     如果格式是’jpeg’,控制结果图像的质量。此参数对PNG图像无效。当质量降低的时候,抓取的画质会下降,需要存储的字节数也会递减。

// callback ( function ),function(string dataUrl) {...};
//     dataUrl ( string )
//     被抓取标签的可视区域的URL。此URL可能会作为图像的src属性。格式为base64的格式
document.getElementById("capture").onclick = function () {
    chrome.tabs.captureVisibleTab(null, {
        format: "png",
        quality: 100
    }, dataUrl => {
        console.log(dataUrl)
        chrome.tabs.create({ url: dataUrl });
    })
}

// 跳转百度首页
document.getElementById("linkBidu").onclick = function () {
    chrome.tabs.create({ url: 'https://www.baidu.com' });
}

// 打开新窗口
document.getElementById("openWindows").onclick = function () {
    chrome.windows.create({ state: 'maximized' });
}

// 关闭浏览器
document.getElementById("closeCurrentWindow").onclick = function () {
    chrome.windows.getCurrent({}, (currentWindow) => {
        chrome.windows.remove(currentWindow.id);
    });
}

// 最大化窗口
document.getElementById("windowsMax").onclick = function () {
    chrome.windows.getCurrent({}, (currentWindow) => {
        // state: 可选 'minimized', 'maximized' and 'fullscreen'
        chrome.windows.update(currentWindow.id, { state: 'maximized' });
    });
}

// 最小化窗口
document.getElementById("windowsMin").onclick = function () {
    chrome.windows.getCurrent({}, (currentWindow) => {
        chrome.windows.update(currentWindow.id, { state: 'minimized' });
    });
}

// 当前标签打开新网页
document.getElementById("currentTab").onclick = async () => {
    const [tab] = await chrome.tabs.query({ active: true, currentWindow: true });
    chrome.tabs.update(tab.id, { url: 'https://image.baidu.com/' });
}

// 关闭当前标签页
document.getElementById("closeCurrentPage").onclick = async () => {
    const [tab] = await chrome.tabs.query({ active: true, currentWindow: true });
    chrome.tabs.remove(tab.id);
}

// 创建一个新浏览器窗口
document.getElementById("createPopup").onclick = function () {
    var createData = {
        url: "https://baidu.com",
        type: "popup",
        top: 200,
        left: 300,
        width: 1300,
        height: 800
    }
    // 创建(打开)一个新的浏览器窗口,可以提供大小、位置或默认 URL 等可选参数
    chrome.windows.create(createData);
}
- 重新加载插件,即可看到效果;
十、根据 url 匹配 popup 窗口能否打开
- 修改 manifest.json, permissions 中增加权限;
"permissions": [
    "storage",
    "activeTab",
    "scripting",
    "notifications",
    "contextMenus",
    "declarativeContent"
],
- 修改 background.js, 禁用action, chrome.action.disable(),然后添加自定义规则
chrome.action.disable();

// 删除现有规则,只应用我们的规则
chrome.declarativeContent.onPageChanged.removeRules(undefined, () => {
    // 添加自定义规则
    chrome.declarativeContent.onPageChanged.addRules([
        {
            // 定义规则的条件
            conditions: [
                new chrome.declarativeContent.PageStateMatcher({

                    /**
                     *   下面两个方式根据需要任取一个即可
                     *
                     *   注意:hostEquals 规则永远不会匹配任何内容,因为根据 the documentation(https://developer.chrome.com/extensions/declarativeContent#type-PageStateMatcher),它将与URL的主机部分进行比较,
                     *   例如简单的www.example.com,因此它不能包含 / 或 *;请注意,chrome.declarativeContent使用自己的过滤系统,
                     *   它不支持 content_scripts 或 webRequest 使用的任何常用匹配模式。
                     */

                    // pageUrl: { hostEquals: 'blog.csdn.net', pathPrefix: '/nav/', schemes: ['https'] },
                    pageUrl: { urlPrefix: 'https://www.baidu.com/' },
                }),
            ],
            // 满足条件时显示操作
            actions: [new chrome.declarativeContent.ShowAction()],
        },
    ]);
});
- 重新加载插件,即可看到效果;
十一、点击插件跳转至扩展页
-
目前我们点击插件弹出 popup.html, 现在改为点击插件直接跳转 options.html
-
修改 background.js, 添加 chrome.action.onClicked.addListener
// 点击插件跳转至 options.html
chrome.action.onClicked.addListener((tab) => {
    chrome.runtime.openOptionsPage();
});
- 修改 manifest.json, 将 action 改为空对象
"action": {
    // "default_title": "CustChromePlug popup",
    // "default_popup": "popup.html",
    // "default_icon": {
    //     "16": "icons/icon16.png",
    //     "32": "icons/icon32.png",
    //     "48": "icons/icon48.png",
    //     "64": "icons/icon64.png",
    //     "128": "icons/icon128.png"
    // }
},
- 重新加载插件,访问 “百度” 点击插件(我们在上面添加自定义规则),即可看到效果;
十二、项目地址
项目地址:https://github.com/aibuijn/chrome-plug


