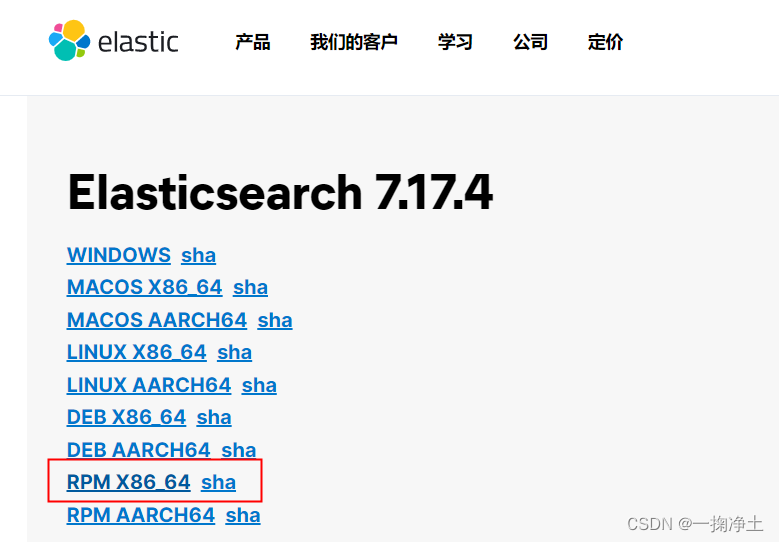
一、下载Elasticsearch7.17.4 的rpm包
下载地址: https://www.elastic.co/cn/downloads/past-releases/elasticsearch-7-17-4

二、建立elasticsearch的yum源
vim /etc/yum.repos.d/es.repo
[elasticsearch]
name=Elasticsearch repository for 7.x packages
baseurl=https://artifacts.elastic.co/packages/7.x/yum
gpgcheck=0
gpgkey=https://artifacts.elastic.co/GPG-KEY-elasticsearch
enabled=1
autorefresh=1
type=rpm-md
刷新yum cache
[root@sg softs]# yum makecache
已加载插件:fastestmirror
Loading mirror speeds from cached hostfile
base                                                                                                                                                         | 3.6 kB  00:00:00
elasticsearch                                                                                                                                                | 1.3 kB  00:00:00
epel                                                                                                                                                         | 4.7 kB  00:00:00
extras                                                                                                                                                       | 2.9 kB  00:00:00
updates                                                                                                                                                      | 2.9 kB  00:00:00
(1/15): base/7/x86_64/other_db                                                                                                                               | 2.6 MB  00:00:00
(2/15): base/7/x86_64/filelists_db                                                                                                                           | 7.2 MB  00:00:00
(3/15): elasticsearch/primary                                                                                                                                | 431 kB  00:00:00
(4/15): epel/x86_64/filelists_db                                                                                                                             |  12 MB  00:00:00
(5/15): epel/x86_64/updateinfo                                                                                                                               | 1.0 MB  00:00:00
(6/15): epel/x86_64/prestodelta                                                                                                                              |  909 B  00:00:00
(7/15): elasticsearch/other                                                                                                                                  |  58 kB  00:00:00
(8/15): epel/x86_64/other_db                                                                                                                                 | 3.4 MB  00:00:00
(9/15): epel/x86_64/primary_db                                                                                                                               | 7.0 MB  00:00:00
(10/15): extras/7/x86_64/filelists_db                                                                                                                        | 277 kB  00:00:00
(11/15): updates/7/x86_64/filelists_db                                                                                                                       | 8.7 MB  00:00:00
(12/15): extras/7/x86_64/other_db                                                                                                                            | 148 kB  00:00:00
(13/15): updates/7/x86_64/primary_db                                                                                                                         |  16 MB  00:00:00
(14/15): updates/7/x86_64/other_db                                                                                                                           | 1.0 MB  00:00:00
(15/15): elasticsearch/filelists                                                                                                                             |  44 MB  00:00:04

elasticsearch                                                                                                                                                             1348/1348
elasticsearch                                                                                                                                                             1348/1348
elasticsearch                                                                                                                                                             1348/1348
元数据缓存已建立
三、安装
执行命令yum install -y elasticsearch-7.17.4-x86_64.rpm
[root@nb002 tools]# yum install -y elasticsearch-7.17.4-x86_64.rpm
已加载插件:fastestmirror
正在检查 elasticsearch-7.17.4-x86_64.rpm: elasticsearch-7.17.4-1.x86_64
elasticsearch-7.17.4-x86_64.rpm 将被安装
正在解决依赖关系
--> 正在检查事务
---> 软件包 elasticsearch.x86_64.0.7.17.4-1 将被 安装
--> 解决依赖关系完成

依赖关系解决

====================================================================================================================================================================================
 Package                                   架构                               版本                                   源                                                        大小
====================================================================================================================================================================================
正在安装:
 elasticsearch                             x86_64                             7.17.4-1                               /elasticsearch-7.17.4-x86_64                             488 M

事务概要
====================================================================================================================================================================================
安装  1 软件包

总计:488 M
安装大小:488 M
Downloading packages:
Running transaction check
Running transaction test
Transaction test succeeded
Running transaction
Creating elasticsearch group... OK
Creating elasticsearch user... OK
  正在安装    : elasticsearch-7.17.4-1.x86_64                                                                                                                                   1/1
### NOT starting on installation, please execute the following statements to configure elasticsearch service to start automatically using systemd
 sudo systemctl daemon-reload
 sudo systemctl enable elasticsearch.service
### You can start elasticsearch service by executing
 sudo systemctl start elasticsearch.service
warning: usage of JAVA_HOME is deprecated, use ES_JAVA_HOME
Future versions of Elasticsearch will require Java 11; your Java version from [/usr/local/jdk1.8.0_331/jre] does not meet this requirement. Consider switching to a distribution of Elasticsearch with a bundled JDK. If you are already using a distribution with a bundled JDK, ensure the JAVA_HOME environment variable is not set.
Created elasticsearch keystore in /etc/elasticsearch/elasticsearch.keystore
  验证中      : elasticsearch-7.17.4-1.x86_64                                                                                                                                   1/1

已安装:
  elasticsearch.x86_64 0:7.17.4-1

完毕!
四、设置开机启动
[root@nb002 tools]# systemctl daemon-reload
[root@nb002 tools]# systemctl enable elasticsearch.service
Created symlink from /etc/systemd/system/multi-user.target.wants/elasticsearch.service to /usr/lib/systemd/system/elasticsearch.service.
五、启停命令
默认是安装到了/usr/share/elasticsearch位置
# 启动
systemctl start elasticsearch.service
# 停止
systemctl stop elasticsearch.service
启动后查看进程:
netstat -anpt | grep -e 9200
netstat -anpt | grep -e 9300
在浏览器访问,http://你的IP:9200

其余2台服务器均按上述方式进行安装ES
六、集群安装
说明:需要3台机器内网互通(用外网ip的话需要对应端口互通9200,9300;本机启动3台虚拟机应该无此问题,节点network.host都可以配置为localhost或者0.0.0.0)
yum安装后的默认配置文件在这个位置:/etc/elasticsearch/elasticsearch.yml
6.1 三个节点配置如下:
elk1节点:
cluster.name: cvec-elk
node.name: elk1
node.data: true
path.data: /data/elasticsearch
path.logs: /data/elasticsearch/log
network.host: 172.28.242.12
http.port: 9200
discovery.seed_hosts:
    - elk1
    - 172.28.242.14:9300
    - 172.28.242.15
cluster.initial_master_nodes: ["elk1", "elk2", "elk3"]
elk2节点:
cluster.name: cvec-elk
node.name: elk2
node.data: true
path.data: /data/elasticsearch
path.logs: /data/elasticsearch/log
network.host: 172.28.242.14
http.port: 9200
discovery.seed_hosts:
    - elk1
    - 172.28.242.14:9300
    - 172.28.242.15
cluster.initial_master_nodes: ["elk1", "elk2", "elk3"]
elk3节点:
cluster.name: cvec-elk
node.name: elk3
node.data: true
path.data: /data/elasticsearch
path.logs: /data/elasticsearch/log
network.host: 172.28.242.15
http.port: 9200
discovery.seed_hosts:
    - elk1
    - 172.28.242.14:9300
    - 172.28.242.15
cluster.initial_master_nodes: ["elk1", "elk2", "elk3"]
6.2 如果修改了data log目录,则需要给新设置的目录赋权限
chomd +777 目录
chmod +777 /data/elasticsearch
chmod +777 /data/elasticsearch/log
6.3 查看集群健康状态(我这里已经green了)
curl -X GET “localhost:9200/_cat/health?v”
[root@sg ~]# curl -X GET "172.28.242.15:9200/_cat/health?v"
epoch      timestamp cluster  status node.total node.data shards pri relo init unassign pending_tasks max_task_wait_time active_shards_percent
1656052660 06:37:40  cvec-elk green
6.4查看集群节点
curl -X GET “localhost:9200/_cat/nodes?v”
[root@sg ~]#  curl -X GET "172.28.242.15:9200/_cat/nodes?v"
ip            heap.percent ram.percent cpu load_1m load_5m load_15m node.role   master name
172.28.242.14           43          97   9    2.37    1.19     0.75 cdfhilmrstw *      elk2
172.28.242.15           12          99   4    0.33    0.31     0.23 cdfhilmrstw -      elk3
172.28.242.12           33          99   8    0.54    0.85     0.82 cdfhilmrstw -      elk1
可以看到elk2为主节点(带星号),这与在head插件上看到的是一致的:

自此,yum方式安装elasticsearch 3节点集群安装配置完毕。


