AI绘图-StableDiffusion安装
安装Python
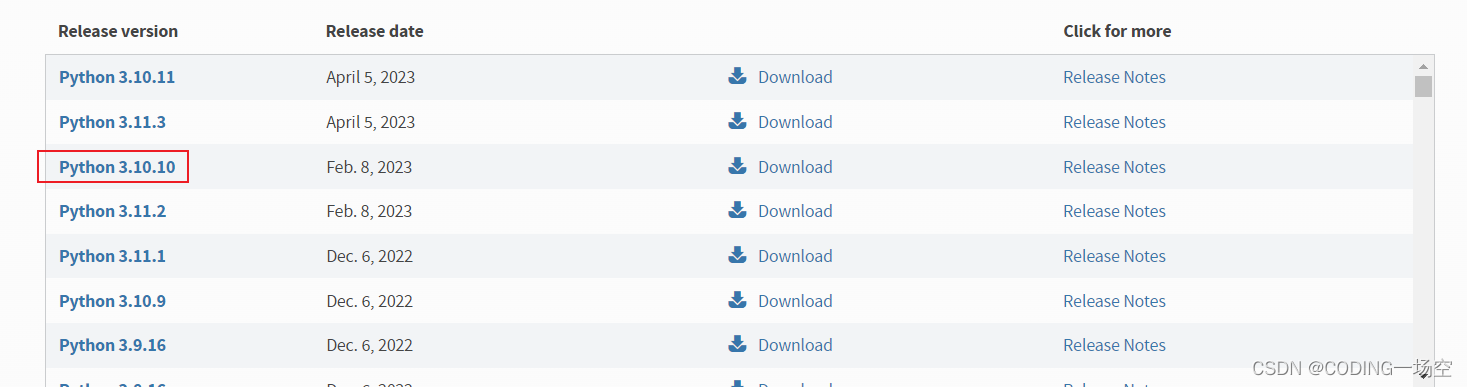
1、去官网 https://www.python.org/downloads/ 下载Python3.10.10版本,网上建议下载3.10.6版本。
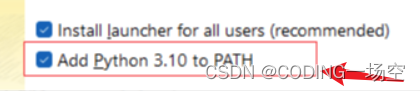
2、安装Python,打开安装界面,注意把Add Python to PATH选项勾上,然后选择自定义安装
3、点击Win+R,输入cmd,在打开界面命令行中输入 Python -V,显示 Python 3.10.6 就表示安装成功
安装Git
1、去Git官网下载。https://git-scm.com/downloads
2、鼠标右键,Git Bash Here,输入指令:git clone https://github.com/AUTOMATIC1111/stable-diffusion-webui.git
运行StableDiffusion
1、双击文件夹中的webui-user.bat,记住科学上网,此时你可能会遇到不少问题。
问题一:如果安装过程中出现如下提示

编辑webui-user.bat
COMMANDLINE_ARGS= --lowvram --precision full --no-half --skip-torch-cuda-test
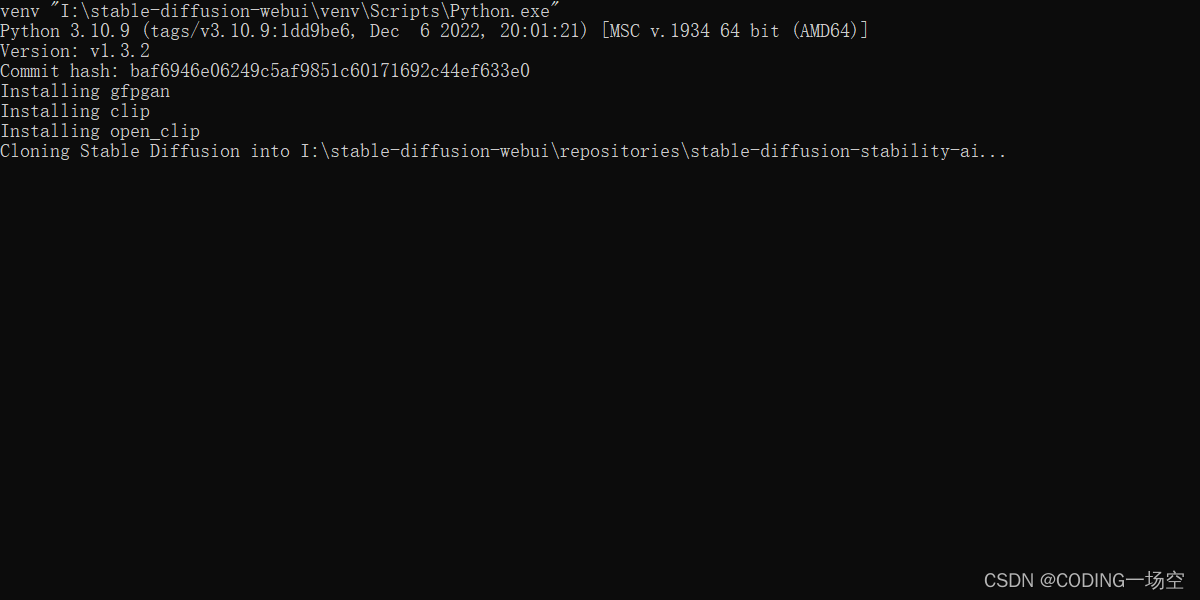
问题二:你可能无法克隆仓库的依赖包。譬如说程序一直卡在以下画面。
在此提供一个万全之策:
找到项目下的这个仓库文件夹repositories,然后你右击鼠标进入命令终端窗口。
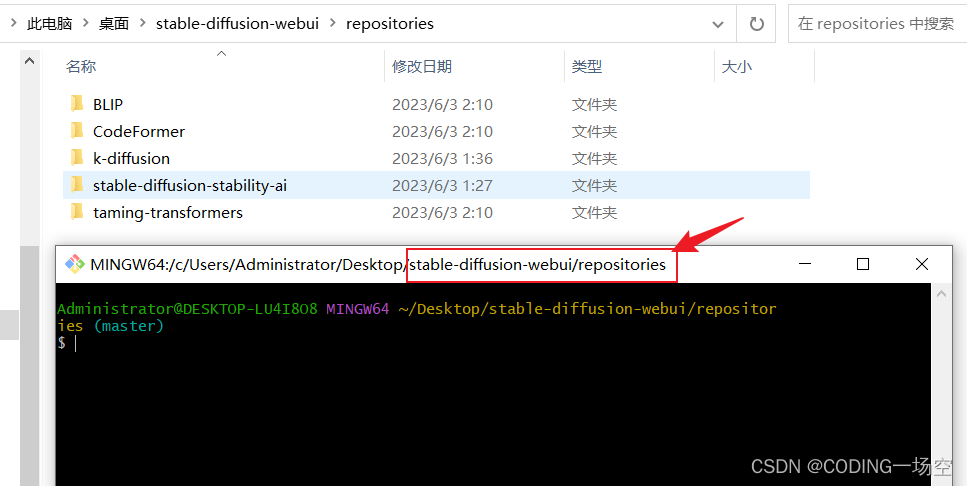
依次执行如下命令:
(1)输入git clone https://github.com/Stability-AI/stablediffusion.git
(2)输入git clone https://github.com/CompVis/taming-transformers.git
(3)输入git clone https://github.com/crowsonkb/k-diffusion.git
(4)输入git clone https://github.com/sczhou/CodeFormer.git
(5)输入git clone https://github.com/salesforce/BLIP.git
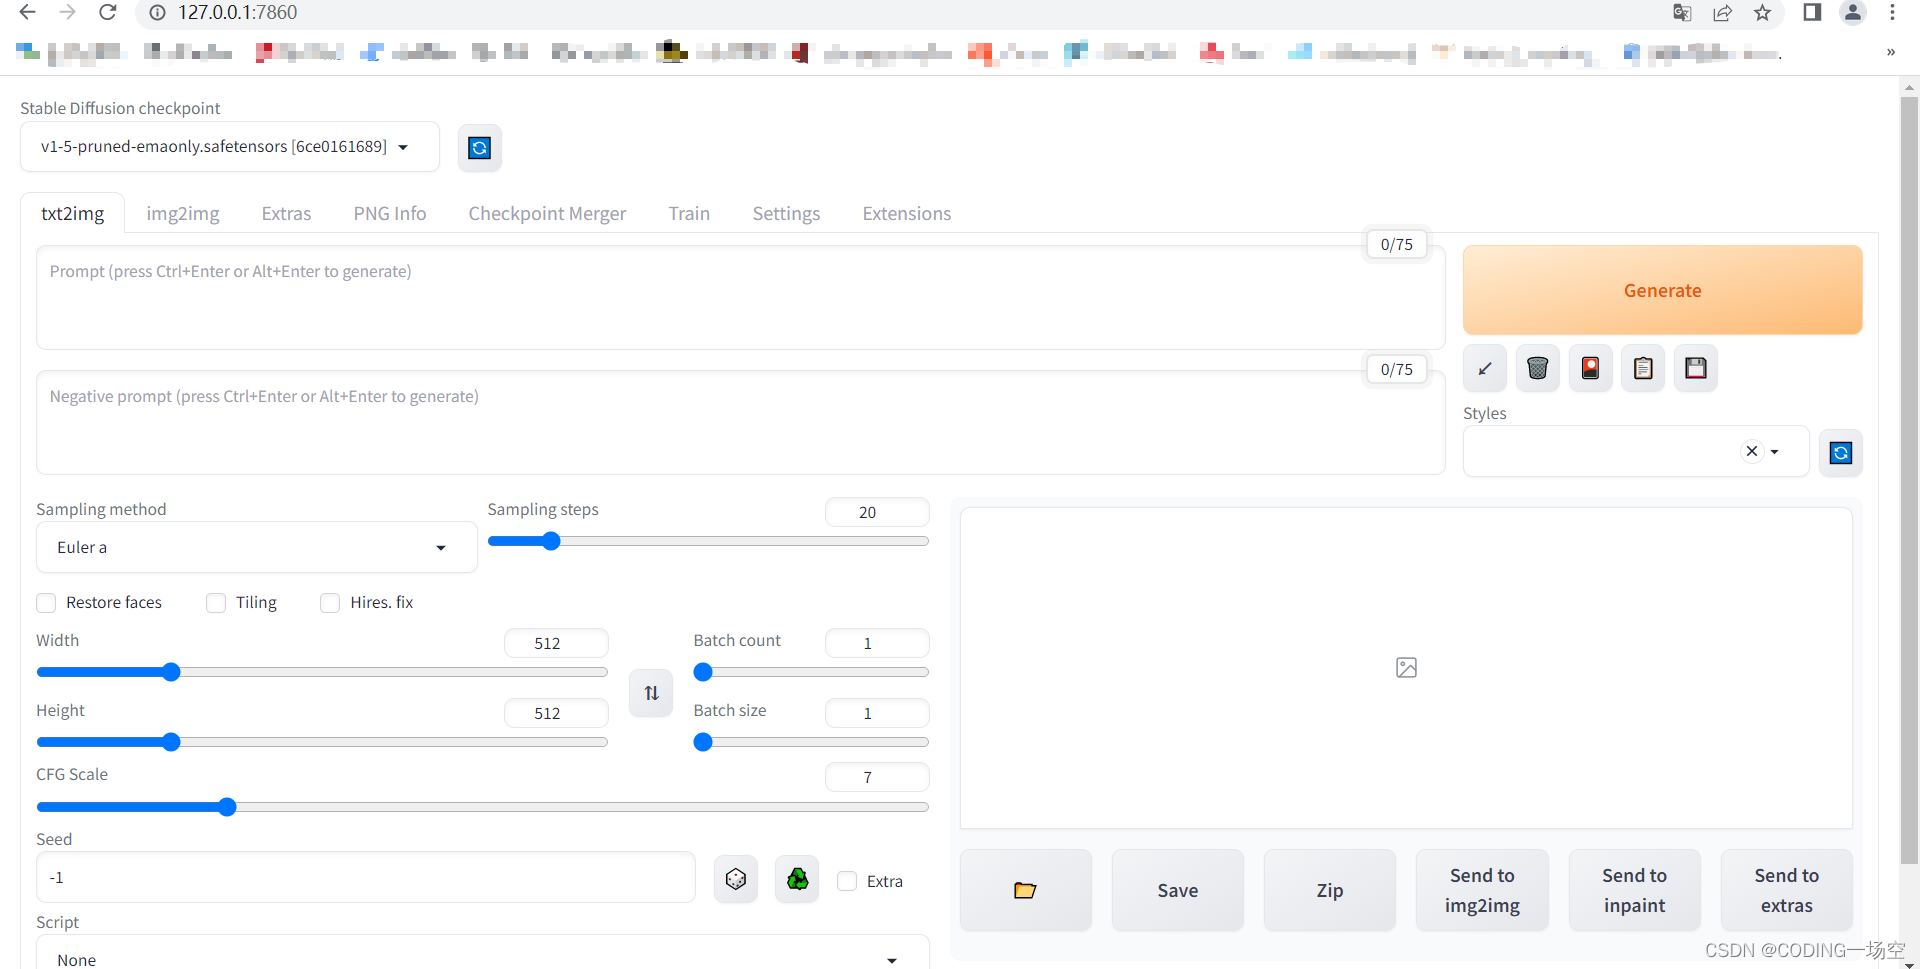
如果出现 http://127.0.0.1:7860,则直接访问即可
在这里插入图片描述