版权声明
- 本文原创作者:谷哥的小弟
- 作者博客地址:http://blog.csdn.net/lfdfhl
概述
Thymeleaf十分类似于JSP中使用的EL表达式。整体而言,Thymeleaf简洁、优雅、高效;非常适合小型项目的快速开发。
Thymeleaf常用标签简述
在此,概要介绍Thymeleaf常用标签。
| 标签 | 功能 | 示例 |
|---|---|---|
| th:text | 显示文本 | <p th:text="${collect.description}">description</p> |
| th:utext | 显示文本(对特殊标签不转义) | <p th:utext="${htmlcontent}">conten</p> |
| th:value | 为表单元素的value属性赋值 | <input th:value="${user.name}" /> |
| th:if | 判断条件 | <a th:if="${userId == collect.userId}" > |
| th:each | 元素遍历 | tr th:each="user,userStat:${users}"> |
| th:id | 标记控件 | <input th:id="'xxx' + ${collect.id}"/> |
| th:object | 替换对象 | <div th:object="${session.user}"> |
| th:with | 变量赋值(定义局部变量) | <div th:with="isEven=${prodStat.count}%2==0"></div> |
| th:style | 设置样式 | th:style="'display:' + @{(${sitrue} ? 'none' : 'inline-block')} + ''" |
| th:onclick | 点击事件 | th:onclick="'getCollect()'" |
| th:unless | 和th:if判断相反 | <a th:href="@{/login}" th:unless=${session.user != null}>Login</a> |
| th:href | 链接地址 | <a th:href="@{/login}" th:unless=${session.user != null}>Login</a> /> |
| th:switch | 多路选择,配合th:case 使用 | <div th:switch="${user.role}"> |
| th:case | th:switch的一个分支 | <p th:case="'admin'">User is an administrator</p> |
| th:fragment | 片段声明 | <div th:fragment="alert"> |
| th:include | 片段包含 | <head th:include="layout :: htmlhead" th:with="title='xx'"></head> /> |
| th:insert | 片段插入 | <div th:insert="fragments/header :: title"></div> |
| th:replace | 片段替换 | <div th:replace="fragments/header :: title"></div> |
| th:selected | 选中 | th:selected="(${xxx.id} == ${configObj.dd})" |
| th:src | 外部资源地址 | <img class="img-responsive" alt="App Logo" th:src="@{/img/logo.png}" /> |
| th:inline | 定义js脚本可以使用变量 | <script type="text/javascript" th:inline="javascript"> |
| th:action | 表单提交地址 | <form action="subscribe.html" th:action="@{/subscribe}"> |
| th:remove | 删除某个属性 | <tr th:remove="all"> |
| th:attr | 设置标签属性,多个属性可以用逗号分隔 | th:attr="src=@{/image/aa.jpg},title=#{logo}" |
Thymeleaf表达式
在此,详细介绍Thymeleaf常用表达式。
| 语法 | 说明 | 作用 |
|---|---|---|
| ${…} | 变量表达式 | 取出上下文变量的值 |
| *{…} | 选择变量表达式 | 取出选择的对象的属性值 |
| #{…} | 消息表达式 | 使文字消息国际化 |
| @{…} | 链接表达式 | 用于表示超链接地址 |
| ~{…} | 片段表达式 | 引用公共的代码片段 |
变量表达式
变量表达式用于从上下文获取变量值。
示例如下:
<p th:text="${message}">默认值</p>
选择变量表达式
选择变量表达式用于从被选择的对象获取属性值。
示例如下:
<div th:object="${session.user}">
    <p th:text="*{name}"></p>
    <p th:text="*{gender}"></p>
    <p th:text="*{age}"></p>
</div>
等同于:
<div>
    <p th:text="${session.user.name}"></p>
    <p th:text="${session.user.gender}"></p>
    <p th:text="${session.user.age}"></p>
</div>
消息表达式
消息表达式主要用于国际化。稍后,再详细介绍。
链接表达式
链接表达式用于处理 URL 链接地址。链接地址可以是相对地址,也可以是绝对地址亦可以在地址中携带参数。
在实际开发过程中,我们通常使用链接表达式实现链接、引入CSS、引入JS。
示例如下:
<p th:text="@{https://www.heidu.com}"></p>
<p th:text="@{commons/base.html}"></p>
<!-- /css/mian.css?v=1.0 -->
<p th:text="@{/css/mian.css(v=1.0)}"></p>
<!-- /user/order?username=lucy -->
<p th:text="@{/user/order(username=${session.user.name})}"></p>
<!-- /user/order?username=lucy&status=ok -->
<p th:text="@{/user/order(username=${session.user.name},status='ok')}"></p>
<!-- /user/lucy/info -->
<p th:text="@{/user/{username}/info(username=${session.user.name})}"></p>
片段表达式
片段表达式用于引用一段公共的 HTML 代码片段。常用th:insert和th:replace引用公共的代码片段;两者的区别在于:th:insert是直接将代码片段插入到标签体内,而th:replace则是用代码片段直接替换标签体内容。
<!-- /views/common/head.html-->
<head th:fragment="jsFragment">
        <script th:src="@{/webjars/jquery/3.3.1/jquery.js}"></script>
</head>

<!-- /views/your.html -->
<div th:replace="~{common/head::jsFragment}"></div>
Thymeleaf行内写法
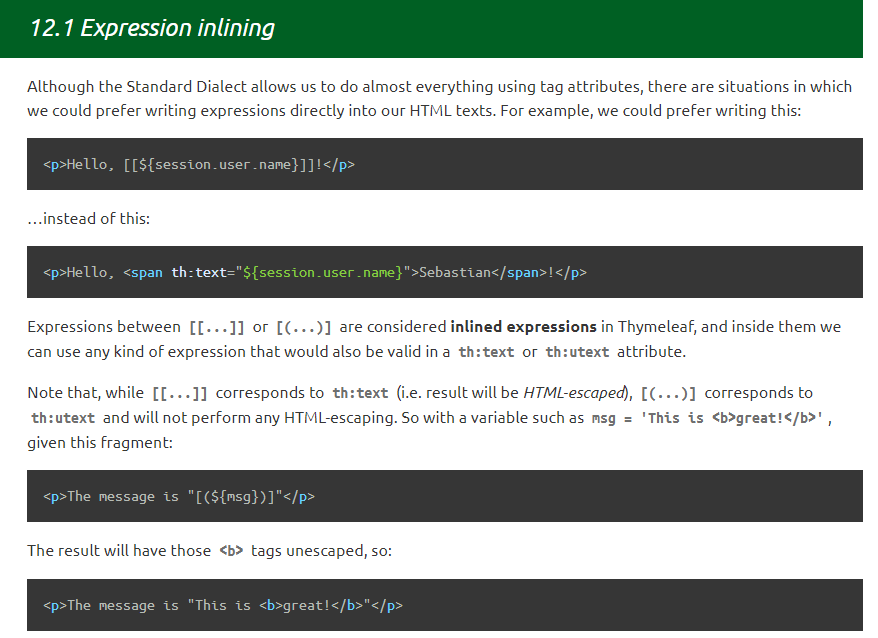
Thymeleaf常见的行内写法有两种:
-
[[…]] 等效于 th:text
-
[(…)] 等效于th:utext
在实际开发过程中,我们通常使用"[[@{/}]]"在前端页面获取项目名
示例如下:
let contextPath = "[[@{/}]]";
Thymeleaf核心技术示例
在此,以示例形式详细介绍Thymeleaf核心技术。
项目结构
要点概述:
- 1、static文件夹用于存放静态资源,例如:css文件、js文件、图片。
- 2、templates用于存放使用了Thymeleaf的html文件。
- 3、entity包用于存放实体,例如:User、Student等。

依赖文件
请在pom.xml文件中添加如下依赖。
<?xml version="1.0" encoding="UTF-8"?>
<project xmlns="http://maven.apache.org/POM/4.0.0" xmlns:xsi="http://www.w3.org/2001/XMLSchema-instance"
         xsi:schemaLocation="http://maven.apache.org/POM/4.0.0 https://maven.apache.org/xsd/maven-4.0.0.xsd">
    <modelVersion>4.0.0</modelVersion>
    <parent>
        <groupId>org.springframework.boot</groupId>
        <artifactId>spring-boot-starter-parent</artifactId>
        <version>2.5.4</version>
        <relativePath/> <!-- lookup parent from repository -->
    </parent>
    <groupId>com.cn</groupId>
    <artifactId>SpringBootThymeleaf01</artifactId>
    <version>0.0.1-SNAPSHOT</version>
    <name>SpringBootThymeleaf01</name>
    <description>SpringBootThymeleaf01</description>
    <properties>
        <java.version>1.8</java.version>
    </properties>
    <dependencies>
        <dependency>
            <groupId>org.springframework.boot</groupId>
            <artifactId>spring-boot-starter-thymeleaf</artifactId>
        </dependency>
        <dependency>
            <groupId>org.springframework.boot</groupId>
            <artifactId>spring-boot-starter-web</artifactId>
        </dependency>

        <dependency>
            <groupId>org.springframework.boot</groupId>
            <artifactId>spring-boot-starter-test</artifactId>
            <scope>test</scope>
        </dependency>
    </dependencies>

    <build>
        <plugins>
            <plugin>
                <groupId>org.springframework.boot</groupId>
                <artifactId>spring-boot-maven-plugin</artifactId>
            </plugin>
        </plugins>
    </build>

</project>
配置文件
请在application.properties文件添加以下配置。
# 缓存设置。开发中设置为false,线上时设置为true
spring.thymeleaf.cache=false
# 模板的编码方式
spring.thymeleaf.encoding=UTF-8
# 模式
spring.thymeleaf.mode=HTML5
# 模板页面存放路径
spring.thymeleat.prefix=classpath:/resources/templates/
# 模板页面名称后缀
spring.thymeleaf.suffix=.html
Student
package com.cn.springbootthymeleaf01.entity;
/**
 * 本文作者:谷哥的小弟
 * 博客地址:http://blog.csdn.net/lfdfhl
 */
public class Student {
    private String name;
    private int age;
    private String gender;

    public Student() {
    }

    public Student(String name, int age, String gender) {
        this.name = name;
        this.age = age;
        this.gender = gender;
    }

    public String getName() {
        return name;
    }

    public void setName(String name) {
        this.name = name;
    }

    public int getAge() {
        return age;
    }

    public void setAge(int age) {
        this.age = age;
    }

    public String getGender() {
        return gender;
    }

    public void setGender(String gender) {
        this.gender = gender;
    }

    @Override
    public String toString() {
        return "Student{" +
                "name='" + name + '\'' +
                ", age=" + age +
                ", gender='" + gender + '\'' +
                '}';
    }
}
User
在User中其birthday字段类型为java.util.Date。
package com.cn.springbootthymeleaf01.entity;

import java.util.Date;
/**
 * 本文作者:谷哥的小弟
 * 博客地址:http://blog.csdn.net/lfdfhl
 */
public class User {
    private Integer id;
    private String name;
    private Double salary;
    private Date birthday;

    public User() {
    }

    public User(Integer id, String name, Double salary, Date birthday) {
        this.id = id;
        this.name = name;
        this.salary = salary;
        this.birthday = birthday;
    }

    public Integer getId() {
        return id;
    }

    public void setId(Integer id) {
        this.id = id;
    }

    public String getName() {
        return name;
    }

    public void setName(String name) {
        this.name = name;
    }

    public Double getSalary() {
        return salary;
    }

    public void setSalary(Double salary) {
        this.salary = salary;
    }

    public Date getBirthday() {
        return birthday;
    }

    public void setBirthday(Date birthday) {
        this.birthday = birthday;
    }

    @Override
    public String toString() {
        return "User{" +
                "id=" + id +
                ", name='" + name + '\'' +
                ", salary=" + salary +
                ", birthday=" + birthday +
                '}';
    }
}
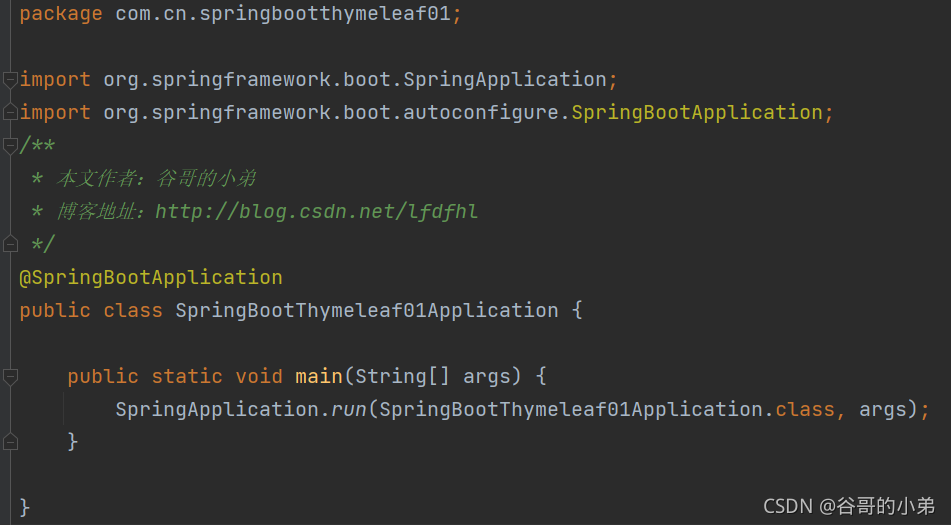
SpringBootThymeleaf01Application
package com.cn.springbootthymeleaf01;

import org.springframework.boot.SpringApplication;
import org.springframework.boot.autoconfigure.SpringBootApplication;
/**
 * 本文作者:谷哥的小弟
 * 博客地址:http://blog.csdn.net/lfdfhl
 */
@SpringBootApplication
public class SpringBootThymeleaf01Application {

    public static void main(String[] args) {
        SpringApplication.run(SpringBootThymeleaf01Application.class, args);
    }

}
Thymeleaf常用标签及数据传递
在此,详细介绍Thymeleaf常用标签
TestController1
package com.cn.springbootthymeleaf01.controller;

import com.cn.springbootthymeleaf01.entity.Student;
import com.cn.springbootthymeleaf01.entity.User;
import org.springframework.stereotype.Controller;
import org.springframework.web.bind.annotation.RequestMapping;
import javax.servlet.http.HttpServletRequest;
import java.util.ArrayList;
import java.util.Date;
import java.util.List;

/**
 * 本文作者:谷哥的小弟
 * 博客地址:http://blog.csdn.net/lfdfhl
 */
@Controller
@RequestMapping("/MyController1")
public class TestController1 {
    @RequestMapping("/test1")
    public String test1(HttpServletRequest httpServletRequest){
        // 传递基本类型数据
        String name = "谷哥的小弟";
        httpServletRequest.setAttribute("name",name);

        // 传递基本类型数据并进行条件判断
        int age = 19;
        httpServletRequest.setAttribute("age",age);

        // 传递带标签的数据
        String htmlContent = "<a href='https://blog.csdn.net/lfdfhl'>本文作者:谷哥的小弟</a>";
        httpServletRequest.setAttribute("htmlContent",htmlContent);

        // 为标签的value属性传递值
        String city = "北京";
        httpServletRequest.setAttribute("city",city);

        // 传递对象
        Student student = new Student("zxx",19,"man");
        httpServletRequest.setAttribute("student",student);

        // 传递对象
        User user = new User(9527, "zxc", 4500.5, new Date());
        httpServletRequest.setAttribute("user", user);

        // 传递集合
        Student student1 = new Student("wmd",19,"man");
        Student student2 = new Student("puy",20,"man");
        Student student3 = new Student("tep",21,"man");
        Student student4 = new Student("cvb",22,"man");
        List<Student> studentList = new ArrayList<Student>();
        studentList.add(student1);
        studentList.add(student2);
        studentList.add(student3);
        studentList.add(student4);
        httpServletRequest.setAttribute("studentList",studentList);

        // 跳转至index.html
        return "index1";
    }
}
index1.html
<!DOCTYPE html>
<!-- 引入Thymeleaf命名空间 -->
<html lang="en" xmlns:th="http://www.thymeleaf.org">
<head>
<meta charset="UTF-8">
<title>Hello Thymeleaf</title>
</head>
<body>
<h2 style="color: red;">本文作者:谷哥的小弟</h2>
<h2 style="color: red;">博客地址:http://blog.csdn.net/lfdfhl</h2>
<br/>
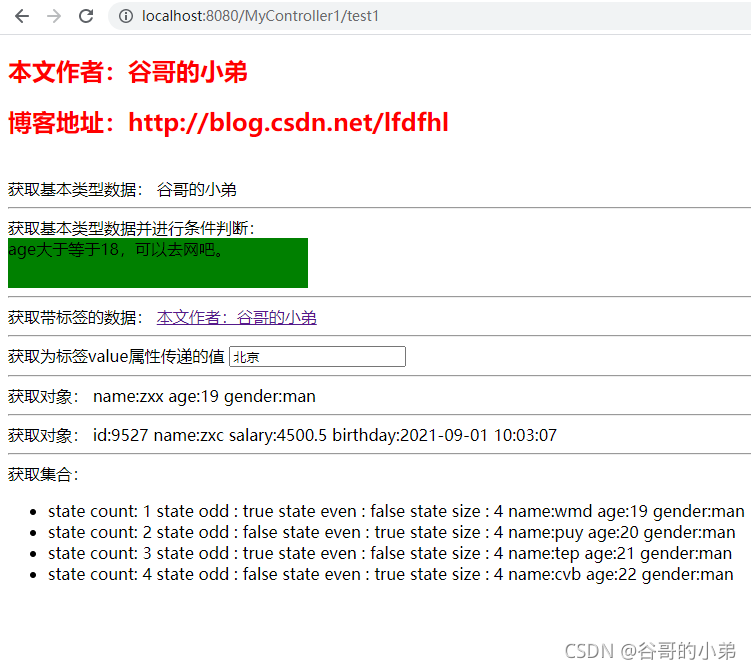
获取基本类型数据:
<span th:text="${name}"></span>
<hr/>
获取基本类型数据并进行条件判断:
<div style="width: 300px;height: 50px;background: green;" th:if="${age>=18}">
age大于等于18,可以去网吧。
</div>
<div style="width: 300px;height: 50px;background: red;" th:if="${age<18}">
age小于18,不可以去网吧。
</div>
<hr/>
获取带标签的数据:
<span th:utext="${htmlContent}"></span>
<hr/>
获取为标签value属性传递的值
<input type="text" name="username" th:value="${city}">
<hr/>
获取对象:
name:<span th:text="${student.name}"></span>
age:<span th:text="${student.age}"></span>
gender:<span th:text="${student.gender}"></span>
<hr/>
获取对象:
id:<span th:text="${user.id}"></span>
name:<span th:text="${user.name}"></span>
salary:<span th:text="${user.salary}"></span>
birthday:<span th:text="${#dates.format(user.birthday,'yyy-MM-dd HH:mm:ss')}"></span>
<hr/>
获取集合:
<ul>
<li th:each="student,state:${studentList}">
state count: <span th:text="${state.count}"></span>
state odd : <span th:text="${state.odd}"></span>
state even : <span th:text="${state.even}"></span>
state size : <span th:text="${state.size}"></span>
name:<span th:text="${student.name}"></span>
age:<span th:text="${student.age}"></span>
gender:<span th:text="${student.gender}"></span>
</li>
</ul>
</body>
</html>
测试地址
http://localhost:8080/MyController1/test1
th:text
该标签用于显示普通文本。
Controller中代码如下:
// 传递基本类型数据
String name = "谷哥的小弟";
httpServletRequest.setAttribute("name",name);
html中代码如下:
获取基本类型数据:
<span th:text="${name}"></span>
<hr/>
th:if
该标签用于条件判断。当判断的结果为true时显示元素;反之,不显示。
Controller中代码如下:
// 传递基本类型数据并进行条件判断
int age = 19;
httpServletRequest.setAttribute("age",age);
html中代码如下:
获取基本类型数据并进行条件判断:
<div style="width: 300px;height: 50px;background: green;" th:if="${age>=18}">
  age大于等于18,可以去网吧。
</div>
<div style="width: 300px;height: 50px;background: red;" th:if="${age<18}">
  age小于18,不可以去网吧。
</div>
<hr/>
th:utext
该标签用于显示带有网页标签的文本。
Controller中代码如下:
// 传递带标签的数据
String htmlContent = "<a href='https://blog.csdn.net/lfdfhl'>本文作者:谷哥的小弟</a>";
httpServletRequest.setAttribute("htmlContent",htmlContent);
html中代码如下:
获取带标签的数据:
<span th:utext="${htmlContent}"></span>
<hr/>
th:value
该标签用于为标签value属性传递值。
Controller中代码如下:
// 为标签的value属性传递值
String city = "北京";
httpServletRequest.setAttribute("city",city);
html中代码如下:
获取为标签value属性传递的值
<input type="text" name="username" th:value="${city}">
<hr/>
传递对象
将对象保存至Request域并在html文件中获取。
传递Student
Controller中代码如下:
// 传递对象
Student student = new Student("zxx",19,"man");
httpServletRequest.setAttribute("student",student);
html中代码如下:
获取对象:
name:<span th:text="${student.name}"></span>
age:<span th:text="${student.age}"></span>
gender:<span th:text="${student.gender}"></span>
<hr/>
在html页面中通过对象名.属性的方式获取相应的值。
传递User
Controller中代码如下:
// 传递对象
User user = new User(9527, "zxc", 4500.5, new Date());
httpServletRequest.setAttribute("user", user);
html中代码如下:
获取对象:
id:<span th:text="${user.id}"></span>
name:<span th:text="${user.name}"></span>
salary:<span th:text="${user.salary}"></span>
birthday:<span th:text="${#dates.format(user.birthday,'yyy-MM-dd HH:mm:ss')}"></span>
<hr/>
利用Spring Boot自带工具类#dates格式化日期。
传递集合
Controller中代码如下:
// 传递集合
Student student1 = new Student("wmd",19,"man");
Student student2 = new Student("puy",20,"man");
Student student3 = new Student("tep",21,"man");
Student student4 = new Student("cvb",22,"man");
List<Student> studentList = new ArrayList<Student>();
studentList.add(student1);
studentList.add(student2);
studentList.add(student3);
studentList.add(student4);
httpServletRequest.setAttribute("studentList",studentList);
html中代码如下:
获取集合:
<ul>
  <li th:each="student,state:${studentList}">
    state count: <span th:text="${state.count}"></span>
    state odd : <span th:text="${state.odd}"></span>
    state even : <span th:text="${state.even}"></span>
    state size : <span th:text="${state.size}"></span>
    name:<span th:text="${student.name}"></span>
    age:<span th:text="${student.age}"></span>
    gender:<span th:text="${student.gender}"></span>
  </li>
</ul>
在html中利用th:each遍历集合,语法如下:
th:each="元素,state:${集合}"
- 1、集合表示待遍历集合
- 2、元素表示遍历过程中得到的当前元素
- 3、state表示当前元素和集合的状态
保存数据至Session域和Application域
在之前的示例中,均是把数据保存到Request域。除此以外,我们还可以将
数据至Session域和Application域。
TestController2
package com.cn.springbootthymeleaf01.controller;

import org.springframework.stereotype.Controller;
import org.springframework.web.bind.annotation.RequestMapping;
import javax.servlet.ServletContext;
import javax.servlet.http.HttpServletRequest;
import javax.servlet.http.HttpSession;

/**
 * 本文作者:谷哥的小弟
 * 博客地址:http://blog.csdn.net/lfdfhl
 */
@Controller
@RequestMapping("/MyController2")
public class TestController2 {
    @RequestMapping("/test2")
    public String test2(HttpServletRequest httpServletRequest){
        // 将数据保存至session域
        String name = "谷哥的小弟";
        HttpSession session = httpServletRequest.getSession();
        session.setAttribute("name",name);

        // 将数据保存至application域
        ServletContext servletContext = httpServletRequest.getServletContext();
        int age = 27;
        servletContext.setAttribute("age",age);

        // 跳转至index2.html
        return "index2";
    }
}
index2.html
<!DOCTYPE html>
<!--  引入Thymeleaf命名空间 -->
<html lang="en" xmlns:th="http://www.thymeleaf.org">
<head>
  <meta charset="UTF-8">
  <title>Hello Thymeleaf</title>
</head>
<body>
<h2 style="color: red;">本文作者:谷哥的小弟</h2>
<h2 style="color: red;">博客地址:http://blog.csdn.net/lfdfhl</h2>
<br/>
从session域获取数据:
name:<span th:text="${session.name}"></span>
<hr/>

从application域获取数据:
age:<span th:text="${application.age}"></span>
<hr/>

</body>
</html>

测试地址
http://localhost:8080/MyController2/test2
保存数据至Session域
Controller中代码如下:
// 将数据保存至session域
String name = "谷哥的小弟";
HttpSession session = httpServletRequest.getSession();
session.setAttribute("name",name);
html中代码如下:
从session域获取数据:
name:<span th:text="${session.name}"></span>
<hr/>
在前端页面中通过session.的方式获取数据。
保存数据至Application域
Controller中代码如下:
// 将数据保存至application域
ServletContext servletContext = httpServletRequest.getServletContext();
int age = 27;
servletContext.setAttribute("age",age);
html中代码如下:
从application域获取数据:
age:<span th:text="${application.age}"></span>
<hr/>
在前端页面中通过application.的方式获取数据。
利用Model保存数据
在之前的示例中,均是把数据保存到Request域、Session域、Application域。除此以外,还可以利用Model保存数据
TestController3
package com.cn.springbootthymeleaf01.controller;

import org.springframework.stereotype.Controller;
import org.springframework.ui.Model;
import org.springframework.web.bind.annotation.RequestMapping;

import javax.servlet.ServletContext;
import javax.servlet.http.HttpServletRequest;
import javax.servlet.http.HttpSession;

/**
 * 本文作者:谷哥的小弟
 * 博客地址:http://blog.csdn.net/lfdfhl
 */
@Controller
@RequestMapping("/MyController3")
public class TestController3 {
    @RequestMapping("/test3")
    public String test3(HttpServletRequest httpServletRequest, Model model){
        // 利用Model保存数据
        String name = "谷哥的小弟";
        model.addAttribute("name",name);
        int age = 27;
        model.addAttribute("age",age);

        // 跳转至index3.html
        return "index3";
    }
}
index3.html
<!DOCTYPE html>
<!-- 引入Thymeleaf命名空间 -->
<html lang="en" xmlns:th="http://www.thymeleaf.org">
<head>
<meta charset="UTF-8">
<title>Hello Thymeleaf</title>
</head>
<body>
<h2 style="color: red;">本文作者:谷哥的小弟</h2>
<h2 style="color: red;">博客地址:http://blog.csdn.net/lfdfhl</h2>
<br/>
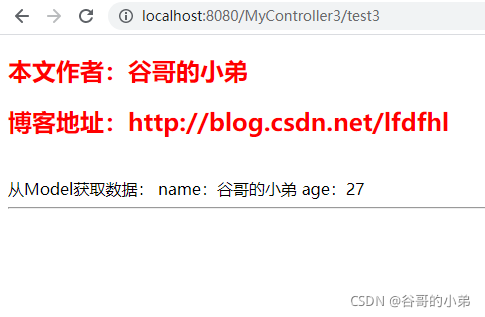
从Model获取数据:
name:<span th:text="${name}"></span>
age:<span th:text="${age}"></span>
<hr/>
</body>
</html>
测试地址
http://localhost:8080/MyController3/test3
重定向
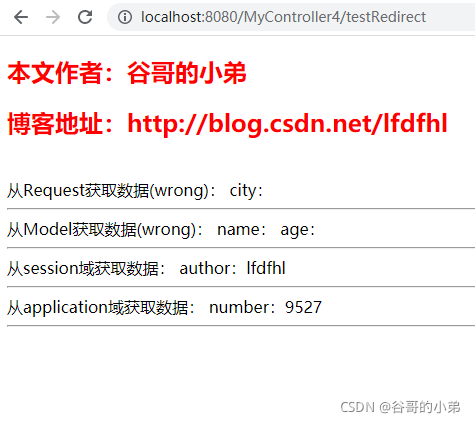
在Spring Boot + Thymeleaf 的开发环境中通常利用 return "redirect:Controller"的方式进行重定向。也就是说:利用redirect重定向至其它Controller。
需要注意的是:在进行重定向时不可利用Request和Model保存数据;而应该使用Session和Application域保存数据。否则,重定向之后的页面无法获取数据进行显示。
TestController4
package com.cn.springbootthymeleaf01.controller;

import org.springframework.stereotype.Controller;
import org.springframework.ui.Model;
import org.springframework.web.bind.annotation.RequestMapping;
import javax.servlet.ServletContext;
import javax.servlet.http.HttpServletRequest;
import javax.servlet.http.HttpSession;

/**
 * 本文作者:谷哥的小弟
 * 博客地址:http://blog.csdn.net/lfdfhl
 */
@Controller
@RequestMapping("/MyController4")
public class TestController4 {
    @RequestMapping("/test4")
    public String test4(HttpServletRequest httpServletRequest, Model model){

        // 利用HttpServletRequest保存数据(wrong)
        String city = "北京";
        httpServletRequest.setAttribute("city", city);

        // 利用Model保存数据(wrong)
        String name = "谷哥的小弟";
        model.addAttribute("name",name);
        int age = 27;
        model.addAttribute("age",age);

        // 将数据保存至session域
        String author = "lfdfhl";
        HttpSession session = httpServletRequest.getSession();
        session.setAttribute("author",author);

        // 将数据保存至application域
        ServletContext servletContext = httpServletRequest.getServletContext();
        int number = 9527;
        servletContext.setAttribute("number",number);

        // 重定向至/MyController4/testRedirect
        return "redirect:/MyController4/testRedirect";
    }

    @RequestMapping("/testRedirect")
    public String testRedirect(){
        return "index4";
    }
}
index4.html
<!DOCTYPE html>
<!--  引入Thymeleaf命名空间 -->
<html lang="en" xmlns:th="http://www.thymeleaf.org">
<head>
  <meta charset="UTF-8">
  <title>Hello Thymeleaf</title>
</head>
<body>
<h2 style="color: red;">本文作者:谷哥的小弟</h2>
<h2 style="color: red;">博客地址:http://blog.csdn.net/lfdfhl</h2>
<br/>
从Request获取数据(wrong):
city:<span th:text="${city}"></span>
<hr/>
从Model获取数据(wrong):
name:<span th:text="${name}"></span>
age:<span th:text="${age}"></span>
<hr/>
从session域获取数据:
author:<span th:text="${session.author}"></span>
<hr/>
从application域获取数据:
number:<span th:text="${application.number}"></span>
<hr/>
</body>
</html>
测试地址
http://localhost:8080/MyController4/testRedirect
请求转发
在Spring Boot + Thymeleaf 的开发环境中通常利用 return "forward:Controller"的方式进行请求转发。也就是说:利用forward请求转发至其它Controller。
TestController5
package com.cn.springbootthymeleaf01.controller;

import org.springframework.stereotype.Controller;
import org.springframework.ui.Model;
import org.springframework.web.bind.annotation.RequestMapping;

import javax.servlet.ServletContext;
import javax.servlet.http.HttpServletRequest;
import javax.servlet.http.HttpSession;

/**
 * 本文作者:谷哥的小弟
 * 博客地址:http://blog.csdn.net/lfdfhl
 */
@Controller
@RequestMapping("/MyController5")
public class TestController5 {
    @RequestMapping("/test5")
    public String test4(HttpServletRequest httpServletRequest, Model model){

        // 利用HttpServletRequest保存数据
        String city = "北京";
        httpServletRequest.setAttribute("city", city);

        // 利用Model保存数据
        String name = "谷哥的小弟";
        model.addAttribute("name",name);
        int age = 27;
        model.addAttribute("age",age);

        // 将数据保存至session域
        String author = "lfdfhl";
        HttpSession session = httpServletRequest.getSession();
        session.setAttribute("author",author);

        // 将数据保存至application域
        ServletContext servletContext = httpServletRequest.getServletContext();
        int number = 9527;
        servletContext.setAttribute("number",number);

        // 请求转发至/MyController5/testForward
        return "forward:/MyController5/testForward";
    }

    @RequestMapping("/testForward")
    public String testForward(){
        return "index5";
    }
}
index5.html
<!DOCTYPE html>
<!--  引入Thymeleaf命名空间 -->
<html lang="en" xmlns:th="http://www.thymeleaf.org">
<head>
  <meta charset="UTF-8">
  <title>Hello Thymeleaf</title>
</head>
<body>
<h2 style="color: red;">本文作者:谷哥的小弟</h2>
<h2 style="color: red;">博客地址:http://blog.csdn.net/lfdfhl</h2>
<br/>
从Request获取数据:
city:<span th:text="${city}"></span>
<hr/>
从Model获取数据:
name:<span th:text="${name}"></span>
age:<span th:text="${age}"></span>
<hr/>
从session域获取数据:
author:<span th:text="${session.author}"></span>
<hr/>
从application域获取数据:
number:<span th:text="${application.number}"></span>
<hr/>
</body>
</html>

测试地址
http://localhost:8080/MyController5/test5
引入静态资源
在开发中,常需要引入已经定义好的静态资源,例如:css、js、图片。
引入css,语法如下:
<!--  通过th:href引入static中的css文件 -->
<link th:href="@{/css文件名}" rel="stylesheet">
引入js,语法如下:
<!--  通过th:src引入static中的js文件 -->
<script th:src="@{/js文件名}"></script>
引入图片,语法如下:
<!--  通过th:src引用static中的图片 -->
<img th:src="@{/文件名}" />
TestController6
package com.cn.springbootthymeleaf01.controller;

import org.springframework.stereotype.Controller;
import org.springframework.ui.Model;
import org.springframework.web.bind.annotation.RequestMapping;

import javax.servlet.http.HttpServletRequest;

/**
 * 本文作者:谷哥的小弟
 * 博客地址:http://blog.csdn.net/lfdfhl
 */
@Controller
@RequestMapping("/MyController6")
public class TestController6 {
    @RequestMapping("/test6")
    public String test6(HttpServletRequest httpServletRequest, Model model){
        // 利用Model保存数据
        String name = "谷哥的小弟";
        model.addAttribute("name",name);
        int age = 27;
        model.addAttribute("age",age);

        // 跳转至index6.html
        return "index6";
    }
}
index6.html
<!DOCTYPE html>
<!-- 引入Thymeleaf命名空间 -->
<html lang="en" xmlns:th="http://www.thymeleaf.org">
<head>
<meta charset="UTF-8">
<title>Hello Thymeleaf</title>
<!-- 通过th:href引入static中的css文件 -->
<link th:href="@{/test.css}" rel="stylesheet">
<!-- 通过th:src引入static中的js文件 -->
<script th:src="@{/test.js}"></script>
<!-- 使用js文件中的函数-->
<script>
showDialog();
</script>
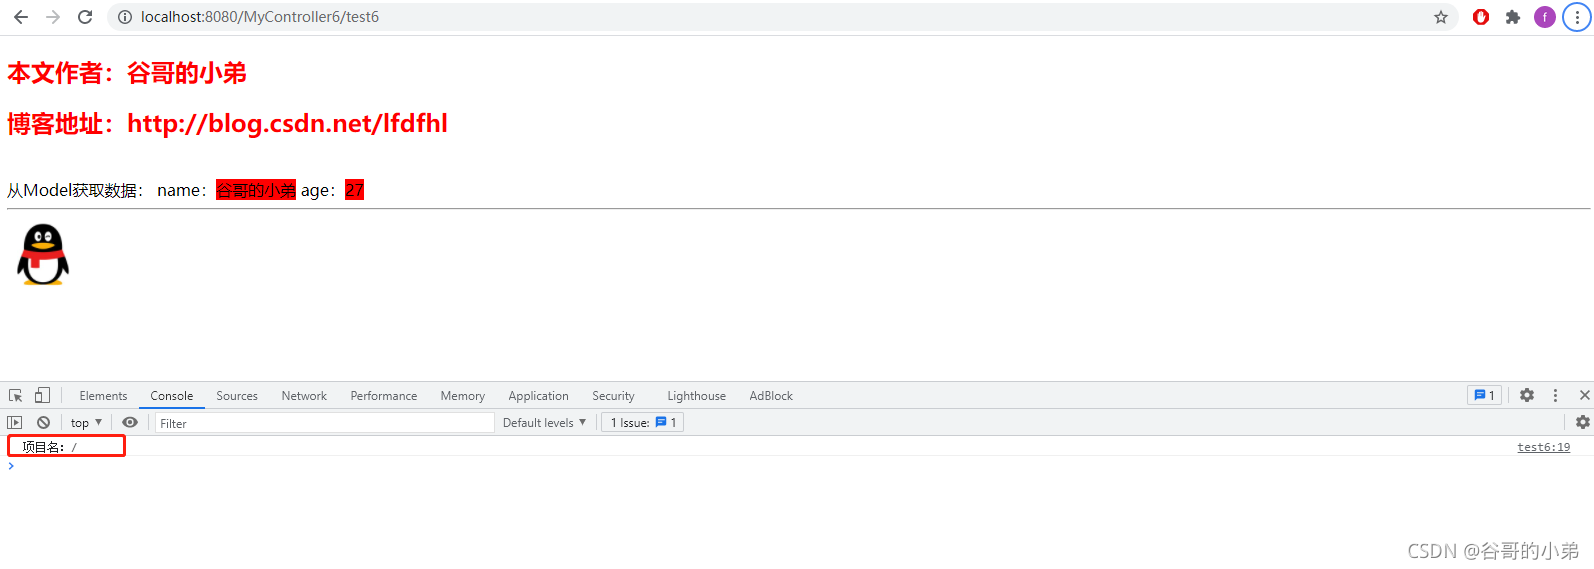
<!-- 获取项目名并在控制台打印 -->
<!-- 该项目没有配置项目项目名,所以打印结果为 /-->
<script>
let contextPath = "[[@{/}]]";
console.log("项目名:"+contextPath)
</script>
</head>
<body>
<h2 style="color: red;">本文作者:谷哥的小弟</h2>
<h2 style="color: red;">博客地址:http://blog.csdn.net/lfdfhl</h2>
<br/>
从Model获取数据:
name:<span th:text="${name}"></span>
age:<span th:text="${age}"></span>
<hr/>
<!-- 通过th:src引用static中的图片 -->
<img th:src="@{/icon.jpg}" width="72" height="72"/>
</body>
</html>


测试路径
http://localhost:8080/MyController6/test6