目录
pthread_create函数介绍
前面写过一篇文章《Thread类的start()方法创建线程的底层分析》,这次来自定义一个线程,并实现在底层创建内核线程来执行用户代码。
pthread_create函数介绍
在这之前,先熟悉下Linux中创建内核线程函数pthread_create的用法。

pthread_create函数的第一个参数用来接收新创建的线程ID,该参数的类型是pthread_t。如何查看这个类型的定义?在Linux中查找pthread.h
[root]# whereis pthread.h
pthread: /usr/include/pthread.h
打开pthread.h,发现其引入了pthreadtypes.h
#ifndef _PTHREAD_H
#define _PTHREAD_H      1

#include <features.h>
#include <endian.h>
#include <sched.h>
#include <time.h>

#include <bits/pthreadtypes.h>
#include <bits/setjmp.h>
#include <bits/wordsize.h>
打开即可看到pthread_t的定义
typedef unsigned long int pthread_t;第二个参数用来设置线程属性,可以传空。
第三个参数是线程运行函数的起始地址。
最后一个参数是运行函数的参数。
了解了使用方法,编写如下MyThread.c代码。在main方法中创建新线程,然后在main和java_start方法中循环打印。
#include <pthread.h>
#include <stdio.h>

void *java_start(void *arg) {
    while (1)
    {
        usleep(1000000);
        printf("this is java_start method!\n");
    }

}

int main() {
	pthread_t tid;
    pthread_create(&tid, NULL, java_start, NULL);
    while (1)
    {
        usleep(1000000);
        printf("this is main method!\n");
    }
    return 0;
}
使用如下命令进行编译:
gcc Mythread.c -o MyThread -pthread运行结果如下:
[root@192 yangxianzhu]# ./MyThread
this is java_start method!
this is main method!
this is java_start method!
this is main method!
this is java_start method!
this is main method!
this is java_start method!
this is main method!
this is main method!
this is java_start method!
this is main method!
this is java_start method!
至此,就完成了在Linux创建一个新的内核线程。
自定义线程
接下来就开始自定义线程。仿照Thread.java,自定义线程MyThread.java代码如下:
package org.example;

public class MyThread {

    public void start() {
        start0();
    }

    private native void start0();

}
其中start0是一个native方法,使用命令javah生成对应的头文件。注意,先进入编译输出目录
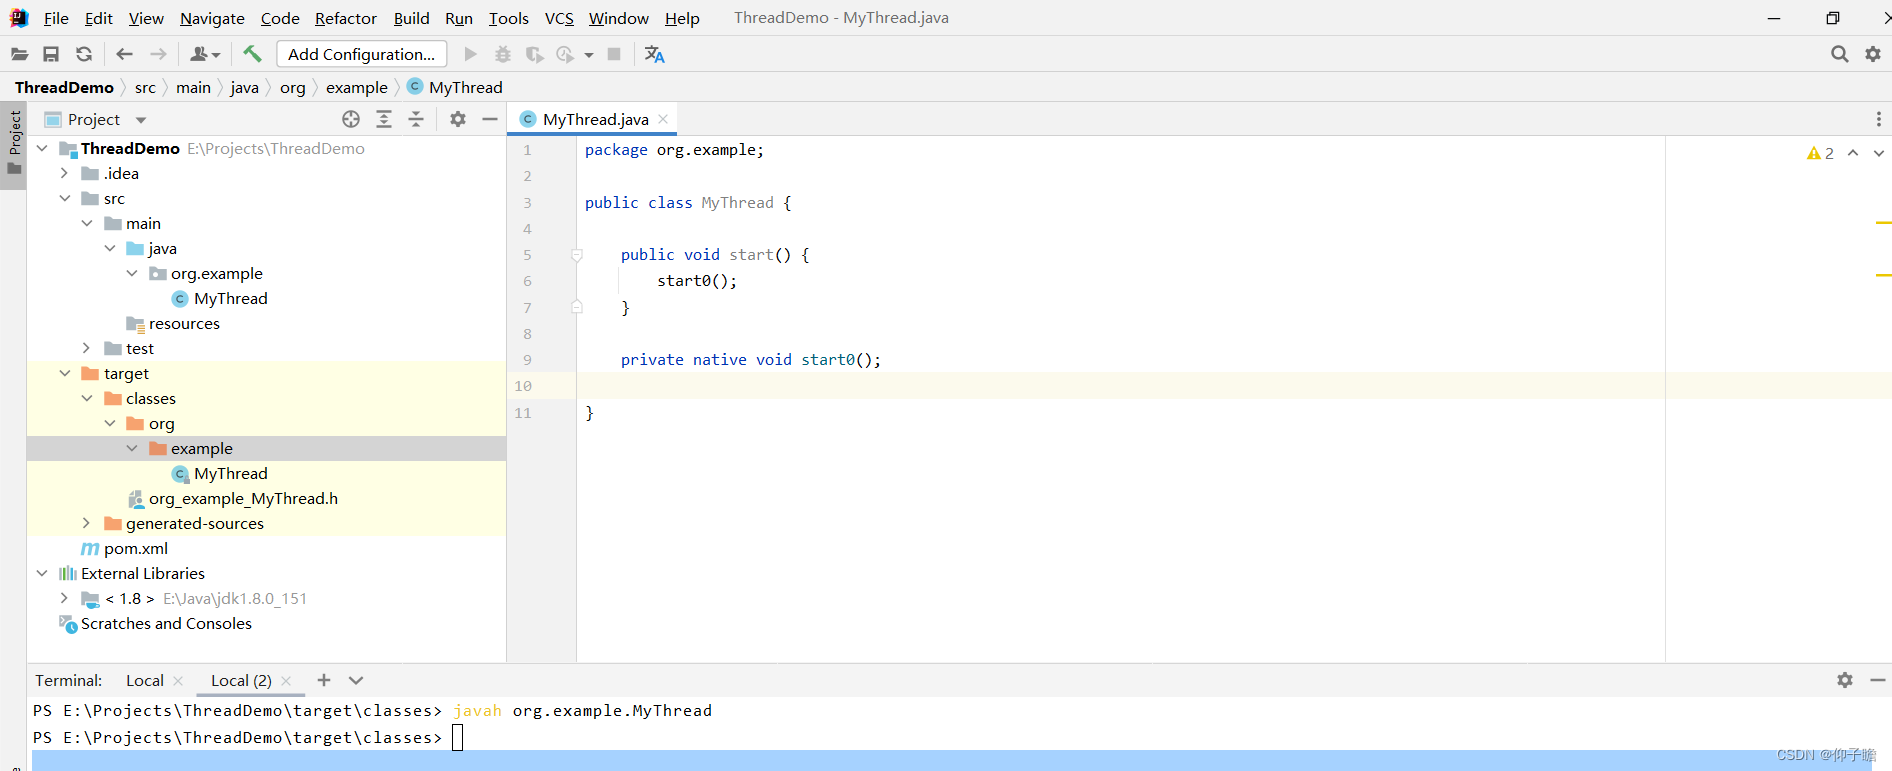
然后执行命令:javah org.example.MyThread,生成的头文件名为org_example_MyThread.h,内容如下:
/* DO NOT EDIT THIS FILE - it is machine generated */
#include <jni.h>
/* Header for class org_example_MyThread */

#ifndef _Included_org_example_MyThread
#define _Included_org_example_MyThread
#ifdef __cplusplus
extern "C" {
#endif
/*
 * Class:     org_example_MyThread
 * Method:    start0
 * Signature: ()V
 */
JNIEXPORT void JNICALL Java_org_example_MyThread_start0
  (JNIEnv *, jobject);

#ifdef __cplusplus
}
#endif
#endif
为了方便后面编译,去除包名。将文件名改成MyThread.h,将里面的方法名JNICALL Java_org_example_MyThread_start0改成JNICALL Java_MyThread_start0。这样,MyThread.java对应的头文件就创建好了。
接下来修改MyThread.c如下:
#include <pthread.h>
#include <stdio.h>
#include "MyThread.h"

void *java_start(void *arg) {
    while (1)
    {
        usleep(1000000);
        printf("this is java_start method!\n");
    }

}

JNIEXPORT void JNICALL Java_MyThread_start0(JNIEnv *env, jobject obj) {
    pthread_t tid;
    pthread_create(&tid, NULL, java_start, NULL);
    while (1)
    {
        usleep(1000000);
        printf("this is start0 method!\n");
    }
}

int main() {
    return 0;
}
首先引入上面生成的头文件MyThread.h,注意这里使用的是#include "MyThread.h",表示该头文件与mythread.c在同一目录下。接着实现Java_MyThread_start0方法,将原先放到main方法里的创建线程的逻辑挪过去。
下面先验证在Java中通过JNI调用mythread.c中的Java_MyThread_start0方法。先将MyThread.c打包成库文件mythread.so,将MyThread.c和MyThread.h拷贝到同一个目录下
[root@192 yangxianzhu]# pwd
/home/yangxianzhu
[root@192 yangxianzhu]# ll
总用量 8
-rw-r--r--. 1 root root 494 12月  4 15:22 MyThread.c
-rw-r--r--. 1 root root 438 12月  4 14:48 MyThread.h
由于在MyThread.h中引入了jni.h,该文件位于jdk下的include目录。打包命令如下:
[root@192 yangxianzhu]# gcc -fPIC -I /usr/local/java/jdk1.8.0_341/include -I /usr/local/java/jdk1.8.0_341/include/linux -shared -o MyThread.so MyThread.c
[root@192 yangxianzhu]# ll
总用量 16
-rw-r--r--. 1 root root  494 12月  4 15:22 MyThread.c
-rw-r--r--. 1 root root  438 12月  4 14:48 MyThread.h
-rwxr-xr-x. 1 root root 8184 12月  4 15:32 MyThread.so
MyThread.so就是生成的库文件,接着在MyThread.java中通过System.load引入库文件,然后创建MyThread对象并调用start方法进行测试。
package org.example;

public class MyThread {

    static {
        //加载库文件
        System.load("/home/yangxianzhu/MyThread.so");
    }

    public void start() {
        start0();
    }

    private native void start0();

    public static void main(String[] args) {
        new MyThread().start();
    }
}
为了方便编译和运行,将MyThread.java中的包路径去除,如下:
public class MyThread {

    static {
        //加载库文件
        System.load("/home/yangxianzhu/MyThread.so");
    }

    public void start() {
        start0();
    }

    private native void start0();

    public static void main(String[] args) {
        new MyThread().start();
    }
}
然后将其拷贝到Linux中的任意目录,此处放到跟库文件同样的/home/yangxianzhu下
[root@192 yangxianzhu]# ll
总用量 20
-rw-r--r--. 1 root root  494 12月  4 15:22 MyThread.c
-rw-r--r--. 1 root root  438 12月  4 14:48 MyThread.h
-rw-r--r--. 1 root root  311 12月  4 15:37 MyThread.java
-rwxr-xr-x. 1 root root 8184 12月  4 15:32 MyThread.so
使用javac命令进行编译:
[root@192 yangxianzhu]# javac MyThread.java
[root@192 yangxianzhu]# ll
总用量 24
-rw-r--r--. 1 root root  494 12月  4 15:22 MyThread.c
-rw-r--r--. 1 root root  529 12月  4 15:41 MyThread.class
-rw-r--r--. 1 root root  438 12月  4 14:48 MyThread.h
-rw-r--r--. 1 root root  311 12月  4 15:37 MyThread.java
-rwxr-xr-x. 1 root root 8184 12月  4 15:32 MyThread.so
然后使用java命令运行,结果如下:
[root@192 yangxianzhu]# java MyThread
this is java_start method!
this is start0 method!
this is java_start method!
this is start0 method!
this is java_start method!
this is start0 method!
this is java_start method!
this is start0 method!
至此就完成了在Java中通过JNI调用MyThread.c中的创建内核线程的方法。
下面就是如何在MyThread.c中回调MyThread.java中的方法,在MyThread.java中添加run方法
public class MyThread {

    static {
        //加载库文件
        System.load("/home/yangxianzhu/MyThread.so");
    }

    public void start() {
        start0();
    }

    private native void start0();

    public void run() {
        System.out.println("this is run method");
    }

    public static void main(String[] args) {
        new MyThread().start();
    }
}
修改MyThread.c内容如下:
#include <pthread.h>
#include <stdio.h>
#include "MyThread.h"

JavaVM *javaVM;
int status; //线程状态:0|INITIALIZED、1|RUNNABLE

void *java_start(void *arg) {
    JNIEnv *env=NULL;
    (*javaVM)->AttachCurrentThread(javaVM, &env, NULL);
    jclass cls;
    jobject obj;
    jmethodID cid;
    jmethodID rid;
    jint ret=0;
    //通过虚拟机找到Java中的类
    cls=(*env)->FindClass(env, "MyThread");
    if (cls==NULL)
    {
        printf("class is not found\n");
        return;
    }
    //如果找到该类,此时通过无参构造函数new出来
    cid=(*env)->GetMethodID(env, cls, "<init>", "()V");
    if(cid==NULL) {
        printf("constructor is not found\n");
    }
    //通过构造函数实例化
    obj=(*env)->NewObject(env, cls, cid);
    if(obj==NULL) {
        printf("NewObject is error\n");
    }
    //找到run方法
    rid=(*env)->GetMethodID(env, cls, "run", "()V");
    if (rid==NULL)
    {
        printf("run method id not found\n");
    }
    //直到线程状态不为0|INITIALIZED,才会执行下面的run方法
    while (status == 0)
    {
        usleep(1000000);
        printf("thread state is INITIALIZED\n");
    }
    printf("thread state is RUNNABLE\n");
    //开始调用run方法
    (*env)->CallIntMethod(env, obj, rid, NULL);
}

JNIEXPORT void JNICALL Java_MyThread_start0(JNIEnv *env, jobject obj) {
    pthread_t tid;
    pthread_create(&tid, NULL, java_start, NULL);
    //休眠5秒后,将线程状态改成1|RUNNABLE
    usleep(5000000);
    status=1;
}

//JVM启动的时候调用,对javaVM进行赋值
JNIEXPORT jint JNI_OnLoad(JavaVM *vm, void *reserved) {
    javaVM=vm;
    return JNI_VERSION_1_8;
}

int main() {
    return 0;
}
重新生成库文件,然后再次编译并运行MyThread,结果如下:
[root@192 yangxianzhu]# java MyThread
thread state is INITIALIZED
thread state is INITIALIZED
thread state is INITIALIZED
thread state is INITIALIZED
thread state is INITIALIZED
thread state is RUNNABLE
this is run method
可以看出MyThread.java中的run方法被执行了。
至此就完成了在Java中通过JNI技术调用.C中的代码创建新内核线程,然后在内核线程中回调Java中的方法。