文章目录
- 📋前言
- 🎯demo 介绍
- 🎯功能分析
- 🧩数据的展示与分页功能
- 🧩编辑功能
- 🧩删除功能
- 🎯部分代码分析
- 🎯完整代码
- 📝最后

📋前言
这篇文章介绍一下基于 Vue3 和 ElementPlus 的小 demo ,是一个模拟的联系人列表管理后台的,功能包括了数据的展示、编辑功能、删除功能以及列表分页功能。这篇文章是为了下一篇做基础和学习,因此列表的数据使用的是死数据。下一篇预告 Node.js + Vue3 + ElementPlus 实现联系人列表管理后台。
🎯demo 介绍
上面我也说到了,这个联系人列表管理后台的功能包括了数据的展示、编辑功能、删除功能以及列表分页功能。接下来我们来分析每个功能具体要做什么、以及如何实现。首先我们可以看到最终效果图如下。

🎯功能分析
接下来我们逐步分析这个 demo 要实现的功能。其中包括了数据的展示、编辑功能、删除功能以及列表分页功能。
🧩数据的展示与分页功能

首先项目运行后展示出的效果如上图,列表包括了 id 、姓名、电话以及相关操作,操作又包括了编辑功能和删除功能的按钮。
注意 id 是从小到大排列,其中数据中的 id 是没有排序的,如下图。
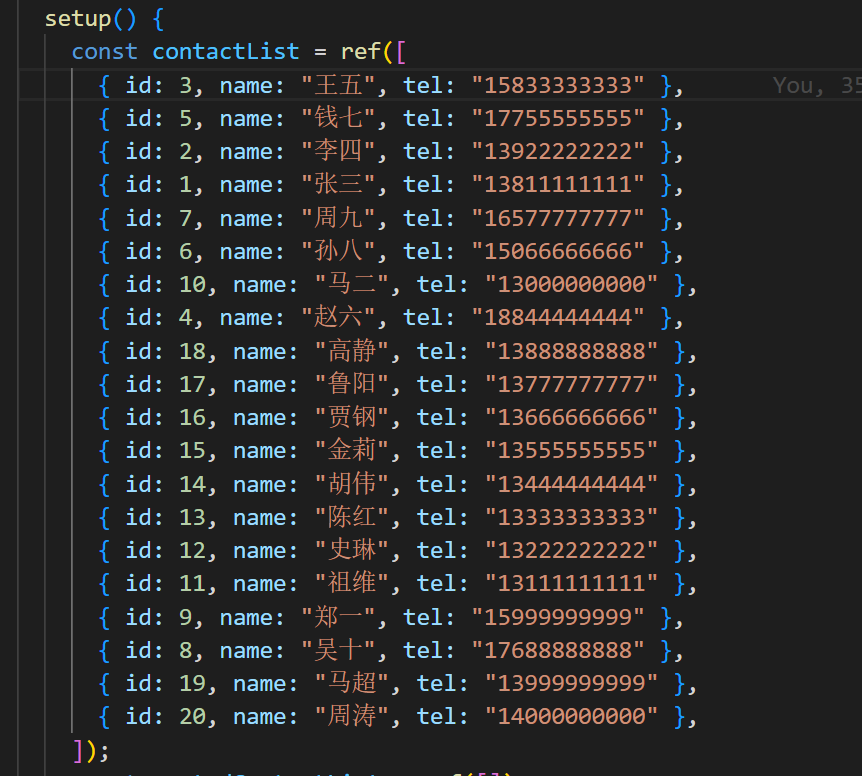
最后是数据列表的分页,这里用到的是 el-pagination 实现分页的功能,五条数据为一页。

🧩编辑功能
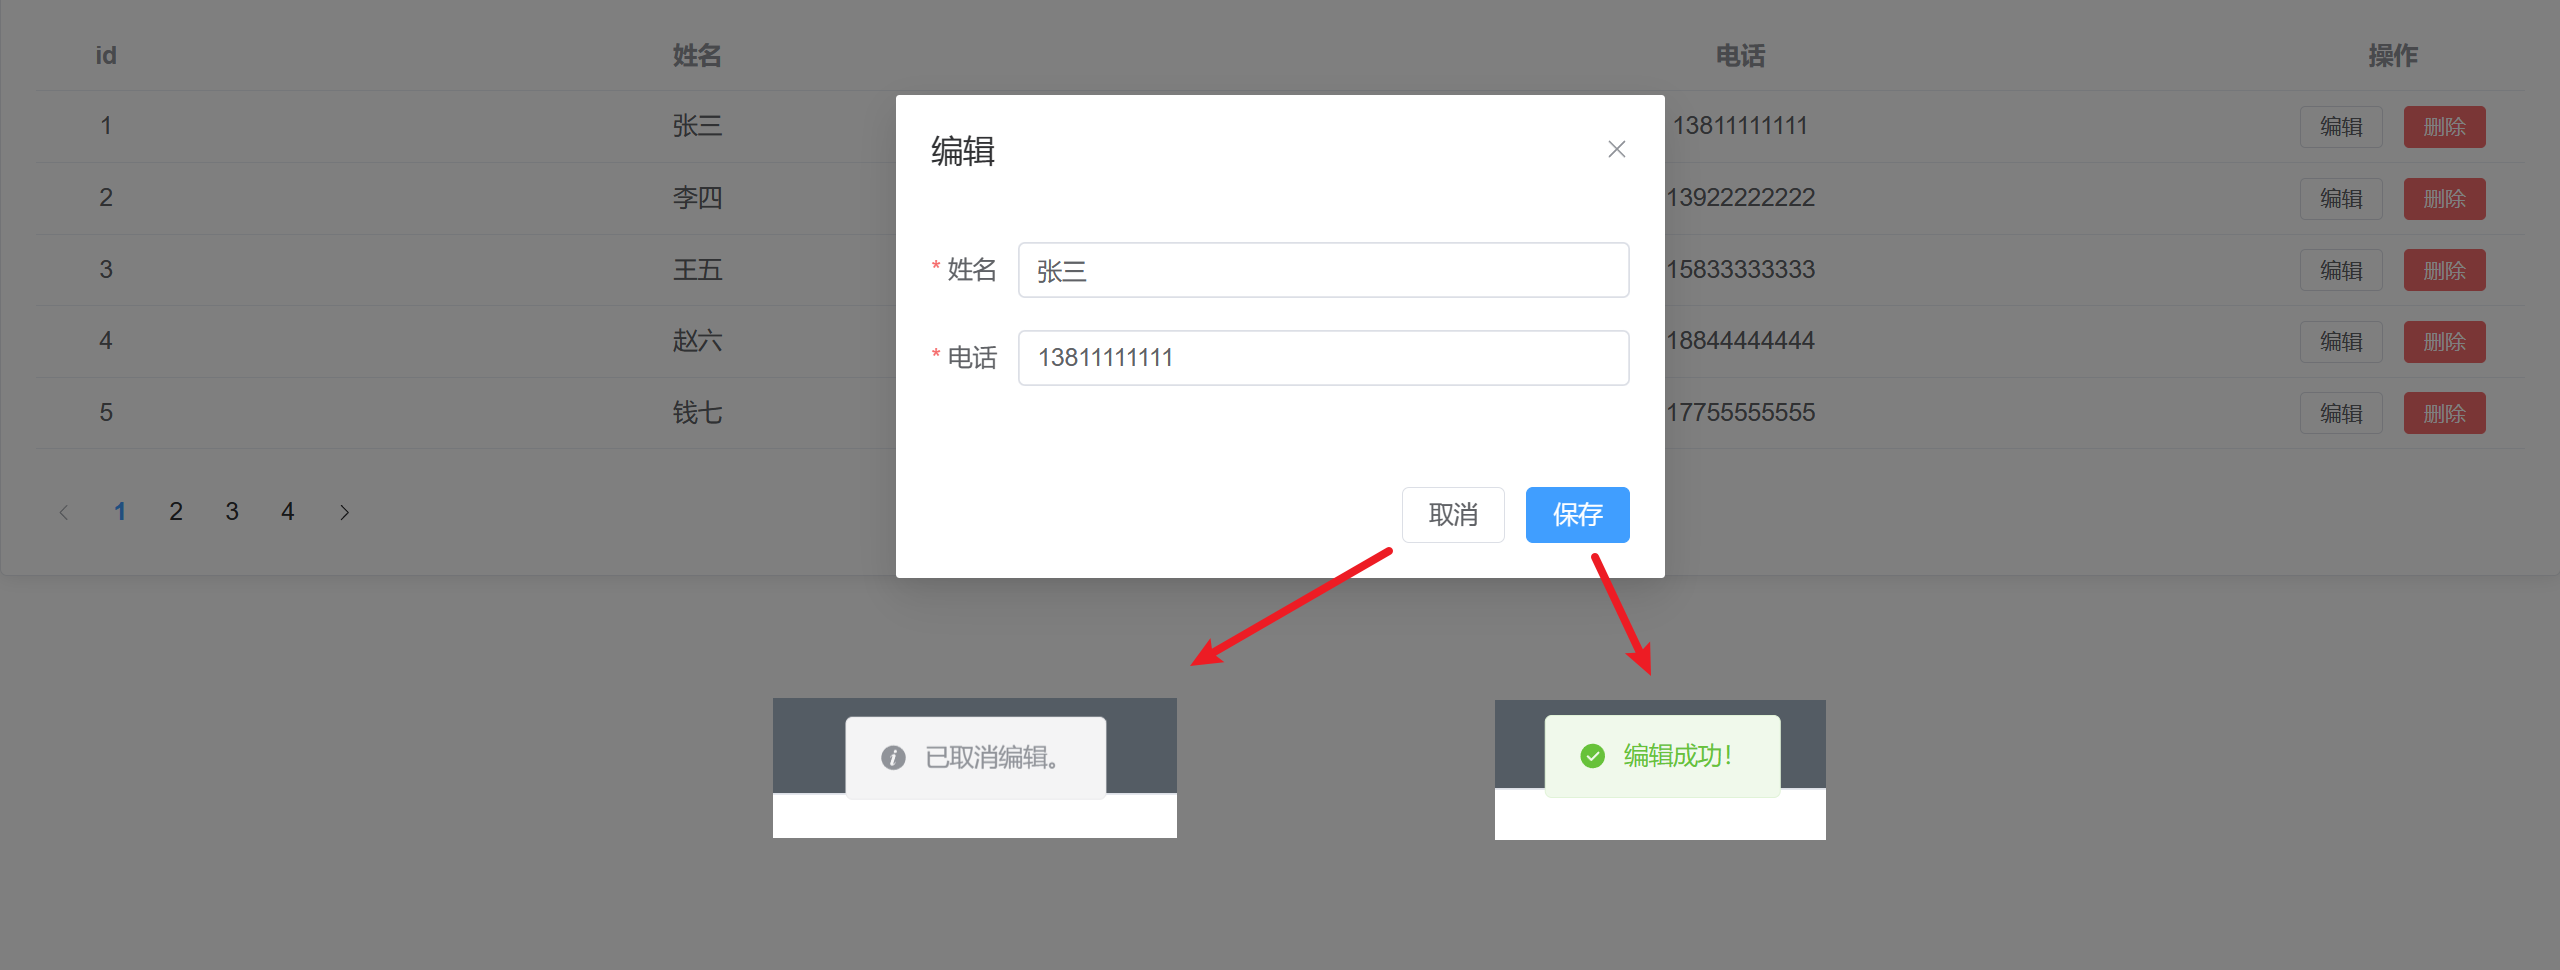
然后是编辑功能,通过点击编辑按钮,然后出现弹窗,对数据进行修改和保持,这里使用到了 el-dialog 和 ElMessage 实现窗口的出现、隐藏以及一些交互效果(消息框)。

交互效果包括了取消编辑、保存编辑的内容,通过 ElMessage 来实现交互后的消息框,效果如下图。
🧩删除功能
然后是编辑功能,通过点击删除按钮,然后出现是否确认删除的弹窗,这里使用到了 ElMessageBox 实现弹窗的出现以及确认、取消的交互效果。

点击确认后数据就会被删除了。然后通过 ElMessage 来实现交互后的消息框,比如删除成功的消息框。
🎯部分代码分析
首先我们分析一下这个 demo 用的组件,有 el-button 、el-form 、el-card 、el-dialog 、el-table 、el-pagination 等等。
这个 demo 的 template 部分结构很简单,只包括了数据列表和弹窗通过 el-card 、el-table 、el-button 实现数据列表,el-dialog 、el-form 、el-button 实现弹窗的部分。
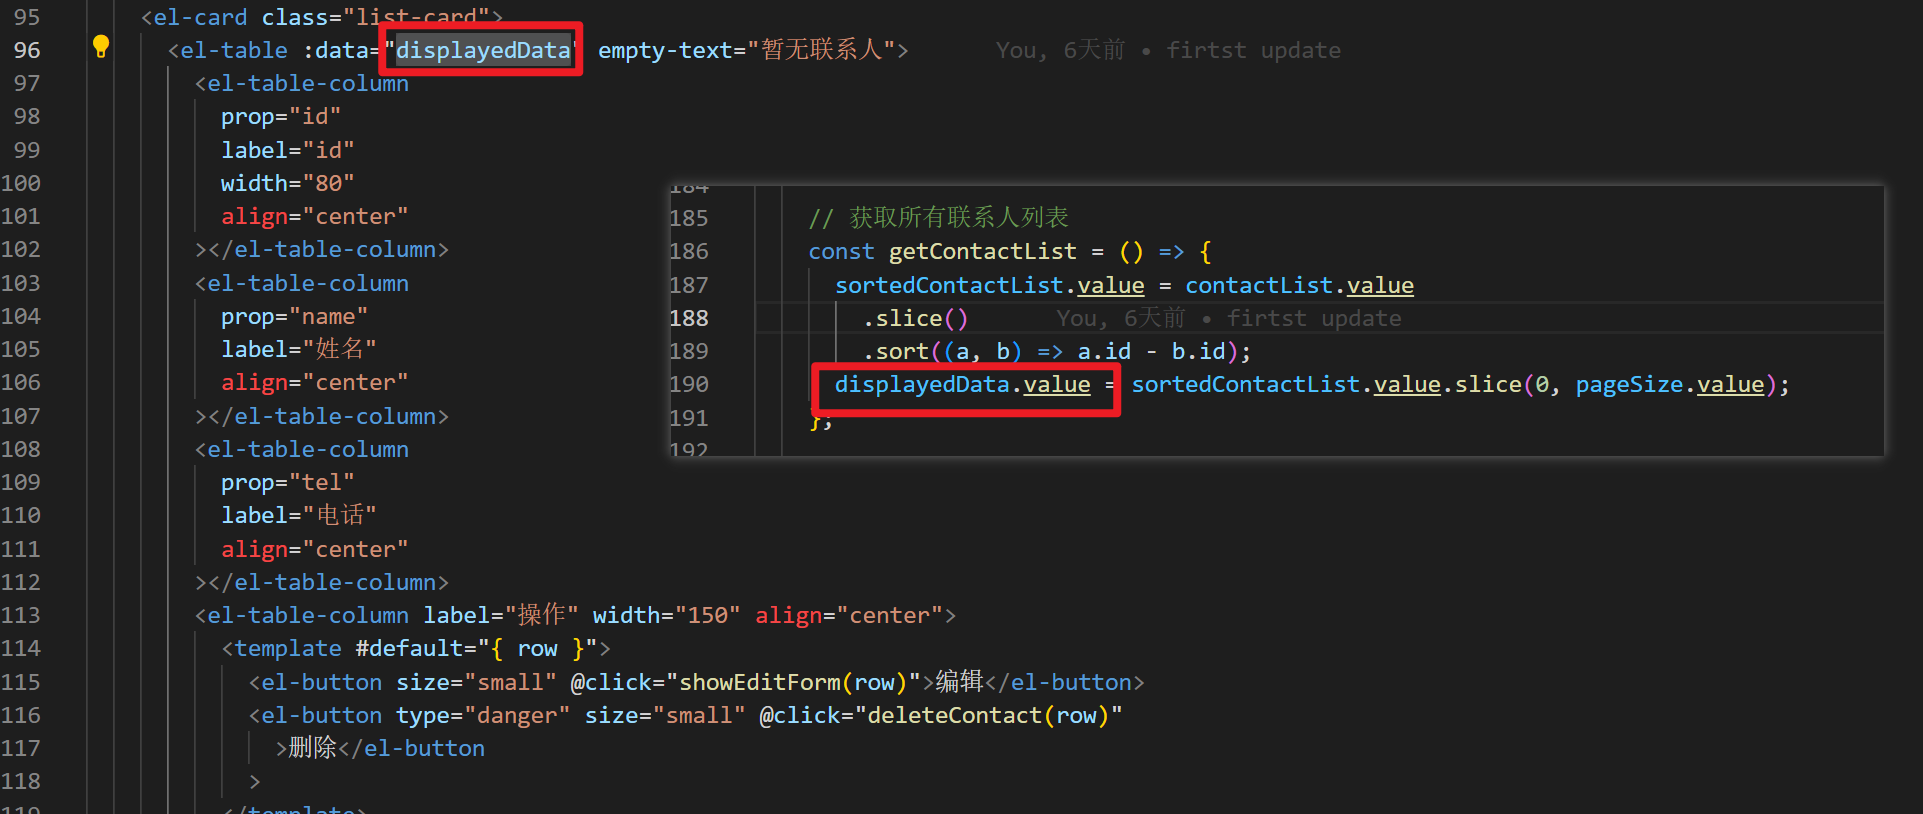
因为这个 demo 的数据是写死的了,没有后台数据以及 axios 获取 ,所以通过以下的方法实现数据列表的渲染。
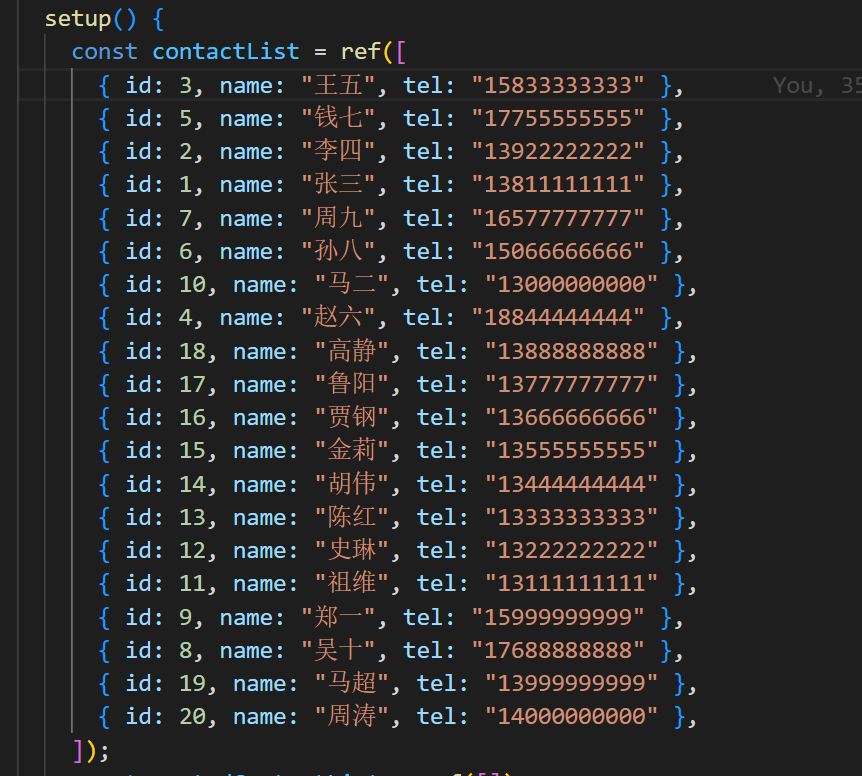
其中默认数据如下。
弹窗部分的代码如下
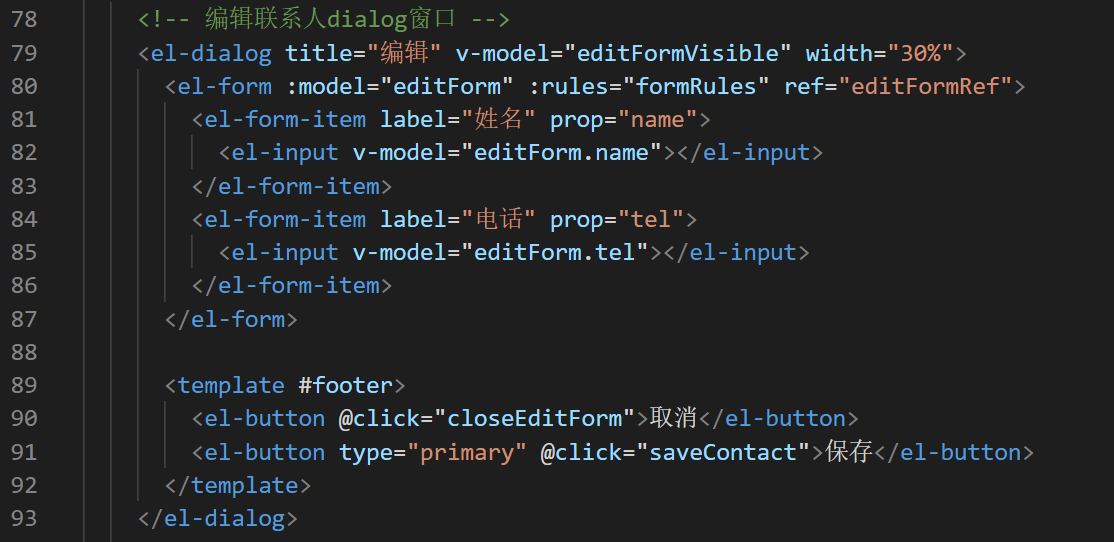
然后还包括一些交互功能的代码,如弹窗的显示与隐藏。
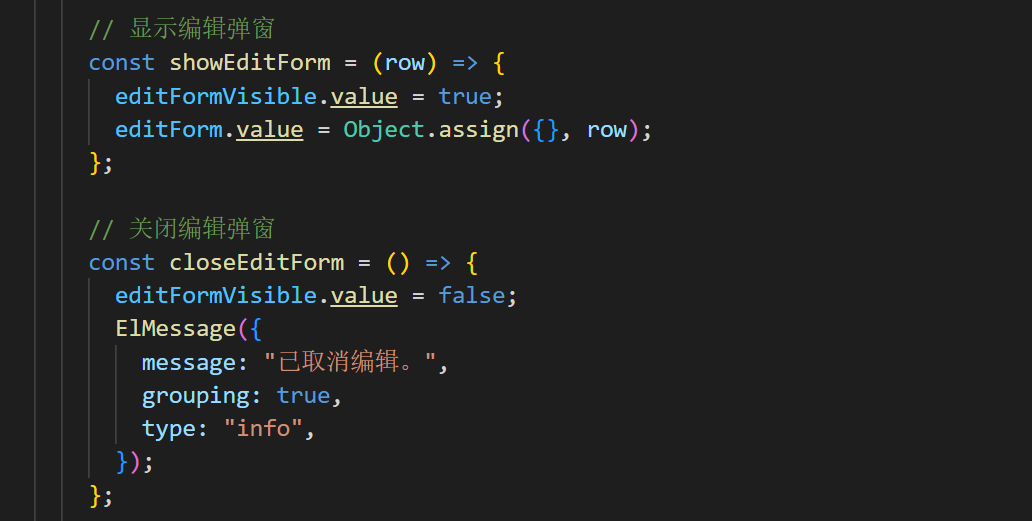
然后就是显示弹窗以后,对应的交互功能,如取消(就是隐藏关闭掉弹窗)、保存的功能。
    // 保存联系人信息
    const saveContact = () => {
      const index = sortedContactList.value.findIndex(
        (item) => item.id === editForm.value.id
      );
      if (index >= 0) {
        const oldItem = contactList.value.find(
          (item) => item.id === editForm.value.id
        );
        contactList.value.splice(contactList.value.indexOf(oldItem), 1, {
          ...oldItem,
          ...editForm.value,
        });
        sortedContactList.value.splice(index, 1, {
          ...oldItem,
          ...editForm.value,
        });
        displayedData.value.splice(
          index - pageSize.value * (currentPage.value - 1),
          1,
          editForm.value
        );
        editFormVisible.value = false;
        ElMessage({
          message: "编辑成功!",
          grouping: true,
          type: "success",
        });
      }
    };
这里我来分析一下如何实现保存编辑内容的功能。首先这段代码的运行逻辑是在编辑联系人信息时,从 contactList 中找到对应的联系人数据项,并用 editForm 中的新数据来更新它,然后同步更新 sortedContactList 和 displayedData。最后,将编辑框关闭,并提示用户编辑成功。
具体逻辑如下。
- 首先,通过 findIndex() 方法查找 sortedContactList 中是否存在 id 和 editForm 中的 id 相同的联系人数据项。(id 是联系人对象的唯一标识符)
- 如果能够找到该联系人数据,就从 contactList 中找到对应的旧联系人数据项,并用新的 editForm 数据来更新它。同时,也更新 sortedContactList 中对应索引上的数据项。
- 接着,根据当前页码和每页显示数量,还需要更新 displayedData 中对应位置的数据项。
- 最后,将编辑框的 visible 属性设置为 false,关闭编辑框。并使用 ElMessage 组件显示一条“编辑成功”的成功提示信息。
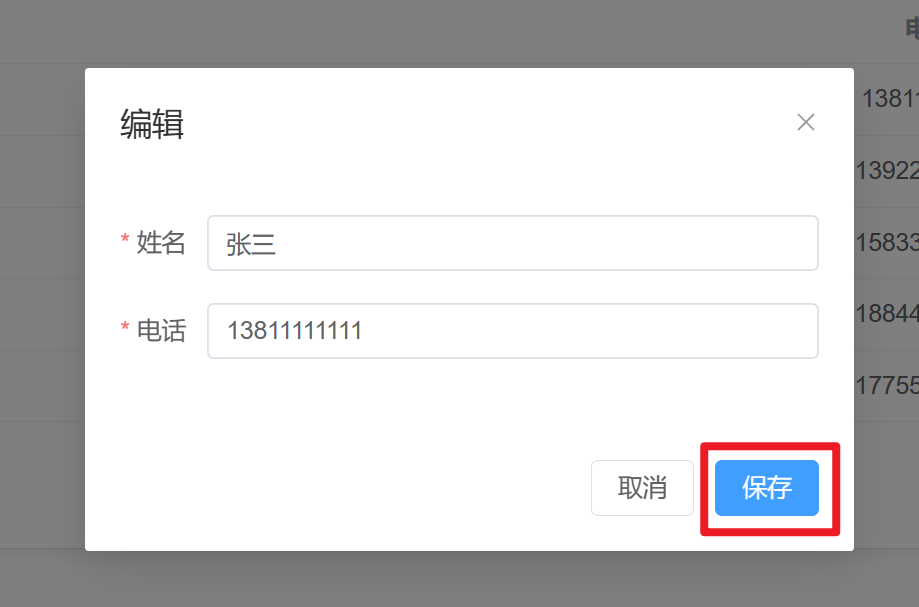
当然,这个 demo 还有其他功能,这里就不过多描述了代码的具体功能了,详情还得是自己去编写了才能体验的到了,最后附上完整代码,供大家参考和学习。
🎯完整代码
<template>
  <div>
    <!-- 编辑联系人dialog窗口 -->
    <el-dialog title="编辑" v-model="editFormVisible" width="30%">
      <el-form :model="editForm" :rules="formRules" ref="editFormRef">
        <el-form-item label="姓名" prop="name">
          <el-input v-model="editForm.name"></el-input>
        </el-form-item>
        <el-form-item label="电话" prop="tel">
          <el-input v-model="editForm.tel"></el-input>
        </el-form-item>
      </el-form>

      <template #footer>
        <el-button @click="closeEditForm">取消</el-button>
        <el-button type="primary" @click="saveContact">保存</el-button>
      </template>
    </el-dialog>

    <el-card class="list-card">
      <el-table :data="displayedData" empty-text="暂无联系人">
        <el-table-column
          prop="id"
          label="id"
          width="80"
          align="center"
        ></el-table-column>
        <el-table-column
          prop="name"
          label="姓名"
          align="center"
        ></el-table-column>
        <el-table-column
          prop="tel"
          label="电话"
          align="center"
        ></el-table-column>
        <el-table-column label="操作" width="150" align="center">
          <template #default="{ row }">
            <el-button size="small" @click="showEditForm(row)">编辑</el-button>
            <el-button type="danger" size="small" @click="deleteContact(row)"
              >删除</el-button
            >
          </template>
        </el-table-column>
      </el-table>
      <div class="pagination">
        <el-pagination
          layout="prev, pager, next"
          :total="contactList.length"
          :page-size="pageSize"
          v-model:current-page="currentPage"
          @current-change="handleCurrentChange"
        />
      </div>
    </el-card>
  </div>
</template>

<script>
import { defineComponent, ref } from "vue";
import { ElMessage, ElMessageBox } from "element-plus";
export default defineComponent({
  name: "ContactList",
  setup() {
    const contactList = ref([
      { id: 3, name: "王五", tel: "15833333333" },
      { id: 5, name: "钱七", tel: "17755555555" },
      { id: 2, name: "李四", tel: "13922222222" },
      { id: 1, name: "张三", tel: "13811111111" },
      { id: 7, name: "周九", tel: "16577777777" },
      { id: 6, name: "孙八", tel: "15066666666" },
      { id: 10, name: "马二", tel: "13000000000" },
      { id: 4, name: "赵六", tel: "18844444444" },
      { id: 18, name: "高静", tel: "13888888888" },
      { id: 17, name: "鲁阳", tel: "13777777777" },
      { id: 16, name: "贾钢", tel: "13666666666" },
      { id: 15, name: "金莉", tel: "13555555555" },
      { id: 14, name: "胡伟", tel: "13444444444" },
      { id: 13, name: "陈红", tel: "13333333333" },
      { id: 12, name: "史琳", tel: "13222222222" },
      { id: 11, name: "祖维", tel: "13111111111" },
      { id: 9, name: "郑一", tel: "15999999999" },
      { id: 8, name: "吴十", tel: "17688888888" },
      { id: 19, name: "马超", tel: "13999999999" },
      { id: 20, name: "周涛", tel: "14000000000" },
    ]);
    const sortedContactList = ref([]);
    const displayedData = ref([]);
    const pageSize = ref(5);
    const currentPage = ref(1);
    const editFormVisible = ref(false);
    const editForm = ref({ id: "", name: "", tel: "" });
    const formRules = ref({
      name: [{ required: true, message: "请输入姓名", trigger: "blur" }],
      tel: [
        {
          required: true,
          message: "请输入电话号码",
          trigger: "blur",
        },
        {
          pattern: /^1[3456789]\d{9}/,
          message: "请输入有效的手机号码",
          trigger: "blur",
        },
      ],
    });

    // 获取所有联系人列表
    const getContactList = () => {
      sortedContactList.value = contactList.value
        .slice()
        .sort((a, b) => a.id - b.id);
      displayedData.value = sortedContactList.value.slice(0, pageSize.value);
    };

    // 显示编辑弹窗
    const showEditForm = (row) => {
      editFormVisible.value = true;
      editForm.value = Object.assign({}, row);
    };

    // 关闭编辑弹窗
    const closeEditForm = () => {
      editFormVisible.value = false;
      ElMessage({
        message: "已取消编辑。",
        grouping: true,
        type: "info",
      });
    };

    // 保存联系人信息
    const saveContact = () => {
      const index = sortedContactList.value.findIndex(
        (item) => item.id === editForm.value.id
      );
      if (index >= 0) {
        const oldItem = contactList.value.find(
          (item) => item.id === editForm.value.id
        );
        contactList.value.splice(contactList.value.indexOf(oldItem), 1, {
          ...oldItem,
          ...editForm.value,
        });
        sortedContactList.value.splice(index, 1, {
          ...oldItem,
          ...editForm.value,
        });
        displayedData.value.splice(
          index - pageSize.value * (currentPage.value - 1),
          1,
          editForm.value
        );
        editFormVisible.value = false;
        ElMessage({
          message: "编辑成功!",
          grouping: true,
          type: "success",
        });
      }
    };

    // 删除联系人
    const deleteContact = (row) => {
      const index = sortedContactList.value.findIndex(
        (item) => item.id === row.id
      );
      ElMessageBox.confirm(`确定要删除联系人${row.name}吗`, "Warning", {
        confirmButtonText: "确认",
        cancelButtonText: "取消",
        type: "warning",
      }).then(() => {
        if (index >= 0) {
          const oldItem = contactList.value.find((item) => item.id === row.id);
          contactList.value.splice(contactList.value.indexOf(oldItem), 1);
          sortedContactList.value.splice(index, 1);
          displayedData.value.splice(
            index - pageSize.value * (currentPage.value - 1),
            1
          );
          ElMessage({
            message: "删除成功!",
            grouping: true,
            type: "success",
          });
        }
      });
    };

    // 处理页码改变事件
    const handleCurrentChange = (val) => {
      currentPage.value = val;
      const start = pageSize.value * (currentPage.value - 1);
      const end = pageSize.value * currentPage.value;
      displayedData.value = sortedContactList.value.slice(start, end);
    };

    // 初始化获取所有联系人列表
    getContactList();

    return {
      contactList,
      sortedContactList,
      displayedData,
      pageSize,
      currentPage,
      editFormVisible,
      editForm,
      formRules,
      getContactList,
      showEditForm,
      closeEditForm,
      saveContact,
      deleteContact,
      handleCurrentChange,
    };
  },
});
</script>

<style>
.pagination {
  margin-top: 20px;
  text-align: center;
}
</style>
📝最后
通过这篇文章的实战学习,学会实现的思路和基本的逻辑,为了下一篇内容做基础和学习,以及实现更多其他功能。下一篇预告 Node.js + Vue3 + ElementPlus 实现联系人列表管理后台,基于这篇文章的内容学习来实现,敬请期待。

