前言
Material Design 是用于指导用户在各种平台和设备上进行视觉、动作和互动设计的全面指南。如需在您的 Android 应用中使用 Material Design,请遵循 Material Design 规范中定义的准则,并使用 Material Design 支持库中提供的新组件和样式。
正篇
安卓中的Material Design
作为Google旗下的一员——安卓,则是将其一些最具代表性一些控件和效果封装在_Material库_,这就让我们开发者可以在不了解Material Design的情况下,也很容易将自己的应用Material化,当然现在在AndroidX库中的一些组件也可以实现一些Material Design的效果。
BottomSheetDialogFragment组件
介绍
这个组件在Material Design中分属Bottom Sheets:
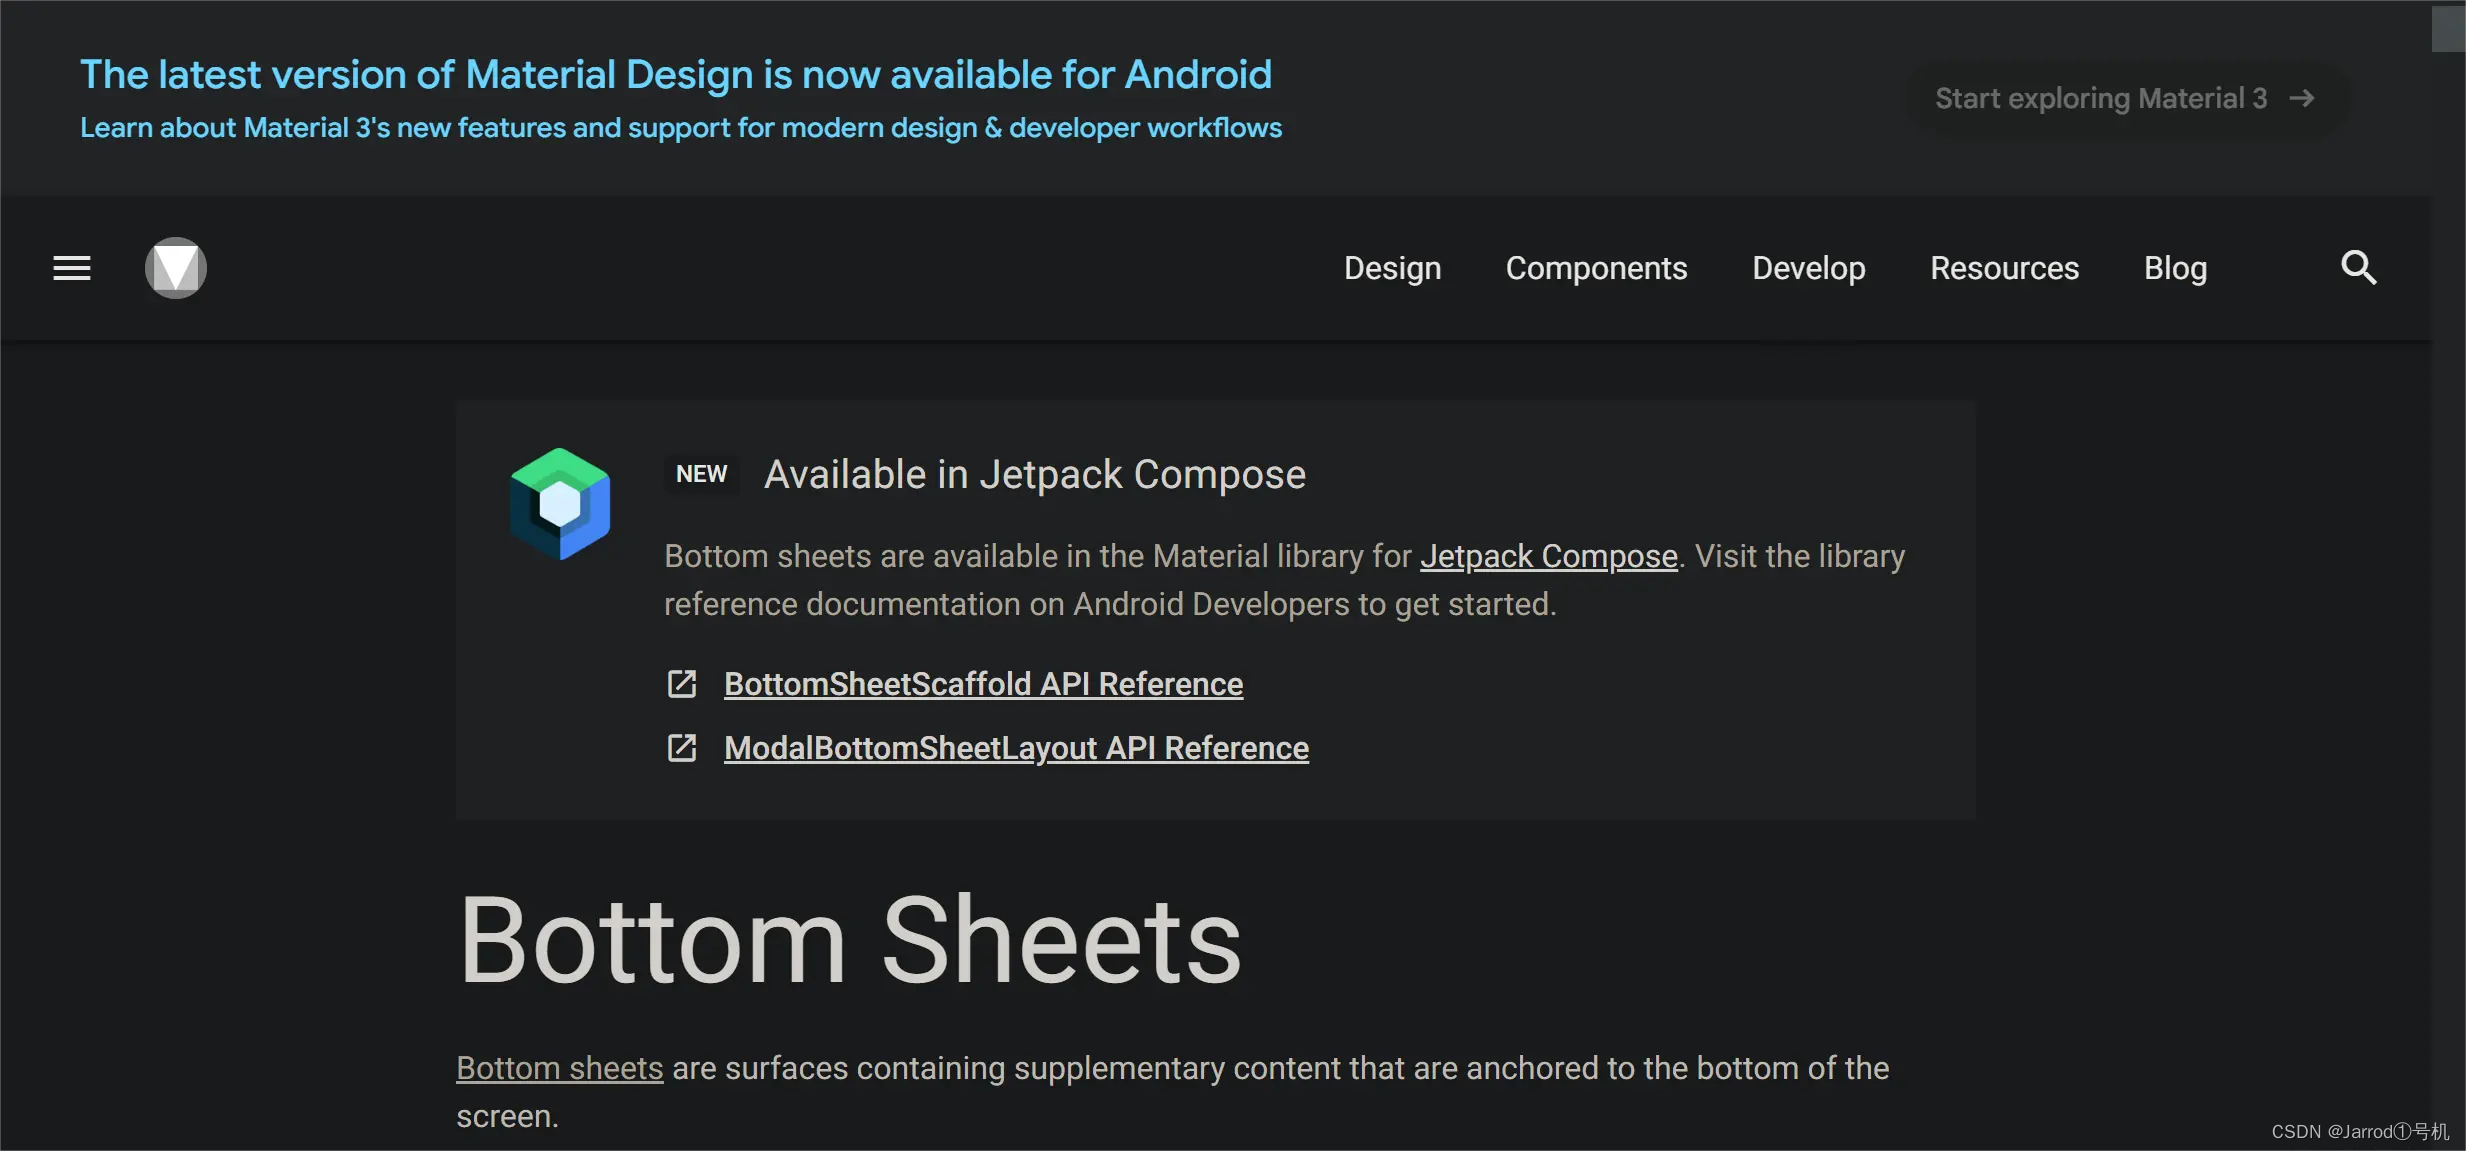 编辑
编辑
BottomSheetDialogFragment 继承自 AppCompatDialogFragment,官方解释为模态底部表,是 DialogFragment 的一个版本,它使用的是 BottomSheetDialog,而不是浮动对话框。
优势
1、拥有自己的生命周期;
2、可对整个页面进行折叠、展开和销毁;
3、可灵活使用自定义样式。
使用方法 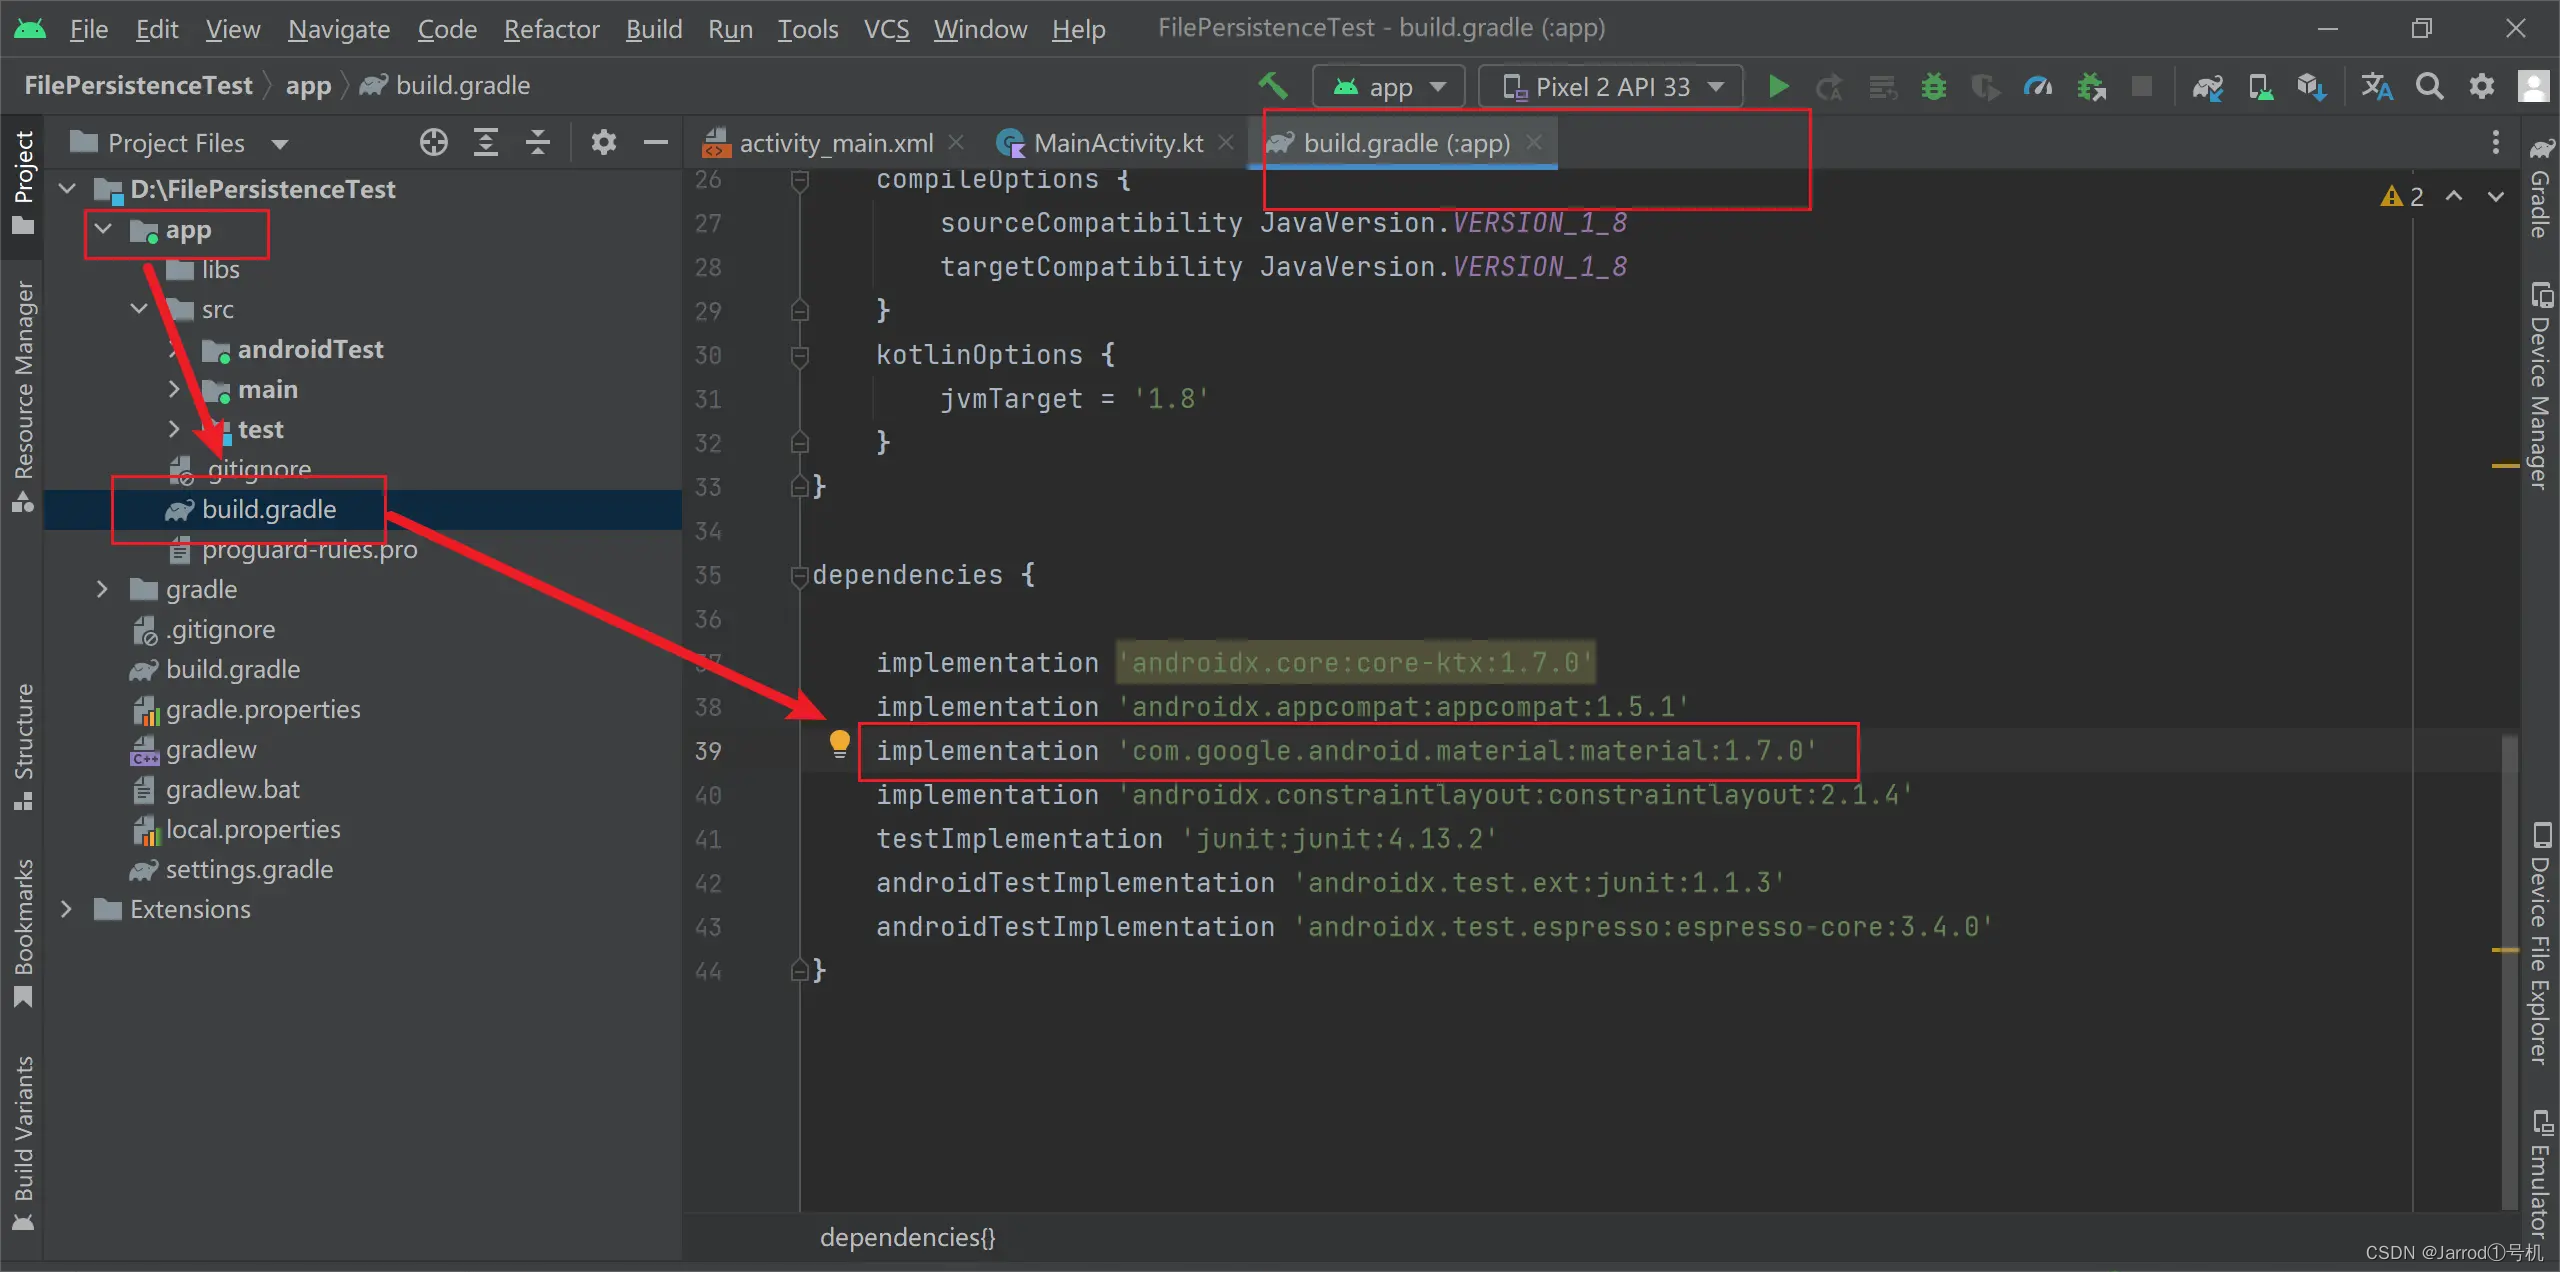
implementation 'com.google.android.material:material:1.7.0'
添加好后Sync Gradle成功后,我们就可以在项目中添加BottomSheetDialogFragment了,很简单,和正常写继承DialogFragment的Dialog一样,因为在上述中我们看到了其继承关系,BottomSheetDialogFragment是继承自AppCompatDialogFragment,而
AppCompatDialogFragment又是继承自DialogFragment。如此一来,由于BottomSheetDialogFragment是DialogFragment的子类,故它具有DialogFragment的所有特性。
实现需求
Dialog部分的实现代码:
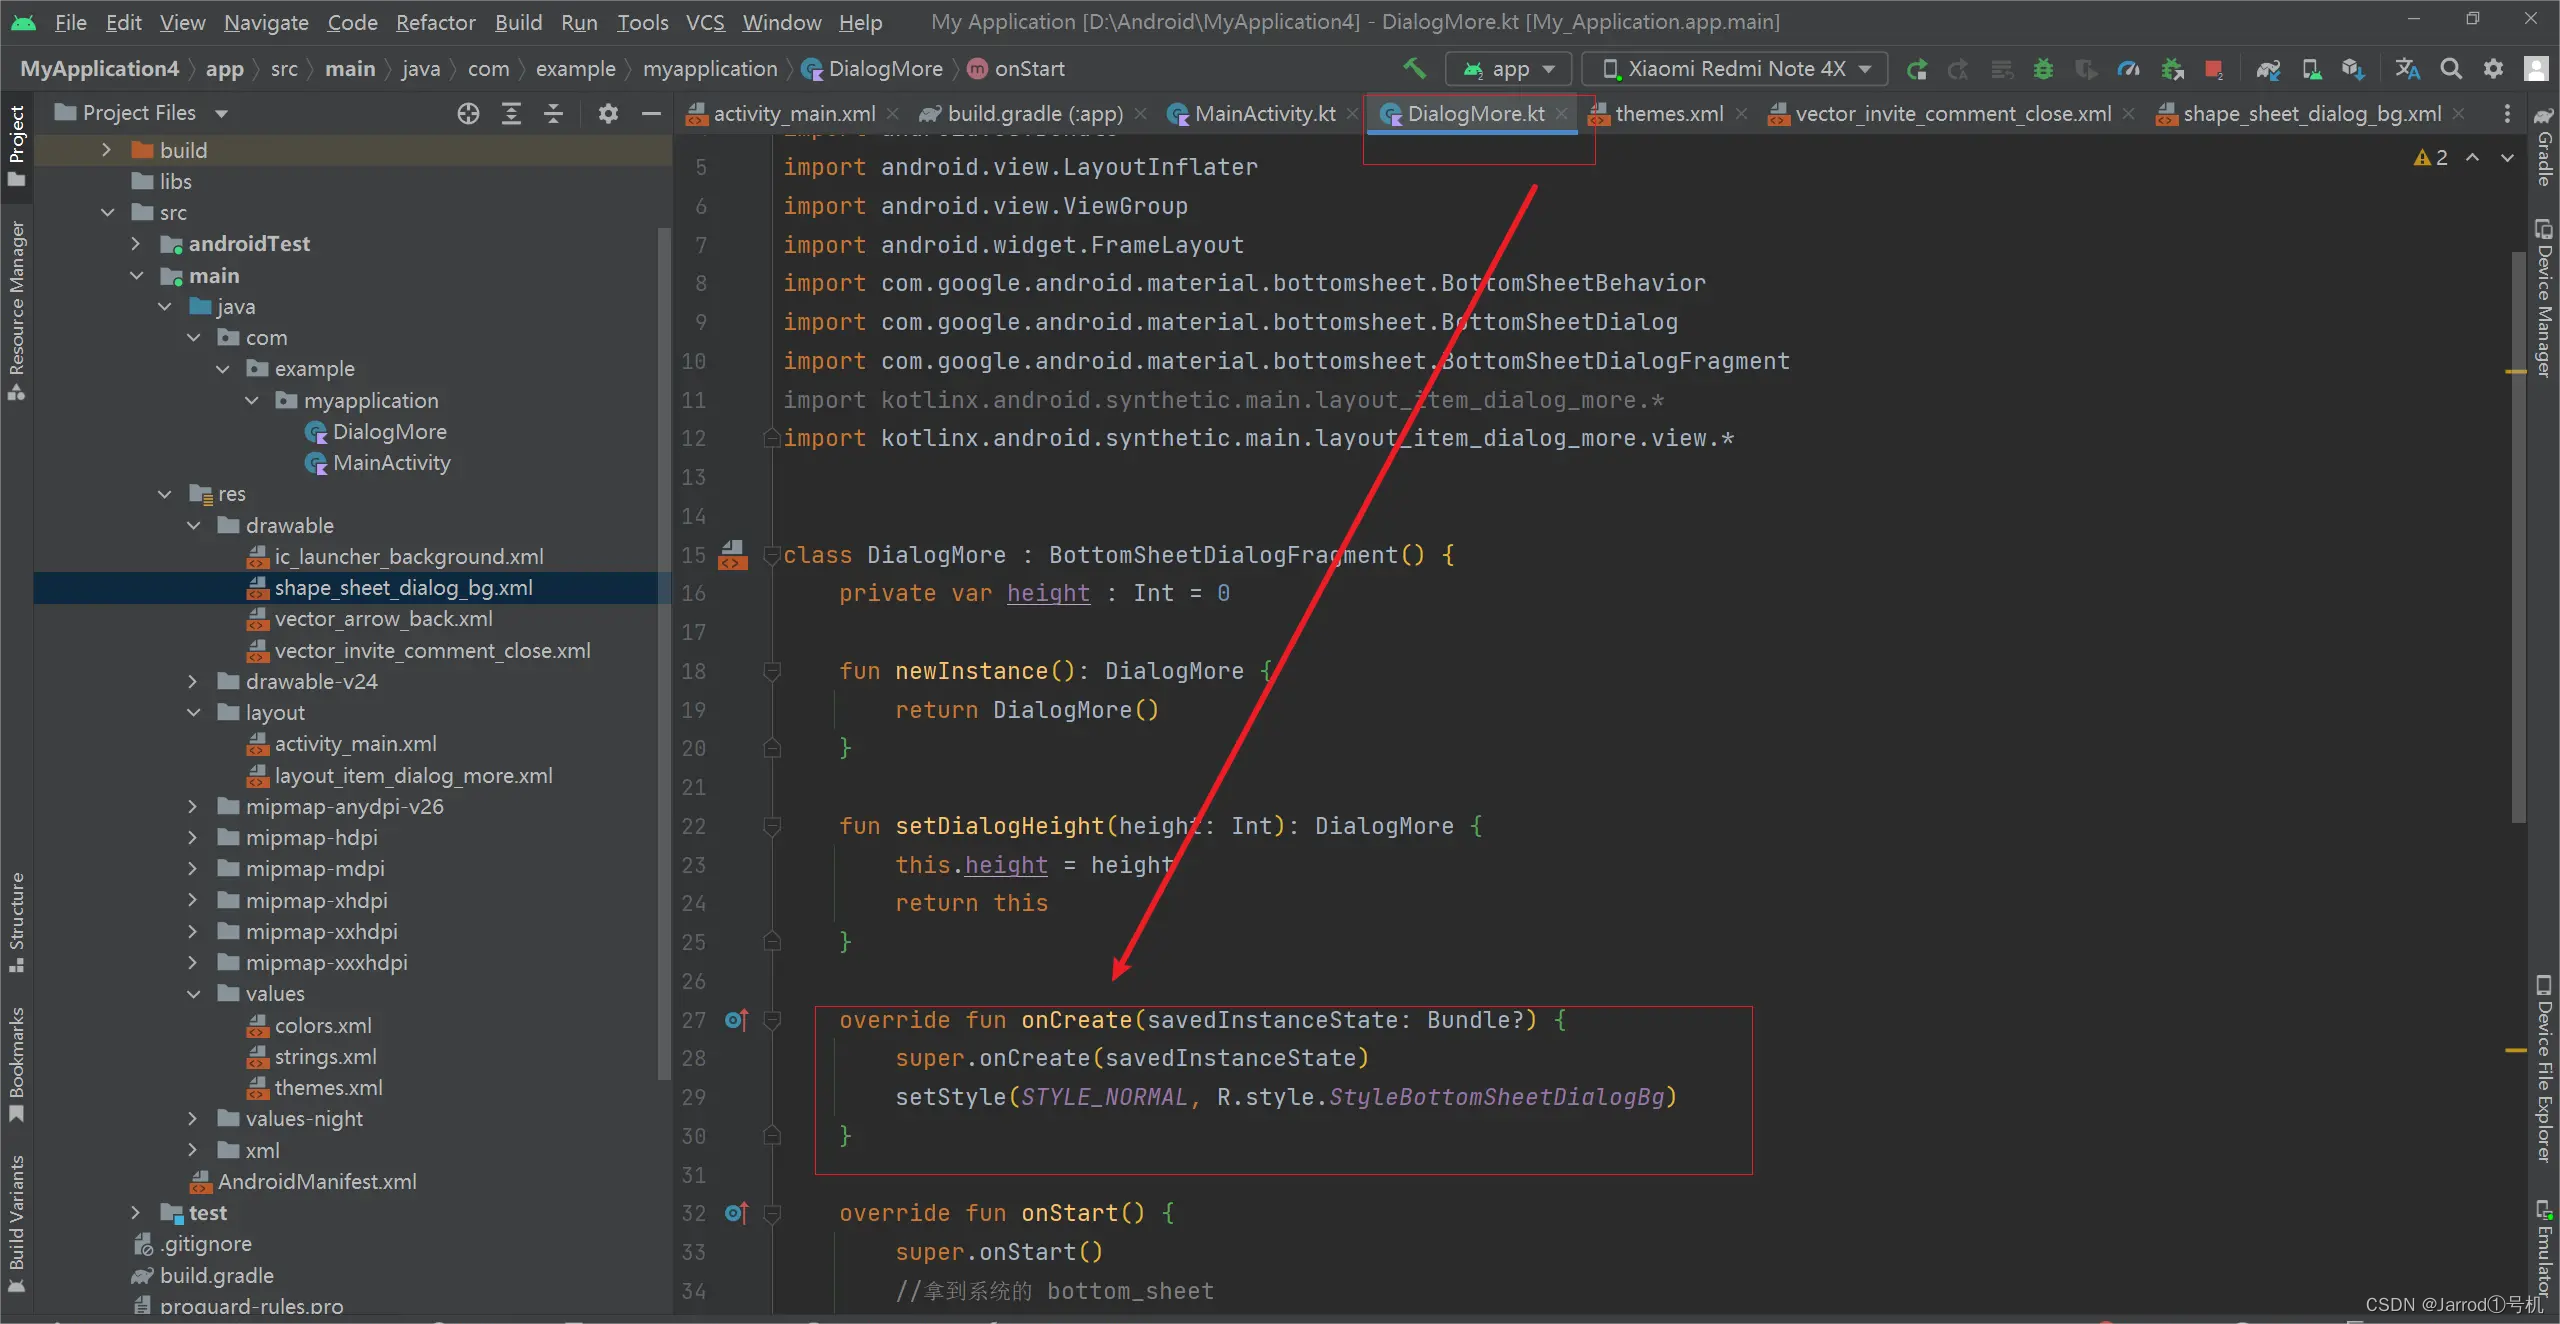
class DialogMore : BottomSheetDialogFragment() {
    private var height : Int = 0

    fun newInstance(): DialogMore {
        return DialogMore()
    }

    fun setDialogHeight(height: Int): DialogMore {
        this.height = height
        return this
    }

    override fun onCreate(savedInstanceState: Bundle?) {
        super.onCreate(savedInstanceState)
        setStyle(STYLE_NORMAL, R.style.StyleBottomSheetDialogBg)
    }

    override fun onStart() {
        super.onStart()
        //拿到系统的 bottom_sheet
        val bottomSheetDialog = (dialog as BottomSheetDialog?)!!
        val view =
            bottomSheetDialog.delegate.findViewById<FrameLayout>(com.google.android.material.R.id.design\_bottom\_sheet)!!
        val behavior = BottomSheetBehavior.from(view)
        //设置弹出高度
        behavior.peekHeight = height
        view.layoutParams.height = ViewGroup.LayoutParams.MATCH_PARENT
        behavior.isHideable = false
    }

    override fun onCreateDialog(savedInstanceState: Bundle?): Dialog {
        val dialog = super.onCreateDialog(savedInstanceState)
        val view = LayoutInflater.from(context).inflate(R.layout.layout\_item\_dialog_more, null)
        dialog.setContentView(view)
        view.vDownClose.setOnClickListener {
            dismiss()
        }
        return dialog
    }

}
可以看到,这部分实现代码和我们平时写底部弹窗方法差不多,不过我们在onStar()方法可以使用BottomSheetBehavior去控制弹窗本身的行为,比如高度控制和一些弹窗的属性设置
在onCreateDialog方法中我们把弹窗布局加进去,使用setContentView()方法获取到布局,一定要写该方法,不然我们在获取BottomSheetBehavior的时候* val behavior = BottomSheetBehavior.from(view)*这句会报空
而我们的弹窗需要顶部圆角,且去除背景阴影,所以增加了样式:
<!--实现BottomSheetDialog圆角效果 且无背景阴影-->
<style name="StyleBottomSheetDialogBg" parent="Theme.Design.Light.BottomSheetDialog">
    <item name="bottomSheetStyle">@style/StyleBottomSheetStyleWrapper</item>
    <item name="android:backgroundDimEnabled">false</item>
</style>
<style name="StyleBottomSheetStyleWrapper" parent="Widget.Design.BottomSheet.Modal">
    <item name="android:background">@android:color/transparent</item>
</style>
该地方样式在Dialog实现代码处调用,在onCreate方法中使用setStyle()方法。

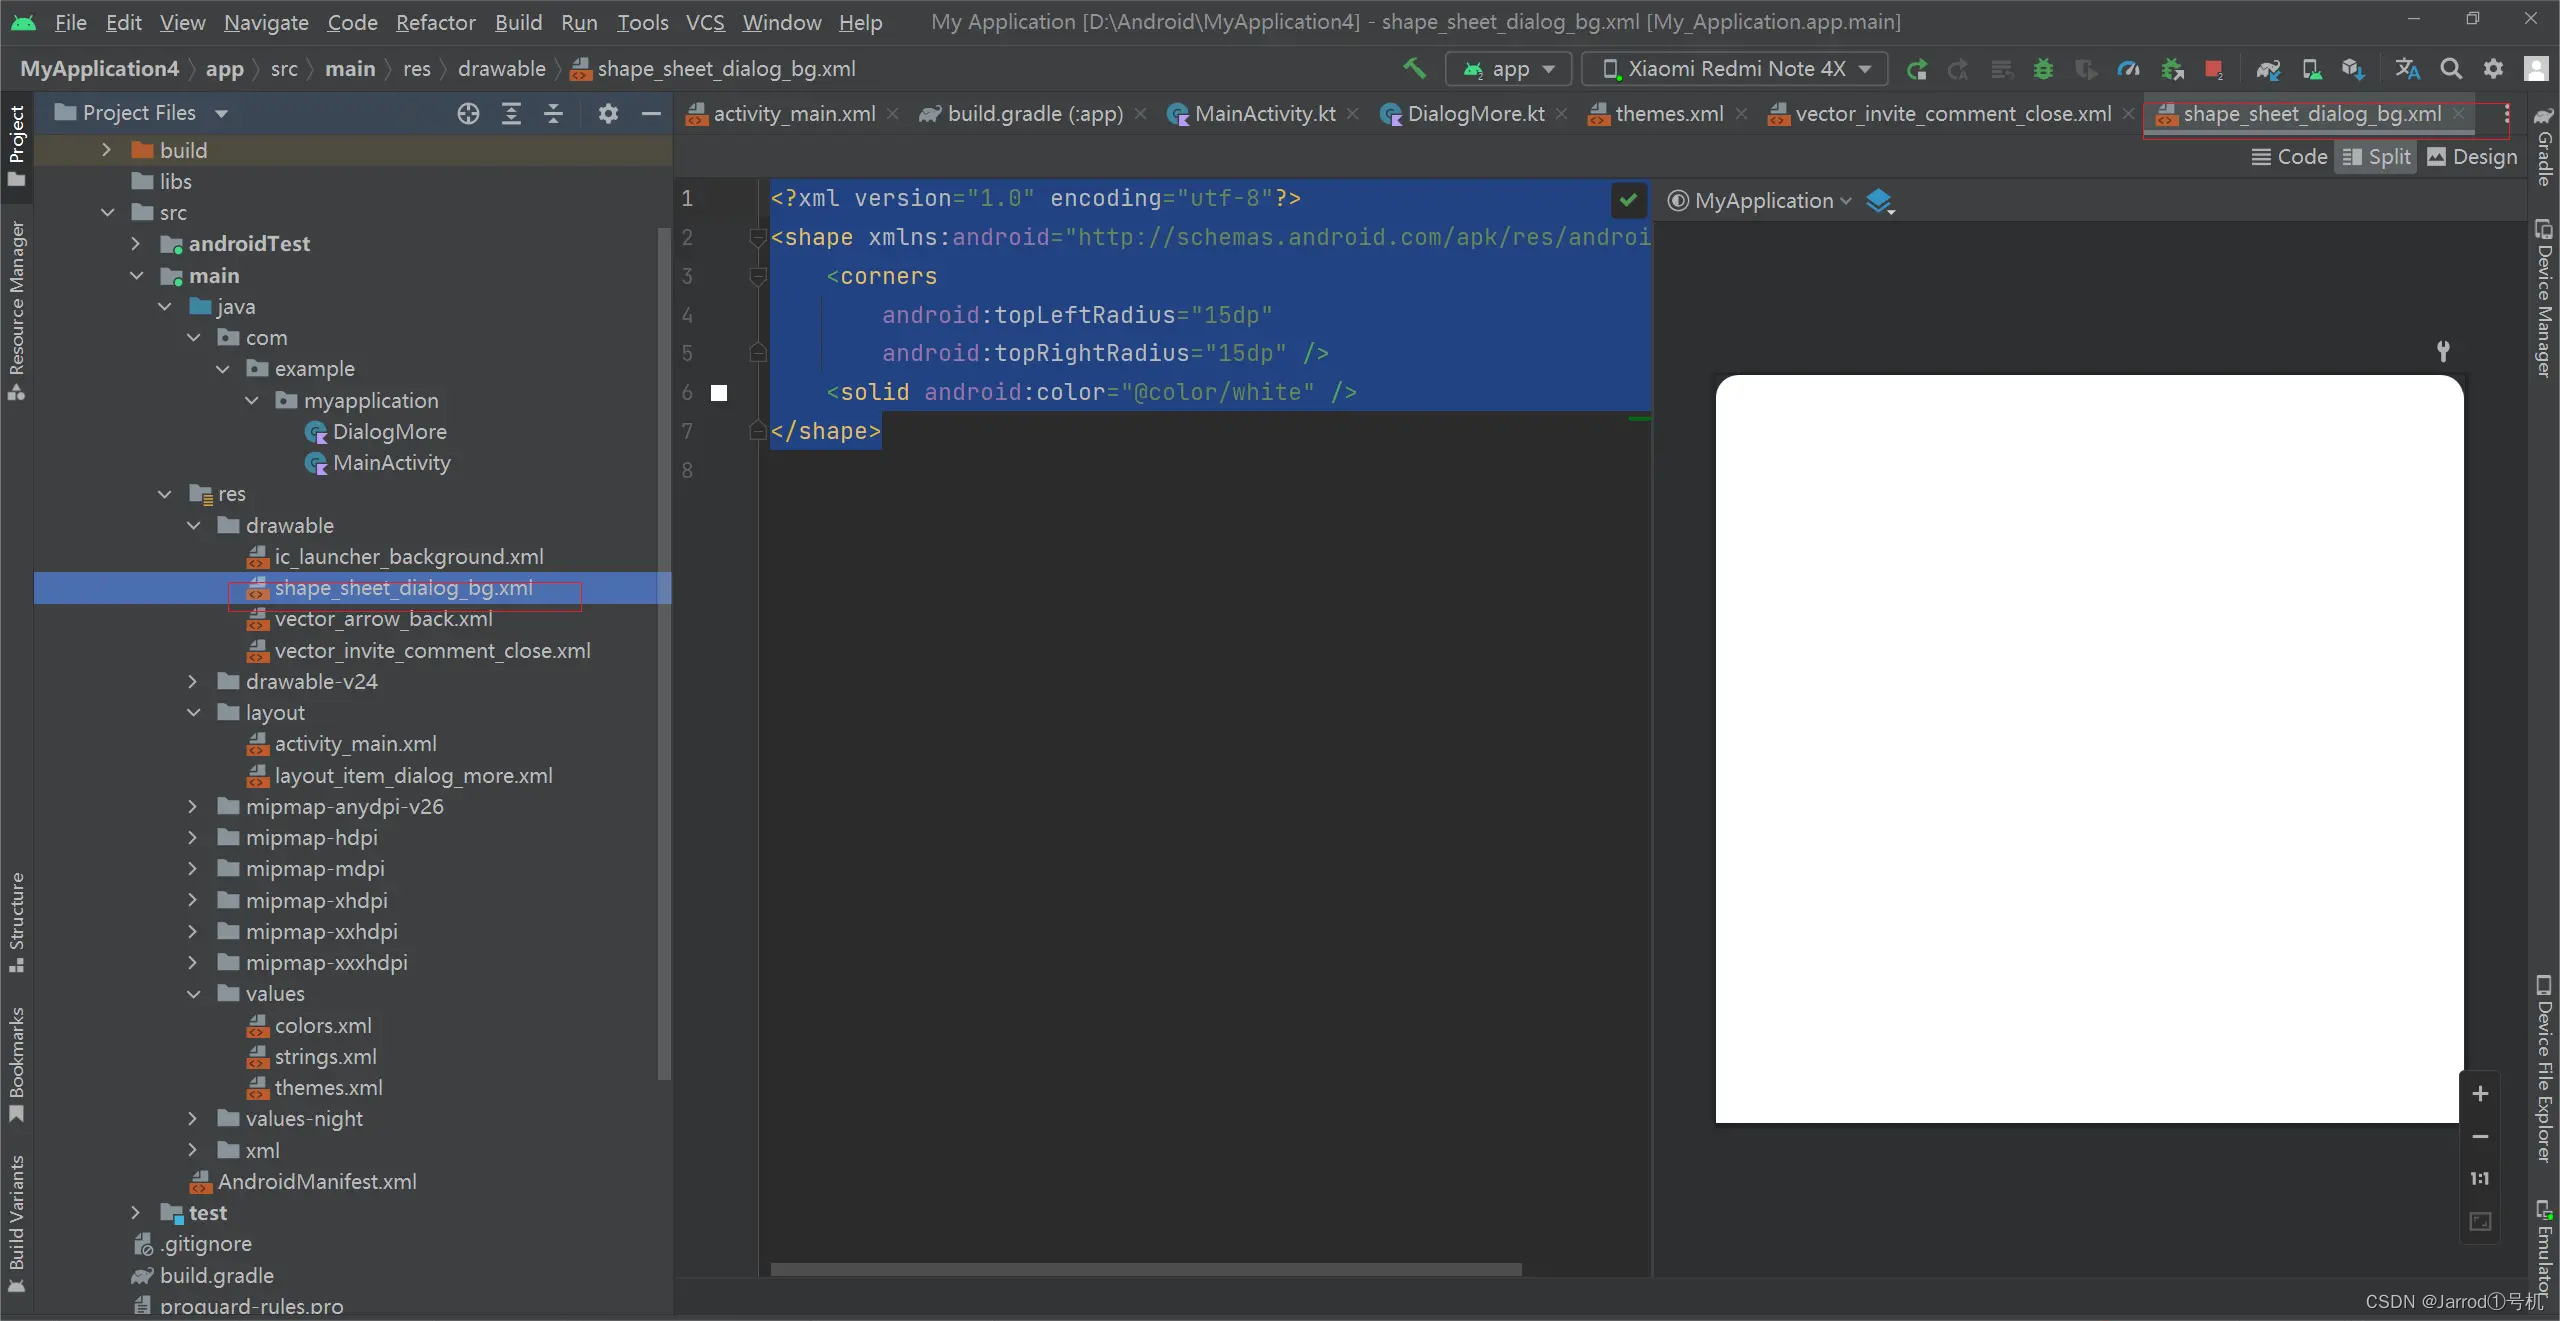
此外,我们还需要在自己的布局中添加圆角:
<?xml version="1.0" encoding="utf-8"?>
<shape xmlns:android="http://schemas.android.com/apk/res/android">
    <corners
        android:topLeftRadius="15dp"
        android:topRightRadius="15dp" />
    <solid android:color="@color/white" />
</shape>
样式可以添加在我们定义的弹窗布局最外层布局

Dialog样例布局如下:
<?xml version="1.0" encoding="utf-8"?>
<LinearLayout xmlns:android="http://schemas.android.com/apk/res/android"
    android:layout\_width="match\_parent"
    android:layout\_height="wrap\_content"
    android:background="@drawable/shape\_sheet\_dialog_bg"
    android:orientation="vertical">
    <LinearLayout
        android:layout\_width="match\_parent"
        android:layout\_height="wrap\_content"
        android:layout_gravity="center"
        android:paddingTop="10dp"
        android:paddingStart="16dp"
        android:paddingEnd="16dp"
        android:gravity="center"
        android:orientation="horizontal">
        <androidx.appcompat.widget.AppCompatImageView
            android:id="@+id/vDownClose"
            android:layout_width="48dp"
            android:layout\_height="wrap\_content"
            android:layout_marginStart="16dp"
            android:layout_gravity="center"
            android:src="@drawable/vector\_invite\_comment_close" />

        <androidx.appcompat.widget.AppCompatTextView
            android:id="@+id/vTitle"
            android:layout\_width="match\_parent"
            android:layout\_height="wrap\_content"
            android:gravity="center"
            android:text="More Content"
            android:textColor="@color/black"
            android:textSize="16sp"
            android:textStyle="bold" />

        <androidx.appcompat.widget.AppCompatTextView
            android:id="@+id/vPositionEdit"
            android:layout_width="48dp"
            android:layout\_height="wrap\_content"
            android:layout_marginEnd="16dp"
            android:text=""
            android:textColor="@color/black"
            android:textSize="16sp" />

    </LinearLayout>
    <androidx.core.widget.NestedScrollView
        android:id="@+id/vNsPosition"
        android:layout\_width="match\_parent"
        android:layout\_height="match\_parent">

        <LinearLayout
            android:layout\_width="match\_parent"
            android:layout\_height="wrap\_content"
            android:orientation="vertical">

            <LinearLayout
                android:id="@+id/llPtz"
                android:layout\_width="match\_parent"
                android:layout_height="8dp"
                android:gravity="center"
                android:orientation="horizontal">
            </LinearLayout>
            <LinearLayout
                android:id="@+id/vLlPosition"
                android:layout\_width="match\_parent"
                android:layout\_height="match\_parent"
                android:orientation="vertical">
               <androidx.appcompat.widget.AppCompatImageView
                   android:layout\_width="match\_parent"
                   android:layout_height="300dp"
                   android:src="@mipmap/ic\_more\_content"
                   android:scaleType="fitCenter"/>

                <androidx.appcompat.widget.AppCompatTextView
                    android:layout\_width="match\_parent"
                    android:layout\_height="wrap\_content"
                    android:layout_marginTop="20dp"
                    android:layout_marginStart="16dp"
                    android:layout_marginEnd="16dp"
                    android:text="1.可以弹出弹窗,且弹窗可以继续拉到顶部。"
                    android:textSize="14dp"
                    android:textColor="#FF666666"/>
                <androidx.appcompat.widget.AppCompatTextView
                    android:layout\_width="match\_parent"
                    android:layout\_height="wrap\_content"
                    android:layout_marginTop="5dp"
                    android:layout_marginStart="16dp"
                    android:layout_marginEnd="16dp"
                    android:text="2.禁止下拉关闭弹窗,使下滑到固定位置后不会再动,关闭弹窗使用关闭按钮。"
                    android:textSize="14sp"
                    android:textColor="#FF666666"/>
            </LinearLayout>
            <LinearLayout
                android:id="@+id/vLlNoPosition"
                android:layout\_width="match\_parent"
                android:layout_height="277dp"
                android:layout_gravity="center"
                android:gravity="center"
                android:orientation="vertical"
                android:visibility="gone">
                <androidx.appcompat.widget.AppCompatTextView
                    android:id="@+id/vNoPositionText"
                    android:layout\_width="match\_parent"
                    android:layout\_height="match\_parent"
                    android:layout_gravity="center"
                    android:gravity="center"
                    android:text="无更多内容"
                    android:textSize="14sp"
                    android:textColor="#FF666666"/>
            </LinearLayout>

        </LinearLayout>
    </androidx.core.widget.NestedScrollView>

</LinearLayout>
如果怕弹窗内部与外面的触控效果产生冲突,最简单的就是使用NestedScrollView控件,而不是普通的ScrollView布局
Activity的布局:
<?xml version="1.0" encoding="utf-8"?>
<LinearLayout xmlns:android="http://schemas.android.com/apk/res/android"
    xmlns:app="http://schemas.android.com/apk/res-auto"
    xmlns:tools="http://schemas.android.com/tools"
    android:layout\_width="match\_parent"
    android:layout\_height="match\_parent"
    tools:context=".MainActivity"
    android:orientation="vertical">
    <LinearLayout
        android:layout\_width="match\_parent"
        android:layout_height="56dp"
        android:orientation="horizontal">
        <LinearLayout
            android:layout_width="56dp"
            android:layout_height="56dp"
            android:orientation="horizontal"
            android:gravity="center">
            <androidx.appcompat.widget.AppCompatImageView
                android:layout_width="16dp"
                android:layout\_height="match\_parent"
                android:src="@drawable/vector\_arrow\_back"
                android:scaleType="fitCenter"/>
        </LinearLayout>
        <LinearLayout
            android:layout_width="0dp"
            android:layout_height="56dp"
            android:layout_weight="1"
            android:gravity="center"
            android:orientation="horizontal">

            <androidx.appcompat.widget.AppCompatTextView
                android:layout\_width="wrap\_content"
                android:layout\_height="wrap\_content"
                android:textStyle="bold"
                android:text="弹窗样例"
                android:textColor="@color/black"
                android:textSize="16sp"
                app:autoSizeMaxTextSize="16sp"
                app:autoSizeMinTextSize="8dp"
                app:autoSizeTextType="uniform"
                android:maxLines="1"/>
        </LinearLayout>

        <LinearLayout
            android:layout_width="56dp"
            android:layout_height="56dp" />

    </LinearLayout>
    <androidx.appcompat.widget.AppCompatImageView
        android:layout\_width="wrap\_content"
        android:layout\_height="wrap\_content"
        android:src="@mipmap/ic\_play\_demo"
        android:scaleType="center"/>
    <LinearLayout
        android:layout\_width="match\_parent"
        android:layout_height="56dp"
        android:orientation="horizontal">
        <androidx.appcompat.widget.AppCompatImageView
            android:layout_width="0dp"
            android:layout_height="56dp"
            android:layout_weight="1"
            android:src="@mipmap/ic\_top\_up"
            android:scaleType= "fitCenter"/>
        <androidx.appcompat.widget.AppCompatImageView
            android:layout_width="0dp"
            android:layout_height="56dp"
            android:layout_weight="1"
            android:src="@mipmap/ic_transfer"
            android:scaleType= "fitCenter"/>
        <androidx.appcompat.widget.AppCompatImageView
            android:layout_width="0dp"
            android:layout_height="56dp"
            android:layout_weight="1"
            android:src="@mipmap/ic_withdraw"
            android:scaleType= "fitCenter"/>
        <androidx.appcompat.widget.AppCompatImageView
            android:id="@+id/vMore"
            android:layout_width="0dp"
            android:layout_height="56dp"
            android:layout_weight="1"
            android:src="@mipmap/ic_more"
            android:scaleType= "fitCenter"/>
    </LinearLayout>
    <LinearLayout
        android:id="@+id/vllSize"
        android:layout\_width="match\_parent"
        android:layout\_height="match\_parent"
        android:background="@color/white"
        android:orientation="vertical"/>


</LinearLayout>
还有在Activity实现调用的代码:
class MainActivity : AppCompatActivity() {

    private var dialogHeight : Int = 0

    override fun onCreate(savedInstanceState: Bundle?) {
        super.onCreate(savedInstanceState)
        setContentView(R.layout.activity_main)
    }

    override fun onWindowFocusChanged(hasFocus: Boolean) {
        super.onWindowFocusChanged(hasFocus)
        // 获取dialog的高度

        dialogHeight = vllSize.measuredHeight
        // 获取dialog的高度
        Log.d( "MainActivity" ,"height = $dialogHeight")
    }

    override fun onResume() {
        super.onResume()

        vMore.setOnClickListener {
            val dialog  = DialogMore().newInstance()
                .setDialogHeight(dialogHeight)
            val ft: FragmentTransaction =
                supportFragmentManager.beginTransaction()
            ft.setTransition(FragmentTransaction.TRANSIT\_FRAGMENT\_FADE)
            dialog.show(ft, "DialogMore")
        }
    }
}
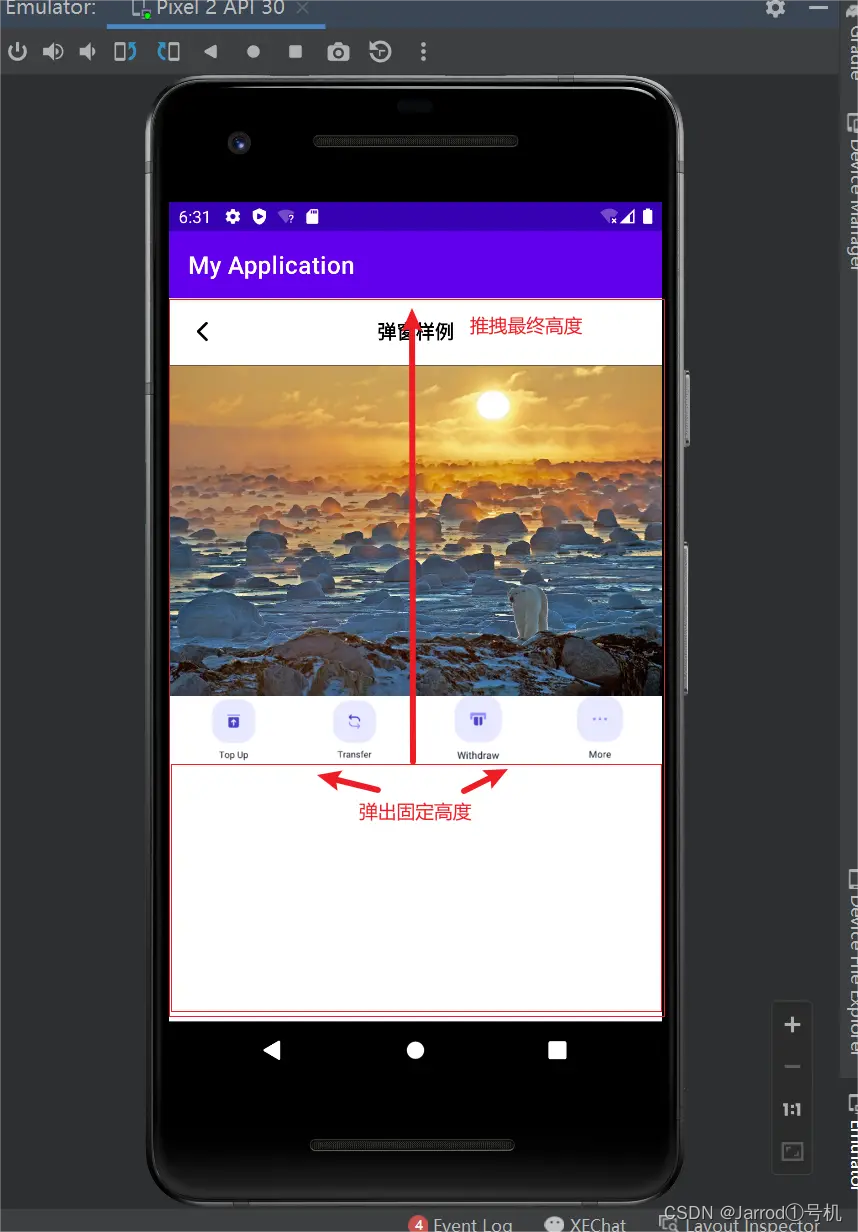
通过测量vllSize控件(剩余底部)的高度,我们可以将弹窗第一次弹窗的高度设置到这,当然高度可以由你任意设置,
在Dialog实现代码中:
override fun onStart() {
    super.onStart()
    //拿到系统的 bottom_sheet
    val bottomSheetDialog = (dialog as BottomSheetDialog?)!!
    val view =
        bottomSheetDialog.delegate.findViewById<FrameLayout>(com.google.android.material.R.id.design\_bottom\_sheet)!!
    val behavior = BottomSheetBehavior.from(view)
    //设置弹出高度
    behavior.peekHeight = height
    view.layoutParams.height = ViewGroup.LayoutParams.MATCH_PARENT
    behavior.isHideable = false
}
view.layoutParams.height我们设置了第二次可把弹窗拉动到整个屏幕上
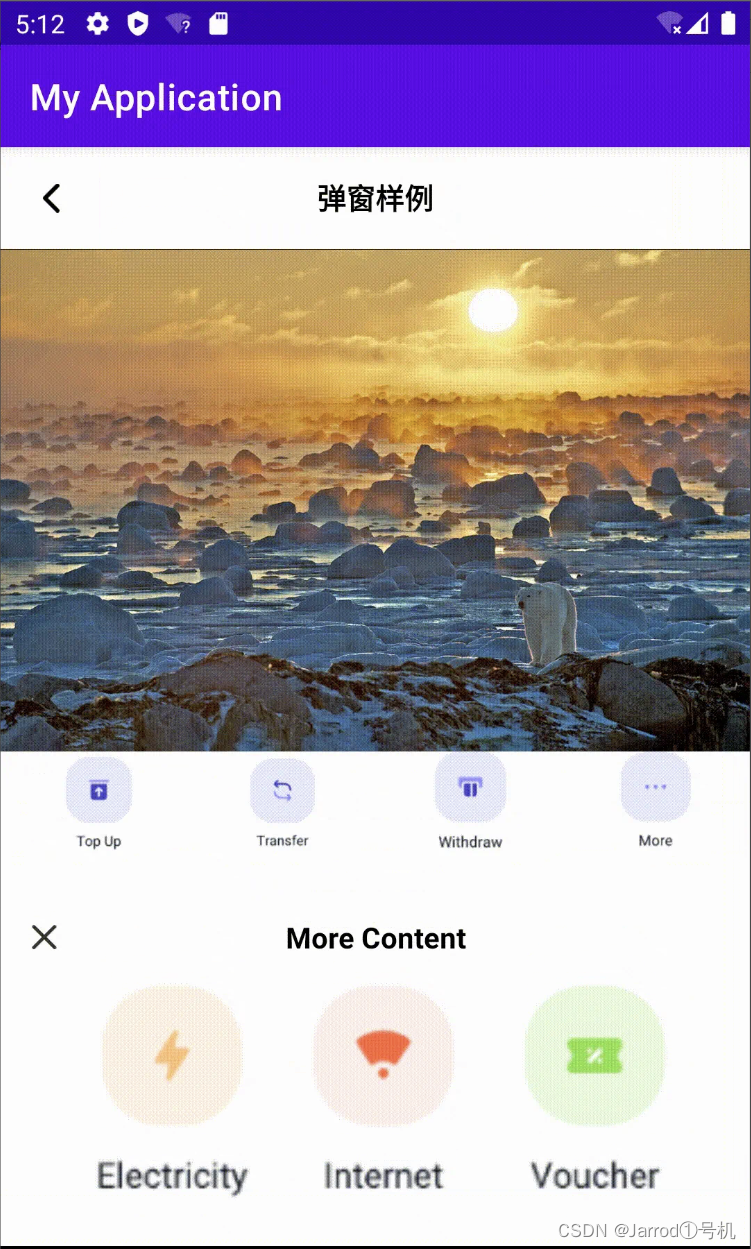
本文中实现的弹窗禁止了相信滑动关闭弹窗,所以不会滑到底部,代码是Dialog实现中的属性控制,不写默认为true向下滑动关闭弹窗,false表示禁止该方式关闭弹窗:
behavior.isHideable = false
最终效果:

作者:茹迦怡
原文地址

![[附源码]Python计算机毕业设计Django青栞系统](https://img-blog.csdnimg.cn/767ba2b81b35430a8b12681c5db5d7ae.png)