目录
- 前言
- 总体设计
- 系统整体结构图
- 系统流程图
- 运行环境
- 模块实现
- 1. 特征提取
- 2. 声学模型
- 3. CTC 解码
- 4. 语言模型
- 系统测试
- 工程源代码下载
- 其它资料下载

前言
本项目基于卷积神经网络和连接性时序分类方法,采用中文语音数据集进行训练,实现声音转录为中文拼音,并将拼音序列转换为中文文本。
本项目提供的是一套完整的语音识别解决方案,可以帮助用户快速搭建语音识别应用,适用于多种场景下的需求。伙伴们可以通过该工程源码,进行个人二次开发,拓展项目的应用场景。
总体设计
本部分包括系统整体结构图和系统流程图。
系统整体结构图
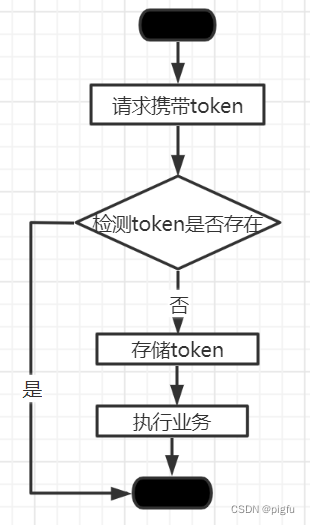
系统整体结构如图所示。

系统流程图
系统流程如图所示。

运行环境
需要 Python3.6 及以上配置,在 Windows 环境下推荐下载 Anaconda 完成 Python 所需的配置,推荐选用 Anaconda 自带的 Spyder 系统。
添加镜像为清华大学后,直接利用 conda install tensorflow 即可安装。除此之外需要额外下载 python_speech_features TensorFlow Keras Numpy wave matplotlib math Scipy h5py http urllib 等安装包库,推荐 conda install 下载安装。
conda install python_speech_features, TensorFlow, Keras,Numpy,wave,matplotlib,math, Scipy,h5py,http,urllib`
模块实现
本项目包括 4 个模块,特征提取、声学模型、CTC 解码、语言模型,下面分别给出各模块的功能介绍及相关代码。
1. 特征提取
将普通的.wav语音信号通过分帧加窗等操作转换为神经网络需要的二维频谱图像信号,即语谱图。
代码如下:
import wave
import numpy as np
from python_speech_features import mfcc, delta
from scipy.fftpack import fft

def read_wav_data(filename):
    '''
    读取.wav 文件,返回声音信号的时域谱矩阵和播放时间
    '''
    wav = wave.open(filename,"rb") # 打开.wav 格式的声音文件流
    num_frame = wav.getnframes() # 获取帧数
    num_channel=wav.getnchannels() # 获取声道数
    framerate=wav.getframerate() # 获取帧速率
    num_sample_width=wav.getsampwidth() # 获取实例的比特宽度,即每一帧的字节数
    str_data = wav.readframes(num_frame) #
    wav.close() # 关闭流
    wave_data = np.fromstring(str_data, dtype = np.short) # 将声音文件数据转换为数组矩阵形式
    wave_data.shape = -1, num_channel # 按照声道数将数组整形,单声道时是一列数组,双声道时是两列矩阵
    wave_data = wave_data.T # 将矩阵转置
    #wave_data = wave_data
    return wave_data, framerate

def GetMfccFeature(wavsignal, fs):
    #获取输入特征
    feat_mfcc=mfcc(wavsignal[0],fs)
    feat_mfcc_d=delta(feat_mfcc,2)
    feat_mfcc_dd=delta(feat_mfcc_d,2)
    #返回值分别是 mfcc 特征向量的矩阵及其一阶差分和二阶差分矩阵
    wav_feature = np.column_stack((feat_mfcc, feat_mfcc_d, feat_mfcc_dd))
    return wav_feature

def GetFrequencyFeature(wavsignal, fs):
    if(16000 != fs):
        raise ValueError('[Error] ASRT currently only supports wav audio files with a sampling rate of 16000 Hz, but this audio is ' + str(fs) + ' Hz. ')
    # wav 波形 加时间窗以及时移 10ms
    time_window = 25 # 单位 ms
    data_input = []
    #print(int(len(wavsignal[0])/fs*1000 - time_window) // 10)
    wav_length = len(wavsignal[0]) #计算一条语音信号的原始长度
    range0_end = int(len(wavsignal[0])/fs*1000 - time_window) // 10 #计算循环终止的位置,也就是最终生成的窗数
    for i in range(0, range0_end):
        p_start = i * 160
        p_end = p_start + 400
        data_line = []
        for j in range(p_start, p_end):
            data_line.append(wavsignal[0][j])
            #print('wavsignal[0][j]:\n',wavsignal[0][j])
        #data_line = abs(fft(data_line)) / len(wavsignal[0])
        data_line = fft(data_line) / wav_length
        data_line2 = []
        for fre_sig in data_line:
            #分别取出频率信号的实部和虚部作为语音信号的频率特征
            #直接使用复数会被 numpy 将虚部丢弃,造成信息丢失
            #print('fre_sig:\n',fre_sig)
            data_line2.append(fre_sig.real)
            data_line2.append(fre_sig.imag)
        data_input.append(data_line2[0:len(data_line2)//2]) #除以 2 是取一半数据,因为是对称的
        #print('data_input:\n',data_input)
        #print('data_line:\n',data_line)
    #print(len(data_input),len(data_input[0]))
    return data_input

def GetFrequencyFeature2(wavsignal, fs):
    if(16000 != fs):
        raise ValueError('[Error] ASRT currently only supports wav audio files with a sampling rate of 16000 Hz, but this audio is ' + str(fs) + ' Hz. ')
    # wav 波形 加时间窗以及时移 10ms
    time_window = 25 # 单位 ms
    window_length = fs / 1000 * time_window #计算窗长度的公式,目前全部为 400 固定值
    wav_arr = np.array(wavsignal)
    #wav_length = len(wavsignal[0])
    wav_length = wav_arr.shape[1]
    range0_end = int(len(wavsignal[0])/fs*1000 - time_window) // 10 #计算循环终止的位置,也就是最终生成的窗数
    data_input = np.zeros((range0_end, 200), dtype = np.float) #用于存放最终的频率特征数据
    data_line = np.zeros((1, 400), dtype = np.float)
    for i in range(0, range0_end):
        p_start = i * 160
        p_end = p_start + 400
        data_line = wav_arr[0, p_start:p_end]
        '''
        x=np.linspace(0, 400 - 1, 400, dtype = np.int64)
        w = 0.54 - 0.46 * np.cos(2 * np.pi * (x) / (400 - 1) ) # 汉明窗
        data_line = data_line * w # 加窗
        '''
        data_line = np.abs(fft(data_line)) / wav_length
        data_input[i]=data_line[0:200] #设置为 400 除以 2 的值(即 200)是取一半数据,因为是对称的
        #print(data_input.shape)
    return data_input

x=np.linspace(0, 400 - 1, 400, dtype = np.int64)
w = 0.54 - 0.46 * np.cos(2 * np.pi * (x) / (400 - 1) ) # 汉明窗

def GetFrequencyFeature3(wavsignal, fs):
    if(16000 != fs):
        raise ValueError('[Error] ASRT currently only supports wav audio files with a sampling rate of 16000 Hz, but this audio is ' + str(fs) + ' Hz. ')
    # wav 波形 加时间窗以及时移 10ms
    time_window = 25 # 单位 ms
    window_length = fs / 1000 * time_window #计算窗长度的公式,目前全部为 400 固定值
    wav_arr = np.array(wavsignal)
    #wav_length = len(wavsignal[0])
    wav_length = wav_arr.shape[1]
    range0_end = int(len(wavsignal[0])/fs*1000 - time_window) // 10 #计算循环终止的位置,也就是最终生成的窗数
    data_input = np.zeros((range0_end, 200), dtype = np.float) #用于存放最终的频率特征数据
    data_line = np.zeros((1, 400), dtype = np.float)
    for i in range(0, range0_end):
        p_start = i * 160
        p_end = p_start + 400
        data_line = wav_arr[0, p_start:p_end]
        data_line = data_line * w # 加窗
        data_line = np.abs(fft(data_line)) / wav_length
        data_input[i]=data_line[0:200] # 设置为 400 除以 2 的值(即 200)是取一半数据,因为是对称的
        #print(data_input.shape)
    data_input = np.log(data_input + 1)
    return data_input

def GetFrequencyFeature4(wavsignal, fs):
    '''
    主要是用来修正 3 版的 bug
    '''
    if(16000 != fs):
        raise ValueError('[Error] ASRT currently only supports wav audio files with a sampling rate of 16000 Hz, but this audio is ' + str(fs) + ' Hz. ')
    # wav 波形 加时间窗以及时移 10ms
    time_window = 25 # 单位 ms
    window_length = fs / 1000 * time_window #计算窗长度的公式,目前全部为 400 固定值
    wav_arr = np.array(wavsignal)
    #wav_length = len(wavsignal[0])
    wav_length = wav_arr.shape[1]
    range0_end = int(len(wavsignal[0])/fs*1000 - time_window) // 10 + 1 #计算循环终止的位置,也就是最终生成的窗数
    data_input = np.zeros((range0_end, window_length // 2), dtype = np.float) #用于存放最终的频率特征数据
    data_line = np.zeros((1, window_length), dtype = np.float)
    for i in range(0, range0_end):
        p_start = i * 160
        p_end = p_start + 400
        data_line = wav_arr[0, p_start:p_end]
        data_line = data_line * w # 加窗
        data_line = np.abs(fft(data_line)) / wav_length
        data_input[i]=data_line[0: window_length // 2] # 设置为 400 除以 2 的值(即 200)是取一半数据,因为是对称的
        #print(data_input.shape)
    data_input = np.log(data_input + 1)
    return data_input
import math
import numpy as np
import matplotlib.pyplot as plt
import time

def wav_scale(energy):
    '''
    语音信号能量归一化
    '''
    means = energy.mean()  # 均值
    var = energy.var()  # 方差
    e = (energy - means) / math.sqrt(var)  # 归一化能量
    return e

def wav_scale2(energy):
    '''
    语音信号能量归一化
    '''
    maxnum = max(energy)
    e = energy / maxnum
    return e

def wav_scale3(energy):
    '''
    语音信号能量归一化
    '''
    for i in range(len(energy)):
        # if i == 1:
        #     # print('wavsignal[0]:\n {:.4f}'.format(energy[1]),energy[1] is int)
        energy[i] = float(energy[i]) / 100.0
        # if i == 1:
        #     # print('wavsignal[0]:\n {:.4f}'.format(energy[1]),energy[1] is int)
    return energy

def wav_show(wave_data, fs):
    # 显示出来声音波形
    time = np.arange(0, len(wave_data)) * (1.0 / fs)  # 计算声音的播放时间,单位为 s
    # 画声音波形
    # plt.subplot(211)
    plt.plot(time, wave_data)
    # plt.subplot(212)
    # plt.plot(time, wave_data[1], c="g")
    plt.show()

def get_wav_list(filename):
    # 读取一个.wav 文件列表,返回一个存储该列表的字典类型值
    txt_obj = open(filename, 'r')  # 打开文件并读入
    txt_text = txt_obj.read()
    txt_lines = txt_text.split('\n')  # 文本分割
    dic_filelist = {}  # 初始化字典
    list_wavmark = []  # 初始化 wav 列表
    for i in txt_lines:
        if (i != ''):
            txt_l = i.split(' ')
            dic_filelist[txt_l[0]] = txt_l[1]
            list_wavmark.append(txt_l[0])
    txt_obj.close()
    return dic_filelist, list_wavmark

def get_wav_symbol(filename):
    '''
    读取指定数据集中,所有 wav 文件对应的语音符号
    返回一个存储符号集的字典类型值
    '''
    txt_obj = open(filename, 'r')  # 打开文件并读入
    txt_text = txt_obj.read()
    txt_lines = txt_text.split('\n')  # 文本分割
    dic_symbol_list = {}  # 初始化字典
    list_symbolmark = []  # 初始化 symbol 列表
    for i in txt_lines:
        if (i != ''):
            txt_l = i.split(' ')
            dic_symbol_list[txt_l[0]] = txt_l[1:]
            list_symbolmark.append(txt_l[0])
    txt_obj.close()
    return dic_symbol_list, list_symbolmark

if __name__ == '__main__':
    wave_data, fs = read_wav_data("A2_0.wav")
    wav_show(wave_data[0], fs)
    t0 = time.time()
    freimg = GetFrequencyFeature3(wave_data, fs)
    t1 = time.time()
    print('time cost:', t1 - t0)
    freimg = freimg.T
    plt.subplot(111)
    plt.imshow(freimg)
    plt.colorbar(cax=None, ax=None, shrink=0.5)
    plt.show()
2. 声学模型
使用类似 VGG 的深层卷积神经网络作为网络模型,并训练。输入层:200 维的特征值序列,一条语音数据的最大长度设为 1600(大约 16s),隐藏层:卷积池化层,卷积核大小为 3*3,池化窗口大小为 2。隐藏层:全连接层,输出层:全连接层,神经元数量为 self.MS_OUTPUT_SIZE,使用 softmax 作为激活函数,CTC 层:使用 CTC 的 loss 作为损失函数,实现连接性时序多输出模型构建。
from keras.models import Model
from keras.layers import Input, Conv2D, MaxPooling2D, Dropout, Reshape, Dense, Activation, Lambda
from keras.optimizers import Adam
import keras.backend as K

class YourModel:
    def __init__(self):
        self.label_max_string_length = 32 #example value
        self.MS_OUTPUT_SIZE = 256 #example value

    def ctc_lambda_func(self, args):
        # example ctc_lambda_func implementation
        return K.ctc_batch_cost(args[0], args[1], args[2], args[3])

    def build_model(self, input_shape):
        input_data = Input(name='the_input', shape=input_shape, dtype='float32')
        layer_h1 = Conv2D(32, (3, 3), use_bias=False, activation='relu', padding='same',
                          kernel_initializer='he_normal')(input_data)
        layer_h1 = Dropout(0.05)(layer_h1)
        layer_h2 = Conv2D(32, (3, 3), use_bias=True, activation='relu', padding='same',
                          kernel_initializer='he_normal')(layer_h1)
        layer_h3 = MaxPooling2D(pool_size=2, strides=None, padding="valid")(layer_h2)
        layer_h3 = Dropout(0.05)(layer_h3)
        layer_h4 = Conv2D(64, (3, 3), use_bias=True, activation='relu', padding='same',
                          kernel_initializer='he_normal')(layer_h3)
        layer_h4 = Dropout(0.1)(layer_h4)
        layer_h5 = Conv2D(64, (3, 3), use_bias=True, activation='relu', padding='same',
                          kernel_initializer='he_normal')(layer_h4)
        layer_h6 = MaxPooling2D(pool_size=2, strides=None, padding="valid")(layer_h5)
        layer_h6 = Dropout(0.1)(layer_h6)
        layer_h7 = Conv2D(128, (3, 3), use_bias=True, activation='relu', padding='same',
                          kernel_initializer='he_normal')(layer_h6)
        layer_h7 = Dropout(0.15)(layer_h7)
        layer_h8 = Conv2D(128, (3, 3), use_bias=True, activation='relu', padding='same',
                          kernel_initializer='he_normal')(layer_h7)
        layer_h9 = MaxPooling2D(pool_size=2, strides=None, padding="valid")(layer_h8)
        layer_h9 = Dropout(0.15)(layer_h9)
        layer_h10 = Conv2D(128, (3,3), use_bias=True, activation='relu', padding='same',
                           kernel_initializer='he_normal')(layer_h9)
        layer_h10 = Dropout(0.2)(layer_h10)
        layer_h11 = Conv2D(128, (3,3), use_bias=True, activation='relu', padding='same',
                           kernel_initializer='he_normal')(layer_h10)
        layer_h12 = MaxPooling2D(pool_size=1, strides=None, padding="valid")(layer_h11)
        layer_h12 = Dropout(0.2)(layer_h12)
        layer_h13 = Conv2D(128, (3,3), use_bias=True, activation='relu', padding='same',
                           kernel_initializer='he_normal')(layer_h12)
        layer_h13 = Dropout(0.2)(layer_h13)
        layer_h14 = Conv2D(128, (3,3), use_bias=True, activation='relu', padding='same',
                           kernel_initializer='he_normal')(layer_h13)
        layer_h15 = MaxPooling2D(pool_size=1, strides=None, padding="valid")(layer_h14)
        layer_h16 = Reshape((200, 3200))(layer_h15)
        layer_h16 = Dropout(0.3)(layer_h16)
        layer_h17 = Dense(128, activation="relu", use_bias=True,
                           kernel_initializer='he_normal')(layer_h16)
        layer_h17 = Dropout(0.3)(layer_h17)
        layer_h18 = Dense(self.MS_OUTPUT_SIZE, use_bias=True,
                          kernel_initializer='he_normal')(layer_h17)
        y_pred = Activation('softmax', name='Activation0')(layer_h18)

        labels = Input(name='the_labels', shape=[self.label_max_string_length], dtype='float32')
        input_length = Input(name='input_length', shape=[1], dtype='int64')
        label_length = Input(name='label_length', shape=[1], dtype='int64')

        ctc_loss = Lambda(self.ctc_lambda_func,output_shape=(self.MS_OUTPUT_SIZE),
                          name='ctc')([y_pred, labels, input_length, label_length])
        model = Model(inputs=[input_data, labels, input_length, label_length], outputs=ctc_loss)
        model_data = Model(inputs=input_data, outputs=y_pred)

        opt = Adam(lr=0.001, beta_1=0.9, beta_2=0.999, decay=0.0, epsilon=10e-8)
        model.compile(loss={'ctc': lambda y_true, y_pred: y_pred}, optimizer=opt)
        test_func = K.function([input_data], [y_pred])

        print('[*Info] Create Model Successful, Compiles Model Successful. ')
        return model, model_data
from data_speech import DataSpeech

datapath = '数据保存的路径'
epoch = 10
save_step = 1000
filename = '默认保存文件名'

data = DataSpeech(datapath, 'train')
num_data = data.GetDataNum() #获取数据的数量
yielddatas = data.data_genetator(batch_size, self.AUDIO_LENGTH)

for epoch in range(epoch): #迭代轮数
    print('[running] train epoch %d .' % epoch)
    n_step = 0 #迭代数据数
    while True:
        try:
            print('[message] epoch %d. Have trained datas %d+'%(epoch, n_step*save_step))
            # data_genetator 是一个生成器函数
            #self._model.fit_generator(yielddatas, save_step, nb_worker=2)
            self._model.fit_generator(yielddatas, save_step)
            n_step += 1
        except StopIteration:
            print('[error] generator error. please check data format.')
            break

    self.SaveModel(comment='_e_'+str(epoch)+'_step_'+str(n_step * save_step))
    self.TestModel(self.datapath, str_dataset='train', data_count=4)
    self.TestModel(self.datapath, str_dataset='dev', data_count=4)
import random
import time

from data_speech import DataSpeech

# 以下代码为测试模型的函数
def TestModel(self, datapath, str_dataset='dev', data_count=0, out_report=False,
              io_step_print=1, io_step_file=1000, show_ratio=True):
    data = DataSpeech(datapath, str_dataset)
    num_data = data.GetDataNum() # 获取数据的数量

    if(data_count <= 0 or data_count > num_data):
        # 当 data_count 为小于等于 0 或者大于测试数据量的值时,则使用全部数据来测试
        data_count = num_data

    try:
        ran_num = random.randint(0,num_data - 1) # 获取一个随机数
        words_num = 0
        word_error_num = 0
        nowtime = time.strftime('%Y%m%d_%H%M%S',time.localtime(time.time()))

        if(out_report == True):
            txt_obj = open('Test_Report_' + str_dataset + '_' + nowtime + '.txt', 'w', encoding='UTF-8')

        txt = '测试报告\n 模型编号 ' + ModelName + '\n\n'

        for i in range(data_count):
            data_input, data_labels = data.GetData((ran_num + i) % num_data)

            # 数据格式出错处理 开始
            # 当输入.wav 文件过长时自动跳过该文件,转而使用下一个.wav 文件来运行
            num_bias = 0
            while(data_input.shape[0] > self.AUDIO_LENGTH):
                print('*[Error]','wave data lenghth of num',(ran_num + i) % num_data, 'is too long.','\n A Exception raise when test Speech Model.')
                num_bias += 1
                data_input, data_labels = data.GetData((ran_num + i + num_bias) % num_data)

            # 数据格式出错处理,结束

            pre = self.Predict(data_input, data_input.shape[0] // 8)
            words_n = data_labels.shape[0]
            words_num += words_n
            edit_distance = GetEditDistance(data_labels, pre)

            if(edit_distance <= words_n):
                word_error_num += edit_distance
            else:
                word_error_num += words_n

            if((i % io_step_print == 0 or i == data_count - 1) and show_ratio == True):
                print('Test Count: ',i,'/',data_count)

            if(out_report == True):
                if(i % io_step_file == 0 or i == data_count - 1):
                    txt_obj.write(txt)
                    txt = ''

                txt += str(i) + '\n'
                txt += 'True:\t' + str(data_labels) + '\n'
                txt += 'Pred:\t' + str(pre) + '\n'
                txt += '\n'

        print('*[Test Result] Speech Recognition ' + str_dataset + ' set word error ratio: ',
              word_error_num / words_num * 100, '%')

        if(out_report == True):
            txt += '*[Test Result] Speech Recognition ' + str_dataset + ' set word error ratio:' +
                   str(word_error_num / words_num * 100) + ' %'
            txt_obj.write(txt)
            txt_obj.close()

    except StopIteration:
        print('[Error] Model Test Error. please check data format.')

# 加载模型
self._model.load_weights(filename)
self.base_model.load_weights(filename + '.base')

# 保存模型
self._model.save_weights(filename + comment + '.model')
self.base_model.save_weights(filename + comment + '.model.base')
self._model.save(filename + comment + '.h5')
self.base_model.save(filename + comment + '.base.h5')

f = open('step'+ModelName+'.txt','w')
f.write(filename+comment)
f.close()
3. CTC 解码
通过 CNN 提取文本图片的 Feature map,将每一个 channel 作为 [公式] 的时间序列输入到 LSTM 中。
用 w 表示 LSTM 的参数,则 LSTM 可以表示为一个函数:y=Nw(x)。
定义输入 x 的时间步为 T,每个时间步上的特征维度记作 m,表示 m 维特征。
(x1,x2,…,xT)xt=(xt1,xt2,…,xtm)
输出时间步也为 T,和输入一一对应,每个时间步的输出维度作为 n,表示 n 维输出,实际
上是 n 个概率。
(y1,y2,…,yT)yt=(yt1,yt2,…,ytn)
假设对 26 个英文字符进行识别,考虑到有些位置没有字符,定义一个-作为空白符加入到字符集合 L′={a,b,c,…,x,y,z}∪{−}=L∪{−}={a,b,c,…,x,y,z,−},那么对于 LSTM 而言每个时间步的输出维度 n 就是 27,表示 27 个字符在这个时间步上输出的概率。
4. 语言模型
from typing import List

class PinyinDecoder:
    def __init__(self, pinyin_dict: dict):
        self.dict_pinyin = pinyin_dict

        # 加载模型
        with open('model1.bin', 'rb') as f:
            self.model1 = pickle.load(f)
        with open('model2.bin', 'rb') as f:
            self.model2 = pickle.load(f)

    def decode(self, py_list: List[str], max_error: float) -> List[List[str]]:
		'''
		实现拼音向文本的转换
		基于马尔可夫链
		'''
        list_words = []
        num_pinyin = len(py_list)
        for i in range(num_pinyin):
            ls = ''
            if(py_list[i] in self.dict_pinyin):
                ls = self.dict_pinyin[py_list[i]]
            else:
                break
            if(i == 0):
                num_ls = len(ls)
                for j in range(num_ls):
                    tuple_word = ['', 0.0]
                    tuple_word = [ls[j], 1.0]
                    list_words.append(tuple_word)
                continue
            else:
                list_words_2 = []
                num_ls_word = len(list_words)
                for j in range(0, num_ls_word):
                    num_ls = len(ls)
                    for k in range(0, num_ls):
                        tuple_word = ['', 0.0]
                        tuple_word = list(list_words[j])
                        tuple_word[0] = tuple_word[0] + ls[k]
                        tmp_words = tuple_word[0][-2:]
                        if(tmp_words in self.model2):
                            tuple_word[1] = tuple_word[1] * float(self.model2[tmp_words]) / float(self.model1[tmp_words[-2]])
                        else:
                            tuple_word[1] = 0.0
                            continue
                        if(tuple_word[1] >= pow(max_error, i)):
                            list_words_2.append(tuple_word)
                list_words = list_words_2
                for i in range(0, len(list_words)):
                    for j in range(i + 1, len(list_words)):
                        if(list_words[i][1] < list_words[j][1]):
                            tmp = list_words[i]
                            list_words[i] = list_words[j]
                            list_words[j] = tmp
                return list_words

    def get_chinese_sentence(self, sentence: str) -> str:
        list_syllable = [] # 存储分离后的拼音
        length = len(sentence)
        for i in range(0, length - 1):
            # 依次从第一个字开始每次连续取两个字拼音
            str_split = list_syllable[i] + ' ' + list_syllable[i+1]
            # 如果这个拼音在汉语拼音状态转移字典里
            if(str_split in self.pinyin):
                # 将第二个字的拼音加入
                list_syllable.append(list_syllable[i+1])
            else:
                # 否则不加入,然后直接将现有的拼音序列进行解码
                str_decode = self.decode(list_syllable, 0.0000)
                #print('decode ',str_tmp,str_decode)
                if(str_decode != []):
                    r += str_decode[0][0]
                # 再从 i+1 开始作为第一个拼音
                list_syllable = [list_syllable[i+1]]
                #print('最后:', str_tmp)
                str_decode = self.decode(list_syllable, 0.0000)
                #print('剩余解码:',str_decode)
                if(str_decode != []):
                    r += str_decode[0][0]
        return r
# 读取拼音汉字的字典文件,返回读取后的字典
def load_pinyin_dict(dictfilename):
    with open(dictfilename, 'r', encoding='UTF-8') as f:
        txt_text = f.read()
    txt_lines = txt_text.split('\n')
    dic_symbol = {}
    for i in txt_lines:
        list_symbol=[]
        if(i!=''):
            txt_l=i.split('\t')
            pinyin = txt_l[0]
            for word in txt_l[1]:
                list_symbol.append(word)
            dic_symbol[pinyin] = list_symbol
    return dic_symbol

# 读取语言模型的文件,返回读取后的模型
def load_language_model(modelLanFilename):
    with open(modelLanFilename, 'r', encoding='UTF-8') as f:
        txt_text = f.read()
    txt_lines = txt_text.split('\n')
    dic_model = {}
    for i in txt_lines:
        if(i!=''):
            txt_l=i.split('\t')
            if(len(txt_l) == 1):
                continue
            dic_model[txt_l[0]] = txt_l[1]
    return dic_model
系统测试
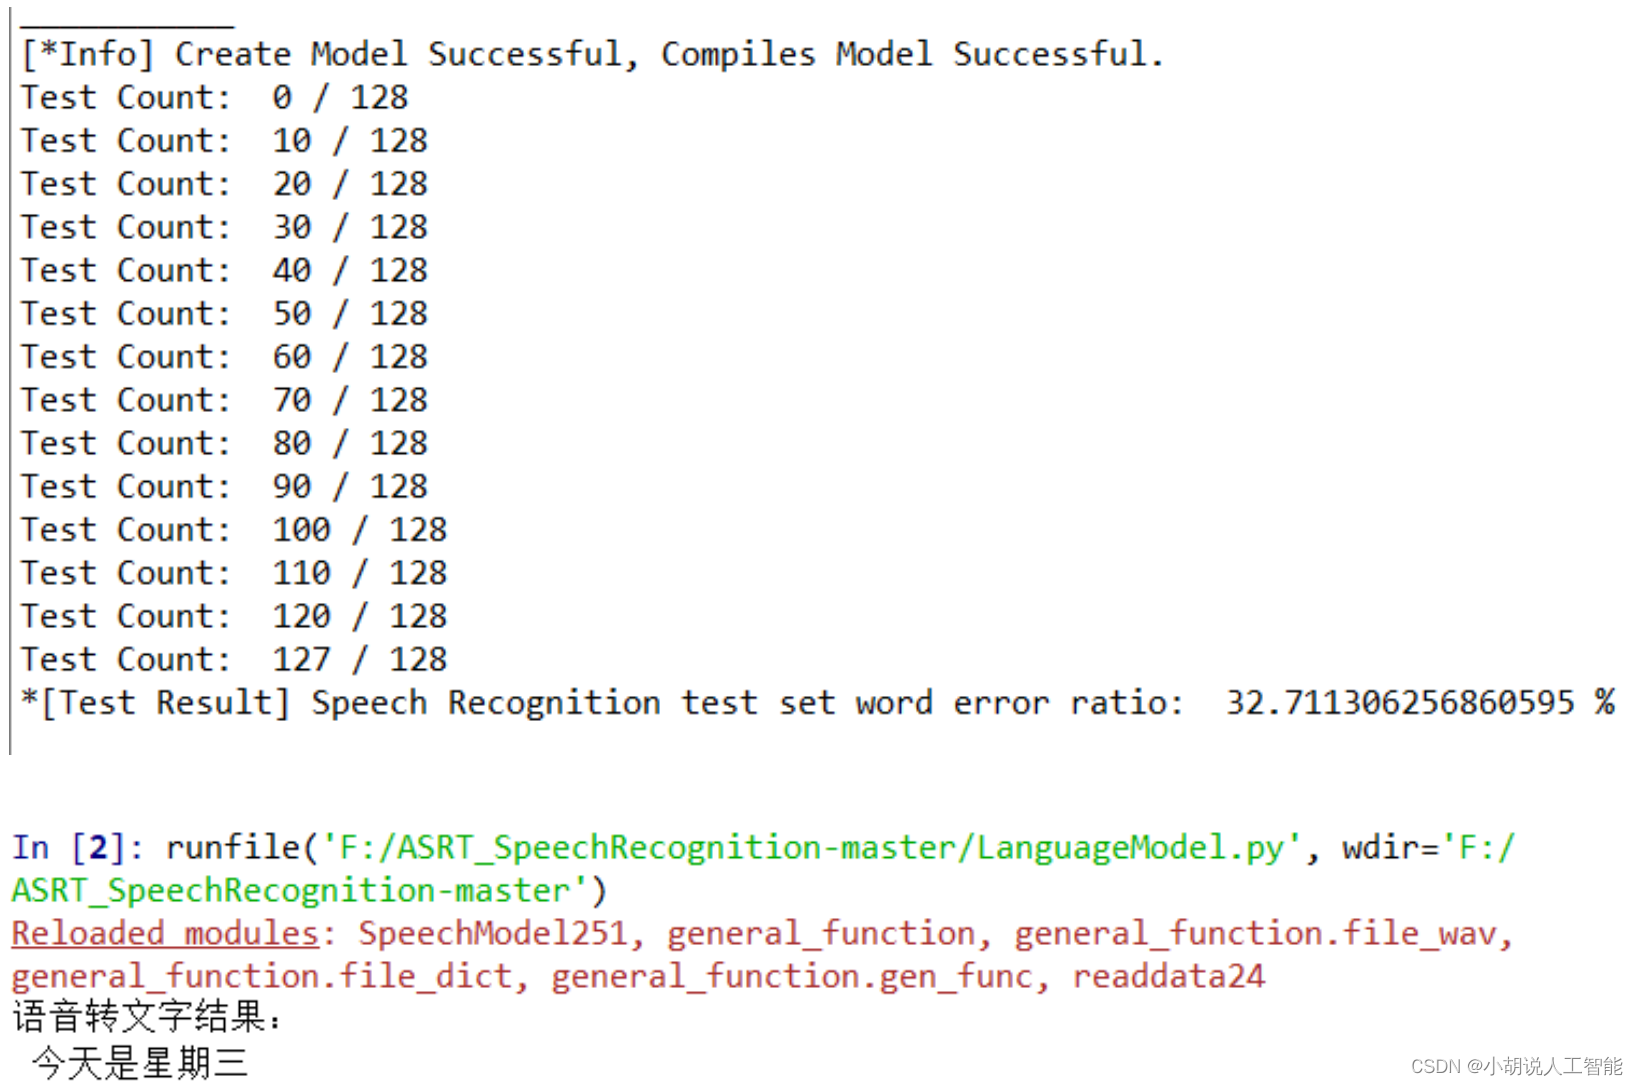
模型训练准确率及测试效果如图所示。

工程源代码下载
详见本人博客资源下载页
其它资料下载
如果大家想继续了解人工智能相关学习路线和知识体系,欢迎大家翻阅我的另外一篇博客《重磅 | 完备的人工智能AI 学习——基础知识学习路线,所有资料免关注免套路直接网盘下载》
这篇博客参考了Github知名开源平台,AI技术平台以及相关领域专家:Datawhale,ApacheCN,AI有道和黄海广博士等约有近100G相关资料,希望能帮助到所有小伙伴们。

