文章目录
- 项目背景
- 项目功能
- 测试计划
- 功能测试
- 测试用例
- 执行测试的操作步骤
- 自动化测试
- 设计的模块、自动化运行的结果、问题定位的结果
- 自动化测试优点
项目背景
对于一个程序员来说,定期整理总结并写博客是不可或缺的步骤,不管是对近期新掌握的技术或者是遇到bug解决bug过程的记录等,都是非常有必要的。
目前的博客网站有很多,比如CSDN、掘金、博客园等。本人在整个学习的阶段也都会经常在上面发布文章和见解等,最近学了一些开发所需要的主流框架,因此以做项目代学,做出了一个简易版的个人博客系统。
项目功能
博客系统中最基本的用户管理、文章管理(增删改查等)都有涉及,此外在这个博客系统中不需要担心安全问题(因为用户密码采用了加盐加密处理,破解成本高,且在一些私人界面加入了拦截器等)、短时间内不需要重复登录(因为在redis中存储了用户的session信息并进行了持久化处理)、可以随时随地地更换自己喜欢的头像(因为上传的图片发送到服务器并使用Nginx存储起来,稍等一段时间后台刷新后即可看到换的头像)。
测试计划
功能测试
测试用例
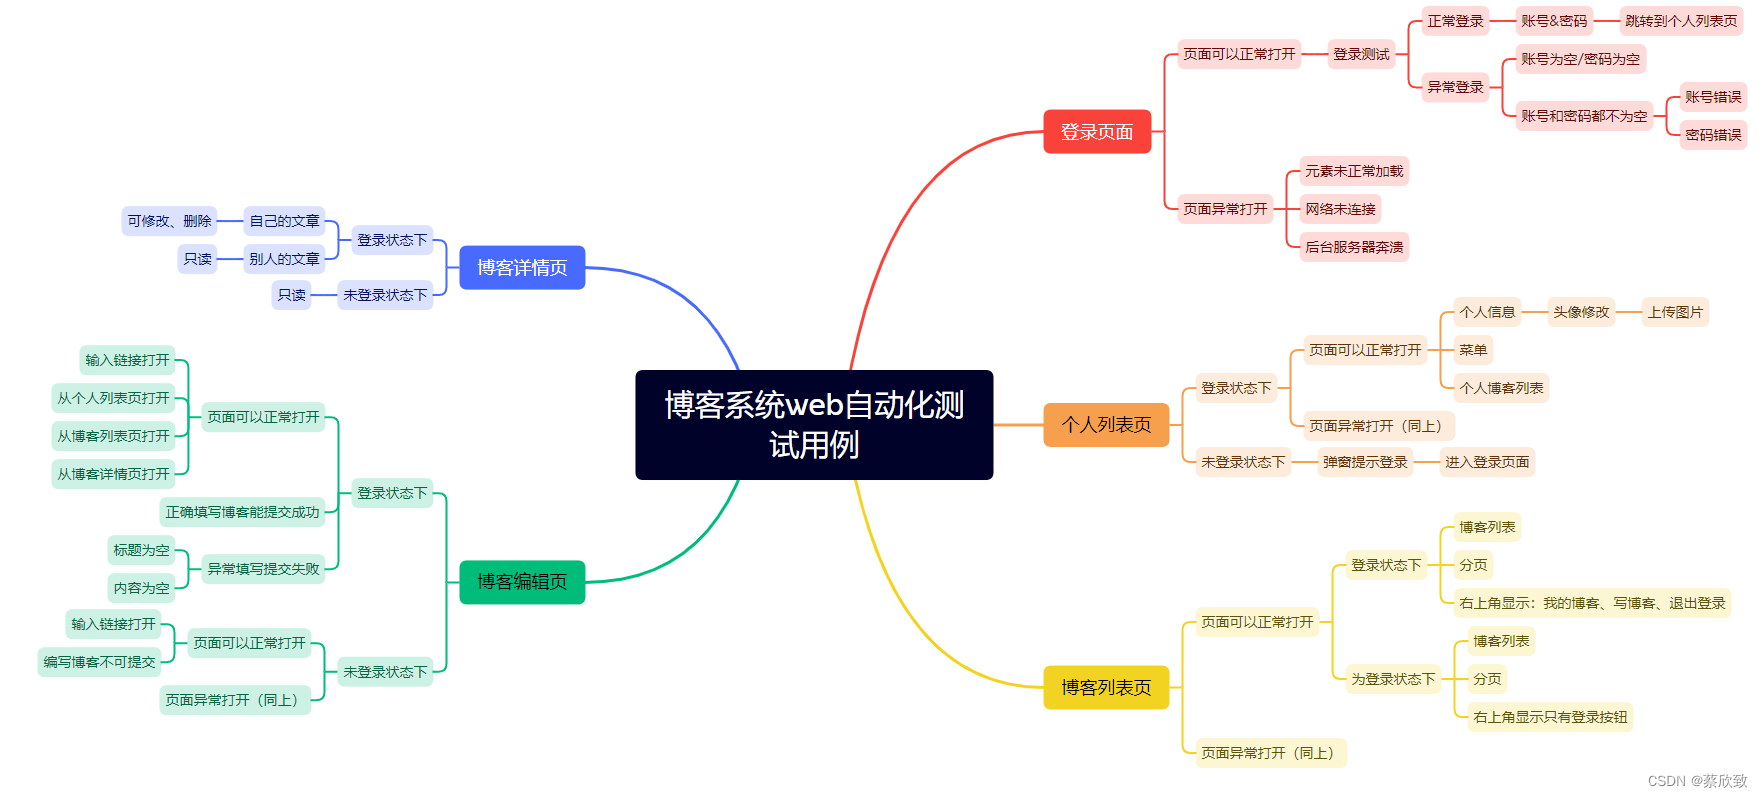
测试的第一步永远都是测试用例的编写,这里对这个项目中的功能使用脑图进行测试用例的编写。
执行测试的操作步骤
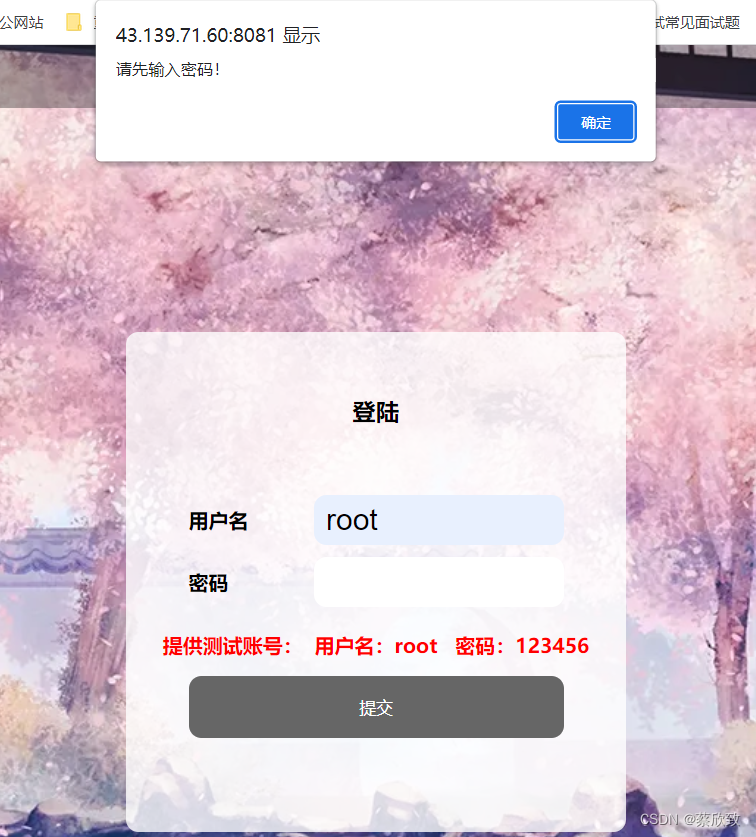
登录页:
(1)账号或密码为空:
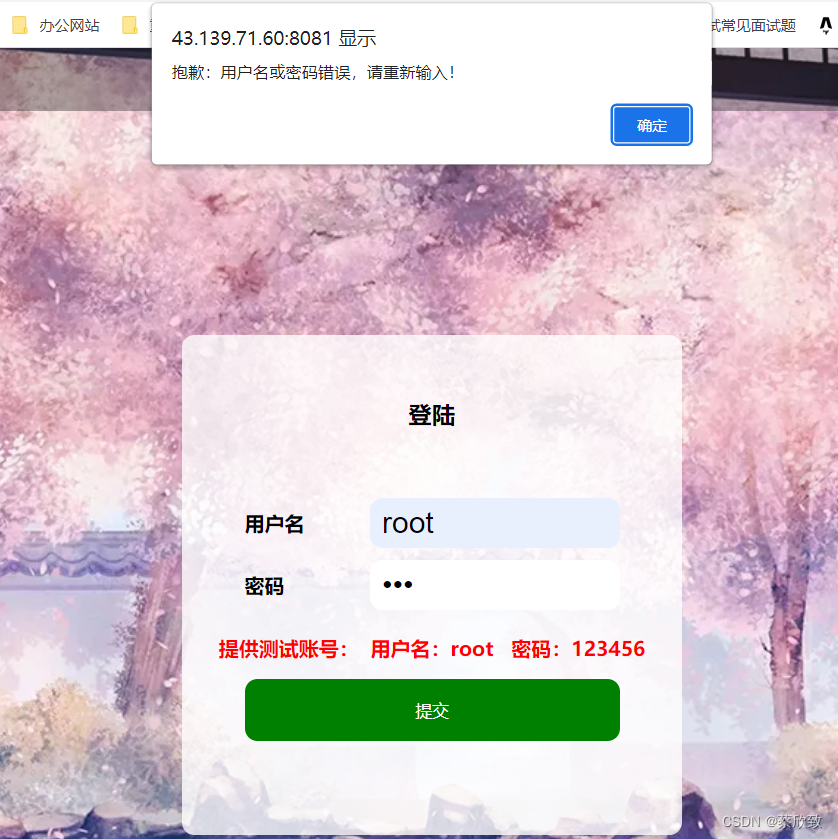
(2)账号或密码填写错误:
(3)正确登录跳转到个人列表页:
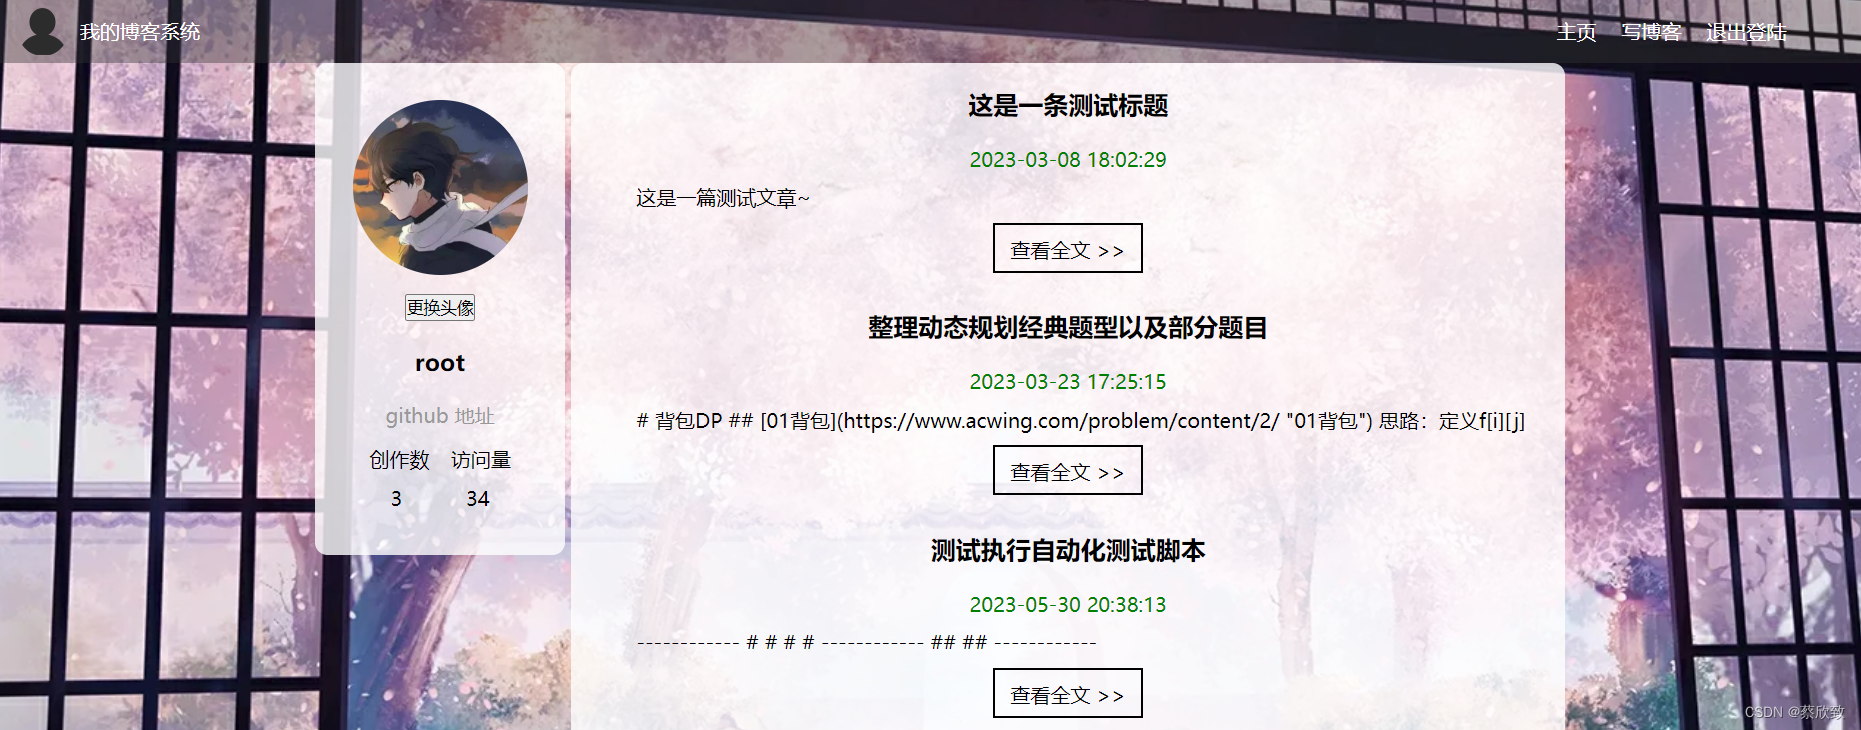
个人列表页:
(1)正常登录状态下:

(2)未登录的状态下输入url - http://43.139.71.60:8081/myblog_list.html(跳转到登录页):

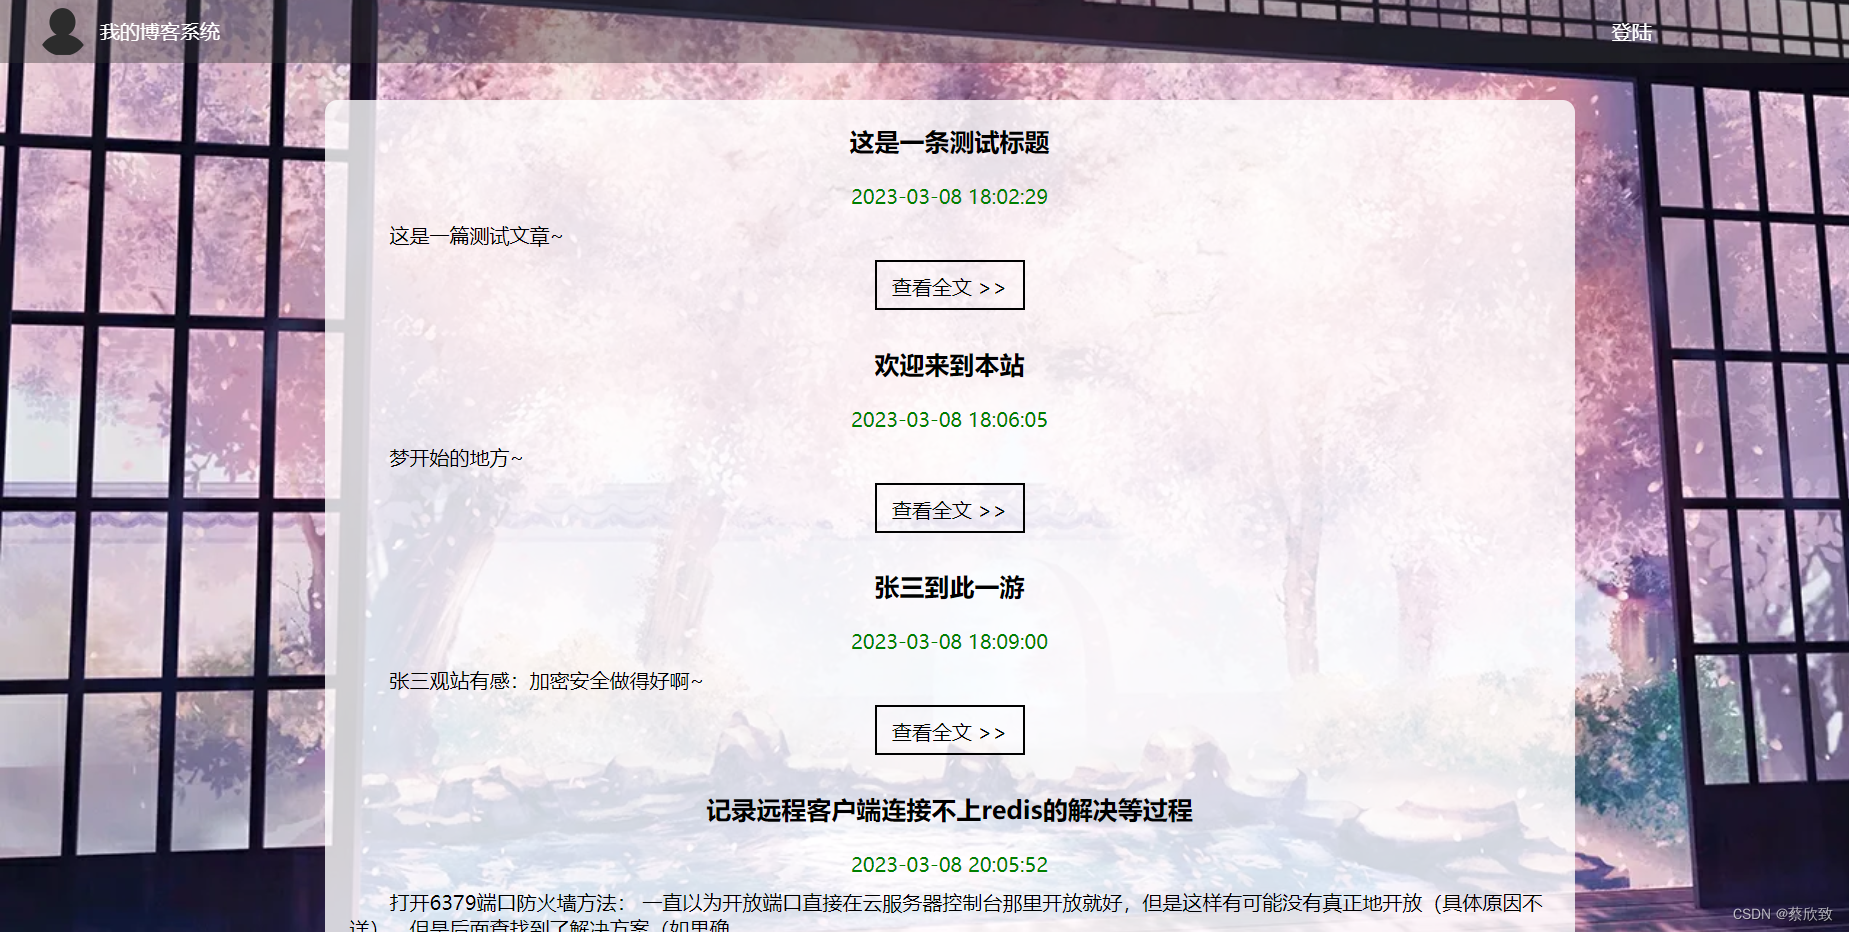
博客列表页:
(1)在未登录的情况下(只有登录按钮):
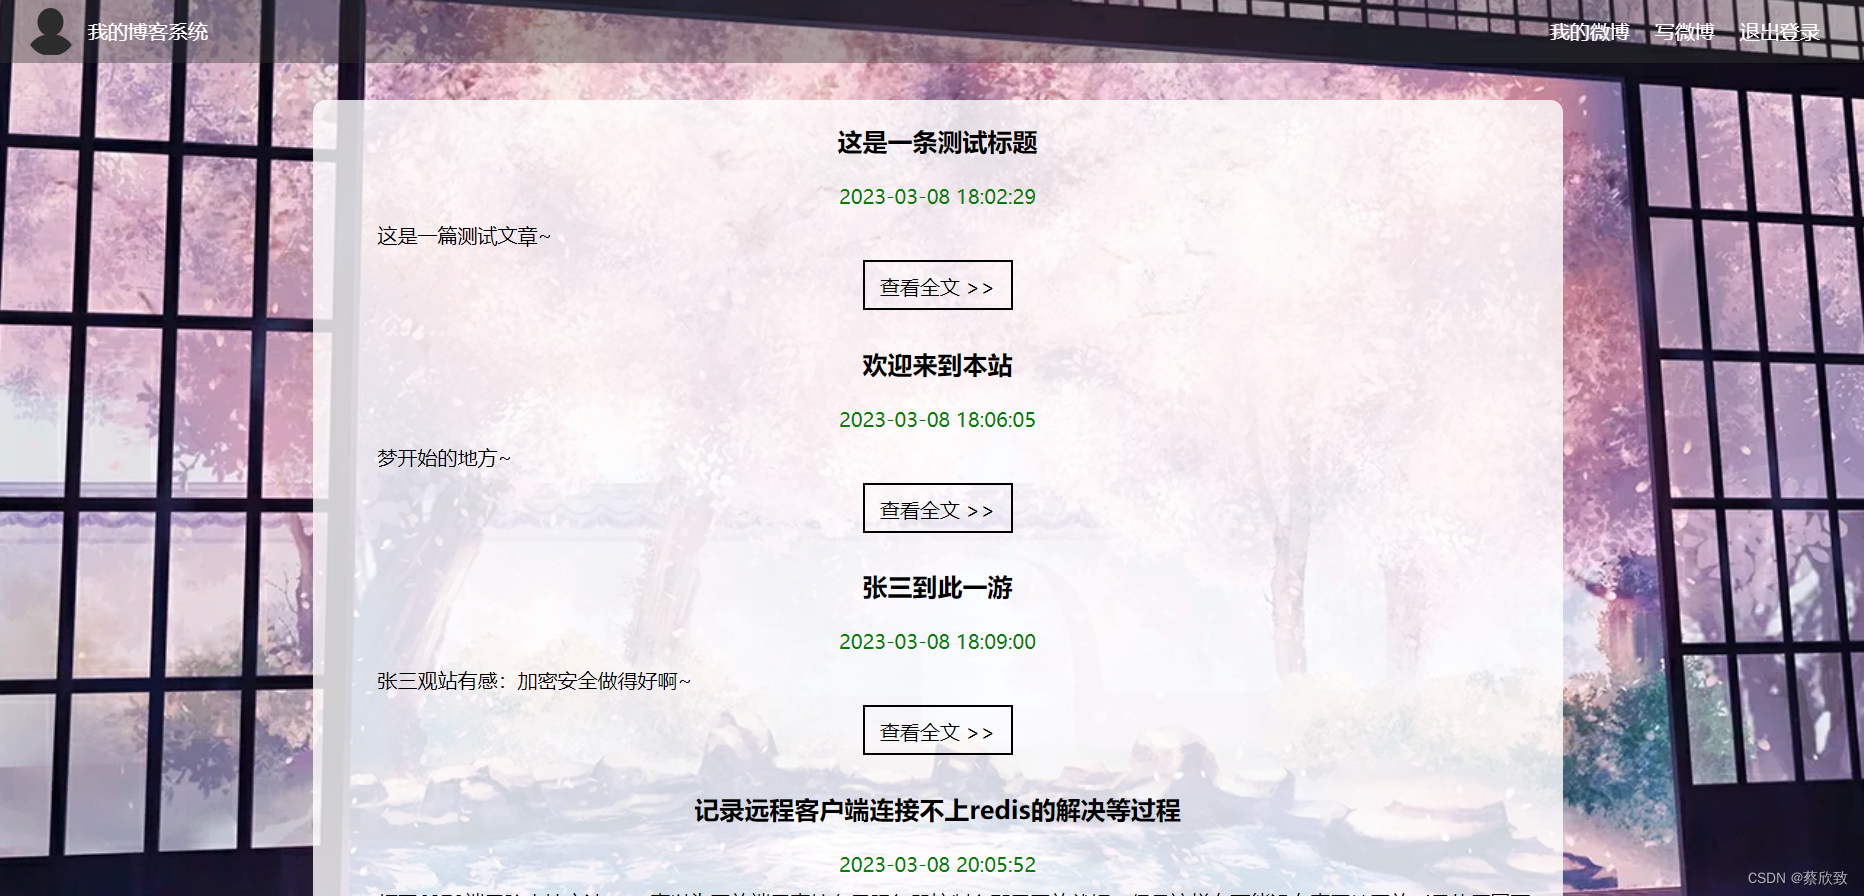
(2)在登录的状态下(有三个按钮选择):
博客详情页:
(1)在未登录的情况下(只读):
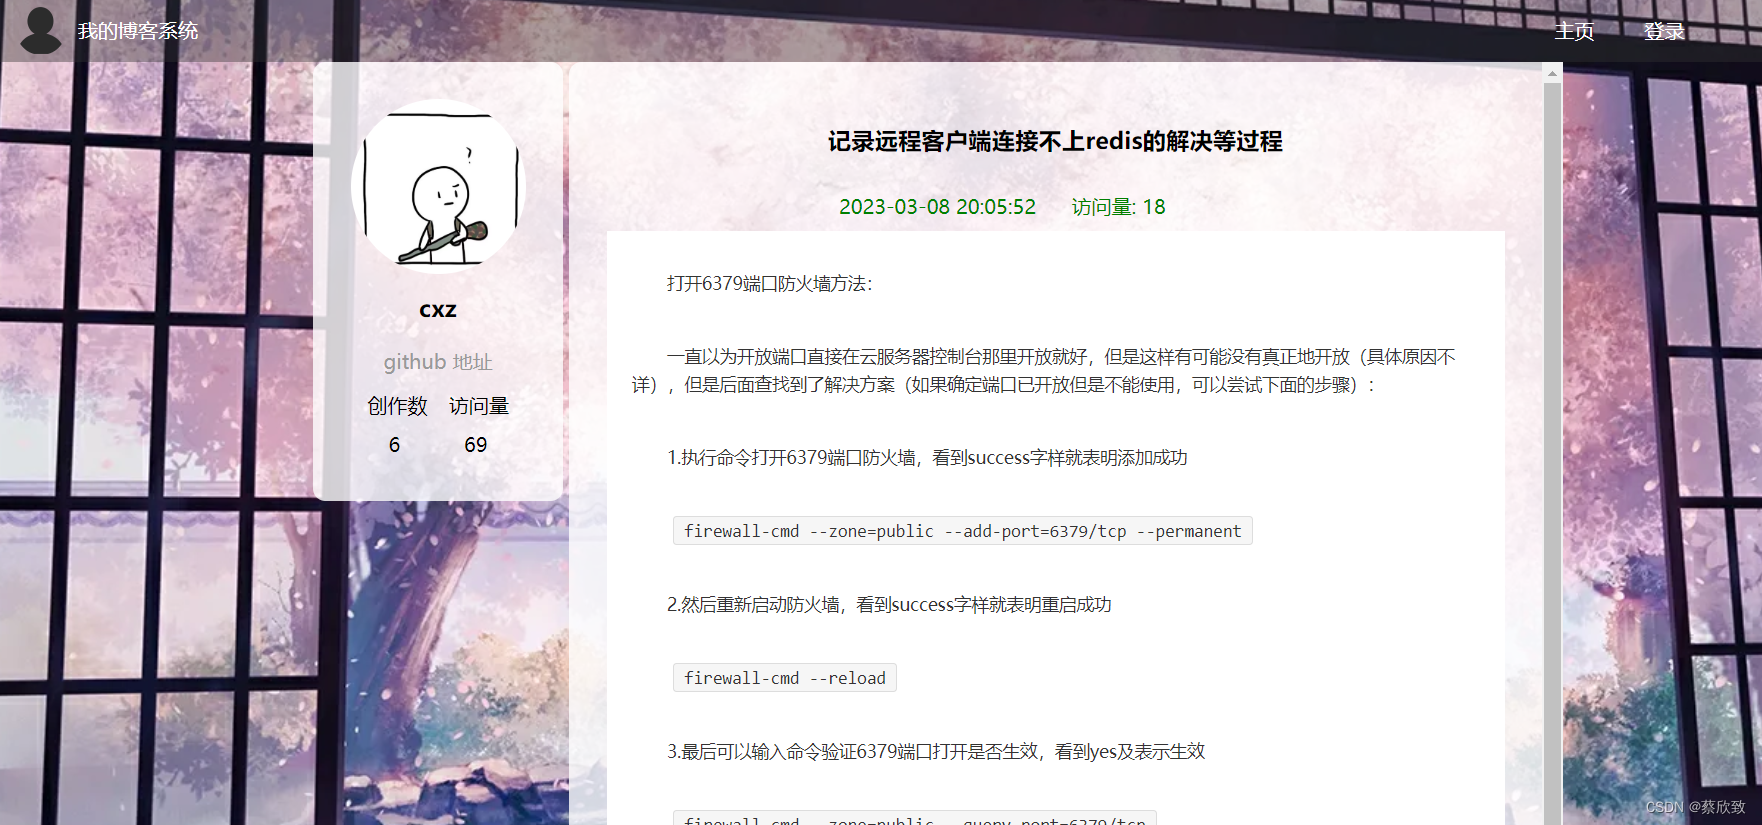
(2)在登录root账号下打开cxz的文章(只读):

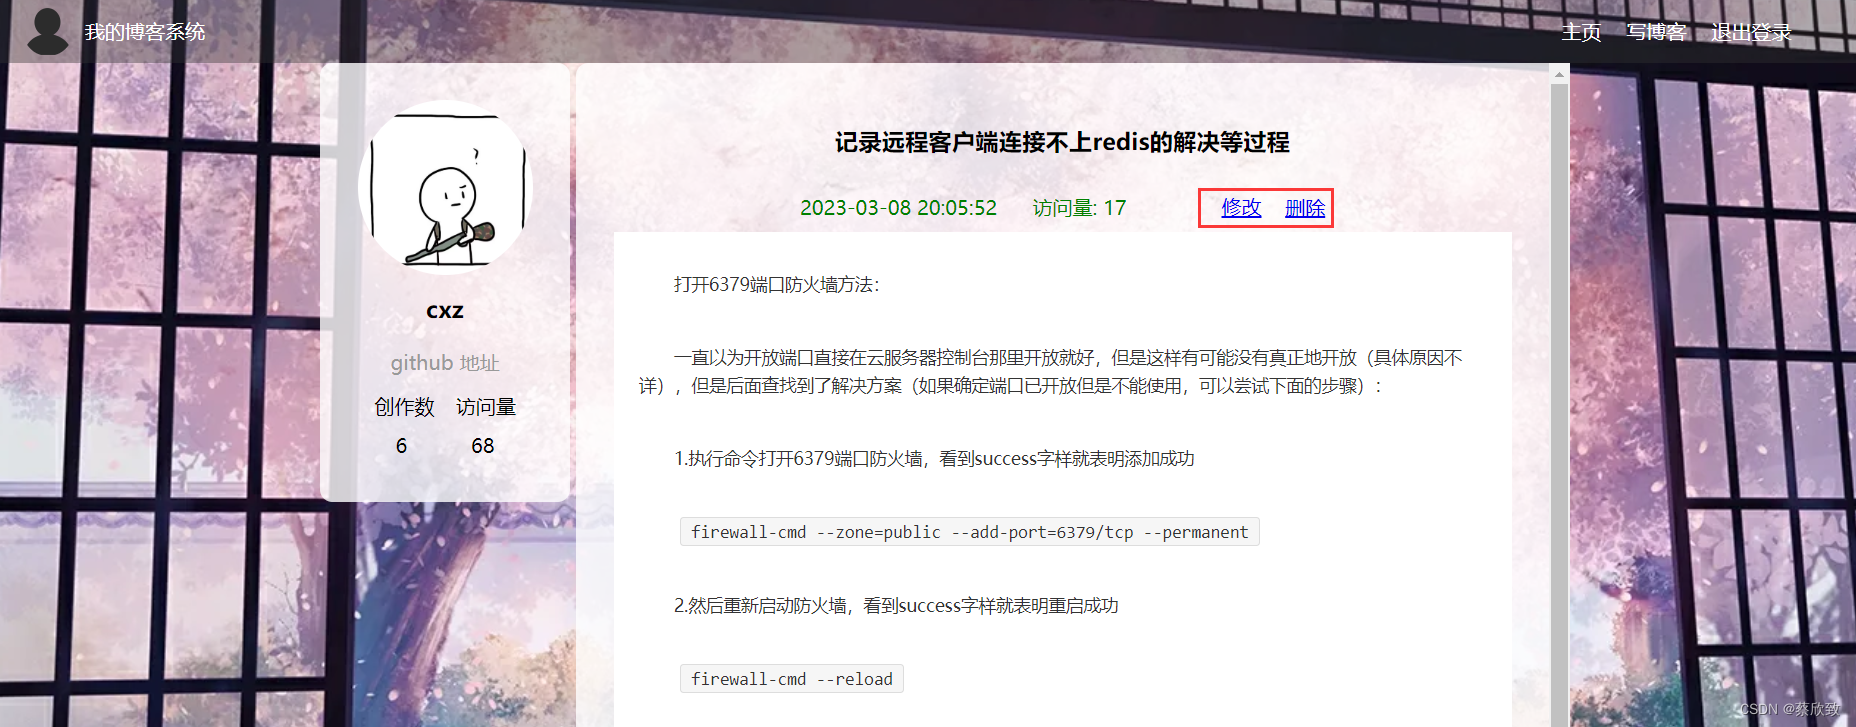
(3)在cxz账户下打开自己的文章(可删除、修改):
博客编辑页:
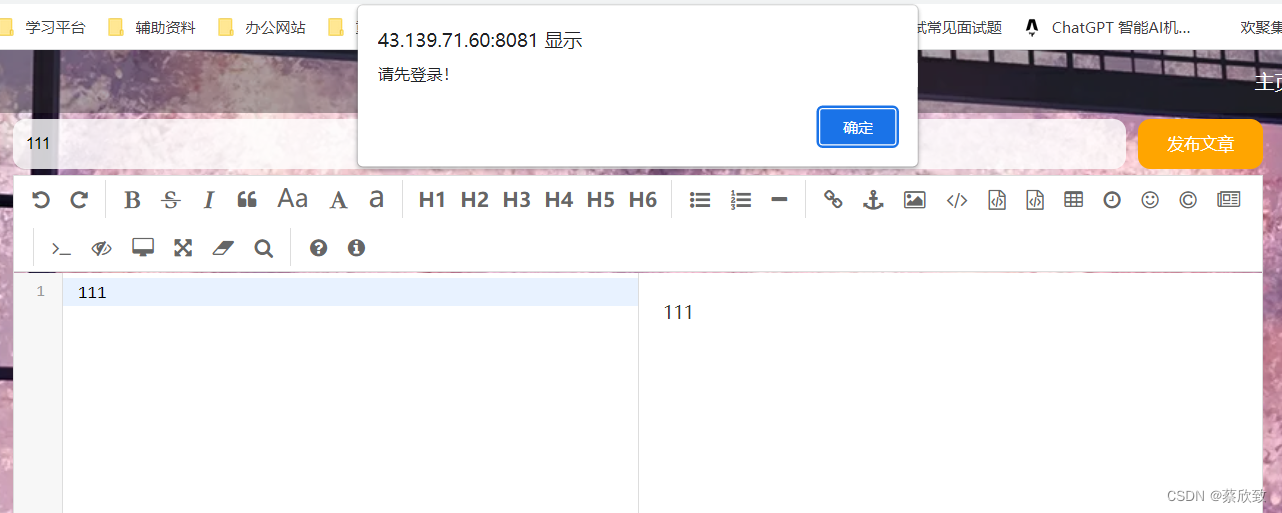
(1)未登录的状态下(提示失败并跳转到登录页):
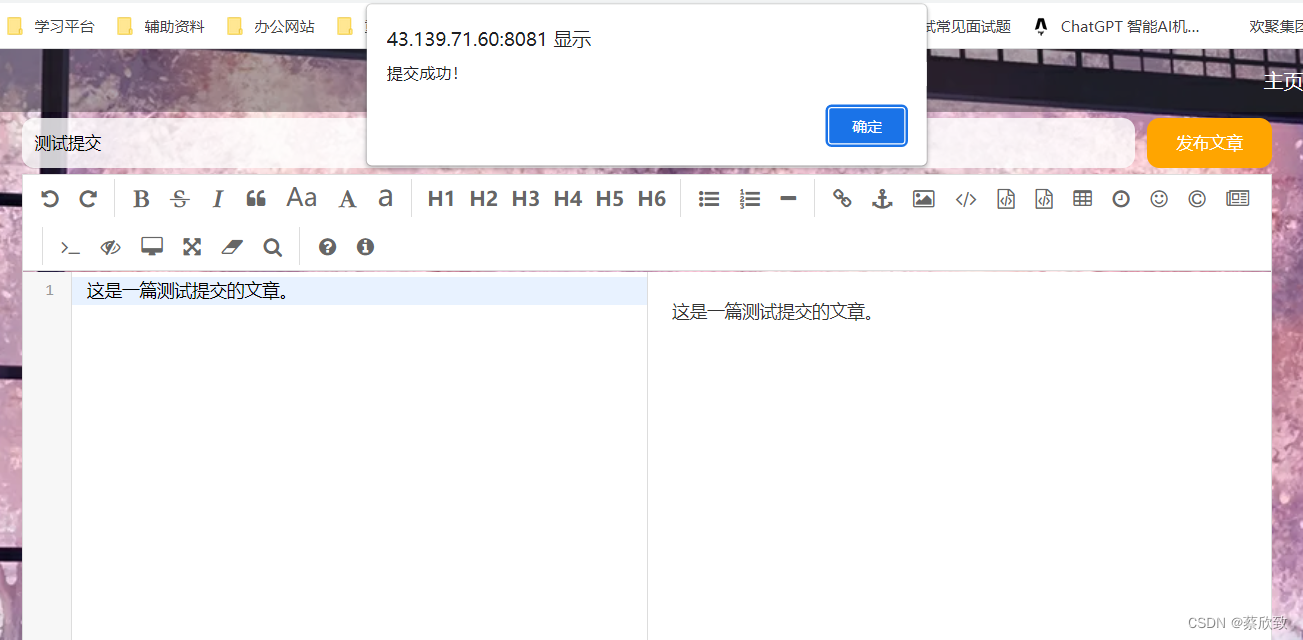
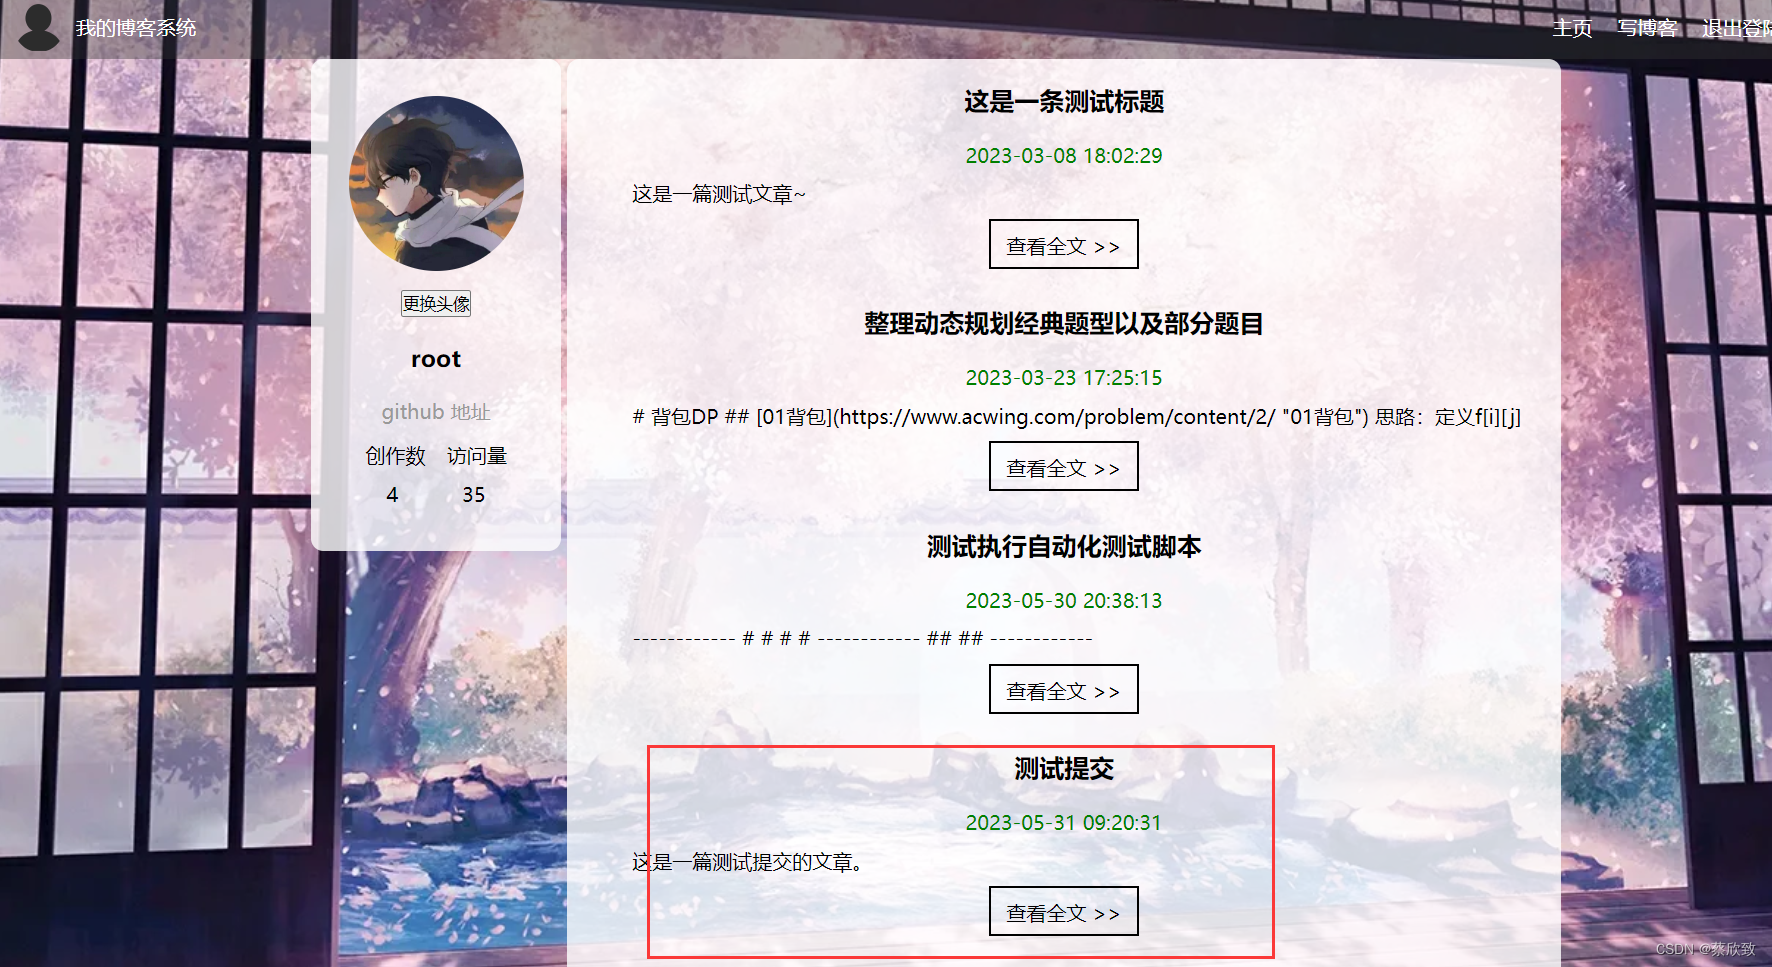
(2)登录的状态下(提示成功并跳转到个人列表页):
自动化测试
重点还是自动化测试。编写自动化代码通常是需要根据编写的测试用例来进行的,但是由于时间关系,本自动化测试对部分主要功能进行编写,如分页、更换头像等没有在范围内,但是这些基本上都是类似的,这里就以部分为例。
设计的模块、自动化运行的结果、问题定位的结果
环境:
编译器:IDEA 2021.3.2
浏览器:Microsoft Edge 113.0.1774.57
驱动程序:msedgedriver.exe(具体在官网选择当前浏览器对应的版本的驱动即可)
自动化测试工具:selenium4
自动化测试框架:junit5
以上对应的依赖包:
        <!--    自动化测试    -->
        <dependency>
            <groupId>org.seleniumhq.selenium</groupId>
            <artifactId>selenium-java</artifactId>
            <version>4.0.0</version>
        </dependency>

        <!--    保存屏幕截图文件    -->
        <dependency>
            <groupId>commons-io</groupId>
            <artifactId>commons-io</artifactId>
            <version>2.6</version>
        </dependency>

        <!--    junit5     -->
        <dependency>
            <groupId>org.junit.jupiter</groupId>
            <artifactId>junit-jupiter</artifactId>
            <version>5.8.2</version>
            <scope>test</scope>
        </dependency>
        <dependency>
            <groupId>org.junit.platform</groupId>
            <artifactId>junit-platform-suite</artifactId>
            <version>1.8.2</version>
            <scope>test</scope>
        </dependency>
由于驱动对象是在一开始就创建的,且全局只用这一个,所以我们可以将它封装起来并用static来修饰:
    public static EdgeDriver driver;

    //创建驱动对象
    public static EdgeDriver createDriver(){
        if(driver == null){
            EdgeOptions options = new EdgeOptions();
            options.addArguments("--remote-allow-origins=*");
            driver = new EdgeDriver(options);

            //创建隐式等待
            driver.manage().timeouts().implicitlyWait(Duration.ofSeconds(10));
        }
        return driver;
    }
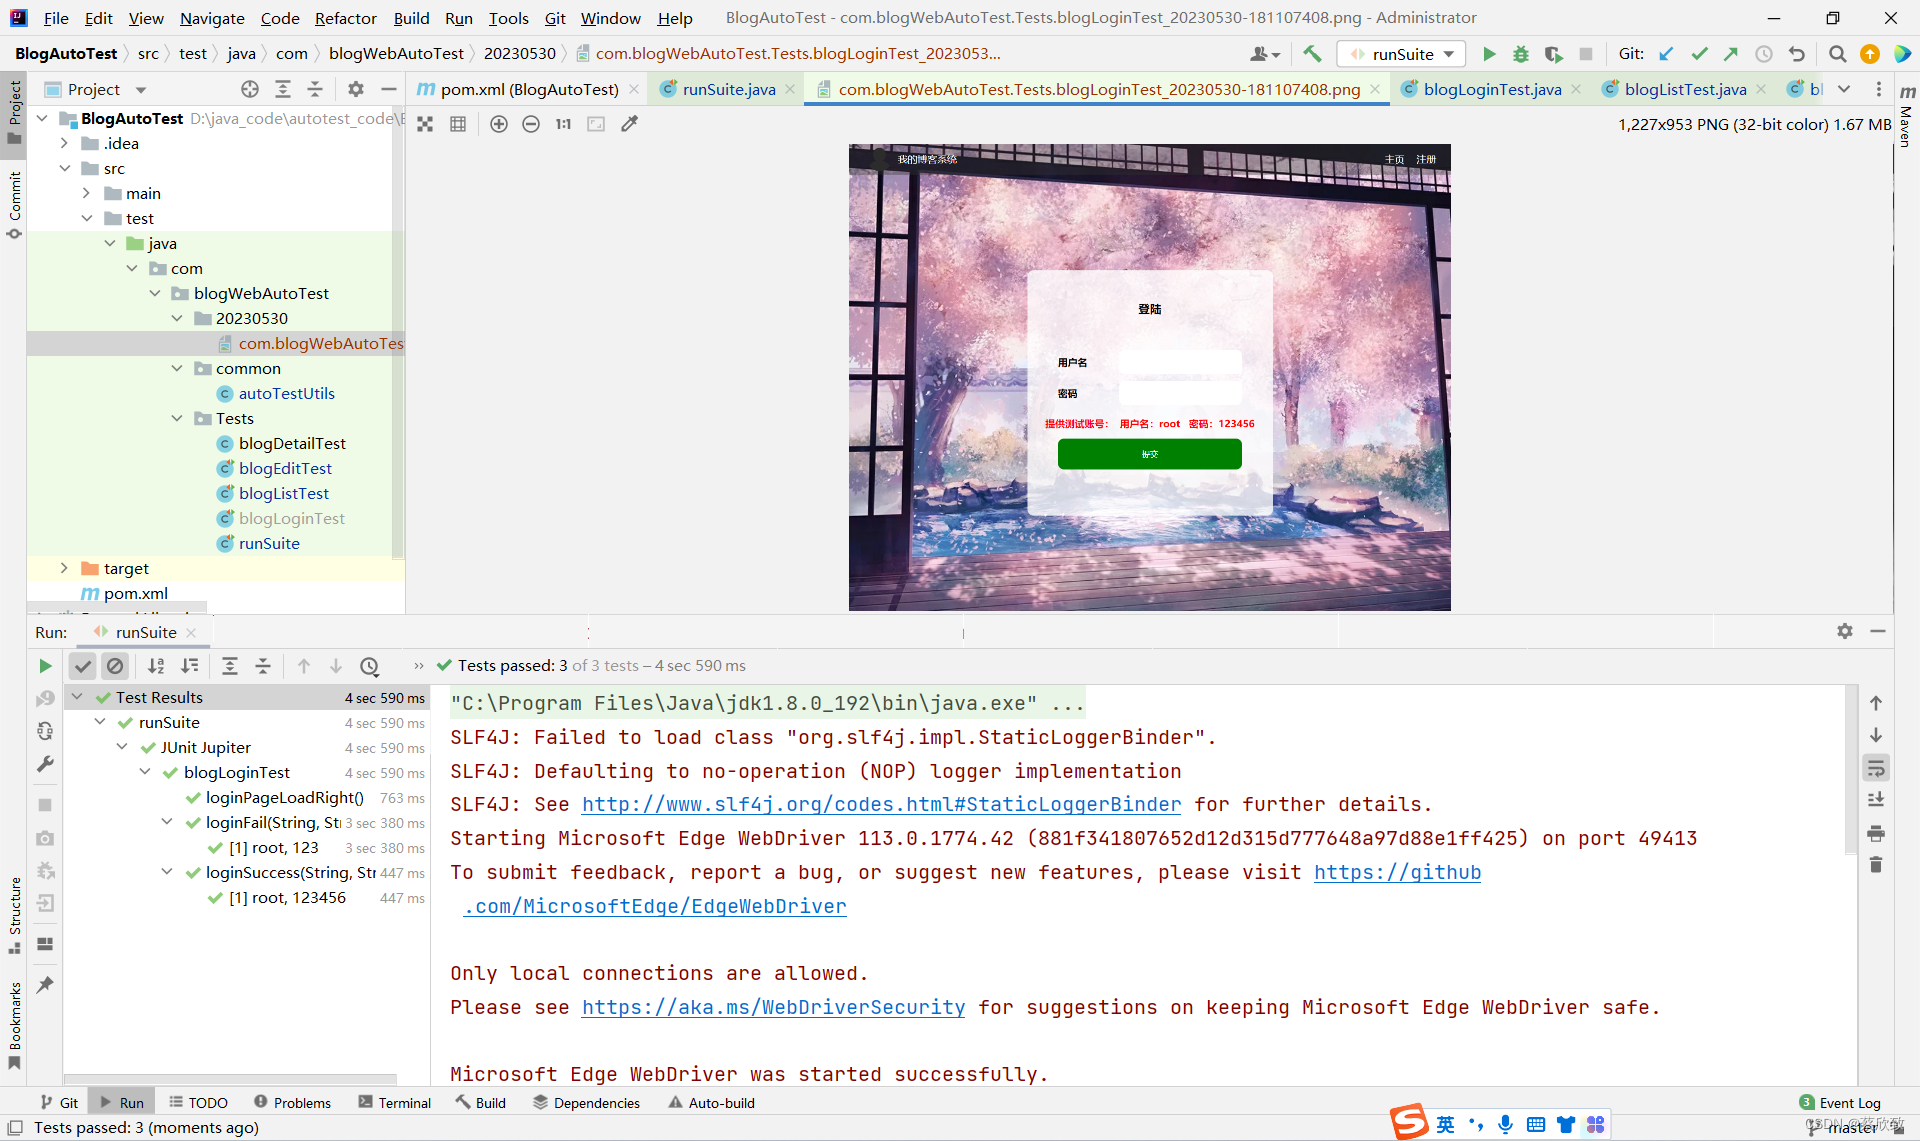
登录页:
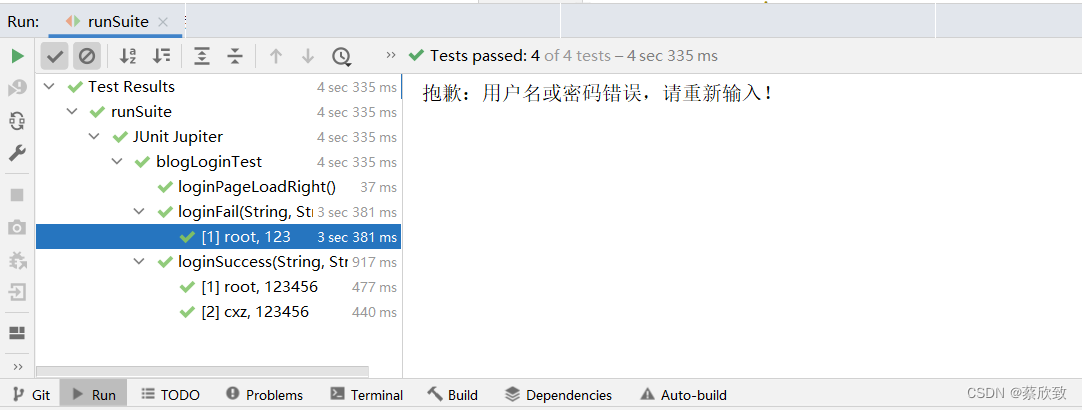
首先测试页面是否正常显示,此外需要测试两种情况:一是正常登录的情况;二是异常登录的情况。
对于异常登录,这里简单测试一组数据,并将报错信息返回回来;对于正常登录,这里测试两组数据。测试登录都使用参数化,也就是以下两个注解:
    @ParameterizedTest
    @CsvSource({"root, 123"})
package com.blogWebAutoTest.Tests;

import com.blogWebAutoTest.common.autoTestUtils;
import org.junit.jupiter.api.*;
import org.junit.jupiter.params.ParameterizedTest;
import org.junit.jupiter.params.provider.CsvSource;
import org.openqa.selenium.By;
import org.openqa.selenium.edge.EdgeDriver;

import java.io.IOException;

/**
 * Created with IntelliJ IDEA.
 * Description:
 * User: Administrator
 * Date: 2023-05-30
 * Time: 15:16
 */
@TestMethodOrder(MethodOrderer.OrderAnnotation.class)
public class blogLoginTest extends autoTestUtils {
    public static EdgeDriver driver;

    @BeforeAll
    static private void baseControl(){
        driver = createDriver();
        driver.get("http://43.139.71.60:8081/login.html");
    }

    /*
    * 页面是否正确打开
    * 检查点:主页、注册元素是否存在
    * */
    @Test
    @Order(1)
    public void loginPageLoadRight() throws IOException {
        driver.findElement(By.cssSelector("body > div.nav > a:nth-child(4)"));
        driver.findElement(By.cssSelector("body > div.nav > a:nth-child(5)"));
        getScreenShot(getClass().getName());
    }

    /*
    * 检查正常登录情况
    * */
    @ParameterizedTest
    @CsvSource({"root, 123456"})
    @Order(3)
    public void loginSuccess(String username, String password) throws InterruptedException, IOException {
        driver.findElement(By.cssSelector("#username")).clear();
        driver.findElement(By.cssSelector("#password")).clear();
        driver.findElement(By.cssSelector("#username")).sendKeys(username);
        driver.findElement(By.cssSelector("#password")).sendKeys(password);
        driver.findElement(By.cssSelector("#submit")).click();
        //对登录结果进行检查
//        Thread.sleep(3000);
        driver.findElement(By.cssSelector("body > div.nav > a:nth-child(5)"));
        getScreenShot(getClass().getName());
        driver.navigate().back();
//        Thread.sleep(3000);
    }

    /*
    * 检查异常的登录情况
    * */
    @ParameterizedTest
    @CsvSource({"root, 123"})
    @Order(2)
    public void loginFail(String username, String password) throws IOException, InterruptedException {
        driver.findElement(By.cssSelector("#username")).clear();
        driver.findElement(By.cssSelector("#password")).clear();
        driver.findElement(By.cssSelector("#username")).sendKeys(username);
        driver.findElement(By.cssSelector("#password")).sendKeys(password);
        driver.findElement(By.cssSelector("#submit")).click();
        //对登录结果进行检查
        Thread.sleep(3000);
        System.out.println(driver.switchTo().alert().getText());
        driver.switchTo().alert().accept();
        getScreenShot(getClass().getName());
//        Thread.sleep(3000);
    }
}
个人列表页:
通过页面的共同元素看页面是否正常打开。
package com.blogWebAutoTest.Tests;

import com.blogWebAutoTest.common.autoTestUtils;
import org.junit.jupiter.api.AfterAll;
import org.junit.jupiter.api.BeforeAll;
import org.junit.jupiter.api.Order;
import org.junit.jupiter.api.Test;
import org.openqa.selenium.By;
import org.openqa.selenium.edge.EdgeDriver;

import java.io.IOException;

/**
 * Created with IntelliJ IDEA.
 * Description:
 * User: Administrator
 * Date: 2023-05-30
 * Time: 15:16
 */
public class blogListTest extends autoTestUtils {
//    public static EdgeDriver driver;

    @BeforeAll
    static private void baseControl(){
//        driver = createDriver();
        driver.get("http://43.139.71.60:8081/myblog_list.html");
    }

    /*
     * 页面是否正确打开
     * 检查点:创作数、访问量、写博客元素是否存在
     * */
    @Test
    public void loginPageLoadRight() throws IOException {
        driver.findElement(By.cssSelector("body > div.container > div.container-left > div > div:nth-child(5) > span:nth-child(1)"));
        driver.findElement(By.cssSelector("body > div.container > div.container-left > div > div:nth-child(5) > span:nth-child(2)"));
        driver.findElement(By.cssSelector("body > div.nav > a:nth-child(5)"));
        getScreenShot(getClass().getName());
    }
}
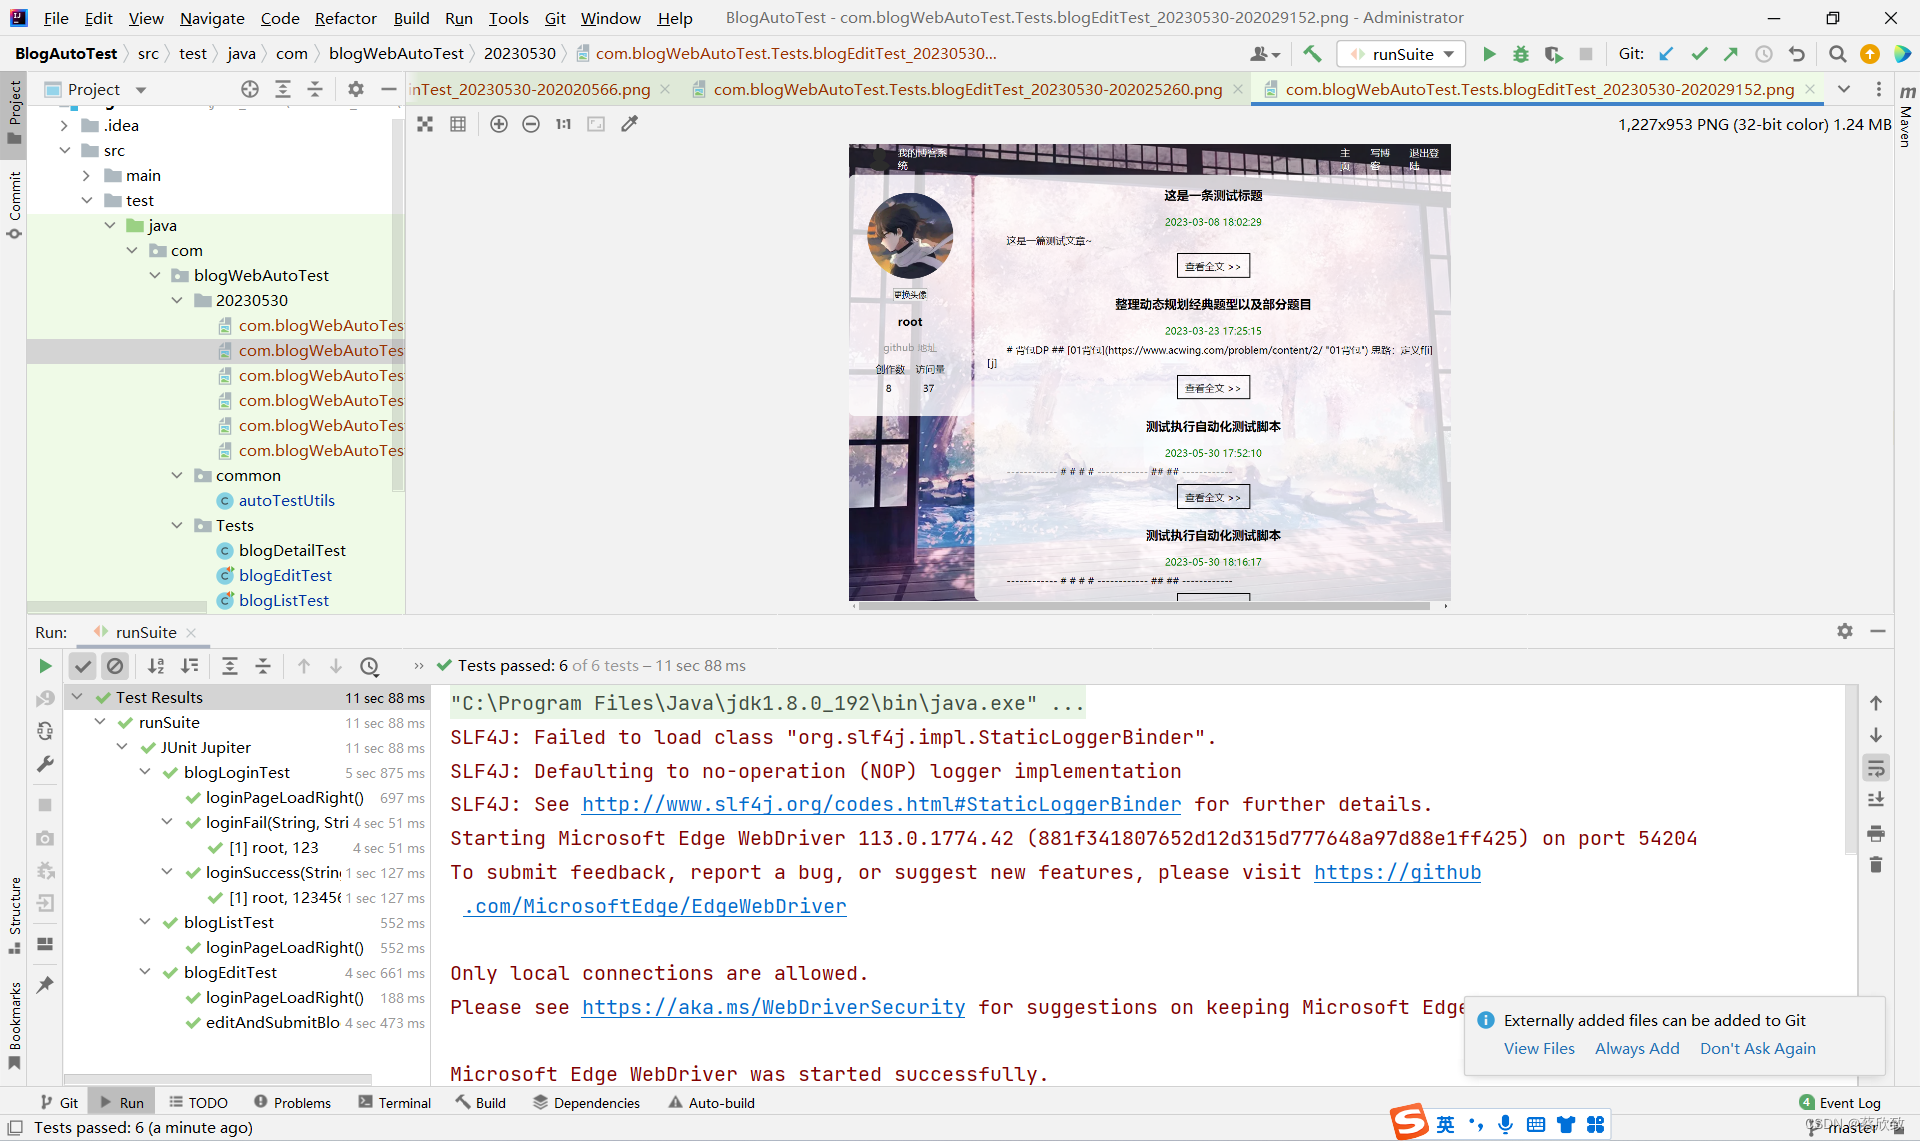
博客编辑页:
首先测试页面是否正常显示,此外需要测试写的博客能否正常提交,这里就可以使用到断言(无论结果显示的是否是“提交成功!”,都可以执行通过,不会出现报错的情况,这也是自动化测试的要求)。
package com.blogWebAutoTest.Tests;

import com.blogWebAutoTest.common.autoTestUtils;
import org.junit.jupiter.api.*;
import org.openqa.selenium.By;

import java.io.IOException;

/**
 * Created with IntelliJ IDEA.
 * Description:
 * User: Administrator
 * Date: 2023-05-30
 * Time: 15:17
 */
@TestMethodOrder(MethodOrderer.OrderAnnotation.class)
public class blogEditTest extends autoTestUtils {
    //    public static EdgeDriver driver;

    @BeforeAll
    static private void baseControl(){
//        driver = createDriver();
        driver.get("http://43.139.71.60:8081/blog_edit.html");
    }

    /*
     * 页面是否正确打开
     * 检查点:主页、我的博客、退出登录元素是否存在
     * */
    @Test
    @Order(1)
    public void loginPageLoadRight() throws IOException {
        driver.findElement(By.cssSelector("body > div.nav > a:nth-child(4)"));
        driver.findElement(By.cssSelector("body > div.nav > a:nth-child(5)"));
        driver.findElement(By.cssSelector("body > div.nav > a:nth-child(6)"));
        getScreenShot(getClass().getName());
    }

    @Test
    @Order(2)
    public void editAndSubmitBlog() throws IOException, InterruptedException {
        driver.findElement(By.cssSelector("#title")).sendKeys("测试执行自动化测试脚本");
        driver.findElement(By.cssSelector("#editorDiv > div.editormd-toolbar > div > ul > li:nth-child(21) > a > i")).click();
        driver.findElement(By.cssSelector("#editorDiv > div.editormd-toolbar > div > ul > li:nth-child(12) > a > i")).click();
        driver.findElement(By.cssSelector("#editorDiv > div.editormd-toolbar > div > ul > li:nth-child(12) > a > i")).click();
        driver.findElement(By.cssSelector("#editorDiv > div.editormd-toolbar > div > ul > li:nth-child(12) > a > i")).click();
        driver.findElement(By.cssSelector("#editorDiv > div.editormd-toolbar > div > ul > li:nth-child(12) > a > i")).click();
        driver.findElement(By.cssSelector("#editorDiv > div.editormd-toolbar > div > ul > li:nth-child(21) > a > i")).click();
        driver.findElement(By.cssSelector("#editorDiv > div.editormd-toolbar > div > ul > li:nth-child(13) > a > i")).click();
        driver.findElement(By.cssSelector("#editorDiv > div.editormd-toolbar > div > ul > li:nth-child(13) > a > i")).click();
        driver.findElement(By.cssSelector("#editorDiv > div.editormd-toolbar > div > ul > li:nth-child(21) > a > i")).click();
        driver.findElement(By.cssSelector("body > div.blog-edit-container > div.title > button")).click();
        Thread.sleep(3000);
        Assertions.assertEquals("提交成功!", driver.switchTo().alert().getText());
        driver.switchTo().alert().accept();
        getScreenShot(getClass().getName());
    }
}
引入截图功能:
由于自动化执行的速度是比较快的,所以中间过程是比较难看到的,因此我们可以使用截图并保存来看:
图片不能单纯地命名为固定的,因为这样会造成覆盖的情况,也就是说之前截的图片会被覆盖掉,比较主流、合理的方法是使用时间戳来命名,更严谨的是按照日期来建文件夹,按照当前时间来取文件名的形式,避免重名的情况。
    //使用时间戳动态生成图片名
    public List<String> getTime(){
        //以天的维度按照文件夹进行保存
        List<String> list = new ArrayList<>();
        SimpleDateFormat simpleDateFormat1 = new SimpleDateFormat("yyyyMMdd");
        SimpleDateFormat simpleDateFormat2 = new SimpleDateFormat("yyyyMMdd-HHmmssSS");
        String dirname = simpleDateFormat1.format(System.currentTimeMillis());
        String filename = simpleDateFormat2.format(System.currentTimeMillis());
        list.add(dirname);
        list.add(filename);
        return list;
    }

    //获取屏幕截图,把所有用例结果保存下来(非常适用于无头模式)
    public void getScreenShot(String s) throws IOException {
        List<String> list = getTime();
        String filename = "./src/test/java/com/blogWebAutoTest/" + list.get(0) + "/" + s + "_" + list.get(1) + ".png";
        File file = driver.getScreenshotAs(OutputType.FILE);
        FileUtils.copyFile(file, new File(filename));
    }
博客详情页:
博客详情页共同的元素是文章标题和发布时间,所以根据其来确定页面是否正常加载。
package com.blogWebAutoTest.Tests;

import com.blogWebAutoTest.common.autoTestUtils;
import org.junit.jupiter.api.AfterAll;
import org.junit.jupiter.api.BeforeAll;
import org.junit.jupiter.api.Test;
import org.openqa.selenium.By;

import java.io.IOException;

/**
 * Created with IntelliJ IDEA.
 * Description:
 * User: Administrator
 * Date: 2023-05-30
 * Time: 15:17
 */
public class blogDetailTest extends autoTestUtils {
    //    public static EdgeDriver driver;

    @BeforeAll
    static private void baseControl(){
//        driver = createDriver();
        driver.get("http://43.139.71.60:8081/blog_content.html?id=18");
    }

    @Test
    public void blogDetailLoadRight() throws IOException {
        driver.findElement(By.cssSelector("#title"));
        driver.findElement(By.cssSelector("#data"));
        getScreenShot(getClass().getName());
    }

    @AfterAll
    private static void driverQuit(){
        driver.quit();
    }
}
注意在最后需要使用@AfterAll注解来释放掉驱动对象,同样也是全局执行一次。
实际上这个自动化涉及到的用例测试是非常少的,且很多功能都还没有测试全面,但其实也是大同小异。后面有时间会继续写完整后面的自动化代码,感兴趣的后面可以看完整代码:博客系统自动化测试代码(努力填坑中…)。
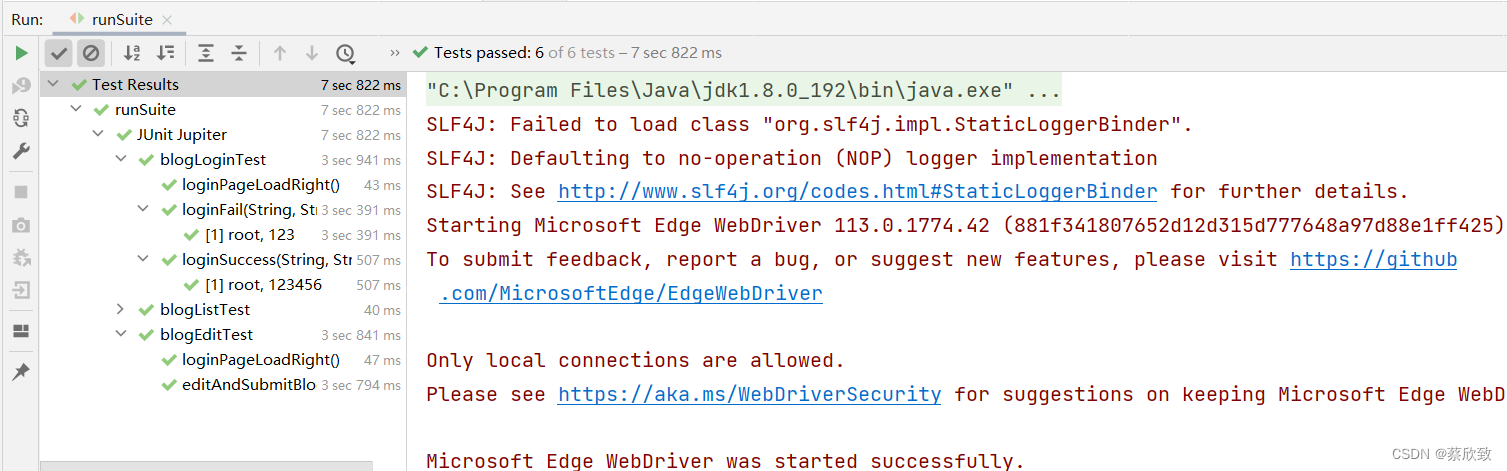
自动化测试优点
(1)使用了junit5框架中提供的注解,避免生成过多的对象,造成时间和资源的浪费,提高了自动化的执行效率。
(2)只创建一次驱动对象,避免每个用例重复创建驱动对象造成时间和资源的浪费。
(3)使用参数化,保持用例的简洁,提高代码的可读性,同时也方便存储大量数据的.csv文件导入。
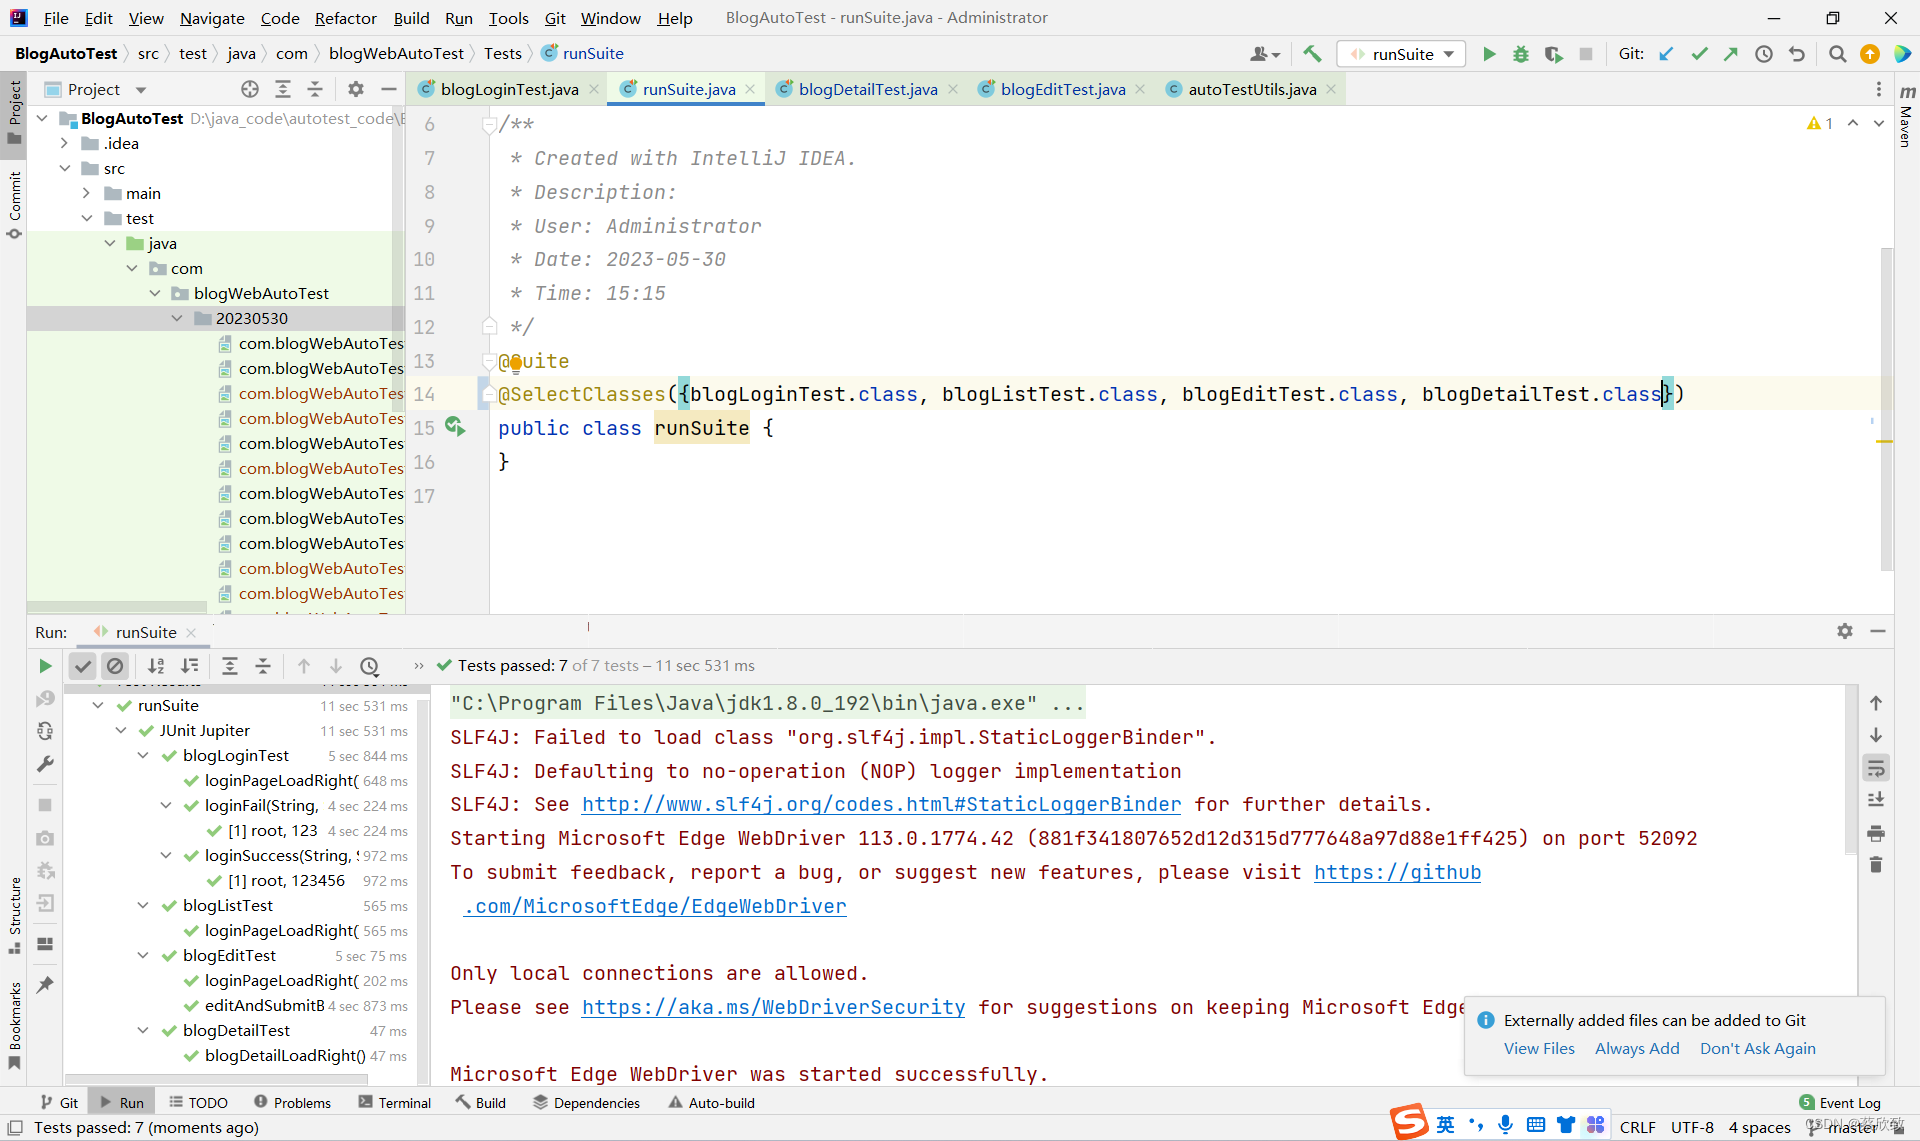
(4)使用测试套件,降低自动化测试的工作量,因为通过套件就可以一次执行所有运行的测试用例。
(5)使用了隐式等待,提高了自动化的运行效率,提高了自动化的稳定性。
(6)加入了屏幕截图功能,方便在无头模式下追溯问题的位置。