文章目录
- 一、使用@PropertySource加载自定义配置文件
- (一)创建Spring Boot Web项目ConfigDemo01
- (二)创建自定义配置文件
- (三)创建自定义配置类
- (四)编写测试方法
- (五)运行测试方法
- (六)修改测试方法代码
- (七)再次运行测试方法
- 课堂练习:在Web页面显示学生配置信息
- 二、使用@ImportResource加载XML配置文件
- (一)创建创建Spring Boot Web项目ConfigDem
- (二)创建自定义服务类
- (三)创建Spring配置文件
- (四)在启动类上添加注解,加载自定义Spring配置文件
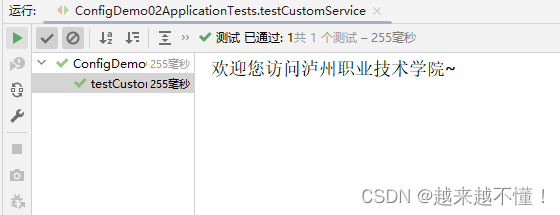
- (五)打开测试类,编写测试方法
- (六)运行测试方法,查看结果
- 三、使用@Configuration编写自定义配置类
- (一)创建Spring Boot Web项目ConfigDemo03
- (二)创建自定义服务类
- (三)创建自定义配置类CustomConfig
- (四)打开测试类,编写测试方法
- (五)运行测试方法,查看结果
一、使用@PropertySource加载自定义配置文件
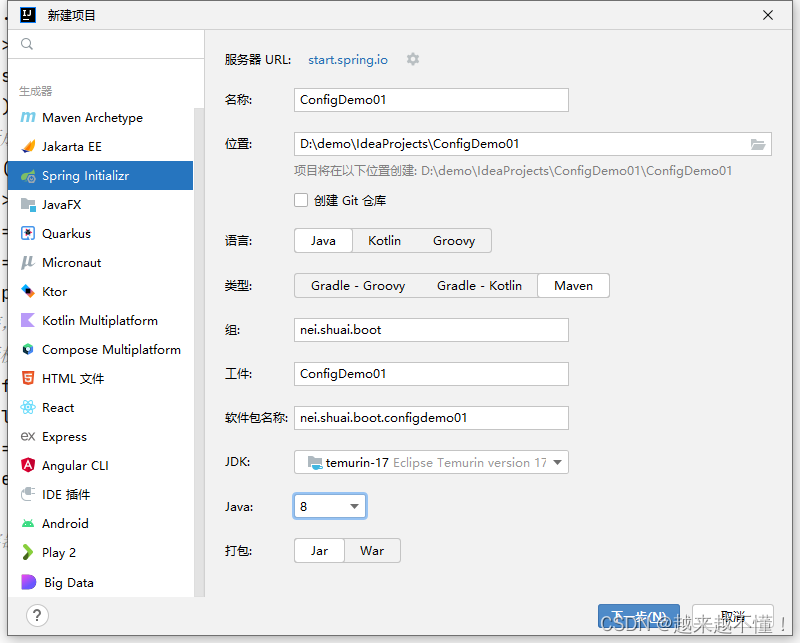
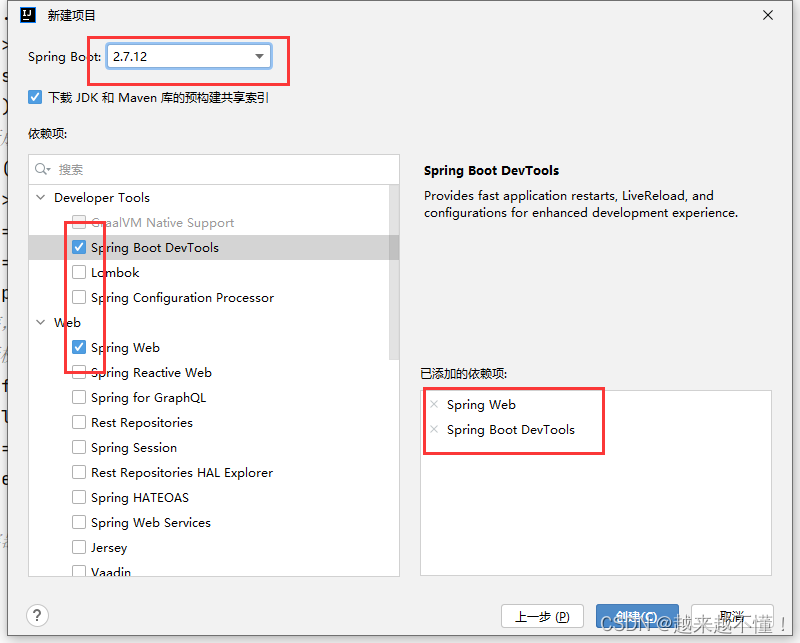
(一)创建Spring Boot Web项目ConfigDemo01
- 设置项目元数据
- 添加项目依赖
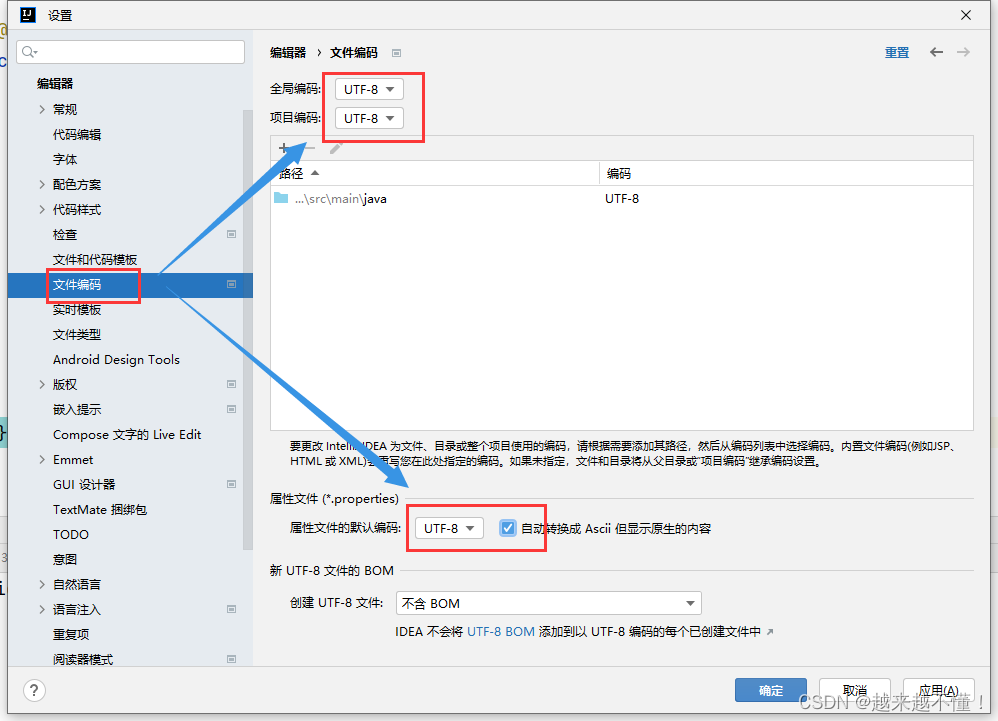
- 设置项目编码为utf8(尤其注意复选框)
(二)创建自定义配置文件
- 在
resources下创建myconfig.properties文件
student.id=20210101
student.name=张三丰
student.gender=男
student.age=18
(三)创建自定义配置类
- 在
net.shuai.boot包里创建配置类config.StudentConfig
package nei.shuai.boot.config;

import org.springframework.boot.context.properties.ConfigurationProperties;
import org.springframework.context.annotation.PropertySource;
import org.springframework.stereotype.Component;

/**
 * 功能:学生配置类
 */
@Component // 交给Spring容器管理
@PropertySource("classpath:myconfig.properties") // 加载自定义配置文件
@ConfigurationProperties(prefix="student") // 配置属性,设置前缀
public class StudentConfig {
    private String id;
    private String name;
    private String gender;

    public String getGender() {
        return gender;
    }

    public void setGender(String gender) {
        this.gender = gender;
    }

    private int age;

    public String getId() {
        return id;
    }

    public void setId(String id) {
        this.id = id;
    }

    public String getName() {
        return name;
    }

    public void setName(String name) {
        this.name = name;
    }

    public int getAge() {
        return age;
    }

    public void setAge(int age) {
        this.age = age;
    }

    @Override
    public String toString() {
        return "StudentConfig{" +
                "id='" + id + '\'' +
                ", name='" + name + '\'' +
                ", gender=" + gender + '\'' +
                ", age=" + age +
                '}';
    }
}
(四)编写测试方法
- 点开测试类
ConfigDemo01ApplicationTests - 编写测试方法,注入学生配置实体,创建
testStudentConfig()测试方法,在里面输出学生配置实体信息
package nei.shuai.boot;

import nei.shuai.boot.config.StudentConfig;
import org.junit.jupiter.api.Test;
import org.springframework.beans.factory.annotation.Autowired;
import org.springframework.boot.test.context.SpringBootTest;

@SpringBootTest
class ConfigDemo01ApplicationTests {

    @Autowired // 自动装配学生配置实体
    private StudentConfig studentConfig;

    @Test
    public void testStudentConfig() {
        // 输出学生配置实体信息
        System.out.println(studentConfig);
    }

}
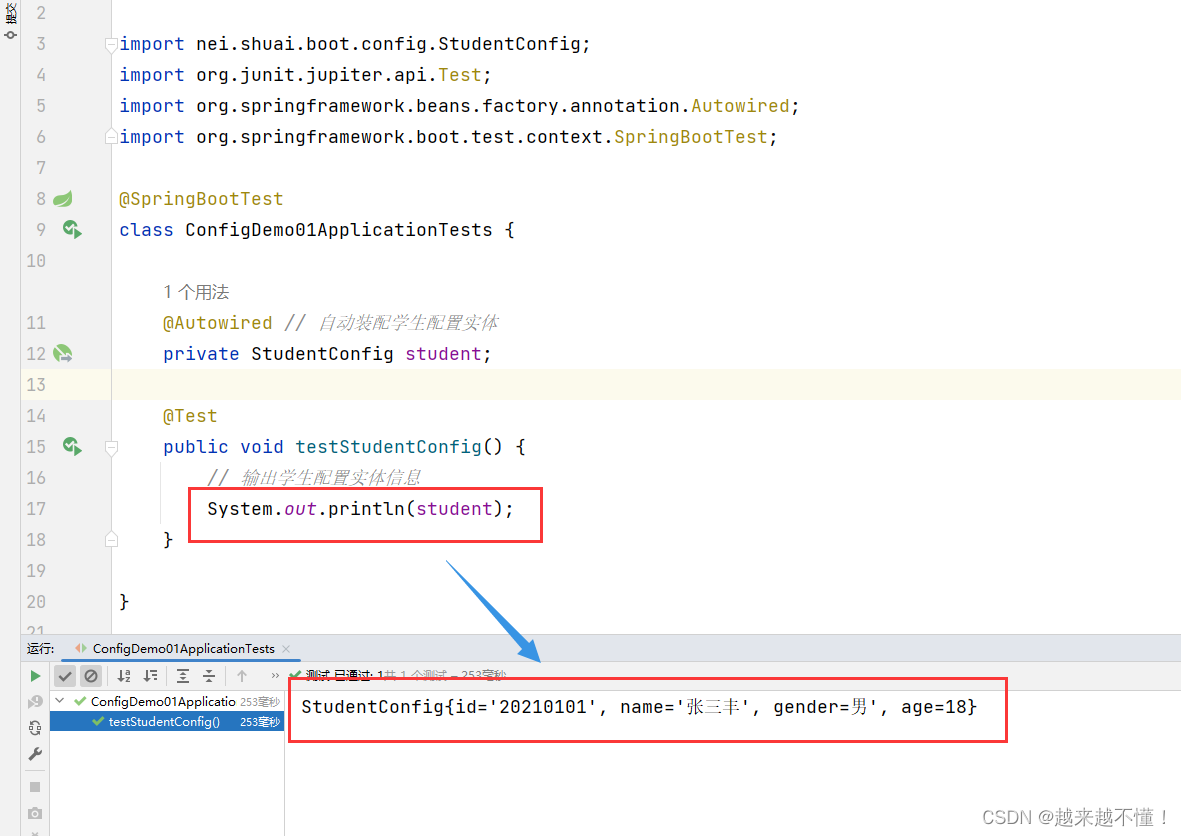
(五)运行测试方法

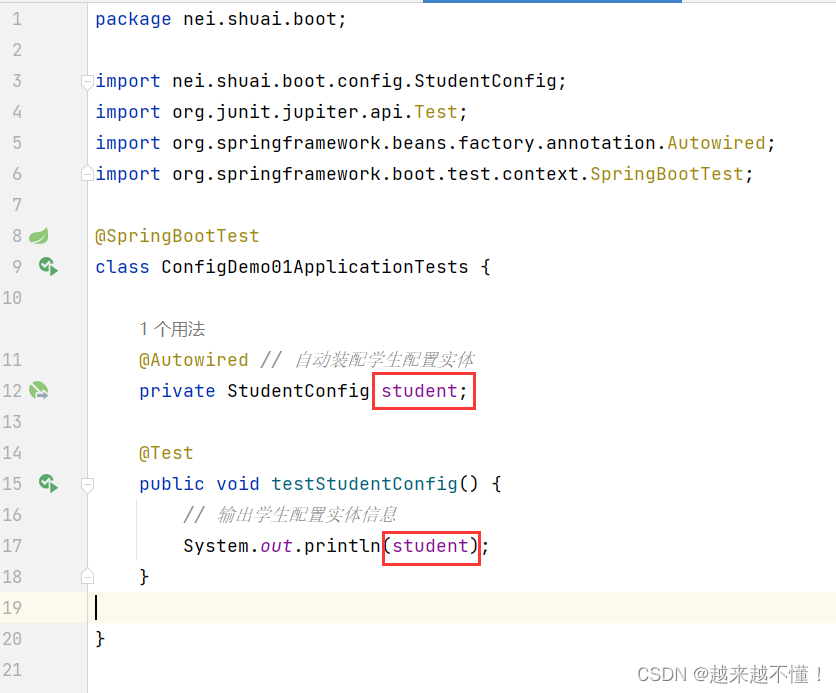
(六)修改测试方法代码
- 说明:注入的
StudentConfig名称不必是studentConfig,在Spring Boot 2.4.5里,StudentConfig的注解@Component默认是单例的,因此不会因为注入名称是studentConfig1而产生的两个StudentConfig实例。
(七)再次运行测试方法
课堂练习:在Web页面显示学生配置信息
- 创建
controller子包,在子包里控制器StudentConfigController
package nei.shuai.boot.controller;

import nei.shuai.boot.config.StudentConfig;
import org.springframework.beans.factory.annotation.Autowired;
import org.springframework.stereotype.Controller;
import org.springframework.web.bind.annotation.RequestMapping;
import org.springframework.web.bind.annotation.ResponseBody;

@Controller
public class StudentConfigController {

    @Autowired // 自动装配学生配置实体
    private StudentConfig studentConfig;

    @RequestMapping("/student")
    @ResponseBody
    public String student() {
        return studentConfig.toString();
    }
}
- 运行启动类
StudentConfigController - 在浏览器里访问
http://localhost:8080/student

- 显示学生对象JSON
package nei.shuai.boot.controller;

import nei.shuai.boot.config.StudentConfig;
import org.springframework.beans.factory.annotation.Autowired;
import org.springframework.stereotype.Controller;
import org.springframework.web.bind.annotation.RequestMapping;
import org.springframework.web.bind.annotation.ResponseBody;

@Controller
public class StudentConfigController {

    @Autowired // 自动装配学生配置实体
    private StudentConfig studentConfig;

    @RequestMapping("/student")
    @ResponseBody
    public StudentConfig student() {
        return studentConfig;
    }
}
- 在浏览器里访问
http://localhost:8080/student

- 格式化字符串
package nei.shuai.boot.controller;

import nei.shuai.boot.config.StudentConfig;
import org.springframework.beans.factory.annotation.Autowired;
import org.springframework.stereotype.Controller;
import org.springframework.web.bind.annotation.RequestMapping;
import org.springframework.web.bind.annotation.ResponseBody;

@Controller
public class StudentConfigController {

    @Autowired // 自动装配学生配置实体
    private StudentConfig studentConfig;

    @RequestMapping("/student")
    @ResponseBody
    public String student() {
        return "学号:" + studentConfig.getId() + "<br/>" +
                "姓名:" + studentConfig.getName() + "<br/>" +
                "性别:" + studentConfig.getGender() + "<br/>" +
                "年龄:" + studentConfig.getAge();
    }
}
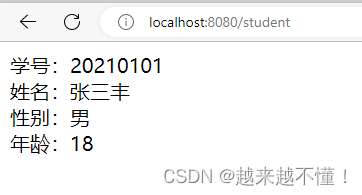
- 在浏览器里访问
http://localhost:8080/student
二、使用@ImportResource加载XML配置文件
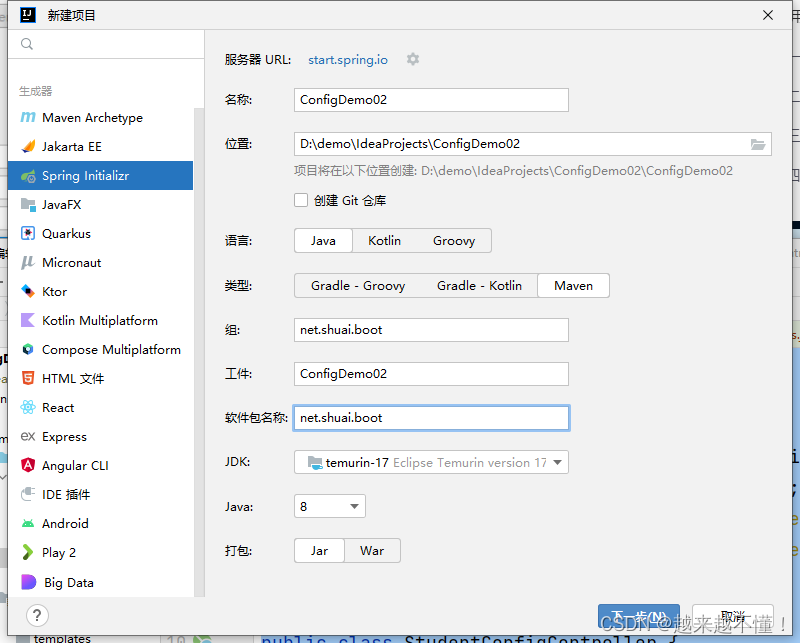
(一)创建创建Spring Boot Web项目ConfigDem
- 设置项目元数据
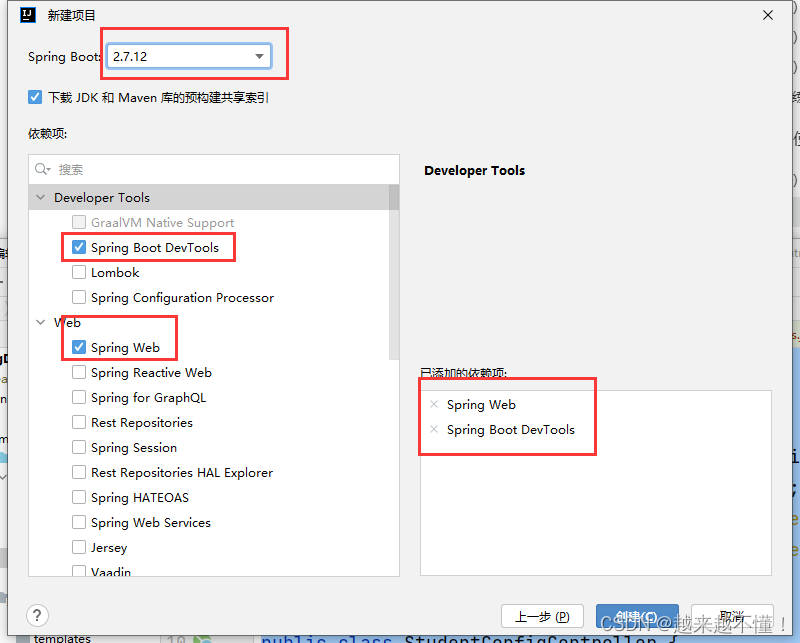
- 添加项目依赖
(二)创建自定义服务类
- 在
net.shuai.boot包里创建service子包,在子包里创建CustomService类
package net.shuai.boot.service;

/**
 * 功能:自定义服务类
 */
public class CustomService {
    public void welcome() {
        System.out.println("欢迎您访问泸州职业技术学院~");
    }
}
(三)创建Spring配置文件
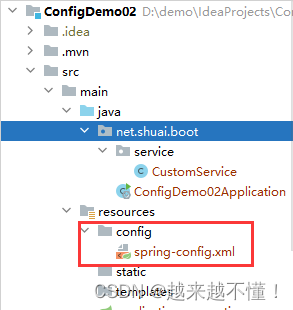
- 在
resources目录里创建配置文件spring-config.xml
- 在
<beans>元素里添加子元素<bean>,定义自定义服务类的JavaBean
<bean id="customService" class="net.shuai.boot.service.CustomService"/>
- 定义一个Bean,指定Bean的名称及类所在的路径

(四)在启动类上添加注解,加载自定义Spring配置文件
- 在启动类上添加注解
@ImportResource("classpath:config/spring-config.xml")
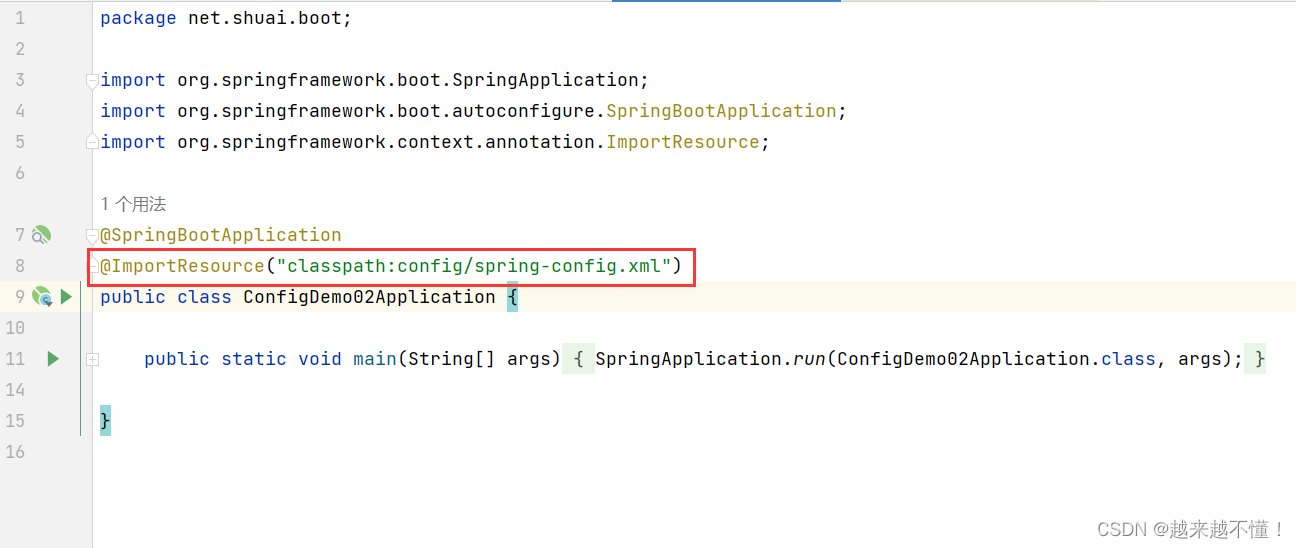
- 在Spring Boot启动后,Spring容器中就会自动实例化一个名为customService的Bean对象
(五)打开测试类,编写测试方法
- 点开测试类ConfigDemo02ApplicationTests
package net.shuai.boot;

import net.shuai.boot.service.CustomService;
import org.junit.jupiter.api.Test;
import org.springframework.beans.factory.annotation.Autowired;
import org.springframework.boot.test.context.SpringBootTest;

import java.util.Currency;

@SpringBootTest
class ConfigDemo02ApplicationTests {

    @Autowired // 注入自定义的服务实体类
    private CustomService customService;

    @Test
    public void testCustomService() {
        // 调用自定义服务实体的方法
        customService.welcome();
    }

}
(六)运行测试方法,查看结果
三、使用@Configuration编写自定义配置类
- 使用@Configuration编写自定义配置类,这是Spring Bboot的推荐方式
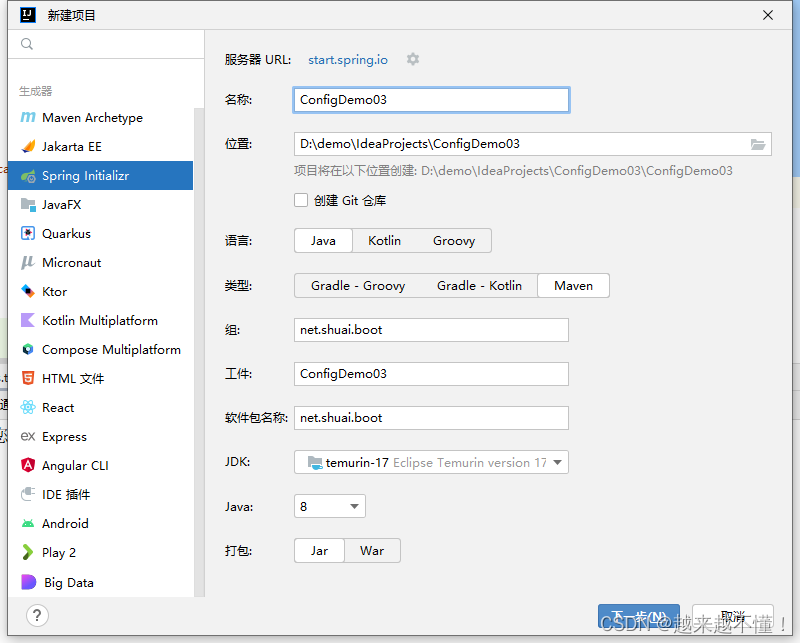
(一)创建Spring Boot Web项目ConfigDemo03
- 设置项目元数据
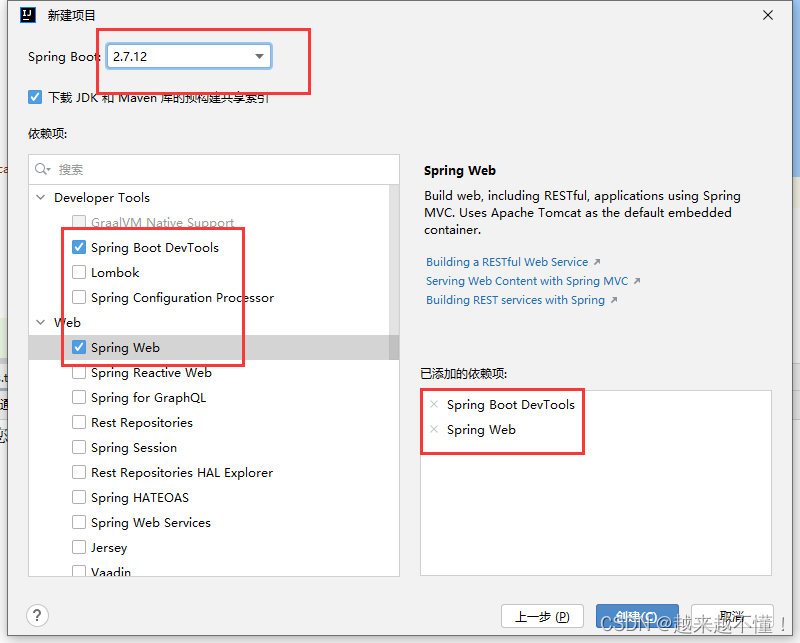
- 添加项目依赖
(二)创建自定义服务类
- 在
net.shuai.boot包里创建service子包,在子包里创建CustomService类
package net.shuai.boot.service;

/**
 * 功能:自定义服务类
 */
public class CustomService {
    public void welcome() {
        System.out.println("欢迎您访问泸州职业技术学院~");
    }
}
(三)创建自定义配置类CustomConfig
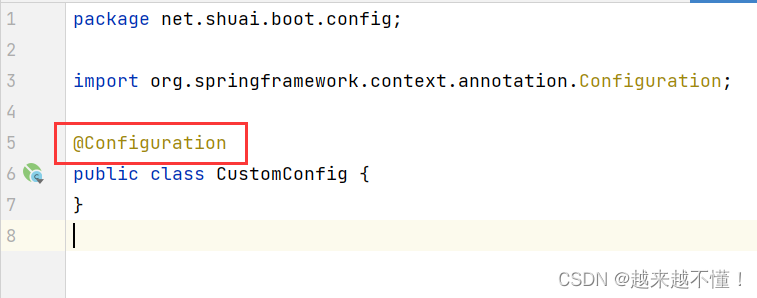
- 在
net.shuai.boot包里创建config子包,在子包里创建自定义配置类CustomConfig - 添加注解
@Configuration,指定配置类
- 创建获取
Bean的方法getCustomService()
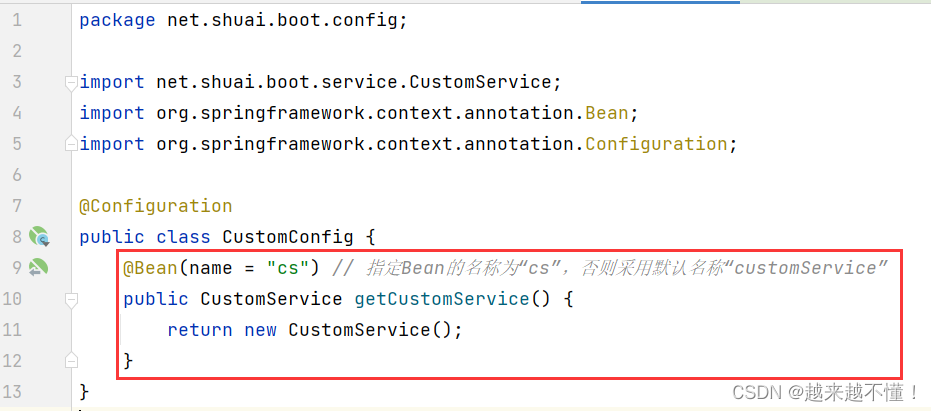
package net.shuai.boot.config;

import net.shuai.boot.service.CustomService;
import org.springframework.context.annotation.Bean;
import org.springframework.context.annotation.Configuration;

@Configuration
public class CustomConfig {
    @Bean(name = "cs") // 指定Bean的名称为“cs”,否则采用默认名称“customService”
    public CustomService getCustomService() {
        return new CustomService();
    }
}
(四)打开测试类,编写测试方法
- 点开测试类
ConfigDemo03ApplicationTests - 注入在
CustomConfig配置类里定义的Bean,创建测试方法testCustomService(),然后调用自定义Bean的方法
package net.shuai.boot;

import net.shuai.boot.service.CustomService;
import org.junit.jupiter.api.Test;
import org.springframework.beans.factory.annotation.Autowired;
import org.springframework.boot.test.context.SpringBootTest;

@SpringBootTest
class ConfigDemo03ApplicationTests {

    @Autowired // 注入自定义服务类
    private CustomService customService;

    @Test
    public void testCustomService() {
        customService.welcome();
    }
}
(五)运行测试方法,查看结果


