文章目录
- 一、BottomNavigation 底部导航
- 1.1 底部导航栏的布局、点击
- 1.2 设置 bottomBar 的颜色
- 1.3 设置顶部 actionBar 的颜色
- 二、主页 StudyScreen
- 2.1 顶部状态栏
- 2.2
一、BottomNavigation 底部导航
1.1 底部导航栏的布局、点击
首先,构造 NavigationItem 的 data class,初始化 navigationItems 列表,其中每一项对应了底部的一个导航项。
然后,用 Scaffold 里的 BottomNavigation 做底部导航,每个导航项有 Icon 和 Text,维护一个 currentNavigationIndex:当用户选择某导航项时则更新此值,并通过 selected 字段展示被选中的效果。
项目结构如下:
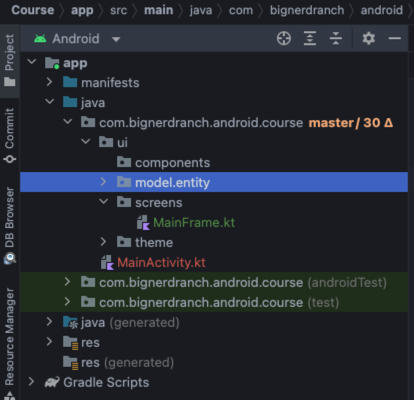
代码如下:
package com.bignerdranch.android.course.ui.model.entity

import androidx.compose.ui.graphics.vector.ImageVector

data class NavigationItem(val title: String, val icon: ImageVector)
package com.bignerdranch.android.course.ui.screens

import androidx.compose.material.*
import androidx.compose.material.icons.Icons
import androidx.compose.material.icons.filled.DateRange
import androidx.compose.material.icons.filled.Home
import androidx.compose.material.icons.filled.Person
import androidx.compose.runtime.*
import androidx.compose.ui.tooling.preview.Preview
import com.bignerdranch.android.course.ui.model.entity.NavigationItem

@Composable
fun MainFrame() {
    val navigationItems = listOf(
        NavigationItem(title = "学习", icon = Icons.Filled.Home),
        NavigationItem(title = "任务", icon = Icons.Filled.DateRange),
        NavigationItem(title = "我的", icon = Icons.Filled.Person),
    )
    var currentNavigationIndex by remember {
        mutableStateOf(0)
    }
    Scaffold(bottomBar = {
        BottomNavigation() {
            navigationItems.forEachIndexed { index, navigationItem ->
                BottomNavigationItem(
                    selected = currentNavigationIndex == index,
                    onClick = {
                        currentNavigationIndex = index
                    },
                    icon = {
                        Icon(
                            imageVector = navigationItem.icon,
                            contentDescription = null
                        )
                    }, label = {
                        Text(text = navigationItem.title)
                    }
                )
            }
        }
    }) {
        Text(text = "current navigation item: $currentNavigationIndex")
    }
}

@Preview
@Composable
fun MainFramePreview() {
    MainFrame()
}
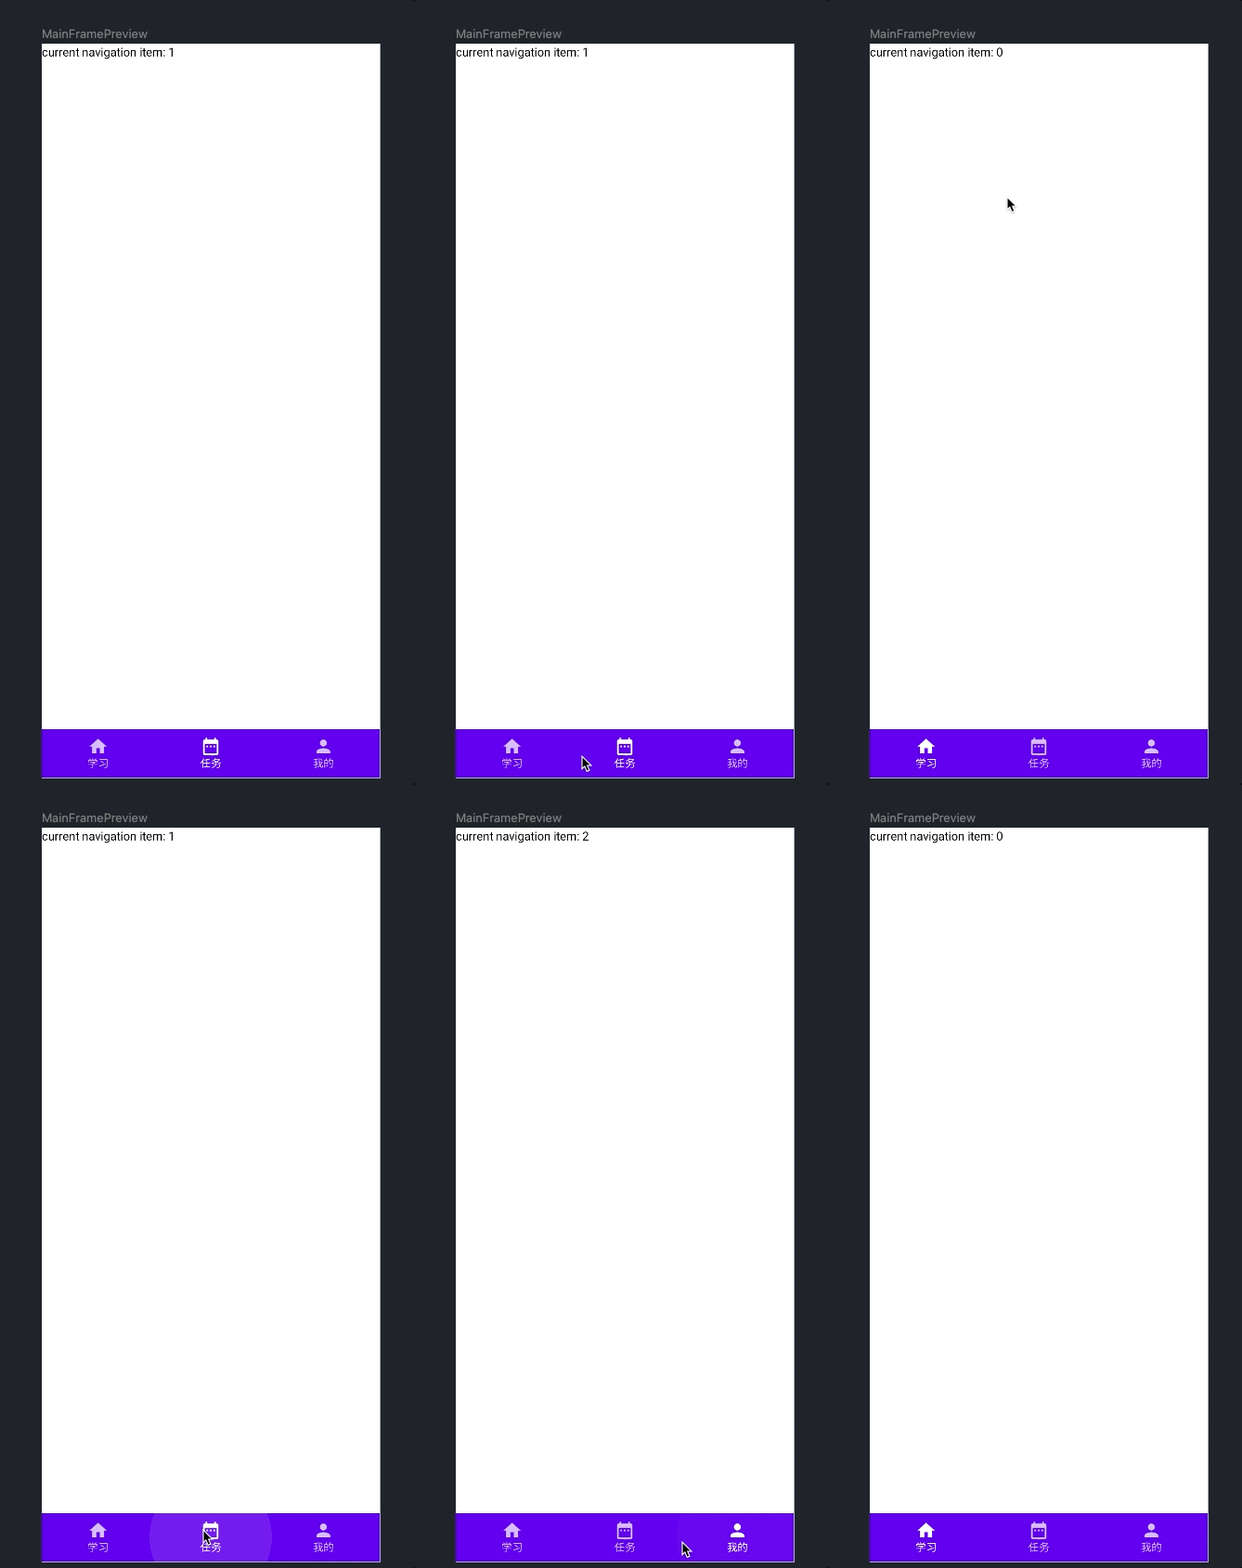
预览后,底部导航栏的效果如下:
1.2 设置 bottomBar 的颜色
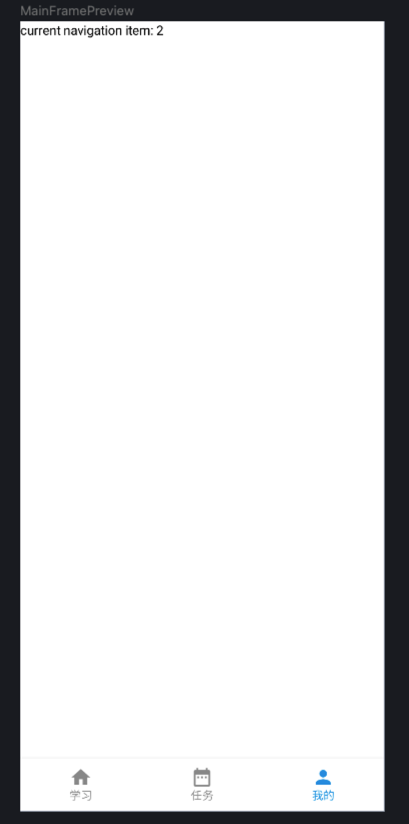
为了美观,我们对颜色做微调,设置 BottomNavigation 的 background,和 BottomNavigationItem 的 selectedContentColor 和 unselectedContentColor 即可改变底部导航栏的颜色,代码如下:
@Composable
fun MainFrame() {
    val navigationItems = listOf(
        NavigationItem(title = "学习", icon = Icons.Filled.Home),
        NavigationItem(title = "任务", icon = Icons.Filled.DateRange),
        NavigationItem(title = "我的", icon = Icons.Filled.Person),
    )
    var currentNavigationIndex by remember {
        mutableStateOf(0)
    }
    Scaffold(bottomBar = {
        BottomNavigation(
            backgroundColor = MaterialTheme.colors.surface,
        ) {
            navigationItems.forEachIndexed { index, navigationItem ->
                BottomNavigationItem(
                    selected = currentNavigationIndex == index,
                    onClick = {
                        currentNavigationIndex = index
                    },
                    icon = {
                        Icon(
                            imageVector = navigationItem.icon,
                            contentDescription = null
                        )
                    },
                    label = {
                        Text(text = navigationItem.title)
                    },
                    selectedContentColor = Color(0xFF149EE4),
                    unselectedContentColor = Color(0xFF999999)
                )
            }
        }
    }) {
        Text(text = "current navigation item: $currentNavigationIndex")
    }
}
预览效果如下:
1.3 设置顶部 actionBar 的颜色
theme.xml 设置使用 blue_700:
<?xml version="1.0" encoding="utf-8"?>
<resources>

    <style name="Theme.Course" parent="android:Theme.Material.Light.NoActionBar">
        <item name="android:statusBarColor">@color/blue_700</item>
    </style>
</resources>
colors.xml 定义 blue_700 的颜色:
<?xml version="1.0" encoding="utf-8"?>
<resources>
    <color name="purple_200">#FFBB86FC</color>
    <color name="purple_500">#FF6200EE</color>
    <color name="purple_700">#FF3700B3</color>
    <color name="blue_700">#FF149EE7</color>
    <color name="teal_200">#FF03DAC5</color>
    <color name="teal_700">#FF018786</color>
    <color name="black">#FF000000</color>
    <color name="white">#FFFFFFFF</color>
</resources>
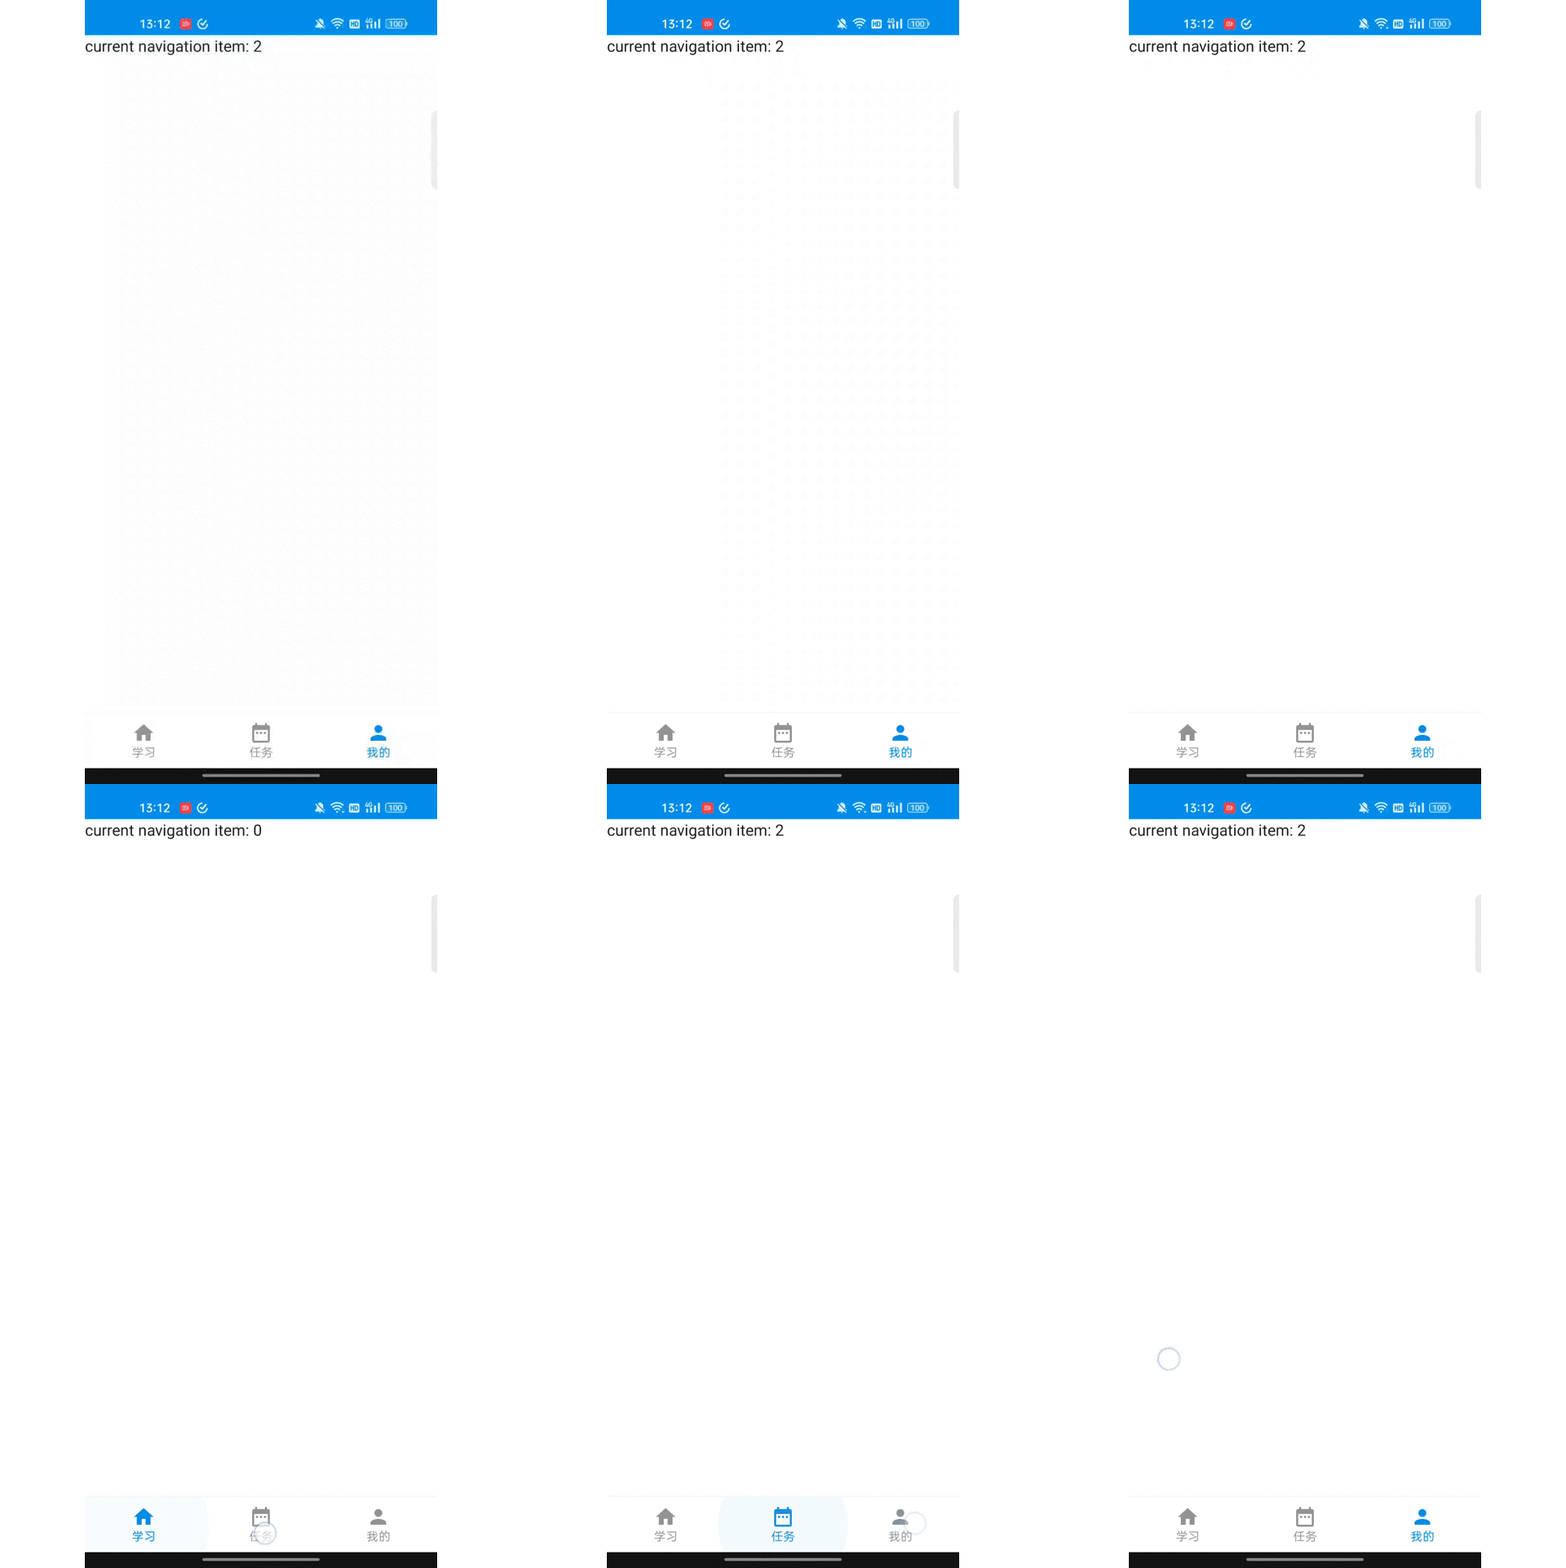
效果如下,顶部变为蓝色了:
二、主页 StudyScreen
2.1 顶部状态栏
首先,用 TopAppBar 实现自己的顶部状态栏,其中 Brush 用 linearGradient 实现了渐变色,代码如下:
package com.bignerdranch.android.course.ui.components

import androidx.compose.foundation.background
import androidx.compose.foundation.layout.Row
import androidx.compose.foundation.layout.fillMaxWidth
import androidx.compose.foundation.layout.height
import androidx.compose.material.Text
import androidx.compose.runtime.Composable
import androidx.compose.ui.Modifier
import androidx.compose.ui.graphics.Brush
import androidx.compose.ui.tooling.preview.Preview
import androidx.compose.ui.unit.dp
import com.bignerdranch.android.course.ui.theme.Blue200
import com.bignerdranch.android.course.ui.theme.Blue700

@Composable
fun TopAppBar(content: @Composable () -> Unit) {
    Row(
        modifier = Modifier
            .background(
                Brush.linearGradient(listOf(Blue700, Blue200))
            )
            .fillMaxWidth()
            .height(45.dp)
    ) {
        content()
    }
}

@Preview
@Composable
fun TopAppBarPreview() {
    TopAppBar() {
        Text("标题")
    }
}
在 Scaffold 中用 when(currentNavigationIndex) 来根据底部栏的选中项,来展示对应的屏幕,代码如下:
package com.bignerdranch.android.course.ui.screens

import androidx.compose.material.*
import androidx.compose.material.icons.Icons
import androidx.compose.material.icons.filled.DateRange
import androidx.compose.material.icons.filled.Home
import androidx.compose.material.icons.filled.Person
import androidx.compose.runtime.*
import androidx.compose.ui.graphics.Color
import androidx.compose.ui.tooling.preview.Preview
import com.bignerdranch.android.course.ui.model.entity.NavigationItem

@Composable
fun MainFrame() {
    val navigationItems = listOf(
        NavigationItem(title = "学习", icon = Icons.Filled.Home),
        NavigationItem(title = "任务", icon = Icons.Filled.DateRange),
        NavigationItem(title = "我的", icon = Icons.Filled.Person),
    )
    var currentNavigationIndex by remember {
        mutableStateOf(0)
    }
    Scaffold(bottomBar = {
        BottomNavigation(
            backgroundColor = MaterialTheme.colors.surface,
        ) {
            navigationItems.forEachIndexed { index, navigationItem ->
                BottomNavigationItem(
                    selected = currentNavigationIndex == index,
                    onClick = {
                        currentNavigationIndex = index
                    },
                    icon = {
                        Icon(
                            imageVector = navigationItem.icon,
                            contentDescription = null
                        )
                    },
                    label = {
                        Text(text = navigationItem.title)
                    },
                    selectedContentColor = Color(0xFF149EE4),
                    unselectedContentColor = Color(0xFF999999)
                )
            }
        }
    }) {
        TopAppBar() { }
//        Text(text = "current navigation item: $currentNavigationIndex")
        when (currentNavigationIndex) {
            0 -> StudyScreen()
            1 -> TaskScreen()
            2 -> MineScreen()
        }
    }
}

@Preview
@Composable
fun MainFramePreview() {
    MainFrame()
}
运行后,顶部有了渐变蓝色,且当底部切换时展示不同的内容,效果如下:
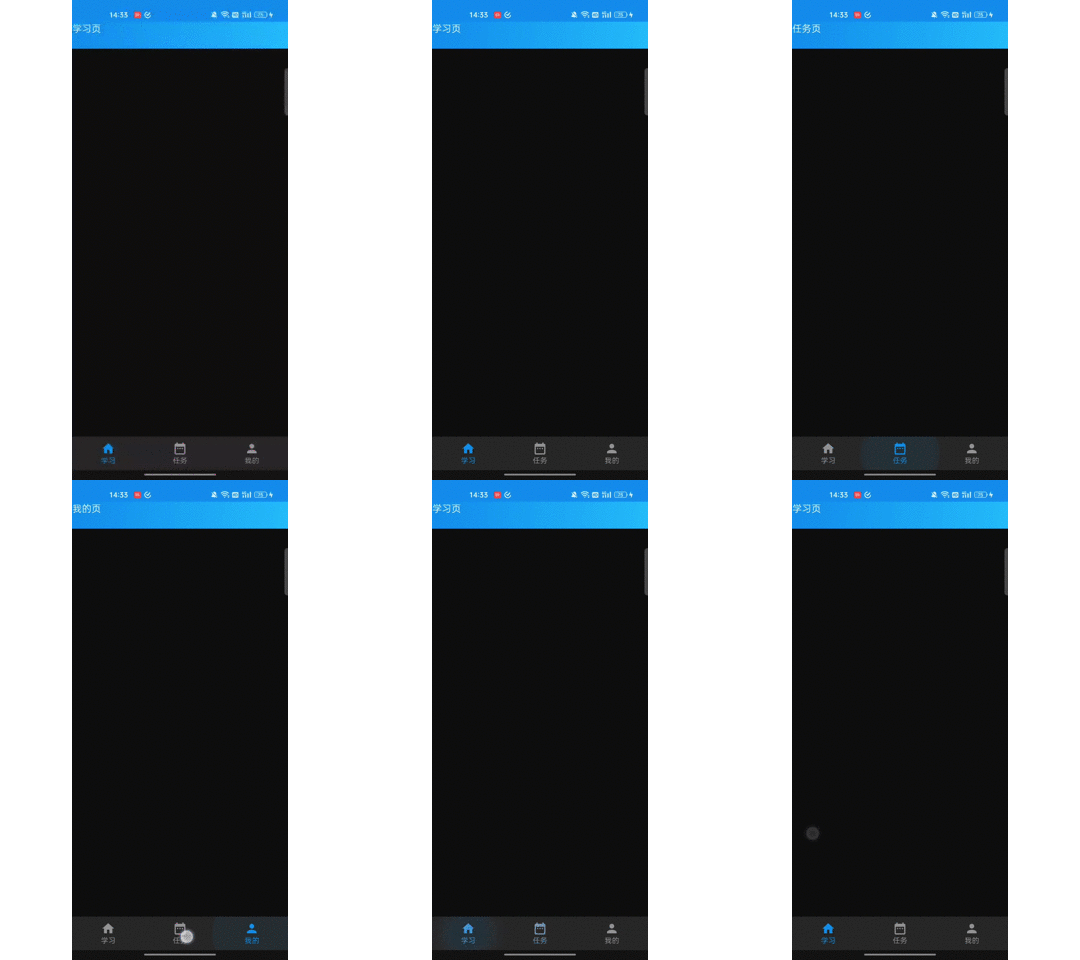










![[数据结构 -- C语言] 堆(Heap),你小子就是堆,看我如何透彻的将你拿捏](https://img-blog.csdnimg.cn/img_convert/dcdf083024a59aa0ad433ebc896430b4.png)
