前言
昨天写过一篇关于如何使用 Grpc 的博客,出于好奇想知道 @GrpcService、@GrpcClient、@GrpcGlobalServerInterceptor、@GrpcGlobalClientInterceptor这些注解是如何生效的,以及服务注册的流程是怎样的,就简单过了一遍源码,帮助大家梳理一下流程吧
推荐阅读
grpc 系列:Grpc 整合 Nacos SpringBoot 日常使用(Java版本)包括 Jwt 认证
Spring 源码系列之自动装配:手把手debug自动装配源码、顺带弄懂了@Import等相关的源码(全文3w字、超详细)
源码切入点分析
可能很多小伙伴对于自主看源码无从下手,尤其是这种小众的 Jar 包,由于我们 Java 版本 Grpc 使用的是 net.devh.boot.grpc 包下面的代码,我们找到这种带 autoconfigure 尾缀的包点进去,里面的代码全是关于自动装配的源码,里面包括各种配置类的加载,顺藤摸瓜即可找到我们所需的源码。
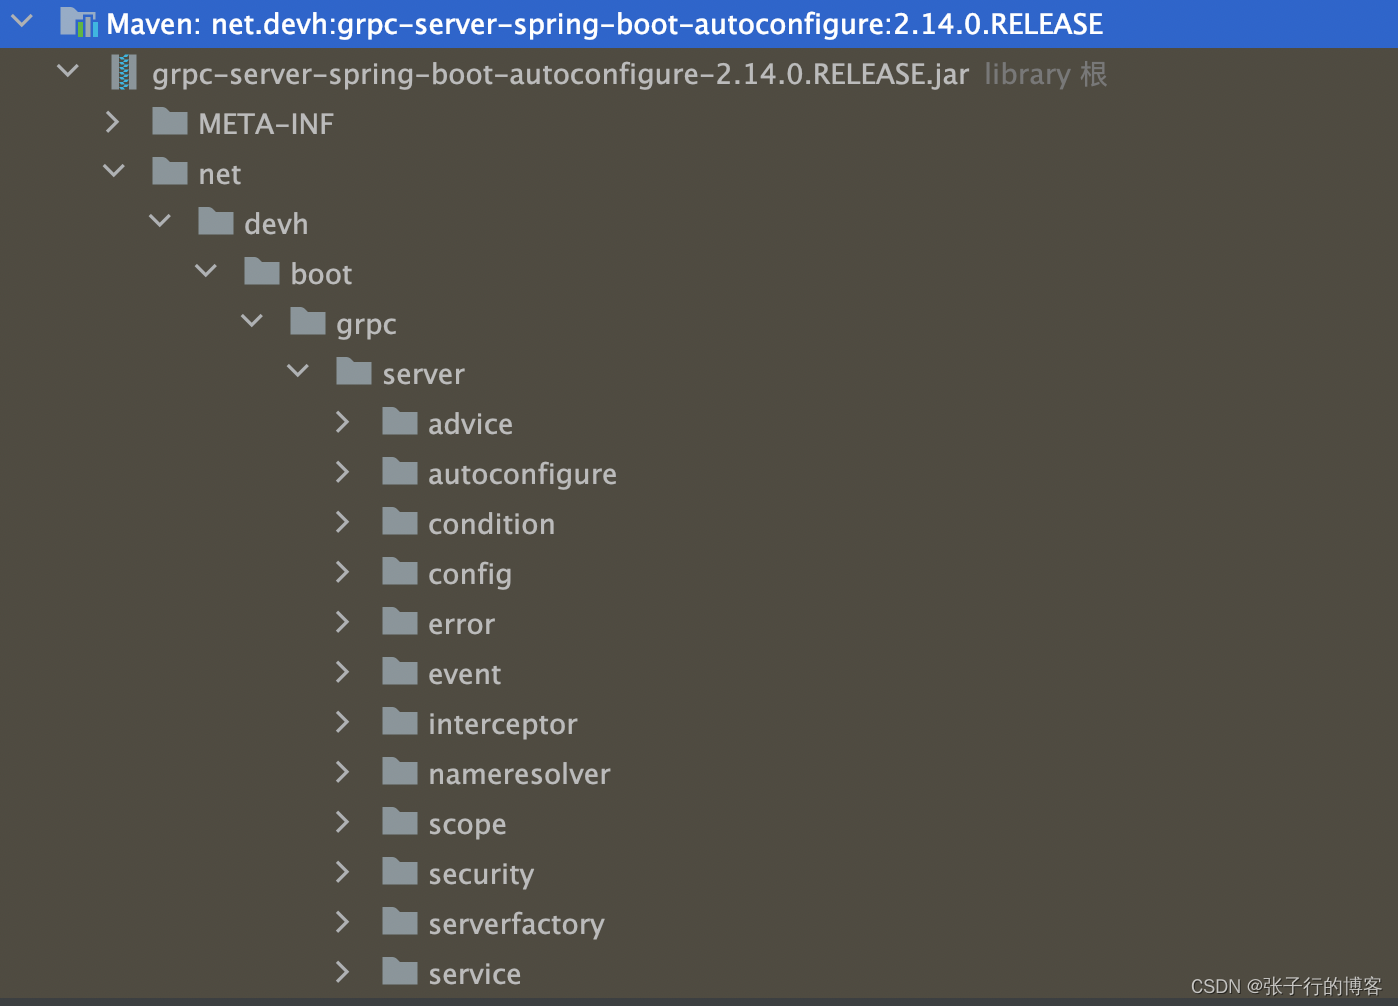
自动装配有个特点会自动将 MATE-INF 目录下 spring.factories 中标注的类,生成一个个 Bean 注入到我们的 IOC 容器中(原理本文不做阐述)。知道了这一点就好办了点击 spring.factories 文件,看一下 net.devh.boot.grpc 这个包要加载哪些 Bean 即可。

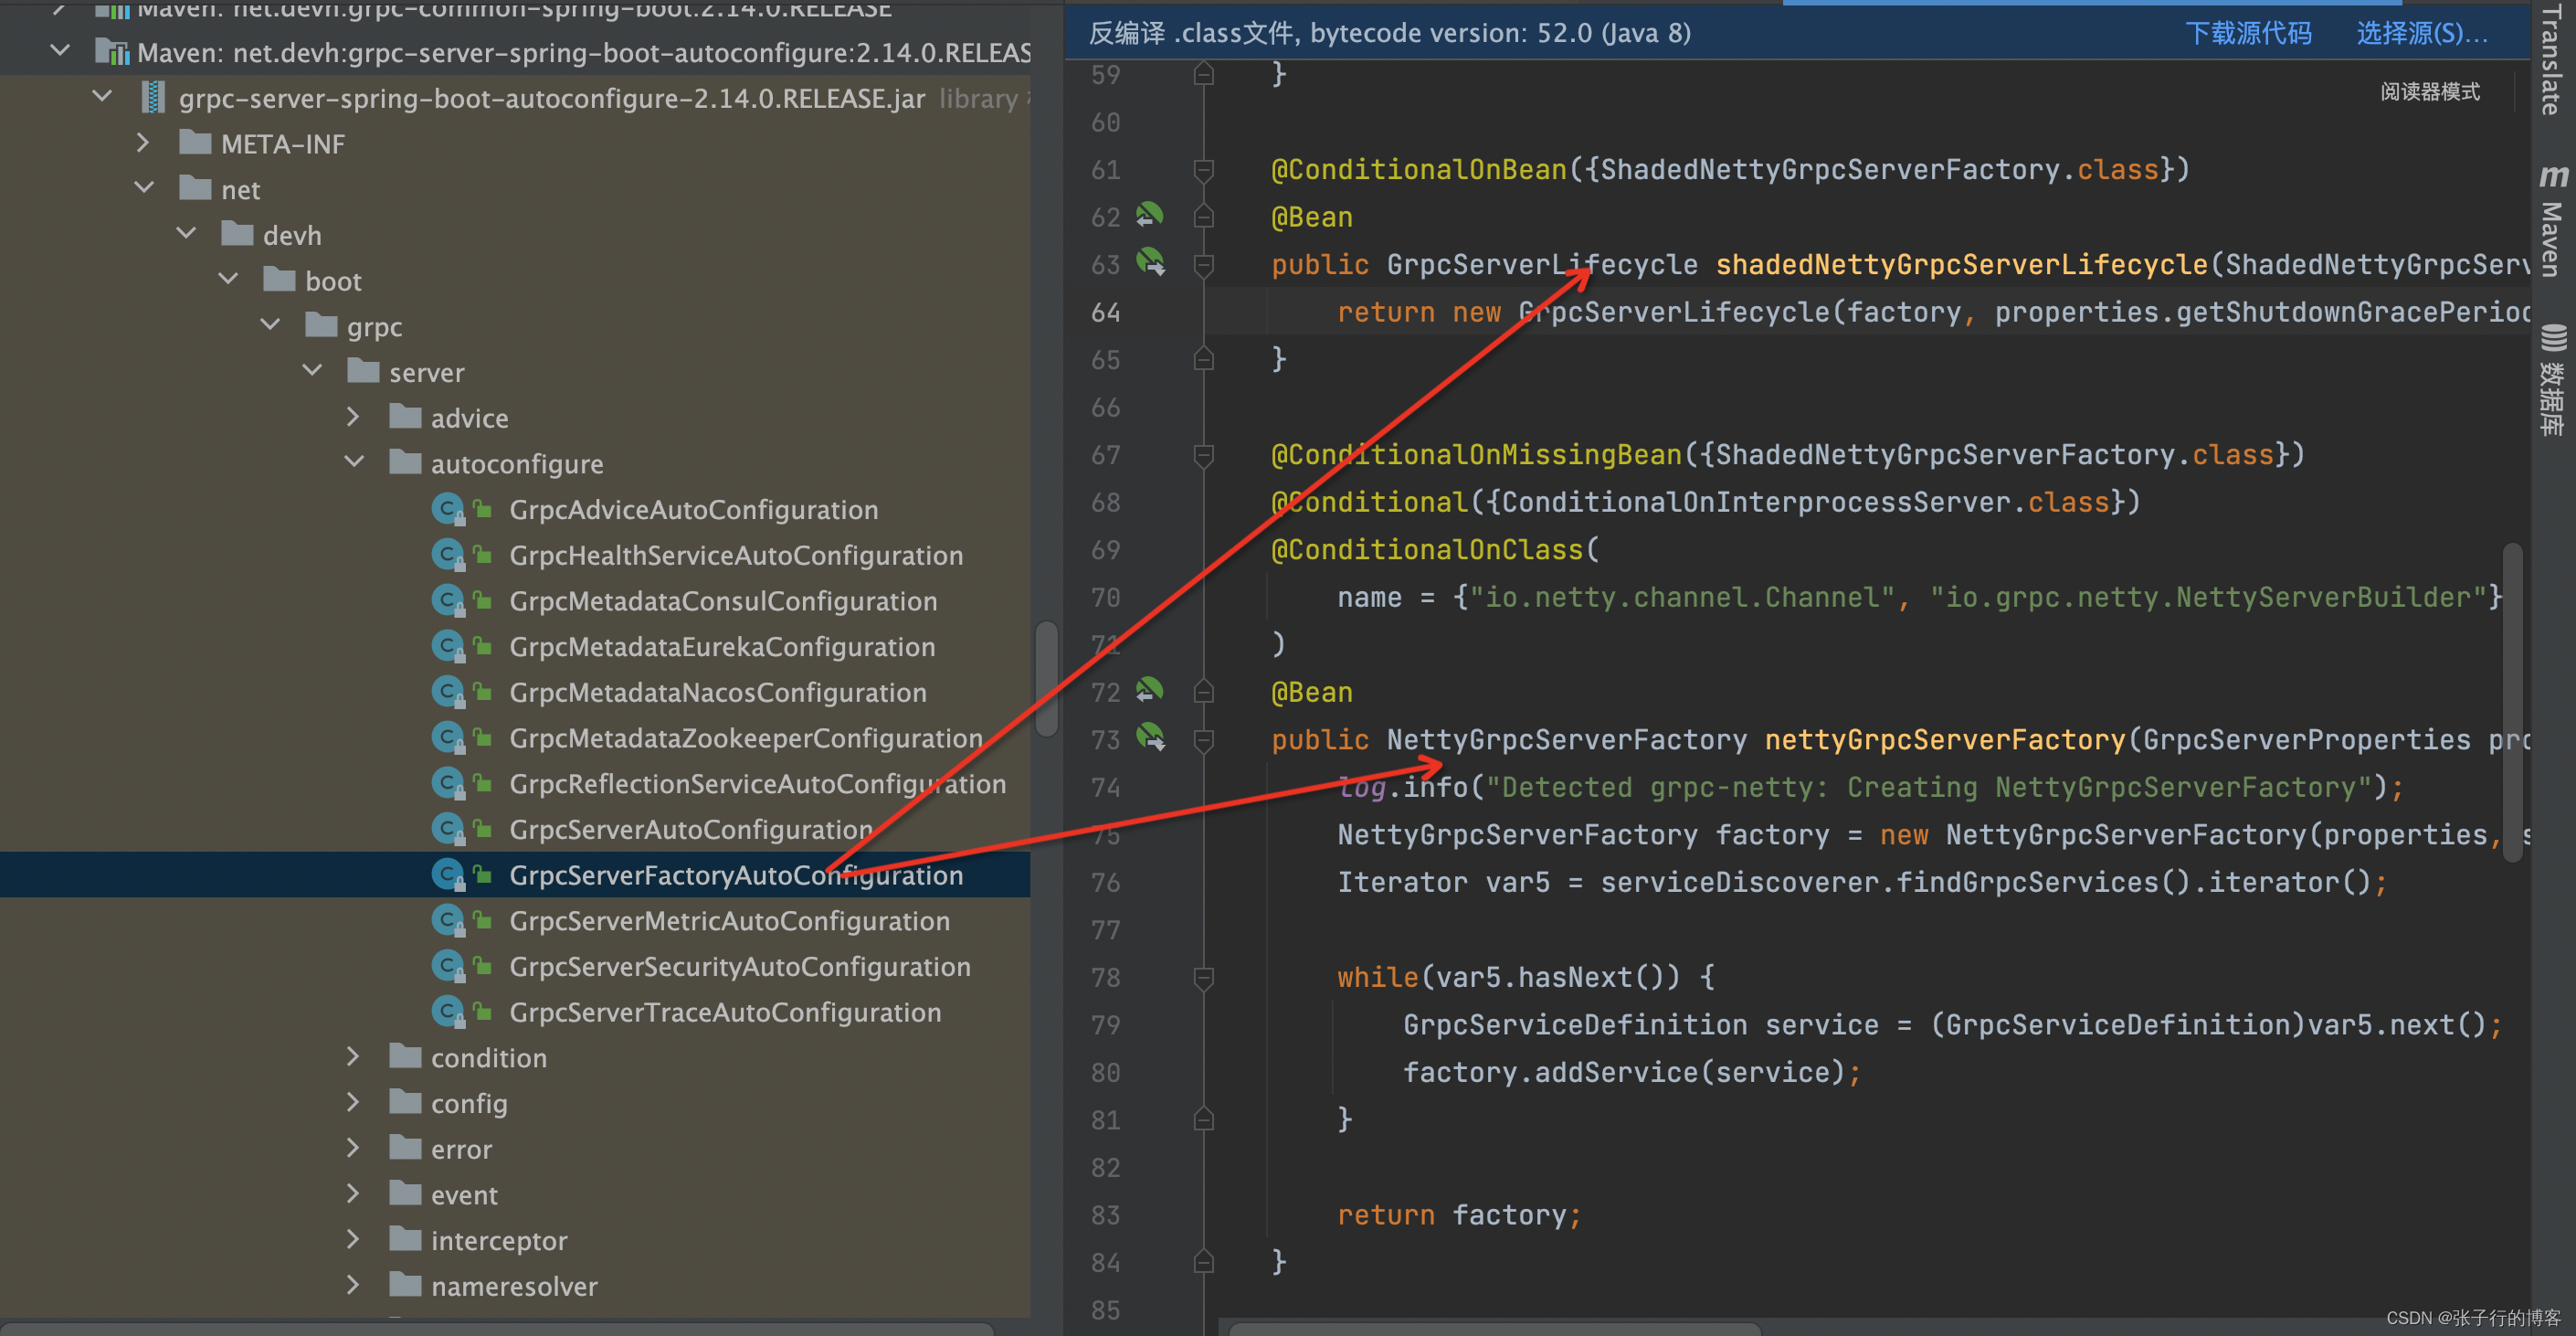
由于我已经 debug 过了,直接说结论:大家去看 GrpcServerFactoryAutoConfiguration 这个类即可。可以看到里面注入了很多个 Bean ,大家关注 GrpcServerLifecycle、NettyGrpcServerFactory 这俩个类即可。提前剧透一下,GrpcServerLifecycle: 负责控制 Grpc 容器的开启与关闭。NettyGrpcServerFactory:负责提供 Grpc 服务、Grpc 拦截器等原料信息。
Grpc 容器的开启与关闭(GrpcServerLifecycle)
我们点进去 GrpcServerLifecycle 发现,他其实就是一个 SmartLifecycle,这个东西看着有点眼熟,原来是 org.spring 包下面的类,通过实现 SmartLifecycle 我们可以在 Spring 容器的开始、停止阶段做一些事情。那我们接着分析 GrpcServerLifecycle 中的代码即可。可以看到当容器启动的时候会进行调用 createAndStartGrpcServer 方法,进行创建并且启动 Grpc 服务。
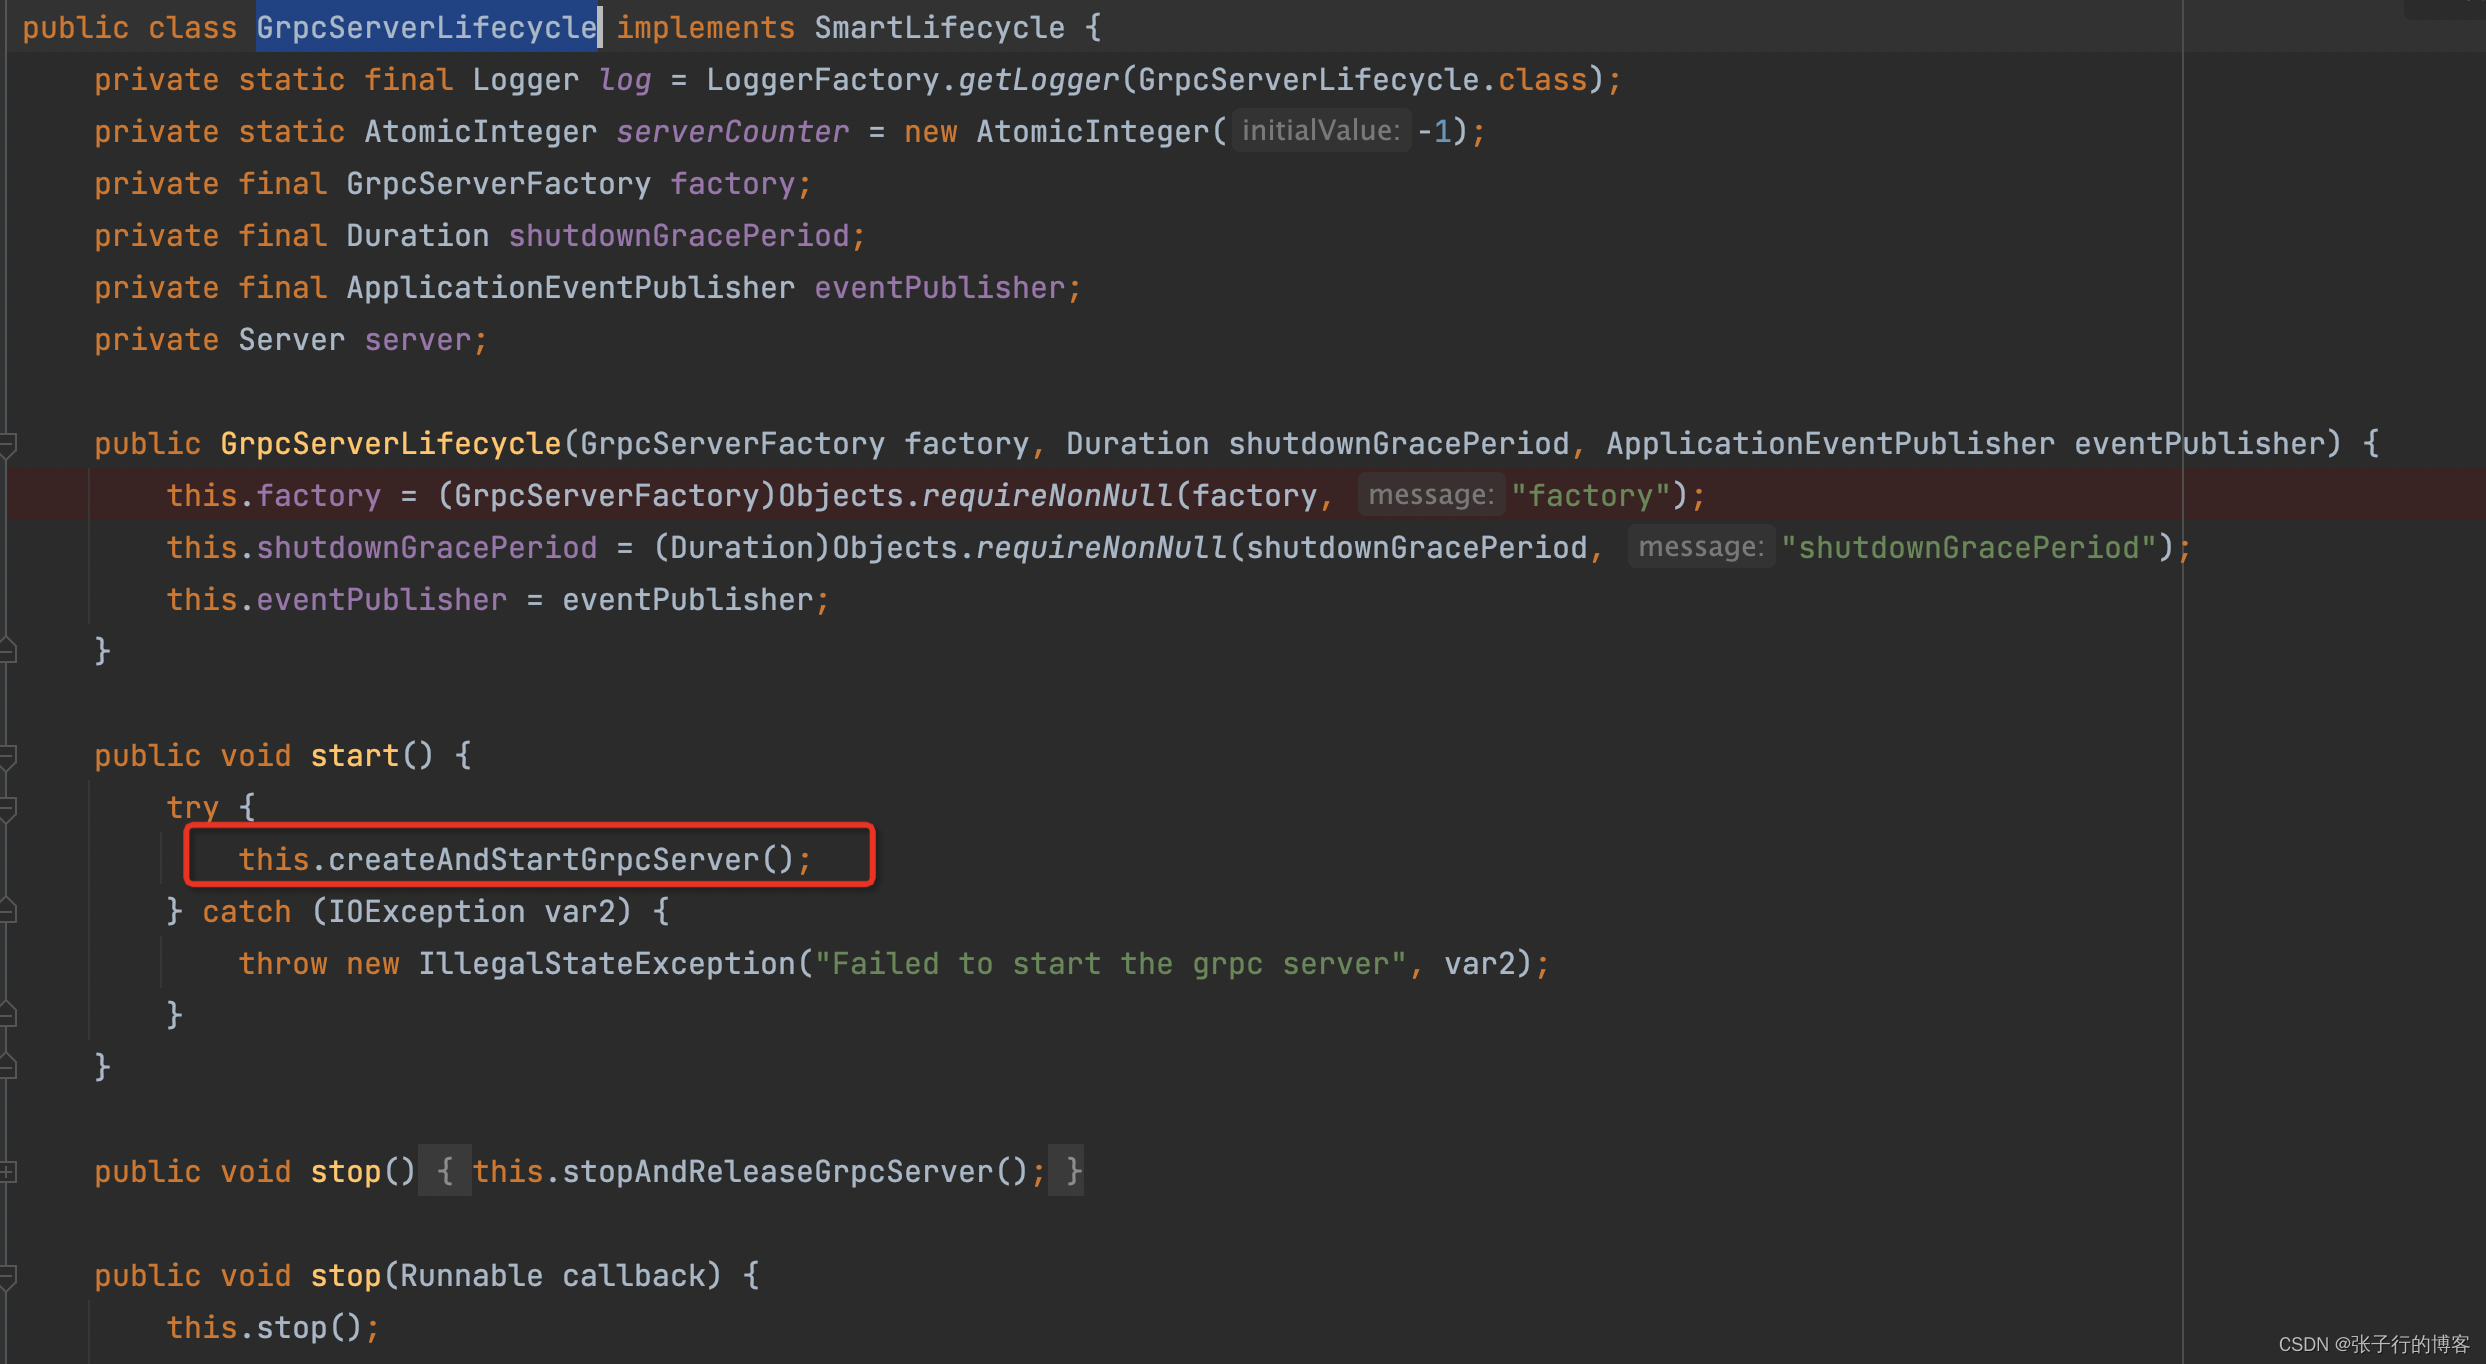
这里贴一下 createAndStartGrpcServer 代码,里面会通过 ShadedNettyGrpcServerFactory 创建 Grpc 服务,然后进行启动。接下来进入 createServer 方法一探究竟。
protected void createAndStartGrpcServer() throws IOException {
    if (this.server == null) {
        //通过 Grpc 工厂创建 Grpc 服务
        Server localServer = this.factory.createServer();
        this.server = localServer;
        //启动 Grpc 服务
        localServer.start();
        String address = this.factory.getAddress();
        int port = this.factory.getPort();
        log.info("gRPC Server started, listening on address: {}, port: {}", address, port);
        //发布监听事件
        this.eventPublisher.publishEvent(new GrpcServerStartedEvent(this, localServer, address, port));
        Thread awaitThread = new Thread(() -> {
            try {
                localServer.awaitTermination();
            } catch (InterruptedException var2) {
                Thread.currentThread().interrupt();
            }

        });
        awaitThread.setName("grpc-server-container-" + serverCounter.incrementAndGet());
        awaitThread.setDaemon(false);
        awaitThread.start();
    }

}
其实我们看到这里的时候大概都已经很明了了,net.devh.boot.grpc 包无非就是对非 Spring 环境下使用 Grpc 做了代码封装。非 Spring 环境服务端启动 Grpc 代码如下,对比 createAndStartGrpcServer 与下面 main 方法中的代码,可以看到出奇的一致。
  public static void main(String[] args) throws IOException, InterruptedException {
        //1. 绑定端口
        ServerBuilder serverBuilder = ServerBuilder.forPort(8090);
        //2. 发布服务
        serverBuilder.addService(new LoginServiceRpcImpl());
        //3. 创建服务对象
        Server server = serverBuilder.build();
        server.start();
        server.awaitTermination();
    }
通过 ShadedNettyGrpcServerFactory 创建 Grpc 服务
来到 createServer 方法,可以看到调用了一些个 configure 方法,代码写的还是很不错的,简洁明了我们关注第一个 configureServices 方法即可。看他是如何配置 Services 的
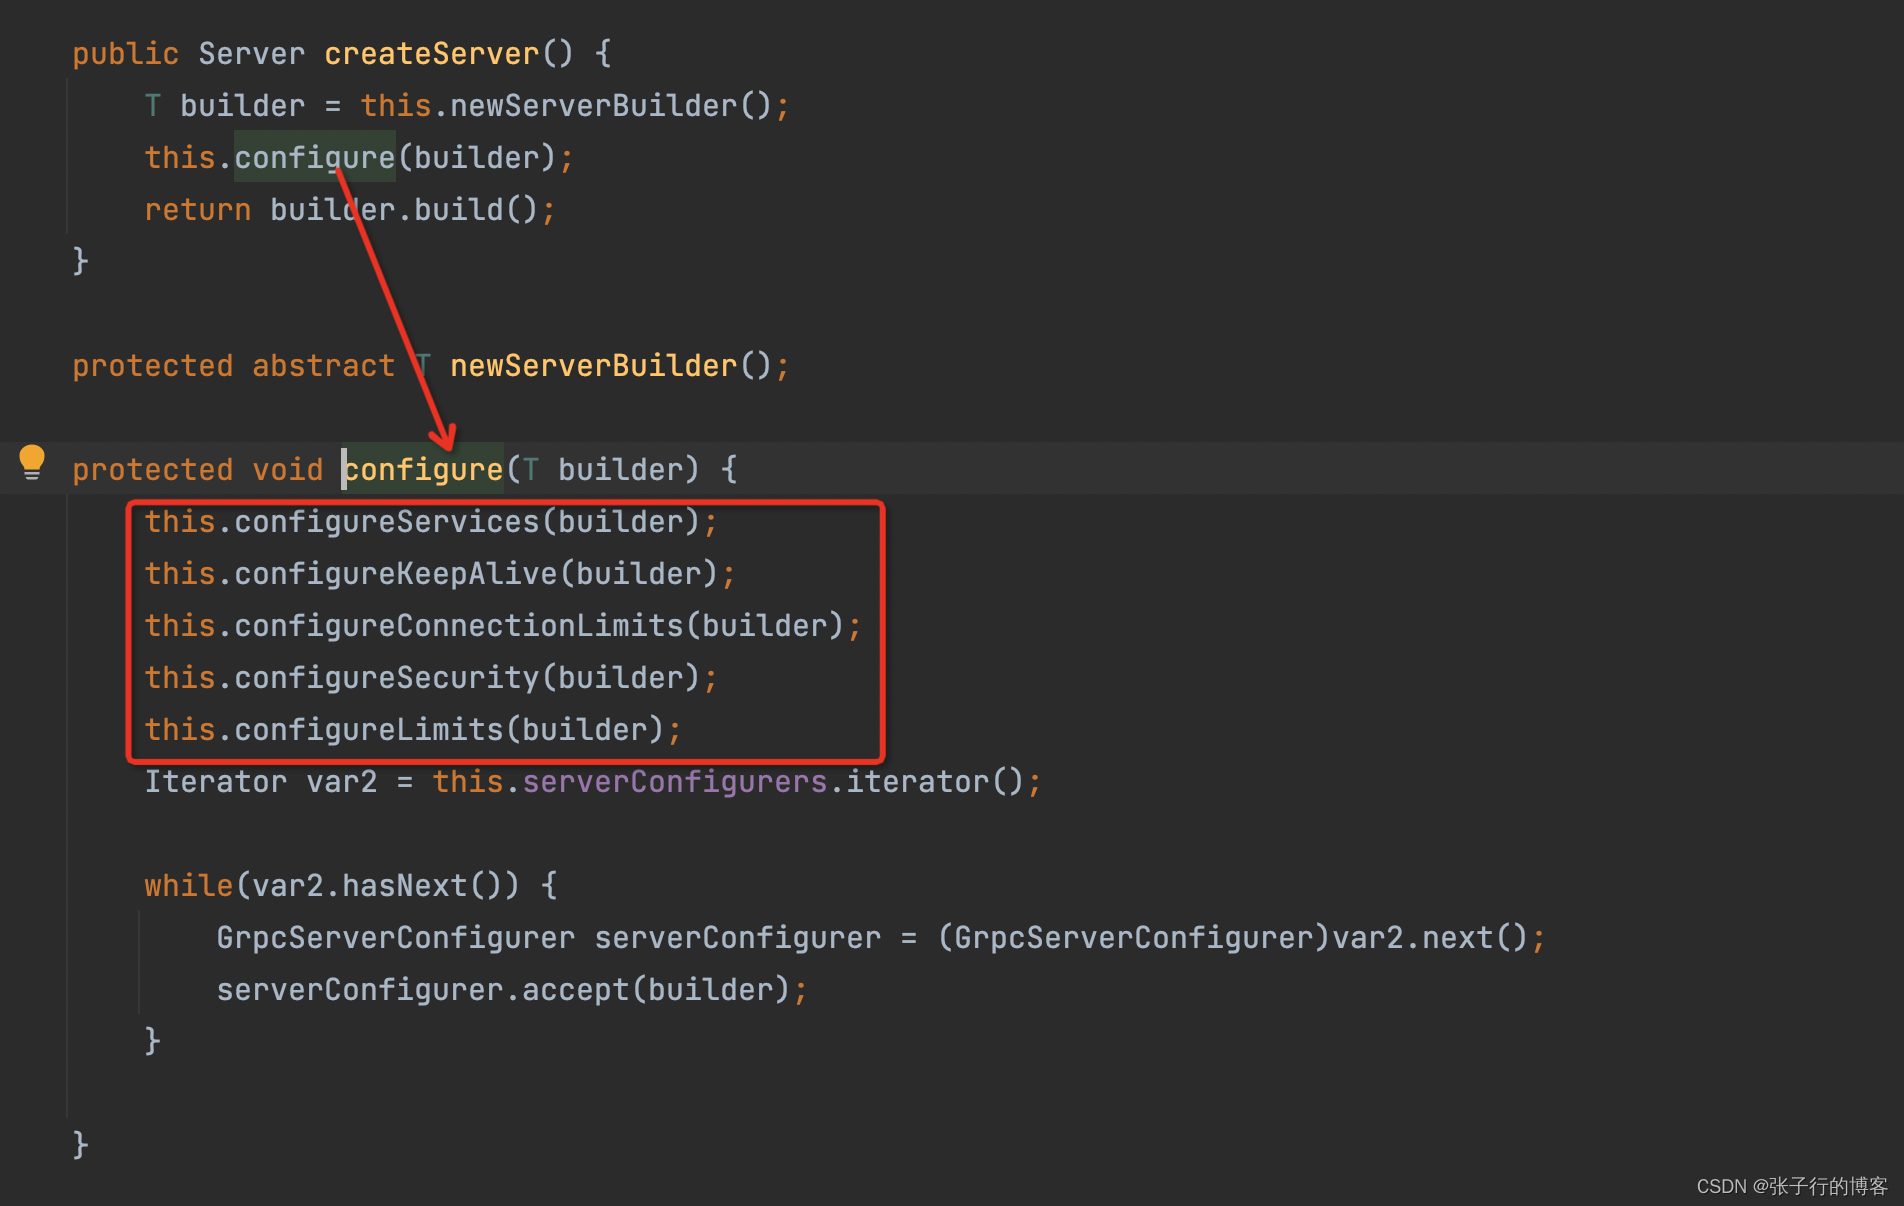
通过观察 configureServices 代码,可以看到把 serviceList 中的类都装配到 Bulider 中了,而 serviceList 其实就是 @GrpcService 类的集合,在 ShadedNettyGrpcServerFactory 创建之初,就会获取被 @GrpcService 注解标注类的 Bean 放到 serviceList 中来。
  protected void configureServices(T builder) {
        Set<String> serviceNames = new LinkedHashSet();
        Iterator var3 = this.serviceList.iterator();

        while(var3.hasNext()) {
            GrpcServiceDefinition service = (GrpcServiceDefinition)var3.next();
            String serviceName = service.getDefinition().getServiceDescriptor().getName();
            if (!serviceNames.add(serviceName)) {
                throw new IllegalStateException("Found duplicate service implementation: " + serviceName);
            }

            log.info("Registered gRPC service: " + serviceName + ", bean: " + service.getBeanName() + ", class: " + service.getBeanClazz().getName());
            builder.addService(service.getDefinition());
        }

    }
这里贴一下 ShadedNettyGrpcServerFactory 相关代码,可以看到先是调用 findGrpcServices 方法获取所有被 @GrpcService 注解标注类的 BeanDefinition,然后调用 addService 方法把这些 BeanDefinition 放置在 ShadedNettyGrpcServerFactory.serviceList 集合中去。最后在配置 Grpc 服务(configureServices)的时候,将ShadedNettyGrpcServerFactory 里面的 serviceList 中的 Grpc 服务集成到一个 builder 中,最终配置好后,利用 bulider.start() 开启 Grpc 服务端。整个流程就是这样子的了。

findGrpcServices 源码如下:里面会对 @GrpcService 的类进行创建 Bean ,还会为所有的 GrpcService 进行绑定全局的拦截器。
 public Collection<GrpcServiceDefinition> findGrpcServices() {
 //通过 Spring 上下文获取被 @GrpcService 注解标注的所有类的名称
        Collection<String> beanNames = Arrays.asList(this.applicationContext.getBeanNamesForAnnotation(GrpcService.class));
        List<GrpcServiceDefinition> definitions = Lists.newArrayListWithCapacity(beanNames.size());
        //获取全局拦截器
        GlobalServerInterceptorRegistry globalServerInterceptorRegistry = (GlobalServerInterceptorRegistry)this.applicationContext.getBean(GlobalServerInterceptorRegistry.class);
        Iterator var4 = beanNames.iterator();

        while(var4.hasNext()) {
            String beanName = (String)var4.next();
            //拿到对 @GrpcService 标注的类,的 Bean (有责拿、无则进行创建 bean 然后返回)
            BindableService bindableService = (BindableService)this.applicationContext.getBean(beanName, BindableService.class);
            ServerServiceDefinition serviceDefinition = bindableService.bindService();
            GrpcService grpcServiceAnnotation = (GrpcService)this.applicationContext.findAnnotationOnBean(beanName, GrpcService.class);
            // 为所有 GrpcService 绑定全局拦截器
            serviceDefinition = this.bindInterceptors(serviceDefinition, grpcServiceAnnotation, globalServerInterceptorRegistry);
            definitions.add(new GrpcServiceDefinition(beanName, bindableService.getClass(), serviceDefinition));
            log.debug("Found gRPC service: " + serviceDefinition.getServiceDescriptor().getName() + ", bean: " + beanName + ", class: " + bindableService.getClass().getName());
        }
//返回所有被 @GrpcService 标注类的 BeanDefinition
        return definitions;
    }
addService: 将所有 GrpcServiceDefinition 放到 serviceList 中

小结
net.devh.boot.grpc 这个包利用了 Srping 自动装配的特性,对 GrpcServerLifecycle、ShadedNettyGrpcServerFactory 这俩个类生成 Bean。然后 GrpcServerLifecycle 利用 Spring 扩展点中的 SmartLifecycle 接口实现在 Spring 容器启动完成后,通过 ShadedNettyGrpcServerFactory 创建自己的 Grpc 服务。最终完成 Grpc 服务的注册。而 ShadedNettyGrpcServerFactory 顾名思议即一个工厂。在创建之初就会扫描所有带 @GrpcService 注解的类,然后生成 Bean。
🌹🌹🌹🌹🌹🌹本文只是简单分析了一下流程,具体的细节读者可以自行去剖析即可🌹🌹🌹🌹🌹🌹🌹🌹🌹🌹🌹发现更多好文章,不妨关注我一波,日后分享更多实战有意思的文章🌹🌹🌹🌹🌹
