目录
- 所需环境
- 安装docker
- 安装rclone
- 获取阿里云盘token
- 获取docker镜像并运行
- 获取本机IP
- 信息总结
- rclone配置
- 挂载网盘到本地文件夹
- 开机启动
所需环境
安装docker
使用官方脚本进行全自动安装
 curl -fsSL https://test.docker.com -o test-docker.sh
 sudo sh test-docker.sh
安装rclone
使用官方脚本进行全自动安装
curl https://rclone.org/install.sh | sudo bash
获取阿里云盘token
1.首先登陆阿里云盘
2.按F12打开审查元素
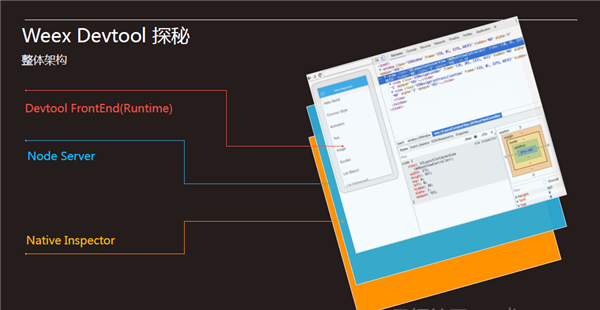
3.点击Application后按照图片查找token

获取docker镜像并运行
原github链接:https://github.com/tickstep/aliyunpan#%E5%A6%82%E4%BD%95%E5%AE%89%E8%A3%85
docker run -d --name=aliyunpan-webdav --restart=always -p 23077:23077 -e TZ="Asia/Shanghai" -e ALIYUNPAN_REFRESH_TOKEN="<your refreshToken>" -e ALIYUNPAN_AUTH_USER="admin" -e ALIYUNPAN_AUTH_PASSWORD="admin" -e ALIYUNPAN_WEBDAV_MODE="rw" -e ALIYUNPAN_PAN_DRIVE="File" -e ALIYUNPAN_PAN_DIR="/" tickstep/aliyunpan-webdav:v0.2.7
ALIYUNPAN_REFRESH_TOKEN RefreshToken
ALIYUNPAN_AUTH_USER webdav登录用户名
ALIYUNPAN_AUTH_PASSWORD webdav登录密码
ALIYUNPAN_WEBDAV_MODE webdav模式,支持:rw-读写,ro-只读
ALIYUNPAN_PAN_DRIVE 网盘类型,可选: File-文件 Album-相册
ALIYUNPAN_PAN_DIR 网盘文件夹的webdav服务根目录
获取本机IP
ifconfig

获取到本机ip为192.168.0.192
信息总结
我们通过docker运行配置的映射端口为:23077,用户名为admin,密码为admin
查询到的本机IP为:192.168.0.192
如下表所示
| IP | 端口 | 用户名 | 密码 |
|---|---|---|---|
| 192.168.0.192 | 23077 | admin | admin |
rclone配置
jianglin@jianglin-Dell-G15-5520:~$ rclone config
Current remotes:

e) Edit existing remote
n) New remote
d) Delete remote
r) Rename remote
c) Copy remote
s) Set configuration password
q) Quit config
e/n/d/r/c/s/q> n			#选择新建

Enter name for new remote.
name> aliyun   				#输入创建的名字 这个自己随意

Option Storage.
Type of storage to configure.
Choose a number from below, or type in your own value.

 ...
43 / Transparently chunk/split large files
   \ (chunker)
44 / Union merges the contents of several upstream fs
   \ (union)
45 / Uptobox
   \ (uptobox)
46 / WebDAV
   \ (webdav)
47 / Yandex Disk
   \ (yandex)
...

Storage> 46				#协议为WebDAV 我这里是46 你们如果rclone版本不一样可能是不同的数字

Option url.
URL of http host to connect to.
E.g. https://example.com.
Enter a value.
url> http://192.168.0.192:23077			#前面查询的本机ip,端口是docker映射出来的端口

Option vendor.
Name of the WebDAV site/service/software you are using.
Choose a number from below, or type in your own value.
Press Enter to leave empty.
 1 / Nextcloud
   \ (nextcloud)
 2 / Owncloud
   \ (owncloud)
 3 / Sharepoint Online, authenticated by Microsoft account
   \ (sharepoint)
 4 / Sharepoint with NTLM authentication, usually self-hosted or on-premises
   \ (sharepoint-ntlm)
 5 / Other site/service or software
   \ (other)
vendor> 5							#没有我们需要的 就选择5 其他

Option user.
User name.
In case NTLM authentication is used, the username should be in the format 'Domain\User'.
Enter a value. Press Enter to leave empty.
user> admin							#前面docker运行设置的用户名

Option pass.
Password.
Choose an alternative below. Press Enter for the default (n).
y) Yes, type in my own password
g) Generate random password
n) No, leave this optional password blank (default)
y/g/n> y  							#我们有自己的密码 选择y输入自己的密码
Enter the password:
password:							#输入前面docker运行设置的密码
Confirm the password:
password:							#确认密码

Option bearer_token.
Bearer token instead of user/pass (e.g. a Macaroon).
Enter a value. Press Enter to leave empty.
bearer_token> 						#留空直接回车

Edit advanced config?
y) Yes
n) No (default)
y/n> 								# 以上这些信息够了。直接回车

--------------------
[aliyun]
type = webdav
url = http://192.168.0.192:23077
vendor = other
user = admin
pass = *** ENCRYPTED ***
--------------------
y) Yes this is OK (default)
e) Edit this remote
d) Delete this remote
y/e/d> # 确认无误,直接回车

Current remotes:

Name                 Type
====                 ====
aliyun         		 webdav

e) Edit existing remote
n) New remote
d) Delete remote
r) Rename remote
c) Copy remote
s) Set configuration password
q) Quit config
e/n/d/r/c/s/q> q
挂载网盘到本地文件夹
mkdir -p ~/Aliyun
rclone mount aliyunwebdav:/<SOURCE_DIR> <TARGET_DIR> --cache-dir /tmp --allow-other --vfs-cache-mode writes --allow-non-empty
SOURCE_DIR为阿里云盘中的目录,若不填,则挂载一级目录。
TARGET_DIR为电脑主机中实际映射到的目录
出现如下报错信息
mount helper error: fusermount3: option allow_other only allowed if 'user_allow_other' is set in /etc/fuse.conf
Fatal error: failed to mount FUSE fs: fusermount: exit status 1
看起来是配置文件的问题
sudo vim /etc/fuse.conf #将其中的user_allow_other注释取消掉,如下图所示
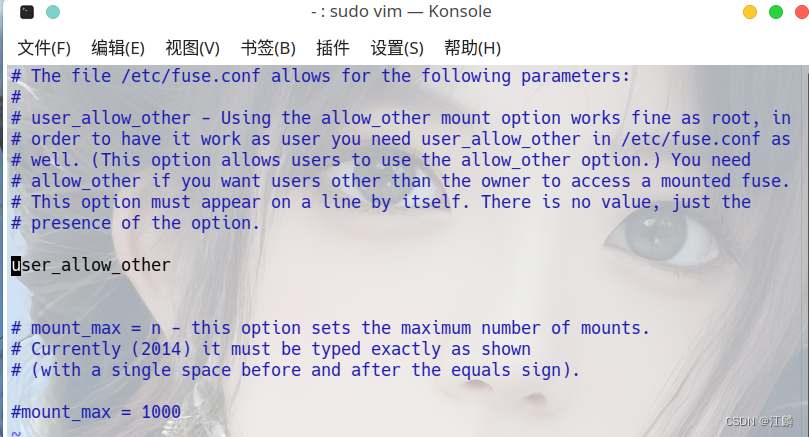
此时重新执行上面的挂载命令,没有任何输出即为成功,此时命令行处于阻塞状态,新开一个终端进行测试。

开机启动
这里没搞定,试了所有方法总有问题,可能是开机wifi连接比这个自启动脚本慢,超时自动失败了,希望弄成功的下面留言一下,看到会回复


