文章目录
- VMware教程
- 创建新的虚拟机
- 自定义安装
- 选择稍后安装操作系统
- 这里选择Linux操作系统,版本为Centos7 64位
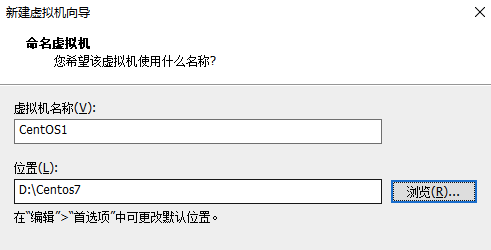
- 选择名称和安装位置
- 选择处理器、内核数量(可根据电脑硬件以及需求进行调整)
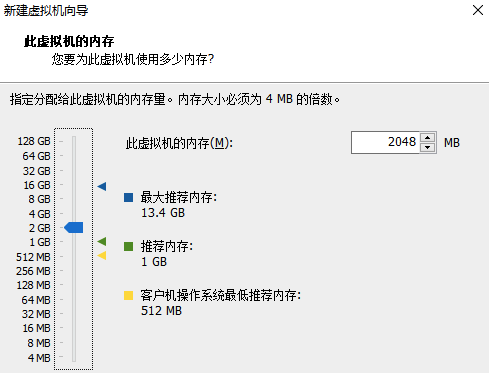
- 选择2G内存(可根据电脑硬件以及需求进行调整)
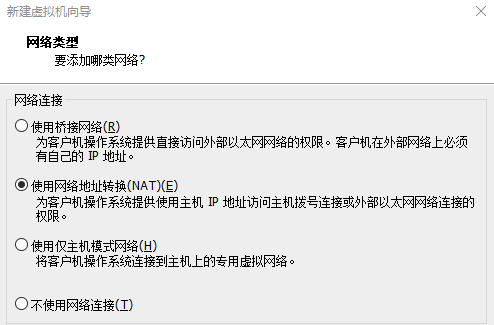
- 选择网络类型
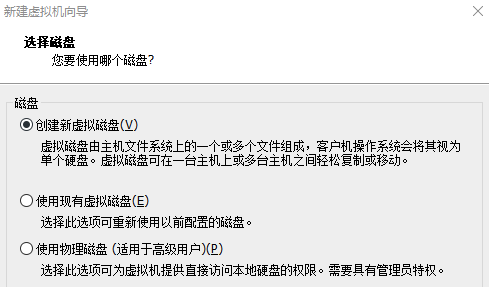
- 选择虚拟磁盘
- 对于不需要的硬件进行移除
- 国内镜像源地址
- 下载镜像
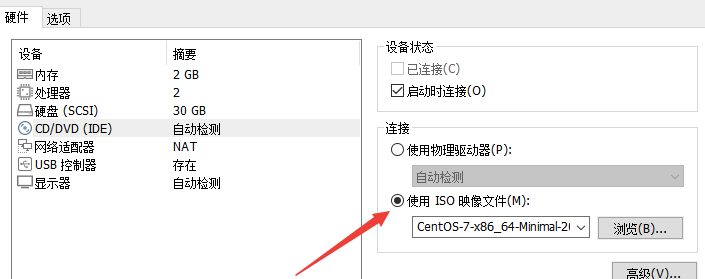
- 安装镜像
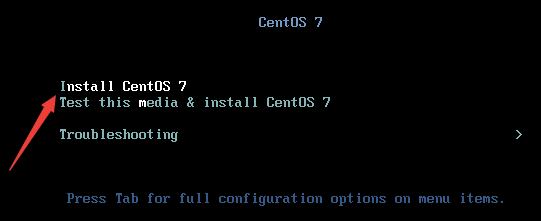
- 选择第一项Install CentOS 7
- 磁盘划分
- 设置网络
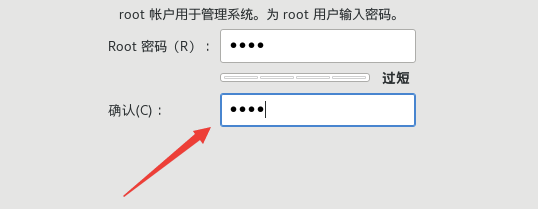
- 设置root密码
VMware教程
官网下载版:阿里网盘分享地址
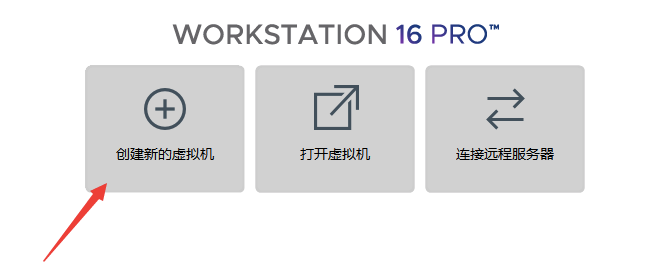
创建新的虚拟机
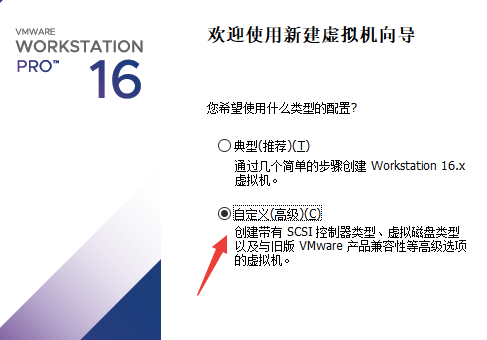
自定义安装
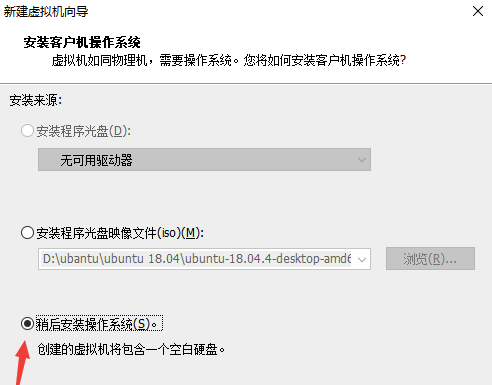
选择稍后安装操作系统
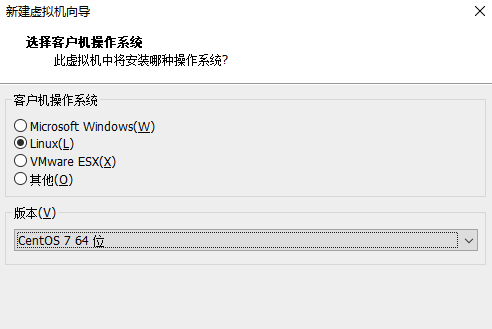
这里选择Linux操作系统,版本为Centos7 64位
选择名称和安装位置
选择处理器、内核数量(可根据电脑硬件以及需求进行调整)

选择2G内存(可根据电脑硬件以及需求进行调整)
选择网络类型
选择虚拟磁盘

对于不需要的硬件进行移除
国内镜像源地址
- 清华源:https://mirrors.tuna.tsinghua.edu.cn/
- 阿里源:https://developer.aliyun.com/mirror/
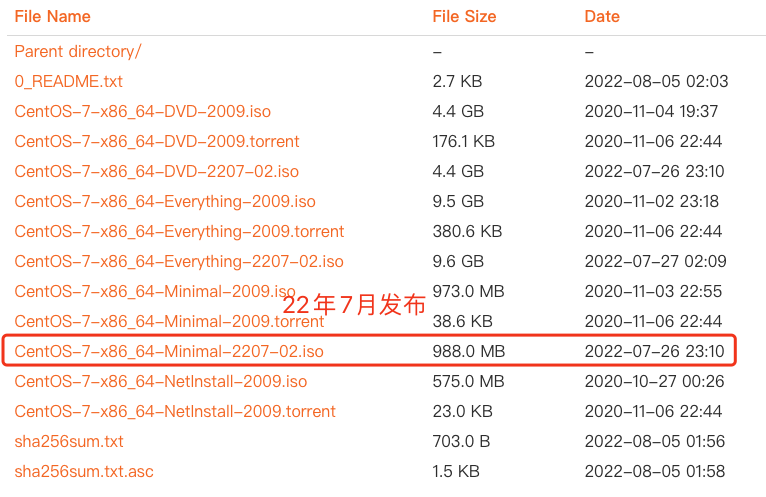
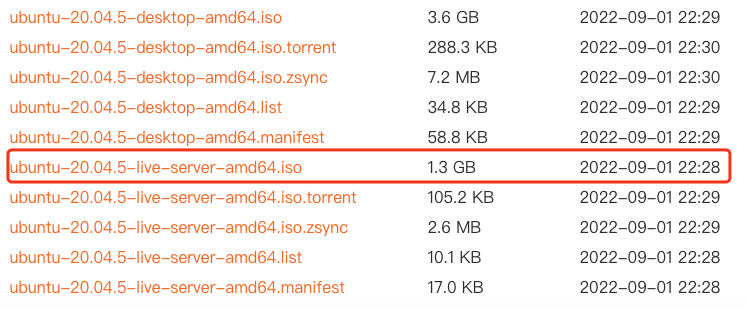
下载镜像
-
CentOS Minimal:CentOS的最小化安装版本,只包含最基本的命令行工具和软件包,适合用于服务器环境。
https://mirrors.aliyun.com/centos/7.9.2009/isos/x86_64/
-
Ubuntu Server:Ubuntu的服务器版本,也是一个无桌面版操作系统,只包含命令行界面和基本工具,适合用于服务器环境。
https://mirrors.aliyun.com/oldubuntu-releases/releases/20.04.5/
安装镜像
以centos7为例
选择第一项Install CentOS 7
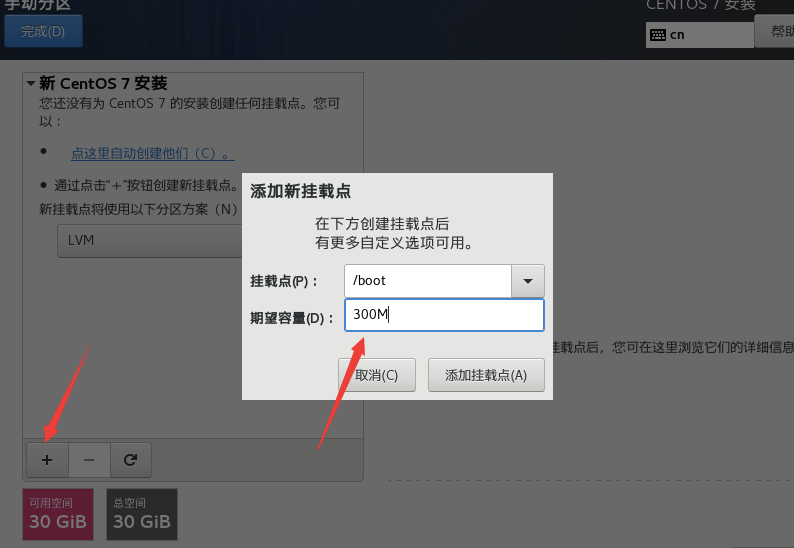
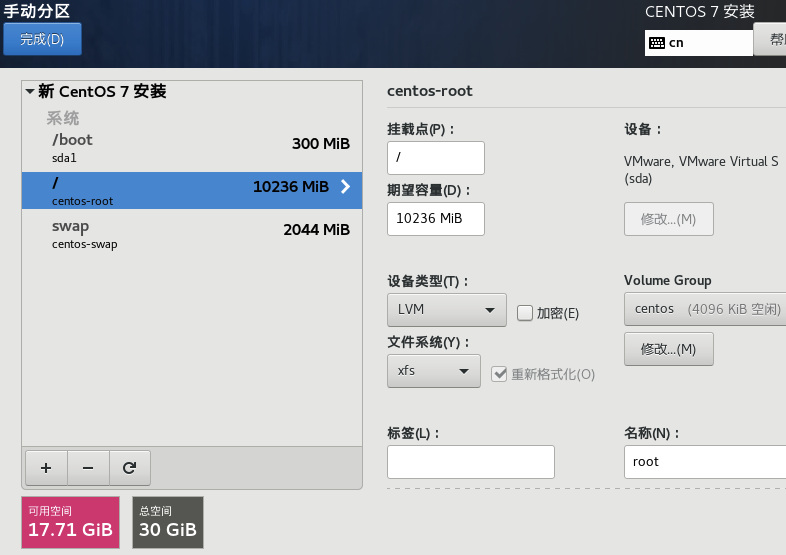
磁盘划分
在手动完成分区中选择加号,并挂载/boot 容量为300M
设置网络
里面有一栏需要设置网络,这个时候需要自己手动打开
设置root密码