前言
现在很多 APP 都会有一个关于页面,用于放置一些必要的信息,例如:版本号、版权信息等。有时也会用于展示设置、帮助、反馈等功能的入口。
通常,我们都会自己挨个创建不同的 item ,略显繁琐。
所以我就在想,能不能封装一个通用的关于页面?在满足大多数子定义需求的情况下,尽可能的简单?
效果预览
 |  |
|---|---|
 |  |
 |
实现过程
确定需求
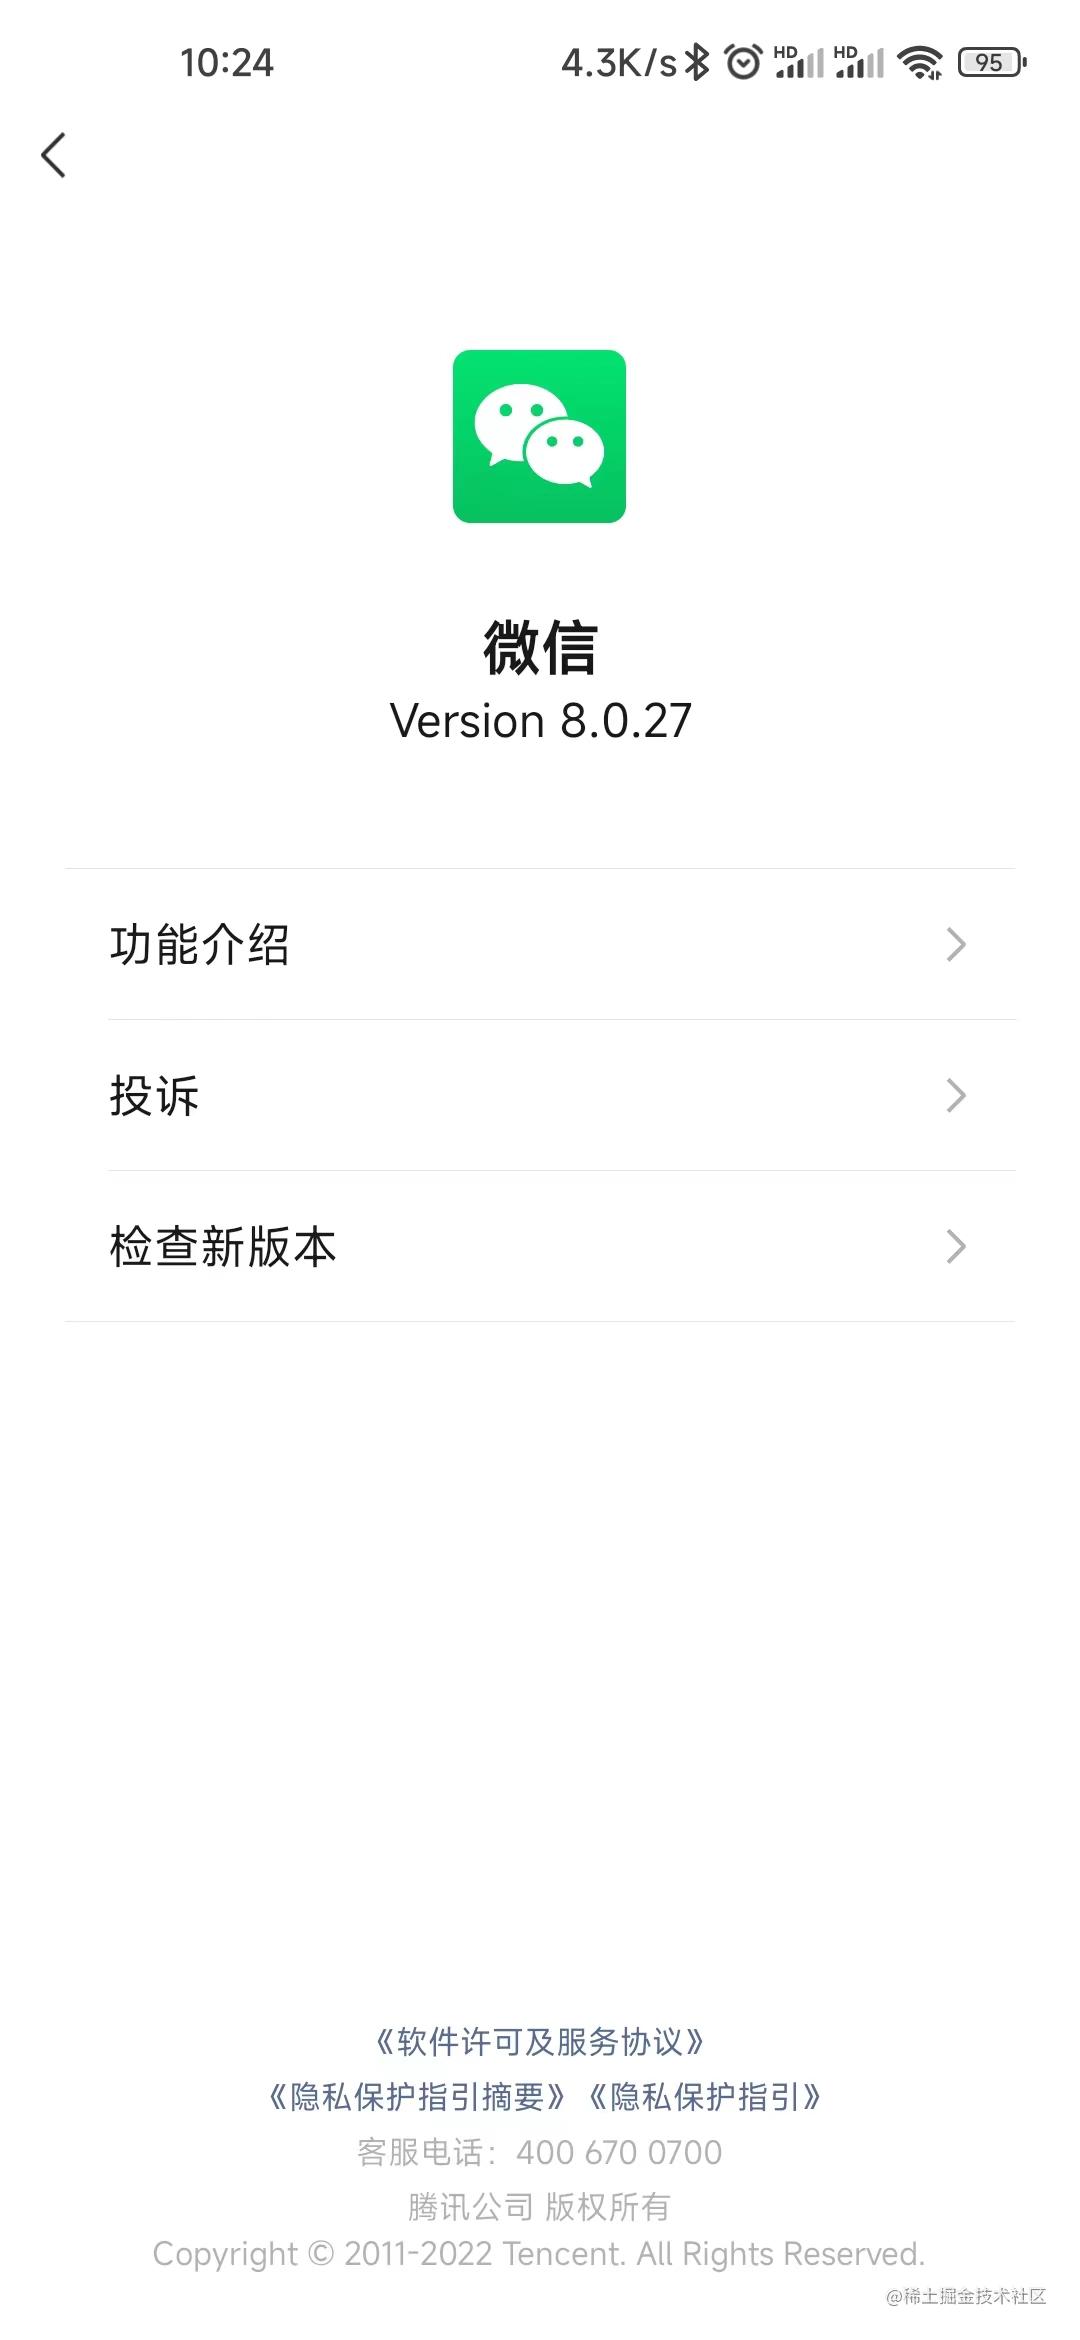
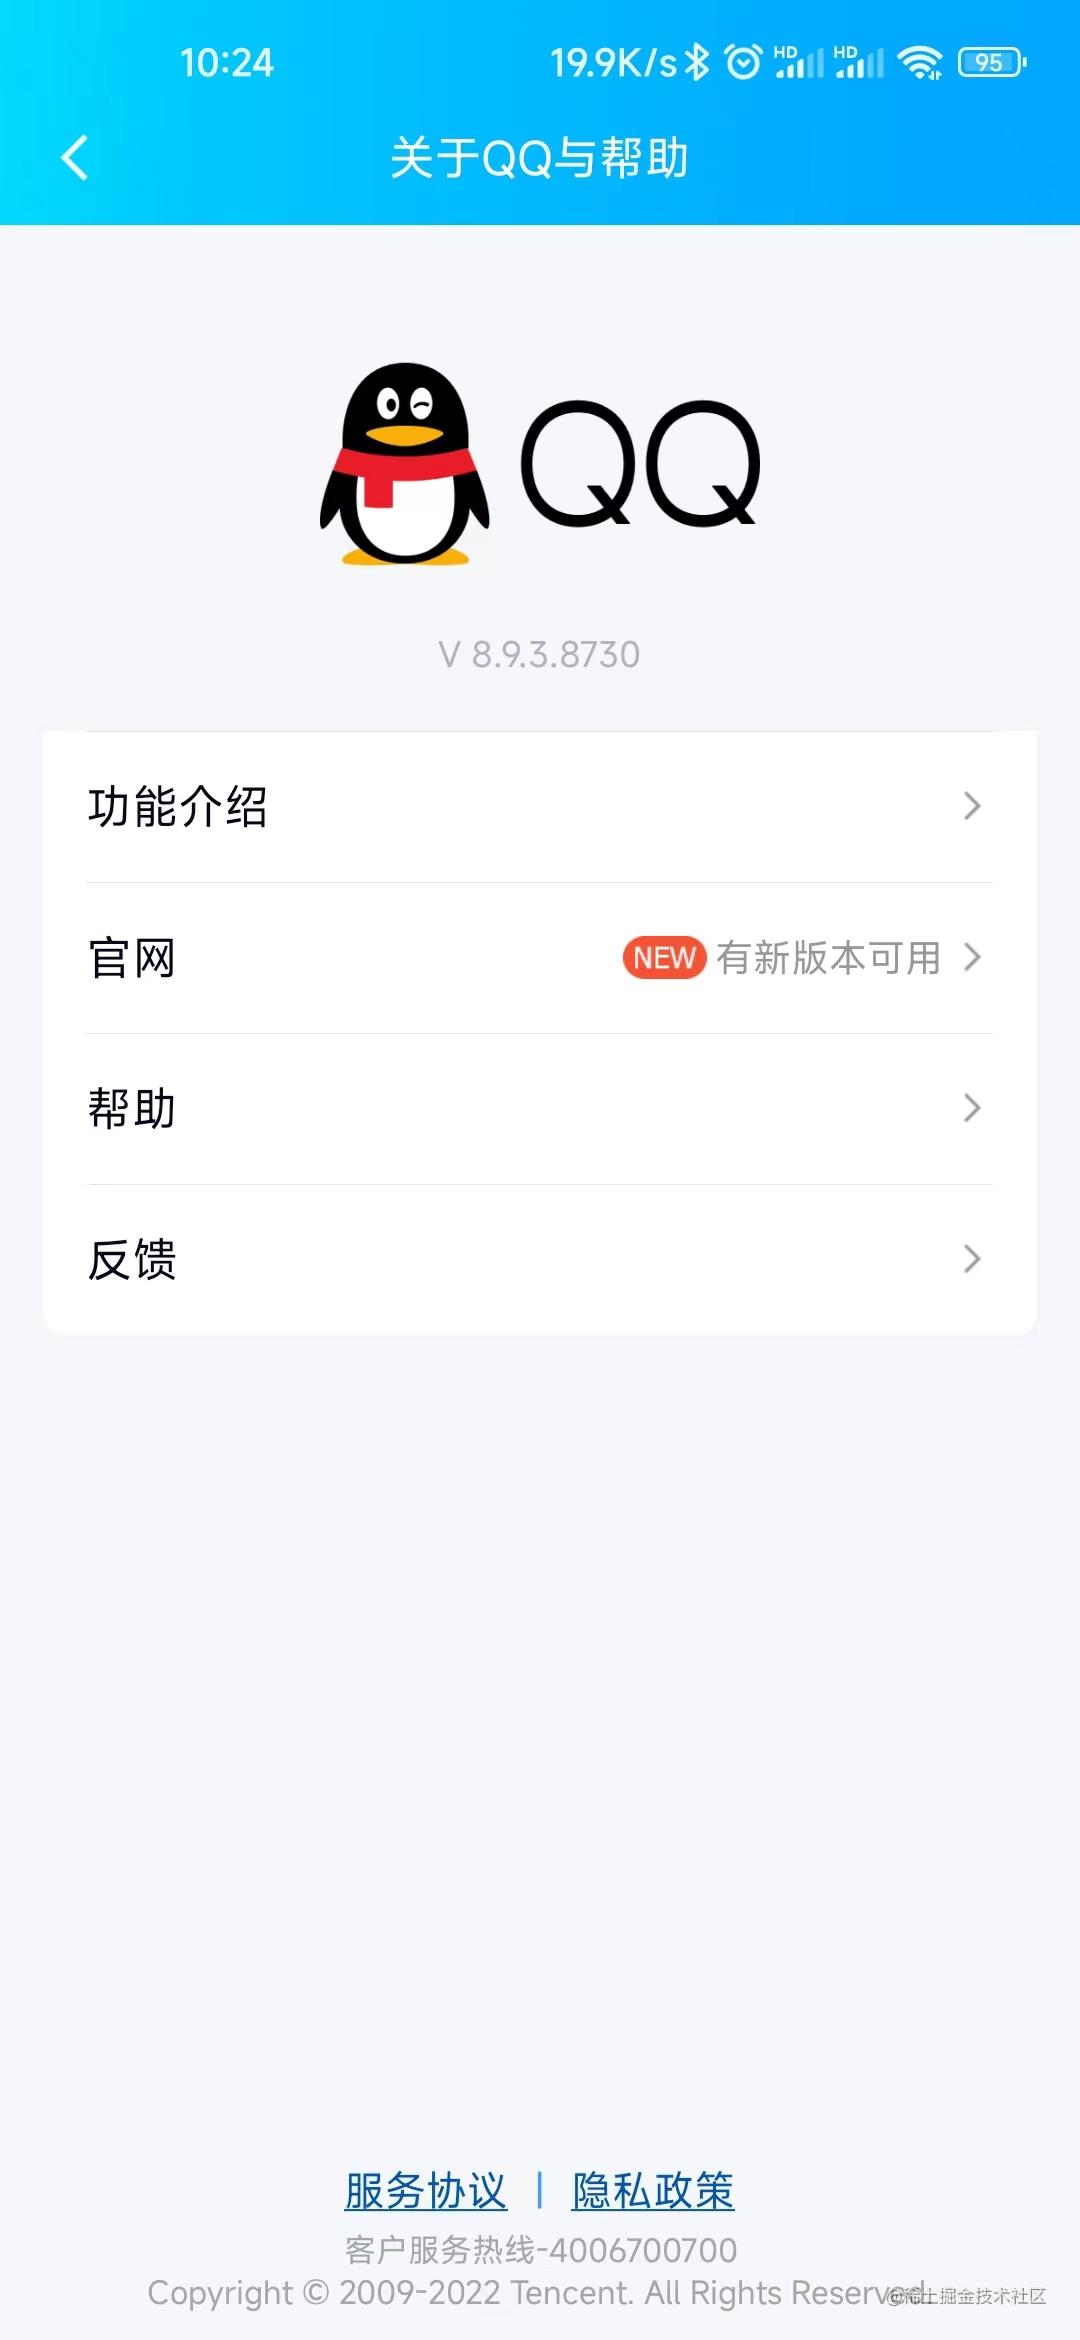
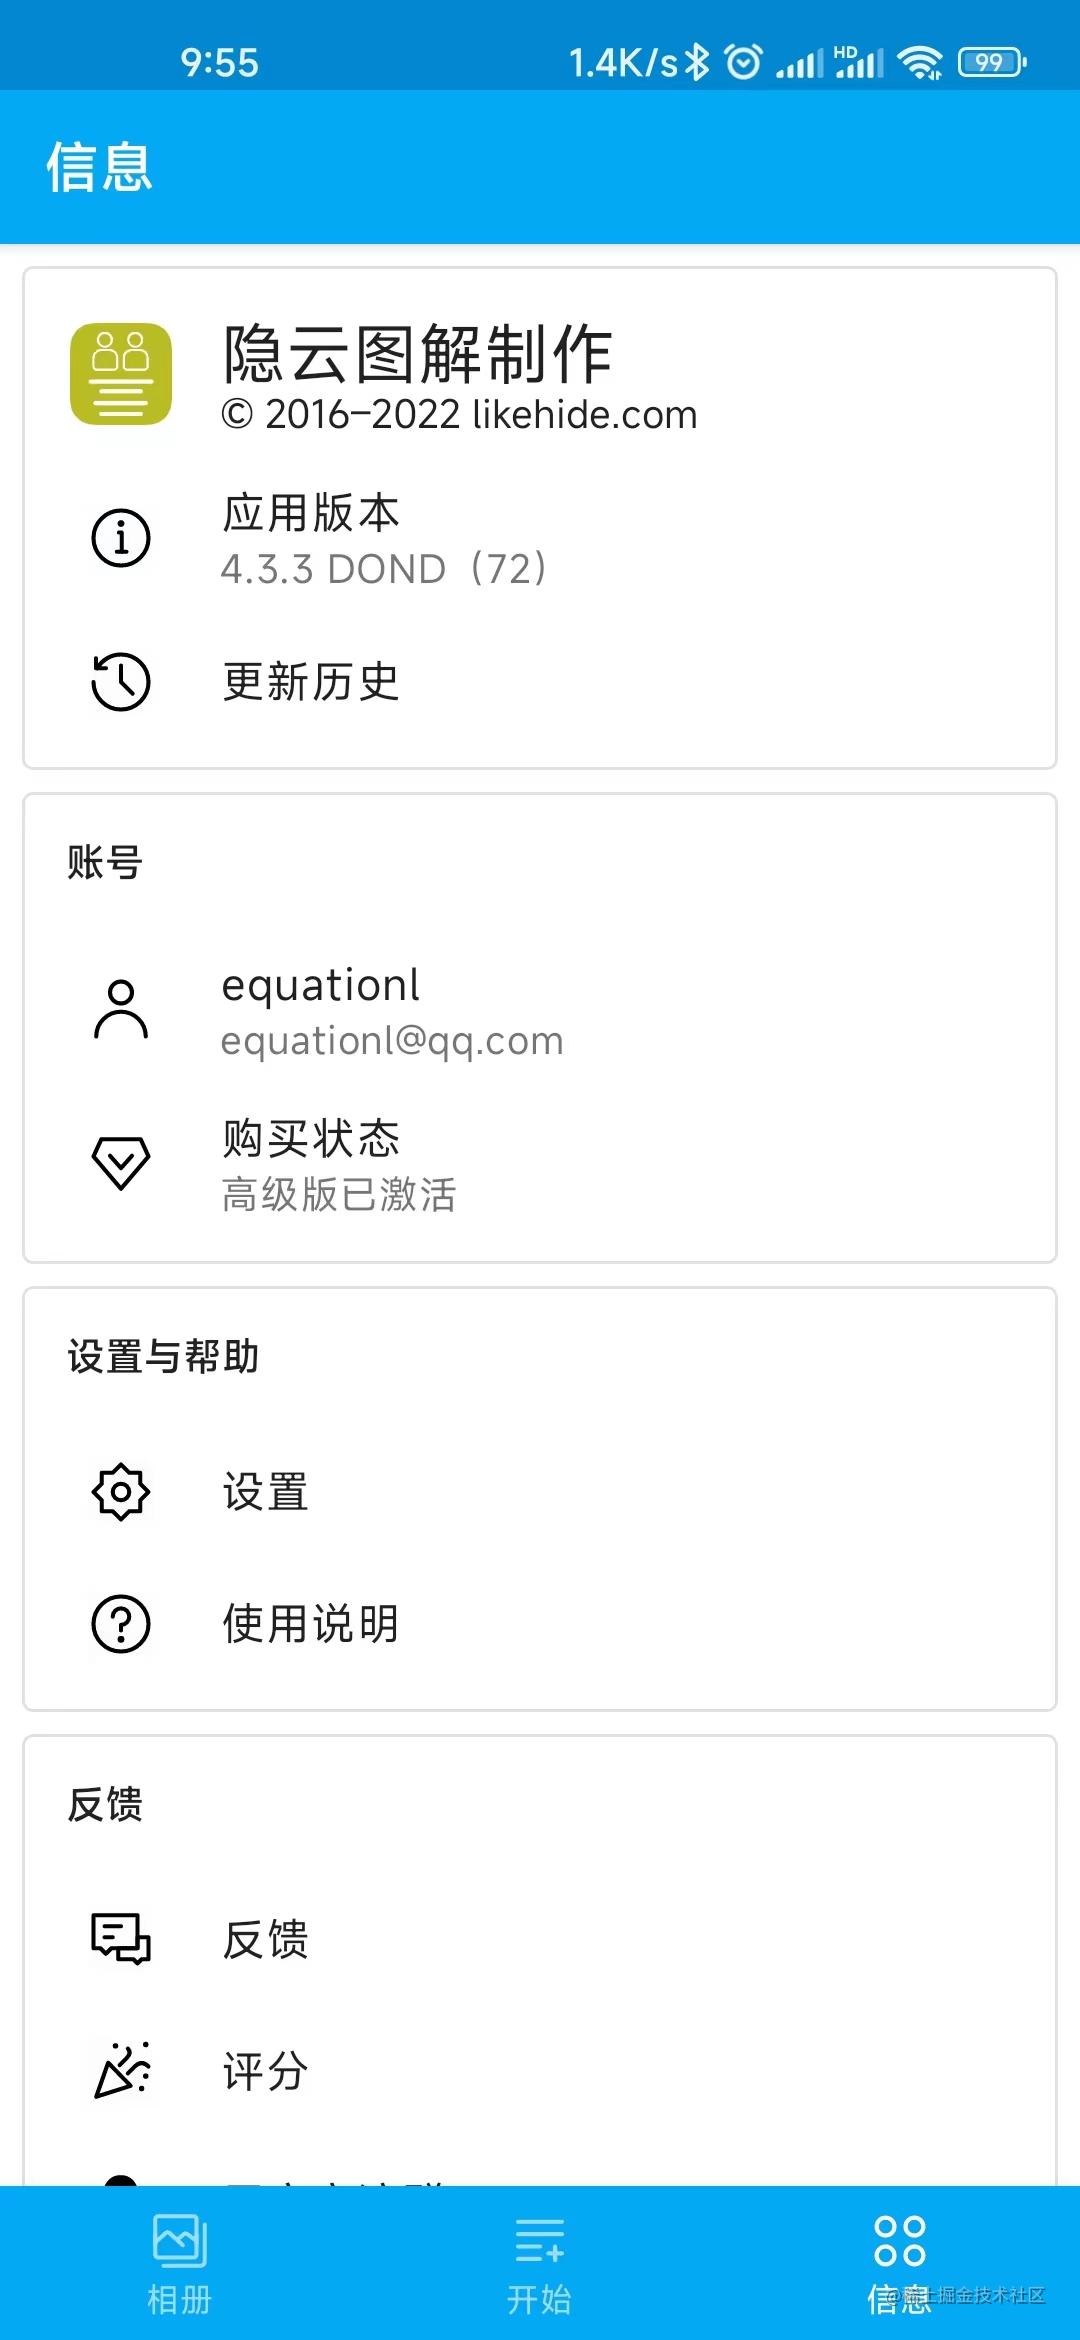
首先我截取了两种不同类型的关于页面的截图:
| 仅展示信息 | 有交互 |
|---|---|
 |  |
 |  |
 |  |
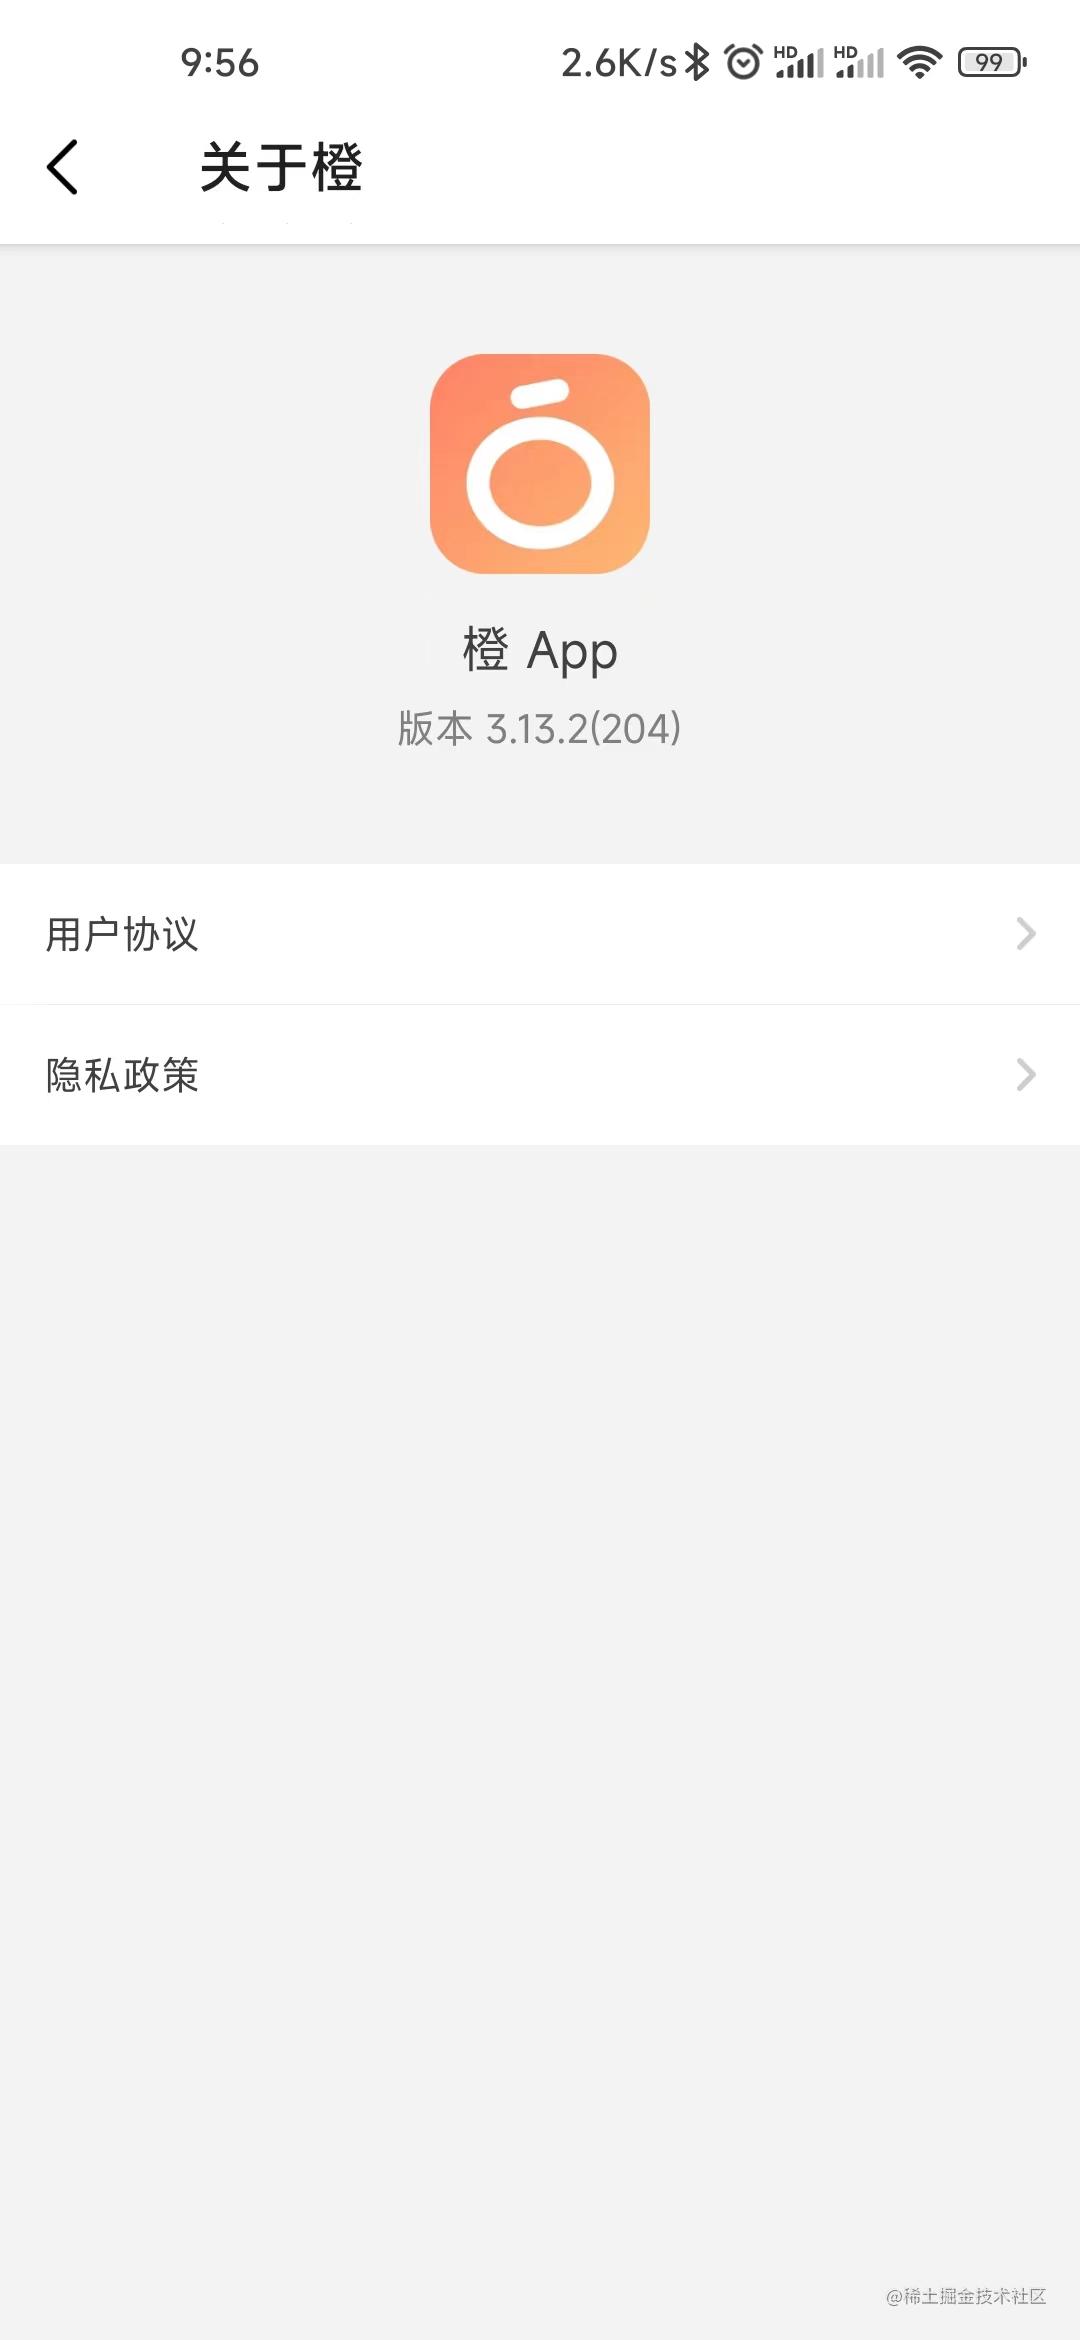
可以看到,主流的关于页面大致有两种类型,一种仅用于展示版本号、使用指南、隐私政策等信息,几乎没有需要交互的地方,这种一般在大型 APP 中比较常见。
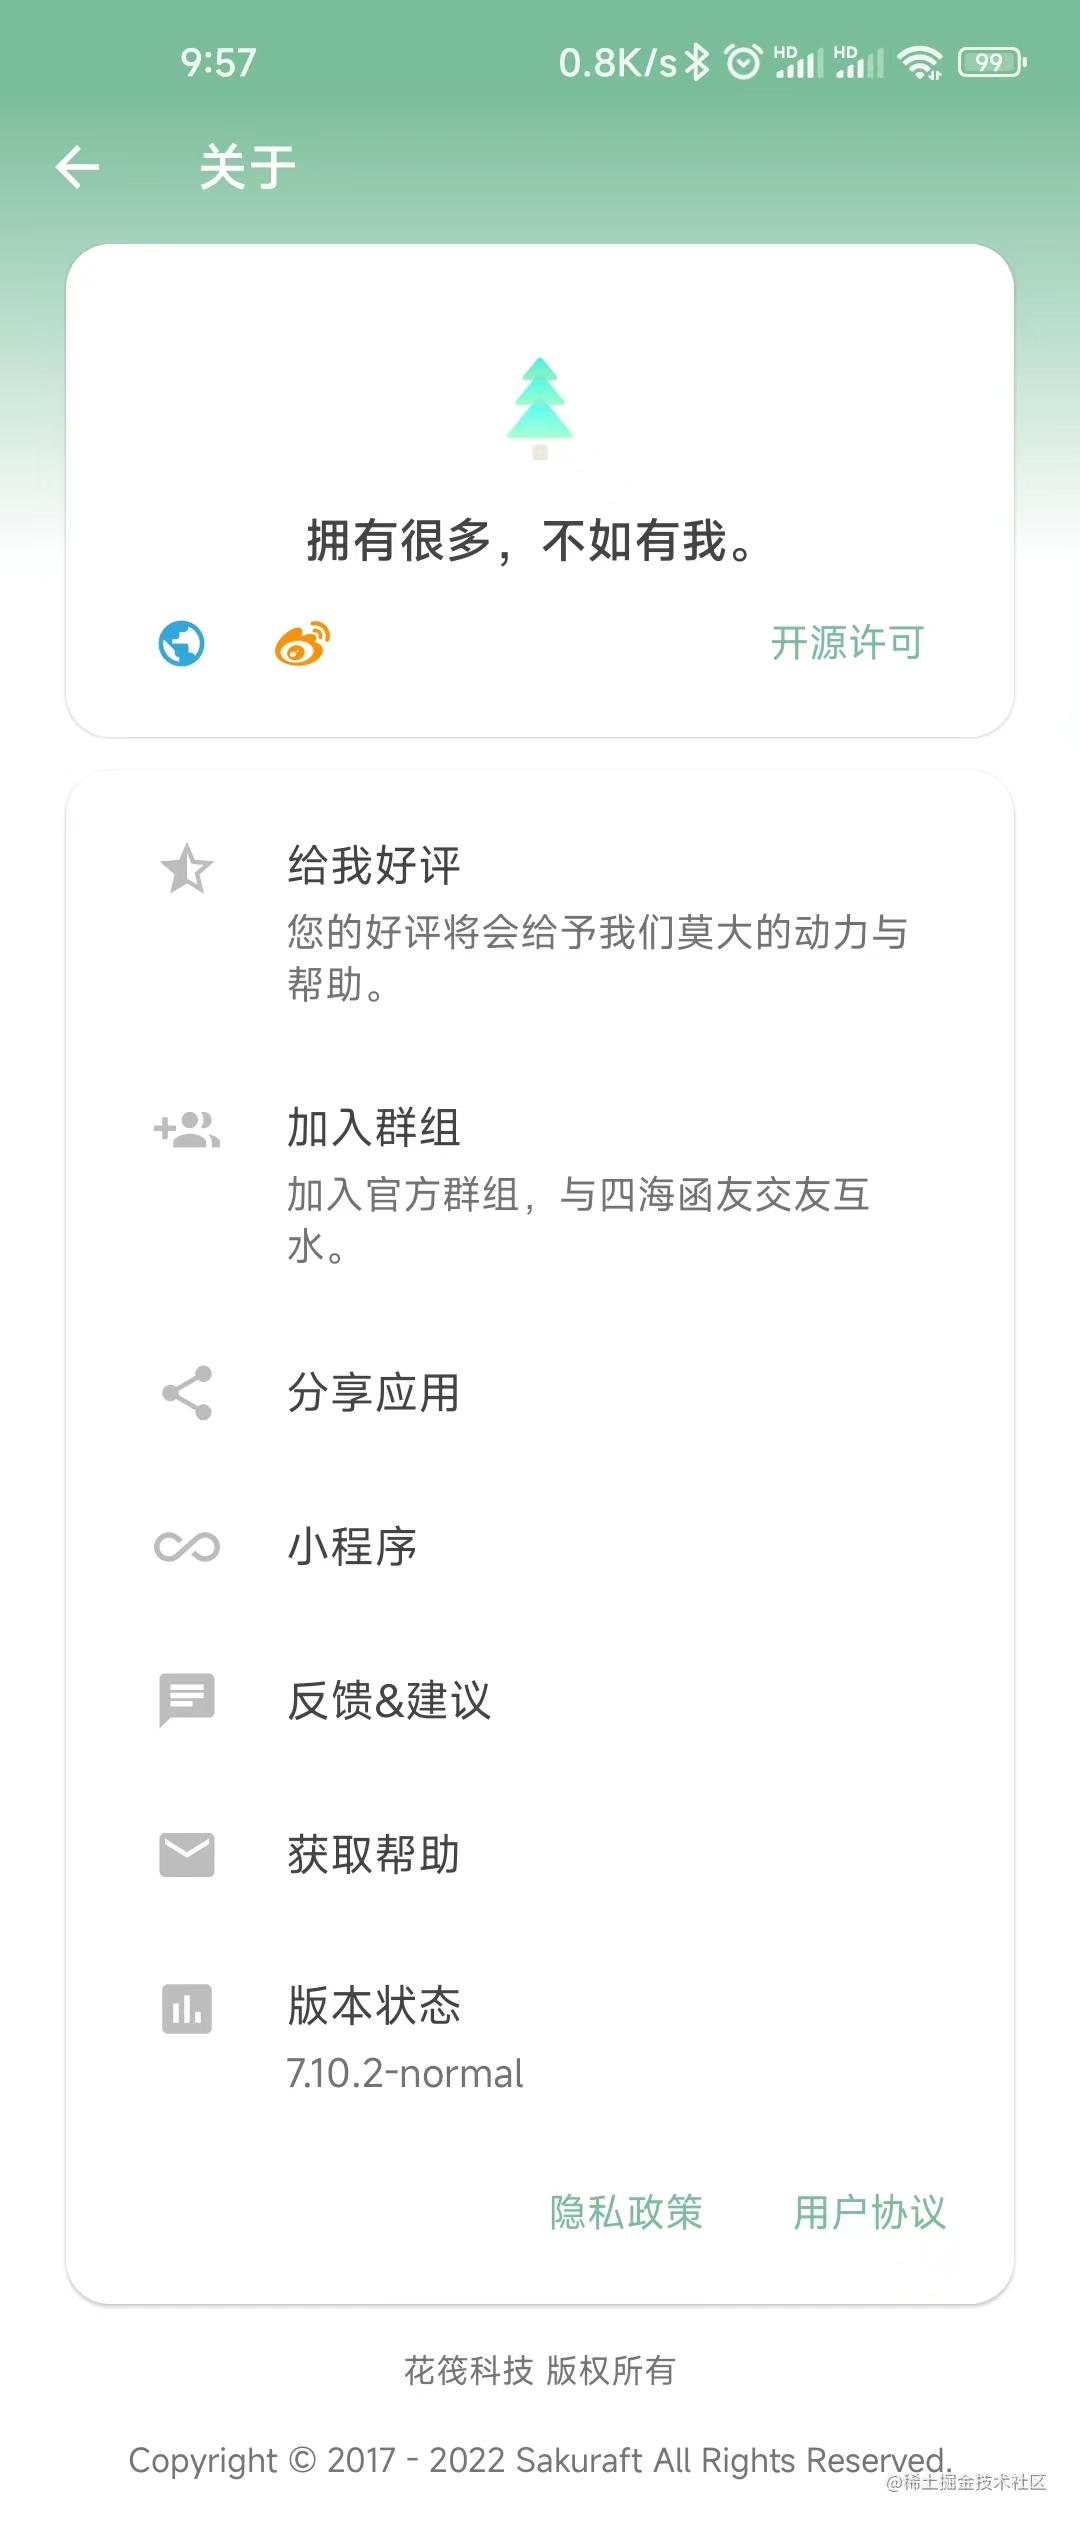
另外一种则是混杂了许多功能,除了上面说的展示信息外,还会把设置等强交互的功能也放到关于页面,这种一般在独立开发者的 APP 中比较常见。
虽然不同类型的APP对于关于页面的设计大不相同,但是基本上都是会在顶部第一项展示 APP 图标、应用名称和一些应用基本信息。
而中间的内容,无非就是各种不同的 item,不过不同风格的 APP 排列样式不同,例如仅展示信息的 APP 几乎都是简约的普通列表形式;而其他 APP 则一般会采用 Card 或其他形式分割不同的模块,在同一个模块内依然采用列表现实不同的 item。
至于最底部的内容,通常是版权信息或政策信息等,使用普通文本居中显示。
因此,最终确定这个框架的整体布局应该类似于这样:
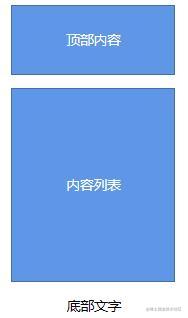
当然,这只是整体框架布局,三个模块中能够插入的内容应该是要能自定义的。
那么,能往这三个模块中插入的内容应该有什么呢?
按照上面的分析,我们应该预设几个可用的 item:
- AppInfoItem 用于实现顶部APP信息的 item (icon、名称、版本号、其他信息等)
- NormalItem 一个普通的 item
- TextItem 一个纯文本 item
- ItemModule 一个单独的模块,可在其中放置上述 item,用于分割不同功能类型的 item
编写主框架入口
为了方便使用,我们需要给这个框架编写一个主入口,所有的 composable 都应该置于这个主入口之中。
按照上面分析的分区,我们的主入口将接收三个 composable: topContent 、 mainContent 、 bottomContent 。
实现如下:
@Composable
fun AboutScreen(
    modifier: Modifier = Modifier,
    topContent: (@Composable () -> Unit)? = null,
    mainContent: (@Composable () -> Unit)? = null,
    bottomContent: (@Composable () -> Unit)? = null,
    keepBottomInBottom: Boolean = false
) {
    Box {
        Column(modifier = modifier.verticalScroll(rememberScrollState())) {
            if (topContent != null) {
                topContent()
            }
            if (mainContent != null) {
                mainContent()
            }
            if (bottomContent != null && !keepBottomInBottom) {
                bottomContent()
            }
        }

        if (bottomContent != null && keepBottomInBottom) {
            Column(Modifier.fillMaxSize(), verticalArrangement = Arrangement.Bottom) {
                bottomContent()
            }
        }
    }
}
因为不是每个 APP 都是完整的拥有三个内容区域,所以所有的内容区域都是使用的可空类型,然后判断不为空才显示。
并且,我们也不能预估实际使用时内容长度有多少,一个屏幕能不能显示的下,故此我们需要给父组件添加一个 verticalScroll(rememberScrollState()) 。
另外,正如上面所说,我们无法预估内容长度,但是一般来说,最底部的版权信息肯定是要置底的,所以这里我们交给用户自己选择,如果他认为他的内容不会超出屏幕可显示区域,则传入 keepBottomInBottom 参数为 true。
此时,底部内容 bottomContent 将不会堆叠在在 Column 中,而是会往上提一层到上一级的 Box 中,与 Column 同级别。然后将其设置为填充最大可用尺寸,并将内容置于最底部。
额外插两句,Column 表示垂直排列它包裹的所有 composable,类似 view 中的 LinearLayout ;Box 表示直接叠加其中的所有 composable ,类似 FrameLayout。
编写头部布局
头部一般都是用于存放 APP 的基本信息,因此我们可以封装一个通用的基本信息组件,但是为了不过于死板,应当留下足够的可扩展空间。
所以我们先写一个基础组件:
/**
 * 头部 APP 信息基础 Item
 *
 * @param iconContent 图标内容
 * @param textContent 文本内容
 * @param modifier Modifier
 * */
@Composable
fun AppInfoVerticalItem(
    iconContent: @Composable () -> Unit,
    textContent: @Composable () -> Unit,
    modifier: Modifier = Modifier
) {
    Column(modifier = modifier) {
        iconContent()
        textContent()
    }
}
代码很简单,就是一个 Column 接收两个 composable 内容,图标内容和文本内容。
什么?你问我为什么明明两个参数都是 composable 而且也没有做什么特殊处理,为什么要用两个参数,只用一个不行吗?
这个问题就留给各位读者自己思考了哈哈ヾ(≧▽≦*)oψ(`∇´)ψ
对了,看到这里的函数名字 AppInfoVerticalItem 应该就想到,既然有垂直的,那就是说还有水平的咯?没错是这样的:
@Composable
fun AppInfoHorizontalItem(
    iconContent: @Composable () -> Unit,
    textContent: @Composable () -> Unit,
    modifier: Modifier = Modifier
) {
    Row(modifier = modifier, horizontalArrangement = Arrangement.SpaceBetween) {
        iconContent()
        textContent()
    }
}
定义完基础组件肯定是不够的,我们应该要封装一个开箱即用的组件才是这个框架的目的:
@Composable
fun AppInfoVerticalItem(
    iconPaint: Painter,
    modifier: Modifier = Modifier,
    text: String? = null,
    subText: String? = null,
    textStyle: TextStyle = MaterialTheme.typography.h4,
    subTextStyle: TextStyle = MaterialTheme.typography.body2
) {
    AppInfoVerticalItem(
        iconContent = {
            Column(Modifier.fillMaxWidth(), horizontalAlignment = Alignment.CenterHorizontally) {
                Icon(
                    painter = iconPaint,
                    contentDescription = "icon"
                )
            }
        },
        textContent = {
            Column(Modifier.fillMaxWidth(), horizontalAlignment = Alignment.CenterHorizontally) {

                if (text != null) {
                    Text(
                        text = text,
                        style = textStyle,
                        maxLines = 1
                    )
                }

                if (subText != null) {
                    Text(
                        text = subText,
                        style = subTextStyle
                    )
                }

            }
        },
        modifier = modifier
    )
}
在上面的代码中了,为了易于修改文本的样式,我们预留了 textStyle 和 subTextStyle 参数,可以使用 style 修改文本的颜色、字号、修饰符、字体等信息。
因为我们说过,在这里的图标一般都是 APP 的 icon , 所以这里就直接固定图标类型为 Painter , 而没有多重载几个方法,覆盖可使用的所有图标类型(ImageVector 、 ImageBitmap)
上面的组件封装后只需要“一行”代码即可调用:
@Preview(backgroundColor = 0xFFFFFFFF, showBackground = true)
@Composable
fun PreviewVerticalAppInfoItem() {
    AppInfoVerticalItem(
        iconPaint = painterResource(id = R.drawable.ic_launcher_foreground),
        text = "示例APP",
        subText = "V1.0.0"
    )
}
显示效果如下:
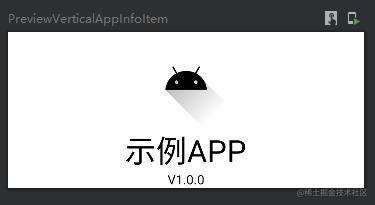
水平显示同理,这里不再赘述。
编写主要内容布局
编写思路同上,其实这个没有什么难度,不过就是拿几个基础 composable 做堆叠组合而已,所以我这里直接上代码了,需要注意的地方已经在代码中注释说明:
/**
 * 一个独立的模块,使用 Card 作为载体
 *
 * @param modifier Modifier
 * @param title 模块标题,会被置于载体 Card 之外
 * @param backGroundColor Card 背景颜色
 * @param border Card 变宽
 * @param elevation Card 高度(会影响 Card 的阴影深度)
 * @param shape Card 形状(可自定义形状或增加圆角)
 * @param titleStyle 标题文本的样式
 * @param content 内容
 * */
@OptIn(ExperimentalMaterialApi::class)
@Composable
fun ModuleItem(
    modifier: Modifier = Modifier,
    title: String? = null,
    backGroundColor: Color = Color.Unspecified,
    border: BorderStroke? = null,
    elevation: Dp = 1.dp,
    shape: Shape = MaterialTheme.shapes.medium,
    titleStyle: TextStyle = MaterialTheme.typography.h5,
    content: @Composable () -> Unit
) {
    Column {
        if (title != null) {
            // 将标题文本放到 Card 外面,这样比较美观
            Text(
                text = title,
                style = titleStyle,
                modifier = Modifier.padding(start = 6.dp)
            )
        }

        Card(
            onClick = { }, // 其实这里只是将 card 作为外部载体使用,不需要直接点击 card,但是这个参数是必须的,所以直接传一个空的给它
            enabled = false, // 禁用点击
            modifier = modifier.fillMaxWidth(),
            backgroundColor = backGroundColor,
            border = border,
            elevation = elevation,
            shape = shape
        ) {
            Column(modifier = Modifier.padding(8.dp)) {
                content()
            }
        }
    }
}

/**
 * 基础 Item 载体,使用 Row 作为载体承载内容
 *
 * @param startContent 左边的内容
 * @param endContent 右边的内容
 * @param modifier Modifier
 * @param horizontalArrangement 水平对齐方式
 * @param verticalAlignment 垂直对齐方式
 * */
@Composable
fun BaseSubItem(
    startContent: @Composable () -> Unit,
    endContent: @Composable () -> Unit,
    modifier: Modifier = Modifier,
    horizontalArrangement: Arrangement.Horizontal = Arrangement.SpaceBetween,
    verticalAlignment: Alignment.Vertical = Alignment.Top
) {
    Row(
        modifier = modifier.fillMaxWidth(),
        horizontalArrangement = horizontalArrangement,
        verticalAlignment = verticalAlignment
    ) {
        startContent()
        endContent()
    }
}

/**
 * 一般 Item,显示效果形如普通文本列表,但是可以添加尾部图标与尾部文字,建议包裹在 [NormalSubItemModule] 使用
 *
 * @param startText 主文本,位于列表最左边
 * @param modifier Modifier
 * @param endText 辅助文本,位于列表最右边,但是在 [endIcon] 左边
 * @param startTextStyle 主文本样式
 * @param endTextStyle 辅助文本样式
 * @param endIcon 尾部图标
 * @param onClick 点击回调
 * */
@Composable
fun NormalSubItem(
    startText: String,
    modifier: Modifier = Modifier,
    endText: String? = null,
    startTextStyle: TextStyle = LocalTextStyle.current,
    endTextStyle: TextStyle = LocalTextStyle.current,
    endIcon: (@Composable () -> Unit)? = null,
    onClick: (() -> Unit)? = null
) {
    BaseSubItem(
        // 这里如果没有设置点击回调则不添加 clickable,因为如果即使添加的是空 lambda 也会有点击涟漪效果,不太美观
        modifier = if (onClick != null) modifier.clickable { onClick() } else modifier,
        startContent = {
            Text(text = startText, style = startTextStyle)
        },
        endContent = {
            Row(verticalAlignment = Alignment.CenterVertically) {
                if (endText != null) {
                    Text(text = endText, style = endTextStyle)
                }
                if (endIcon != null) {
                    endIcon()
                }
            }
        },
        verticalAlignment = Alignment.CenterVertically
    )
}

/**
 * 带有前导图标的一般 Item ,显示效果类似对话框,建议包裹在 [NormalWithStartIconSubItemModule] 中使用
 *
 * @param text 主文本
 * @param modifier Modifier
 * @param subText 辅助文本
 * @param textStyle 主文本样式
 * @param subTextStyle 辅助文本样式
 * @param isAlignIcon 是否留空,如果设置为 true,那么即使没有图标也会将图标位置留空占位
 * @param startIcon 图标
 * @param onClick 点击回调
 * */
@Composable
fun NormalWithStartIconSubItem(
    text: String,
    modifier: Modifier = Modifier,
    subText: String? = null,
    textStyle: TextStyle = MaterialTheme.typography.h6,
    subTextStyle: TextStyle = MaterialTheme.typography.body2,
    isAlignIcon: Boolean = true,
    startIcon: (@Composable () -> Unit)? = null,
    onClick: (() -> Unit)? = null
) {
    BaseSubItem(
        modifier = if (onClick != null) modifier.clickable { onClick() } else modifier,
        horizontalArrangement = Arrangement.Start,
        verticalAlignment = Alignment.CenterVertically,
        startContent = {
            // 如果条件满足的话,即使图标为空,也要把位置留空出来,即 fillMaxWidth(0.2f)
            Column(Modifier.fillMaxWidth(if (!isAlignIcon && startIcon == null) 0f else 0.2f)) {
                if (startIcon != null) {
                    startIcon()
                }
            }

            Column(modifier = Modifier.padding(start = 6.dp).fillMaxWidth(0.8f)) {
                Text(text = text, style = textStyle)
                if (subText != null) {
                    Text(text = subText, style = subTextStyle)
                }
            }
        },
        // 由于该组件风格不是严格的左右布局,所以这里将内容全放入 startContent 中,不使用 endContent
        endContent = {  }
    )
}

/**
 *
 * 用于承载 [NormalSubItem] 的模块,会将传入的所有 [NormalSubItem] 放入同一个 Card 中
 *
 * @param itemList 内容列表
 * @param modifier 承载这个 module 的父 composable 的 modifier
 * @param title 该模块标题
 * @param showDivider 是否在 item 之间显示分割线
 * @param showAllDivider 是否在第一个 item 之前 和 最后一个 item 之后显示分割线
 * @param backGroundColor 模块背景颜色
 * @param border 模块边框
 * @param elevation 模块高度(影响阴影深度)
 * @param itemPadding item 之间的 padding
 * @param startTextStyle 主文本样式
 * @param endTextStyle 辅助文本样式
 * @param cardShape 模块形状
 * @param titleStyle 标题样式
 * @param extraContent 额外的子定义内容,会在最后显示
 * @param onClick 点击回调,参数为点击的 item 索引
 * */
@Composable
fun NormalSubItemModule(
    itemList: List<NormalSubItemData>,
    modifier: Modifier = Modifier,
    title: String? = null,
    showDivider: Boolean = true,
    showAllDivider: Boolean = false,
    backGroundColor: Color = Color.Unspecified,
    border: BorderStroke? = null,
    elevation: Dp = 1.dp,
    itemPadding: Dp = 6.dp,
    startTextStyle: TextStyle = LocalTextStyle.current,
    endTextStyle: TextStyle = LocalTextStyle.current,
    cardShape: Shape = MaterialTheme.shapes.medium,
    titleStyle: TextStyle = MaterialTheme.typography.h5,
    extraContent: (@Composable () -> Unit)? = null,
    onClick: ((clickNo: Int) -> Unit)? = null
) {
    ModuleItem(
        title = title,
        modifier = modifier,
        backGroundColor = backGroundColor,
        border = border,
        elevation = elevation,
        shape = cardShape,
        titleStyle = titleStyle
    ) {
        if (showAllDivider) {
            Divider(modifier = Modifier.padding(bottom = itemPadding))
        }
        itemList.forEachIndexed { index: Int, normalSubItemData: NormalSubItemData ->
            NormalSubItem(
                normalSubItemData.startText,
                endIcon = normalSubItemData.endIcon,
                onClick =
                if (onClick == null) null
                else { { onClick(index) } },
                endText = normalSubItemData.endText,
                modifier = Modifier.padding(bottom = if (!showAllDivider && index == itemList.lastIndex) 0.dp else itemPadding),
                startTextStyle = startTextStyle,
                endTextStyle = endTextStyle
            )
            if (showDivider && index != itemList.lastIndex) {
                Divider(modifier = Modifier.padding(bottom = itemPadding))
            }
        }
        if (showAllDivider) {
            Divider(modifier = Modifier.padding(bottom = itemPadding))
        }
        if (extraContent != null) {
            extraContent()
        }
    }
}

/**
 *
 * 用于承载 [NormalWithStartIconSubItem] 的模块,会将传入的所有 [NormalWithStartIconSubItem] 放入同一个 Card 中
 *
 * @param itemList 内容列表
 * @param modifier 承载这个 module 的父 composable 的 modifier
 * @param title 该模块标题
 * @param showDivider 是否在 item 之间显示分割线
 * @param showAllDivider 是否在第一个 item 之前 和 最后一个 item 之后显示分割线
 * @param backGroundColor 模块背景颜色
 * @param border 模块边框
 * @param elevation 模块高度(影响阴影深度)
 * @param itemPadding item 之间的 padding
 * @param textStyle 主文本样式
 * @param subTextStyle 辅助文本样式
 * @param cardShape 模块形状
 * @param titleStyle 标题样式
 * @param extraContent 额外的子定义内容,会在最后显示
 * @param onClick 点击回调,参数为点击的 item 索引
 * */
@Composable
fun NormalWithStartIconSubItemModule(
    itemList: List<NormalSubItemWithStartIconData>,
    modifier: Modifier = Modifier,
    title: String? = null,
    showDivider: Boolean = true,
    showAllDivider: Boolean = false,
    backGroundColor: Color = Color.Unspecified,
    border: BorderStroke? = null,
    elevation: Dp = 1.dp,
    itemPadding: Dp = 6.dp,
    isAlignIcon: Boolean = true,
    textStyle: TextStyle = MaterialTheme.typography.h6,
    subTextStyle: TextStyle = MaterialTheme.typography.body2,
    cardShape: Shape = MaterialTheme.shapes.medium,
    titleStyle: TextStyle = MaterialTheme.typography.h5,
    extraContent: (@Composable () -> Unit)? = null,
    onClick: ((clickNo: Int) -> Unit)? = null
) {
    ModuleItem(
        title = title,
        modifier = modifier,
        backGroundColor = backGroundColor,
        border = border,
        elevation = elevation,
        shape = cardShape,
        titleStyle = titleStyle
    ) {
        if (showAllDivider) {
            Divider(modifier = Modifier.padding(bottom = itemPadding))
        }
        itemList.forEachIndexed { index: Int, normalSubItemWithStartIconData: NormalSubItemWithStartIconData ->
            NormalWithStartIconSubItem(
                normalSubItemWithStartIconData.text,
                subText = normalSubItemWithStartIconData.subText,
                startIcon = normalSubItemWithStartIconData.startIcon,
                onClick =
                if (onClick == null) null
                else { { onClick(index) } },
                modifier = Modifier.padding(bottom = itemPadding),
                textStyle = textStyle,
                subTextStyle = subTextStyle,
                isAlignIcon = isAlignIcon
            )
            if (showDivider && index != itemList.lastIndex) {
                Divider(modifier = Modifier.padding(bottom = itemPadding))
            }
        }
        if (showAllDivider) {
            Divider(modifier = Modifier.padding(bottom = itemPadding))
        }
        if (extraContent != null) {
            extraContent()
        }
    }
}

data class NormalSubItemData(
    val startText: String,
    val endText: String? = null,
    val endIcon: (@Composable () -> Unit)? = null,
)

data class NormalSubItemWithStartIconData(
    val text: String,
    val subText: String? = null,
    val startIcon: (@Composable () -> Unit)? = null,
)
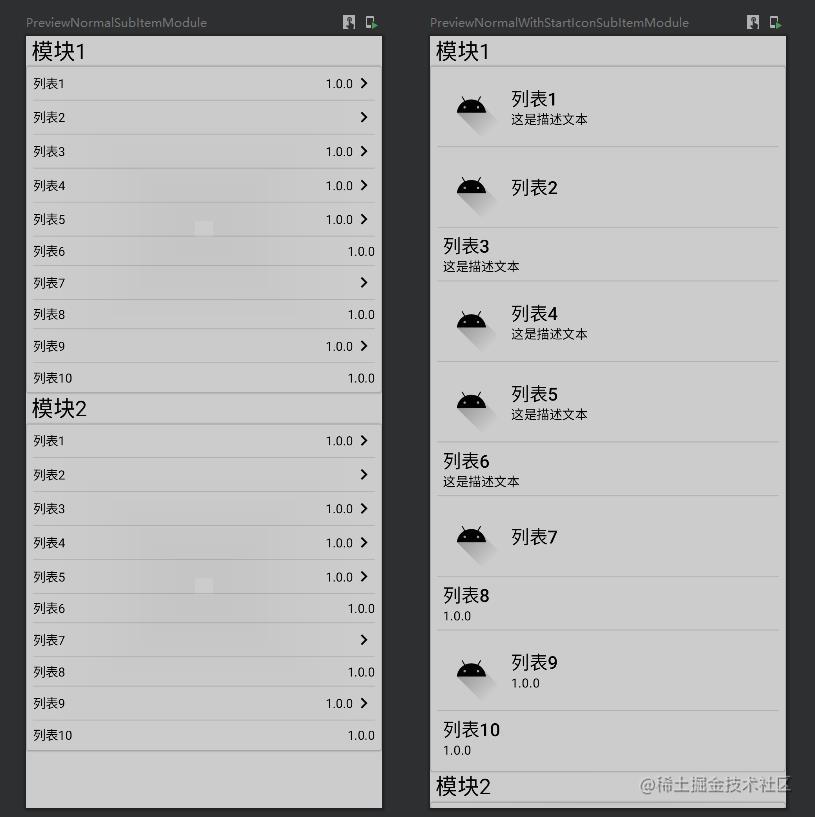
显示效果大致如下:
编写底部内容布局
前面说过,底部内容一般就是一些版权信息:
/**
 * 基础纯文本 item
 * */
@Composable
fun BaseTextItem(
    modifier: Modifier = Modifier,
    content: @Composable () -> Unit
) {
    Column(modifier.fillMaxWidth(), horizontalAlignment = Alignment.CenterHorizontally) {
        content()
    }
}

/**
 * 版权信息文本
 * */
@Composable
fun RightsTextItem(
    dateText: String,
    name: String,
    style: TextStyle = LocalTextStyle.current
) {
    Text(text = "Copyright © $dateText $name All Rights Reserved.", style = style)
}

/**
 * 可点击的链接文本
 * */
@Composable
fun LinkText(
    text: String,
    modifier: Modifier = Modifier,
    fontSize: TextUnit = 12.sp,
    color: Color = MaterialTheme.colors.primary,
    onClick: () -> Unit) {

    Text(
        text = text,
        color = color,
        fontSize = fontSize,
        modifier = modifier.noRippleClickable(onClick = onClick) )
}

/**
 * 没有点击涟漪效果的 Clickable
 * */
inline fun Modifier.noRippleClickable(crossinline onClick: ()->Unit): Modifier = composed {
    clickable(indication = null,
        interactionSource = remember { MutableInteractionSource() }) {
        onClick()
    }
}
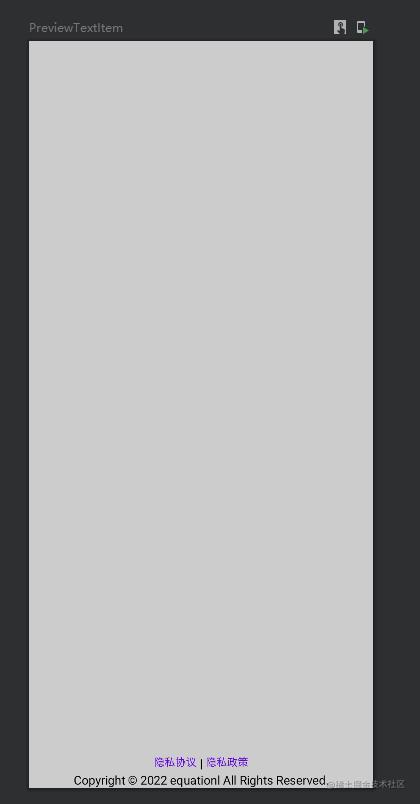
显示效果如下:
利用该框架快速仿写其他APP的关于页面
橙APP
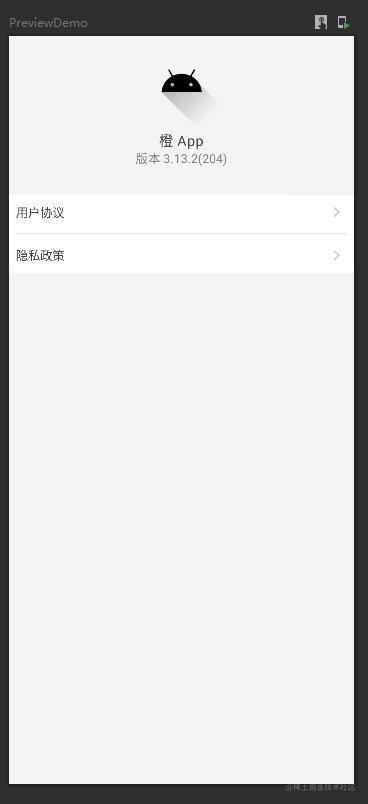
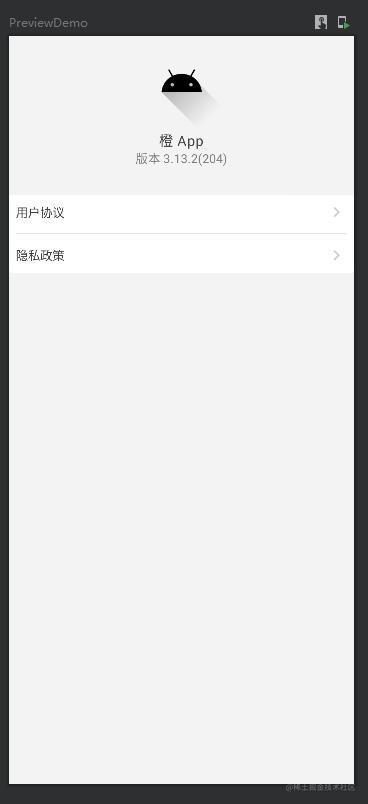
这个是最简单的,因为本身 橙APP 的关于页面就很简单,不过得益于我们的框架,几行代码就可以搞定,但是为了追求细节,所以加了很多自定义参数,显得好像代码还是挺多的,如果自己用的话,基本都是使用默认参数,那就真是几行代码搞定。
对了,因为为了避免不必要的麻烦,我没有用他们的图标,就随便找了些图标代替(我才不会告诉你是因为我懒得扒图呢)
仿写代码如下:
@Composable
fun AboutChengPager() {
    val list = remember {
        listOf(
            NormalSubItemData("用户协议", endIcon = endArrow),
            NormalSubItemData("隐私政策", endIcon = endArrow)
        )
    }

    Column(
        Modifier
            .fillMaxSize()
            .background(Color(0xFFF3F3F3))) {
        AboutScreen(
            topContent = {
                AppInfoVerticalItem(
                    iconPaint = painterResource(id = R.drawable.ic_launcher_foreground),
                    text = "橙 App",
                    subText = "版本 3.13.2(204)",
                    modifier = Modifier.padding(bottom = 32.dp),
                    textStyle = MaterialTheme.typography.body1.copy(color = Color(0xFF404040)),
                    subTextStyle = MaterialTheme.typography.body2.copy(color = Color(0xFF7F7F7F))
                )
            },
            mainContent = {
                NormalSubItemModule(
                    itemList = list,
                    backGroundColor = Color.White,
                    startTextStyle = LocalTextStyle.current.copy(color = Color(0xFF404040)),
                    itemPadding = 12.dp
                )
            }
        )
    }
}
仿照效果:
微信
@Composable
fun AboutWechatPager() {
    val list = remember {
        listOf(
            NormalSubItemData("功能介绍", endIcon = endArrow),
            NormalSubItemData("投诉", endIcon = endArrow),
            NormalSubItemData("检查新版本", endIcon = endArrow)
        )
    }

    Column(
        Modifier
            .fillMaxSize()
            .background(Color.White)) {
        AboutScreen(
            topContent = {
                AppInfoVerticalItem(
                    iconPaint = painterResource(id = R.drawable.ic_launcher_foreground),
                    text = "微信",
                    subText = "Version 8.0.27",
                    modifier = Modifier.padding(bottom = 32.dp, top=16.dp),
                    textStyle = MaterialTheme.typography.h6.copy(fontWeight = FontWeight.Black),
                    subTextStyle = MaterialTheme.typography.body2
                )
            },
            mainContent = {
                NormalSubItemModule(
                    itemList = list,
                    backGroundColor = Color.White,
                    modifier = Modifier.padding(horizontal = 16.dp),
                    border = BorderStroke(0.dp, Color.Transparent),
                    elevation = 0.dp,
                    showAllDivider = true,
                    itemPadding = 12.dp
                )
            },
            bottomContent = {
                BaseTextItem {
                    LinkText(text = "《软件许可及服务协议》", color = Color(0xFF5B6A81)) {}
                    Row {
                        LinkText(text = "《隐私保护指引摘要》", color = Color(0xFF5B6A81)) {}
                        LinkText(text = "《隐私保护指引》", color = Color(0xFF5B6A81)) {}
                    }
                    Text(text = "客服电话:400 670 0700", color = Color(0xFFB1B1B1))
                    Text(text = "腾讯公司 版权所有", color = Color(0xFFB1B1B1))
                    RightsTextItem(
                        dateText = "2011-2022",
                        name = "Tencent.",
                        style = LocalTextStyle.current.copy(color = Color(0xFFB1B1B1))
                    )
                }
            },
            keepBottomInBottom = true
        )
    }
}
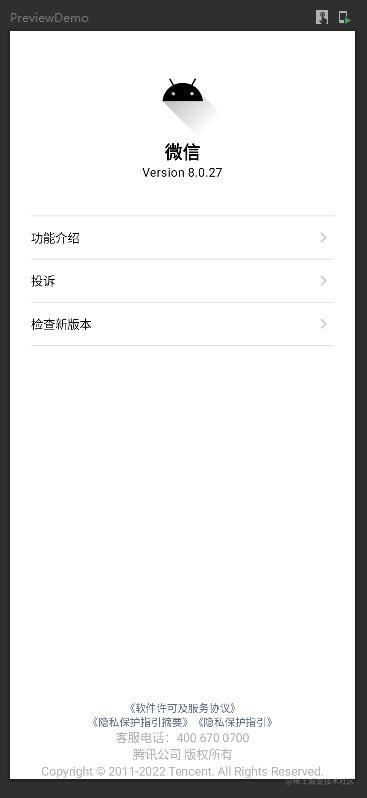
效果如下:
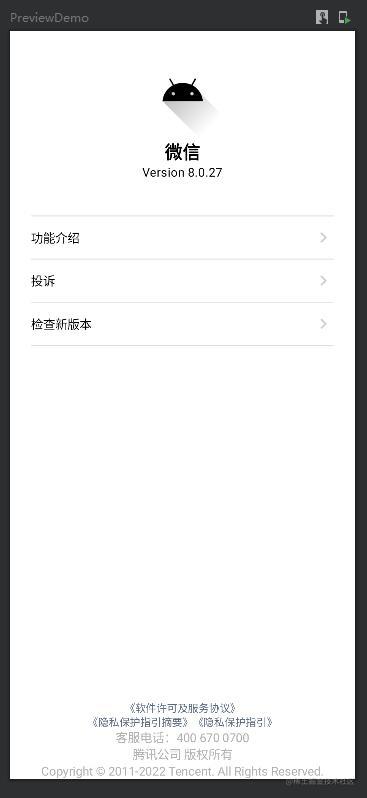
微信的关于页相对于常规关于页,它去掉了中间内容模块的边框,增加了两条分割线,所以在仿写时我们需要设置参数:
NormalSubItemModule(
    itemList = list,
    backGroundColor = Color.White,
    modifier = Modifier.padding(horizontal = 16.dp),
    border = BorderStroke(0.dp, Color.Transparent), // 设置边框线宽为0,颜色为透明,即隐藏边框
    elevation = 0.dp, // 设置高度为 0, 即不要阴影
    showAllDivider = true, // 开启显示所有分割线
    itemPadding = 12.dp
)
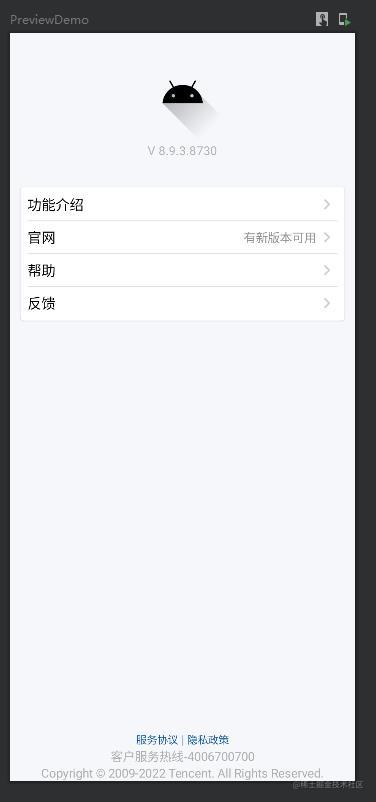
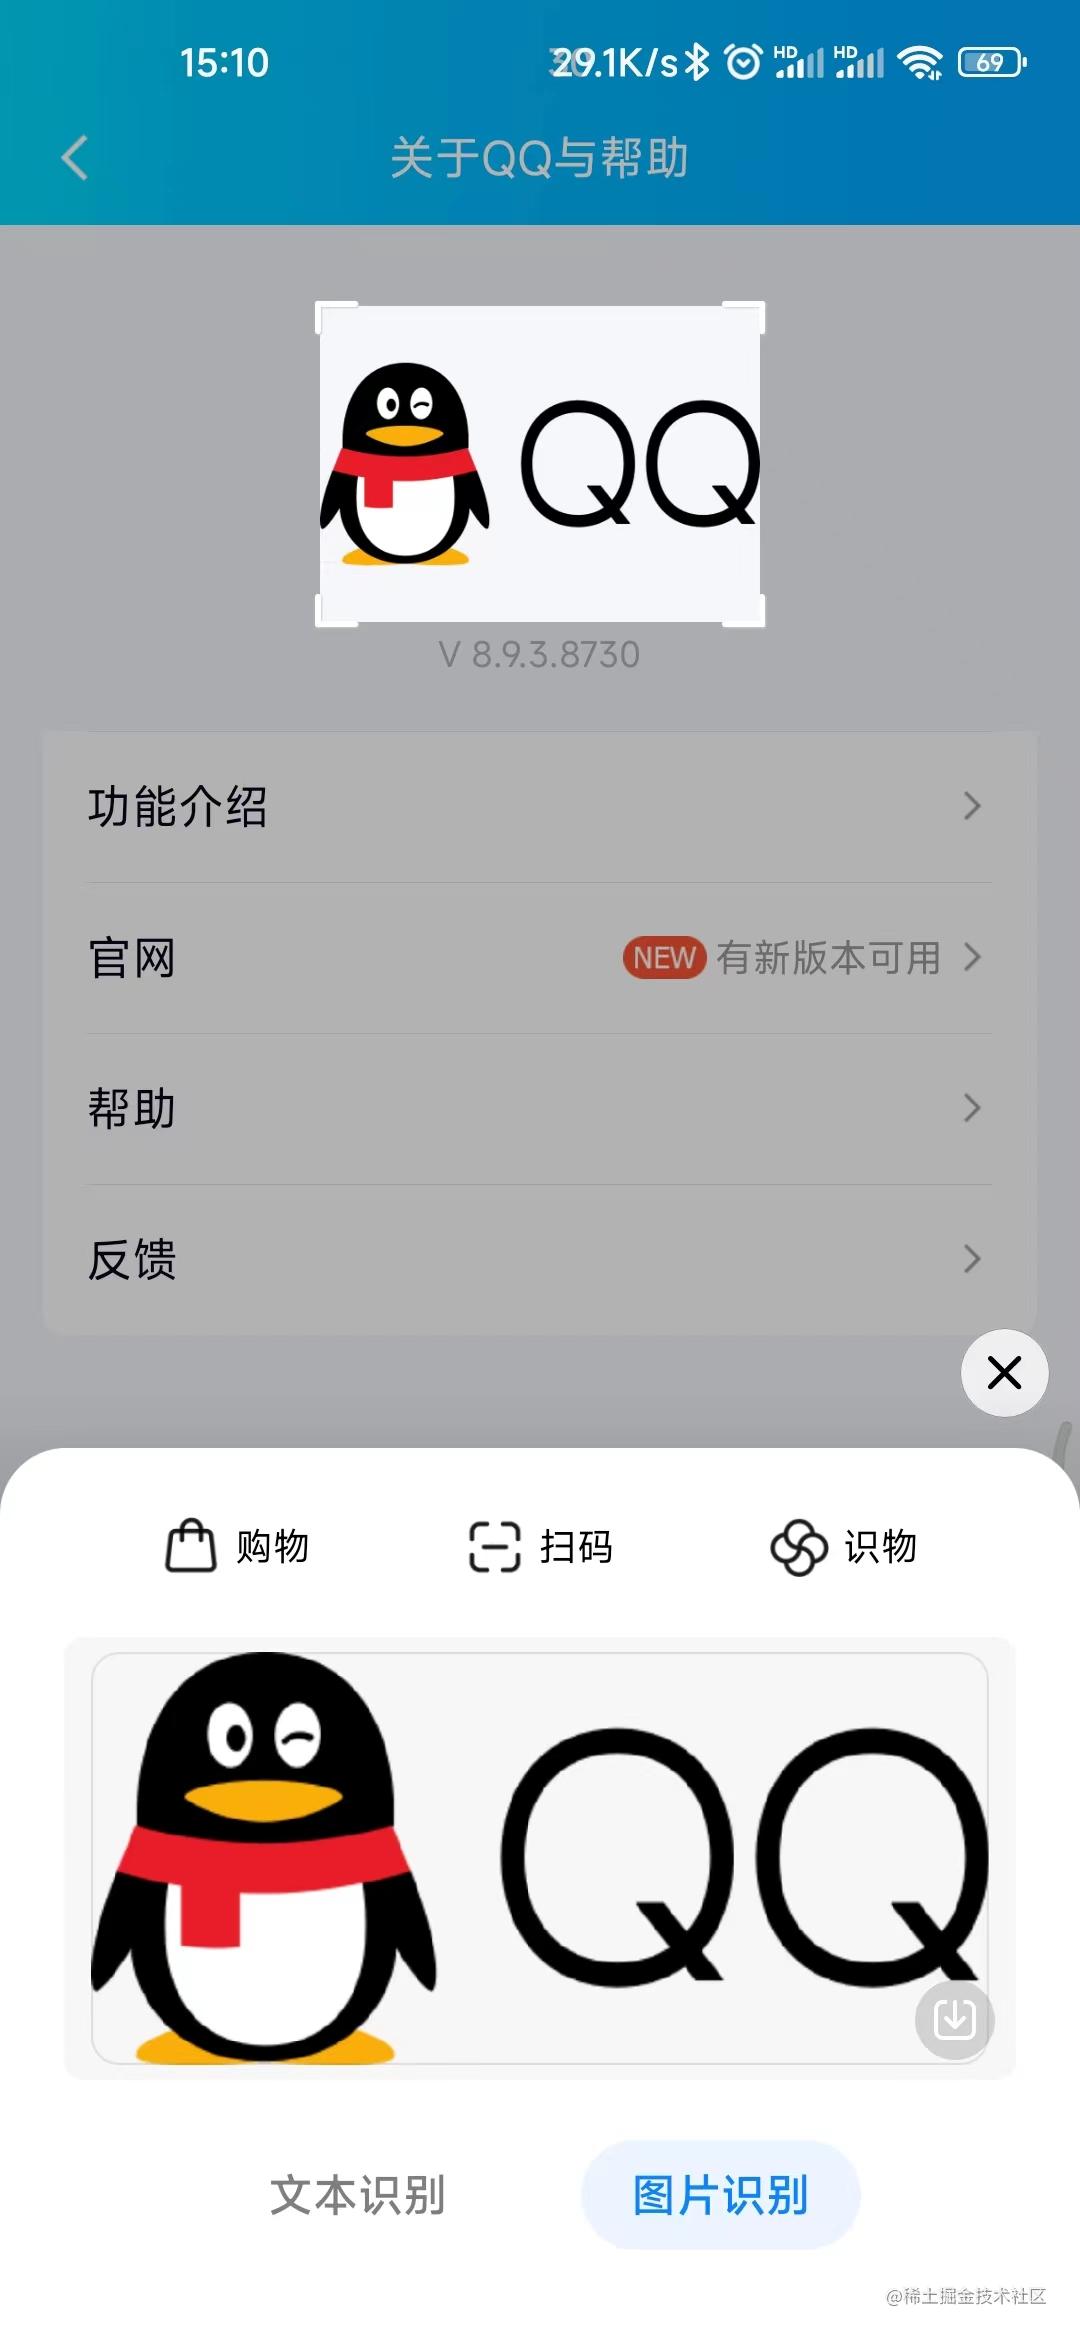
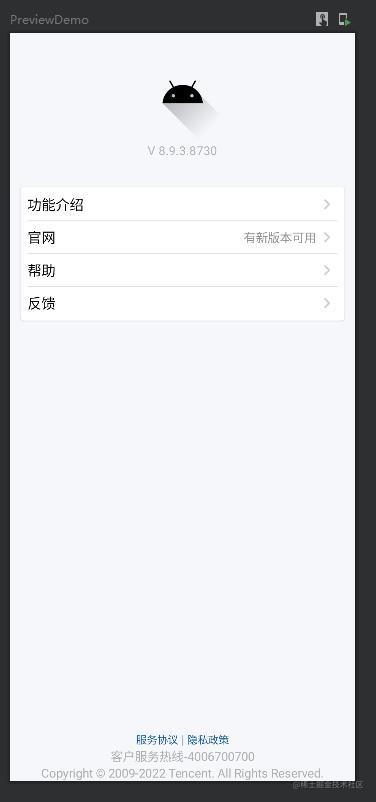
QQ的关于页与常规有两点不同:
- 主内容列表有辅助文本和图标
- 头部内容的图标和文字是横着排的?
关于第一点,框架本身就支持添加辅助文本,例如本例中的,为 “官网” 这个 item 添加辅助文本 “有新版本可用”。但是不支持添加额外的图标,不过这个页好解决,因为我们的 endIcon 接收的是一个 composable , 也就是说,你可以自己随意添加内容。这里我们就不演示了。
关于第二点,其实,它只是一个单张的图片而已,不信你看:
仿写代码如下:
@Composable
fun AboutQqPager() {
    val list = remember {
        listOf(
            NormalSubItemData("功能介绍", endIcon = endArrow),
            NormalSubItemData("官网", endIcon = endArrow, endText = "有新版本可用"),
            NormalSubItemData("帮助", endIcon = endArrow),
            NormalSubItemData("反馈", endIcon = endArrow)
        )
    }

    Column(
        Modifier
            .fillMaxSize()
            .background(Color(0xFFF6F7FB))) {
        AboutScreen(
            topContent = {
                AppInfoVerticalItem(
                    iconPaint = painterResource(id = R.drawable.ic_launcher_foreground),
                    subText = "V 8.9.3.8730",
                    modifier = Modifier.padding(bottom = 32.dp, top=16.dp),
                    subTextStyle = MaterialTheme.typography.body2.copy(color = Color(0xFFB3B3BD))
                )
            },
            mainContent = {
                NormalSubItemModule(
                    itemList = list,
                    backGroundColor = Color.White,
                    modifier = Modifier
                        .padding(horizontal = 12.dp)
                        .padding(bottom = 6.dp),
                    startTextStyle = LocalTextStyle.current.copy(fontSize = 16.sp),
                    endTextStyle = LocalTextStyle.current.copy(color = Color(0xFF939393)),
                    border = BorderStroke(width = 0.dp, color = Color.Transparent)
                )
            },
            bottomContent = {
                BaseTextItem {
                    Row(verticalAlignment = Alignment.CenterVertically) {
                        LinkText(text = "服务协议", color = Color(0xFF115AA9)) {}

                        Text(text=" | ", color = Color(0xFF5A9CD9))

                        LinkText(text = "隐私政策", color = Color(0xFF115AA9)) {}
                    }
                    Text(text = "客户服务热线-4006700700", color = Color(0xFFAFAFAF))
                    RightsTextItem(
                        dateText = "2009-2022",
                        name = "Tencent.",
                        style = LocalTextStyle.current.copy(color = Color(0xFFAFAFAF))
                    )
                }
            },
            keepBottomInBottom = true
        )
    }
}
效果如下:
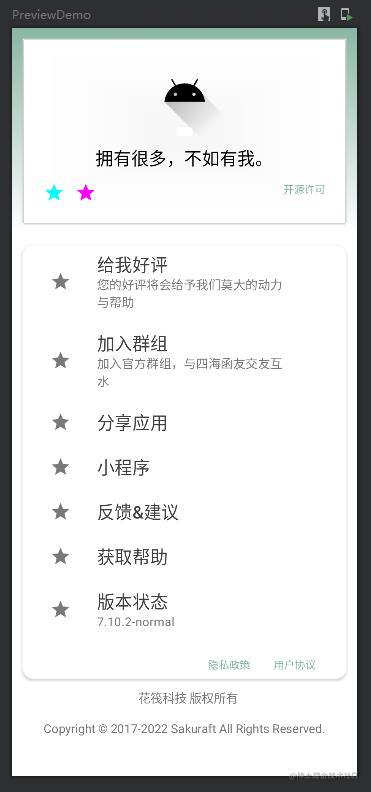
一个木函
一个木函的问题在于,它的头部不同于其他的所有关于页,所以这里我们直接手写。并且,它的头部布局还有一个渐变背景色,不过没关系,我们几乎为框架的每一个 composable 都预留了 modifier 参数,所以实现起来同样很简单。
而它的中间内容末尾又添加了两个按钮,显然不是常规 item,不过没关系,我们预留了 extraContent
代码如下:
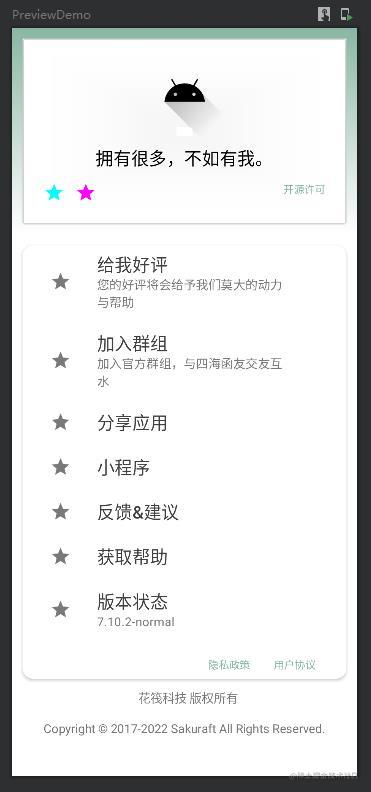
@Composable
fun AboutBoxPager() {
    val list = remember {
        listOf(
            NormalSubItemWithStartIconData("给我好评", subText = "您的好评将会给予我们莫大的动力与帮助", startIcon = boxSampleIcon),
            NormalSubItemWithStartIconData("加入群组", subText = "加入官方群组,与四海函友交友互水", startIcon = boxSampleIcon),
            NormalSubItemWithStartIconData("分享应用", startIcon = boxSampleIcon),
            NormalSubItemWithStartIconData("小程序", startIcon = boxSampleIcon),
            NormalSubItemWithStartIconData("反馈&建议", startIcon = boxSampleIcon),
            NormalSubItemWithStartIconData("获取帮助", startIcon = boxSampleIcon),
            NormalSubItemWithStartIconData("版本状态", subText = "7.10.2-normal", startIcon = boxSampleIcon)
        )
    }

    Column(
        Modifier
            .fillMaxSize()
            .background(Color.White)) {
        AboutScreen(
            topContent = {
                Column(
                    modifier = Modifier.background(
                        brush = Brush.verticalGradient(
                            listOf(
                                Color(0xFF89B6A2),
                                Color.White
                            )
                        )
                    )
                ) {
                    ModuleItem(
                        modifier = Modifier
                            .padding(12.dp)
                            .background(Color.White)) {
                        Column(modifier = Modifier.padding(bottom = 16.dp)) {
                            Row(Modifier.fillMaxWidth(), horizontalArrangement = Arrangement.Center) {
                                Icon(painter = painterResource(id = R.drawable.ic_launcher_foreground), contentDescription = "logo")
                            }
                            BaseTextItem {
                                Text(
                                    text = "拥有很多,不如有我。",
                                    Modifier.padding(vertical = 6.dp),
                                    style = MaterialTheme.typography.h6
                                )
                            }
                            Row(
                                Modifier
                                    .fillMaxWidth()
                                    .padding(top = 8.dp), horizontalArrangement = Arrangement.SpaceBetween) {
                                Row {
                                    Icon(
                                        imageVector = Icons.Outlined.Star,
                                        contentDescription = "star",
                                        modifier = Modifier.padding(start = 16.dp, end=12.dp),
                                        tint = Color.Cyan
                                    )

                                    Icon(
                                        imageVector = Icons.Outlined.Star,
                                        contentDescription = "star",
                                        tint = Color.Magenta
                                    )
                                }
                                LinkText(
                                    text = "开源许可",
                                    modifier = Modifier.padding(end = 16.dp),
                                    color = Color(0xFF89B6A2)
                                ) {}
                            }
                        }
                    }
                }
            },
            mainContent = {
                NormalWithStartIconSubItemModule(
                    itemList = list,
                    modifier = Modifier.padding(12.dp),
                    backGroundColor = Color.White,
                    showDivider = false,
                    elevation = 2.dp,
                    itemPadding = 24.dp,
                    textStyle = MaterialTheme.typography.h6.copy(color = Color(0xFF404040)),
                    subTextStyle = MaterialTheme.typography.body2.copy(color = Color(0xFF797979)),
                    cardShape = RoundedCornerShape(12.dp), // 定义模块框的形状,这里使用圆角,且圆角大小为 12 dp
                    extraContent = {
                        Row(
                            Modifier
                                .fillMaxWidth()
                                .padding(top = 8.dp), horizontalArrangement = Arrangement.End) {
                            Row(Modifier.fillMaxWidth(0.5f), horizontalArrangement = Arrangement.SpaceEvenly) {
                                LinkText(text = "隐私政策", color = Color(0xFF89B6A2)) { }
                                LinkText(text = "用户协议", color = Color(0xFF89B6A2)) { }
                            }
                        }
                    }
                )
            },
            bottomContent = {
                BaseTextItem {
                    Text(
                        text = "花筏科技 版权所有",
                        modifier = Modifier.padding(bottom = 16.dp, start = 8.dp),
                        color = Color(0xFF797979)
                    )
                    RightsTextItem(
                        dateText = "2017-2022",
                        name = "Sakuraft",
                        style = LocalTextStyle.current.copy(color = Color(0xFF797979))
                    )
                }
            }
        )
    }
}
效果如下:
LibChecker
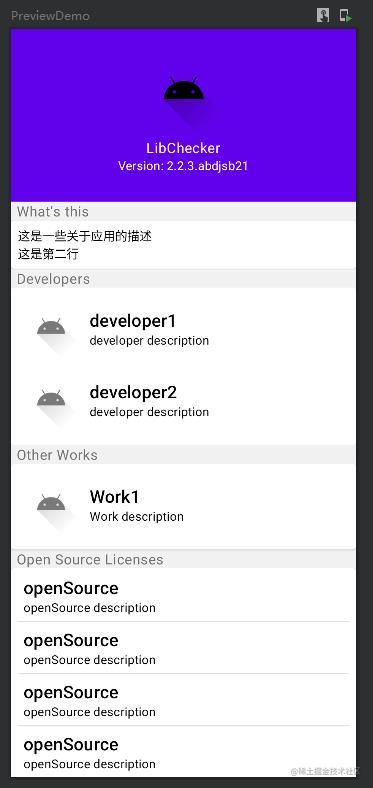
LibChecker 也很简单,唯一一个不同的地方是只有它使用到了模块标题。
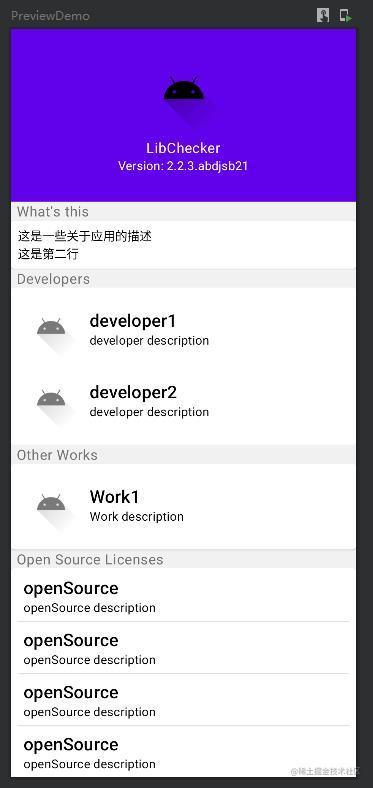
并且它在某些模块中没有显示 item 列表,而是直接显示纯文本,这个问题也不大,传一个空列表进去再通过 extraContent 自定义文本即可:
@Composable
fun AboutLibPager() {
    val sampleIcon = @Composable {
        Row(modifier = Modifier.fillMaxWidth(), horizontalArrangement = Arrangement.Center) {
            Icon(painter = painterResource(id = R.drawable.ic_launcher_foreground), contentDescription = "icon", tint = Color(0xFF797979))
        }
    }

    val developerList = remember {
        listOf(
            NormalSubItemWithStartIconData("developer1", subText = "developer description", startIcon = sampleIcon),
            NormalSubItemWithStartIconData("developer2", subText = "developer description", startIcon = sampleIcon),
        )
    }

    val otherWorkList = remember {
        listOf(
            NormalSubItemWithStartIconData("Work1", subText = "Work description", startIcon = sampleIcon),
        )
    }

    val contributorList = remember {
        listOf(
            NormalSubItemWithStartIconData("contributorList", subText = "contributorList description", startIcon = sampleIcon)
        )
    }

    val openSourceList = remember {
        listOf(
            NormalSubItemWithStartIconData("openSource", subText = "openSource description"),
            NormalSubItemWithStartIconData("openSource", subText = "openSource description"),
            NormalSubItemWithStartIconData("openSource", subText = "openSource description"),
            NormalSubItemWithStartIconData("openSource", subText = "openSource description"),
            NormalSubItemWithStartIconData("openSource", subText = "openSource description"),
        )
    }

    Column(
        Modifier
            .fillMaxSize()
            .background(Color(0xFFF1F1F1))) {
        AboutScreen(
            topContent = {
                AppInfoVerticalItem(
                    iconPaint = painterResource(id = R.drawable.ic_launcher_foreground),
                    text = "LibChecker",
                    subText = "Version: 2.2.3.abdjsb21",
                    modifier = Modifier
                        .background(Color(0xFF6101EB))
                        .padding(bottom = 32.dp, top = 16.dp),
                    textStyle = MaterialTheme.typography.body1.copy(color = Color.White),
                    subTextStyle = MaterialTheme.typography.body2.copy(color = Color.White),
                )
            },
            mainContent = {
                NormalSubItemModule(
                    itemList = listOf(),
                    title = "What's this",
                    backGroundColor = Color.White,
                    titleStyle = MaterialTheme.typography.body1.copy(color = Color(0xFF737373)),
                    extraContent = {
                        Text(text = "这是一些关于应用的描述\n这是第二行")
                    }
                )

                NormalWithStartIconSubItemModule(
                    itemList = developerList,
                    title = "Developers",
                    titleStyle = MaterialTheme.typography.body1.copy(color = Color(0xFF737373)),
                    backGroundColor = Color.White,
                    showDivider = false
                )

                NormalWithStartIconSubItemModule(
                    itemList = otherWorkList,
                    title = "Other Works",
                    titleStyle = MaterialTheme.typography.body1.copy(color = Color(0xFF737373)),
                    backGroundColor = Color.White,
                    showDivider = false
                )

                // 下面这些其实就是重复组件,为了能够一屏显示完,这里给注释掉

                /*NormalWithStartIconSubItemModule(
                    itemList = contributorList,
                    title = "Contribution",
                    titleStyle = MaterialTheme.typography.body1.copy(color = Color(0xFF737373)),
                    backGroundColor = Color.White,
                    showDivider = false
                )*/

                /*NormalSubItemModule(
                    itemList = listOf(),
                    title = "Acknowledgement",
                    titleStyle = MaterialTheme.typography.body1.copy(color = Color(0xFF737373)),
                    backGroundColor = Color.White,
                    extraContent = {
                        Text(text = "这是一些关于版权的描述:\n第二行")
                    }
                )*/

                /*NormalSubItemModule(
                    itemList = listOf(),
                    title = "Declaration",
                    titleStyle = MaterialTheme.typography.body1.copy(color = Color(0xFF737373)),
                    backGroundColor = Color.White,
                    extraContent = {
                        Text(text = "这是一些声明")
                    }
                )*/

                NormalWithStartIconSubItemModule(
                    itemList = openSourceList,
                    titleStyle = MaterialTheme.typography.body1.copy(color = Color(0xFF737373)),
                    title = "Open Source Licenses",
                    backGroundColor = Color.White,
                    isAlignIcon = false
                )
            }
        )
    }
}
效果如下:
demo地址
还没来得及传 github ,待会儿传完我放评论区
