本博客地址:https://security.blog.csdn.net/article/details/130734964
一、GitLab安装
GitLab是一个用于仓库管理系统的开源项目,使用Git作为代码管理工具,并在此基础上搭建Web服务,可通过Web界面访问公开的或者私人的项目。它拥有与GitHub类似的功能,能够浏览源代码,管理缺陷和注释,也可以自定义流水线(pipeline),在流水线中配置CI/CD以及集成软件质量测试和安全测试工具。
安装环境:CentOS
安装要求:内存大于2GB
安装GitLab:
yum install openssh-server
yum install postfix
lokkit -s http -s ssh
curl https://packages.gitlab.com/install/repositories/gitlab/gitlab-ee/script.rpm.sh | sudo bash
yum install -y gitlab-ee
配置GitLab(可选项):
vim /etc/gitlab/gitlab.rb
--------------------------------------------------------------------

# GitLab默认会占用80、8080和9090端口,为避免冲突可以改默认端口
# 修改以下<>中的值:
external_url 'http://<IP>:<端口>'
unicorn['port'] = <8080>
prometheus['listen_address'] = 'localhost:<9090>'
修改完后重新配置:
gitlab-ctl reconfigure
其他操作:
# 查看安装后的程序运行情况
gitlab-ctl status

# 重启Gitlab服务
gitlab-ctl restart

# 启动Gitlab
gitlab-ctl start

# 关闭Gitlab
gitlab-ctl stop
打开对应端口:
# 查看防火墙的状态;
firewall-cmd --state

# 如果上一步处于关闭状态:
systemctl start firewalld.service

# 开启8081端口(因为我这里设置的是8081):
firewall-cmd --zone=public --add-port=8081/tcp --permanent

# 重启防火墙:
systemctl restart firewalld.service

#重新载入配置:
firewall-cmd --reload
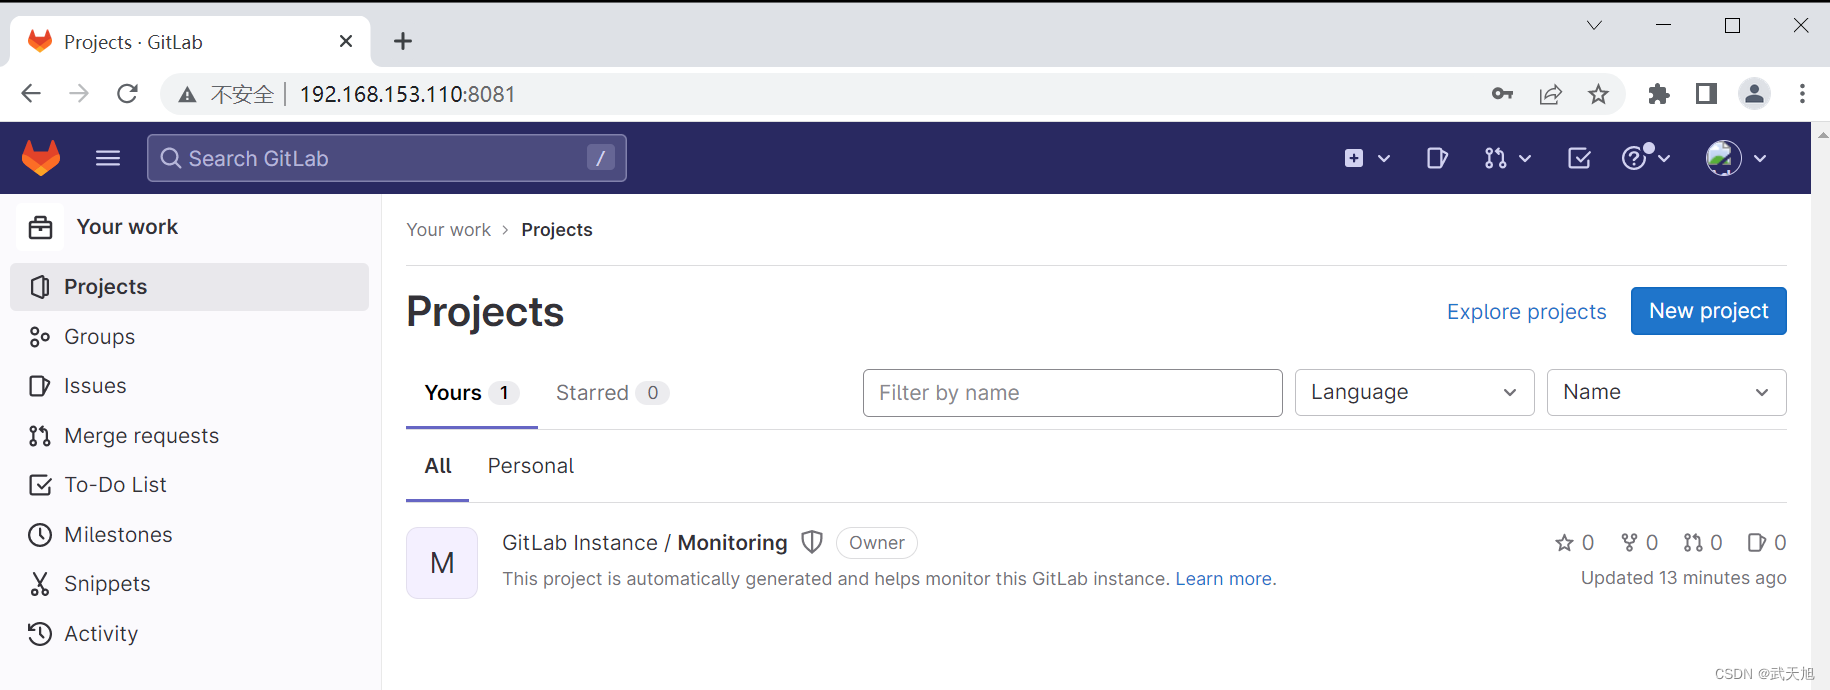
登录GitLab,用户名是root,初始密码保存在/etc/gitlab/initial_root_password文件中
二、创建pipeline
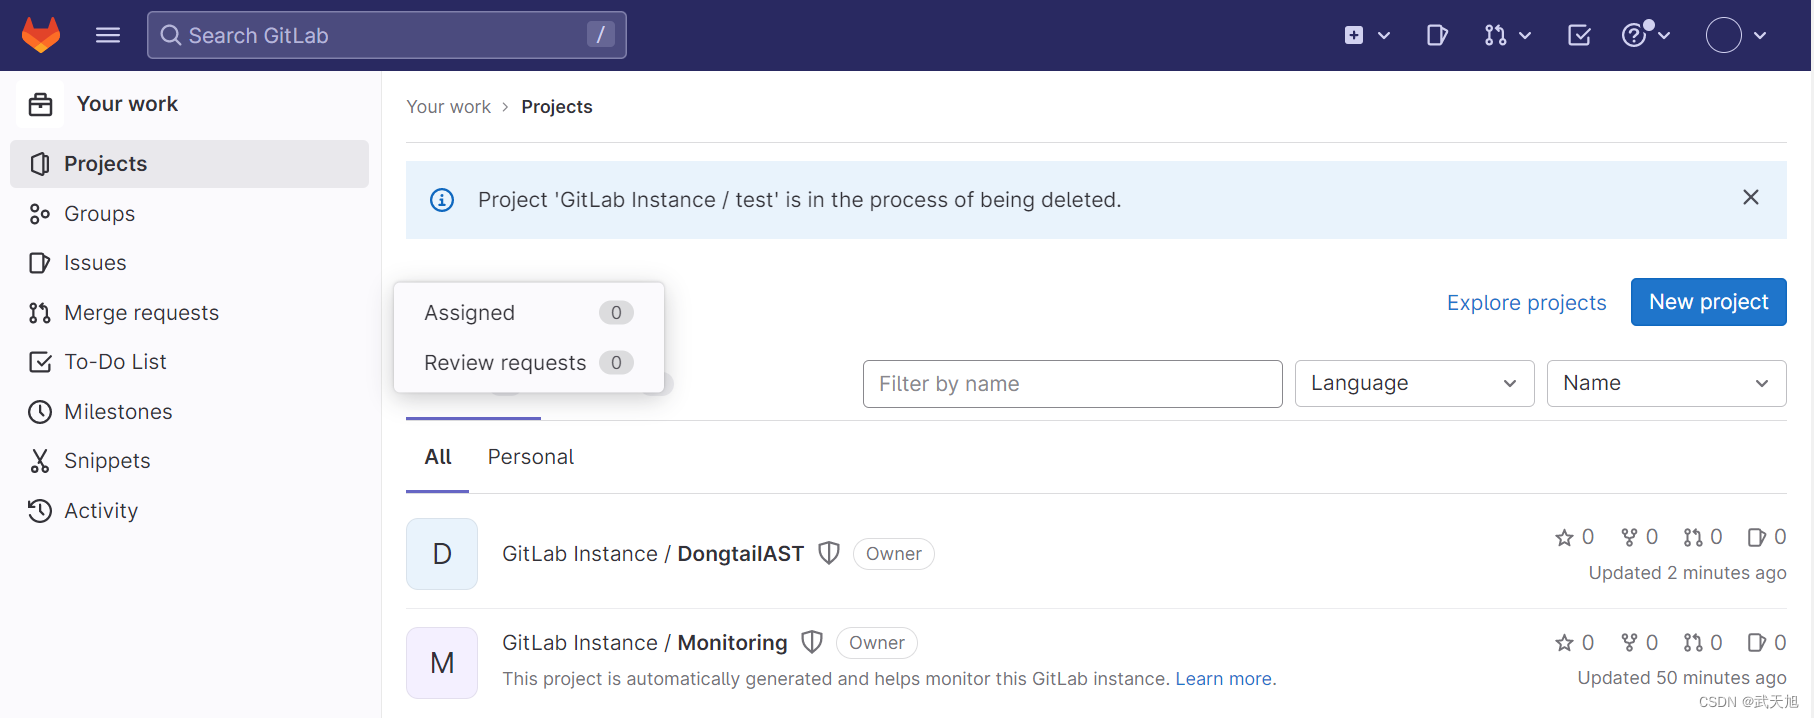
1、先创建或导入一个Project
2、创建Pipeline
单击(CI/CD)下拉菜单中的(Editor)选项进入(Editor)页面,根据pipeline模板创建一条流水线。在默认模板中,新建的流水线有构建(Build)、测试(Test)、交付(Deploy)三个阶段。
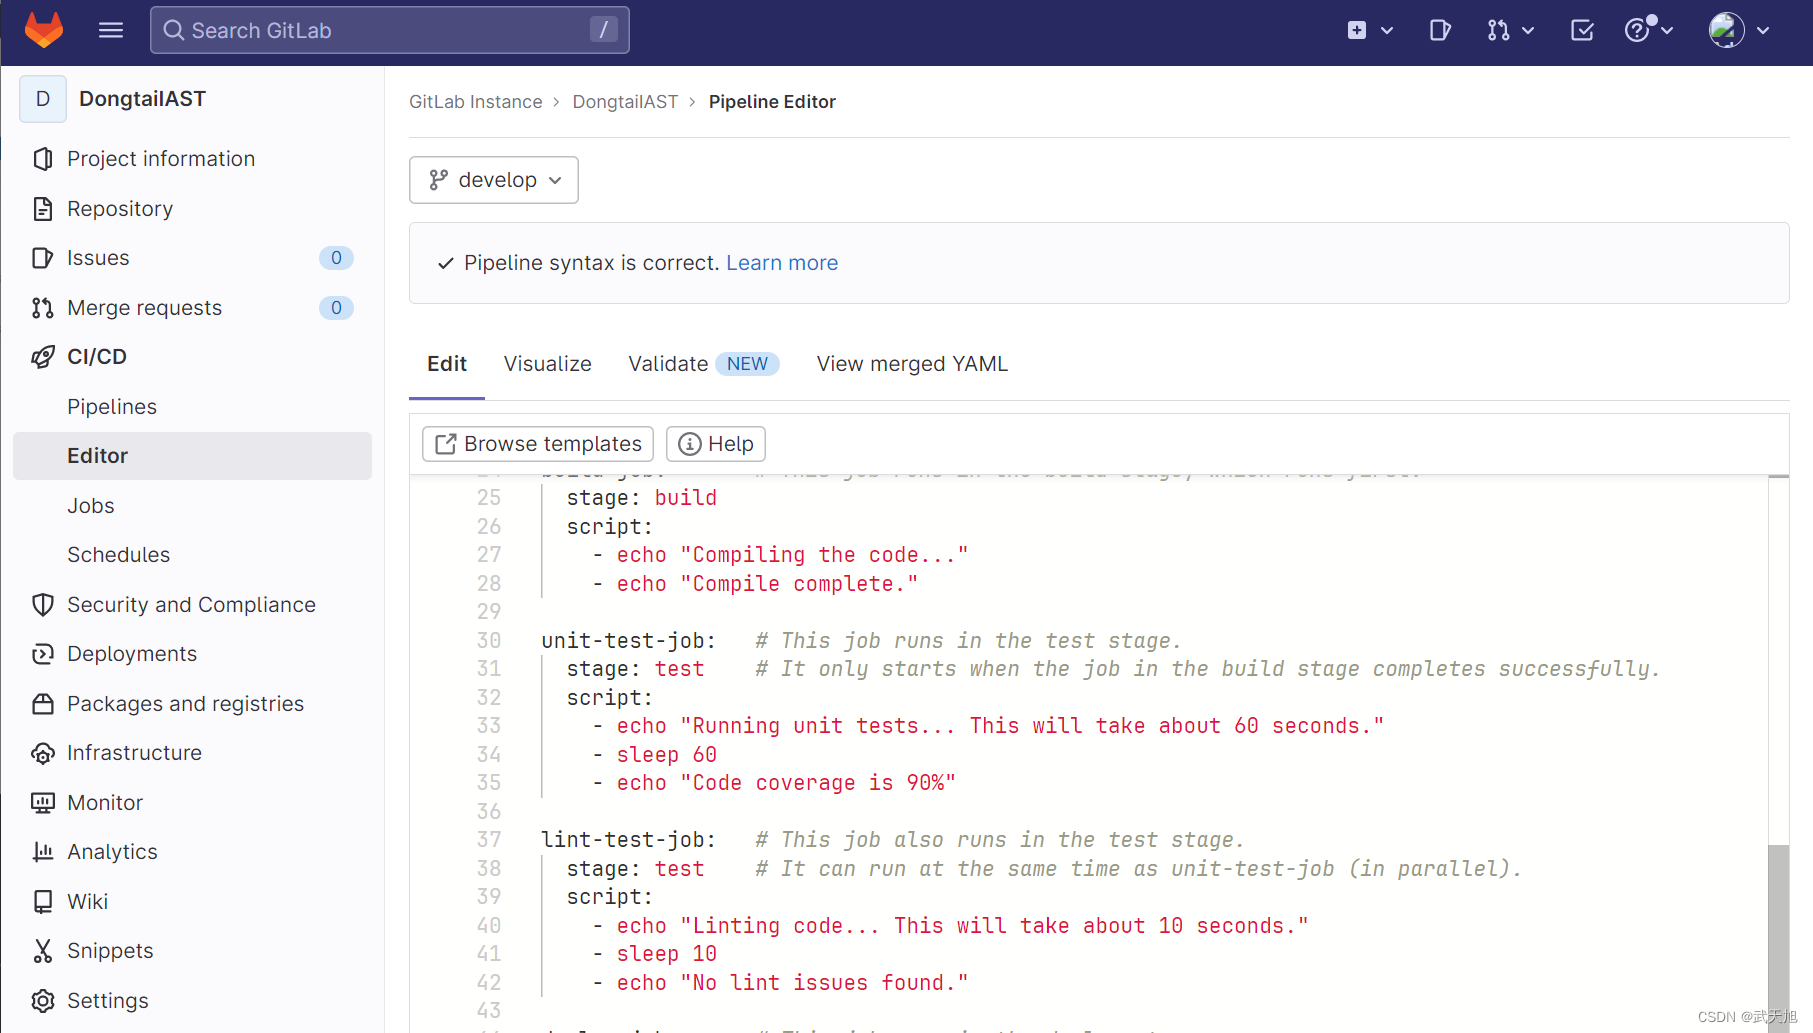
具体每个阶段干什么可以通过pipeline进行配置,因为整个过程需要在服务器上编译、打包等等,单靠gitlab server是不能完成这个事情的,要让这个pipeline真正地运行起来,需要在服务器上创建一个GitLab runner,并把GitLab runner注册到GitLab server上,这样GiTlab Server的pipeline就可以使用runner来执行任务了。
安装gitlab runner并绑定:
curl -L --output /usr/local/bin/gitlab-runner https://gitlab-runner-downloads.s3.amazonaws.com/latest/binaries/gitlab-runner-linux-amd64
chmod +x /usr/local/bin/gitlab-runner
useradd --comment 'GitLab Runner' --create-home gitlab-runner --shell /bin/bash
gitlab-runner install --user=gitlab-runner --working-directory=/home/gitlab-runner
/usr/local/bin/gitlab-runner install --user=gitlab-runner --working-directory=/home/gitlab-runner
/usr/local/bin/gitlab-runner start
# registration-token在gitlab的界面上查看获取,路径是 project/setting/CICD/Runners
/usr/local/bin/gitlab-runner register --url http://192.168.153.110:8081/ --registration-token GR1348941nYaiLm7--Hn7HeiRT8W3
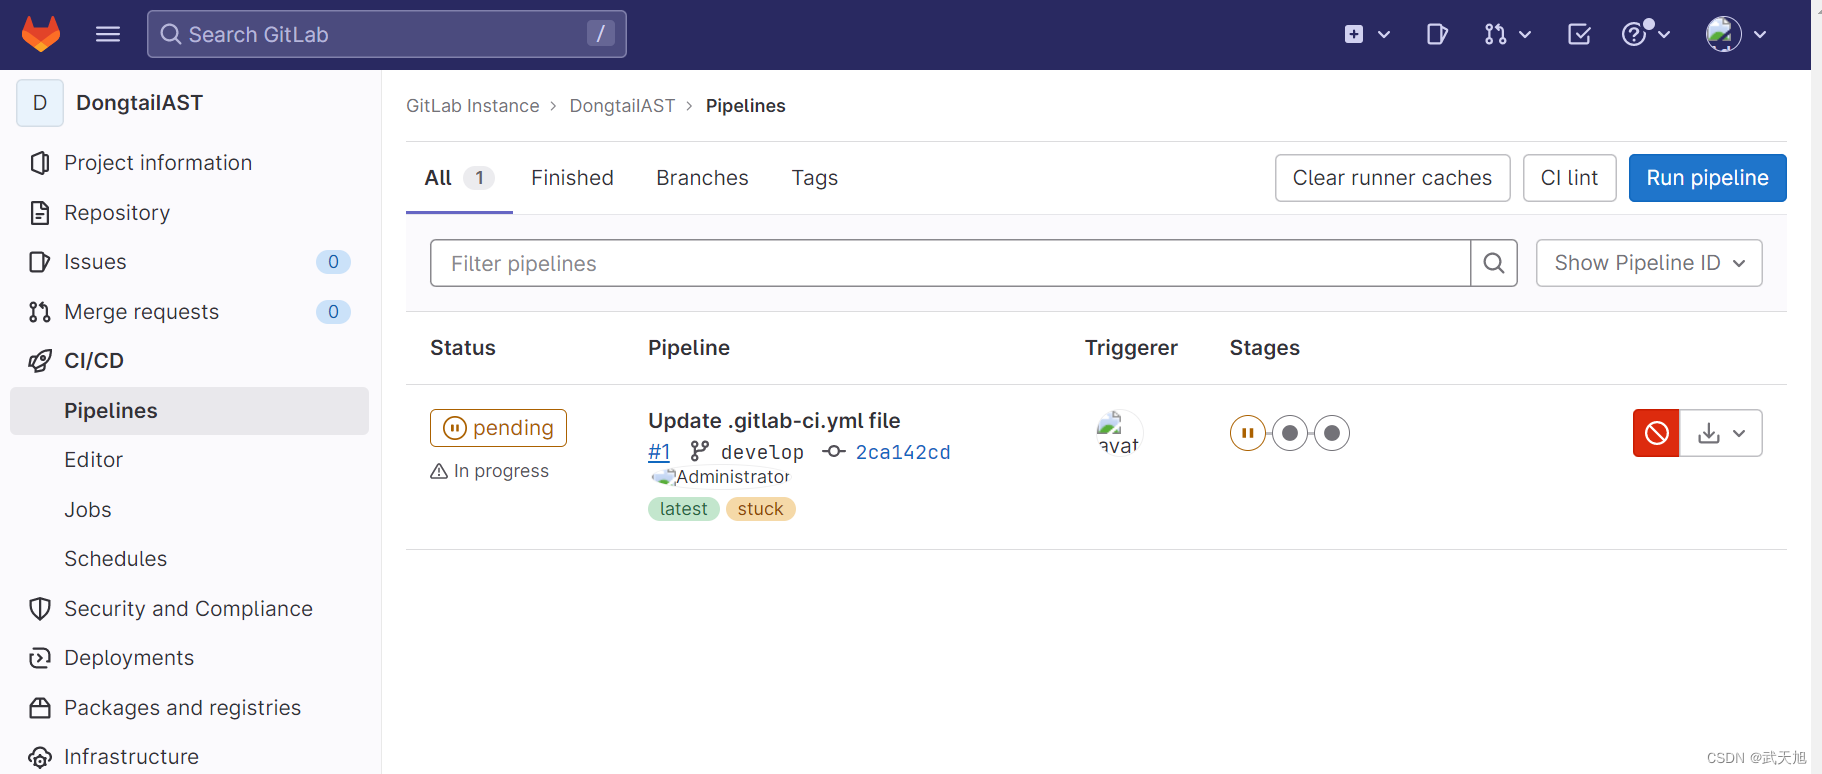
完成gitlab runner的注册之后,就可以执行pipeline了,如下所示:
三、Gitlab与ZAP集成
ZAP(Zed Attack Proxy)是一个动态的应用安全测试工具。我们这里通过GitLab流水线自动触发,并生成安全测试报告,之后GitLab对其进行评估,以确定目标分支之间已发现的安全漏洞
ZAP安装:
# ZAP依赖于Java11,先安装Java11
yum install java-11-openjdk.x86_64
wget https://github.com/zaproxy/zaproxy/releases/download/v2.12.0/ZAP_2_12_0_unix.sh
# 在这一步安装过程中,根据提示输入ZAP配置参数
sh ZAP_2_12_0_unix.sh
ZAP命令工具安装:
# 创建ZAP的目录链接,zap-cli默认从/zap路径下寻找zap.sh工作脚本
ln -s /opt/zaproxy/ /zap
dnf install python3
pip3 install --upgrade zapcli
通过zap-cli对应用进行扫描:
zap-cli --verbose quick-scan -sc --start-options '-config api.disablekey=true' http://192.168.153.110:31874/

如果需要自动触发扫描,就要将ZAP与GitLab进行集成,在GitLab pipeline中增加一个阶段,在这个阶段中运行ZAP安全扫描。这样在每次自动化构建生成应用镜像后,GitLab流水线自动将应用部署在云原生环境中,并自动运行ZAP安全测试,最后生成安全测试报告。这样就实现了自动化的代码集成、编译构建、应用部署和安全测试。
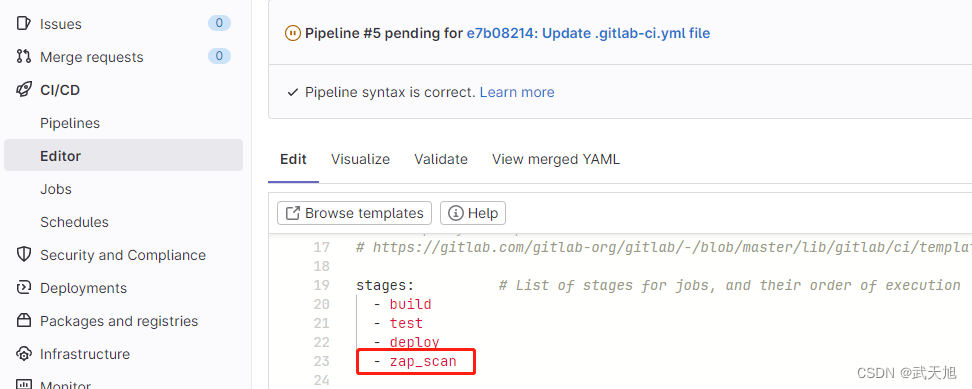
由于扫描对针对运行起来的服务,所以扫描的执行阶段配置在deploy阶段之后:
配置zap_scan阶段的执行脚本:
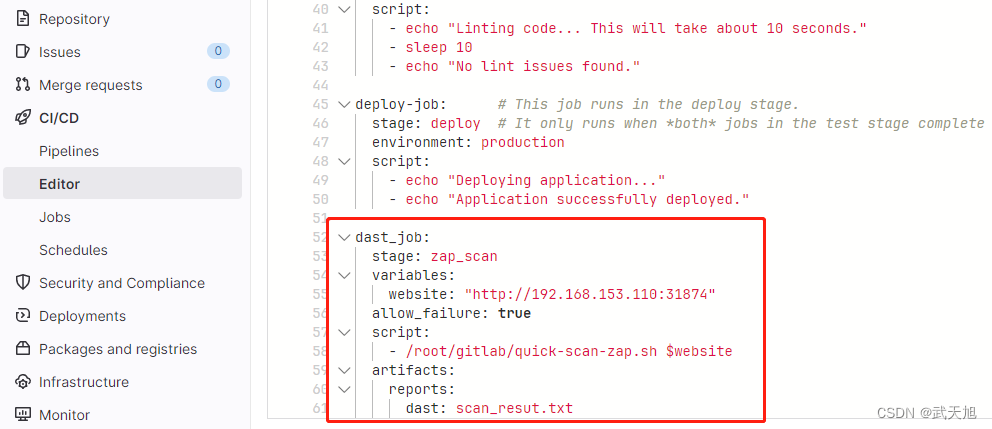
将sh脚本放在:/root/gitlab/quick_scan-zap.sh,脚本内容如下:
! /bin/bash
zap-cli --verbose quick-scan -sc --start-options '-config api.disablekey=true' $1 -l Informational | tee scan_result.txt; alerts=cat scan_result.txt | grep 'High | Critical' | (wc -l);
echo $alerts
Get Results
if [ $alerts -gt 0 ]; then
  echo "$alerts findings.Build failing"
  exit 1
else
  exit 0
  echo "success -no findings identified"
fi
此时,在GitLab运行pipeline,运行完成之后,就可以看到ZAP的扫描结果了
四、Gitlab与SonarQube集成
SonarQube是主流的自动代码审计工具,可检测代码中的错误和漏洞。它支持包括Java、Python、Golang、C在内的几十种编程语言的代码质量管理与检测。同时SonarQube也可以与CI/CD流水线集成,在项目进行过程中连续地执行代码检查。
依赖环境安装:
# SonarQube依赖于Java11,先安装Java11
yum install java-11-openjdk.x86_64

# SonarQube依赖于ElasticSearch,切换为非root账号来启动
安装教程:https://blog.csdn.net/xionglangs/article/details/123789875
SonarQube安装:
# 先下载SonarQube的软件包,然后解压
wget https://binaries.sonarsource.com/Distribution/sonarqube/sonarqube-9.9.1.69595.zip
unzip sonarqube-9.9.1.69595.zip
cd sonarqube-9.9.1.69595/bin/linux-x86-64/
./sonar.sh start
安装完成之后,SonarQube就可以运行了。
接下来需要将SonarQube与GitLab进行集成,这样就可以从GitLab流水线发起自动化代码扫描任务,与前面集成ZAP类似,pipeline脚本如下:
stages:
  - build
  - test
  - sonar_check
  - deploy
  - zap_scan
......
sonarqube-analysis:
  stage: sonar_check
  script:
    - /home/gitlab/sonar_analyze.sh
    - sleep 10
  only:
    - master
至此,我们就实现了Gitlab与SonarQube的集成。
