Spring6.0新特性
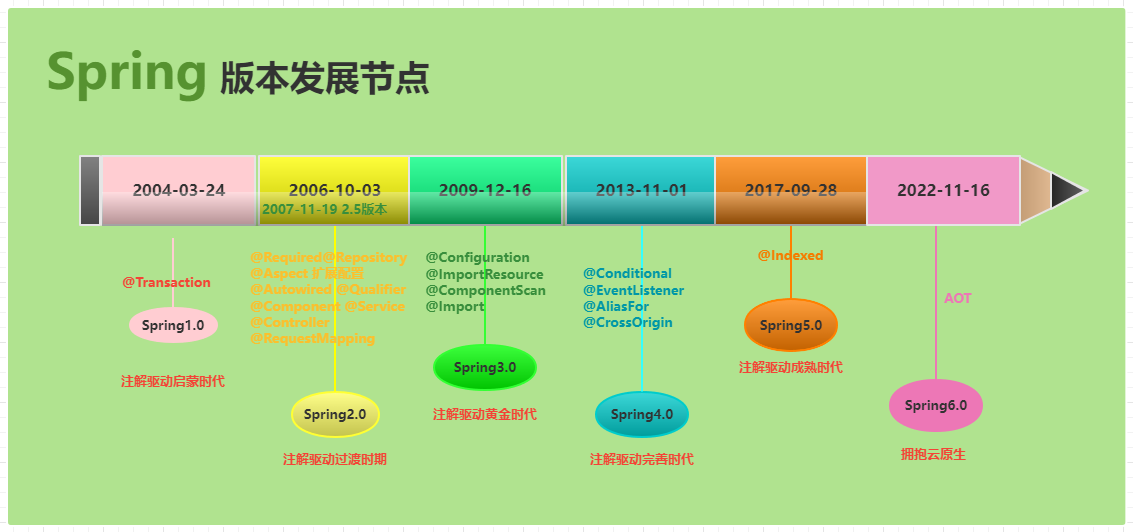
一、Spring的发展历史
二、AOT
AOT是Spring6.0提供的一个新特性,Ahead of Time 提前编译。
1.AOT概述
1.1 JIT和AOT的关系
1.1.1 JIT
JIT(Just-in-time) 动态编译,即时编译,也就是边运行边编译,也就是在程序运行时,动态生成代码,启动比较慢,编译时需要占用运行时的资源。
1.1.2 AOT
AOT,Ahead Of Time 指的是运行前编译,预先编译,AOT 编译能直接将源代码转化为机器码,内存占用低,启动速度快,可以无需 runtime 运行,直接将 runtime 静态链接至最终的程序中,但是无运行时性能加成,不能根据程序运行情况做进一步的优化,AOT 缺点就是在程序运行前编译会使程序安装的时间增加。
简单来讲:JIT即时编译的是在程序的运行过程中,将字节码转换为可在硬件上直接运行的机器码,并部署至托管环境中的过程。而 AOT 编译指的则是,在程序运行之前,便将字节码转换为机器码的过程。

三、GraalVM
GraalVM即支持AOT也支持JIT。支持多种开发语言。
Spring6 支持的 AOT 技术,这个 GraalVM 就是底层的支持,Spring 也对 GraalVM 本机映像提供了一流的支持。GraalVM 是一种高性能 JDK,旨在加速用 Java 和其他 JVM 语言编写的应用程序的执行,同时还为 JavaScript、Python 和许多其他流行语言提供运行时。 GraalVM 提供两种运行 Java 应用程序的方法:在 HotSpot JVM 上使用 Graal 即时 (JIT) 编译器或作为提前 (AOT) 编译的本机可执行文件。 GraalVM 的多语言能力使得在单个应用程序中混合多种编程语言成为可能,同时消除了外语调用成本。GraalVM 向 HotSpot Java 虚拟机添加了一个用 Java 编写的高级即时 (JIT) 优化编译器。
GraalVM 具有以下特性:
(1)一种高级优化编译器,它生成更快、更精简的代码,需要更少的计算资源
(2)AOT 本机图像编译提前将 Java 应用程序编译为本机二进制文件,立即启动,无需预热即可实现最高性能
(3)Polyglot 编程在单个应用程序中利用流行语言的最佳功能和库,无需额外开销
(4)高级工具在 Java 和多种语言中调试、监视、分析和优化资源消耗
1.GraalVM安装
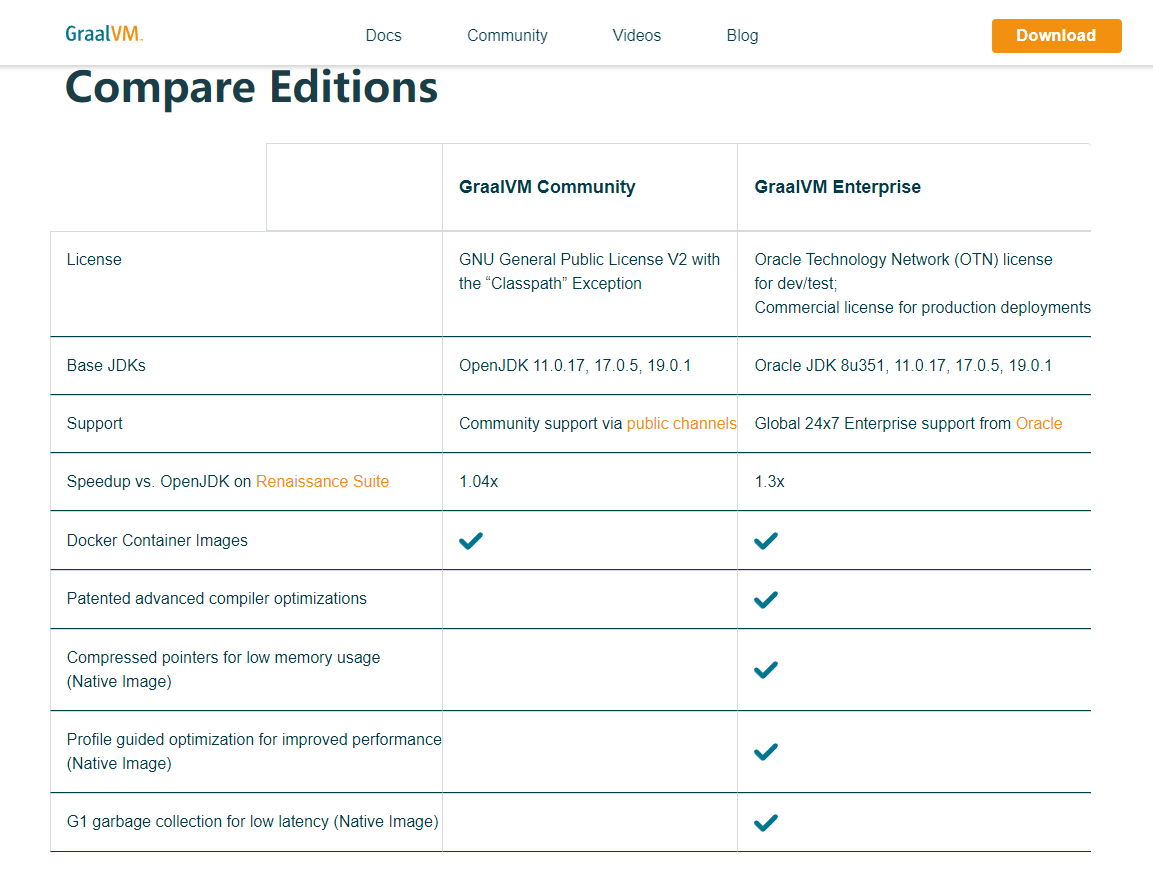
1.1 下载GraalVM
下载地址:https://www.graalvm.org/downloads/
下载社区版本即可,点击进入选择相关的版本:https://github.com/graalvm/graalvm-ce-builds/releases

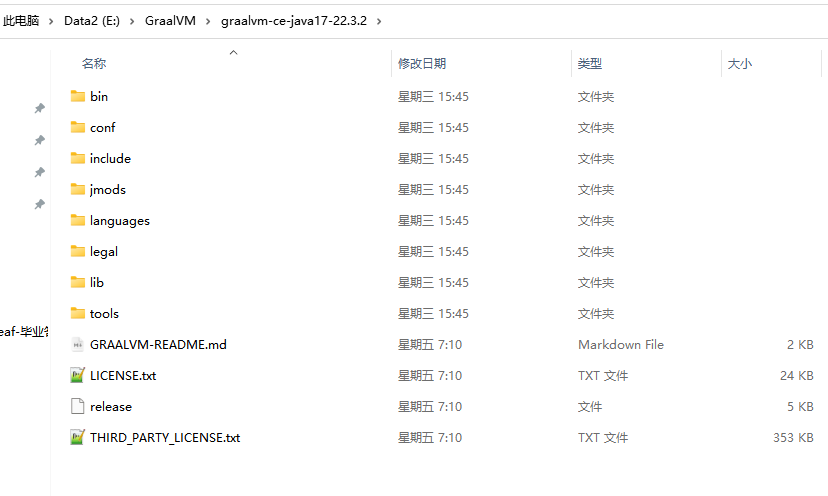
下载好后解压缩出来
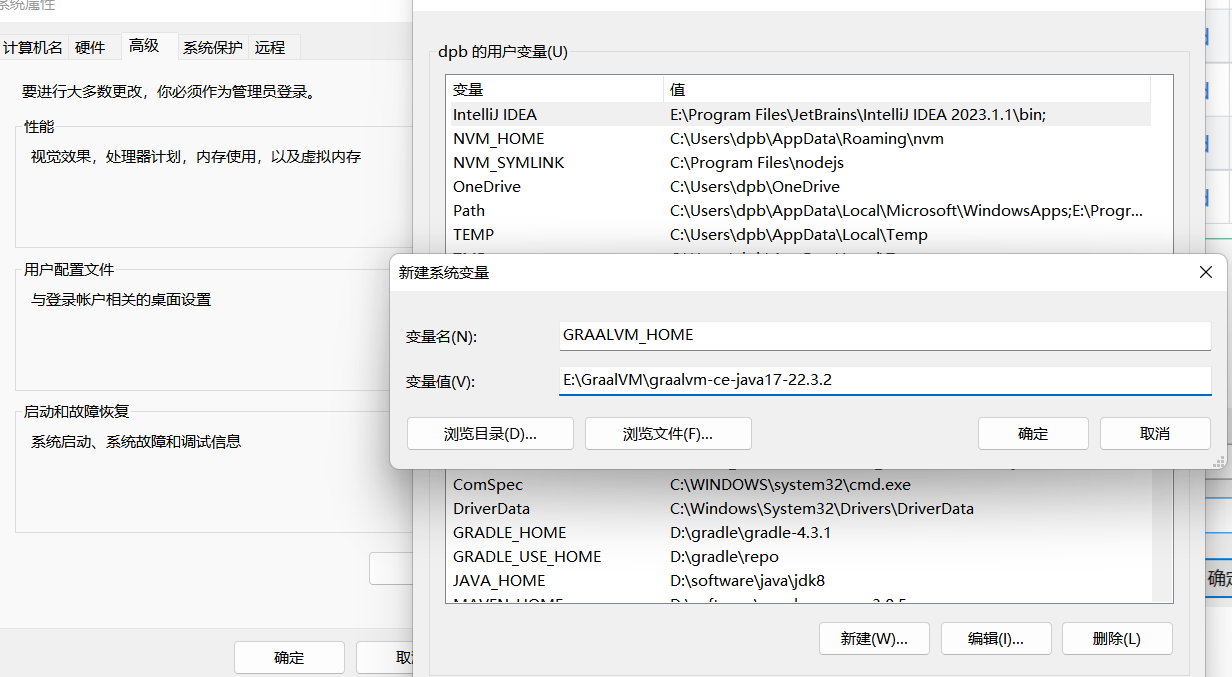
1.2 配置环境变量
添加:GRAALVM_HOME
编辑用户变量
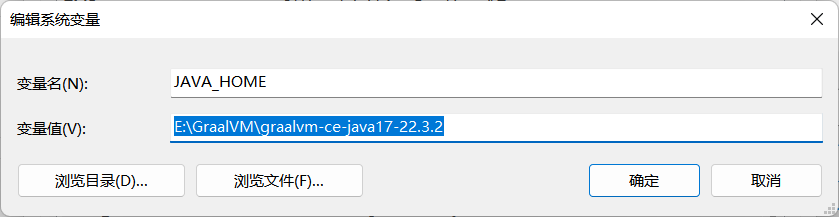
把JAVA_HOME修改为graalvm的位置
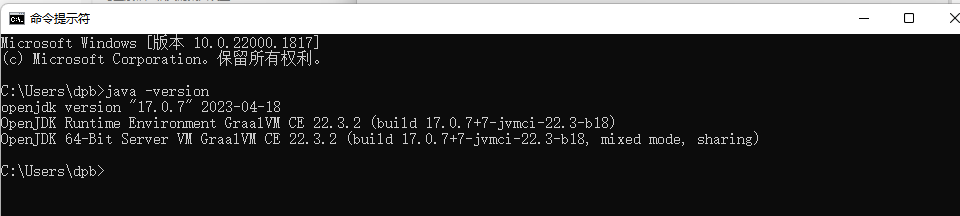
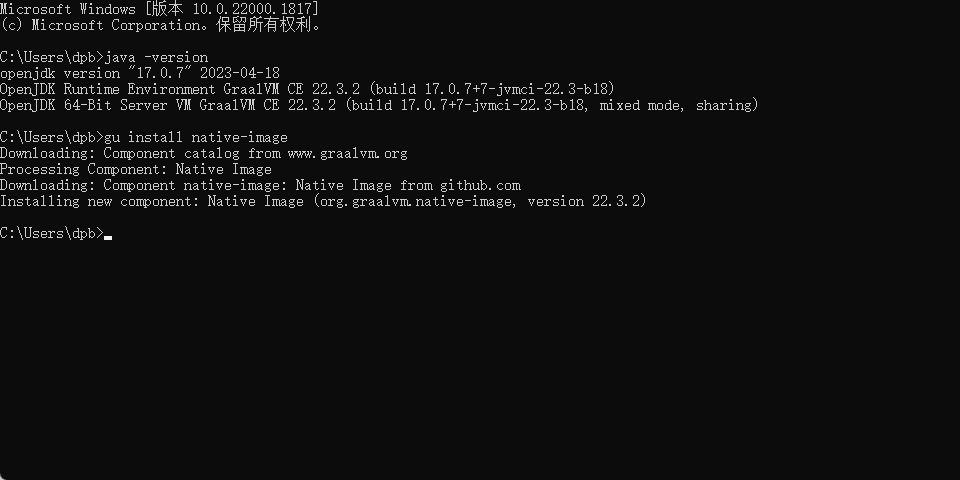
检查是否配置成功
1.3 安装native-image插件
使用命令 gu install native-image 下载安装插件,因为社区版默认不提供支持。需要手动下载
1.4 Native Image
Native image(本地镜像)是一种在Java平台上构建本地应用程序的技术。它将Java应用程序编译成本地机器代码,以便在不需要Java虚拟机(JVM)的情况下运行。这使得应用程序可以更快地启动,更高效地执行,并且占用更少的内存。
Native image使用GraalVM编译器技术,可以将Java应用程序转换为本地可执行文件,支持Windows、Linux和MacOS等多个操作系统平台。此外,Native image还可以将Java应用程序打包成单个可执行文件,从而方便部署和分发。
使用Native image,开发人员可以将Java应用程序作为本地应用程序来构建和部署,从而获得更好的性能和更好的用户体验。
2.安装C++的编译环境
2.1 下载Visual Studio
https://visualstudio.microsoft.com/zh-hans/downloads/

同样我们下载社区版本即可
2.2 安装Visual Studio
下载后双击直接安装即可

等待在线下载

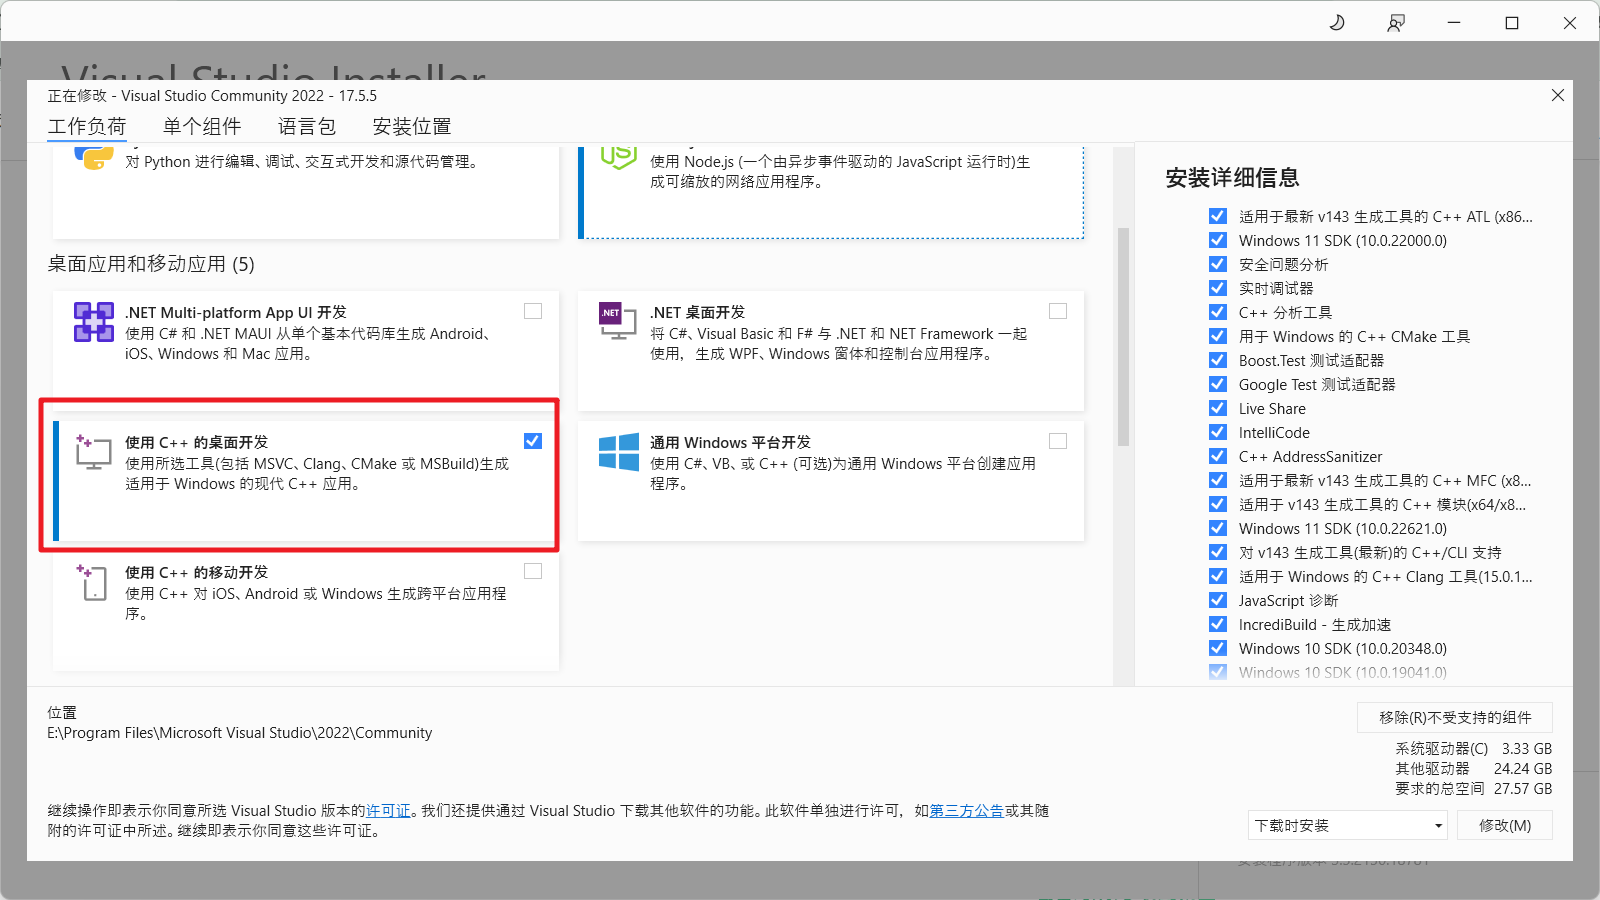

注意安装选项,然后继续等待

创建一个普通Hello.java文件
public class Hello{

	public static void main(String[] args){
		System.out.println("Hello World ...");
	}
}
然后通过 javac Hello.java 编译

通过native-image Hello 执行
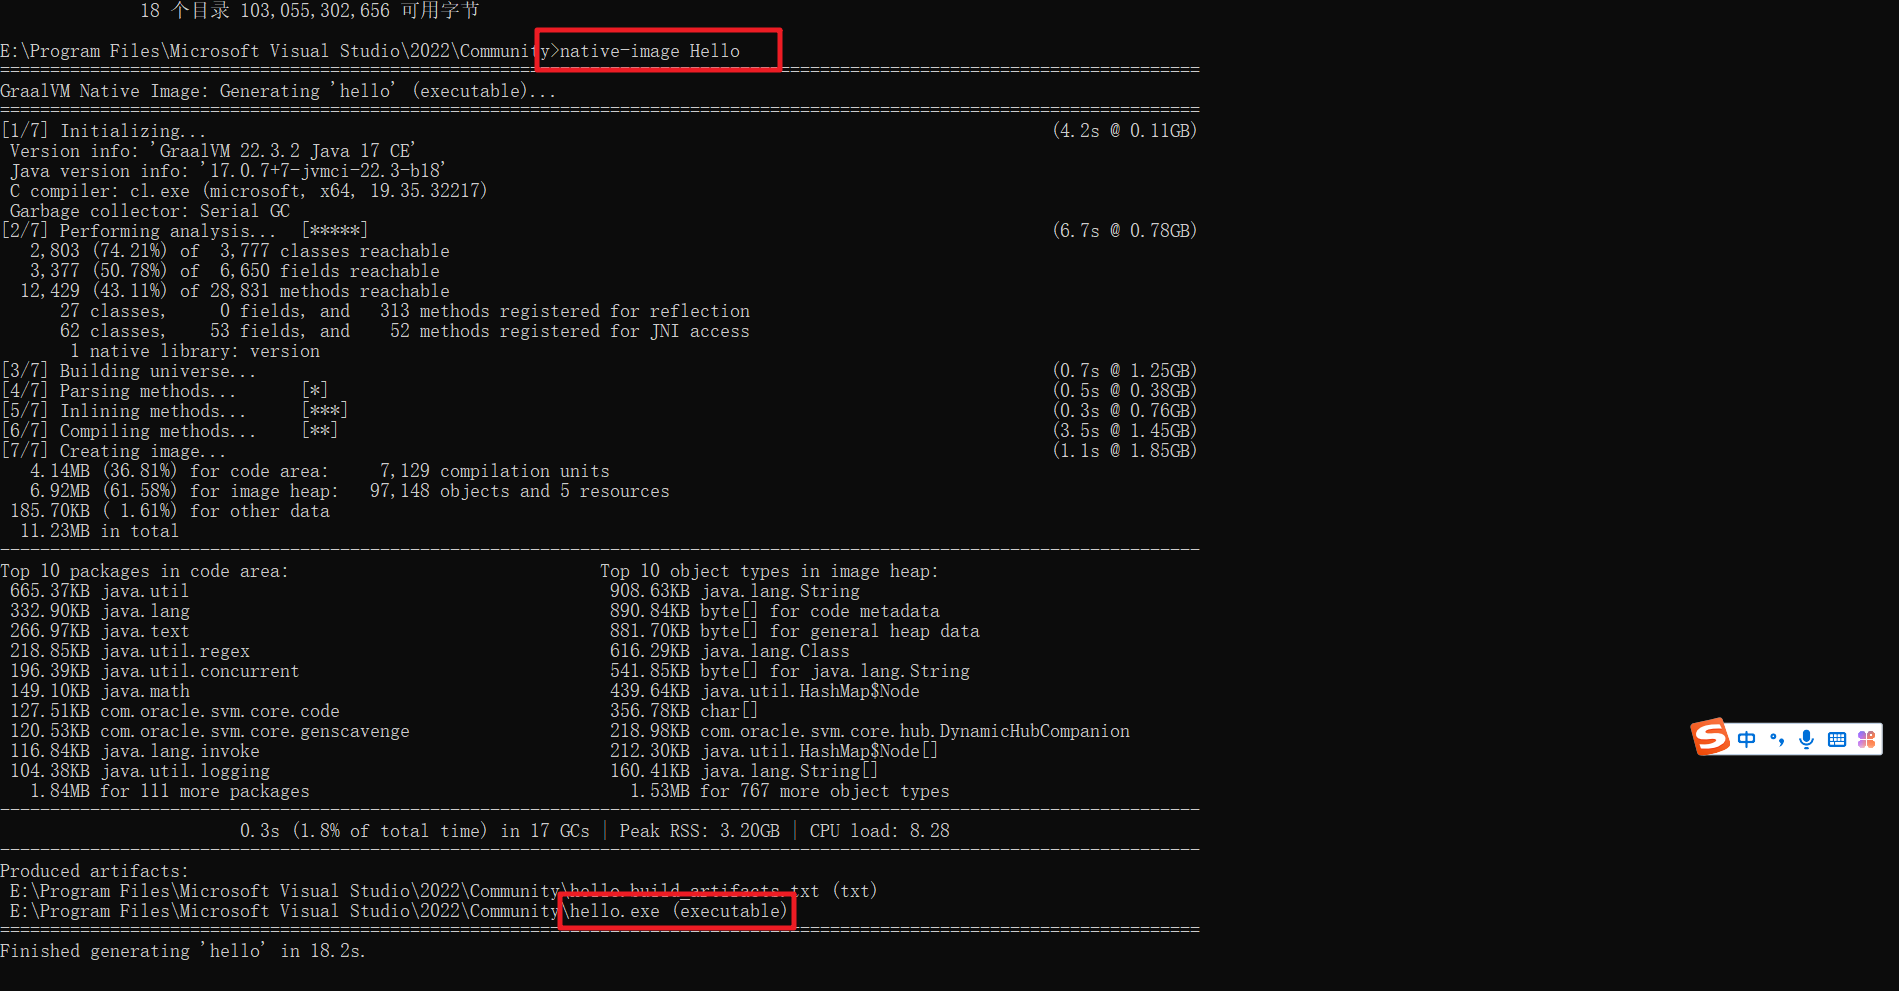
通过 native-image 生成了 Hello.exe 文件,我们就可以直接生成了。

四、SpringBoot实战
我们同样可以在SpringBoot项目中通过AOT来提前编译我们的项目,新建一个Maven项目。然后添加相关的依赖
    <parent>
        <groupId>org.springframework.boot</groupId>
        <artifactId>spring-boot-starter-parent</artifactId>
        <version>3.0.2</version>
    </parent>

    <dependencies>
        <dependency>
            <groupId>org.springframework.boot</groupId>
            <artifactId>spring-boot-starter-web</artifactId>
        </dependency>
    </dependencies>
同时我们还需要添加相关的SpringBoot插件
    <build>
        <plugins>
            <plugin>
                <groupId>org.graalvm.buildtools</groupId>
                <artifactId>native-maven-plugin</artifactId>
            </plugin>
            <plugin>
                <groupId>org.springframework.boot</groupId>
                <artifactId>spring-boot-maven-plugin</artifactId>
            </plugin>
        </plugins>
    </build>
然后我们编写一点简单的代码测试即可
然后我们打开 x64 Native Tools Command Prompt for VS 2019 。然后我们需要切换到工程目录下
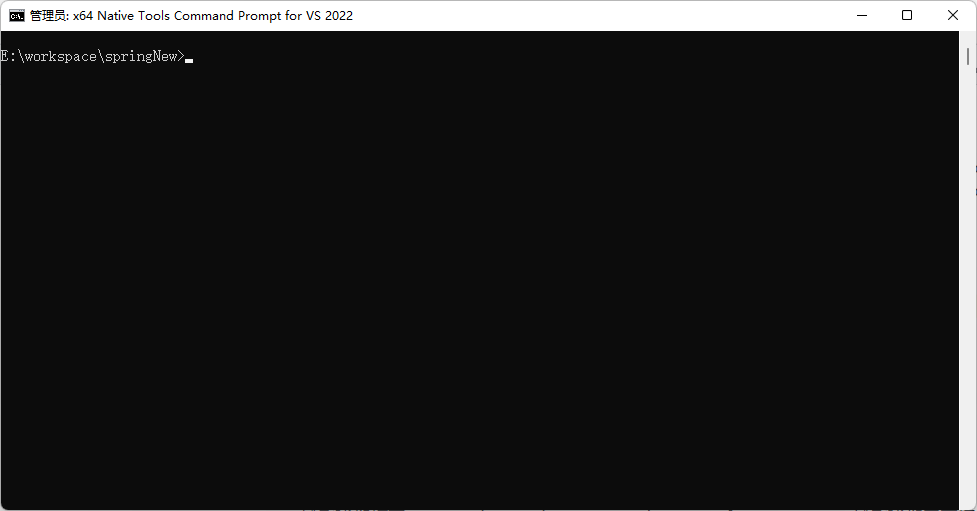
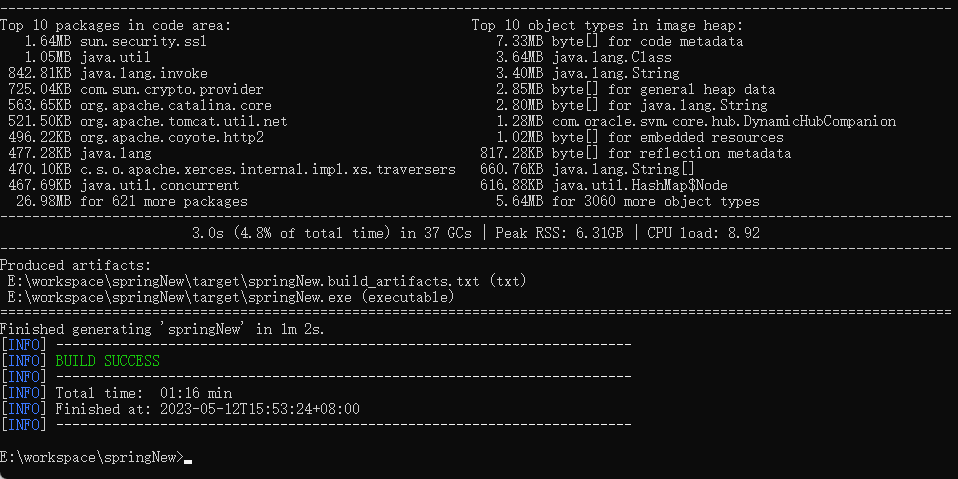
然后执行 mvn -Pnative native:compile 进行编译就可以了,编译成功就会在target目录下生成 EXE 文件。后续执行该文件就可以了
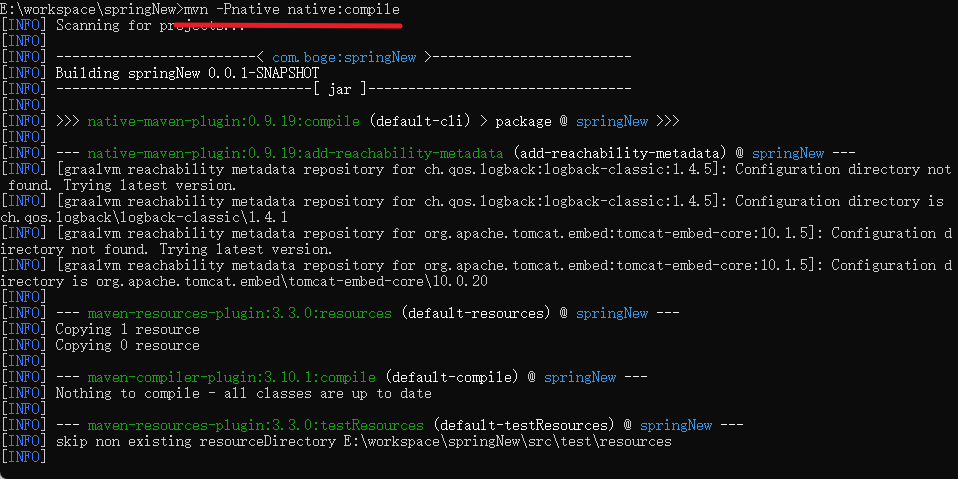
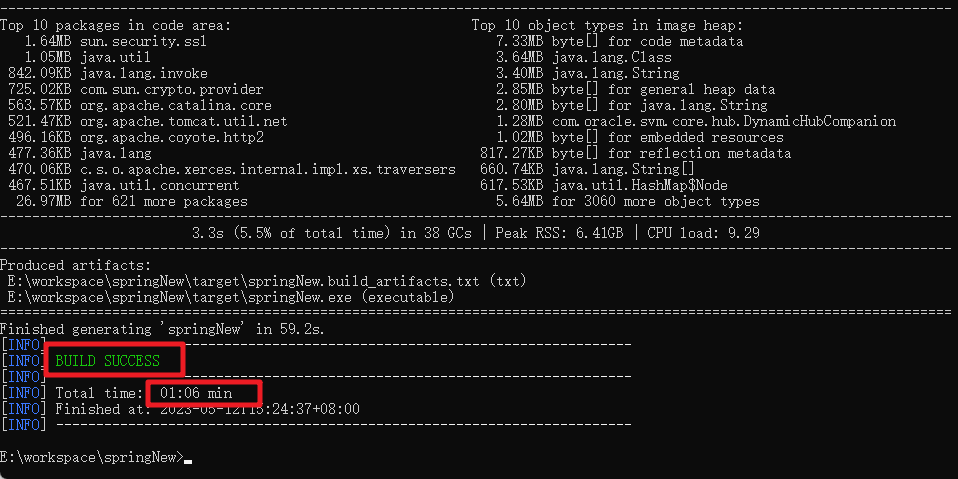
编译成功
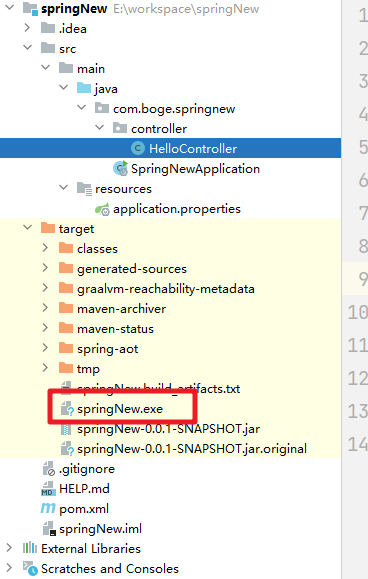
然后我们双击执行exe文件即可。你会发现速度会快很多

五、RuntimeHints
与常规 JVM 运行时相比,将应用程序作为本机映像运行需要额外的信息。例如,GraalVM 需要提前知道组件是否使用反射。同样,除非明确指定,否则类路径资源不会在本机映像中提供。因此,如果应用程序需要加载资源,则必须从相应的 GraalVM 原生图像配置文件中引用它。
APIRuntimeHints在运行时收集反射、资源加载、序列化和 JDK 代理的需求。
1.案例分析
声明个普通的实体类型
public class UserEntity {
    public String hello(){
        return "hello ...";
    }
}
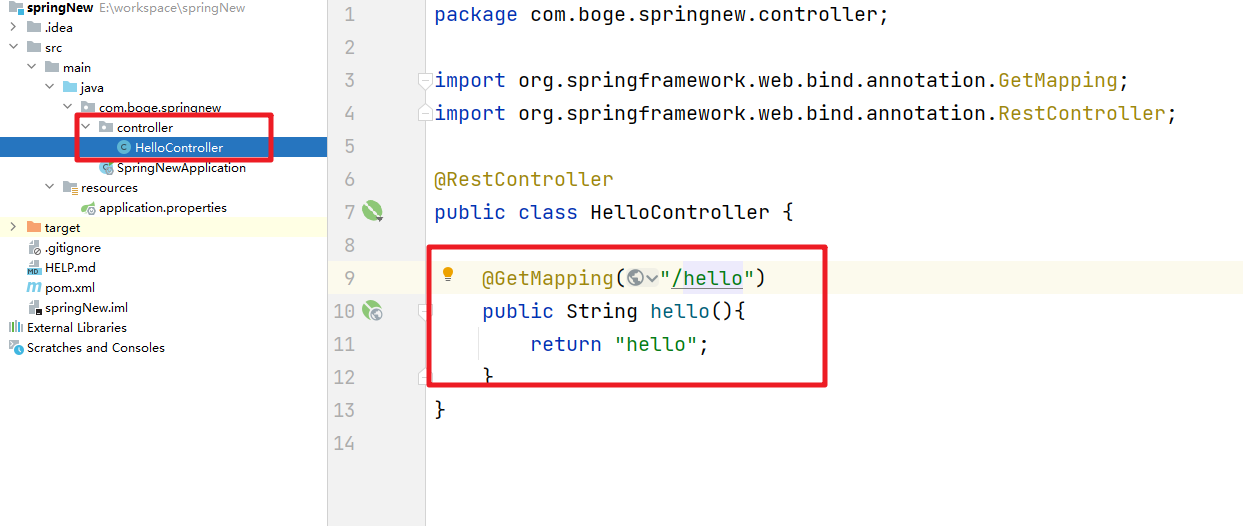
然后我们在控制器中通过反射来操作处理
    @GetMapping("/hello")
    public String hello(){
        String res = "hello";
        try {
            Method hello = UserEntity.class.getMethod("hello");
            res =  (String)hello.invoke(UserEntity.class.newInstance(),null);
        } catch (NoSuchMethodException e) {
            throw new RuntimeException(e);
        } catch (InvocationTargetException e) {
            throw new RuntimeException(e);
        } catch (IllegalAccessException e) {
            throw new RuntimeException(e);
        } catch (InstantiationException e) {
            throw new RuntimeException(e);
        }
        return res;
    }
然后通过命令编译为 exe 文件
运行exe文件后。我们通过浏览器发起请求
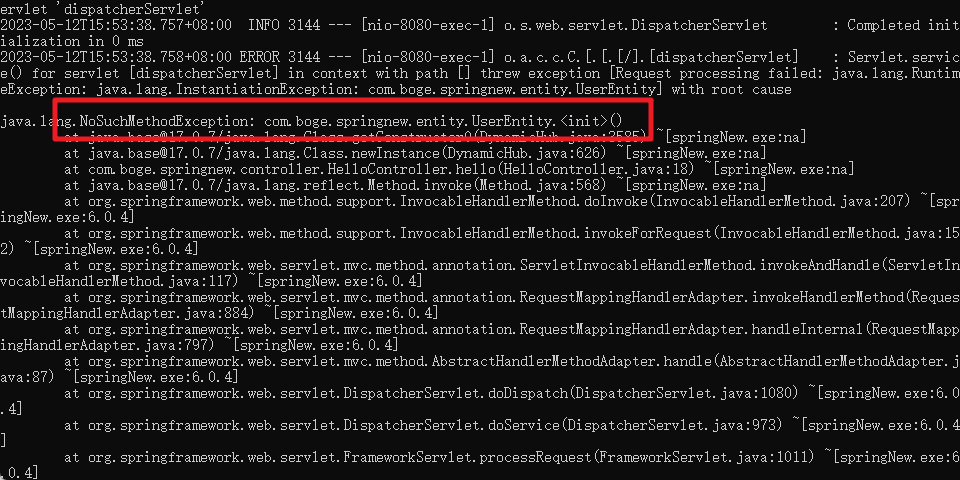
在HelloController中。我们通过反射的方式使用到了UserEntity的无参构造方法。如果不做任何处理。那么打成二进制可执行文件后是执行不了的。上面是具体的报错信息。针对这种情况。我们可以通过 Runtime Hints 机制来处理。
2. RuntimeHintsRegistrar
官网提供的解决方案。我们自定义一个RuntimeHintsRegistrar接口的实现类,然后把该实现类注入到Spring中
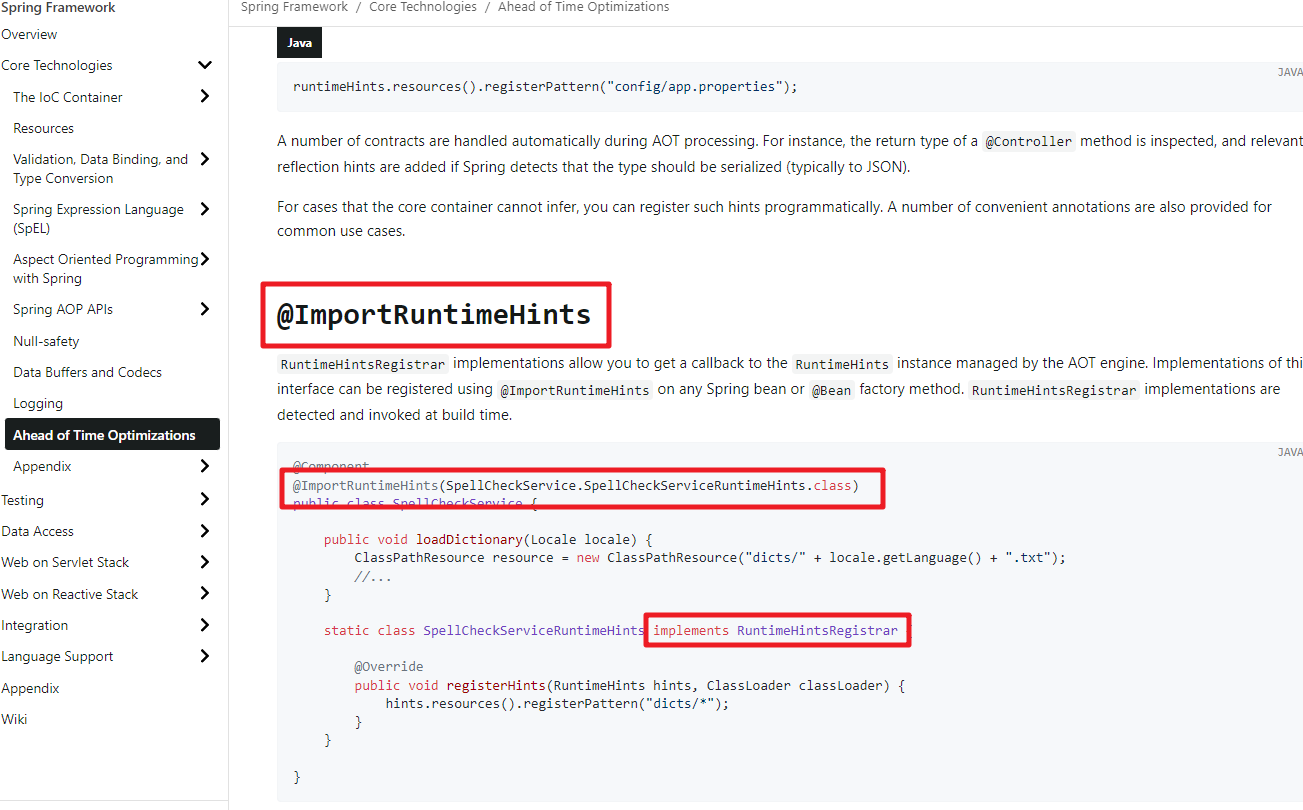
我们自己的实现
@RestController
@ImportRuntimeHints(HelloController.UserEntityRuntimeHints.class)
public class HelloController {

    @GetMapping("/hello")
    public String hello(){
        String res = "hello";
        try {
            Method hello = UserEntity.class.getMethod("hello");
            res =  (String)hello.invoke(UserEntity.class.newInstance(),null);
        } catch (NoSuchMethodException e) {
            throw new RuntimeException(e);
        } catch (InvocationTargetException e) {
            throw new RuntimeException(e);
        } catch (IllegalAccessException e) {
            throw new RuntimeException(e);
        } catch (InstantiationException e) {
            throw new RuntimeException(e);
        }
        return res;
    }

    static class UserEntityRuntimeHints implements RuntimeHintsRegistrar{

        @Override
        public void registerHints(RuntimeHints hints, ClassLoader classLoader) {
            try {
                hints.reflection().registerConstructor(UserEntity.class.getConstructor(), ExecutableMode.INVOKE);
            } catch (NoSuchMethodException e) {
                throw new RuntimeException(e);
            }
        }
    }
}
六、SpringBoot的核心代码
SpringApplicationAotProcessor
我们执行 mvn -Pnative native:compile时会执行GraalVM中的相关指令。最终会调用SpringApplicationAotProcessor中的main 方法来完成相关提前编译操作。
	public static void main(String[] args) throws Exception {
		int requiredArgs = 6; // 调用main方法接收的有6个参数
		Assert.isTrue(args.length >= requiredArgs, () -> "Usage: " + SpringApplicationAotProcessor.class.getName()
				+ " <applicationName> <sourceOutput> <resourceOutput> <classOutput> <groupId> <artifactId> <originalArgs...>");
		// 获取SpringBoot项目的入口class
		Class<?> application = Class.forName(args[0]);
		// 通过传递过来的参数完成相关生成目录的配置
		Settings settings = Settings.builder().sourceOutput(Paths.get(args[1])).resourceOutput(Paths.get(args[2]))
				.classOutput(Paths.get(args[3])).groupId((StringUtils.hasText(args[4])) ? args[4] : "unspecified")
				.artifactId(args[5]).build();
		String[] applicationArgs = (args.length > requiredArgs) ? Arrays.copyOfRange(args, requiredArgs, args.length)
				: new String[0];
	  // 执行 process 方法
		new SpringApplicationAotProcessor(application, settings, applicationArgs).process();
	}
进入到process 方法中
	public final T process() {
		try {
			// 设置状态
			System.setProperty(AOT_PROCESSING, "true");
			return doProcess(); // 处理的核心方法
		}
		finally {
			System.clearProperty(AOT_PROCESSING);
		}
	}
进入到 doProcess() 方法中
 	@Override
	protected ClassName doProcess() {
		deleteExistingOutput(); // 删除已经存在的目录
		// 启动SpringBoot服务  但是不会做扫描bean
		GenericApplicationContext applicationContext = prepareApplicationContext(getApplicationClass());
		return performAotProcessing(applicationContext);
	}
prepareApplicationContext方法
	@Override
	protected GenericApplicationContext prepareApplicationContext(Class<?> application) {
		return new AotProcessorHook(application).run(() -> {
			Method mainMethod = application.getMethod("main", String[].class);
			return ReflectionUtils.invokeMethod(mainMethod, null, new Object[] { this.applicationArgs });
		});
	}
此次会执行启动类中的main方法来启动SpringBoot,
在启动中创建Spring上下文对象时会做如下的处理
	private ConfigurableApplicationContext createContext() {
		if (!AotDetector.useGeneratedArtifacts()) {
			return new AnnotationConfigServletWebServerApplicationContext();
		}
		return new ServletWebServerApplicationContext();
	}
如果没有使用AOT,那么就会创建AnnotationConfigServletWebServerApplicationContext,它里面会添加ConfigurationClassPostProcessor,从而会解析配置类,从而会扫描,而如果使用了AOT,则会创建 ServletWebServerApplicationContext,它就是一个空容器,它里面没有ConfigurationClassPostProcessor,所以后续不会触发扫描了
再回到performAotProcessing方法中
	protected ClassName performAotProcessing(GenericApplicationContext applicationContext) {
		FileSystemGeneratedFiles generatedFiles = createFileSystemGeneratedFiles();
		DefaultGenerationContext generationContext = new DefaultGenerationContext(
				createClassNameGenerator(), generatedFiles);
		ApplicationContextAotGenerator generator = new ApplicationContextAotGenerator();
		// 进行相关的扫描操作
		ClassName generatedInitializerClassName = generator.processAheadOfTime(applicationContext, generationContext);
		//如果有反射的注册信息。这里会完成相关信息的生成到reflect-config.json对应的RuntimeHints中去
		registerEntryPointHint(generationContext, generatedInitializerClassName);
		// 生成source目录下的Java文件
		generationContext.writeGeneratedContent();
		//  将RuntimeHints中的内容写入resource目录下的Graalvm的各个配置文件中
		writeHints(generationContext.getRuntimeHints());
		writeNativeImageProperties(getDefaultNativeImageArguments(getApplicationClass().getName()));
		return generatedInitializerClassName;
	}
processAheadOfTime中的逻辑
	public ClassName processAheadOfTime(GenericApplicationContext applicationContext,
			GenerationContext generationContext) {
		return withCglibClassHandler(new CglibClassHandler(generationContext), () -> {
			// 扫描处理
			applicationContext.refreshForAotProcessing(generationContext.getRuntimeHints());
		// 获取bean工厂对象
		DefaultListableBeanFactory beanFactory = applicationContext.getDefaultListableBeanFactory();
			ApplicationContextInitializationCodeGenerator codeGenerator =
					new ApplicationContextInitializationCodeGenerator(generationContext);
			new BeanFactoryInitializationAotContributions(beanFactory).applyTo(generationContext, codeGenerator);
			return codeGenerator.getGeneratedClass().getName();
		});
	}
进入到refreshForAotProcessing方法中
	public void refreshForAotProcessing(RuntimeHints runtimeHints) {
		if (logger.isDebugEnabled()) {
			logger.debug("Preparing bean factory for AOT processing");
		}
		prepareRefresh();
		obtainFreshBeanFactory(); // 获取工厂对象。并完成扫描操作
		prepareBeanFactory(this.beanFactory);
		postProcessBeanFactory(this.beanFactory);
		invokeBeanFactoryPostProcessors(this.beanFactory); // 之后工厂的后置处理器
		this.beanFactory.freezeConfiguration();
		PostProcessorRegistrationDelegate.invokeMergedBeanDefinitionPostProcessors(this.beanFactory);
		preDetermineBeanTypes(runtimeHints);
	}
BeanFactoryInitializationAotContributions方法的逻辑:会读取aot.properties文件的加载器以及BeanFactory封装成为一个Loader对象,然后传入
	BeanFactoryInitializationAotContributions(DefaultListableBeanFactory beanFactory) {
		this(beanFactory, AotServices.factoriesAndBeans(beanFactory));
	}