目录
Spring Boot 整合MyBatis
代码+配置实现
创建数据库和表
使用灵活的方式创建maven
创建resources/application.yml ,配置数据源参数, 并完成Spring Boot 项目启动测试
测试DruidDataSourceConfig
创建MonsterMapper接口
创建resources\mapper\MonsterMapper.xml , 文件模板从mybatis 官方文档拷贝
创建 service/MonsterService.java接口
创建 service/impl/MonsterServiceImpl.java接口
创建MonsterController
修改resources/application.yml , 指定mybatis.xml 的配置参数
测试页面效果
注意事项和细节说明
Spring Boot 整合MyBatis-Plus
基本介绍
整合MyBatis-Plus 实例
需求说明/图解
代码实现
创建数据库和表
创建springboot_mybatisplus 项目-pom.xml 引入必要的依赖
修改pom.xml 引入MyBatis-Plus starter
创建resources/application.yml 配置数据源参数
切换数据源为druid ,修改pom.xml
创建配置文件DruidDataSourceConfig.java
创建主函数
测试是否能正确启动项目, 注意观察mybatis-plus 是否引入成功
创建ben/ Monster.java
创建/mapper/MonsterMapper.java
创建service/MonsterService.java
创建impl/MonsterServiceImpl.java
创建/controller/MonsterController.java
修改Application.java , 加入对Mapper 的扫描
编辑启动项目,完成测试
整合MyBatis-Plus 注意事项和细节
Spring Boot 整合MyBatis
代码+配置实现
创建数据库和表
CREATE DATABASE `springboot_mybatis`
use `springboot_mybatis`
CREATE TABLE `monster` (
`id` INT NOT NULL AUTO_INCREMENT,
`age` INT NOT NULL,
`birthday` DATE DEFAULT NULL,
`email` VARCHAR(255) DEFAULT NULL,
`gender` char(1) DEFAULT NULL,
`name` VARCHAR(255) DEFAULT NULL,
`salary` DOUBLE NOT NULL,
PRIMARY KEY (`id`)
) CHARSET=utf8

SELECT * FROM `monster`

insert into monster values(null, 20, '2000-11-11', 'nmw@sohu.com', '男', '牛魔王', 5000.88);
insert into monster values(null, 10, '2011-11-11', 'bgj@sohu.com', '女', '白骨精', 8000.88);
使用灵活的方式创建maven
注意我们这里使用的数据源为druid.
    <!--导入springboot父工程-规定写法-->
    <parent>
        <artifactId>spring-boot-starter-parent</artifactId>
        <groupId>org.springframework.boot</groupId>
        <version>2.5.3</version>
    </parent>

    <!--引入相关的依赖-->
    <dependencies>
        <!--引入web starter-->
        <dependency>
            <groupId>org.springframework.boot</groupId>
            <artifactId>spring-boot-starter-web</artifactId>
        </dependency>

        <!--引入mybatis starter, 如果小伙伴看不到 版本,自己手写2.2.2-->
        <dependency>
            <groupId>org.mybatis.spring.boot</groupId>
            <artifactId>mybatis-spring-boot-starter</artifactId>
            <version>2.2.2</version>
        </dependency>

        <!--引入mysql驱动: 这里使用版本仲裁 8.0.26-->
        <dependency>
            <groupId>mysql</groupId>
            <artifactId>mysql-connector-java</artifactId>
        </dependency>

        <!--引入配置处理器 -->
        <dependency>
            <groupId>org.springframework.boot</groupId>
            <artifactId>spring-boot-configuration-processor</artifactId>
        </dependency>

        <!--引入lombok-->
        <dependency>
            <groupId>org.projectlombok</groupId>
            <artifactId>lombok</artifactId>
        </dependency>

        <!--引入test starter-->
        <dependency>
            <groupId>org.springframework.boot</groupId>
            <artifactId>spring-boot-starter-test</artifactId>
        </dependency>

        <!--引入druid依赖-->
        <dependency>
            <groupId>com.alibaba</groupId>
            <artifactId>druid</artifactId>
            <version>1.1.17</version>
        </dependency>
    </dependencies>
创建resources/application.yml ,配置数据源参数, 并完成Spring Boot 项目启动测试
server:
  port: 9090
spring:
  datasource:
    driver-class-name: com.mysql.cj.jdbc.Driver
    url: jdbc:mysql://localhost:3306/springboot_mybatis?useSSL=true&useUnicode=true&characterEncoding=UTF-8
    username: root
    password: 自己的密码
测试DruidDataSourceConfig
/**
建议, 最好是先自己把这个类写出,然后拷贝自己需要的代码, 这样自己写代码也知道是为什么
 *
 */
@Configuration
public class DruidDataSourceConfig {


    @ConfigurationProperties("spring.datasource")
    @Bean
    public DataSource dataSource() throws SQLException {
        DruidDataSource druidDataSource =
                new DruidDataSource();
        return druidDataSource;
    }
}
创建/Monster.java -SSM整合在博客的项目有介绍
@Data
public class Monster {
    private Integer id;
    private Integer age;
    //这里通过注解来解决时区问题
    //GMT 就是格林尼治标准时间
    @JsonFormat(pattern = "yyyy-MM-dd HH:mm:ss", timezone = "GMT+8")
    private Date birthday;
    private String email;
    private String name;
    private String gender;
    private Double salary;
}
创建MonsterMapper接口
@Mapper
public interface MonsterMapper {
    //方法,根据id返回Monster对象
    public Monster getMonsterById(Integer id);
}
创建resources\mapper\MonsterMapper.xml , 文件模板从mybatis 官方文档拷贝
<?xml version="1.0" encoding="UTF-8"?>
<!DOCTYPE mapper PUBLIC "-//mybatis.org//DTD Mapper 3.0//EN"
        "http://mybatis.org/dtd/mybatis-3-mapper.dtd">
<mapper namespace="com.wyx.springboot.mybatis.mapper.MonsterMapper">
    <!--配置getMonsterById-->
    <select id="getMonsterById" resultType="Monster">
        SELECT * FROM `monster` WHERE id=#{id}
    </select>
</mapper>
创建 service/MonsterService.java接口
public interface MonsterService {

    //根据id返回Monster对象
    public Monster getMonsterById(Integer id);
}
创建 service/impl/MonsterServiceImpl.java接口
@Service
public class MonsterServiceImpl implements MonsterService {

    //装配MonsterMapper
    @Resource
    private MonsterMapper monsterMapper;

    @Override
    public Monster getMonsterById(Integer id) {
        return monsterMapper.getMonsterById(id);
    }
}
创建MonsterController
@Controller
public class MonsterController {

    //装配MonsterService
    @Resource
    private MonsterService monsterService;


    @ResponseBody
    @GetMapping("/monster")
    public Monster getMonsterById(@RequestParam(value = "id") Integer id){

        return monsterService.getMonsterById(id);
    }
}
修改resources/application.yml , 指定mybatis.xml 的配置参数
server:
  port: 9090
spring:
  datasource:
    driver-class-name: com.mysql.cj.jdbc.Driver
    url: jdbc:mysql://localhost:3306/springboot_mybatis?useSSL=true&useUnicode=true&characterEncoding=UTF-8
    username: root
    password: 自己的密码


mybatis:
  #指定要扫描的 Xxxmapper.xml
  mapper-locations: classpath:mapper/*.xml

  #通过config-location 可以指定mybatis-config.xml,可以以传统的方式来配置mybatis
  #config-location:
  #config-location: classpath:mybatis-config.xml

  #我们也可以直接在application.yml进行配置
  #举例说明1. 比如配置原来的 typeAliases
  #举例说明2 配置输出底层的原生sql
  #还有很多其它的配置,我们使用到再说
  type-aliases-package: com.wyxdu.springboot.mybatis.bean
  configuration:
    log-impl: org.apache.ibatis.logging.stdout.StdOutImpl

  #说明: 配置mybatis的两种方式的选择: 如果配置比较简单,就直接在application.yml配置即可
  #如果配置内容比较多,可以考虑单独的做一个mybatis-config.xml
测试页面效果
● 完成测试, 浏览器: http://localhost:10000/monster?id=1

注意事项和细节说明
spring boot 整合mybatis 取出的日期, 出现8 小时时差解决方案

@JsonFormat(pattern="yyyy-MM-dd HH:mm:ss",timezone="GMT+8")
Spring Boot 整合MyBatis-Plus
官网https://baomidou.com

基本介绍
1. MyBatis-Plus (简称MP)是一个MyBatis 的增强工具,在MyBatis 的基础上只做增强不做改变,为简化开发、提高效率而生。

2. 强大的CRUD 操作:内置通用Mapper、通用Service,通过少量配置即可实现单表大部分CRUD 操作,更有强大的条件构造器,满足各类使用需求
整合MyBatis-Plus 实例
需求说明/图解
1. 将Spring Boot 和MyBatis-Plus 整合
2. 查询数据,如图

代码实现
创建数据库和表
CREATE DATABASE `springboot_mybatisplus`
USE `springboot_mybatisplus`
CREATE TABLE `monster` (
`id` INT NOT NULL AUTO_INCREMENT,
`age` INT NOT NULL,
`birthday` DATE DEFAULT NULL,
`email` VARCHAR(255) DEFAULT NULL,
`gender` CHAR(1) DEFAULT NULL,
`name` VARCHAR(255) DEFAULT NULL,
`salary` DOUBLE NOT NULL,
PRIMARY KEY (`id`)
) CHARSET=utf8

SELECT * FROM `monster`

INSERT INTO monster VALUES(NULL, 20, '2000-11-11', 'xzj@sohu.com', ' 男', ' 蝎子精',
15000.88);
INSERT INTO monster VALUES(NULL, 10, '2011-11-11', 'ytj@sohu.com', ' 女', ' 玉兔精',
18000.88);
创建springboot_mybatisplus 项目-pom.xml 引入必要的依赖
    <!--导入springboot父工程-规定写法-->
    <parent>
        <artifactId>spring-boot-starter-parent</artifactId>
        <groupId>org.springframework.boot</groupId>
        <version>2.5.3</version>
    </parent>

    <!--引入必要的依赖-->
    <dependencies>

        <!--引入web starter-->
        <dependency>
            <groupId>org.springframework.boot</groupId>
            <artifactId>spring-boot-starter-web</artifactId>
        </dependency>

        <!--引入mysql驱动: 这里使用版本仲裁 8.0.26-->
        <dependency>
            <groupId>mysql</groupId>
            <artifactId>mysql-connector-java</artifactId>
        </dependency>


        <!--引入配置处理器 -->
        <dependency>
            <groupId>org.springframework.boot</groupId>
            <artifactId>spring-boot-configuration-processor</artifactId>
        </dependency>

        <!--引入lombok-->
        <dependency>
            <groupId>org.projectlombok</groupId>
            <artifactId>lombok</artifactId>
        </dependency>

        <!--引入test starter-->
        <dependency>
            <groupId>org.springframework.boot</groupId>
            <artifactId>spring-boot-starter-test</artifactId>
        </dependency>


    </dependencies>
修改pom.xml 引入MyBatis-Plus starter

  <!--引入mybatis-plus starter-->
        <!-- https://mvnrepository.com/artifact/com.baomidou/mybatis-plus-boot-starter -->
        <dependency>
            <groupId>com.baomidou</groupId>
            <artifactId>mybatis-plus-boot-starter</artifactId>
            <version>3.4.3</version>
        </dependency>
创建resources/application.yml 配置数据源参数
server:
  port: 9090
spring:
  datasource:
    driver-class-name: com.mysql.cj.jdbc.Driver
    url: jdbc:mysql://localhost:3306/springboot_mybatisplus?useSSL=true&useUnicode=true&characterEncoding=UTF-8
    username: root
    password: 自己的数据库密码
切换数据源为druid ,修改pom.xml
        <!--引入druid依赖-->
        <dependency>
            <groupId>com.alibaba</groupId>
            <artifactId>druid</artifactId>
            <version>1.1.17</version>
        </dependency>
创建配置文件DruidDataSourceConfig.java
@Configuration
public class DruidDataSourceConfig {


    @ConfigurationProperties("spring.datasource")
    @Bean
    public DataSource dataSource() throws SQLException {
        DruidDataSource druidDataSource =
                new DruidDataSource();
        return druidDataSource;
    }
}
创建主函数
@SpringBootApplication
public class Application {
    public static void main(String[] args) {
        SpringApplication.run(Application.class, args);
    }
}
测试是否能正确启动项目, 注意观察mybatis-plus 是否引入成功

创建ben/ Monster.java
@Data
//说明:
//1. 如果这个类名Monster 和表名monster 一致,可以映射上,则@TableName 可以省略
//2. 如果这个类名Monster 和表名不一致,不能映射上,则@TableName 可以指定
@TableName("monster")
public class Monster {
    private Integer id;
    private Integer age;
    @JsonFormat(pattern="yyyy-MM-dd HH:mm:ss",timezone="GMT+8")
    private Date birthday;
    private String email;
    private String name;
    private String gender;
    private Double salary;
}
创建/mapper/MonsterMapper.java
1. BaseMapper 已经默认提供了很多crud 方法, 可以直接用
2. 如果BaseMapper 提供的方法不满足需要,可以再开发MonsterMapper.xml
@Mapper
public interface MonsterMapper  extends BaseMapper<Monster> {
}
创建service/MonsterService.java
解读
1.在传统的方法中 在接口中定义方法/声明方法,然后在实现类进行实现
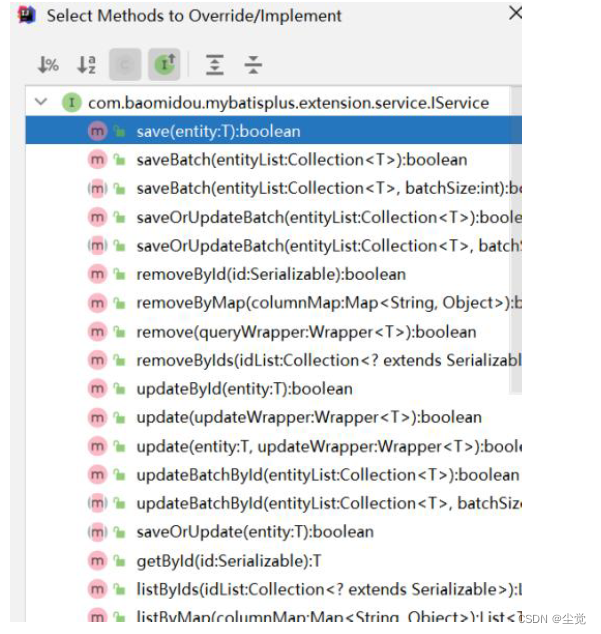
2. 在mybits-plus中我们可以继承父接口IService
这个IService接口声明很多方法比如crud
4. 如果默认方法不能满足需求,我们可以再声明需要的方法,然后在实现类去实现就可
@Service
public interface MonsterService extends IService<Monster> {
}
创建impl/MonsterServiceImpl.java
解读
以前的做法是MonsterServiceImpl implements MonsterService 接口.
但是这样做会报错 因为以前父接口没有继承接口可以直接这样
但是现在父接口继承了一个IService接口 所以你要实现IService的方法
但是那个太多了我们也用不了那么多
所以mybits-plus给我们提供一个ServiceImpl类来继承 这个类实现了IService接口
所以我们可以看 ServiceImpl类 实现了IService接口.
MonsterService又继承了IService接口.
所以我们MonsterServiceImpl 继承了ServiceImpl类 就可以相当于实现了MonsterService接口.


@Service
public class MonsterServiceImpl extends ServiceImpl<MonsterMapper, Monster> implements MonsterService {
}
创建/controller/MonsterController.java
@Controller
public class MonsterController {
    @Autowired
    MonsterService monsterService;
    @ResponseBody
    @GetMapping("/monster")
    public Monster getByMonsterId(@RequestParam("id") Integer id) {
        return monsterService.getById(id);
    }
    @ResponseBody
    @GetMapping("/list")
    public List<Monster> listMonster() {
        return monsterService.list();
    }
}
修改Application.java , 加入对Mapper 的扫描
@MapperScan("com.wyx.mybatisplus.mapper")
@SpringBootApplication
public class Application {
    public static void main(String[] args) {
        SpringApplication.run(Application.class, args);
    }
}
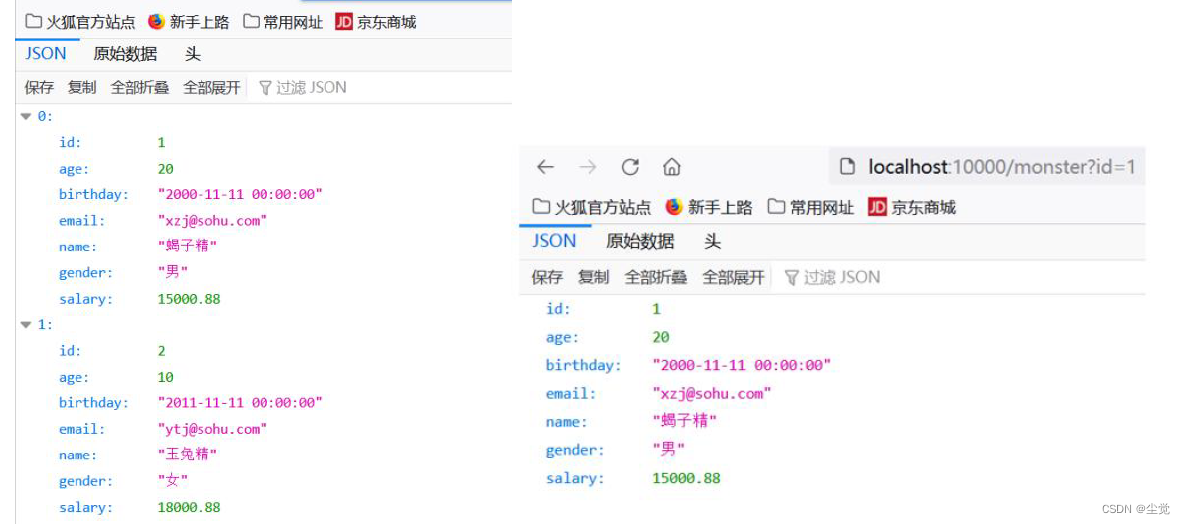
 启动项目,完成测试
浏览器: http://localhost:10000/list http://localhost:10000/monster?id=1
整合MyBatis-Plus 注意事项和细节
1. @TableName 作用.
 如果这个类名Monster 和表名monster 一致,可以映射上,则@TableName 可以省略.
如果这个类名Monster 和表名不一致,不能映射上,则可以通过@TableName 指定.
2. MyBatis-Plus starter 到底引入了哪些依赖?

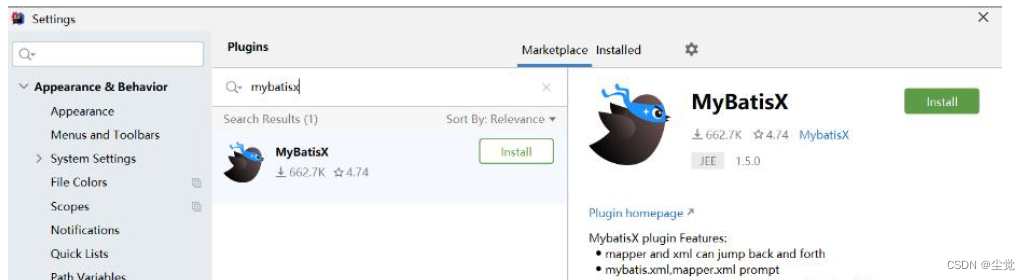
3. 为了开发方便, 可以安装MyBatisX 插件,
参考文档:https://baomidou.com/guide/mybatisx-idea-plugin.html