在软件开发的过程中,接口文档的编写往往是一个非常重要的环节,因为它是前端和后端沟通的桥梁,帮助团队更好地协作。然而,手动编写接口文档不仅耗费时间,还容易出错,因此我们需要一种简单的方法来管理接口文档。在这篇文章中,我将介绍SpringBoot整合Swagger2的简单方法,以帮助您更好地管理接口文档。
1. 什么是Swagger2
在开始介绍SpringBoot整合Swagger2的步骤之前,让我们谈一下Swagger2是什么。Swagger2是一种RESTful API文档生成工具,能够自动化生成API文档,并提供交互式文档,以方便开发人员使用。Swagger2不仅可以生成接口文档,还可以生成模拟数据,以方便前后端协作。
2. 添加Swagger2依赖
在Spring Boot应用中使用Swagger2需要添加如下Maven依赖:
<dependency>
    <groupId>io.springfox</groupId>
    <artifactId>springfox-swagger2</artifactId>
    <version>{latest-version}</version>
</dependency>
<dependency>
    <groupId>io.springfox</groupId>
    <artifactId>springfox-swagger-ui</artifactId>
    <version>{latest-version}</version>
</dependency>
其中{latest-version}需要替换成最新版本号。
3. 配置Swagger2
配置Swagger2并不困难,只需要增加一个SwaggerConfig类即可,代码如下:
@Configuration
@EnableSwagger2
public class SwaggerConfig {
    @Bean
    public Docket api() {
        return new Docket(DocumentationType.SWAGGER_2)
                .select()
                .apis(RequestHandlerSelectors.any())
                .paths(PathSelectors.any())
                .build();
    }
}
其中:
@Configuration表示这是一个配置类;@EnableSwagger2表示开启Swagger2的支持;Docket是Swagger2的配置类,用于配置Swagger2的相关信息;DocumentationType.SWAGGER_2表示采用Swagger2的规范;RequestHandlerSelectors.any()表示所有Controller都会被扫描;PathSelectors.any()表示所有路径都会被扫描。
4. 编写接口文档注释
添加好Swagger2依赖和配置类后,接下来我们需要在Controller层的接口方法上编写注释。示例如下:
@RestController
@RequestMapping("/user")
@Api(tags = "用户管理")
public class UserController {

    @ApiOperation("新增用户")
    @PostMapping("")
    public CommonResult addUser(@RequestBody User user) {
        // ...
    }

    @ApiOperation("删除用户")
    @DeleteMapping("/{id}")
    public CommonResult deleteUser(@PathVariable Long id) {
        // ...
    }

    @ApiOperation("修改用户")
    @PutMapping("/{id}")
    public CommonResult updateUser(@PathVariable Long id, @RequestBody User user) {
        // ...
    }

    @ApiOperation("查询用户详情")
    @GetMapping("/{id}")
    public User getUserById(@PathVariable Long id) {
        // ...
    }

    @ApiOperation("查询用户列表")
    @GetMapping("")
    public List<User> getUserList() {
        // ...
    }
}
在上述代码中:
@Api(tags = "用户管理")表示这是一个"用户管理"模块的接口;@ApiOperation("新增用户")表示新增用户的接口;@PostMapping("")表示HTTP请求方法为POST,路径为""。
5. 查看接口文档
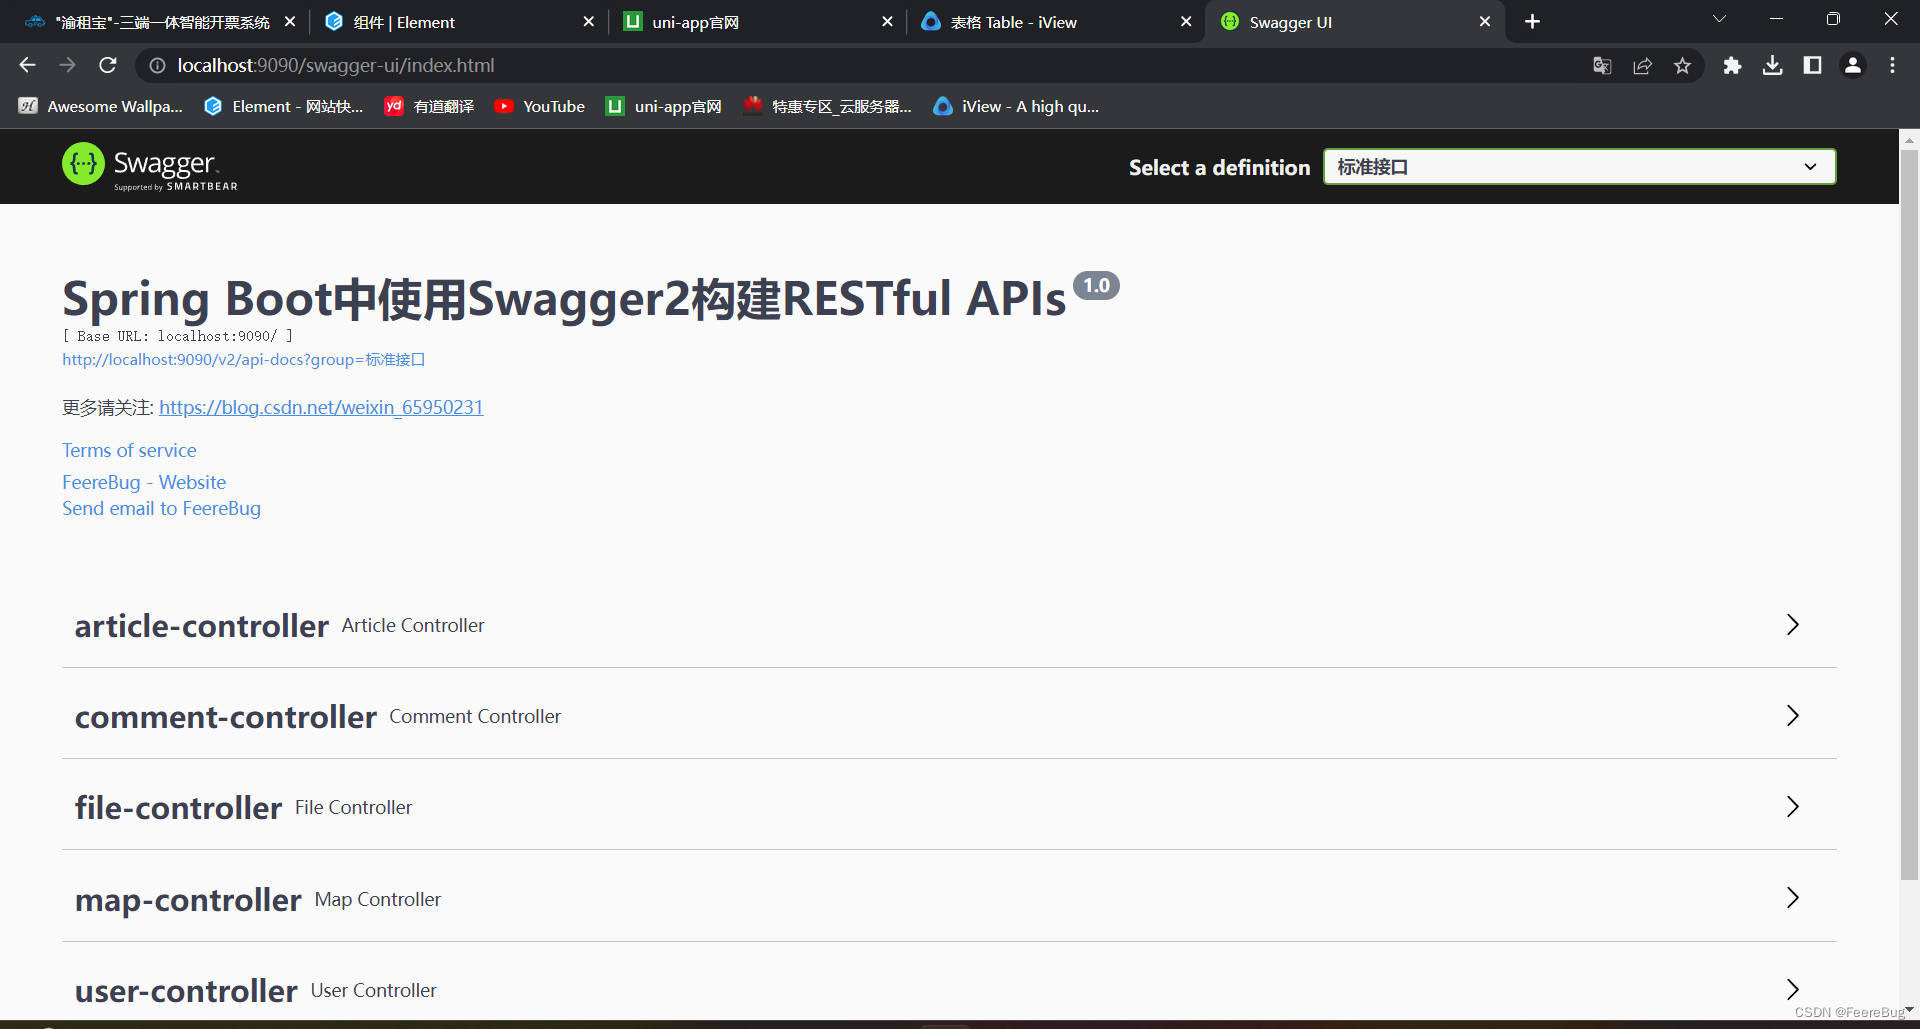
添加好接口文档注释后,我们就可以通过访问Swagger2的UI来查看接口文档了。只需要在浏览器中输入"http://localhost:8080/swagger-ui.html",就可以进入Swagger2的UI界面了。接口文档的效果可以参考下图:
6. 使用Swagger2的高级特性
Swagger2不仅可以生成接口文档,还可以生成模拟数据,以方便前后端协作。通过使用Swagger2的高级特性,我们可以在测试阶段使用模拟数据进行开发,以提高开发效率。以下是一些使用Swagger2高级特性的示例:
@ApiModel:用于对响应数据进行注释,表示一个用户对象,包含userName和password字段。
@ApiModel("用户对象")
public class User {
    @ApiModelProperty(value = "用户名", required = true)
    private String userName;

    @ApiModelProperty(value = "密码", required = true)
    private String password;

    // ...
}
@ApiResponses:用于对响应状态码进行注释。
@ApiOperation("查询用户详情")
@GetMapping("/{id}")
@ApiResponses({
        @ApiResponse(code = 200, message = "成功"),
        @ApiResponse(code = 400, message = "请求错误"),
        @ApiResponse(code = 401, message = "未授权"),
        @ApiResponse(code = 403, message = "禁止访问"),
        @ApiResponse(code = 404, message = "资源不存在")
})
public User getUserById(@PathVariable Long id) {
    // ...
}
@ApiModelProperty:用于对请求参数进行注释,表示请求参数为用户名。
@ApiOperation("查询用户")
@GetMapping("")
public List<User> getUserList(@ApiParam(value = "用户名") @RequestParam(required = false) String userName) {
    // ...
}
7. 总结
通过本文的介绍,我们了解了Swagger2的基本使用方法,并讲解了一些高级特性,让接口文档管理变得更加简单。在项目中使用Swagger2可以有效地提高开发效率,减少接口文档编写的工作量。希望本文对大家在接口文档管理方面有所帮助。


