用场景对three.js进行渲染:场景、相机、渲染器
const scene = new THREE.Scene();
const camera = new THREE.PerspectiveCamera( 75, window.innerWidth / window.innerHeight, 0.1, 1000 );

const renderer = new THREE.WebGLRenderer();
renderer.setSize( window.innerWidth, window.innerHeight );
document.body.appendChild( renderer.domElement );
场景
function Scene() {

  Object3D.call( this );

  this.type = 'Scene';

  this.background = null;
  this.fog = null;
  this.overrideMaterial = null;

  this.autoUpdate = true; // checked by the renderer

}
透视摄影机
参数解析:
- fov: 视野角度(FOV)。视野角度就是无论在什么时候,你所能在显示器上看到的场景的范围,它的单位是角度(与弧度区分开)。
- aspect: 长宽比(aspect ratio)。 也就是你用一个物体的宽除以它的高的值。比如说,当你在一个宽屏电视上播放老电影时,可以看到图像仿佛是被压扁的。
- near: 近截面(near)
- far: 远截面(far)
function PerspectiveCamera( fov, aspect, near, far ) {

  Camera.call( this );

  this.type = 'PerspectiveCamera';

  this.fov = fov !== undefined ? fov : 50;
  this.zoom = 1;

  this.near = near !== undefined ? near : 0.1;
  this.far = far !== undefined ? far : 2000;
  this.focus = 10;

  this.aspect = aspect !== undefined ? aspect : 1;
  this.view = null;

  this.filmGauge = 35;	// width of the film (default in millimeters)
  this.filmOffset = 0;	// horizontal film offset (same unit as gauge)

  this.updateProjectionMatrix();

}
渲染器
function WebGLRenderer( parameters ) {

  console.log( 'THREE.WebGLRenderer', REVISION );

  parameters = parameters || {};
  //...
}
浅试
创建一个渲染场景,没有物体
<!DOCTYPE html>
<html lang="en">

<head>
  <meta charset="UTF-8">
  <meta http-equiv="X-UA-Compatible" content="IE=edge">
  <meta name="viewport" content="width=device-width, initial-scale=1.0">
  <title>Document</title>
  <!-- <script src="./three.js"></script> -->
  <style type="text/css">
    body {
      overflow: hidden;
      margin: 0;
    }
  </style>
  <script src="https://cdn.bootcss.com/three.js/92/three.js"></script>
</head>

<body>
  <script>
    const scene = new THREE.Scene();
    const camera = new THREE.PerspectiveCamera(75, window.innerWidth / window.innerHeight, 0.1, 1000);

    const renderer = new THREE.WebGLRenderer();
    renderer.setSize(window.innerWidth, window.innerHeight);
    document.body.appendChild(renderer.domElement);
  </script>
</body>

</html>
创建一个物体
const geometry = new THREE.BoxGeometry( 1, 1, 1 );
const material = new THREE.MeshBasicMaterial( { color: 0x00ff00 } );
const cube = new THREE.Mesh( geometry, material );
scene.add( cube );

camera.position.z = 5;
立方体(BoxGeometry)
参数解析
- width :X轴上面的宽度,默认值为1。
- height :Y轴上面的高度,默认值为1。
- depth :Z轴上面的深度,默认值为1。
- widthSegments :可选)宽度的分段数,默认值是1。
- heightSegments :(可选)高度的分段数,默认值是1。
- depthSegments :可选)深度的分段数,默认值是1
function BoxGeometry( width, height, depth, widthSegments, heightSegments, depthSegments ) {

  Geometry.call( this );

  this.type = 'BoxGeometry';

  this.parameters = {
    width: width,
    height: height,
    depth: depth,
    widthSegments: widthSegments,
    heightSegments: heightSegments,
    depthSegments: depthSegments
  };

  this.fromBufferGeometry( new BoxBufferGeometry( width, height, depth, widthSegments, heightSegments, depthSegments ) );
  this.mergeVertices();

}
材质
function MeshBasicMaterial( parameters ) {

  Material.call( this );

  this.type = 'MeshBasicMaterial';

  this.color = new Color( 0xffffff ); // emissive

  this.map = null;

  this.lightMap = null;
  this.lightMapIntensity = 1.0;

  this.aoMap = null;
  this.aoMapIntensity = 1.0;

  this.specularMap = null;

  this.alphaMap = null;

  this.envMap = null;
  this.combine = MultiplyOperation;
  this.reflectivity = 1;
  this.refractionRatio = 0.98;

  this.wireframe = false;
  this.wireframeLinewidth = 1;
  this.wireframeLinecap = 'round';
  this.wireframeLinejoin = 'round';

  this.skinning = false;
  this.morphTargets = false;

  this.lights = false;

  this.setValues( parameters );

}
网格
function Mesh( geometry, material ) {

  Object3D.call( this );

  this.type = 'Mesh';

  this.geometry = geometry !== undefined ? geometry : new BufferGeometry();
  this.material = material !== undefined ? material : new MeshBasicMaterial( { color: Math.random() * 0xffffff } );

  this.drawMode = TrianglesDrawMode;

  this.updateMorphTargets();

}
物品渲染在场景上
// 创建场景
const scene = new THREE.Scene();

// 创建相机
const camera = new THREE.PerspectiveCamera(75, window.innerWidth / window.innerHeight, 1, 1000);

// 渲染
const renderer = new THREE.WebGLRenderer();
// 设置渲染场景大小
renderer.setSize(window.innerWidth, window.innerHeight);
// 将渲染加到body
document.body.appendChild(renderer.domElement);

// 创建物体
const geometry = new THREE.BoxGeometry(1, 1, 1, 2,2,3);
const material = new THREE.MeshBasicMaterial({color: '#30b2f4'});
const cube = new THREE.Mesh(geometry, material);

// 场景中添加物体
scene.add(cube);

// 设置相机位置
camera.position.z = 3;
camera.position.x = 2;
camera.position.y = 1;

// 渲染
renderer.render(scene, camera);
浅加一个动画
window.requestAnimationFrame() 告诉浏览器——你希望执行一个动画,并且要求浏览器在下次重绘之前调用指定的回调函数更新动画。该方法需要传入一个回调函数作为参数,该回调函数会在浏览器下一次重绘之前执行
window.requestAnimationFrame(callback);
// 创建场景
const scene = new THREE.Scene();

// 创建相机
const camera = new THREE.PerspectiveCamera(75, window.innerWidth / window.innerHeight, 1, 1000);

// 渲染
const renderer = new THREE.WebGLRenderer();
// 设置渲染场景大小
renderer.setSize(window.innerWidth, window.innerHeight);
// 将渲染加到body
document.body.appendChild(renderer.domElement);

// 创建物体
const geometry = new THREE.BoxGeometry(1, 1, 1, 2, 2, 3);
const material = new THREE.MeshBasicMaterial({ color: '#30b2f4' });
const cube = new THREE.Mesh(geometry, material);

// 场景中添加物体
scene.add(cube);

// 设置相机位置
camera.position.z = 3;
camera.position.x = 2;
camera.position.y = 1;


// 添加动画效果
function animation() {
  window.requestAnimationFrame(animation);
  // cube.rotation.x += 0.01;
  // cube.rotation.y += 0.01;
  camera.position.z += 0.01
  camera.position.y += 0.01

  // 渲染
  renderer.render(scene, camera);
}

animation()
添加曲线
参数解析
- points – Vector3点数组
- closed – 该曲线是否闭合,默认值为false。
- curveType – 曲线的类型,默认值为centripetal。
- tension – 曲线的张力,默认为0.5。
function CatmullRomCurve3( points, closed, curveType, tension ) {

  Curve.call( this );

  this.type = 'CatmullRomCurve3';

  this.points = points || [];
  this.closed = closed || false;
  this.curveType = curveType || 'centripetal';
  this.tension = tension || 0.5;

}
function Vector3( x, y, z ) {

  this.x = x || 0;
  this.y = y || 0;
  this.z = z || 0;

}
function BufferGeometry() {

  Object.defineProperty( this, 'id', { value: bufferGeometryId += 2 } );

  this.uuid = _Math.generateUUID();

  this.name = '';
  this.type = 'BufferGeometry';

  this.index = null;
  this.attributes = {};

  this.morphAttributes = {};

  this.groups = [];

  this.boundingBox = null;
  this.boundingSphere = null;

  this.drawRange = { start: 0, count: Infinity };

}
function LineBasicMaterial( parameters ) {

  Material.call( this );

  this.type = 'LineBasicMaterial';

  this.color = new Color( 0xffffff );

  this.linewidth = 1;
  this.linecap = 'round';
  this.linejoin = 'round';

  this.lights = false;

  this.setValues( parameters );

}
function Line( geometry, material, mode ) {

  if ( mode === 1 ) {

    console.warn( 'THREE.Line: parameter THREE.LinePieces no longer supported. Created THREE.LineSegments instead.' );
    return new LineSegments( geometry, material );

  }

  Object3D.call( this );

  this.type = 'Line';

  this.geometry = geometry !== undefined ? geometry : new BufferGeometry();
  this.material = material !== undefined ? material : new LineBasicMaterial( { color: Math.random() * 0xffffff } );

}
//Create a closed wavey loop
const curve = new THREE.CatmullRomCurve3([
  new THREE.Vector3(-10, 0, 10),
  new THREE.Vector3(-5, 5, 5),
  new THREE.Vector3(0, 0, 0),
  new THREE.Vector3(5, -5, 5),
  new THREE.Vector3(10, 0, 10)
]);

const points = curve.getPoints(50);
const geometryCurve = new THREE.BufferGeometry().setFromPoints(points);
const materialCurve = new THREE.LineBasicMaterial({ color: 0xff0000 });

// Create the final object to add to the scene
const curveObject = new THREE.Line(geometryCurve, materialCurve);


// 场景中添加物体
scene.add(curveObject);
添加灯光
function AmbientLight( color, intensity ) {

  Light.call( this, color, intensity );

  this.type = 'AmbientLight';

  this.castShadow = undefined;

}
动画执行一段时间,移除物体
// 创建场景
const scene = new THREE.Scene();

// 创建相机
const camera = new THREE.PerspectiveCamera(76, window.innerWidth / window.innerHeight, 1, 1000);

// 渲染
const renderer = new THREE.WebGLRenderer();
// 设置渲染场景大小
renderer.setSize(window.innerWidth, window.innerHeight);
// 将渲染加到body
document.body.appendChild(renderer.domElement);

// 创建物体
const geometry = new THREE.BoxGeometry(1, 1, 1, 2, 2, 3);
const material = new THREE.MeshBasicMaterial({ color: '#30b2f4' });
const cube = new THREE.Mesh(geometry, material);

//Create a closed wavey loop
const curve = new THREE.CatmullRomCurve3([
  new THREE.Vector3(-10, 0, 10),
  new THREE.Vector3(-5, 5, 5),
  new THREE.Vector3(0, 0, 0),
  new THREE.Vector3(5, -5, 5),
  new THREE.Vector3(10, 0, 10)
]);

const points = curve.getPoints(50);
const geometryCurve = new THREE.BufferGeometry().setFromPoints(points);
const materialCurve = new THREE.LineBasicMaterial({ color: 0xff0000 });

// Create the final object to add to the scene
const curveObject = new THREE.Line(geometryCurve, materialCurve);

// 添加灯光
const light = new THREE.AmbientLight('#52D59A'); // soft white light

// 场景中添加物体
scene.add(light);

scene.add(cube);
scene.add(curveObject);

// 设置相机位置
camera.position.z = 3;
camera.position.x = 2;
camera.position.y = -2;


let count = 0
// 添加动画效果
function animation() {

  if (count !== 110) {
    window.requestAnimationFrame(animation);
    renderer.render(scene, camera);

  }
  if (count >= 100) {
    scene.remove(cube)
  }

  // cube.rotation.x += 0.01;
  // cube.rotation.y += 0.01;
  camera.position.z += 0.01
  camera.position.y += 0.01
  count++;

  console.log('count', count);
  // 渲染
}

animation()
function Object3D() {

  Object.defineProperty( this, 'id', { value: object3DId ++ } );

  this.uuid = _Math.generateUUID();

  this.name = '';
  this.type = 'Object3D';

  this.parent = null;
  this.children = [];

  this.up = Object3D.DefaultUp.clone();

  var position = new Vector3();
  var rotation = new Euler();
  var quaternion = new Quaternion();
  var scale = new Vector3( 1, 1, 1 );
  function onRotationChange() {

    quaternion.setFromEuler( rotation, false );

  }

  function onQuaternionChange() {

    rotation.setFromQuaternion( quaternion, undefined, false );

  }

  rotation.onChange( onRotationChange );
  quaternion.onChange( onQuaternionChange );

  Object.defineProperties( this, {
    position: {
      enumerable: true,
      value: position
    },
    rotation: {
      enumerable: true,
      value: rotation
    },
    quaternion: {
      enumerable: true,
      value: quaternion
    },
    scale: {
      enumerable: true,
      value: scale
    },
    modelViewMatrix: {
      value: new Matrix4()
    },
    normalMatrix: {
      value: new Matrix3()
    }
  } );

  this.matrix = new Matrix4();
  this.matrixWorld = new Matrix4();

  this.matrixAutoUpdate = Object3D.DefaultMatrixAutoUpdate;
  this.matrixWorldNeedsUpdate = false;

  this.layers = new Layers();
  this.visible = true;

  this.castShadow = false;
  this.receiveShadow = false;

  this.frustumCulled = true;
  this.renderOrder = 0;

  this.userData = {};
  }
修改渲染的背景颜色
// 渲染
const renderer = new THREE.WebGLRenderer();

// 更改渲染背景色,默认为黑色
renderer.setClearColor('rgba(191, 115, 87, 0.95)', 1.0)
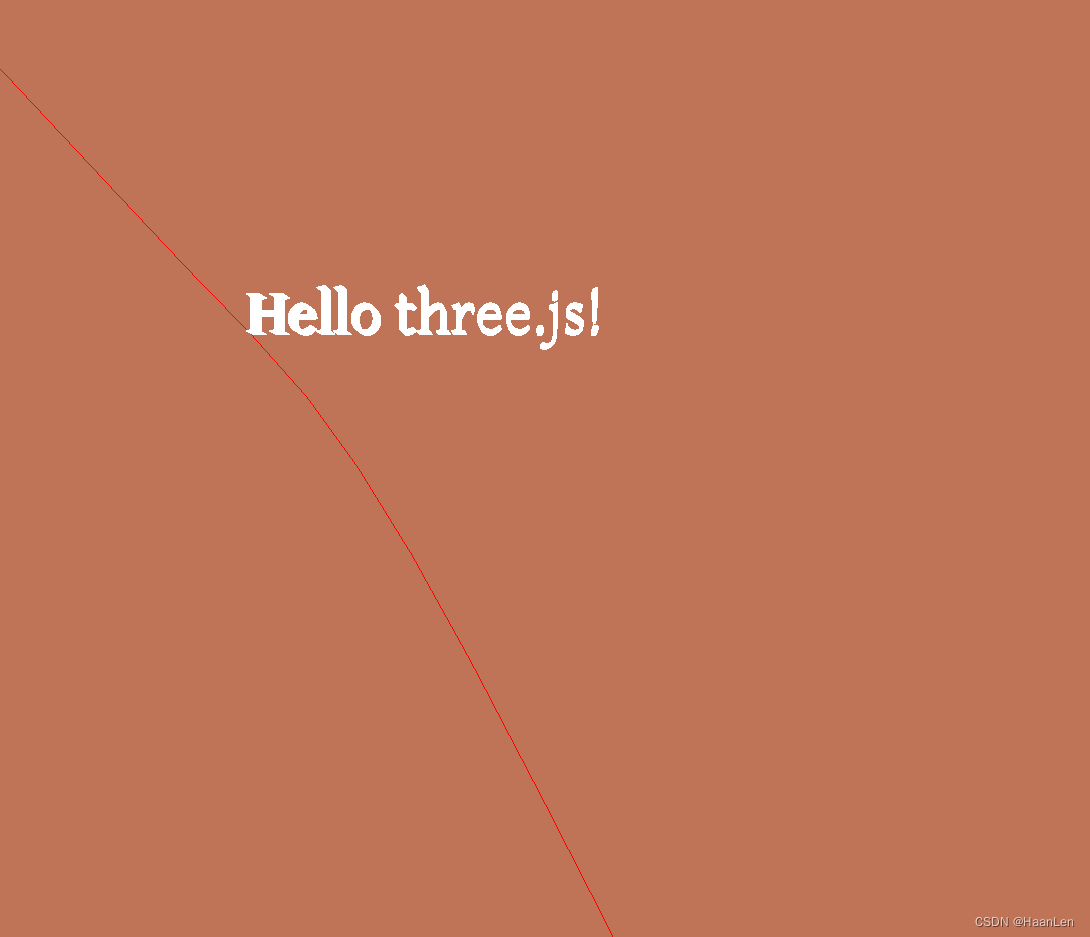
渲染3D文本
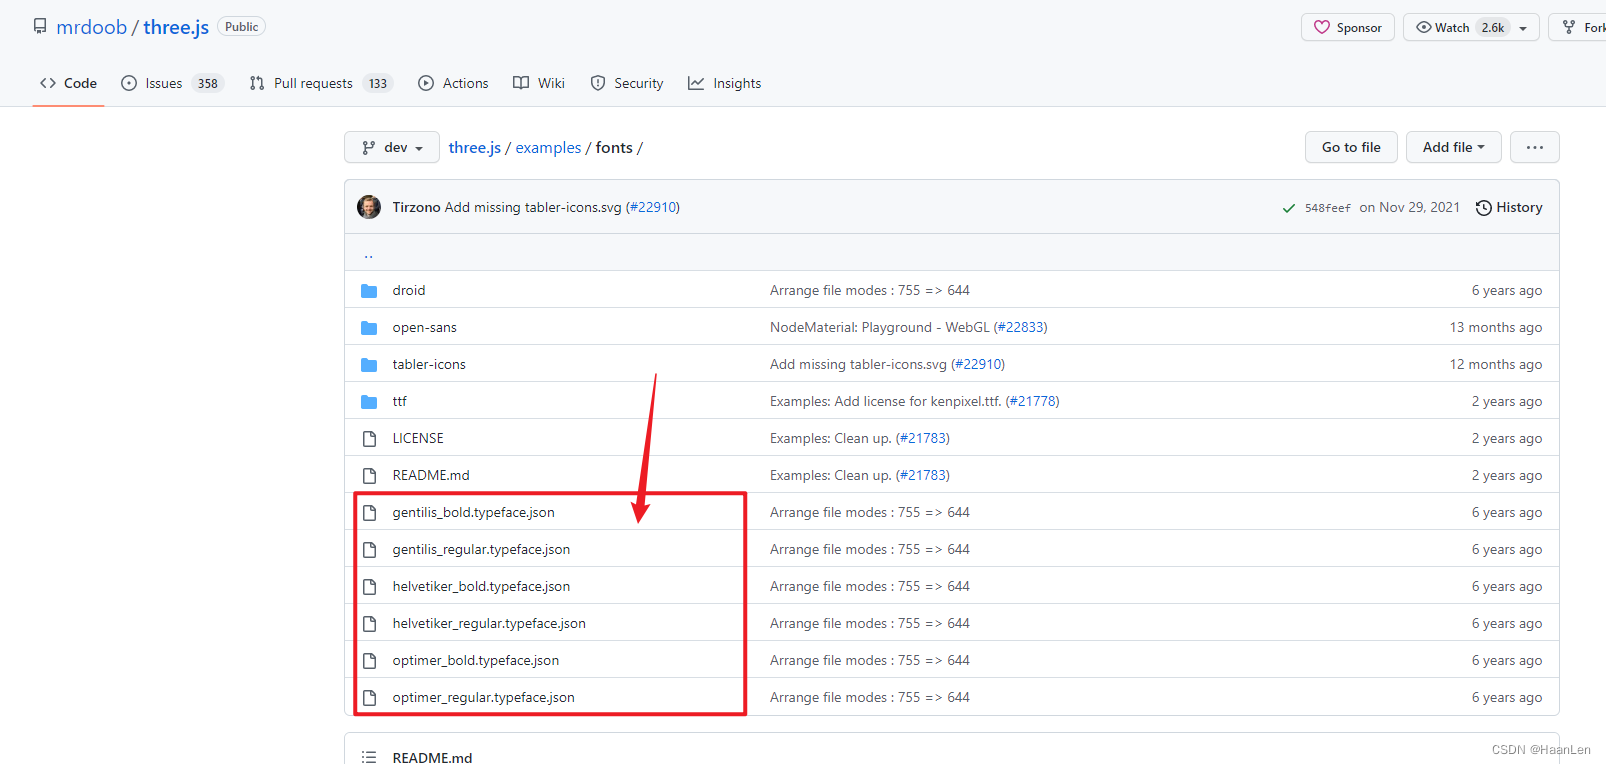
在官网可随意下载一个字体json文件放置本地使用
地址:https://github.com/mrdoob/three.js/tree/dev/examples/fonts
// 创建场景
const scene = new THREE.Scene();
const loader = new THREE.FontLoader();
loader.load('./gentilis_regular.json', function (font) {
  const geometryText = new THREE.TextGeometry('Hello three.js!', {
    font: font,
    size: 0.3,
    height: 0.1,
    // curveSegments: 12,//表示文本的)曲线上点的数量。默认值为12。
    // bevelEnabled: true,//是否开启斜角
    // bevelThickness: 10,//文本上斜角的深度,默认值为20。
    // bevelSize: 8,//斜角与原始文本轮廓之间的延伸距离。默认值为8。
    // bevelSegments: 5//斜角的分段数。默认值为3。
  });
  const m = new THREE.MeshBasicMaterial({color:'#ffffff'});
  const  mesh = new THREE.Mesh(geometryText,m);
  scene.add(mesh)
});
GitHub:https://github.com/mrdoob/three.js/blob/master/src/scenes/Scene.js
![[附源码]Python计算机毕业设计Django基于web的建设科技项目申报管理系统](https://img-blog.csdnimg.cn/74aa88dab14c440fb6c48eb1b320c929.png)
