目录
Pinia的讲解与使用
Pinia的安装与使用
store数据操作
解构store数据
actions-getters的使用
Pinia常用API
持久化插件
Pinia的讲解与使用
Pinia 是由 Eduardo San Martin Morote 创建的,这是一个轻量级的、使用 Vue3 Composition API 的状态管理库。Pinia 于2020年8月正式发布,也就是在 Vue 3.0.0 版本推出后不久,可以说是比较新的一个状态管理解决方案。虽然 Pinia 是一种相对较新的解决方案,但它受到了许多 Vue.js 开发者的青睐,并在许多项目中得到广泛应用。
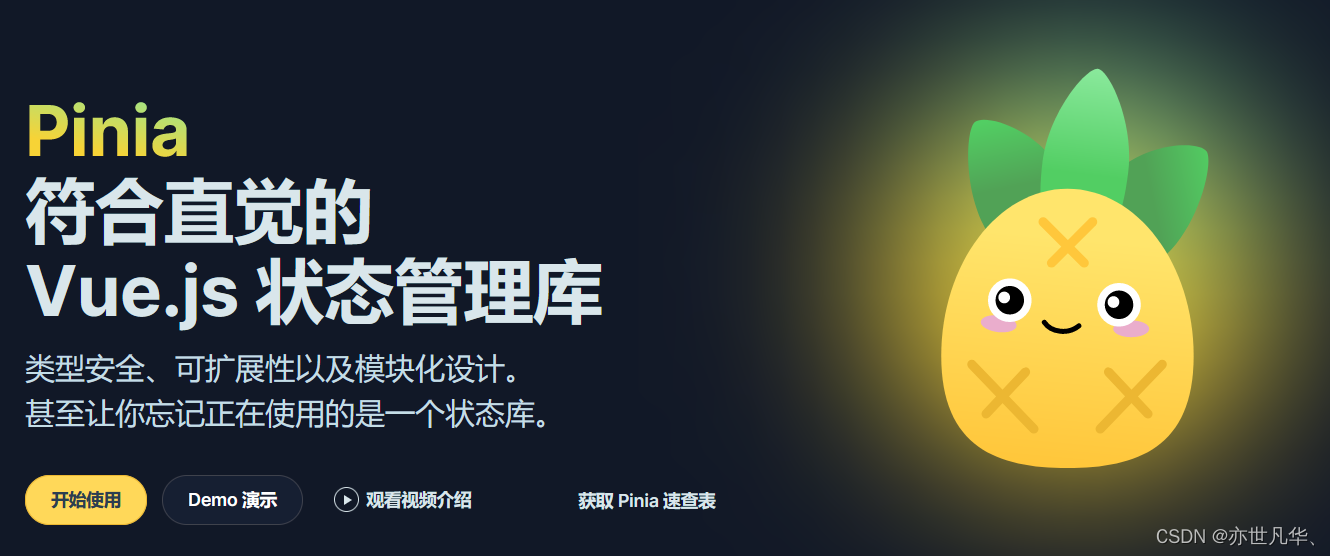
官方文档为:https://pinia.vuejs.org/zh/introduction.html ,从官网的图示我们不难看出,Pinia是专为 Vue.js 框架设计的状态管理解决方案,其核心是建立在 Vue 3 Composition API 之上的。因此Pinia 不能直接用于使用其他框架的项目。
但是,Pinia 可以与其他框架和库一起使用,例如在通过 Vue.js 构建的应用程序中,如果需要在 React 组件中使用 Pinia 中的状态,可以使用 Vue.js 手动渲染 React 组件的方法来实现。但是这种使用方式需要额外处理,使用起来可能会有一定的挑战性。如果你正在使用React,可以考虑使用专为React设计的状态管理方案,比如Redux,Mobx, Recoil等等。
那么我们在项目中该如何选择合适的状态管理工具进行使用?也就是说Pinia和Vuex的区别和应用场景到底有什么区别,别急,等我慢慢道来。
Pinia 和 Vuex 是 Vue.js 框架中两种常见的状态管理解决方案。它们都是用于管理响应式状态,但存在一些区别。如下:
API 的不同
Pinia 提供了一个更简单、更直接、易于理解的 API;而 Vuex 的 API 更加灵活,但也更为复杂,需要花费更多的时间学习。
全局状态的处理不同
在 Vuex 中有一个全局的 store(仓库),用于存储应用程序中的所有状态,而 Pinia 中则是一个基于类的 API,每个组件实例均有自己的 Pinia store,这使得应用程序的状态管理更加灵活、容易。此外,Pinia 还具有更好的 TypeScript 支持。
API 实时性的差异
在 Pinia 中,所有 getter 和 action 都会被实时更新,而在 Vuex 中只有 getter 会被实时更新,action 不会。
那么Pinia到底有啥特点能够吸引Vue开发者的对其竞相追逐呢?如下:
1)Pinia 是使用 TypeScript 编写的,它充分利用了 TypeScript 强类型系统的优点,提供了更好的类型声明和类型检查能力。
2)Pinia 的代码结构更加简洁明了,由于 Vue.js 3 在状态管理方面提供了更好的支持,Pinia 可以借助 Vue.js 3 的一些新特性来实现更简单、更直观的状态管理方案。
3)Pinia 支持插件,它提供了一个插件 API,可以将它与其他库和工具集成使用,如 devtools、vuex-persistedstate 等。
4)Pinia 通过提供 API 来支持响应式和异步操作,是一个更加灵活和可配置的状态管理方案。
5)在使用 Pinia 时,不需要像 Vuex 一样集中式地管理所有的状态,而是可以分成多个 Store,每个 Store 可以管理自己相关的状态。这种分离使代码结构更加清晰,易于维护。
总之,Pinia 相较于 Vuex 更加简单方便,不需要使用复杂的 API 和语法来管理应用状态,它还能够适应更广泛的应用场景,而 Vuex 则更加适用于复杂的状态管理需求。
Pinia的安装与使用
这里我采用的是vite构建工具进行创建的 vue3 最新项目,并结合TS的语言支持,如果你想在vue2中使用pinia,可自行查阅官网,这里不再赘述。如果不了解vite构建工具的朋友推荐看一下我之前讲解的文章:vite脚手架的搭建与使用 ,当然如果你是现成已经创建好的项目,直接执行如下命令安装库即可,这里不再赘述。
创建完项目后,终端执行如下命令进行安装Pinia库:
npm install pinia安装完成之后,我们就可以在main.ts中进行引入Pinia相关配置代码,创建一个 pinia 实例 (根 store) 并将其传递给应用,如下:
import { createApp } from 'vue'
import App from './App.vue'
import { createPinia } from 'pinia'

const store = createPinia()
let app = createApp(store)
app.use(store)

createApp(App).mount('#app')初始化仓库store: Store (如 Pinia) 是一个保存状态和业务逻辑的实体,它并不与你的组件树绑定。换句话说,它承载着全局状态。它有点像一个永远存在的组件,每个组件都可以读取和写入它。一般我们通常在 src 目录下新建文件夹 store ,里面存放中我们初始化仓库的文件代码:
在Pinia中 store是用defineStore()定义的,它的第一个参数是一个独一无二的名字,作为store中的唯一ID,Pinia 将用它来连接 store 和 devtools。为了方便处理ID,我将其单独抽离出来一个文件,用来枚举所有的pinia仓库ID,如下:
export const enum Names {
  Student = 'Student'
}
在store文件夹下新建index.ts文件,用来存放数据和操作的数据的方法:
import { defineStore } from "pinia";
import { Names } from "./storeName";

// 将返回的函数命名为 use... 是一个符合组合式函数风格的约定。
export const useStudentStore = defineStore(Names.Student,{
  state:()=>({
    name:'张三',
    age:18
  })
})
在App.vue中我们进行引入store并将store中的数据进行渲染到界面上:
<template>
  <div class="">
    Pinia:{{ Student.age }}
  </div>
</template>

<script setup lang="ts">
import { useStudentStore } from "./store"
const Student = useStudentStore()
</script>
在 vue 开发者工具中我们也可以看到我们创建的pinia数据。

store数据操作
直接修改:
在pinia中我们可以直接对store中的数据进行操作,不再像vuex一样需要借助action才能进行:
<template>
  <div class="">
    Pinia:{{ Student.age }}
    <button @click="change">修改</button>
  </div>
</template>

<script setup lang="ts">
import { useStudentStore } from "./store"
const Student = useStudentStore()
const change = () =>{
  Student.age++
}
</script>
$patch函数修改:
如果想批量修改数据的话可以借助store身上的一个 $patch 函数,传入一个对象进行批量修改:
<template>
  <div class="">
    Pinia:{{ Student.name }}
    Pinia:{{ Student.age }}
    <button @click="change">修改</button>
  </div>
</template>

<script setup lang="ts">
import { useStudentStore } from "./store"
const Student = useStudentStore()
const change = () =>{
  Student.$patch({
    name:'李四',
    age:20
  })
}
</script>
当然也可以采用函数式写法:

$state函数修改:
当然也可以采用$state函数进行修改,但是缺陷是必须将state对象中的所有数据都进行修改,不能只单独修改某一个。

action函数修改:
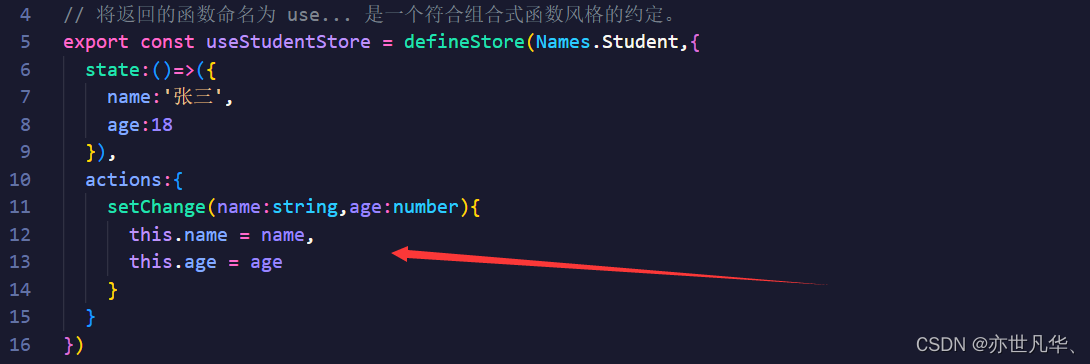
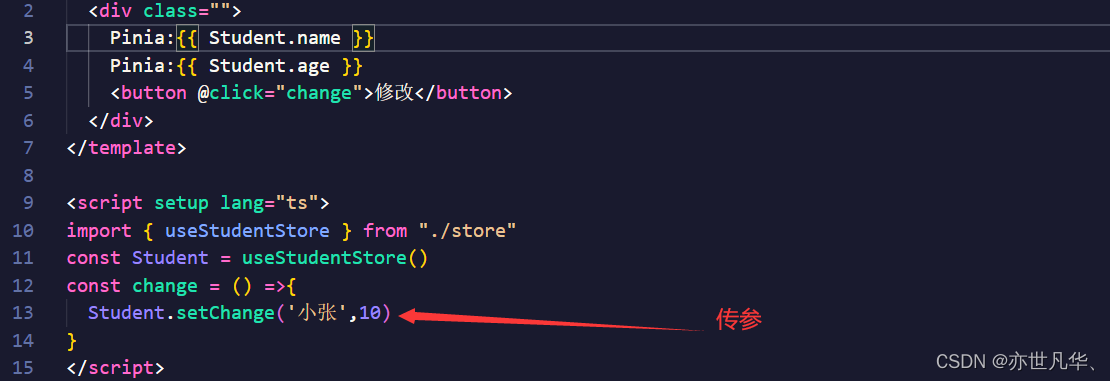
这里也可以借助store代码中的actions方法进行操作state中的数据,如下:

解构store数据
当我们使用store时,也可以采用解构方式,但是解构出来的store数据是非响应式的,如下:
<template>
  <div class="">
    Pinia:{{ Student.name }}
    Pinia:{{ Student.age }}
    <p>解构后的数据</p>
    Pinia:{{ name }}
    Pinia:{{ age }}
    <button @click="change">修改</button>
  </div>
</template>

<script setup lang="ts">
import { useStudentStore } from "./store"
const Student = useStudentStore()
const { name,age } = Student
const change = () =>{
  Student.setChange('小张',10)
}
</script>
如果想将解构后的数据设置为响应式,可以采取这种方式


actions-getters的使用
在pinia中actions属性中可以调用同步函数和异步函数,如下:
同步函数的简单使用:
import { defineStore } from "pinia";
import { Names } from "./storeName";

type User = {
  name:string,
  age:number
}
let result:User = {
  name:'小王',
  age:100
}

// 将返回的函数命名为 use... 是一个符合组合式函数风格的约定。
export const useStudentStore = defineStore(Names.Student,{
  state:()=>({
    person:<User>{}
  }),
  actions:{
    setChange(){
      this.person = result
    }
  }
})
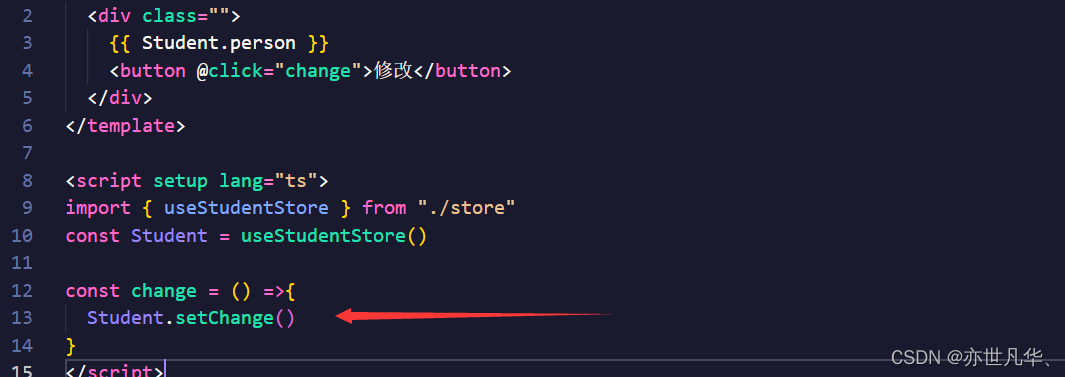
在App.vue中直接调用函数即可:

异步函数的简单使用:
import { defineStore } from "pinia";
import { Names } from "./storeName";

type User = {
  name:string,
  age:number
}
const Login = ():Promise<User>=>{
  return new Promise((resolve)=>{
    setTimeout(()=>{
      resolve({
        name:'小明',
        age:100
      })
    },2000)
  })
}
// 将返回的函数命名为 use... 是一个符合组合式函数风格的约定。
export const useStudentStore = defineStore(Names.Student,{
  state:()=>({
    person:<User>{},
    name:'老王'
  }),
  actions:{
    async setChange(){
      const result = await Login( )
      this.person = result
      this.setName('小王')
    },
    setName(name:string){
      this.name = name
    }
  }
})
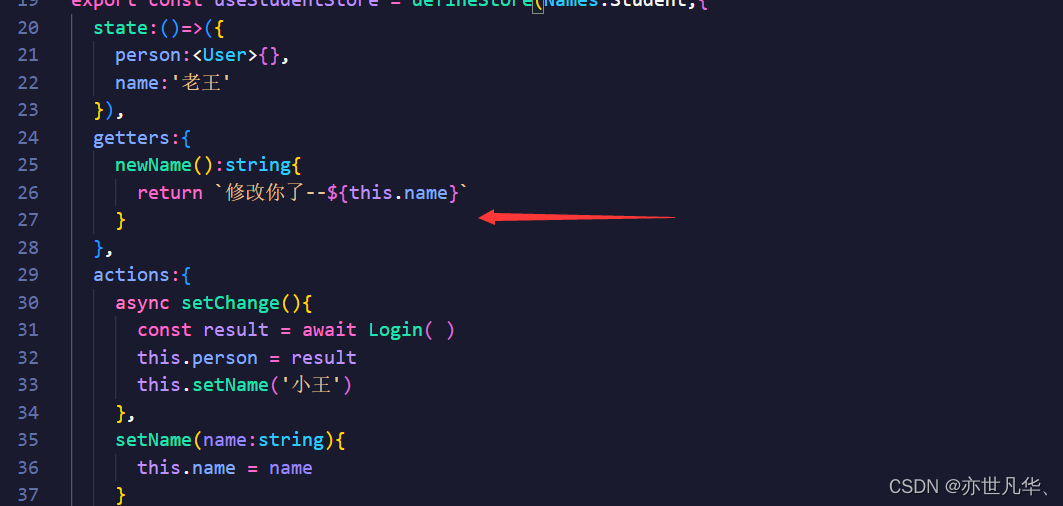
在pinia中getters属性中可以修饰一些值,如下:


Pinia常用API
pinia给我们也提供了一些常用的API,便捷我们日常的开发,如下:
$reset:重置state状态数据


$subscribe:响应state的变化


$onAction:响应actions的变化


持久化插件
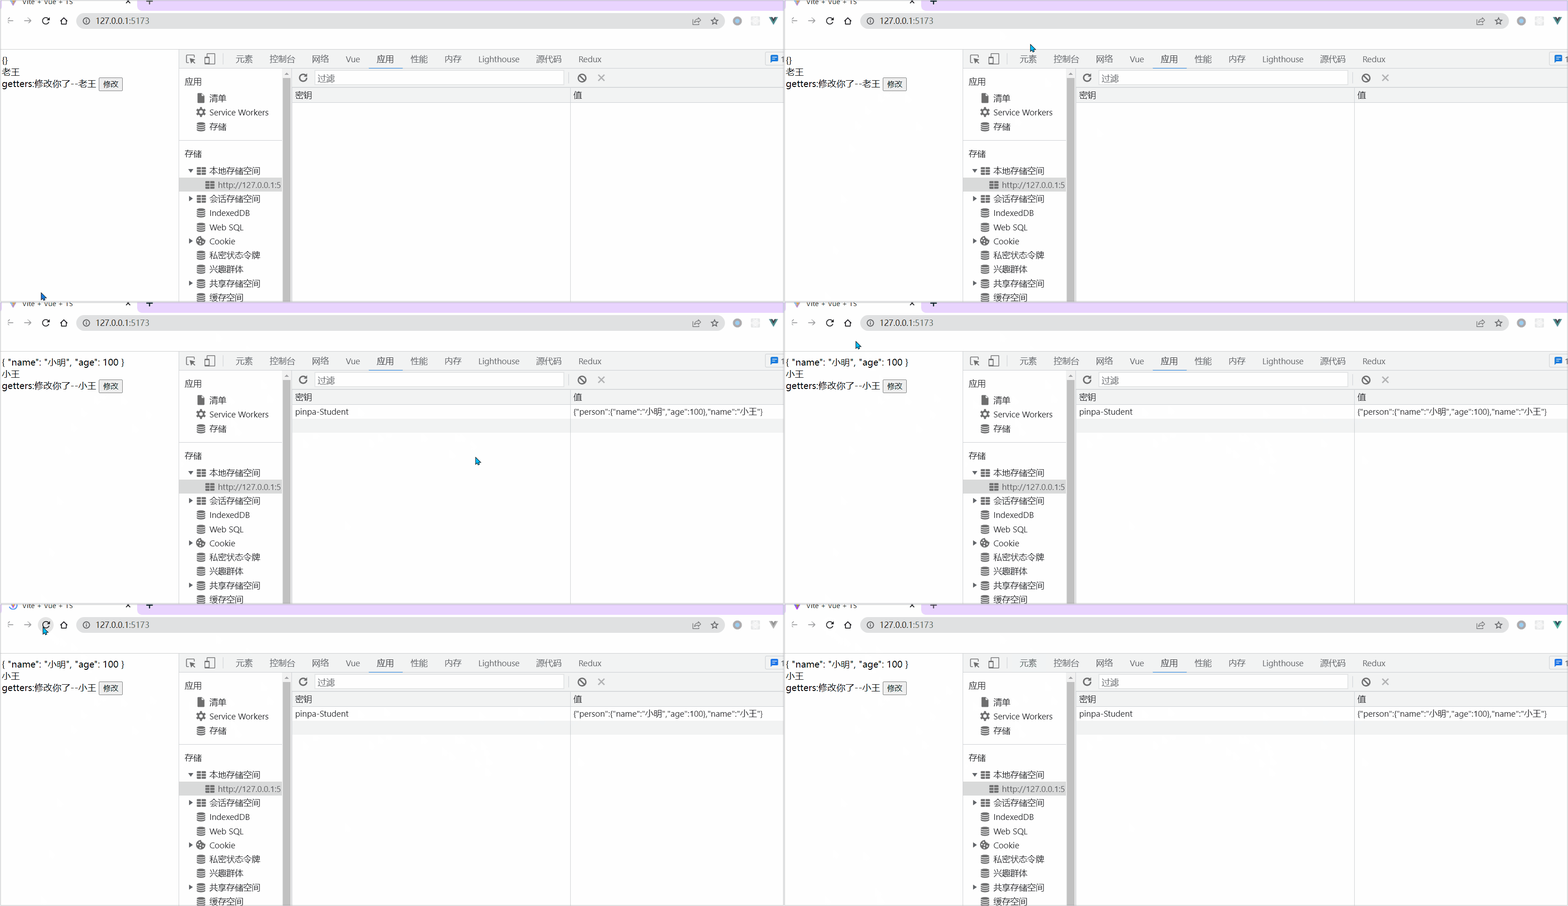
pinia和vuex都有一个通病,就是页面一旦刷新数据就会丢失,我们希望刷新页面之后,数据将会在页面中进行保留,详情代码都放置在 mian.ts 中,如下:
import { createApp,toRaw } from 'vue'
import App from './App.vue'
import { createPinia, PiniaPluginContext } from 'pinia'

const setStorage = (key:string,value:any) => {
  localStorage.setItem(key,JSON.stringify(value))
}
const getStorage = (key:string) =>{
  return localStorage.getItem(key) ? JSON.parse(localStorage.getItem(key) as string) : {}
}

type options = {
  key?:string
}
const __piniakey__:string = 'null'
const piniaPlugin = (options:options) => {
  return (context:PiniaPluginContext) => {
    const { store } = context
    const data = getStorage(`${options?.key ?? __piniakey__}-${store.$id}`)
    store.$subscribe(()=>{
      setStorage(`${options?.key ?? __piniakey__}-${store.$id}`,toRaw(store.$state))
    })
    console.log(store,'store')
    return {
      ...data
    }
  }
}
const store = createPinia()
store.use(piniaPlugin({
  key:'pinpa'
}))
let app = createApp(store)
app.use(store)

createApp(App).mount('#app')