libtorch+yolov5
- 一、环境配置
- 二、下载官网例子
- 三、测试
- 3.1、创建项目
- 3.2、cmakelist.txt编写
- 3.3、运行测试
一、环境配置
需要配置libtorch+OpenCV,此处参考博文:clion配置libtorch+OpenCV环境配置。
环境解决后即可开始下一步啦。
二、下载官网例子
下载地址:YOLOv5 libtorch版本测试代码。
解压后如图所示:

三、测试
3.1、创建项目
博主是新建了一个项目,把相关代码复制过去重新运行的。
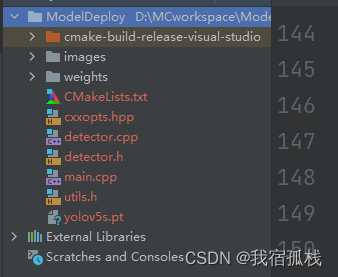
这是总的目录结构。
其中【images】和【weights】即为二中下载源码中的【images】和【weights】,其他的头文件和源文件是二中源码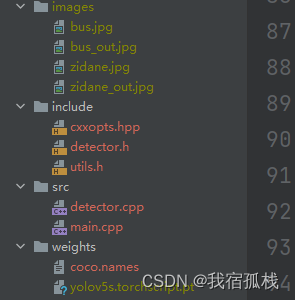
这里博主没有新建【include】和【src】目录,直接将5个文件复制到了新建项目下。
3.2、cmakelist.txt编写
这一步至关重要。
cmakelist.txt如下:
cmake_minimum_required(VERSION 3.19)
project(ModelDeploy)

set(CMAKE_CXX_STANDARD 14)

set(CMAKE_PREFIX_PATH D:/pyTorch/libtorch-win-shared-with-deps-2.0.0+cu117/libtorch)
#set(Torch_DIR "D:/pyTorch/libtorch-win-shared-with-deps-2.0.0+cu117/libtorch/share/cmake/Torch")
#include_directories(D:/pyTorch/libtorch-win-shared-with-deps-2.0.0+cu117/libtorch/include")
#include_directories("D:/pyTorch/libtorch-win-shared-with-deps-2.0.0+cu117/libtorch/include/torch/csrc/api/include")
find_package(Torch REQUIRED )

set(OpenCV_DIR D:/opencv/opencv-4.5.5/cmake-build-release-visual-studio/install)
find_package(OpenCV REQUIRED)
include_directories(${OpenCV_INCLUDE_DIRS})

add_executable(modelDeploy main.cpp detector.cpp utils.h cxxopts.hpp)
target_link_libraries(modelDeploy ${TORCH_LIBRARIES} ${OpenCV_LIBS})
set_property(TARGET modelDeploy PROPERTY CXX_STANDARD 14)
其实就是博文clion配置libtorch+OpenCV环境配置中的cmakelist.txt做了些许修改。
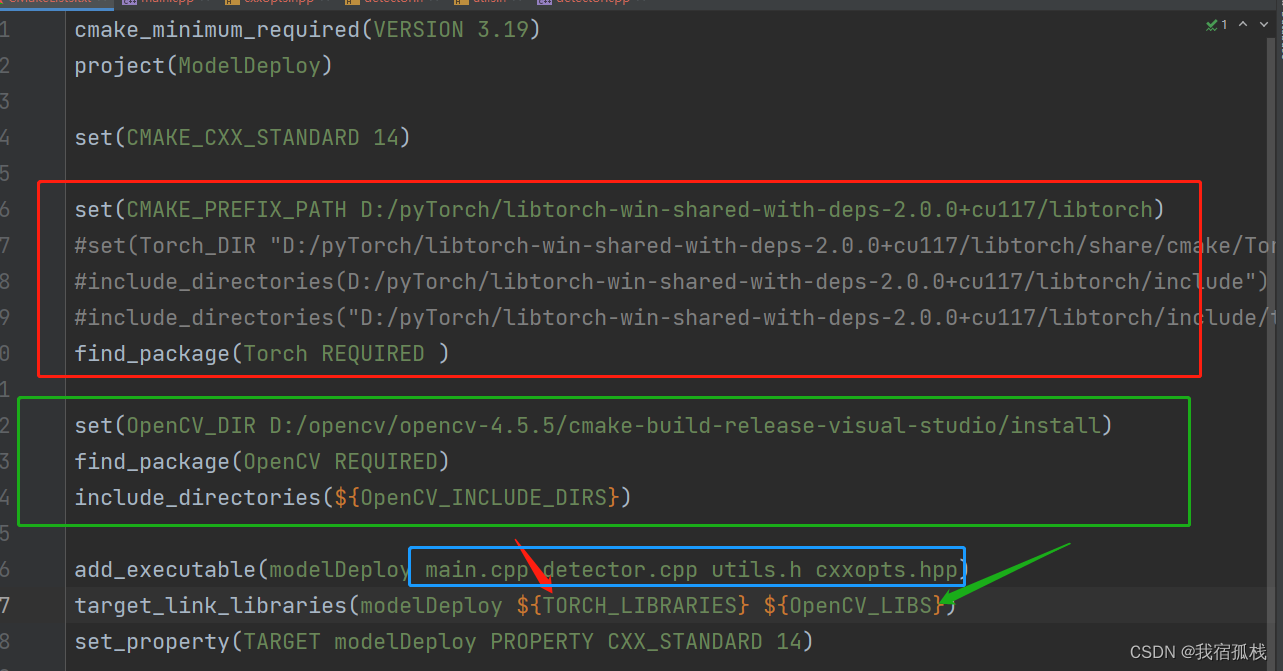
其中红色框和绿色框分别是libtorch和OpenCV的相关配置;蓝色框则是添加需要运行的头文件和源文件,这里就是和博文clion配置libtorch+OpenCV环境配置中的cmakelist.txt的不同之处,所以关于红色框和绿色框的路径地址怎么给,也可以参考该博文。
3.3、运行测试
main.cpp
#include <iostream>
#include <torch/script.h>
#include <memory>
#include <torch/torch.h>

#include <iostream>
#include <time.h>
#include<windows.h>

#include <opencv2/opencv.hpp>
#include <opencv2/core/core.hpp>
#include <opencv2/highgui/highgui_c.h>
#include <opencv2/highgui/highgui.hpp>
#include <opencv2/imgproc/imgproc.hpp>

#include "detector.h"
#include "cxxopts.hpp"

using namespace cv;

std::vector<std::string> LoadNames(const std::string& path)
{
    // load class names
    std::vector<std::string> class_names;
    std::ifstream infile(path);
    if (infile.is_open()) {
        std::string line;
        while (std::getline(infile, line)) {
            class_names.emplace_back(line);
        }
        infile.close();
    }
    else {
        std::cerr << "Error loading the class names!\n";
    }

    return class_names;
}
void Demo(cv::Mat& img,
          const std::vector<std::vector<Detection>>& detections,
          const std::vector<std::string>& class_names,
          bool label = true) {

    if (!detections.empty()) {
        for (const auto& detection : detections[0]) {
            const auto& box = detection.bbox;
            float score = detection.score;
            int class_idx = detection.class_idx;

            cv::rectangle(img, box, cv::Scalar(0, 0, 255), 2);

            if (label) {
                std::stringstream ss;
                ss << std::fixed << std::setprecision(2) << score;
                std::string s = class_names[class_idx] + " " + ss.str();

                auto font_face = cv::FONT_HERSHEY_DUPLEX;
                auto font_scale = 1.0;
                int thickness = 1;
                int baseline=0;
                auto s_size = cv::getTextSize(s, font_face, font_scale, thickness, &baseline);
                cv::rectangle(img,
                              cv::Point(box.tl().x, box.tl().y - s_size.height - 5),
                              cv::Point(box.tl().x + s_size.width, box.tl().y),
                              cv::Scalar(0, 0, 255), -1);
                cv::putText(img, s, cv::Point(box.tl().x, box.tl().y - 5),
                            font_face , font_scale, cv::Scalar(255, 255, 255), thickness);
            }
        }
    }

    cv::namedWindow("Result", cv::WINDOW_AUTOSIZE);
    cv::imshow("Result", img);
    cv::waitKey(0);
}

int main(int argc, const char* argv[]) {
  /*  std::cout << "Hello world." << std::endl;
    torch::Tensor a = torch::rand({2, 3});
    std::cout << a << std::endl;
    std::string path = "D:/aniya.jpg";
    Mat im = imread(path);
    imshow("image", im);
    waitKey(0);

    torch::jit::script::Module module;
    std::cout << torch::cuda::is_available() << std::endl;
    try {
        module = torch::jit::load("D:/MCworkspace/ModelDeploy/yolov5s.torchscript.pt");
        module.to(torch::kCUDA);		// set model to cpu / cuda mode
        module.eval();
        std::cout << "MODEL LOADED\n";
    }
    catch (const c10::Error& e) {
        std::cerr << "error loading the model\n";
    }
*/
    cxxopts::Options parser(argv[0], "A LibTorch inference implementation of the yolov5");
    // TODO: add other args
    parser.allow_unrecognised_options().add_options()
            ("weights", "yolov5s.torchscript.pt", cxxopts::value<std::string>()->default_value("../weights/yolov5s.torchscript.pt"))
            ("source", "images", cxxopts::value<std::string>()->default_value("../images/bus.jpg"))
            ("conf-thres", "object confidence threshold", cxxopts::value<float>()->default_value("0.4"))
            ("iou-thres", "IOU threshold for NMS", cxxopts::value<float>()->default_value("0.5"))
            ("gpu", "Enable cuda device or cpu", cxxopts::value<bool>()->default_value("false"))
            ("view-img", "display results", cxxopts::value<bool>()->default_value("true"))
            ("h,help", "Print usage");

    auto opt = parser.parse(argc, argv);

    if (opt.count("help")) {
        std::cout << parser.help() << std::endl;
        exit(0);
    }

    // check if gpu flag is set
    bool is_gpu = opt["gpu"].as<bool>();

    // set device type - CPU/GPU
    torch::DeviceType device_type;
    if (torch::cuda::is_available() && is_gpu) {
        device_type = torch::kCUDA;
    } else {
        device_type = torch::kCPU;
    }

    // load class names from dataset for visualization
    std::vector<std::string> class_names = LoadNames("../weights/coco.names");
    if (class_names.empty()) {
        return -1;
    }

    // load network
    std::string weights = opt["weights"].as<std::string>();
    auto detector = Detector(weights, device_type);

    // load input image
    std::string source = opt["source"].as<std::string>();
    cv::Mat img = cv::imread(source);
    if (img.empty()) {
        std::cerr << "Error loading the image!\n";
        return -1;
    }

    // run once to warm up
    std::cout << "Run once on empty image" << std::endl;
    auto temp_img = cv::Mat::zeros(img.rows, img.cols, CV_32FC3);
    detector.Run(temp_img, 1.0f, 1.0f);

    // set up threshold
    float conf_thres = opt["conf-thres"].as<float>();
    float iou_thres = opt["iou-thres"].as<float>();

    // inference
    auto result = detector.Run(img, conf_thres, iou_thres);

    // visualize detections
    if (opt["view-img"].as<bool>()) {
        Demo(img, result, class_names);
    }

//    cv::destroyAllWindows();
//    Sleep(100000);
//    waitKey(0);

    return 0;

}
这里可以先在clion编辑器端运行,所以博主在源码的基础上添加了两个默认值,可以直接运行:

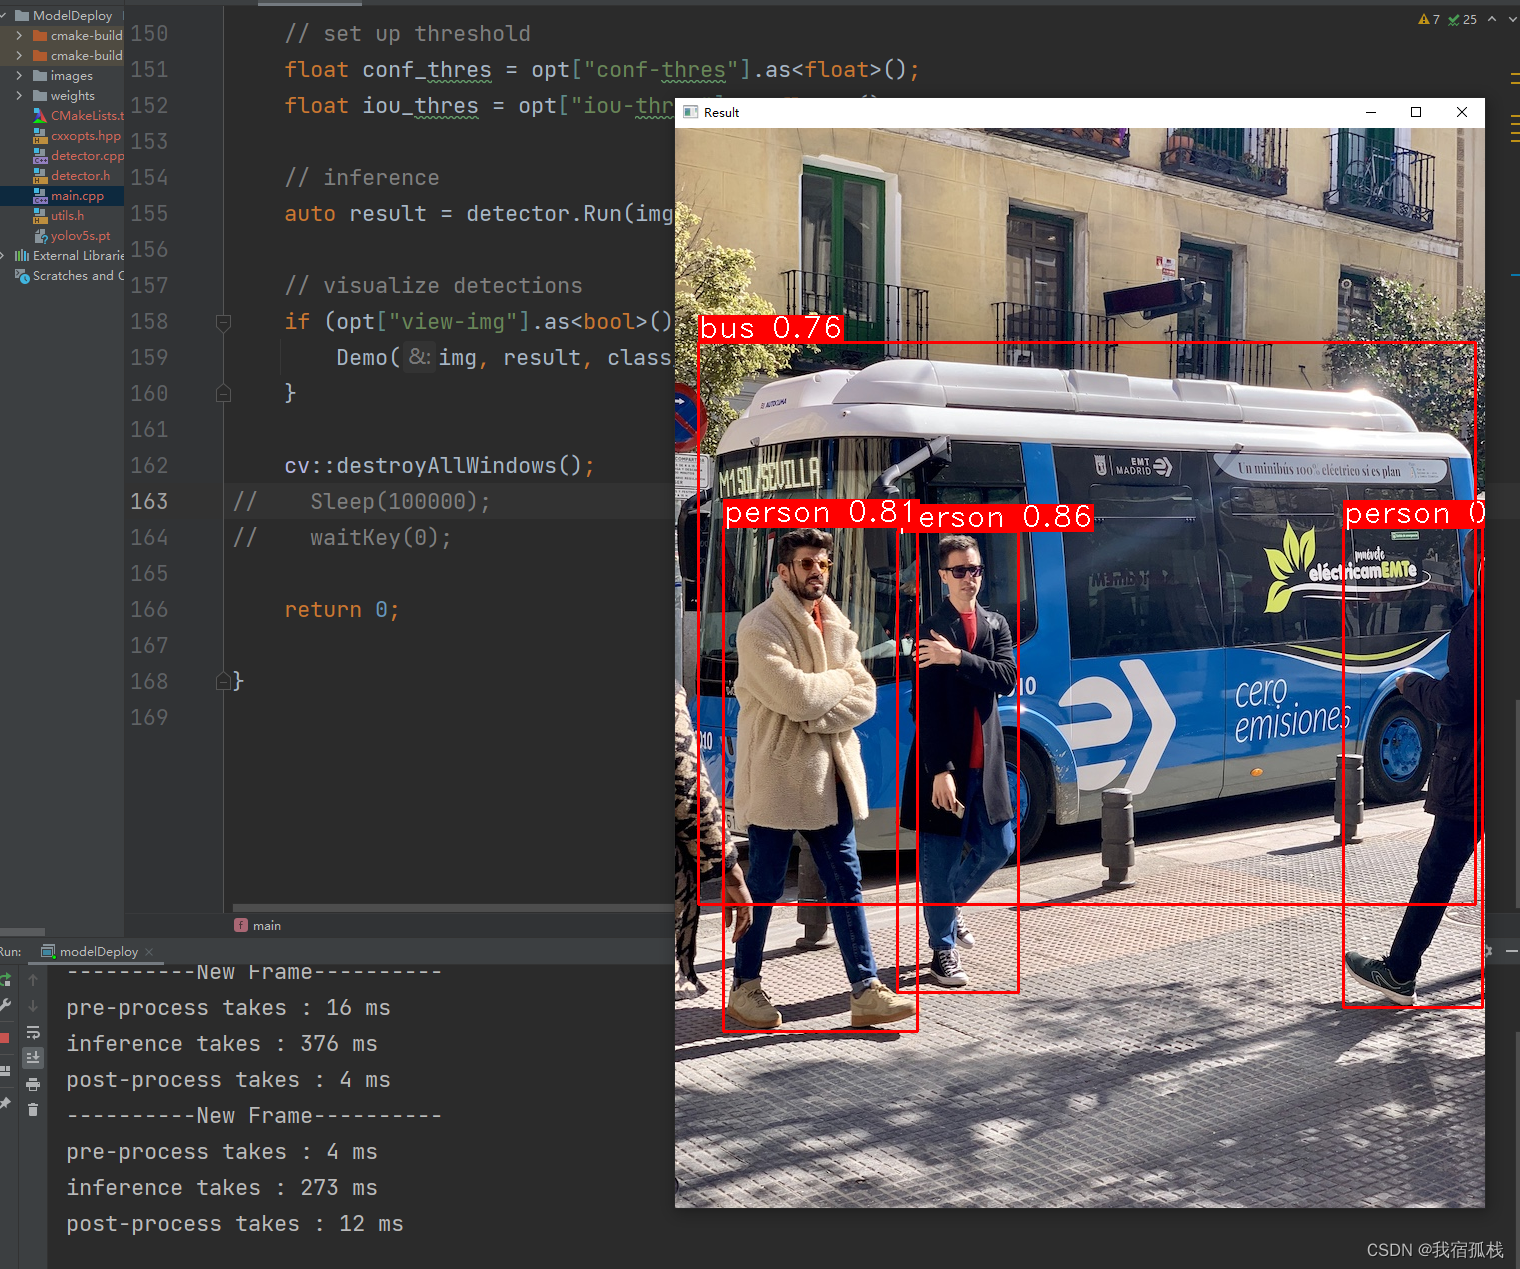
终端运行
进入到生成的.exe可执行文件目录,也就是编译目录下:
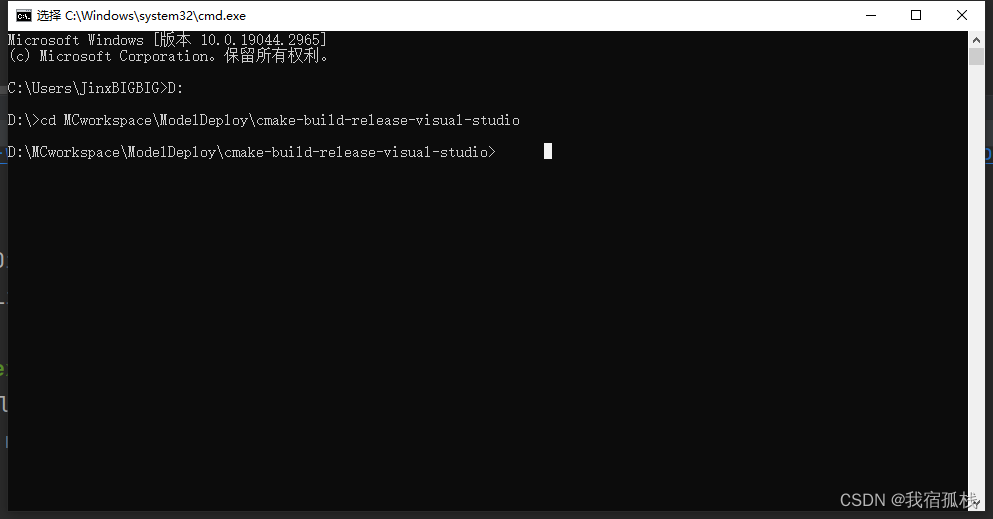
在运行之前,需要将【images】复制到编译目录下,这是方便自定义给测试图片时路径书写方便。
运行modelDeploy.exe:
modelDeploy.exe --source ../images/bus.jpg --view-img
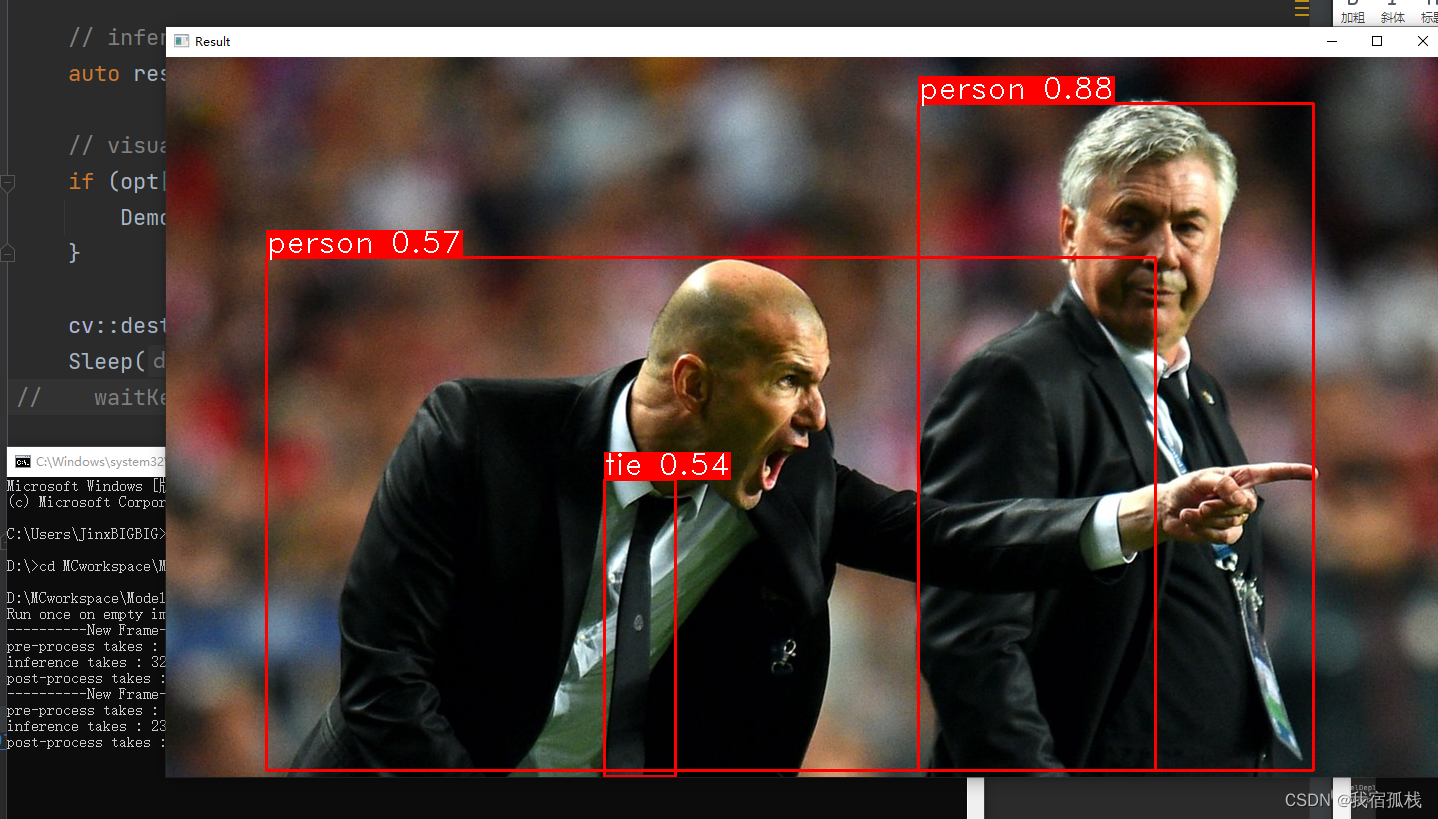
如果不自定义图片,直接运行modelDeploy.exe,效果则和编译器端直接运行的结果一样
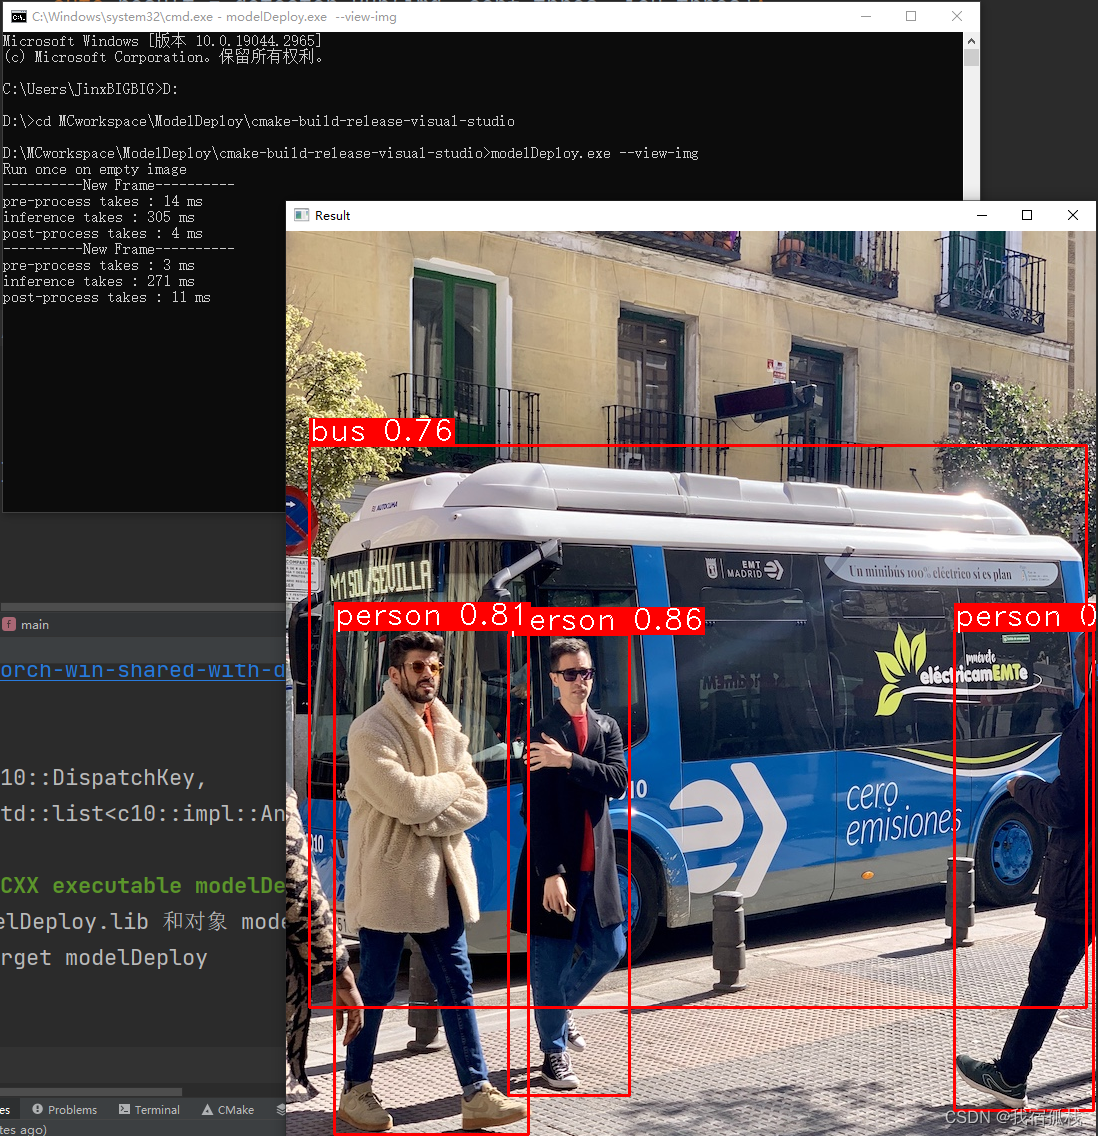
对于终端会闪退的问题,可以添加如下代码解决。
#include<windows.h>
Sleep(100000);
代码Sleep(100000)的时间可以自行设置。
至此就结束啦。部署有什么问题可以私信博主。

