先上效果图:
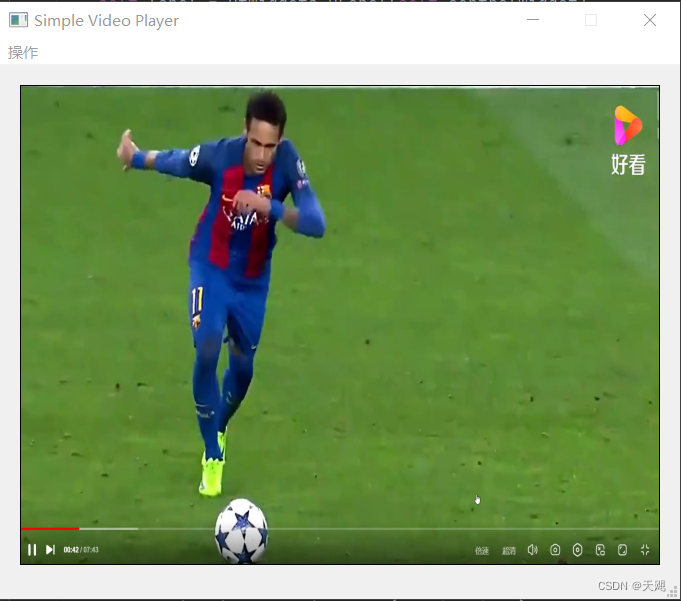
这个就是用python-pyqt5-opencv做出来的简易视频播放器,主要实现本地视频文件播放、本地摄像头播放和远程摄像头播放三个功能。
核心代码:
def ShowCamera(self, url):
    try:
        if url == None:
            self.cap = cv2.VideoCapture(0)
        else:
            self.cap = cv2.VideoCapture(url)

        print('摄像头是否开启: {}'.format(self.cap.isOpened()))
        if self.cap.isOpened:
            self.cap.set(cv2.CAP_PROP_FRAME_WIDTH, 640)
            self.cap.set(cv2.CAP_PROP_FRAME_HEIGHT, 480)
            self.cap.set(cv2.CAP_PROP_FPS, 25)

            print(self.cap.get(3))
            print(self.cap.get(4))
            print(self.cap.get(5))
            print('开始读取摄像头数据......')

            while(True):
                ret, color_frame = self.cap.read()
                if ret == False:
                    return
                if url == None:
                    color_frame = cv2.flip(color_frame, 1)
                cv2.waitKey(1)
                im = cv2.cvtColor(color_frame, cv2.COLOR_RGB2BGR)
                a = QImage(im.data, im.shape[1], im.shape[0], QImage.Format_RGB888)
                self.setPic(a)

            self.cap.release()
        else:
            print('camera open failed')
    except Exception as e:
        print(str(e))
三类播放使用的都是同一个showcamera()函数,唯一的区别就是函数中的url参数不同。
文件播放:url=文件名
本地相机:url=0
网络串流:url=‘rtsp://……’
除了这个核心代码,打开文件使用的是QFileDialog,打开网络串流使用的是自定义的QinputDialog,两个代码如下:
def OpenFile(self):
    fileName, filetype = QFileDialog.getOpenFileName(self, '选择文件')
    print(fileName, filetype)
    self.ShowCamera(fileName)
def Remote(self):
    input_dialog = QtWidgets.QInputDialog(self)
    input_dialog.setInputMode(QInputDialog.TextInput)
    input_dialog.setWindowTitle('打开网络串流')
    input_dialog.setLabelText('请输入网络串流地址rtsp://')
    input_dialog.setFixedSize(500, 100)
    input_dialog.show()
    if input_dialog.exec_() == input_dialog.Accepted:
        text = input_dialog.textValue()
        if text != '':
            print(text)
            self.ShowCamera(text)
        else:
            print('地址错误或空')
最后,是用Qlabel加载图片的代码:
def setPic(self, image):
    self.label.setPixmap(QPixmap.fromImage(image))
剩下的就是UI界面的定义了,代码就不贴了,想要完整的全部代码,可以在CSDN下载:
https://download.csdn.net/download/hydekong/87789206