微服务通讯:个、RPC入门教程
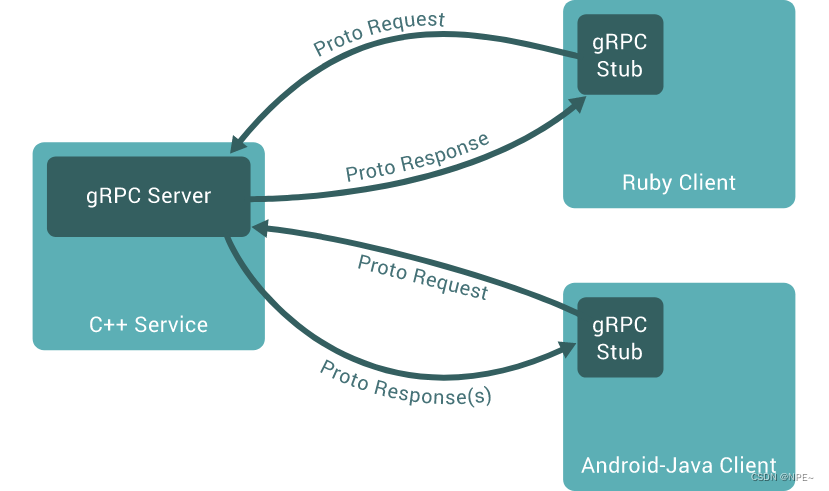
gRPC是一个RPC框架,用于服务器之间服务的相互通讯,常见微服务项目开发中。市面上的RPC有很多,例如:dubbo、SpringCloud底层封装的等
1 概念
1.1 gRPC
- gRPC是一个高性能、开源的通用RPC(远程过程调用remote procedure call)框架。
- gRPC与语言无关,你可以用C++作为服务器,使用Go、Java等作为客户端
- gPRC会屏蔽底层的细节,client只需要直接定义好方法,就能拿到预期的返回结果,对于Server端来说,还需要实现我们定义的方法。【类比于Java中的Feign,但是feign不是RPC,feign是基于HTTP的,有7层】
- 官网地址:https://grpc.io/docs/what-is-grpc/introduction/
- 中文教程地址:http://doc.oschina.net/grpc
- gRPC使用了Protocol Buffss(简称
protobuf),这是谷歌开源的一套成熟的数据结构序列化机制
①服务端编写过程
- 创建gRPC Server对象,你可以理解为它是Serverdaunt抽象的对象
- 将server(其包含被调用的服务端接口)注册到gRPC Server的内部注册中心
这样可以在接收到请求时,通过内部的服务发现,发现该服务端接口并转接进行逻辑处理
- 创建Listen,监听TCP端口
- gRPC Server开始Listen、Accept,直到Stop
②客户端编写
- 创建与给定目标(服务端)的连接交互
- 创建对应Client对象
- 发送RPC请求,等待同步响应,得到回调后返回响应结果
- 输出响应结果
1.2 protobuf
①介绍
- 谷歌开源的一种数据格式,适合高性能
- 二进制数据格式,需要编码和解码,数据本身不具有可读性,只能反序列化后才能得到真正可读的数据
- 序列化后体积比json和XML更小,适合网络传输
- 支持跨平台多语言
- 序列化、反序列化很快
- 消息格式升级和兼容性很不错
②安装protobuf
- 进入对应的GitHub
- 根据自己操作系统下载对应版本:

- 下载成功后解压并配置环境变量
配置为系统环境变量,因为配置为用户环境变量Goland可能不识别
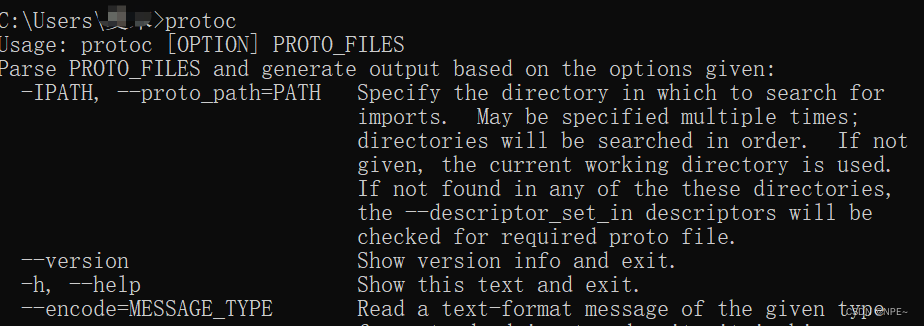
# 打开cmd执行以下命令查看是否配置成功
protoc
2 gRPC安装及使用
2.1 安装
- 安装gRPC核心库
// 下载grpc
go get google.golang.org/grpc

//安装对应工具
go install google.golang.org/protobuf/cmd/protoc-gen-go@latest
go install google.golang.org/grpc/cmd/protoc-gen-go-grpc@latest
2.2 使用
①proto文件编写【定义接口】
- 编写proto文件
hello.proto:
//使用proto3的语法
syntax = "proto3";

//指明最后生成的go文件夹最后放在哪个目录的哪个包中
// . 表示当前目录; service表示包名为service
option go_package = ".;service";

//1. 定义一个服务【SayHello】,服务中可以有对应的方法【SayHello】
service SayHello {
  rpc SayHello(HelloRequest) returns (HelloResponse) {}
}

//关键字:message,可以理解为go中的结构体
message HelloRequest{
  string requestName = 1; //1表示消息顺序
//  int64 age = 2;
}

message HelloResponse {
  string responseMsg = 1;
}
- 执行以下命令,生成对应文件
 protoc --go_out=. .\hello.proto
 protoc --go-grpc_out=. hello.proto
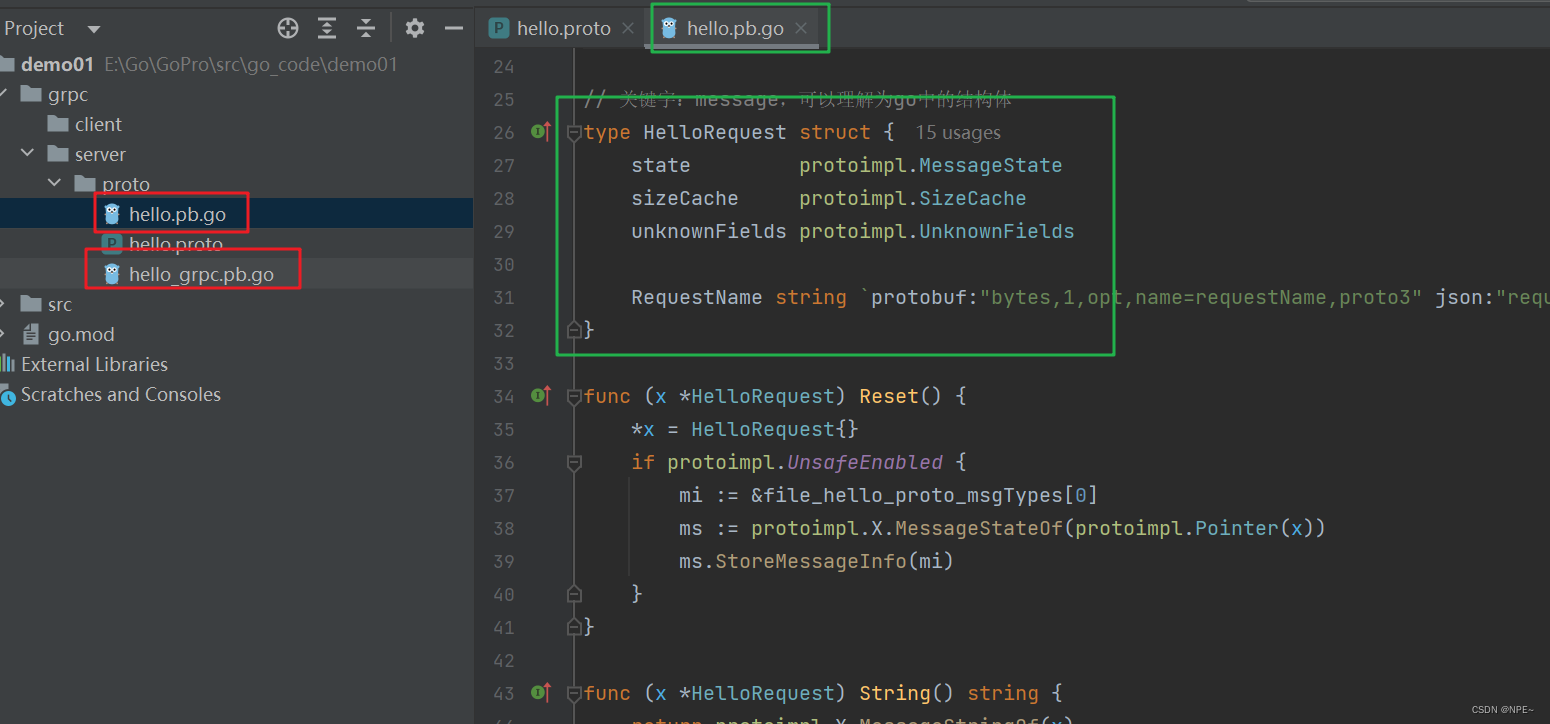
3. 将server/proto文件下的hello.pb.go和hello_grpc.pb.go同时复制一份放在client/ptoro下
最终结构:

注意:
如果发现Goland识别不了protoc命令,
- 报如下错误:protoc‘ 不是内部或外部命令,也不是可运行的程序 或批处理文件
- 解决办法:将protoc配置为系统环境变量,然后重启Goland即可
②服务端编写
- 编写服务端的启动代码
main.go:
package main

import (
	"context"
	"fmt"
	"go_code/demo01/grpc/client/proto"
	"google.golang.org/grpc"
	"net"
)

// hello Server
type server struct {
	proto.UnimplementedSayHelloServer
}

func (s *server) SayHello(ctx context.Context, req *proto.HelloRequest) (*proto.HelloResponse, error) {
	//服务端实现接口【具体处理逻辑】
	fmt.Printf("client端远程调用成功..., 传入参数为=%v", req.GetRequestName())
	return &proto.HelloResponse{ResponseMsg: "hello," + req.RequestName}, nil
}

func main() {
	//1. 开启端口
	listen, _ := net.Listen("tcp", ":9090")
	//2. 创建grpc服务
	grpcServer := grpc.NewServer()
	//3. 将我们自己编写好的服务注册到grpc
	proto.RegisterSayHelloServer(grpcServer, &server{})

	//4. 启动服务
	err := grpcServer.Serve(listen)
	if err != nil {
		fmt.Printf("failed to server: %v", err)
		return
	}
}
整体结构:

③客户端编写
main.go:
package main

import (
	"context"
	"fmt"
	pb "go_code/demo01/grpc/server/proto"
	"google.golang.org/grpc"
	"google.golang.org/grpc/credentials/insecure"
	"log"
)

func main() {
	//1. 与Server建立连接[案例中:此处禁用安全传输,我们这里没有使用加密验证]
	conn, err := grpc.Dial("127.0.0.1:9090", grpc.WithTransportCredentials(insecure.NewCredentials()))
	if err != nil {
		log.Fatalf("did not connect: %v", err)
	}
	defer conn.Close() //延时关闭连接

	//2. 与对应服务建立连接
	client := pb.NewSayHelloClient(conn)
	//3. 执行grpc调用[对应方法已经在对应的Server端实现了]
	resp, _ := client.SayHello(context.Background(), &pb.HelloRequest{RequestName: "curry"})
	fmt.Println(resp.GetResponseMsg())

}
④测试结果
- 配置goland同时启动多个实例

- 启动server和client,查看结果

3 https及实现grpc加密通信
3.1 加密相关知识
3.2 实现grpc加密通信【基于TLS】
1. 安装openssl并配置环境变量
在github上找到对应版本并安装:https://github.com/openssl/openssl/releases
# 在cmd窗口输入以下命令,查看是否配置成功
openssl

2. 生成对应key和证书
在上面入门的基础上新建文件夹
key,通过cmd来到key目录下,执行下面命令
# 1. 生成私钥
openssl genrsa -out server.key 2048

# 2. 生成证书,全部回车即可,可以不填[就是一些基本信息:国家、地区什么的]
openssl req -new -x509 -key server.key -out server.crt -days 36500

# 3. 生成csr[同样可以全部回车,不填写任何信息]
openssl req -new -key server.key -out server.csr
最终效果:

3. 配置openssl.cnf
更改openssl.cnf (Linux上是openssl.cfg)
- 复制一份你安装的openssl的bin目录里面的openssl.cnf文件到你项目所在目录
- 找到[CA_default],打开copy_extensions = copy (就是把前面的#去掉)
- 找到[req],打开req_extensions = v3_req # The extensions to add to a certificate request
- 找到[ v3_req ],添加subjectAltName = @alt_names
- 添加新的标签[alt_names]和标签字段
DNS.1 = *.ziyi.com

# 1. 生成证书私钥test.key
openssl genpkey -algorithm RSA -out test.key

# 2. 通过私钥test.key生成证书请求文件test.csr(注意cfg和cnf,linux上是cfg)
openssl req -new -nodes -key test.key -out test.csr -days 3650 -subj "/C=cn/OU=myorg/O=mycomp/CN=myname" -config ./openssl.cnf -extensions v3_req
#test.csr是上面生成的证书请求文件。ca.crt/server.key是CA证书文件和key,用来对test.csr进行签名认证,这两个文件在第2大部分已经生成

# 3. 生成SAN证书 pem
openssl x509 -req -days 365 -in test.csr -out test.pem -CA server.crt -CAkey server.key -CAcreateserial -extfile ./openssl.cnf -extensions v3_req
4. 编写main.go代码(客户端、服务端)
- 服务端
package main

import (
	"context"
	"fmt"
	"go_code/demo01/grpc/client/proto"
	"google.golang.org/grpc"
	"google.golang.org/grpc/credentials"
	"net"
)

// hello Server
type server struct {
	proto.UnimplementedSayHelloServer
}

func (s *server) SayHello(ctx context.Context, req *proto.HelloRequest) (*proto.HelloResponse, error) {
	//服务端实现接口【具体处理逻辑】
	fmt.Printf("client端远程调用成功..., 传入参数为=%v", req.GetRequestName())
	return &proto.HelloResponse{ResponseMsg: "hello," + req.RequestName}, nil
}

func main() {
	//TSL认证
	//两个参数分别是crtFile、keyFile
	//自带签名证书文件和私钥文件
	//0. 配置证书和私钥文件
	creds, _ := credentials.NewServerTLSFromFile("E:\\Go\\GoPro\\src\\go_code\\demo01\\grpc\\key\\test.pem",
		"E:\\Go\\GoPro\\src\\go_code\\demo01\\grpc\\key\\test.key")
	//1. 开启端口
	listen, _ := net.Listen("tcp", ":9090")
	2. 创建grpc服务
	//grpcServer := grpc.NewServer()

	//2. 创建带证书的服务
	grpcServer := grpc.NewServer(grpc.Creds(creds))
	//3. 将我们自己编写好的服务注册到grpc
	proto.RegisterSayHelloServer(grpcServer, &server{})

	//4. 启动服务
	err := grpcServer.Serve(listen)
	if err != nil {
		fmt.Printf("failed to server: %v", err)
		return
	}
}
结果:
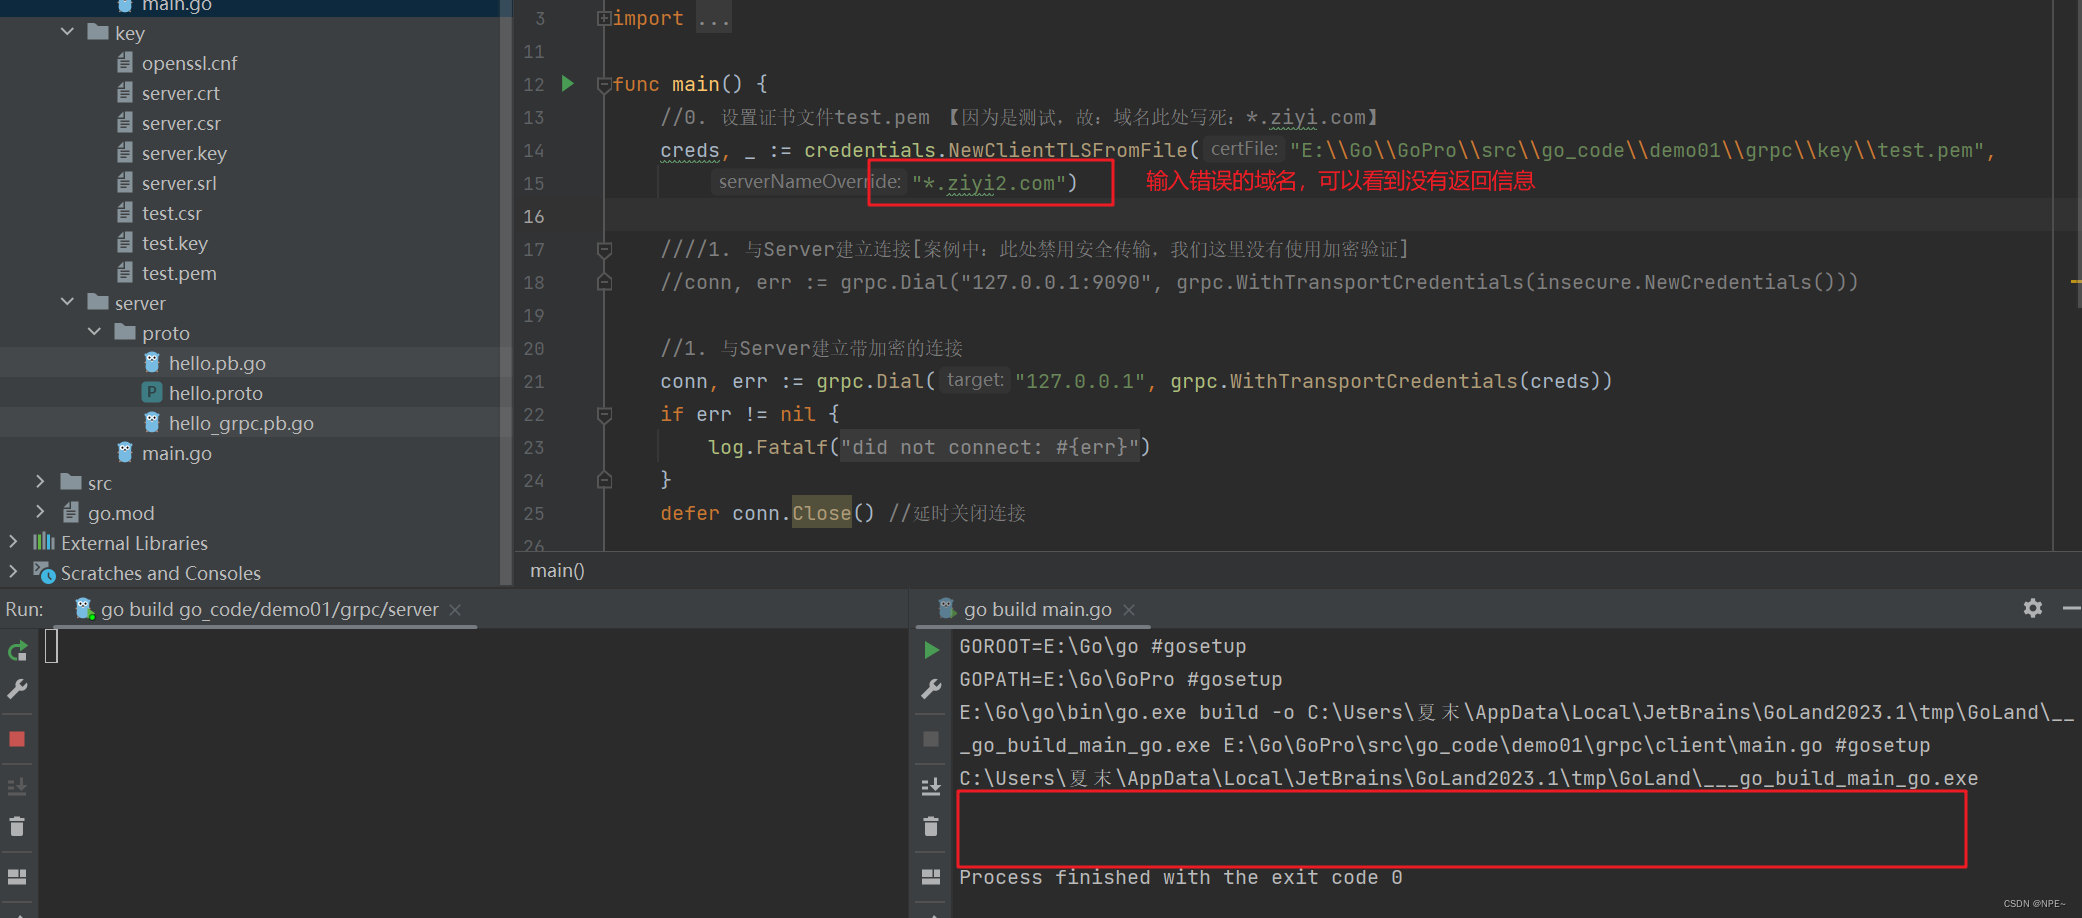
3.3 实现grpc加密通信【基于Token】
1. 认识对应接口
gRPC提供给我们了一个接口,接口中有两个方法,接口位于credentials包下,这个接口需要客户端来实现
type PerRPCCredentials interface {
	/*
	获取元数据信息,也就是客户端提供了k-v对,
	context用于控制超时和取消,uri是请求入口处的uri
	*/
	GetRequestMetadata(ctx context.Context, uri ...string) (map[string]string, error)

	/*
	用于设置是否需要TLS认证进行安全传入,如果返回true则必须加上TLS验证
	*/
	RequireTransportSecurity() bool
}
token是可以和TLS结合的
2. 编写服务端代码
package main

import (
	"context"
	"errors"
	"fmt"
	"go_code/demo01/grpc/client/proto"
	"google.golang.org/grpc"
	"google.golang.org/grpc/credentials/insecure"
	"google.golang.org/grpc/metadata"
	"net"
)

// hello Server
type server struct {
	proto.UnimplementedSayHelloServer
}

// 业务
func (s *server) SayHello(ctx context.Context, req *proto.HelloRequest) (*proto.HelloResponse, error) {
	fmt.Printf("---------------")
	//【校验token】
	//获取客户端传入的元数据信息
	md, ok := metadata.FromIncomingContext(ctx)
	if !ok {
		return nil, errors.New("未传输token")
	}
	var appId string
	var appKey string
	if v, ok := md["appId"]; ok {
		appId = v[0]
	}
	if v, ok := md["appKey"]; ok {
		appKey = v[0]
	}

	if appId != "ziyi" || appKey != "123456" {
		return nil, errors.New("token 不正确")
	}

	//服务端实现接口【具体处理逻辑】
	fmt.Printf("client端远程调用成功..., 传入参数为=%v", req.GetRequestName())
	return &proto.HelloResponse{ResponseMsg: "hello," + req.RequestName}, nil
}

func main() {
	TSL认证
	两个参数分别是crtFile、keyFile
	自带签名证书文件和私钥文件
	0. 配置证书和私钥文件
	//creds, _ := credentials.NewServerTLSFromFile("E:\\Go\\GoPro\\src\\go_code\\demo01\\grpc\\key\\test.pem",
	//	"E:\\Go\\GoPro\\src\\go_code\\demo01\\grpc\\key\\test.key")

	//1. 开启端口
	listen, _ := net.Listen("tcp", ":9090")
	2. 创建grpc服务
	//grpcServer := grpc.NewServer()

	//2. 创建带证书的服务
	grpcServer := grpc.NewServer(grpc.Creds(insecure.NewCredentials()))
	//3. 将我们自己编写好的服务注册到grpc
	proto.RegisterSayHelloServer(grpcServer, &server{})

	//4. 启动服务
	err := grpcServer.Serve(listen)
	if err != nil {
		fmt.Printf("failed to server: %v", err)
		return
	}
}
3. 客户端代码
package main

import (
	"context"
	"fmt"
	pb "go_code/demo01/grpc/server/proto"
	"google.golang.org/grpc"
	"google.golang.org/grpc/credentials/insecure"
	"log"
)

type ClientTokenAuth struct {

}

func (c ClientTokenAuth) GetRequestMetadata(ctx context.Context, uri ...string) (map[string]string, error){
	return map[string]string{
		"appId": "ziyi",
		"appKey": "123456",
	}, nil
}

func (c ClientTokenAuth) RequireTransportSecurity() bool {
	return false
}

func main() {
	0. 设置证书文件test.pem 【因为是测试,故:域名此处写死:*.ziyi.com】,线上应该通过浏览器去获取
	//creds, _ := credentials.NewClientTLSFromFile("E:\\Go\\GoPro\\src\\go_code\\demo01\\grpc\\key\\test.pem",
	//	"*.ziyi2.com")

	//1. 与Server建立连接[案例中:此处禁用安全传输,我们这里没有使用加密验证]
	var opts []grpc.DialOption
	opts = append(opts, grpc.WithTransportCredentials(insecure.NewCredentials())) //这里我们不使用TLS,因此这里传入空
	opts = append(opts, grpc.WithPerRPCCredentials(new(ClientTokenAuth))) //传入我们自定义的验证方式【Token】
	conn, err := grpc.Dial("127.0.0.1:9090", opts...)

	1. 与Server建立带加密的连接
	//conn, err := grpc.Dial("127.0.0.1", grpc.WithTransportCredentials(creds))
	if err != nil {
		log.Fatalf("did not connect: %v", err)
	}
	defer conn.Close() //延时关闭连接

	//2. 与对应服务建立连接
	client := pb.NewSayHelloClient(conn)
	//3. 执行grpc调用[对应方法已经在对应的Server端实现了]
	resp, _ := client.SayHello(context.Background(), &pb.HelloRequest{RequestName: "curry"})
	fmt.Println(resp.GetResponseMsg())

}
总结:gRPC将各种认证方式浓缩到一个凭证(credentials)上,可以单独使用一种拼争,比如只使用TLS或者只使用自定义凭证,也可以多种凭证组合,gRPC提供统一的gRPC验证机制,使得研发人员使用方便,这也是gRPC设计的巧妙之处
