1. 基础使用
首先创建最基本的SpringBoot项目,默认都会。主要是引入依赖和创建Controller进行测试。
<?xml version="1.0" encoding="UTF-8"?>
<project xmlns="http://maven.apache.org/POM/4.0.0"
         xmlns:xsi="http://www.w3.org/2001/XMLSchema-instance"
         xsi:schemaLocation="http://maven.apache.org/POM/4.0.0 http://maven.apache.org/xsd/maven-4.0.0.xsd">
    <modelVersion>4.0.0</modelVersion>

    <parent>
        <groupId>org.springframework.boot</groupId>
        <artifactId>spring-boot-starter-parent</artifactId>
        <version>2.3.9.RELEASE</version>
        <relativePath />
    </parent>

    <groupId>org.example</groupId>
    <artifactId>spring-securitydemo</artifactId>
    <version>1.0-SNAPSHOT</version>


    <properties>
        <maven.compiler.source>8</maven.compiler.source>
        <maven.compiler.target>8</maven.compiler.target>
        <project.build.sourceEncoding>UTF-8</project.build.sourceEncoding>
    </properties>

    <dependencies>

        <dependency>
            <groupId>org.springframework.boot</groupId>
            <artifactId>spring-boot-starter-web</artifactId>
        </dependency>

        <dependency>
            <groupId>org.springframework.boot</groupId>
            <artifactId>spring-boot-starter-test</artifactId>
        </dependency>

        <dependency>
            <groupId>org.springframework.boot</groupId>
            <artifactId>spring-boot-starter-security</artifactId>
        </dependency>

    </dependencies>

</project>
上述代码为依赖的引入。
然后随便写一个controller,写上一个对应的接口,然后直接去浏览器访问。就会发现跳转到了这个登录页面,这个页面也就是Spring Security的默认登陆页面。如果访问很慢,就bootstrap.min.css这个静态资源加载不出来,换个网络即可。
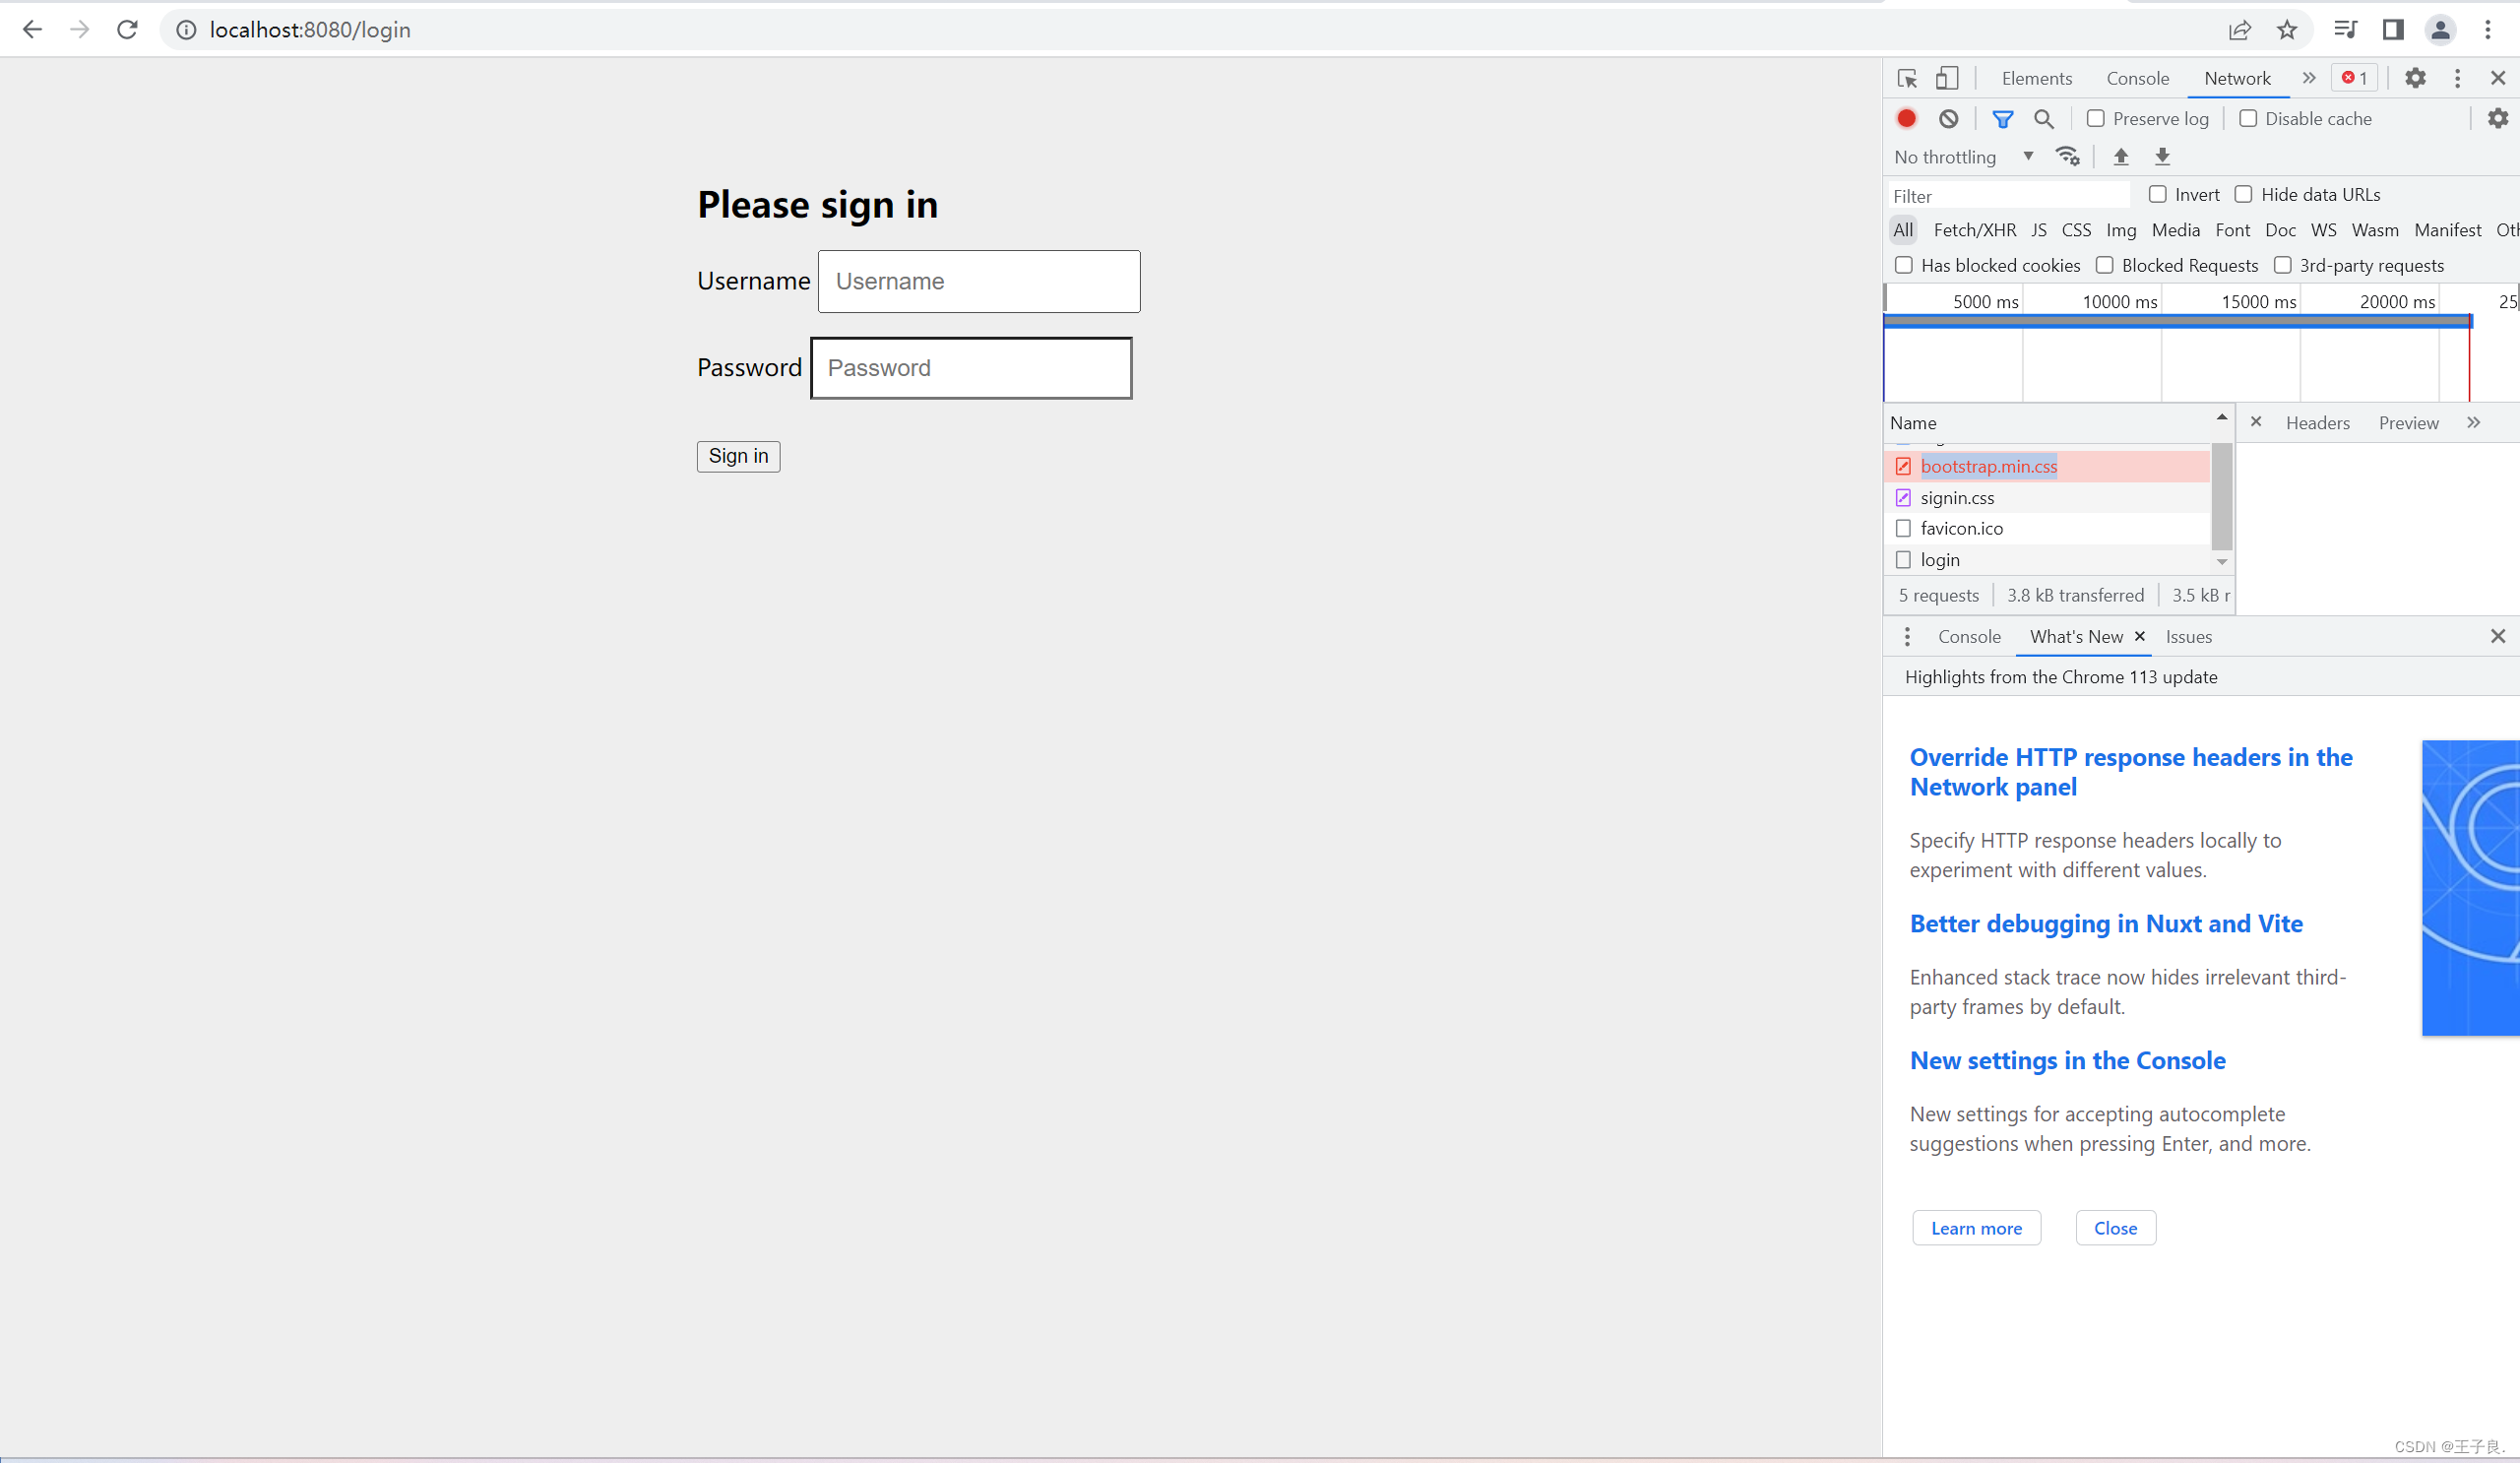
如果要对该页面进行登录的话,Security有一组自带的账号密码,账号就是User,密码是在启动SpringBoot的时候随机生成的一串密码。控制台会有一串打印输出。
Using generated security password: 8320e15d-f070-4e9e-8c86-03be64eb5c92
使用这俩结合即可登录,访问到正常的接口。获取正常的数据。
2. 基本原理
本质上,SpringSecurity就是一个过滤器链,也就是说在里面会有很多的过滤器,这一堆过滤器在一起 构成了一个过滤器链。从启动可以获取到过滤器链。
过滤链的组成。
org.springframework.security.web.context.request.async.WebAsyncManagerIntegrati
onFilterorg.springframeworksecurity.web,context.SecurityContextPersistenceFilter
org.springframework.security.web,header.HeaderWriterFilter
org.springframework.security.web,csrfCsrfFilter
org.springframework.security.web.authentication.logout.LogoutFilter
org.springframework.security.web.authentication.UsernamePasswordAuthenticationFiter
org.springframework.security.web.authentication.ui.DefaultLoginPageGeneratingFilter
org.springframework.security.web.authentication.ui,DefaultLogoutPageGeneratingFilter
org.springframework.security.web.savedrequest.RequestCacheAwareFilter
...
重点有三个过滤器,分别是以下
2.1 三大过滤器(重点)
2.1.1 FilterSecurityInterceprot
这个过滤器是一个方法级的权限过滤器,用于操作哪一些方法可以访问,哪一些方法不可以访问。位于过滤器链的最底部。
分析一下源码,首先这个类实现了Filter
public class FilterSecurityInterceptor
extends AbstractSecurityInterceptor
implements Filter
也就是说,它自身肯定就是一个过滤器,也就是说这个类一定有这几个方法,初始化,销毁,doFilter。其中doFilter也就是我们的过滤具体内容。然后下面的doFilter中的具体内容。
public void doFilter(ServletRequest request, ServletResponse response, FilterChain chain) throws IOException, ServletException {
        this.invoke(new FilterInvocation(request, response, chain));
    }
在这里,调用了本类中的 invoke方法,里面传入了一个FilterInvocation对象,参数携带了request,response,chain。其中,chain是放行对象。然后我们下去看invoke方法里面到底执行了什么东西。
public void invoke(FilterInvocation filterInvocation) throws IOException, ServletException {
        if (this.isApplied(filterInvocation) && this.observeOncePerRequest) {
            filterInvocation.getChain().doFilter(filterInvocation.getRequest(), filterInvocation.getResponse());
        } else {
            if (filterInvocation.getRequest() != null && this.observeOncePerRequest) {
                filterInvocation.getRequest().setAttribute("__spring_security_filterSecurityInterceptor_filterApplied", Boolean.TRUE);
            }

            InterceptorStatusToken token = super.beforeInvocation(filterInvocation);

            try {
                filterInvocation.getChain().doFilter(filterInvocation.getRequest(), filterInvocation.getResponse());
            } finally {
                super.finallyInvocation(token);
            }

            super.afterInvocation(token, (Object)null);
        }
    }
上述代码,是invoke执行的内容,前面无非的做了一堆判断,看后面的这几行代码。
 InterceptorStatusToken token = super.beforeInvocation(filterInvocation);

try {
    filterInvocation.getChain().doFilter(filterInvocation.getRequest(), filterInvocation.getResponse());
} finally {
    super.finallyInvocation(token);
}

super.afterInvocation(token, (Object)null);
super.beforeInvocation(filterInvocation); 表示如果在之前,有被放行过。才会去执行下面的代码。就形成了一个执行器链。
2.1.2 ExceptionTranslationFilter
这个类是一个异常过滤器。毋庸置疑,他也是一个过滤器。我们找到他的doFilter,来进行查看。
 private void doFilter(HttpServletRequest request, HttpServletResponse response, FilterChain chain) throws IOException, ServletException {
        try {
            chain.doFilter(request, response);
        } catch (IOException var7) {
            throw var7;
        } catch (Exception var8) {
            Throwable[] causeChain = this.throwableAnalyzer.determineCauseChain(var8);
            RuntimeException securityException = (AuthenticationException)this.throwableAnalyzer.getFirstThrowableOfType(AuthenticationException.class, causeChain);
            if (securityException == null) {
                securityException = (AccessDeniedException)this.throwableAnalyzer.getFirstThrowableOfType(AccessDeniedException.class, causeChain);
            }

            if (securityException == null) {
                this.rethrow(var8);
            }

            if (response.isCommitted()) {
                throw new ServletException("Unable to handle the Spring Security Exception because the response is already committed.", var8);
            }

            this.handleSpringSecurityException(request, response, chain, (RuntimeException)securityException);
        }

    }
在这里做了异常捕捉,对异常做了很多判断,针对每一种异常进行不同的处理方式,也就是说这是一个异常统一处理。实际上也是如此,这个类是一个一场过滤器,用来处理在认证授权过程中被抛出的异常。
2.1.3 UsernamePasswordAuthenticationFilter
对/login的POST请求进行拦截处理,校验表单中的用户名,密码。
public Authentication attemptAuthentication(HttpServletRequest request, HttpServletResponse response) throws AuthenticationException {
        if (this.postOnly && !request.getMethod().equals("POST")) {
            throw new AuthenticationServiceException("Authentication method not supported: " + request.getMethod());
        } else {
            String username = this.obtainUsername(request);
            username = username != null ? username : "";
            username = username.trim();
            String password = this.obtainPassword(request);
            password = password != null ? password : "";
            UsernamePasswordAuthenticationToken authRequest = new UsernamePasswordAuthenticationToken(username, password);
            this.setDetails(request, authRequest);
            return this.getAuthenticationManager().authenticate(authRequest);
        }
    }
上述代码也不是很晦涩,首先判断是不是Post请求,如果是Post请求,则会去执行else中的内容,获取账号密码,判断为空,然后都不成立的情况下,去做校验。
2.2 过滤器是如何加载的
因为我们使用的是SpringBoot项目,所以SpringBoot对其做了自动装配,不需要我们去进行额外的配置,如果是使用其他类型的项目,则可能需要我们去大幅度的进行配置。那如果不使用SpringBoot, 应该如何去配置SpringSecurity。
2.2.1 DelegatingFilterProxy
如果我们不使用SpringBoot项目进行自动装配。则我们第一步需要配置DelegatingFilterProxy。源码如下。(doFilter)
public void doFilter(ServletRequest request, ServletResponse response, FilterChain filterChain) throws ServletException, IOException {
        Filter delegateToUse = this.delegate;
        if (delegateToUse == null) {
            synchronized(this.delegateMonitor) {
                delegateToUse = this.delegate;
                if (delegateToUse == null) {
                    WebApplicationContext wac = this.findWebApplicationContext();
                    if (wac == null) {
                        throw new IllegalStateException("No WebApplicationContext found: no ContextLoaderListener or DispatcherServlet registered?");
                    }

                    delegateToUse = this.initDelegate(wac);
                }

                this.delegate = delegateToUse;
            }
        }

        this.invokeDelegate(delegateToUse, request, response, filterChain);
    }
在上面依然是做了很多判断, 不过重点在下面这一行代码。
delegateToUse = this.initDelegate(wac);调用了本类中的initDelegate。看不懂没关系,init 应该看得懂,他做了一个初始化,点进去看源码。
protected Filter initDelegate(WebApplicationContext wac) throws ServletException {
        String targetBeanName = this.getTargetBeanName();
        Assert.state(targetBeanName != null, "No target bean name set");
        Filter delegate = (Filter)wac.getBean(targetBeanName, Filter.class);
        if (this.isTargetFilterLifecycle()) {
            delegate.init(this.getFilterConfig());
        }

        return delegate;
    }
参数有一个WabApplicationContext,通过WabAppliaction来获取一个bean对象,也就是通过IOC容器来获取一个Bean。他有一个固定的名称,就是 FilterChainProxy。
