every blog every motto: You can do more than you think.
https://blog.csdn.net/weixin_39190382?type=blog
0. 前言
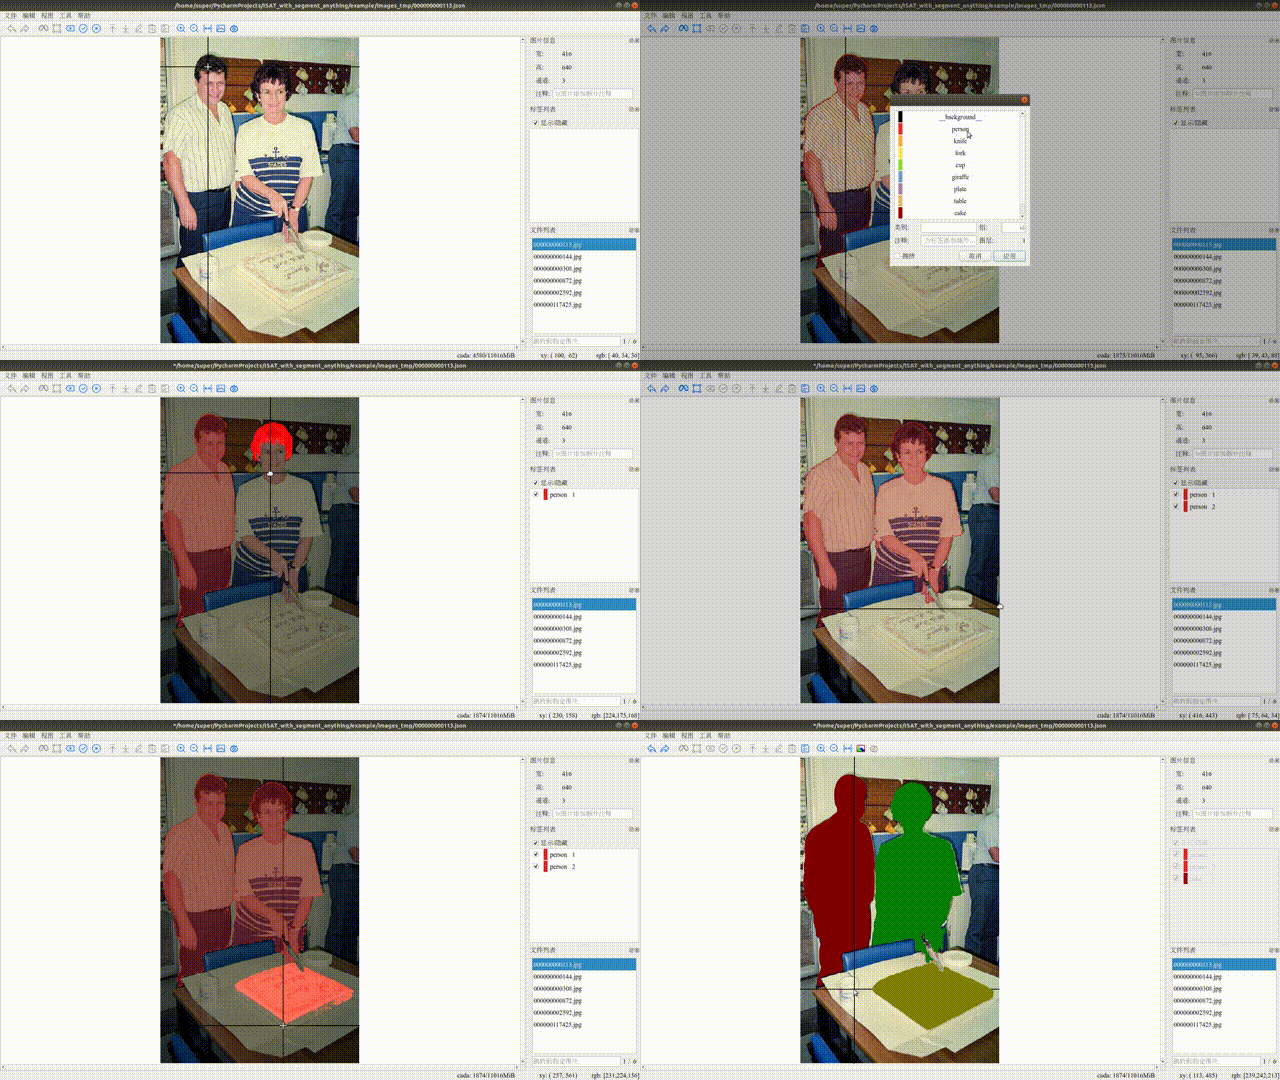
极速分割标注工具
1. 正文
1.1 安装
创建虚拟环境
conda create -n ISAT_with_segment_anything python==3.8
conda activate ISAT_with_segment_anything
安装segment anything
git clone https://github.com/facebookresearch/segment-anything.git
cd segment-anything
pip install -e .
cd ..
安装ISAT_with_segment_anything
git clone https://github.com/yatengLG/ISAT_with_segment_anything.git
cd ISAT_with_segment_anything
pip install -r requirements.txt
下载预训练模型
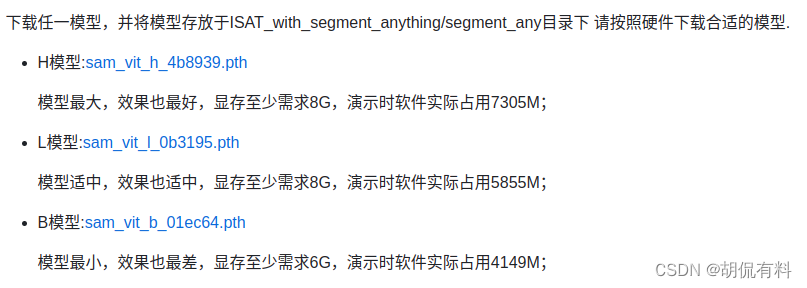
https://github.com/yatengLG/ISAT_with_segment_anything
https://github.com/yatengLG/ISAT_with_segment_anything
1.2 运行
python main.py
1.3 操作说明
1.3.1 基本说明
- 左键:选择感兴趣的区域
- 右键:取消选择(不感兴趣区域)
- E:结束标注,选择类别
- 拖拽多边形顶点,精细化调整标注。
- 通过目标图层高低,调整目标之间遮挡关系(多目标之间存在重叠区域时)
1.3.2 常用快捷键
- q:开启模型标注模式
- c: 开始正常标注模式
- e: 结束标注,选择类别
- s: 保存
- d: 下一张图
- a: 上一张图
1.4 注意事项
- 仅支持打开文件下的图片,不支持递归子文件夹内图片
- 如果多个文件夹分批次标注,需要关闭程序,重新运行。如果当前文件夹标注完成,不关闭程序,打开(加载)新的文件,若两个文件夹内图片名称有重复,可能出现混乱
- 对于不好标注图片需要用常规标注模式
参考
[1] [https://github.com/yatengLG/ISAT_with_segment_anything


![“正大杯”第十三届市场调查与分析大赛[省一]经验总结+复盘](https://img-blog.csdnimg.cn/77ea6237489444e685d7ca69bdfca28a.jpeg)
