目录
- 项目简介
- 功能设计
- 数据库表设计
- 用户表
- 订单表
- 菜品表
- 订单详情表(关联菜品表和订单表)
- 配置类
- 实体类
- Dish
- OrderDetail
- OrderInfo
- UserInfo
- 统一后端返回内容
- 用户模块
- 用户注册功能
- mapper接口
- xml文件
- controller层
- 前端
- 用户登录功能
- 验证用户账号和密码(session存储)
- session key值
- controller层
- mapper层
- xml
- 前端
- 显示所有用户可以点的菜品列表
- 显示菜品
- controller层
- mapper层
- xml
- 前端
- 统计点的菜品个数以及下单总价
- 刷新页面维持用户登录状态功能
- 退出登录功能
- 前端
- controller
- 用户下单菜品功能
- controller层
- mapper层
- xml
- 用户查看订单详情功能
- 前端
- controller
- mapper接口
- xml
- 商家模块
- 商家登录功能
- 前端
- controller
- mapper
- xml
- 保持登录状态
- 前端
- controller
- 菜品添加功能
- 前端
- controller
- mapper
- xml
- 菜品删除功能
- 前端
- controller
- mapper
- xml
- 获取订单列表功能
- 前端
- 查看所有订单
- 修改订单状态
- 查看某个订单详情
- controller
- 查看所有订单
- 修改订单状态
- 查看某个订单详情
- mapper
- 查看所有订单
- 修改订单状态
- 查看某个订单详情
- xml
- 查看所有订单
- 修改订单状态
- 查看某个订单详情
- 退出登录功能
- 前端
- controller
项目简介
现如今,随着餐饮行业的不断扩大,消费者的年轻化,餐饮行业的点餐逐渐由线下转为线上点单,因此我们这个点餐系统就应运而生。点餐系统为餐厅增添了用户与餐厅的互动性,还可以实现更加多样化的点餐。
本项目运用spingboot + springmvc + mybatis + vue实现了一个具有商家和普通用户的双角色点餐系统。
功能设计
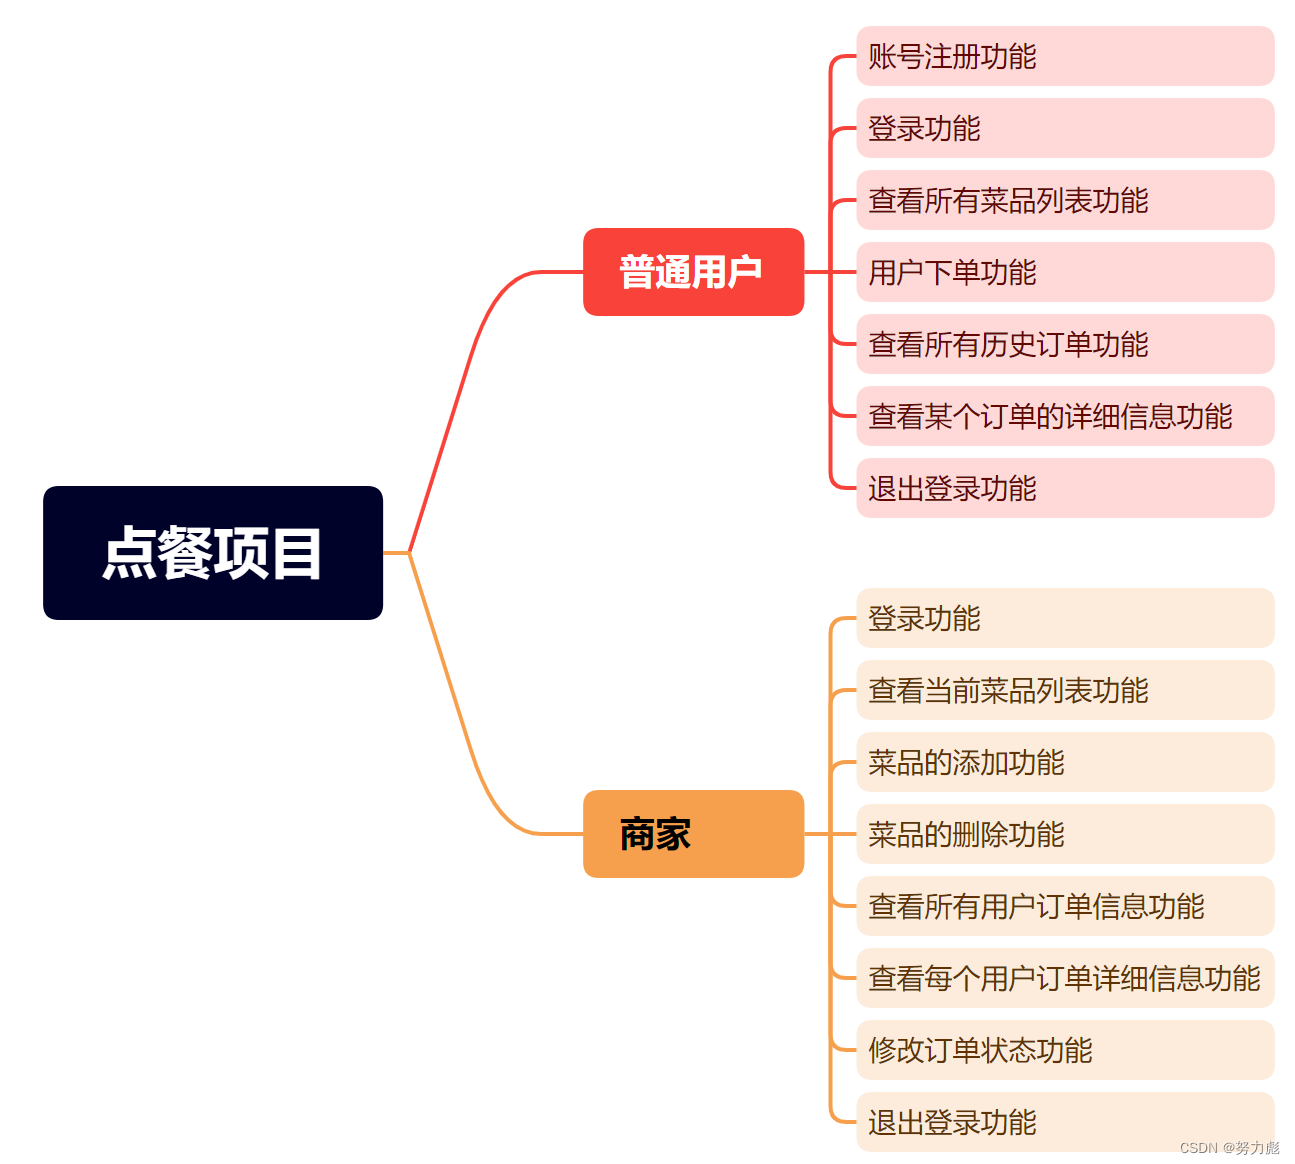
数据库表设计
用户表
-
主键id(自增)
-
用户名
-
密码
-
身份标识
+----------+--------------+------+-----+---------+----------------+
| Field    | Type         | Null | Key | Default | Extra          |
+----------+--------------+------+-----+---------+----------------+
| id       | int(11)      | NO   | PRI | NULL    | auto_increment |
| username | varchar(250) | YES  |     | NULL    |                |
| password | varchar(50)  | YES  |     | NULL    |                |
| isadmin  | int(11)      | YES  |     | NULL    |                |
+----------+--------------+------+-----+---------+----------------+
订单表
-
订单主键ID(自增)
-
用户ID
-
订单创建时间
-
状态(0:未完成; 1:已完成)
+------------+----------+------+-----+-------------------+----------------+
| Field      | Type     | Null | Key | Default           | Extra          |
+------------+----------+------+-----+-------------------+----------------+
| id         | int(11)  | NO   | PRI | NULL              | auto_increment |
| uid        | int(11)  | YES  |     | NULL              |                |
| createtime | datetime | YES  |     | CURRENT_TIMESTAMP |                |
| status     | int(11)  | YES  |     | NULL              |                |
+------------+----------+------+-----+-------------------+----------------+
菜品表
-
主键ID(自增)
-
菜品名
-
价格
+-------+---------------+------+-----+---------+----------------+
| Field | Type          | Null | Key | Default | Extra          |
+-------+---------------+------+-----+---------+----------------+
| id    | int(11)       | NO   | PRI | NULL    | auto_increment |
| name  | varchar(250)  | NO   |     | NULL    |                |
| price | decimal(10,0) | NO   |     | NULL    |                |
+-------+---------------+------+-----+---------+----------------+
订单详情表(关联菜品表和订单表)
-
订单id
-
菜品id
+-------+---------+------+-----+---------+-------+
| Field | Type    | Null | Key | Default | Extra |
+-------+---------+------+-----+---------+-------+
| did   | int(11) | NO   |     | NULL    |       |
| oid   | int(11) | NO   |     | NULL    |       |
+-------+---------+------+-----+---------+-------+
这个表是为了处理订单表和菜品表的多对多关系,也就是中间表
配置类
package com.example.ordersys.config;

/**
 * @author SongBiao
 * @Date 2021/1/18
 */
//此类专门存储session中的key值
public class AppFinal {
    //将session中的key值提取出来,单独放到一个类里面去
    //用户的session key
    public static final String USERINFO_SESSION_KEY = "USERINFO_SESSION_KEY";
}
此类用于统一session存储过程中的key值
实体类
Dish
package com.example.ordersys.model;

import lombok.Data;

import java.math.BigDecimal;

/**
 * @author SongBiao
 * @Date 2021/1/18
 */
@Data
public class Dish {
    private int id;
    private String name;
    private BigDecimal price;

}
OrderDetail
package com.example.ordersys.model;

import lombok.Data;

/**
 * @author SongBiao
 * @Date 2021/1/18
 */
@Data
public class OrderDetail {
    private int oid;
    private int did;
    private Dish dish;
}
OrderInfo
package com.example.ordersys.model;

import lombok.Data;

import java.util.Date;

/**
 * @author SongBiao
 * @Date 2021/1/18
 */
@Data
public class OrderInfo {
    private int id;
    private int uid;
    private Date createtime;
    private int status;
    private String uname;
}
UserInfo
package com.example.ordersys.model;

import lombok.Data;

/**
 * @author SongBiao
 * @Date 2021/1/18
 */
@Data
public class UserInfo {
    private int id;
    private String username;
    private String password;
    private int isadmin;
}
统一后端返回内容
package com.example.ordersys.tools;

import lombok.Data;

/**
 * @author SongBiao
 * 此类用于规范controller类返回的数据类型的统一,我们定义如下类
 * @Date 2021/1/18
 */
@Data
public class ResponseBody<T> {
    //后端返回给前端的状态
    private int status;
    //定义参数的描述信息
    private String msg;
    //后端返回给前端的数据
    private T data;
    public ResponseBody(int status,
                        String msg,
                        T data){
        this.status = status;
        this.msg = msg;
        this.data = data;
    }

}
用户模块
用户注册功能
mapper接口
 //注册方法
    public int register(UserInfo userInfo);
xml文件
 <insert id="register">
      insert into userinfo(username,password,isadmin)
      values(#{username},#{password},0)
    </insert>
controller层
 /**
     * 用户注册功能,这里指的是顾客
     */
    @RequestMapping("/reg")
    public ResponseBody<Integer> register(UserInfo userInfo) {
        int data = userMapper.register(userInfo);
        return new ResponseBody<>(0, "", data);
    }
前端
<!-- 注册窗口 -->
            <v-row justify="center">
                <v-dialog v-model="reg.showRegister" persistent max-width="400px">
                    <v-card>
                        <v-card-title>
                            <span class="headline">注册</span>
                        </v-card-title>
                        <v-card-text>
                            <v-container>
                                <v-row>
                                    <v-col cols="12" sm="12">
                                        <v-text-field label="用户名*" v-model="reg.name" required></v-text-field>
                                    </v-col>
                                </v-row>
                                <v-row>
                                    <v-col cols="12" sm="12">
                                        <v-text-field label="密码*" v-model="reg.password" required></v-text-field>
                                    </v-col>
                                </v-row>
                                <v-row>
                                    <v-col cols="12" sm="12">
                                        <v-text-field label="确认密码*" v-model="reg.password2" required></v-text-field>
                                    </v-col>
                                </v-row>
                                <v-row>
                                    <v-col cols="12" sm="6">
                                        <v-btn color="primary" block v-on:click="doRegister">注册</v-btn>
                                    </v-col>
                                    <v-col cols="12" sm="6">
                                        <v-btn color="primary" block v-on:click="reg.showRegister = false">取消
                                        </v-btn>
                                    </v-col>
                                </v-row>
                            </v-container>
                        </v-card-text>
                    </v-card>
                </v-dialog>
            </v-row>
// 注册方法
            doRegister() {
                //获取用户输入的值,通过v-model来确定如何获取值
                let username = app.reg.name;
                let password = app.reg.password;
                let password2 = app.reg.password2;
                //非空校验
                if (username == "") {
                    alert("请先输入用户名");
                    return false;
                }
                if (password == "") {
                    alert("请先输入密码");
                    return false;
                }
                if (password2 == "") {
                    alert("请先输入确认密码");
                    return false;
                }
                if (password != password2) {
                    alert("两次输入的密码不一致,请核对");
                    return false;
                }
                //请求后端接口实现注册功能
                jQuery.getJSON("/user/reg", {
                    "username": username,
                    "password": password
                }, function (result) {
                    if (result != null && result.data != null && result.data > 0) {
                        alert("恭喜添加成功");
                        //每次一个用户注册信息后将信息置空
                        app.reg.name = "";
                        app.reg.password = "";
                        app.reg.password2 = "";
                        //隐藏注册窗体
                        app.reg.showRegister = false;
                    } else {
                        alert("抱歉,添加失败,请重试");
                    }
                });
            },
用户登录功能
(1)验证用户的账号和密码
(2)存储session信息
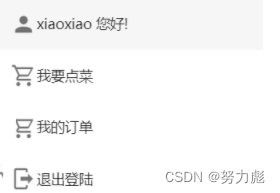
(3)显示欢迎信息
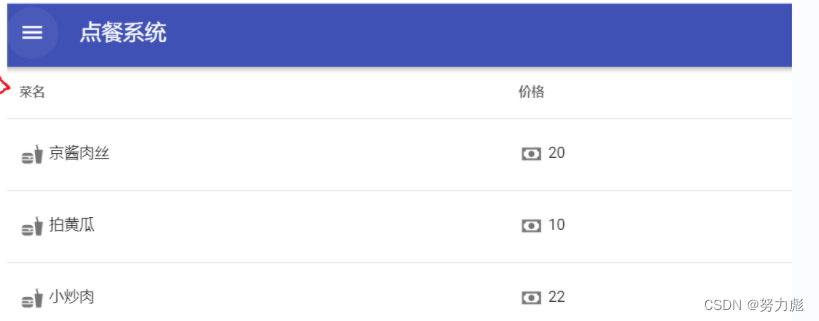
(4)显示所有用户可以点的菜品列表
(5)刷新页面维持页面登录状态
(6)退出登录
验证用户账号和密码(session存储)
session key值
package com.example.ordersys.config;

/**
 * @author SongBiao
 * @Date 2021/1/18
 */
//此类专门存储session中的key值
public class AppFinal {
    //将session中的key值提取出来,单独放到一个类里面去
    //用户的session key
    public static final String USERINFO_SESSION_KEY = "USERINFO_SESSION_KEY";
}
controller层
//登录功能
    @RequestMapping("/login")
    public ResponseBody<UserInfo> login(UserInfo userInfo, HttpServletRequest request) {
        UserInfo user = userMapper.login(userInfo);
        //登录后将信息存入session当中
        if (user != null && user.getId() > 0) {
            HttpSession session = request.getSession();
            session.setAttribute(AppFinal.USERINFO_SESSION_KEY,
                    user);

        }
        return new ResponseBody<>(0, "", user);
    }
mapper层
//登录方法
    public UserInfo login(UserInfo userInfo);
xml
<select id="login" resultType="com.example.ordersys.model.UserInfo">
    select * from userinfo where
    username=#{username} and password=#{password}
</select>
前端
// 登录方法
doLogin() {
    //获取用户输入的用户名和密码,还是看v-model
    let username = app.login.inputUsername;
    let password = app.login.inputPassword;
    //非空校验
    if (username == "") {
        alert("请输入用户名");
        return false;
    }
    if (password == "") {
        alert("请输入密码");
        return false;
    }
    //访问后端接口,验证用户信息
    jQuery.getJSON("/user/login", {
        "username": username,
        "password": password
    }, function (result) {
        if (result != null && result.data != null && result.data.id > 0) {
            //登录成功
            alert("登录成功!");
            //登录成功后,隐藏左侧未登录之前的导航,并显示欢迎信息
            //因为两者的v-show是一样的
            app.login.isLogin = true;
            //去掉登录时的窗口,还是查看v-model
            app.login.showLoginDialog = false;
            //请求后端得到菜品列表
            jQuery.getJSON("/dish/list", {}, function (result) {
                if (result != null && result.data != null) {
                    app.dishes = result.data;
                }
            });

        } else {
            //用户名或密码错误,请重新输入
            alert("用户名或密码错误,请重新输入");
        }
    });
},
显示所有用户可以点的菜品列表
显示菜品
controller层
@RequestMapping("/list")
public ResponseBody<List<Dish>> getList() {
    List<Dish> data = dishMapper.getDishList();
    return new ResponseBody<>(0, "", data);
}
mapper层
//查询菜单列表
public List<Dish> getDishList();
xml
<select id="getDishList" resultType="com.example.ordersys.model.Dish">
   select * from dish
</select>
前端
<v-simple-table v-show="status == 'dishesPage' && login.isLogin">
    <template v-slot:default>
        <thead>
        <tr>
            <th class="text-left">菜名</th>
            <th class="text-left">价格</th>
            <th class="text-left">选择</th>
        </tr>
        </thead>
        <tbody>
        <tr v-for="dish in dishes">
            <td>
                <v-icon>mdi-food</v-icon>
                {{dish.name}}
            </td>
            <td>
                <v-icon>mdi-cash</v-icon>
                {{dish.price}}
            </td>
            <!--   选择窗体-->
            <td>
                <v-switch v-model="dish.isSelected"></v-switch>
            </td>
        </tr>
        </tbody>
    </template>
</v-simple-table>
jQuery.getJSON("/dish/list", {}, function (result) {
                if (result != null && result.data != null) {
                    app.dishes = result.data;
                }
            });
统计点的菜品个数以及下单总价
<v-row v-show="status == 'dishesPage' && login.isLogin">
    <v-col :col="11">
        <div class="pa-2">已点 {{selectedDishCount}} 道菜, 总计 {{selectedDishPrice}} 元</div>
    </v-col>

</v-row>
computed: {
    // 点餐的个数
    selectedDishCount() {
        let count = 0;
        this.dishes.forEach(dish => {
            if (dish.isSelected) {
                count++;
            }
        });
        return count;
    },
    // 计算下单的菜品总价
    selectedDishPrice() {
        let price = 0;
        this.dishes.forEach(dish => {
            if (dish.isSelected) {
                price += dish.price;
            }
        })
        return price;
    }
},
刷新页面维持用户登录状态功能
//判断是否登录的方法
isLogin() {
    jQuery.getJSON("/user/islogin", {}, function (result) {
        if (result != null && result.data != null && result.data.id > 0) {
            //此时确定为登录状态,点击刷新后应该仍在主页面,而不是需要重新登录
            app.login.isLogin = true;
            //设置欢迎信息
            app.login.inputUsername = result.data.username;
            //请求后端得到菜品列表
            jQuery.getJSON("/dish/list", {}, function (result) {
                if (result != null && result.data != null) {
                    app.dishes = result.data;
                }
            });
        }
    });
},
注意要在最后调用这个isLogin方法

controller层
/**
 * 判断登录状态
 *
 * @param request
 * @return
 */
@RequestMapping("/islogin")
public ResponseBody<UserInfo> isLogin(HttpServletRequest request) {
    UserInfo user = null;
    HttpSession session = request.getSession(false);
    if (session != null && session.getAttribute(AppFinal.USERINFO_SESSION_KEY) != null) {
        user = (UserInfo) session.getAttribute(AppFinal.USERINFO_SESSION_KEY);
    }
    return new ResponseBody<UserInfo>(0, "", user);
}
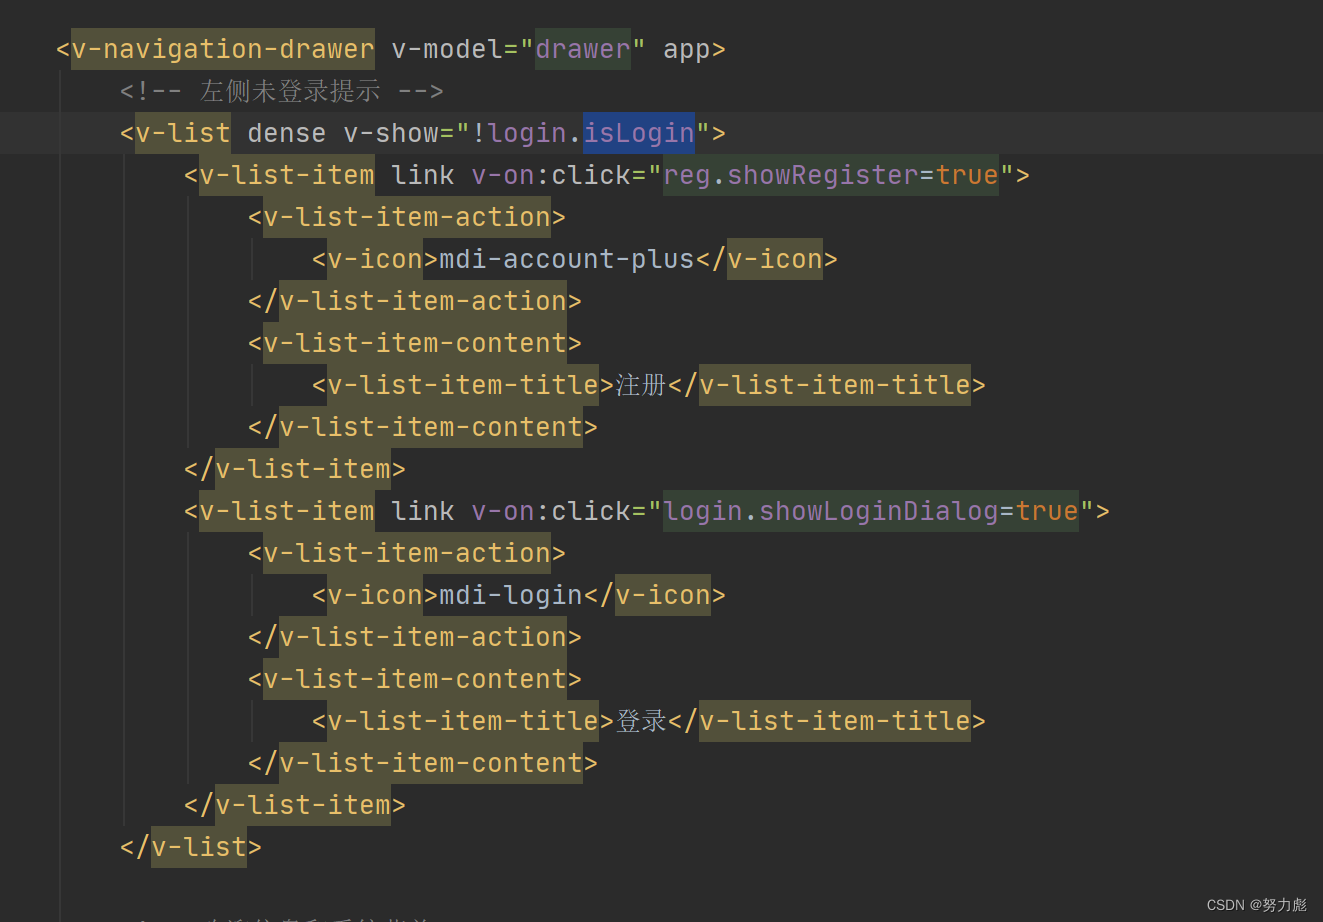
isLogin方法是判断当前登录后,刷新页面不退出登录状态,最后在app外面调用了这个isLogin方法
原理是每次vue刷新页面会把就是会把变量如果改变了再全部变为初始值,所以如果我们不去设置isLogin方法的话,最终当我门点击刷新后,isLogin这个属性重新置为false,那么就会显示我们的导航栏了:因为!login.isLogin为true,
退出登录功能
前端
<v-list-item link v-on:click="logout">
    <v-list-item-action>
        <v-icon>mdi-logout</v-icon>
    </v-list-item-action>
    <v-list-item-content>
        <v-list-item-title>退出登录</v-list-item-title>
    </v-list-item-content>
</v-list-item>
//退出登录功能
logout() {
    if (confirm("是否确认退出?")) {
        jQuery.getJSON("/user/logout", {}, function (result) {
            if (result != null && result.data != null && result.data > 0) {
                //退出成功
                alert("退出成功");
                //刷新当前页面
                location.href = location.href;
            } else {
                alert("抱歉,操作失败,请重试");
            }
        });
    }
},
controller
/**
 * 退出登录
 * @param request
 * @return
 */
@RequestMapping("/logout")
public ResponseBody<Integer> logOut(HttpServletRequest request) {
    int data = 0;
    HttpSession session = request.getSession(false);
    if (session != null && session.getAttribute(AppFinal.USERINFO_SESSION_KEY) != null) {
        session.removeAttribute(AppFinal.USERINFO_SESSION_KEY);
        data = 1;
    }
    session.removeAttribute(AppFinal.USERINFO_SESSION_KEY);
    return new ResponseBody<>(0, "", data);

}
用户下单菜品功能
<v-col :cols="2">
    <v-btn color="primary" block v-on:click="dishSubmit">下单</v-btn>
</v-col>
dishSubmit() {
    if (confirm("确实提交?")) {
        let dids = "";//菜品id集合
        app.dishes.forEach(dish => {
            //选中了菜品就加1
            if (dish.isSelected) {
                dids += (dish.id + ",");
            }
        });
        if (dids != null) {
            //dids不等于null说明菜品已经下单提交,请求后端实现点餐
            //传递的参数为菜品id的集合
            jQuery.getJSON("/order/add", {"dids": dids}, function (result) {
                if (result != null && result.data != null && result.data > 0) {
                    alert("恭喜:点餐成功");
                }
            });
        } else {
            alert("请先选中菜品信息");
        }
    }
},
controller层
(1)菜品信息插入到OrderInfo表中
首先拿到下单的用户uid,从而拿到对应的订单oid
(2)中间表OrderDetail也要完成订单与菜品的关联
将之前拿到的订单oid与前端传来的菜品dids进行关联
@RequestMapping("/add")
public ResponseBody<Integer> addOrder(String dids, HttpServletRequest request) {
    int data = 0;
    //1:添加订单信息,返回一个订单ID
    //(1):要想添加订单信息,第一步是获取用户的id,因为在订单列表中,用户id是订单表的逻辑外键
    //我们是要通过用户的id来拿到对应的订单id

    // 如果当前Session没有就为null
    HttpSession session = request.getSession(false);
    if (session != null && session.getAttribute(AppFinal.USERINFO_SESSION_KEY) != null) {
        int uid = ((UserInfo) session.getAttribute(AppFinal.USERINFO_SESSION_KEY)).getId();
        //(2):将用户的id存入到OrderInfo
        OrderInfo orderInfo = new OrderInfo();
        orderInfo.setUid(uid);
        //订单添加方法
        //result代表添加影响的行数
        //addOrder方法会获取到订单表的自增id
        int result = orderInfoMapper.addOrder(orderInfo);

        //result大于0说明插入成功,因为在使用MyBatis做持久层时,insert语句默认是不返回记录的主键值,而是返回插入的记录条数
        if (result > 0) {
            //2:添加订单详情,需要用到订单ID
            data = orderDetailMapper.add(orderInfo.getId(), dids.split(","));
        }

    }
    return new ResponseBody<>(0, "", data);
}
mapper层
//添加订单
public int addOrder(OrderInfo orderInfo);
//传参的时候订单的id可能只有一个,但是菜品的id可能有多个,所以用String数组来表示
public int add(int oid,String[] dids);
xml
<!--注意此处插入时需要获取自增id,则需要使用useGeneratedKeys和keyProperty
keyProperty会将得到的主键id值赋给对应表中的主键,useGeneratedKeys为是否使用自动主键,肯定值为true-->
<insert id="addOrder" useGeneratedKeys="true" keyProperty="id">
 insert into orderinfo(uid,status) values(#{uid},0)
</insert>
注意:在使用MyBatis做持久层时,insert语句默认是不返回记录的主键值,而是返回插入的记录条数
![[外链图片转存失败,源站可能有防盗链机制,建议将图片保存下来直接上传(img-TfIWhawh-1669814415971)(点餐项目.assets/image-20221129170348928.png)]](https://img-blog.csdnimg.cn/af64c29e324e4498af086fb93040941c.png)
<!--使用foreach来遍历我们前台传过来的菜单id这个集合,将集合中的每一条数据存入到did中
oid代表订单id,订单id只有一个,但是菜单id可以有很多个,因为每个菜品都对应一个id -->
<!--因为我们要往did中插入的菜单id是一个集合,所以我们可以使用foreach循环,collection是
集合,我们放入的是add方法的参数:数组dids,item代表列,separator代表分隔符,意思就是
values后面是(),(),()这样的形式-->
<insert id="add">
    insert into orderdetail(oid,did) values
    <foreach collection="dids" item="item" separator=",">
        (#{oid},#{item})
    </foreach>
</insert>
用户查看订单详情功能
前端
显示用户自身订单状态代码
<v-list-item link v-on:click="orderList">
    <v-list-item-action>
        <v-icon>mdi-cart-outline</v-icon>
    </v-list-item-action>
    <v-list-item-content>
        <v-list-item-title>我的订单</v-list-item-title>
    </v-list-item-content>
</v-list-item>
orderList() {
    jQuery.getJSON("/order/list", {}, function (result) {
        if (result != null && result.data != null) {
            //获取订单列表成功
            app.orders = result.data;
            app.status = 'ordersPage';
        } else {
            //获取订单失败
            alert("获取订单列表失败,请重试");
        }

    });
},
<!-- 个人订单列表 -->
<v-simple-table v-show="status == 'ordersPage' && login.isLogin">
    <template v-slot:default>
        <thead>
        <tr>
            <th class="text-left">序号</th>
            <th class="text-left">状态</th>
            <th class="text-left">时间</th>
            <th class="text-left">详情</th>
        </tr>
        </thead>
        <tbody>
        <tr v-for="order in orders">
            <td>{{order.id}}</td>
            <!--三元运算符在vue中可以使用-->
            <td>{{order.status==0?'未完成':'已完成'}}</td>
            <td>{{order.createtime}}</td>
            <td>
                <v-btn color='primary' v-on:click="detail(order.id)">查看详情</v-btn>
            </td>
        </tr>
        </tbody>
    </template>
</v-simple-table>
查看详情的代码:
<!-- 某个订单的详情 -->
<v-row justify="center">
    <v-dialog v-model="showCurOrder" persistent max-width="600px">
        <v-simple-table>
            <template v-slot:default>
                <thead>
                <tr>
                    <th class="text-left">菜品</th>
                    <th class="text-left">价格</th>
                </tr>
                </thead>
                <tbody>
                <tr v-for="dish in curOrder">
                    <td>{{dish.dish.name}}</td>
                    <td>{{dish.dish.price}}</td>
                </tr>
                <tr>
                    <td>总金额:{{curOrderMoney()}}</td>
                    <td>
                        <v-btn color="primary" v-on:click="showCurOrder = false">关闭</v-btn>
                    </td>
                </tr>
                </tbody>
            </template>
        </v-simple-table>
    </v-dialog>
</v-row>
//计算某个订单详情的总钱数
curOrderMoney() {
    let money = 0;
    app.curOrder.forEach(order => {
        money += order.dish.price;
    });
    return money;
},
//查看订单详情
detail(oid) {
    jQuery.getJSON("/detail/list", {"oid": oid}, function (result) {
        if (result != null && result.data != null) {
            app.curOrder = result.data;
            //显示订单详情页面
            app.showCurOrder = true;
        }
    });
},
controller
显示订单代码
/**
 * 用户获取订单列表
 *
 * @return
 */
@RequestMapping("/list")
public ResponseBody<List<OrderInfo>> getList(HttpServletRequest request) {
    List<OrderInfo> orderinfo = null;
    HttpSession session = request.getSession(false);
    int uid = 0;
    if (session != null && session.getAttribute(AppFinal.USERINFO_SESSION_KEY) != null) {
        //获取用户id
        uid = ((UserInfo) session.getAttribute(AppFinal.USERINFO_SESSION_KEY)).getId();
        orderinfo = orderInfoMapper.list(uid);
    }
    return new ResponseBody<>(0, "", orderinfo);
}
查看详情代码:
@RequestMapping("/list")
public ResponseBody<List<OrderDetail>> getList(int oid){
    List<OrderDetail> list = orderDetailMapper.getList(oid);
    return new ResponseBody<>(0,"",list);
}
mapper接口
显示订单代码
//获取订单列表
public List<OrderInfo> list(int uid);
查看详情代码
public List<OrderDetail> getList(int oid);
xml
显示订单代码
<select id="list" resultType="com.example.ordersys.model.OrderInfo">
   select * from orderinfo where uid=#{uid}
</select>
查看详情代码
这里要注意,先来看订单详情表的实体类设计:
package com.example.ordersys.model;

import lombok.Data;

/**
 * @author SongBiao
 * @Date 2021/1/18
 */
@Data
public class OrderDetail {
    private int oid;
    private int did;
    private Dish dish;
}
可以看到OrderDetail实体类中还有一个Dish对象,但是注意这个对象在我们表中是没有的,原因是当我们用户查看订单详情的时候,需要查看菜品的详细信息以及总价格,我们直接再这里定义一个对象后,后期通过连表查询,然后将查询的结果包装成一个Dish类对象即可。那么我们再xml中就需要使用resultMap来指定对应的映射关系,
首先再DishMapper.xml中指定dish表对应的实体类的映射关系;
<resultMap id="BaseResultMap" type="com.example.ordersys.model.Dish">
    <id column="id" property="id"></id>
    <result column="name" property="name"></result>
    <result column="price" property="price"></result>
</resultMap>
同时再OrderDetailMapper.xml中指定OrderDetail实体类的映射关系,注意需要使用到association属性来表示一对一的关系,因为后期我们使用连表查询中,orderdetail与dish进行左连接后,查询出来的记录是一行一行的,也就是说一个订单编号对应一个菜品名称,而不是多个
<resultMap id="BaseResultMap" type="com.example.ordersys.model.OrderDetail">
        <result property="did" column="did"></result>
        <result property="oid" column="oid"></result>
        <association property="dish" columnPrefix="d_" resultMap="com.example.ordersys.mapper.DishMapper.BaseResultMap">
        </association>
    </resultMap>


<select id="getList" resultMap="BaseResultMap">
    select o.*,d.name d_name,d.price d_price from orderdetail o left join dish d on o.did=d.id
   where o.oid=#{oid}
</select>
mysql> select o.*,d.name d_name,d.price d_price from orderdetail o left join dish d on o.did=d.id
    ->    where o.oid=16;
+-----+-----+--------+---------+
| did | oid | d_name | d_price |
+-----+-----+--------+---------+
|   3 |  16 | 红烧肉 |      30 |
|   4 |  16 | 茄子   |      25 |
这里就可以显示出订单编号为16的用户点了两个菜,其菜品编号为3,4,菜品名称为红烧肉,茄子,价格分别为30,25
注意这里我们使用了连表查询(左连接)
商家模块
商家登录功能
前端
<!-- 左侧导航 -->
<v-navigation-drawer v-model="drawer" app>
    <v-list dense v-show="!login.isLogin">
        <v-list-item link v-on:click="login.showLoginDialog=true">
            <v-list-item-action>
                <v-icon>mdi-login</v-icon>
            </v-list-item-action>
            <v-list-item-content>
                <v-list-item-title>登录</v-list-item-title>
            </v-list-item-content>
        </v-list-item>
    </v-list>
<v-row justify="center">
    <v-dialog v-model="login.showLoginDialog" persistent max-width="400px">
        <v-card>
            <v-card-title>
                <span class="headline">登录</span>
            </v-card-title>
            <v-card-text>
                <v-container>
                    <v-row>
                        <v-col cols="12" sm="12">
                            <v-text-field label="用户名*" v-model="login.inputUsername" required>
                            </v-text-field>
                        </v-col>
                    </v-row>
                    <v-row>
                        <v-col cols="12" sm="12">
                            <v-text-field label="密码*" v-model="login.inputPassword" required>
                            </v-text-field>
                        </v-col>
                    </v-row>
                    <v-row>
                        <v-col cols="12" sm="6">
                            <v-btn color="primary" block v-on:click="userLogin">登录</v-btn>
                        </v-col>
                        <v-col cols="12" sm="6">
                            <v-btn color="primary" block v-on:click="login.showLoginDialog=false">取消
                            </v-btn>
                        </v-col>
                    </v-row>
                </v-container>
            </v-card-text>
        </v-card>
    </v-dialog>
</v-row>
userLogin() {
    let username = app.login.inputUsername;
    let password = app.login.inputPassword;
    //非空校验
    if (username == "") {
        alert("请输入用户名");
        return false;
    }
    if (password == "") {
        alert("请输入密码");
        return false;
    }
    //访问后端接口,验证用户信息
    jQuery.getJSON("/user/login", {
        "username": username,
        "password": password
    }, function (result) {
        if (result != null && result.data != null && result.data.id > 0) {
            //等于1,说明是管理员登录
            if (result.data.isadmin == 1) {
                //登录成功
                alert("登录成功!");
                //登录成功后,隐藏左侧未登录之前的导航,并显示欢迎信息
                //因为两者的v-show是一样的
                app.login.isLogin = true;
                //去掉登录时的窗口,还是查看v-model
                app.login.showLoginDialog = false;
                //请求后端得到菜品列表
                jQuery.getJSON("/dish/list", {}, function (result) {
                    if (result != null && result.data != null) {
                        app.dishes = result.data;
                    }
                });
            } else {
                alert("非法操作,权限不足");
            }
        } else {
            //用户名或密码错误,请重新输入
            alert("用户名或密码错误,请重新输入");
        }
    });
},
controller
//登录功能
@RequestMapping("/login")
public ResponseBody<UserInfo> login(UserInfo userInfo, HttpServletRequest request) {
    UserInfo user = userMapper.login(userInfo);
    //登录后将信息存入session当中
    if (user != null && user.getId() > 0) {
        HttpSession session = request.getSession();
        session.setAttribute(AppFinal.USERINFO_SESSION_KEY,
                user);

    }
    return new ResponseBody<>(0, "", user);
}
@RequestMapping("/list")
public ResponseBody<List<Dish>> getList() {
    List<Dish> data = dishMapper.getDishList();
    return new ResponseBody<>(0, "", data);
}
mapper
//登录方法
public UserInfo login(UserInfo userInfo);
//查询菜单列表
public List<Dish> getDishList();
xml
<select id="getDishList" resultType="com.example.ordersys.model.Dish">
   select * from dish
</select>
<select id="login" resultType="com.example.ordersys.model.UserInfo">
    select * from userinfo where
    username=#{username} and password=#{password}
</select>
保持登录状态
前端
//保持登录状态的方法
isLogin() {
    jQuery.getJSON("/user/islogin", {}, function (result) {
        if (result != null && result.data != null && result.data.id > 0) {
            if (result.data.isadmin == 1) {
                //等于1是超级管理员
                //此时确定为登录状态,点击刷新后应该仍在主页面,而不是需要重新登录
                app.login.isLogin = true;
                //设置欢迎信息
                app.login.inputUsername = result.data.username;
                //请求后端得到菜品列表
                jQuery.getJSON("/dish/list", {}, function (result) {
                    if (result != null && result.data != null) {
                        app.dishes = result.data;
                    }
                });
            }
        }
    });
},
在new Vue外部调用isLogin方法
![[外链图片转存失败,源站可能有防盗链机制,建议将图片保存下来直接上传(img-kgL3SaIs-1669814415972)(点餐项目.assets/image-20221130114507392.png)]](https://img-blog.csdnimg.cn/717a73aecd8a49bbb22630266a66dcab.png)
controller
@RequestMapping("/islogin")
public ResponseBody<UserInfo> isLogin(HttpServletRequest request) {
    UserInfo user = null;
    HttpSession session = request.getSession(false);
    if (session != null && session.getAttribute(AppFinal.USERINFO_SESSION_KEY) != null) {
        user = (UserInfo) session.getAttribute(AppFinal.USERINFO_SESSION_KEY);
    }
    return new ResponseBody<UserInfo>(0, "", user);
}
菜品添加功能
前端
<v-row v-show="status == 'dishesPage' && login.isLogin">
    <v-col :col="11">
    </v-col>
    <v-col :cols="2">
        <v-btn color="primary" block v-on:click="showAddDish = true">新增菜品</v-btn>
    </v-col>
</v-row>
<!-- 新增菜品 -->
<v-row justify="center">
    <v-dialog v-model="showAddDish" persistent max-width="600px">
        <v-card>
            <v-card-title>
                <span class="headline">新增菜品</span>
            </v-card-title>
            <v-card-text>
                <v-container>
                    <v-row>
                        <v-col cols="12" sm="12">
                            <v-text-field label="菜品名*" v-model="newDish.name" required></v-text-field>
                        </v-col>
                    </v-row>
                    <v-row>
                        <v-col cols="12" sm="12">
                            <v-text-field label="价格(元)*" v-model="newDish.price" required>
                            </v-text-field>
                        </v-col>
                    </v-row>
                    <v-row>
                        <v-col cols="12" sm="6">
                            <v-btn color="primary" block v-on:click="addDish()">新增</v-btn>
                        </v-col>
                        <v-col cols="12" sm="6">
                            <v-btn color="primary" block v-on:click="showAddDish = false">取消</v-btn>
                        </v-col>
                    </v-row>
                </v-container>
            </v-card-text>
        </v-card>
    </v-dialog>
</v-row>
//新增菜品
addDish() {
    if (confirm("确认是否提交?")) {
        let name = app.newDish.name;
        let price = app.newDish.price;
        //
        if (name == "") {
            alert("请先输入菜品名称!");
            return false;
        }
        if (price == "" || price == 0) {
            alert("请先输入价格!");
            return false;
        }
        jQuery.getJSON("/dish/add", {"name": name, "price": price},
            function (result) {
                if (result != null && result.data != null && result.data > 0) {
                    //data>0表示添加成功
                    alert("恭喜:菜品添加成功!");
                    //每次添加完菜品后自动刷新
                    location.href = location.href;
                } else {
                    alert("抱歉:操作失败请重试!");
                }
            });
    }
},
controller
//管理员添加菜品的后台方法
@RequestMapping("/add")
public ResponseBody<Integer> addDish(Dish dish) {
    int data = dishMapper.addDish(dish);
    return new ResponseBody<>(0, "", data);
}
mapper
public int addDish(Dish dish);
xml
<insert id="addDish">
    insert into dish(name,price)
     values(#{name},#{price})
</insert>
菜品添加的逻辑就是每次添加完菜品到Dish表后,刷新页面,调用isLogin方法判断是否延续登录状态,然后isLogin方法重新获取后台的菜单列表,然后进行展示
菜品删除功能
前端
<td>
    <v-btn color="primary" v-on:click="del(dish.id)">删除</v-btn>
</td>
//删除菜品
del(did) {
    if (confirm("确认删除?")) {
        jQuery.getJSON("/dish/del", {"id": did}, function (result) {
            if (result != null && result.data != null && result.data > 0) {
                //删除成功
                alert("删除成功");
                //刷新当前界面
                location.href = location.href;
            } else {
                alert("抱歉,操作失败,请重试");
            }
        });
    }
},
controller
//管理员删除订单的后台方法
@RequestMapping("/del")
public ResponseBody<Integer> deleteDish(int id) {
    int data = dishMapper.del(id);
    return new ResponseBody<>(0, "", data);
}
mapper
public int del(int id);
xml
<delete id="del">
    delete from dish where id=#{id}
</delete>
菜品删除的逻辑就是每次删除菜品后,刷新页面,调用isLogin方法判断是否延续登录状态,然后isLogin方法重新获取后台的菜单列表,然后进行展示
获取订单列表功能
前端
查看所有订单
 <v-list-item link v-on:click="showOrder">
                <v-list-item-action>
                    <v-icon>mdi-cart-outline</v-icon>
                </v-list-item-action>
                <v-list-item-content>
                    <v-list-item-title>查看订单</v-list-item-title>
                </v-list-item-content>
            </v-list-item>
//查看所有人的订单
            showOrder() {
                jQuery.getJSON("/order/alllist", {},
                    function (result) {
                        if (result != null && result.data != null) {
                            app.orders = result.data;
                            // 显示订单列表窗体
                            app.status = 'ordersPage';
                        }
                    });
            },
<!-- 订单列表 -->
<v-simple-table v-show="status == 'ordersPage' && login.isLogin">
    <template v-slot:default>
        <thead>
        <tr>
            <th class="text-left">序号</th>
            <th class="text-left">用户</th>
            <th class="text-left">状态</th>
            <th class="text-left">时间</th>
            <th class="text-left">详情</th>
        </tr>
        </thead>
        <tbody>
        <tr v-for="order in orders">
            <td>{{order.id}}</td>
            <td>{{order.uname}}</td>
            <td>
                <v-switch v-model="order.status" v-on:click="update(order.id,order.status)"></v-switch>
            </td>
            <td>{{order.createtime}}</td>
            <td>
                <v-btn color='primary' v-on:click="detail(order.id)">查看详情</v-btn>
            </td>
        </tr>
        </tbody>
    </template>
</v-simple-table>
修改订单状态
//管理员修改状态
update(oid, status) {
    //因为选中的这个状态在前端我们显示选中为true,不选中为false,所以此处需要用三元符进行一个选择
    status = status ? 1 : 0;
    jQuery.getJSON("/order/update", {"oid": oid, "status": status}, function (result) {
        if (result != null && result.data != null && result.data > 0) {
            alert("恭喜,状态修改成功");
        } else {
            alert("修改失败,请重试");
        }
    });
},
查看某个订单详情
//查看某个订单详情
detail(oid) {
    jQuery.getJSON("/detail/list", {"oid": oid}, function (result) {
        if (result != null && result.data != null) {
            app.curOrder = result.data;
            //显示订单详情页面
            app.showCurOrder = true;
        }
    });
},
<!--订单详情窗口-->
<v-row justify="center">
    <v-dialog v-model="showCurOrder" persistent max-width="600px">
        <v-simple-table>
            <template v-slot:default>
                <thead>
                <tr>
                    <th class="text-left">菜品</th>
                    <th class="text-left">价格</th>
                </tr>
                </thead>
                <tbody>
                <tr v-for="dish in curOrder">
                    <td>{{dish.dish.name}}</td>
                    <td>{{dish.dish.price}}</td>
                </tr>
                <tr>
                    <td>总金额: {{totalPrice()}}</td>
                    <td>
                        <v-btn color="primary" v-on:click="showCurOrder=false">关闭</v-btn>
                    </td>
                </tr>
                </tbody>
            </template>
        </v-simple-table>
    </v-dialog>
</v-row>
//计算某个订单详情的总价
totalPrice() {
    let money = 0;
    app.curOrder.forEach(item => {
        money += item.dish.price;
    });
    return money;
},
controller
查看所有订单
//管理员查看所有人列表信息
    @RequestMapping("/alllist")
    public ResponseBody<List<OrderInfo>> getAllList(HttpServletRequest request) {
        List<OrderInfo> orderinfo = null;
        orderinfo = orderInfoMapper.getAllList();
        return new ResponseBody<>(0, "", orderinfo);
    }
修改订单状态
//管理员修改用户订单的状态
@RequestMapping("/update")
public ResponseBody<Integer> updateStautus(int oid,int status) {
    int data = orderInfoMapper.update(oid,status);
    return new ResponseBody<>(0, "", data);
}
查看某个订单详情
@RequestMapping("/list")
public ResponseBody<List<OrderDetail>> getList(int oid){
    List<OrderDetail> list = orderDetailMapper.getList(oid);
    return new ResponseBody<>(0,"",list);
}
mapper
查看所有订单
//获取所有人的订单列表
public List<OrderInfo> getAllList();
修改订单状态
//修改订单的状态
 public int update(int oid,int status);
查看某个订单详情
public List<OrderDetail> getList(int oid);
xml
查看所有订单
<select id="getAllList" resultType="com.example.ordersys.model.OrderInfo">
    select o.*,u.username uname from orderinfo o left join userinfo u on o.uid=u.id order by o.id desc
</select>
注意这里我们依旧使用到了联表查询,左连接
修改订单状态
<update id="update">
    update orderinfo set status=#{status} where id=#{oid}
</update>
查看某个订单详情
<resultMap id="BaseResultMap" type="com.example.ordersys.model.OrderDetail">
        <result property="did" column="did"></result>
        <result property="oid" column="oid"></result>
        <association property="dish" columnPrefix="d_" resultMap="com.example.ordersys.mapper.DishMapper.BaseResultMap">
        </association>
    </resultMap>


<select id="getList" resultMap="BaseResultMap">
    select o.*,d.name d_name,d.price d_price from orderdetail o left join dish d on o.did=d.id
   where o.oid=#{oid}
</select>
这块的代码逻辑跟之前用户查看订单详情功能一样
退出登录功能
前端
<v-list-item link v-on:click="logout">
    <v-list-item-action>
        <v-icon>mdi-logout</v-icon>
    </v-list-item-action>
    <v-list-item-content>
        <v-list-item-title>退出登录</v-list-item-title>
    </v-list-item-content>
</v-list-item>
logout() {
    if (confirm("是否确认退出?")) {
        jQuery.getJSON("/user/logout", {}, function (result) {
            if (result != null && result.data != null && result.data > 0) {
                //退出成功
                alert("退出成功");
                //刷新当前页面
                location.href = location.href;
            } else {
                alert("抱歉,操作失败,请重试");
            }
        });
    }
},
controller
/**
 * 退出登录
 * @param request
 * @return
 */
@RequestMapping("/logout")
public ResponseBody<Integer> logOut(HttpServletRequest request) {
    int data = 0;
    HttpSession session = request.getSession(false);
    if (session != null && session.getAttribute(AppFinal.USERINFO_SESSION_KEY) != null) {
        session.removeAttribute(AppFinal.USERINFO_SESSION_KEY);
        data = 1;
    }
    session.removeAttribute(AppFinal.USERINFO_SESSION_KEY);
    return new ResponseBody<>(0, "", data);

}




![[论文阅读] Curriculum Semi-supervised Segmentation](https://img-blog.csdnimg.cn/fccbd9557c7f4a8f918c4ab0deb7d8d3.jpeg#pic_center)
